Page 3 of 3
Re: MiL Mi-1
Posted: Fri Jan 31, 2020 3:46 pm
by Meliodas2019
amazing what a coat of paint can do , keep up the hard work Neil, nice job looks great
Re: MiL Mi-1
Posted: Sun Feb 02, 2020 6:12 pm
by RangerNeil
A bit more done - some progress but mainly a step back I'm afraid. I finished the underside blue and I think it looks quite good. Given its a very thin waterbased acrylic that dries fast there are no brushmarks visible - that AKAN paint seems to level nicely which surprised me given all the comments I've read on the issue of acrylics drying before they can level... Maybe airbrushes in Russia as rare as they are in this house??

Anyways - whilst looking at the nose during the painting I found I could not stomach the fit of that canopy glazing - the gap between the fuslage and the base of the screen looked hideous so I dug out the filler/putty and using a tiny jewellers scredriver worked a bead into the gap as per the photo below. I can honestly describe the fit of all the glaxing parts on this model as total sh*t!! I've been rubbing the cockpit doors down gently to fit into the apertures and they are almost there - but there is a hell of a gap between the top of the door and the canopy - got to be a good 1.5mm so I am thinking I will fit the doors in an open position as I lack any sort of plastic material to make up a filler piece with. There really is no excuse for this degree of poor quality - I don't like poking holes at kits and their manufacturers as sometimes we are lucky those kits exist so it gives an idea of how bad this is. I was going to apply the decals tonight but that will have to go on hold for a while.
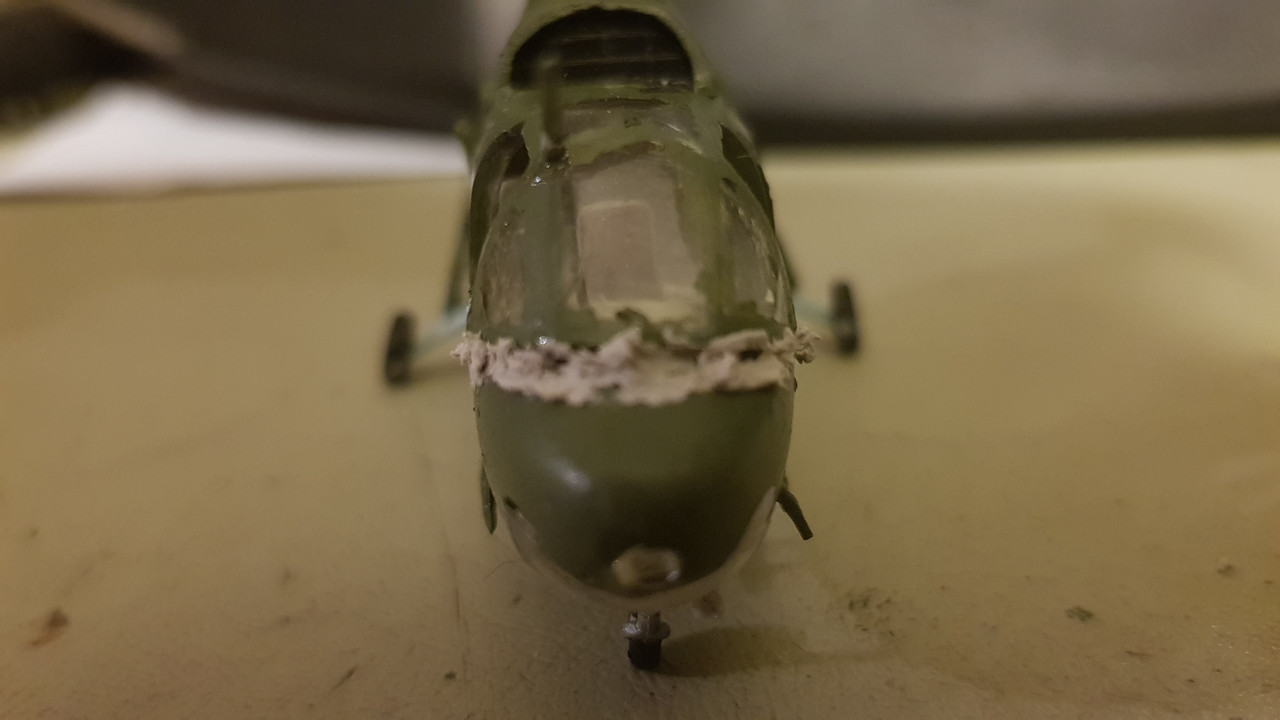
(You can also see how poor my first attempt at using Maskol was!!!

)
Re: MiL Mi-1
Posted: Sun Feb 02, 2020 11:08 pm
by digger303
RangerNeil wrote: Sun Feb 02, 2020 6:12 pm
A bit more done - some progress but mainly a step back I'm afraid. I finished the underside blue and I think it looks quite good. Given its a very thin waterbased acrylic that dries fast there are no brushmarks visible - that AKAN paint seems to level nicely which surprised me given all the comments I've read on the issue of acrylics drying before they can level... Maybe airbrushes in Russia as rare as they are in this house??
Anyways - whilst looking at the nose during the painting I found I could not stomach the fit of that canopy glazing - the gap between the fuslage and the base of the screen looked hideous so I dug out the filler/putty and using a tiny jewellers scredriver worked a bead into the gap as per the photo below. I can honestly describe the fit of all the glaxing parts on this model as total sh*t!! I've been rubbing the cockpit doors down gently to fit into the apertures and they are almost there - but there is a hell of a gap between the top of the door and the canopy - got to be a good 1.5mm so I am thinking I will fit the doors in an open position as I lack any sort of plastic material to make up a filler piece with. There really is no excuse for this degree of poor quality - I don't like poking holes at kits and their manufacturers as sometimes we are lucky those kits exist so it gives an idea of how bad this is. I was going to apply the decals tonight but that will have to go on hold for a while.
(You can also see how poor my first attempt at using Maskol was!!!
)
You have your work cut out for you is this project. In regards to using maskol I also found it difficult to use and have since changed brands. I found maskol to be thick and sticky. I eventually threw mine out when it went hard. I have since found out liquid mask can be thinned with either water or ammonia and that may have been a way to improve it's properties.
Re: MiL Mi-1
Posted: Mon Feb 03, 2020 7:56 am
by Kevthemodeller
This kit is fighting you at every stage, got to admire you for sticking with it Neil

you're making what looks like an awful kit look good

Re: MiL Mi-1
Posted: Mon Feb 03, 2020 2:43 pm
by jmurphy18
I also bow to Kev for sticking to this!!!
Re: MiL Mi-1
Posted: Mon Feb 03, 2020 11:16 pm
by digger303
Re: MiL Mi-1
Posted: Mon Feb 03, 2020 11:50 pm
by RangerNeil
Nah - just too old/thick/stupid/bloody minded
* to know when to give in!!
* delete as appropriate...
Re: MiL Mi-1
Posted: Tue Feb 04, 2020 3:54 pm
by jmurphy18
RangerNeil wrote: Mon Feb 03, 2020 11:50 pm
Nah - just too old/thick/stupid/bloody minded
* to know when to give in!!
* delete as appropriate...
ROTFL! in other words this darn pice of plastic is not gong to beat me..... Where is the hammer, bondo & CA glue
Re: MiL Mi-1
Posted: Tue Feb 04, 2020 10:20 pm
by RangerNeil
jmurphy18 wrote: Tue Feb 04, 2020 3:54 pm
ROTFL! in other words this darn pice of plastic is not gong to beat me..... Where is the hammer, bondo & CA glue
That too....
Got a bit more done tonight - we are nearly there now!! The decals are all on, nose paint retouched where I did someting about the gap between the screen and the fudelage. Not wonderful but believe me - it looks a million times better now. Just need to:
And the Mil will be done.
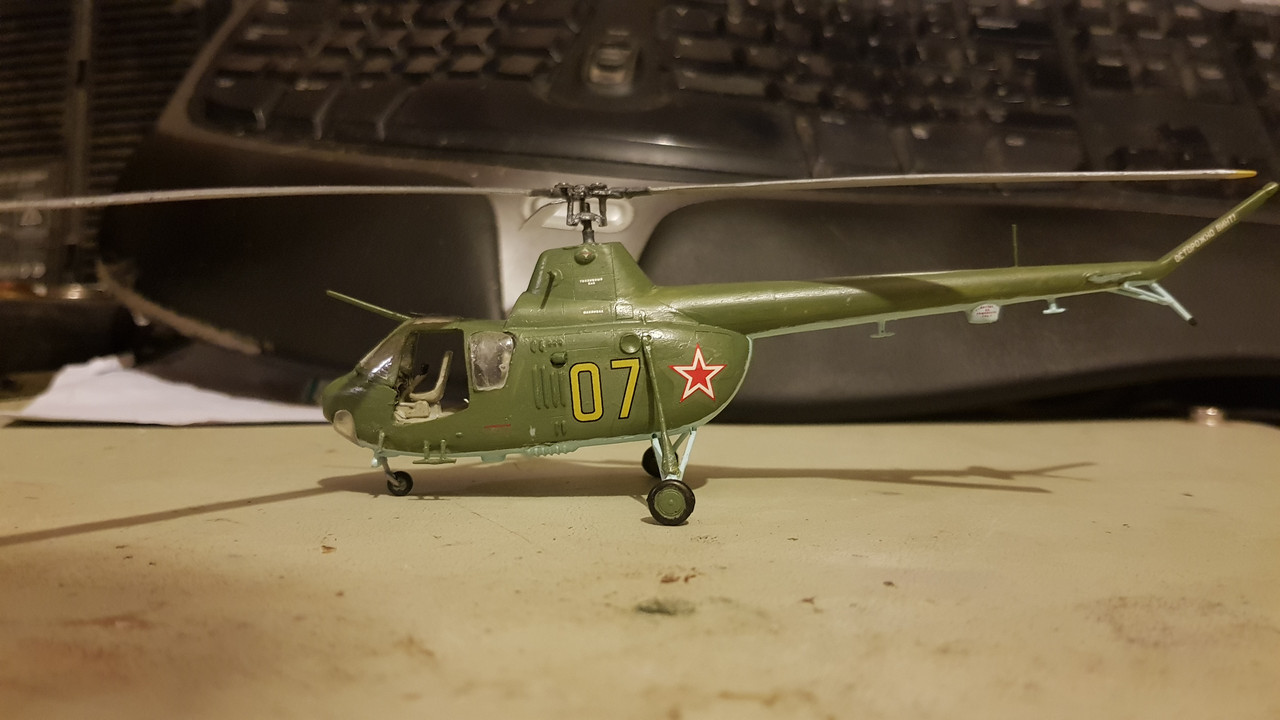
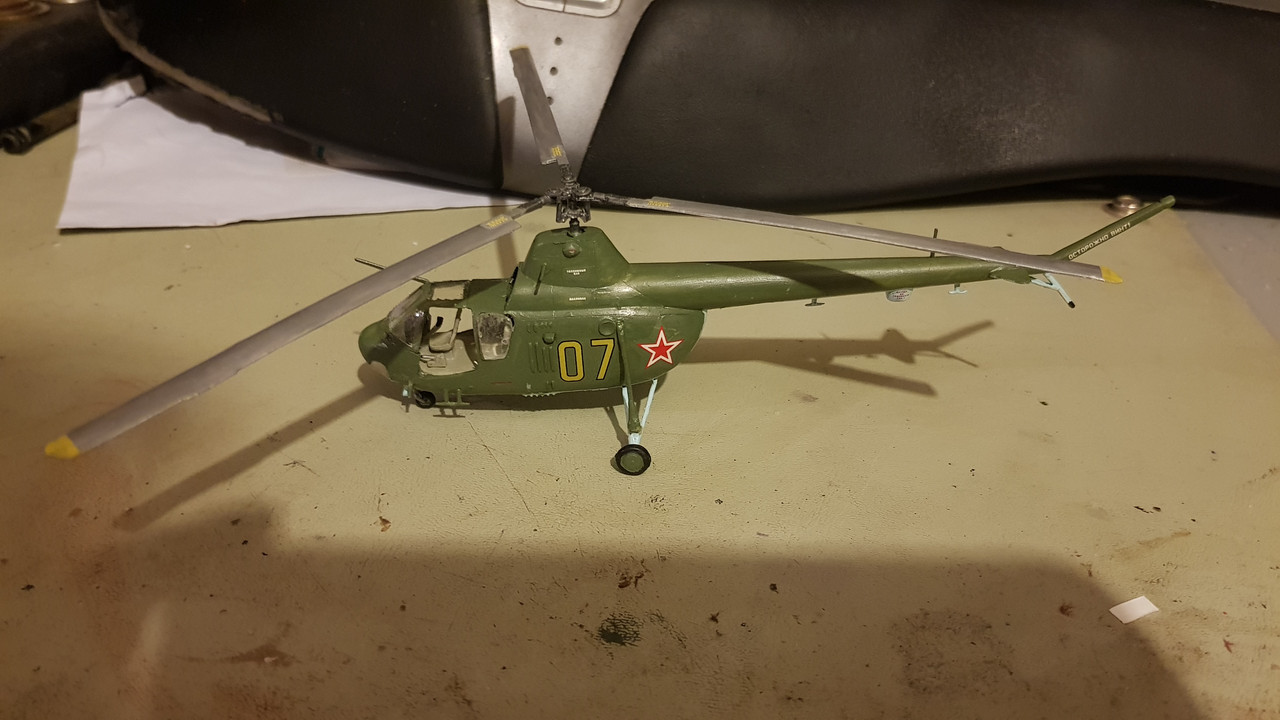
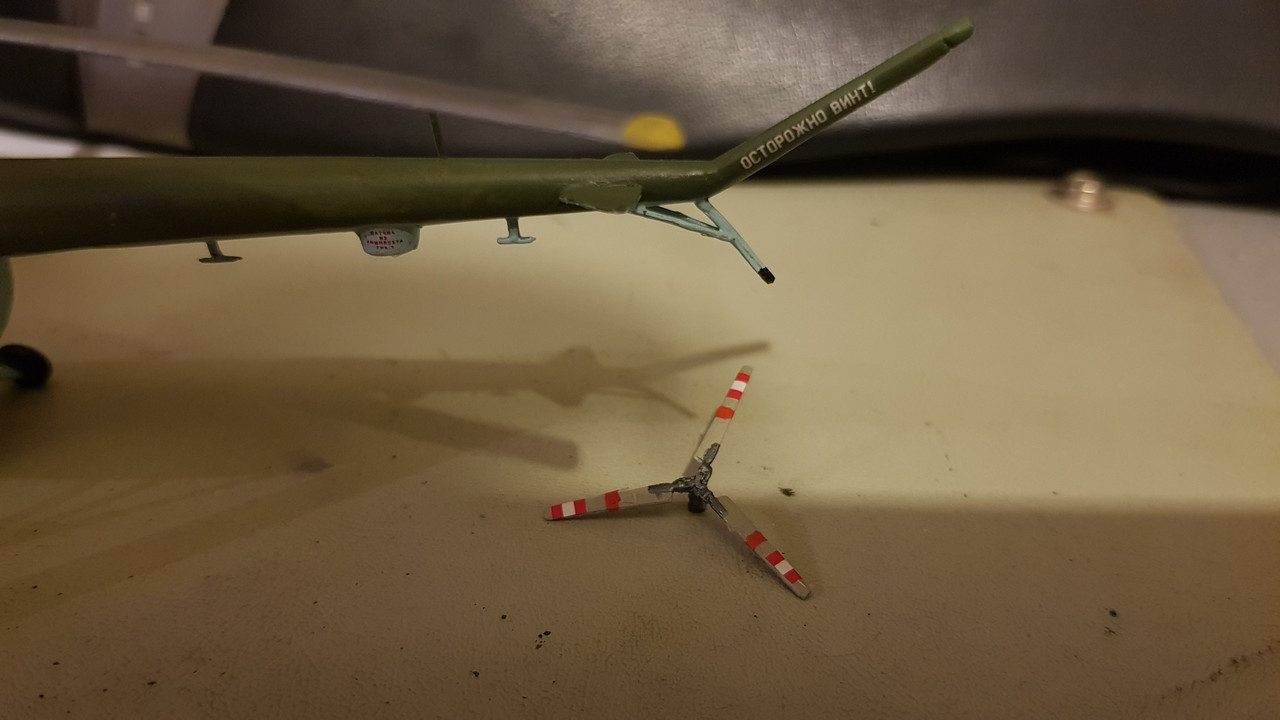
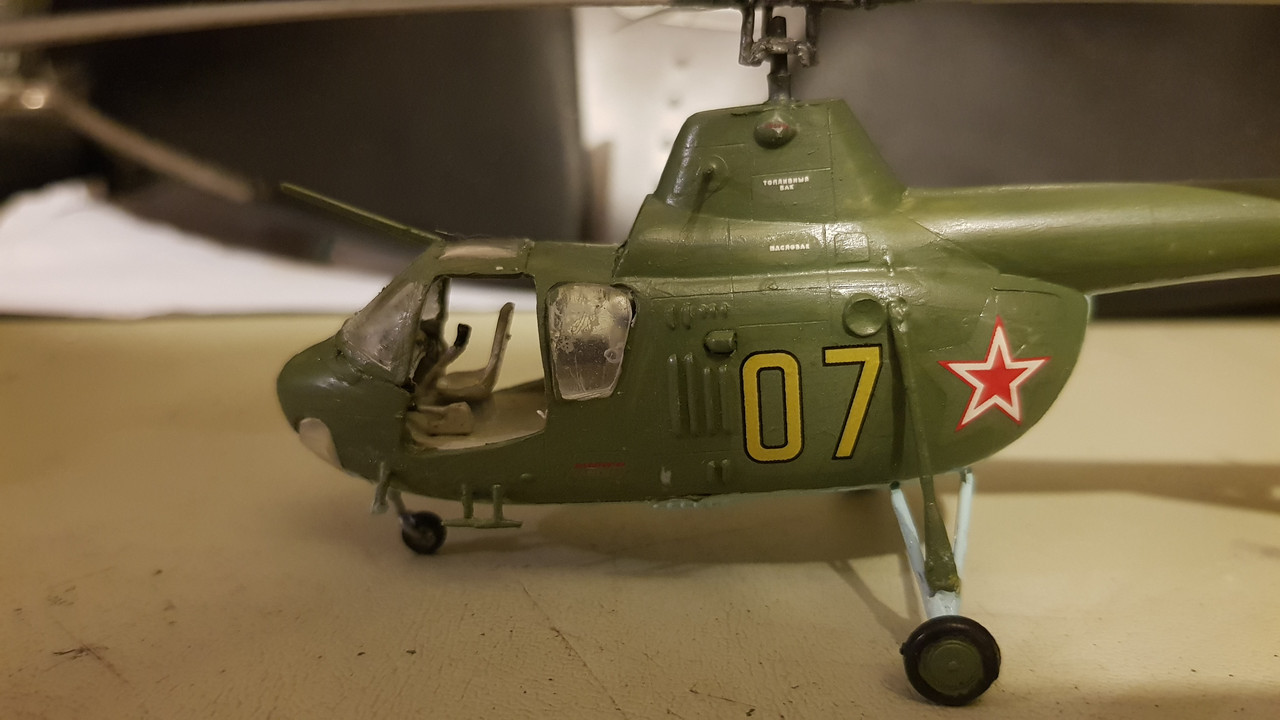
Don't know what happened to that cabin window - it was put in with PVA glue. The fit is typical of ALL the glazing components on this kit.

Re: MiL Mi-1
Posted: Wed Feb 05, 2020 9:41 am
by Meliodas2019
looks great Neil, nice job
Re: MiL Mi-1
Posted: Wed Feb 05, 2020 3:05 pm
by jmurphy18
This looks great Neil! Excellent job

Re: MiL Mi-1
Posted: Mon Feb 17, 2020 6:13 pm
by RangerNeil
Re: MiL Mi-1
Posted: Mon Feb 17, 2020 9:02 pm
by Kevthemodeller
Superb result Neil, how you kept with it I'll never know I wouldn't have even attempted it

Re: MiL Mi-1
Posted: Tue Feb 18, 2020 4:55 pm
by jmurphy18
awesome Neil!! Looks sweet.
Nicely done here
Re: MiL Mi-1
Posted: Tue Feb 18, 2020 5:26 pm
by Meliodas2019
Stunning model great job Neil
Re: MiL Mi-1
Posted: Thu Feb 20, 2020 12:02 am
by digger303
Re: MiL Mi-1
Posted: Thu Feb 20, 2020 12:23 am
by RangerNeil
Thanks Digger

I appreciate the kind words. these two have been a nightmare intro back into modelling but having said that -and don't collapse laughing - I am tempted to try the Mil again to see how much better I can get it now that I know in advance where all the problem issues are.
The Mil is 99% finished - as is the Kamov- I can't make my mind up about that aerial though. Runs from the post on the rotor tower to the post on the fuselage towards the tail rotor. I've tried stretching sprue but getting sprue to go that thin for a length of 20cm is tricky to day the least and thus far I've failed dismally. So I am weighing up whether to use thread super-glued to the posts. Or to do nothing at all.
Decisions, decisions..
Re: MiL Mi-1
Posted: Thu Feb 20, 2020 3:42 am
by digger303
RangerNeil wrote: Thu Feb 20, 2020 12:23 am
Thanks Digger
I appreciate the kind words. these two have been a nightmare intro back into modelling but having said that -and don't collapse laughing - I am tempted to try the Mil again to see how much better I can get it now that I know in advance where all the problem issues are.
The Mil is 99% finished - as is the Kamov- I can't make my mind up about that aerial though. Runs from the post on the rotor tower to the post on the fuselage towards the tail rotor. I've tried stretching sprue but getting sprue to go that thin for a length of 20cm is tricky to day the least and thus far I've failed dismally. So I am weighing up whether to use thread super-glued to the posts. Or to do nothing at all.
Decisions, decisions..
Ezy line is very popular and comes in 3 different gauges.
I sometimes use very thin brass wire. I drill a hole at right angles and bend the wire to match. It is a very resilient material.
Re: MiL Mi-1
Posted: Thu Feb 20, 2020 4:30 pm
by RangerNeil
digger303 wrote: Thu Feb 20, 2020 3:42 am
<snipped>
Ezy line is very popular and comes in 3 different gauges.
I sometimes use very thin brass wire. I drill a hole at right angles and bend the wire to match. It is a very resilient material.
Wire - why didn't I think of that?? Thanks Digger. I have access to some very thin stuff here that would be ideal. II'll give it a try
Re: MiL Mi-1
Posted: Thu Feb 27, 2020 12:03 am
by RangerNeil
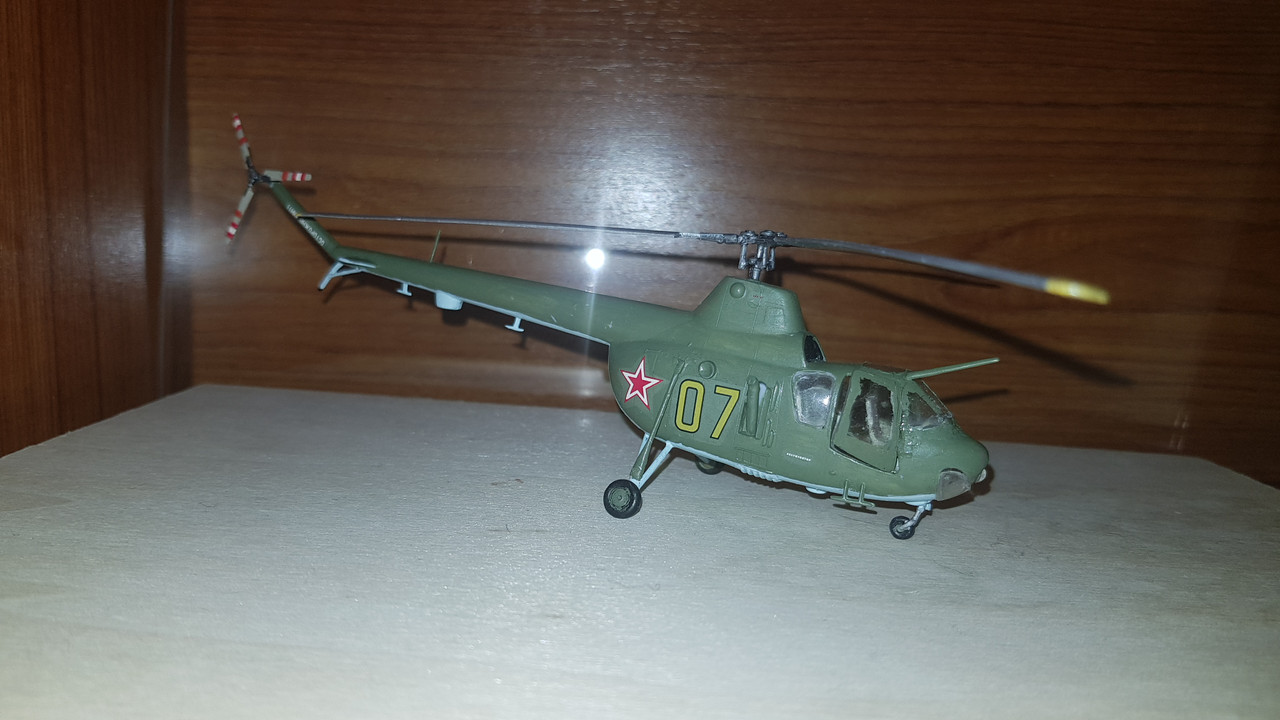
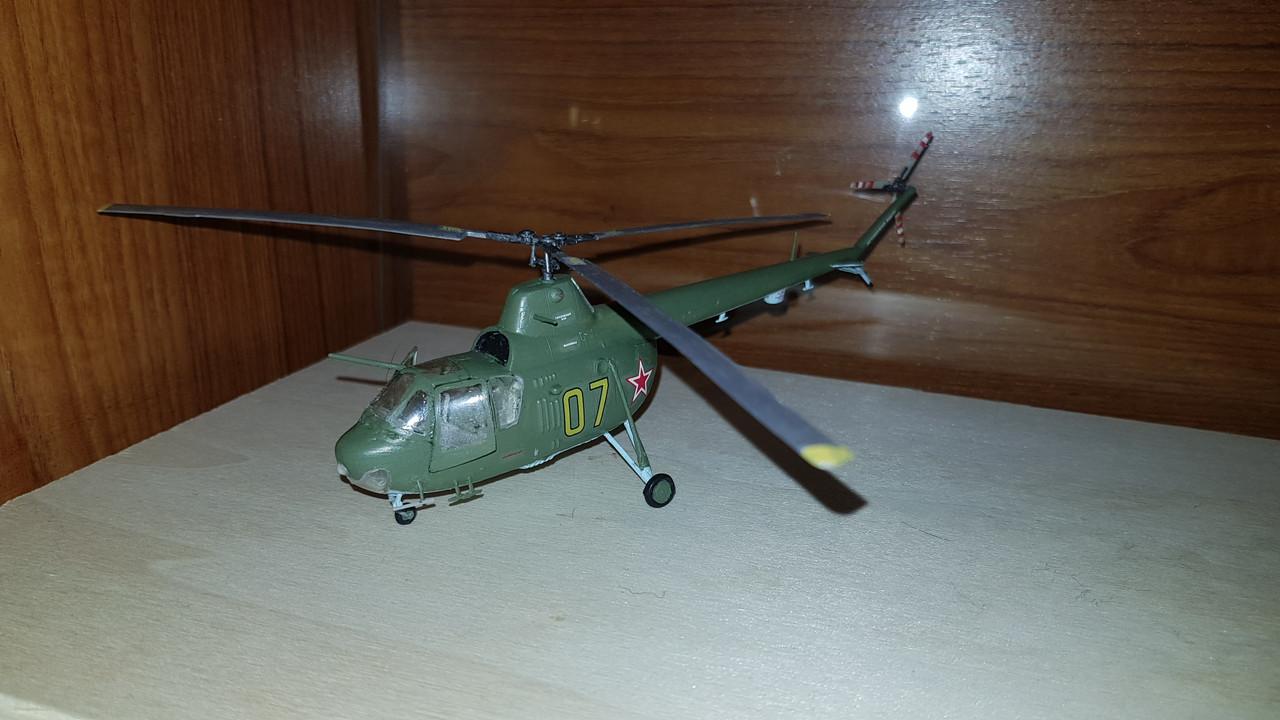
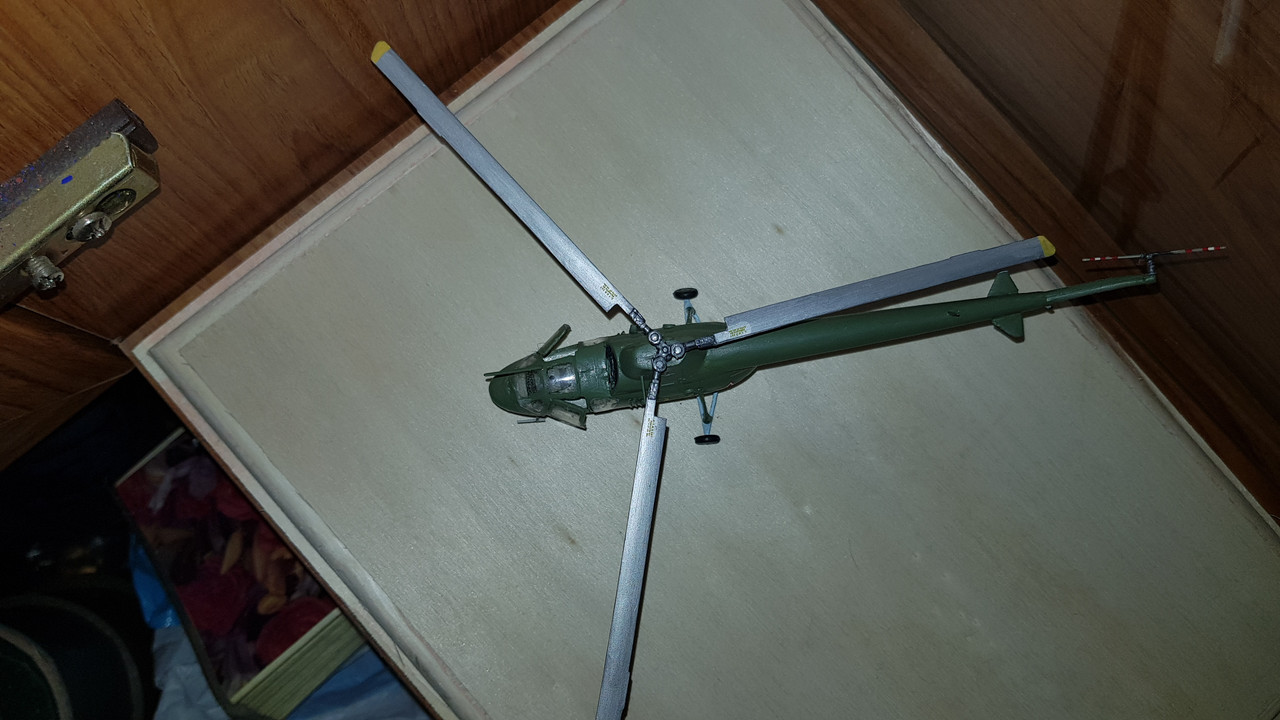
Final post on here as I've declared it finished and put the photos in the Reveal section. I took Diggers suggestion and used some thin wire for the aerial between the rotor head post and the tail boom post. Doesn't look too bad really.
Kit has been a bit of nightmare - what with a load of excess flash and exceedingly poor fit of the clear parts. But at some point I'd like to try another build with all the lessons learnt applied to see if it turns out better.
My thanks to everyone for sticking with the seemingly endless posts on this one. The support was much appreciated during the dark hours!!