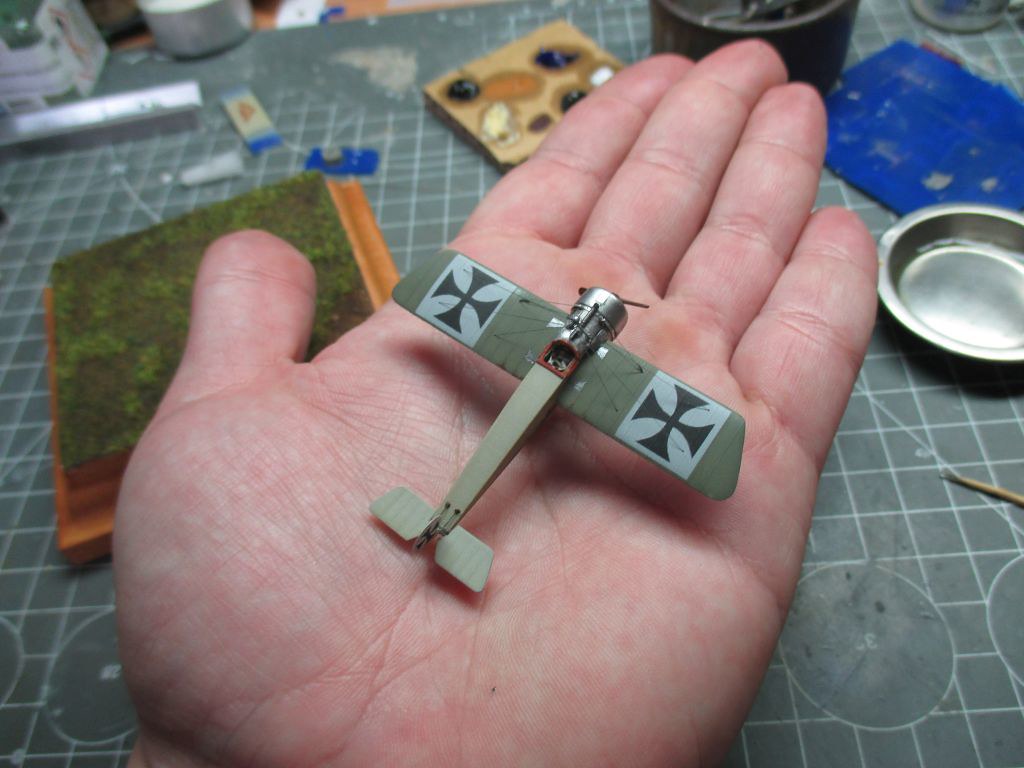
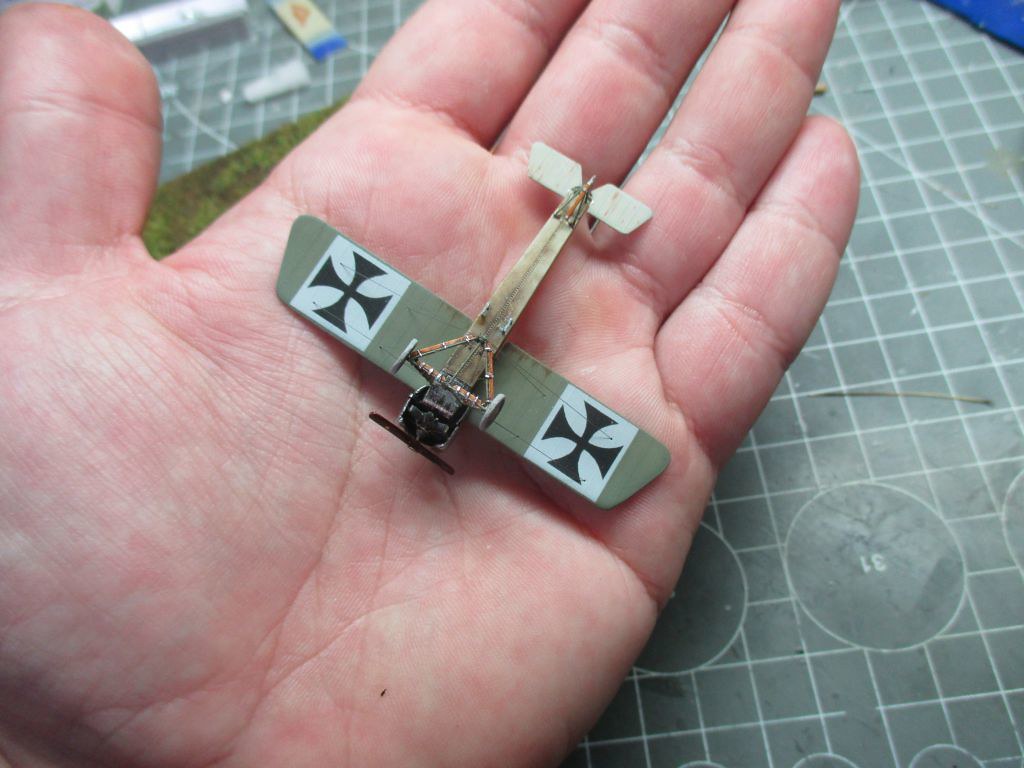
Page 2 of 2
Re: Fokker E.I 1/144 scratch
Posted: Sun Dec 31, 2017 3:25 pm
by ondra
Many thanks for your feedback, Scott!
Exactly, I made the scaffolding to keep the basic shape aligned out of styrene sheets and used white tac to keep the side rods in the correct position. Important hint - the high temperature while soldering changes the behaviour of the white tac and it starts to melt. Do not panic, it can be removed from the brass with another piece of white tac by mottling.
Cheers
Ondra
Re: Fokker E.I 1/144 scratch
Posted: Sun Dec 31, 2017 3:38 pm
by Twokidsnosleep
ondra wrote: Sun Dec 31, 2017 3:25 pm
Many thanks for your feedback, Scott!
Exactly, I made the scaffolding to keep the basic shape aligned out of styrene sheets and used white tac to keep the side rods in the correct position. Important hint - the high temperature while soldering changes the behaviour of the white tac and it starts to melt. Do not panic, it can be removed from the brass with another piece of white tac by mottling.
Cheers
Ondra
Excellent.
Holding the parts in the correct place is a bugger in soldering.
Been using magnets on a steel base to hold parts, but I like the tac idea as well
Re: Fokker E.I 1/144 scratch
Posted: Sun Dec 31, 2017 3:46 pm
by ondra
I was thinking about magnets as well, but they were a no go in this case, as the construction was rather complex and brass does not work with magnets.
Re: Fokker E.I 1/144 scratch
Posted: Sun Dec 31, 2017 5:59 pm
by Twokidsnosleep
ondra wrote: Sun Dec 31, 2017 3:46 pm
I was thinking about magnets as well, but they were a no go in this case, as the construction was rather complex and brass does not work with magnets.
No, more so for lateral stabilization ..magnets for the lateral and a vertical weight
This is a Bugatti cowling I was trying to form


Don’t want to ruin your lovely thread.
I will add the putty stabilization trick to my tool belt

Re: Fokker E.I 1/144 scratch
Posted: Sun Dec 31, 2017 7:09 pm
by ondra
That looks very smart, many thanks for posting!
And please no worries about ruining this thread, I am very happy about every single technique hint shared.
Many thanks, dude.

Ondra
Re: Fokker E.I 1/144 scratch
Posted: Sun Jan 14, 2018 1:37 pm
by ondra
This weekend was mainly about playing around with self adhesive aluminium foil, as I had to add the rest of details to the undercarriage. Not the most enjoyable part of the build, I will admit.


I glued the seat in place and added the cockpit coaming.


The wheels got a bit more weathering by means of wash, I will leave them as they are.

Cheers
Ondra
Re: Fokker E.I 1/144 scratch
Posted: Sun Jan 21, 2018 2:45 pm
by ondra
This weekend was about assembly test using masking fluid. It was neat to see her stand on her wobbly legs for the first time.

The good news: I was able to fix the wrong angle of the undercarriage (once again many thanks for the advice to solder it). On the photos the undercarriage is before the angle correction.


The bad news: I will have to rework the engine, as it does not fit under the cowling. Nevermind, that's life.
Cheers
Ondra
Re: Fokker E.I 1/144 scratch
Posted: Sun Jan 21, 2018 2:47 pm
by Twokidsnosleep
Coming along nicely though
I am still astounded by the work...you blow me away
Re: Fokker E.I 1/144 scratch
Posted: Fri Jan 26, 2018 3:29 pm
by ondra
Many thanks, Scott! Comments like this one are always a highly appreciated booster for my modelling mojo!
The good news is I gave the engine and the cowling one more chance and after thorough sanding on the inside of the cowling I managed to fit the Oberursel beneath it, so I can move on now.
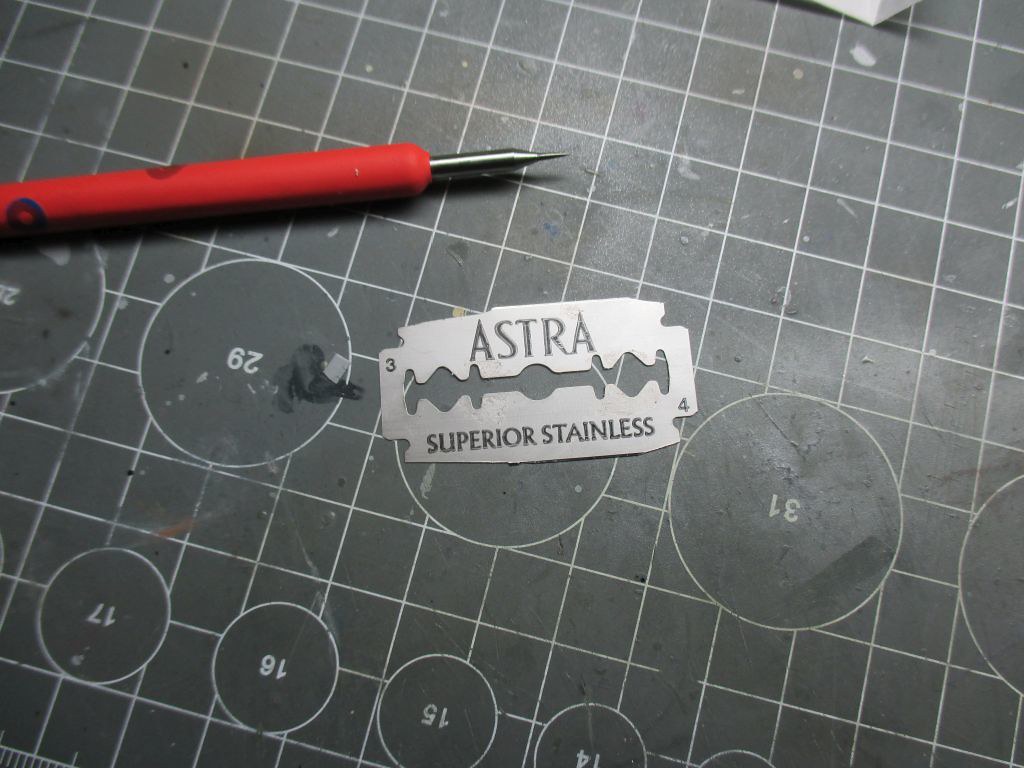
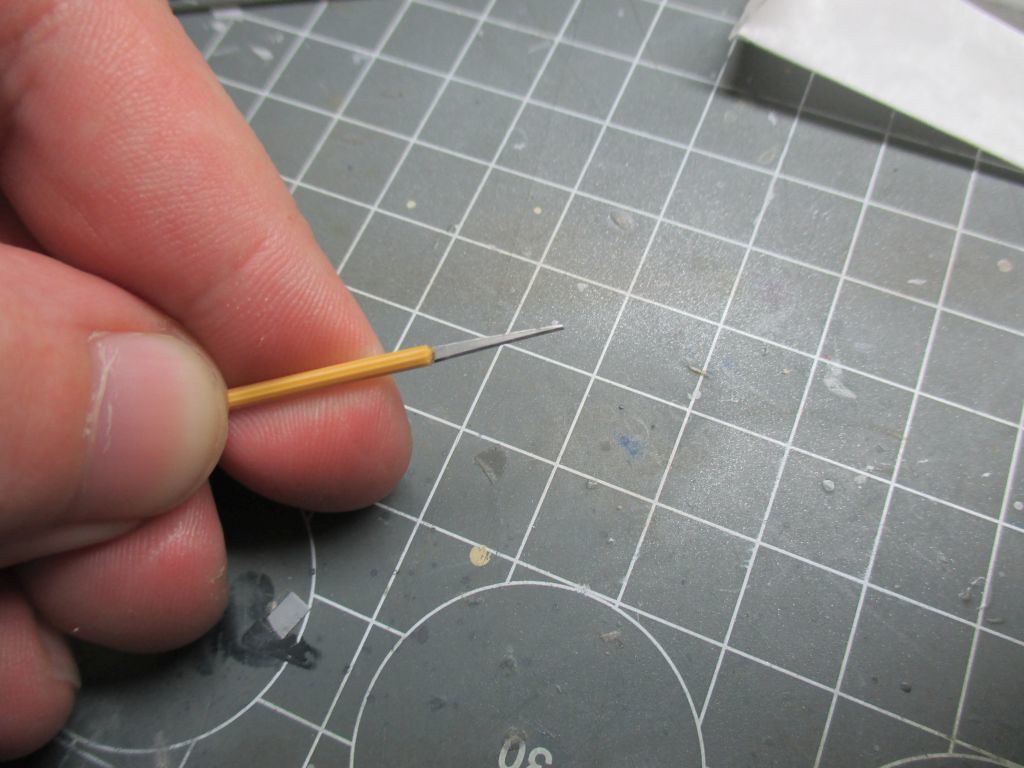
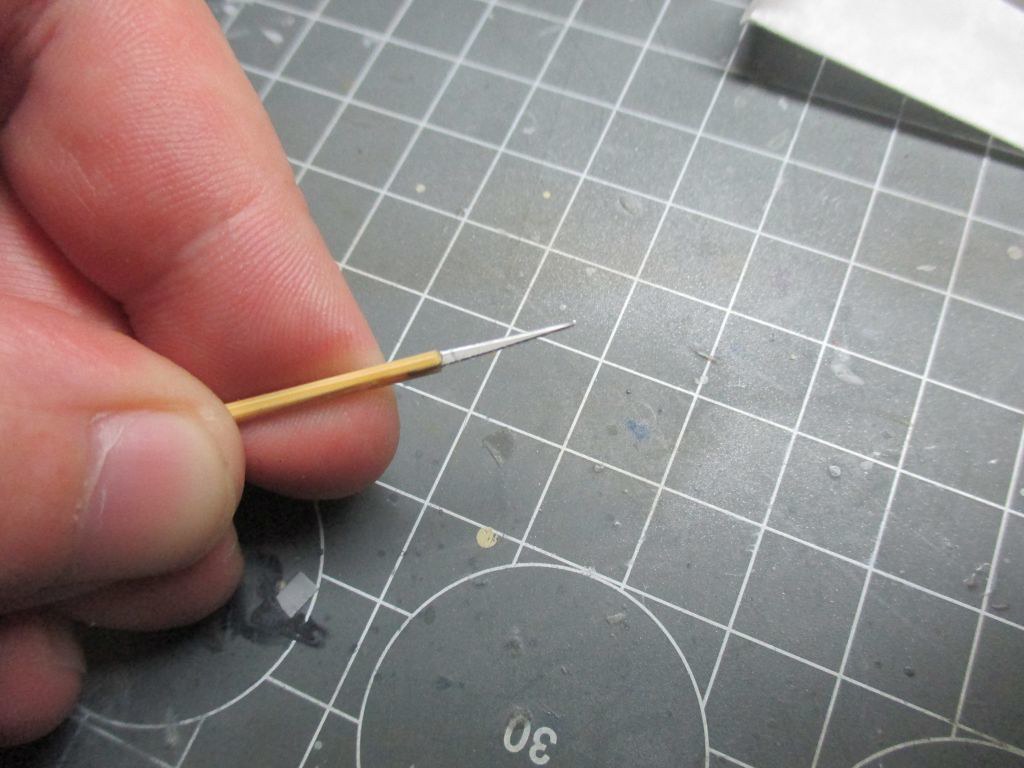
While preparing for the rigging, I decided to work on another one of the weaknesses of my builds. I use the elastic monofilament by Uschi van der Rosten for rigging, which I stretch and glue with CA. The difficult point is cutting the monofilament off precisely enough at the joint. The experience has shown that scissors are not the right tool for that, as they do not allow me to cut the fibre close enough to the joint.
So I tried to create a new tool using razor blades. By trial-fail method I came to the conclusion that the best way to receive the desired shape is using scribbing needle. After gluing the piece of the blade into a piece of toothpick, I received a decently fine tool that should give me the possibility to cut off the excess of the fibre very close to the joint. I will start testing tomorrow.

Cheers
Ondra
Re: Fokker E.I 1/144 scratch
Posted: Fri Jan 26, 2018 10:03 pm
by TommyKillander
I love the ingenuity of devising a tool like that - what a great idea!
I have tried to glue the ends point to point into the CA-glue and then heating the wire, just like David Damek (PLASMO) does, but I can't get it to work, so I use the method of stretching the wire and cut it afterwards. And the issue is exactly what you point out - there's a small "stub" of the wire left after cutting that is impossible to get rid of unless you can hide it with glue and paint...
Tommy
Re: Fokker E.I 1/144 scratch
Posted: Sat Jan 27, 2018 10:41 am
by ondra
Thanks for your generous comment, Tommy!
Have you ever tried a plastic fibre made of a stretched sprue? Many of my fŕiends use it for rigging and it works perfectly in combination with heat for stretching.
Re: Fokker E.I 1/144 scratch
Posted: Tue Jan 30, 2018 5:43 pm
by ondra
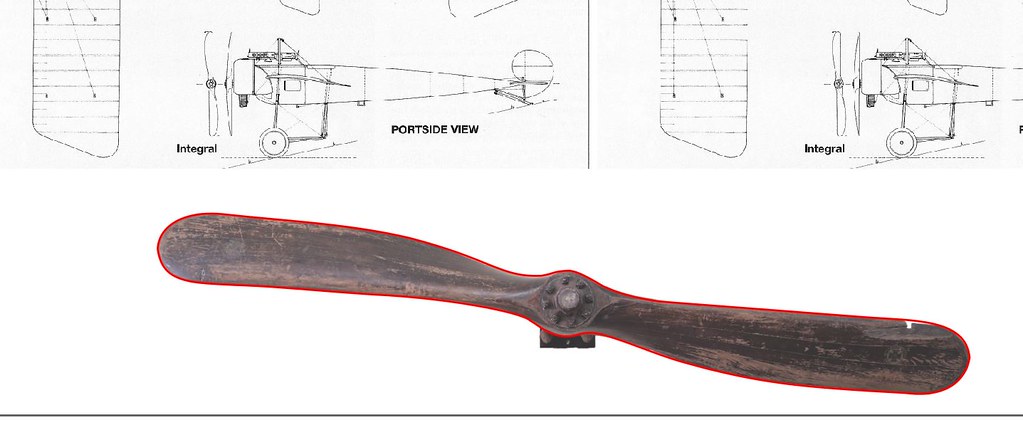
I started the traditional round of procrastination before I star assembling, so I decided to rework the propeller, as the current one does not really have the shape of a Garuda. So I started redrawing.
Cheers
Ondra
Re: Fokker E.I 1/144 scratch
Posted: Tue Jan 30, 2018 6:00 pm
by Twokidsnosleep
ondra wrote: Tue Jan 30, 2018 5:43 pm
I started the traditional round of procrastination before I star assembling, so I decided to rework the propeller, as the current one does not really have the shape of a Garuda. So I started redrawing.
Cheers
Ondra
Love to hear how you make the prop
Are you wood carving it???
Re: Fokker E.I 1/144 scratch
Posted: Wed Jan 31, 2018 9:27 am
by ondra
I do not use wood, as the grain would be out of scale for 1/144. Instead I use a sandwich of red and yellow styrene, which I afterwards carve to shape to create the lamination - see attached.
The Garuda propeller will be different, however. As seen on the photos of the original aircraft, it was probably painted with dark brown or with mahogany stain, so the lamination is not visible. Therefore I will carve it from one solid piece of plastic.
Cheers
Ondra
Re: Fokker E.I 1/144 scratch
Posted: Wed Jan 31, 2018 12:33 pm
by TommyKillander
ondra wrote: Sat Jan 27, 2018 10:41 am
Thanks for your generous comment, Tommy!
Have you ever tried a plastic fibre made of a stretched sprue? Many of my fŕiends use it for rigging and it works perfectly in combination with heat for stretching.
Tried that too - can't get it to work either

I'm useless att stretching sprue


Nice work with the prop!

Tommy
Re: Fokker E.I 1/144 scratch
Posted: Thu Feb 01, 2018 11:23 am
by demarcation
Great work!!

Re: Fokker E.I 1/144 scratch
Posted: Sat Feb 10, 2018 2:27 pm
by ondra
Many thanks for your nice comments, Tommy and Anders.
Today I finally found enough power to overcome the procrastination, so I moved on a bit.
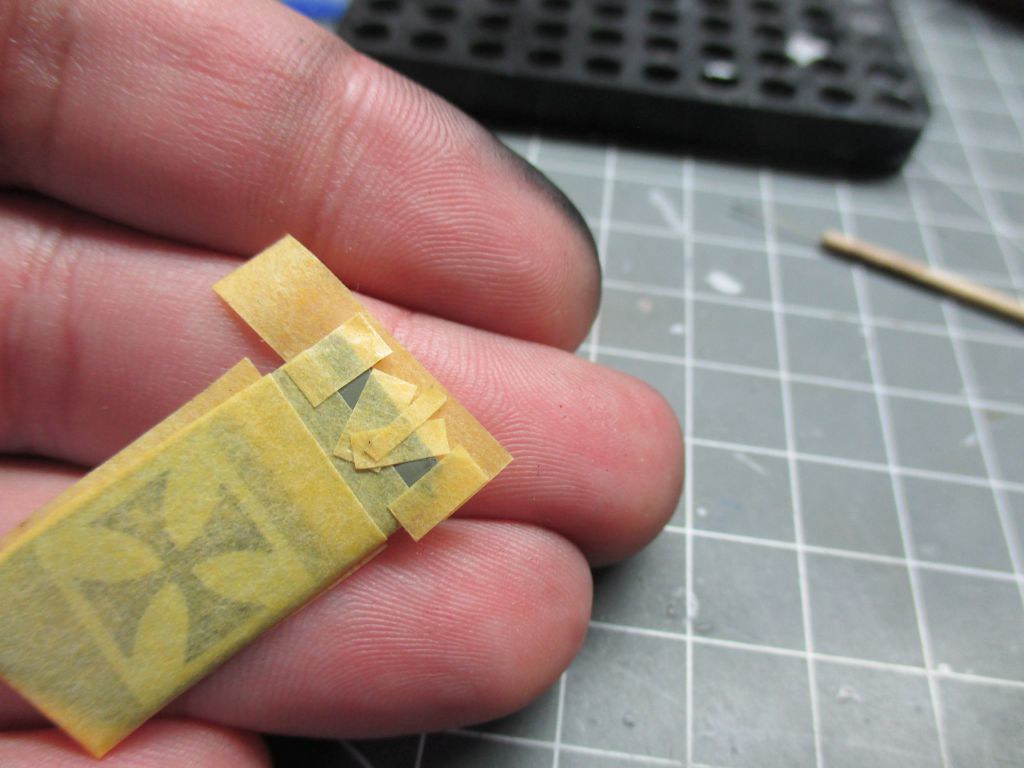
I masked the wings for the aluminium panels and sprayed black surfacer as primer.
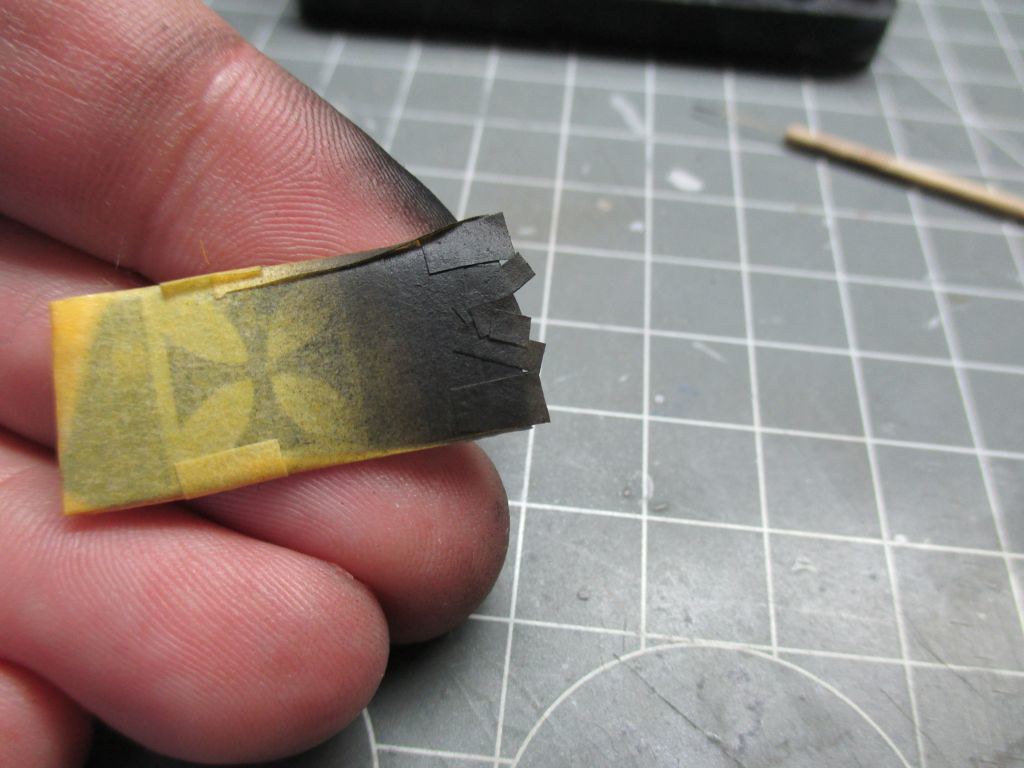
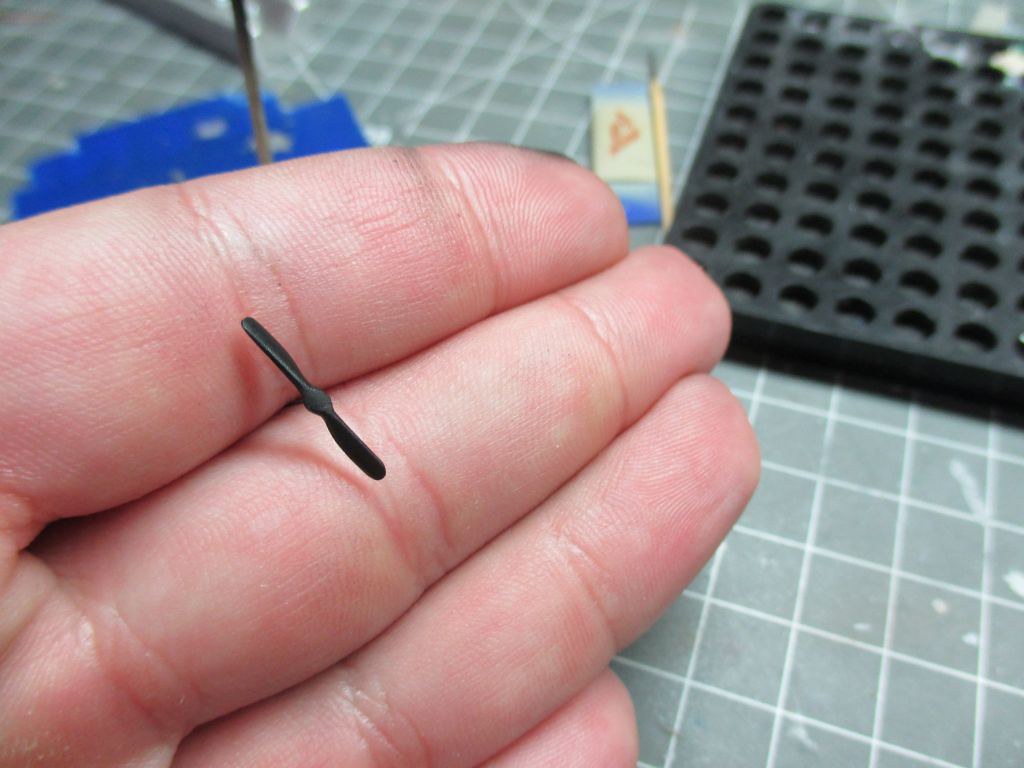
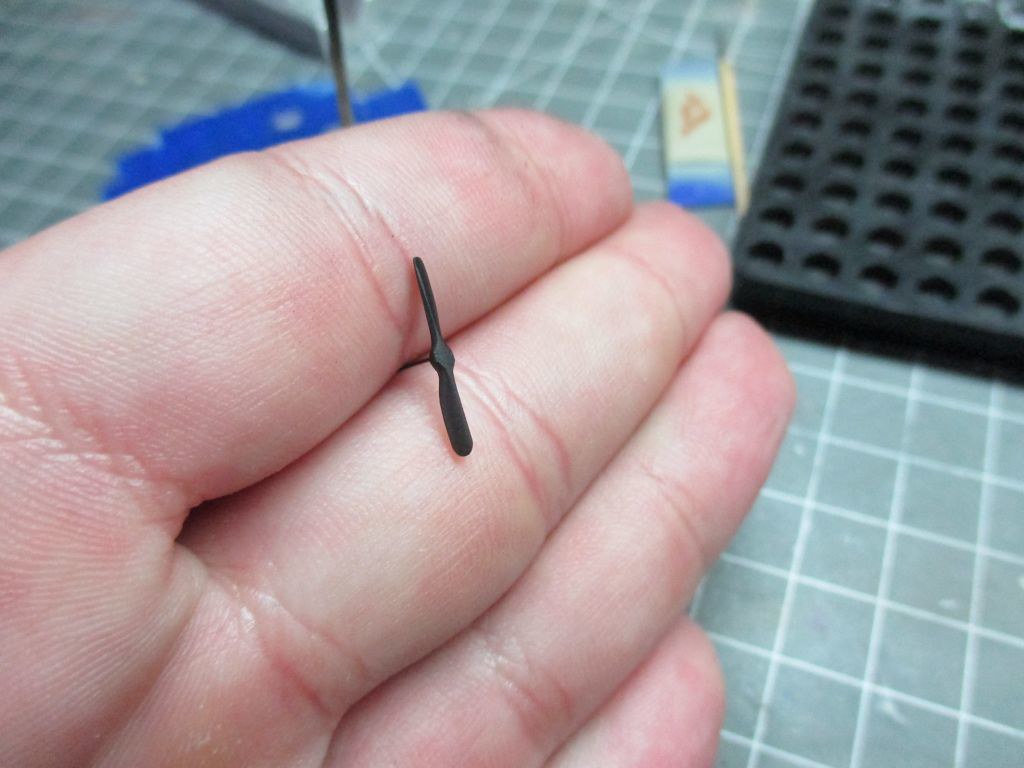
I work on the new propeller, this one resembles the original Garuda a bit more.
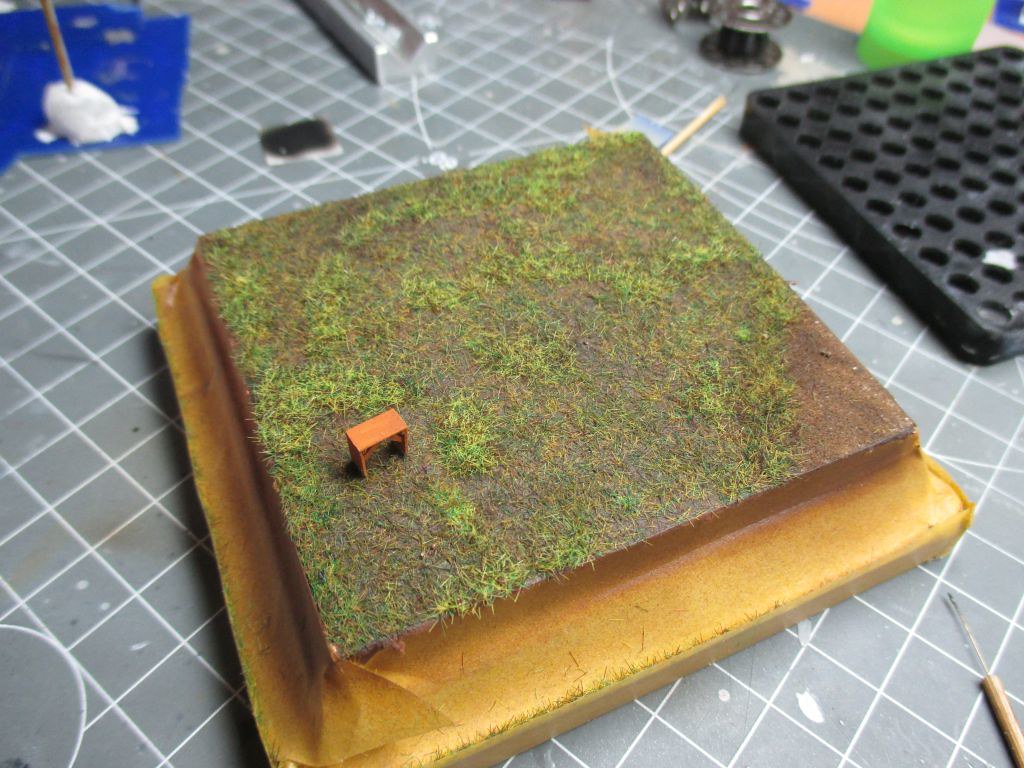
Last but not least I made some changes on the base, now I like it better.
Cheers
Ondra
Re: Fokker E.I 1/144 scratch
Posted: Sun Feb 11, 2018 12:49 pm
by ondra
Today I added the woodgrain to the propeller using Burnt Sienna. Now I will leave it to cure until next weekend and give it a coat of Drooling Bulldog mahogany wood stain.
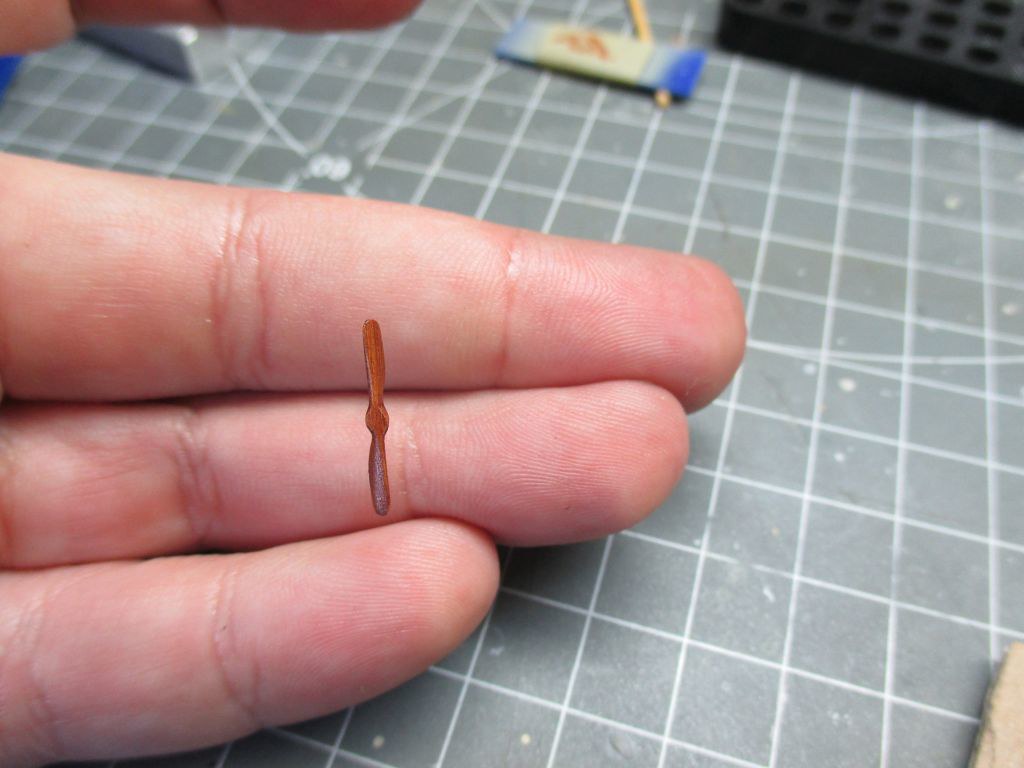

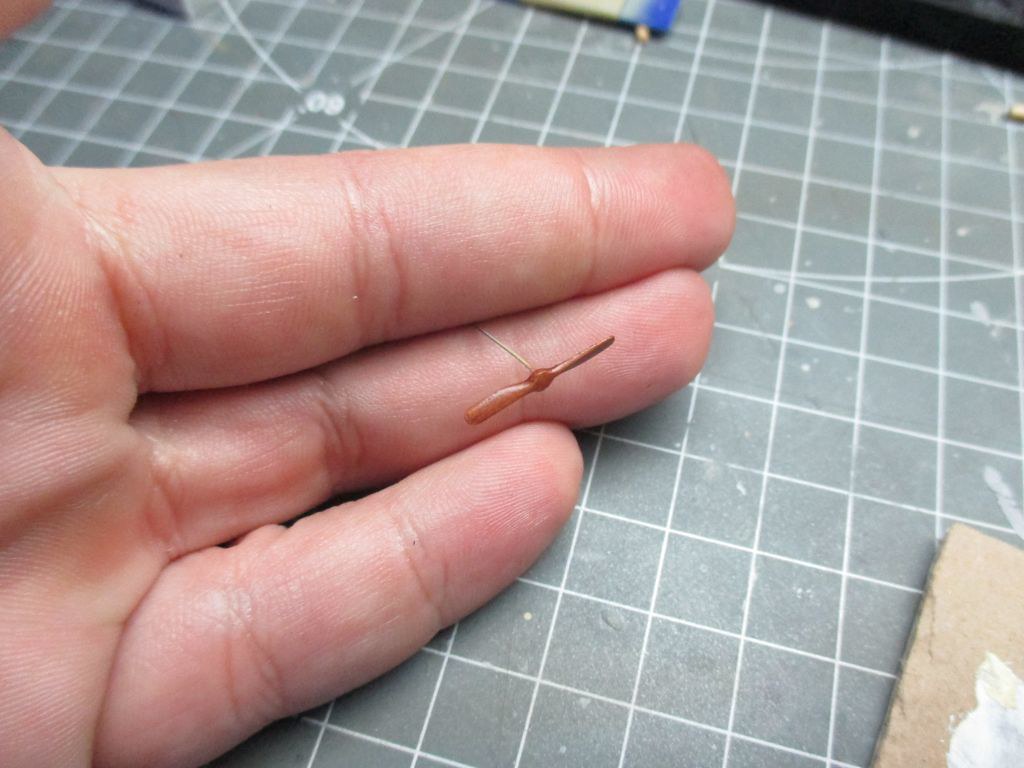
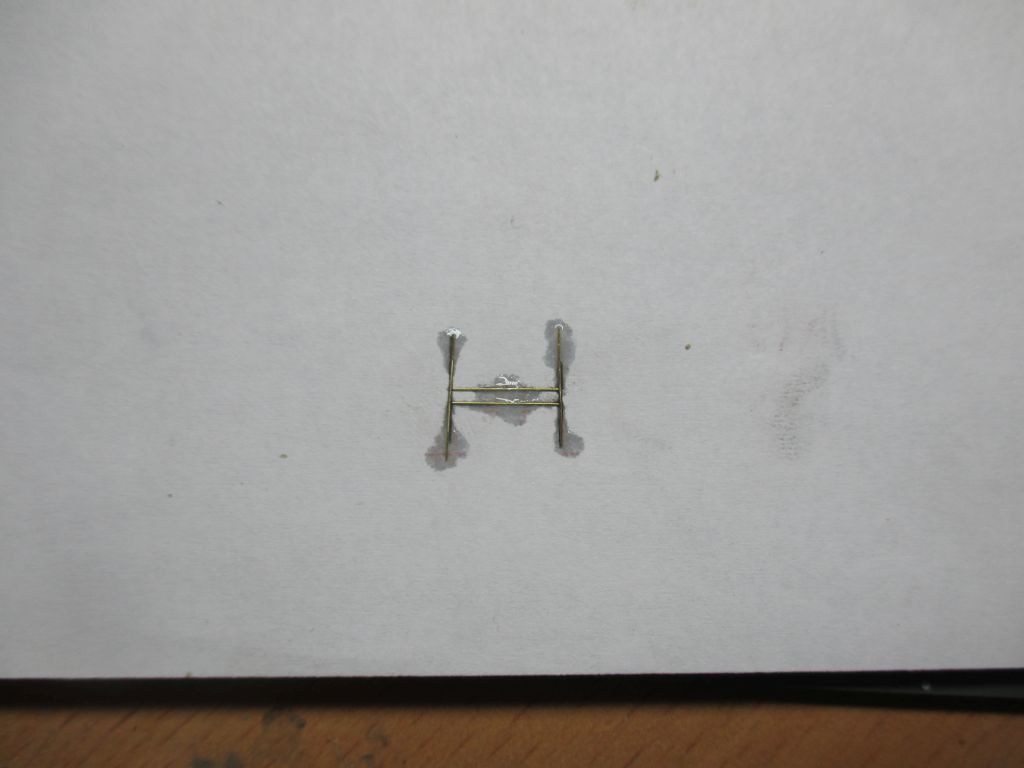
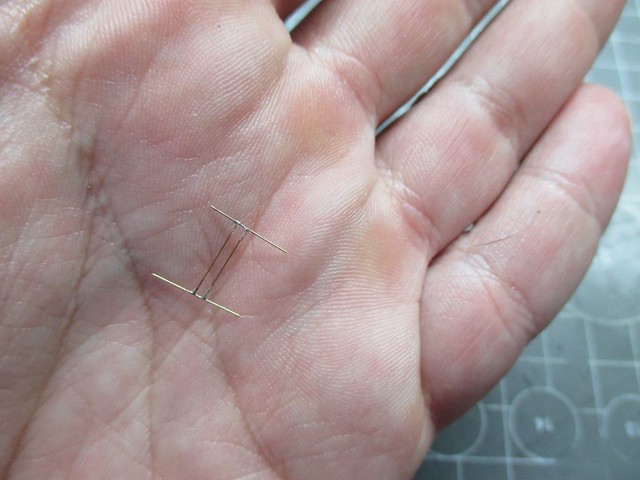
I also soldered the steps for the fuselage. Now I am glad I invested in Valorbe watchmakers files a few years ago. They were very expensive, but they are perfect for cleaning the joints.

Cheers
Ondra
Re: Fokker E.I 1/144 scratch
Posted: Sun Feb 18, 2018 10:04 am
by ondra
Not much progress to report this weekend, I started preparing for the assembly, therefore the first chapter is the rigging on the tail. The aluminium discs will afterwards get painted with burnt sienna to resemble leather.
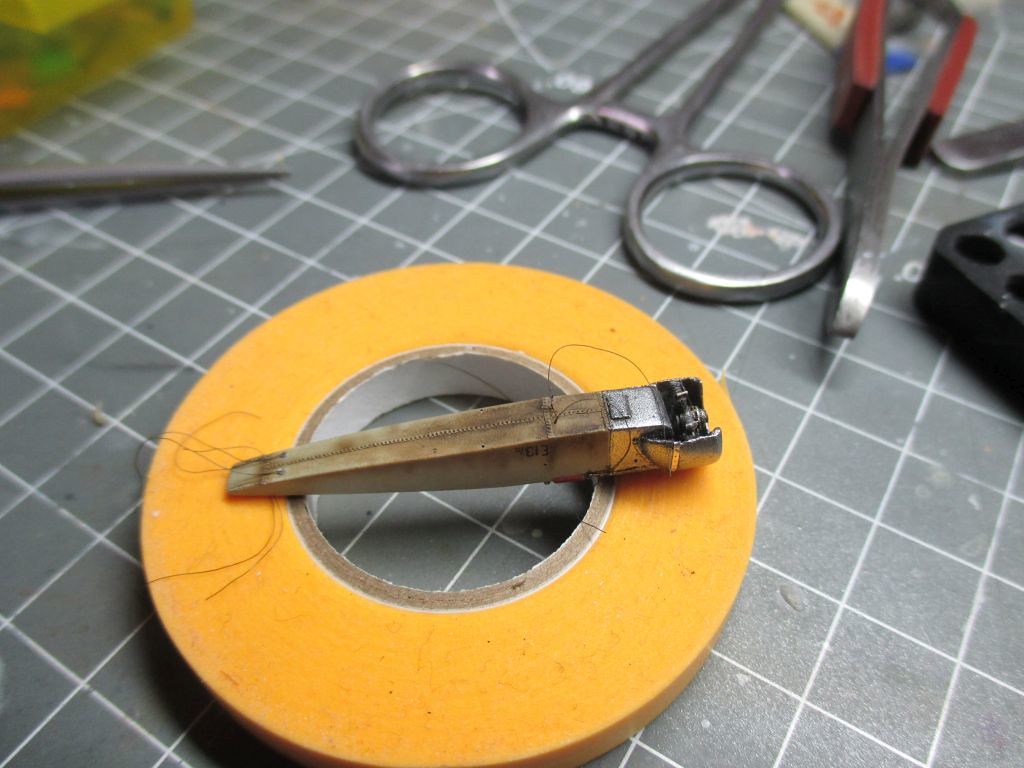
I also fitted the engine and the cowling.
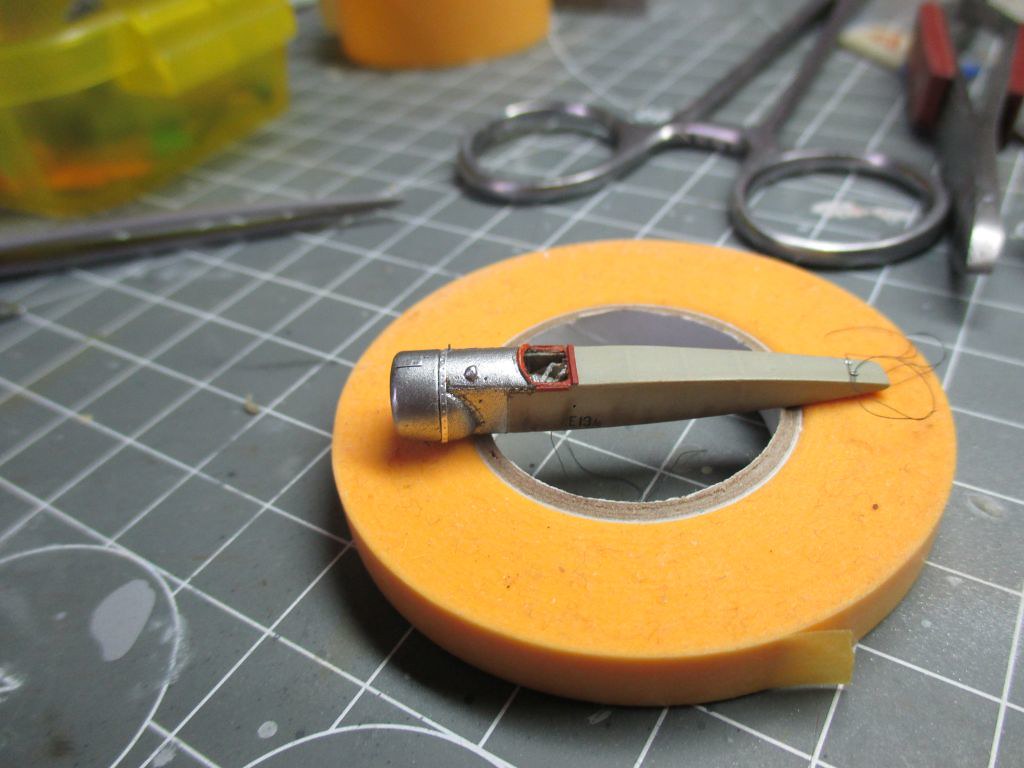
And here is what it looks like with wash applied.
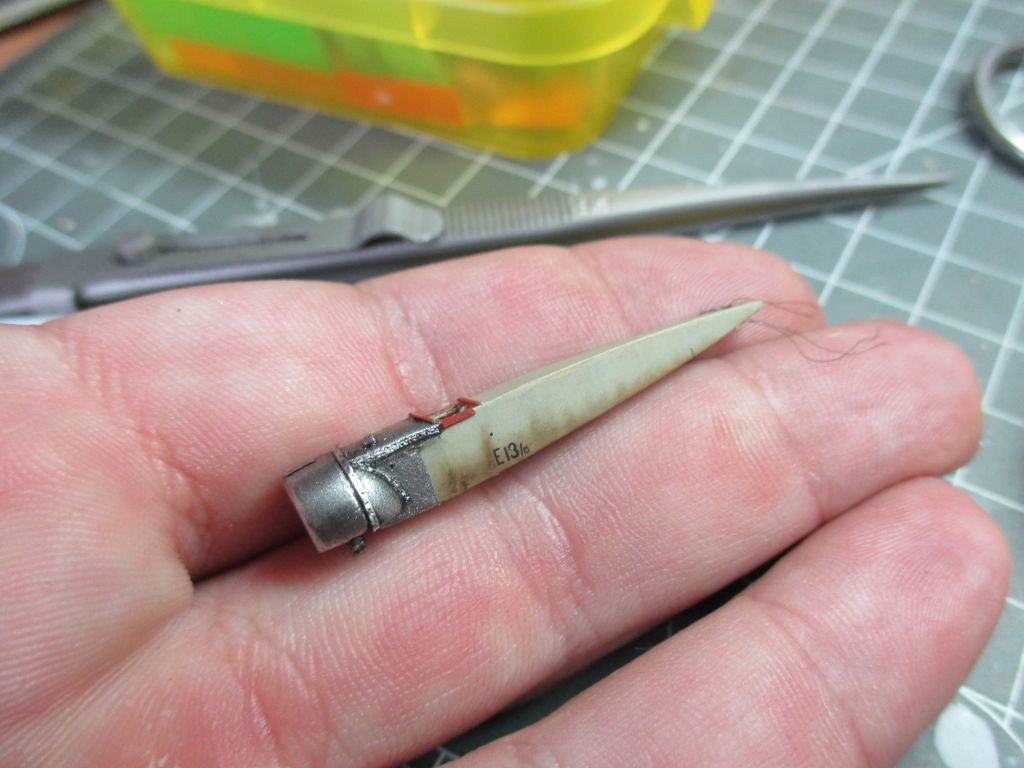
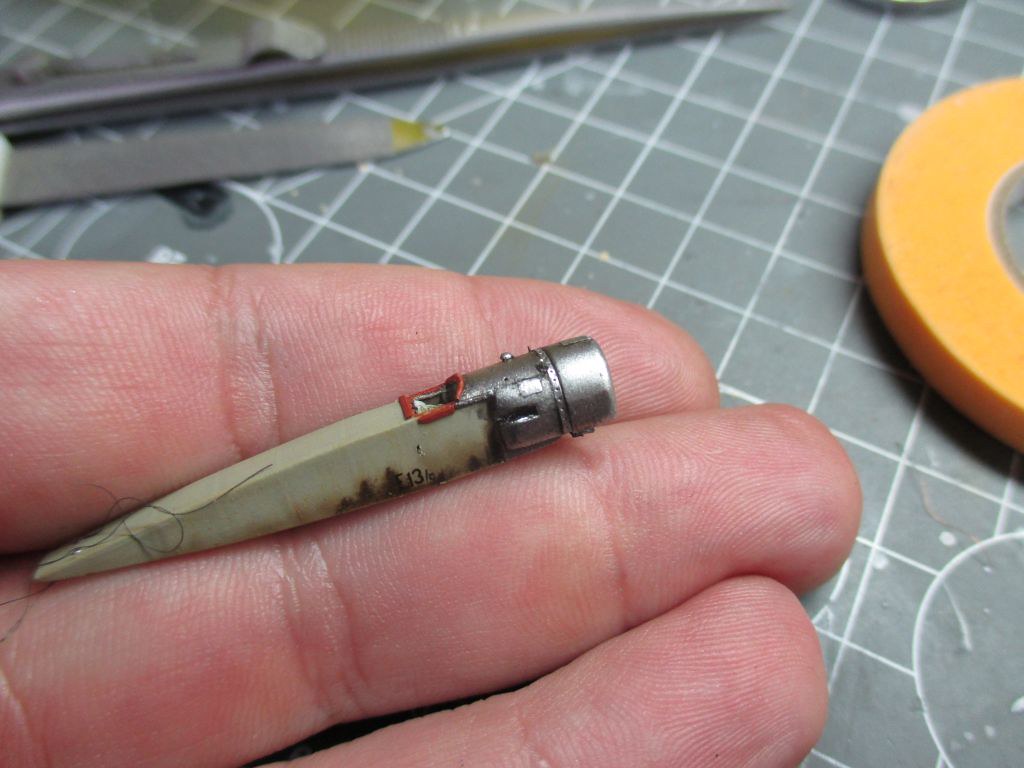
Cheers
Ondra
Re: Fokker E.I 1/144 scratch
Posted: Sun Feb 18, 2018 11:35 am
by kruno59
Something else mate - I have binned more than 1 bi plane so how you can build this is mind blowing
Re: Fokker E.I 1/144 scratch
Posted: Sun Feb 18, 2018 5:04 pm
by DrSprue
This really just blows my mind.... Wow!
Re: Fokker E.I 1/144 scratch
Posted: Sun Feb 18, 2018 6:20 pm
by Twokidsnosleep
Indeed

Re: Fokker E.I 1/144 scratch
Posted: Wed Feb 21, 2018 6:54 pm
by Timmie
Indeed very nice work.
Grtz Arjan
Re: Fokker E.I 1/144 scratch
Posted: Mon Mar 05, 2018 3:41 pm
by ondra
Many thanks to everybody for your nice comments, they are highly appreciated!
If you have been wondering where I got stuck - well, the story was about collecting courage to fit the steps on the fuselage. Done now, next up will be painting them. I guess I will take time until next weekend to let my hands stop from shaking.
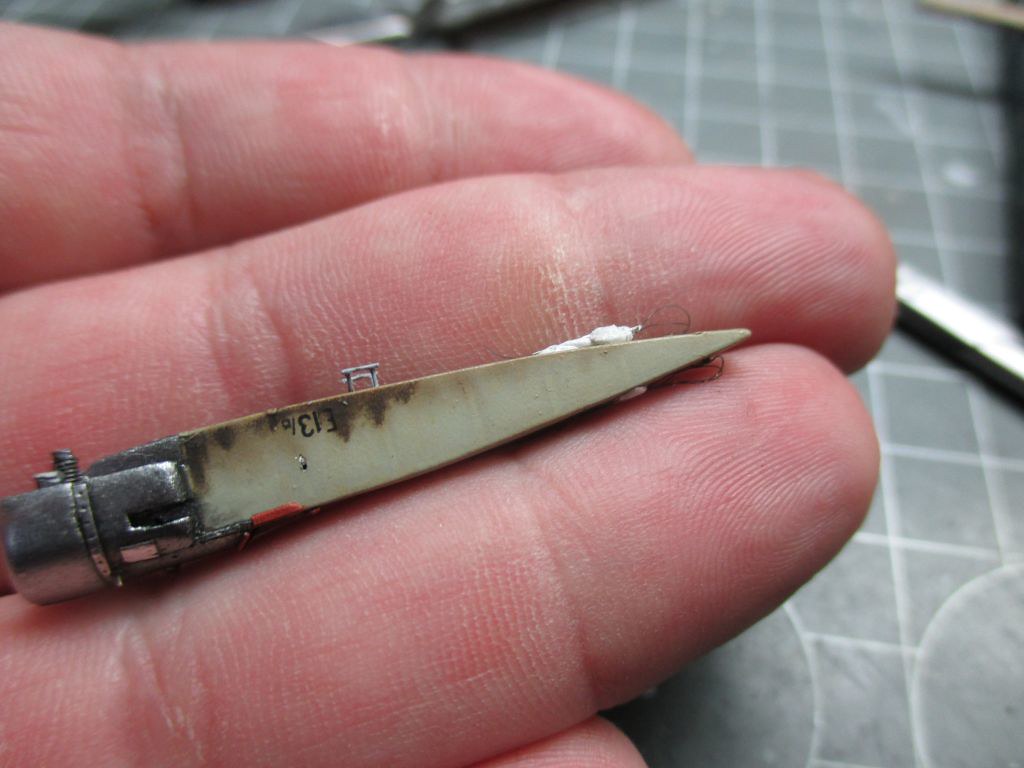
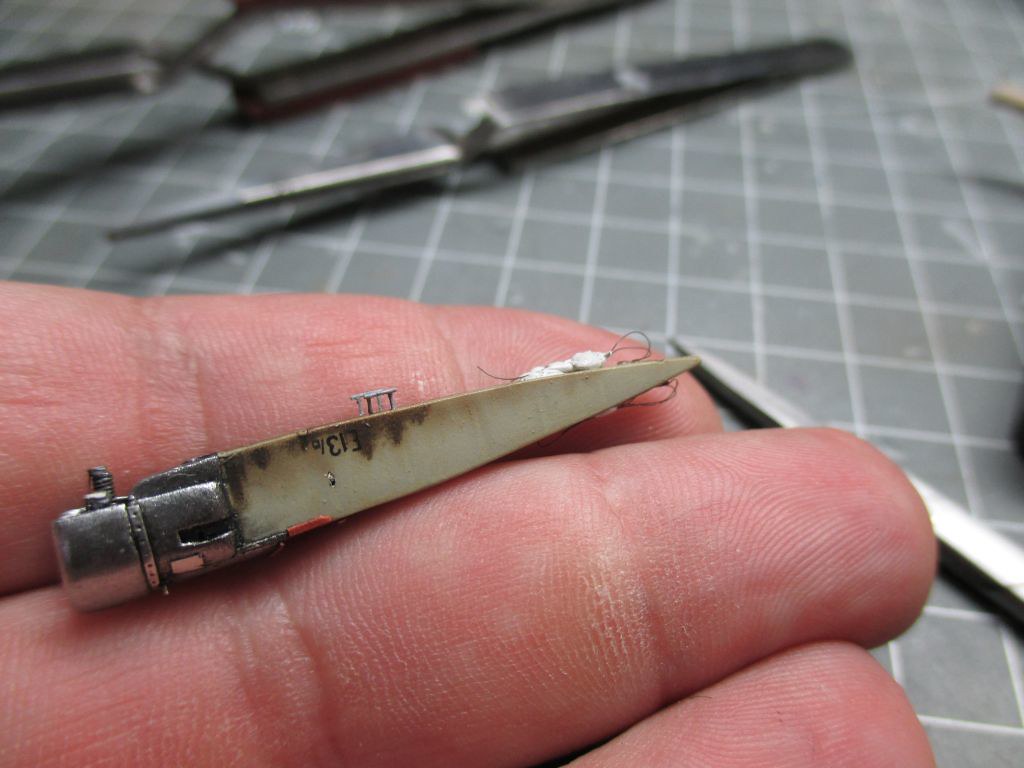
Cheers
Ondra
Re: Fokker E.I 1/144 scratch
Posted: Sat Mar 10, 2018 6:54 am
by ondra
I started rigging and assembling the tail, but it requires regular breaks to avoid shaky hands. The good news, my jig for cutting off the excesses of the elastic monofilament works very well.
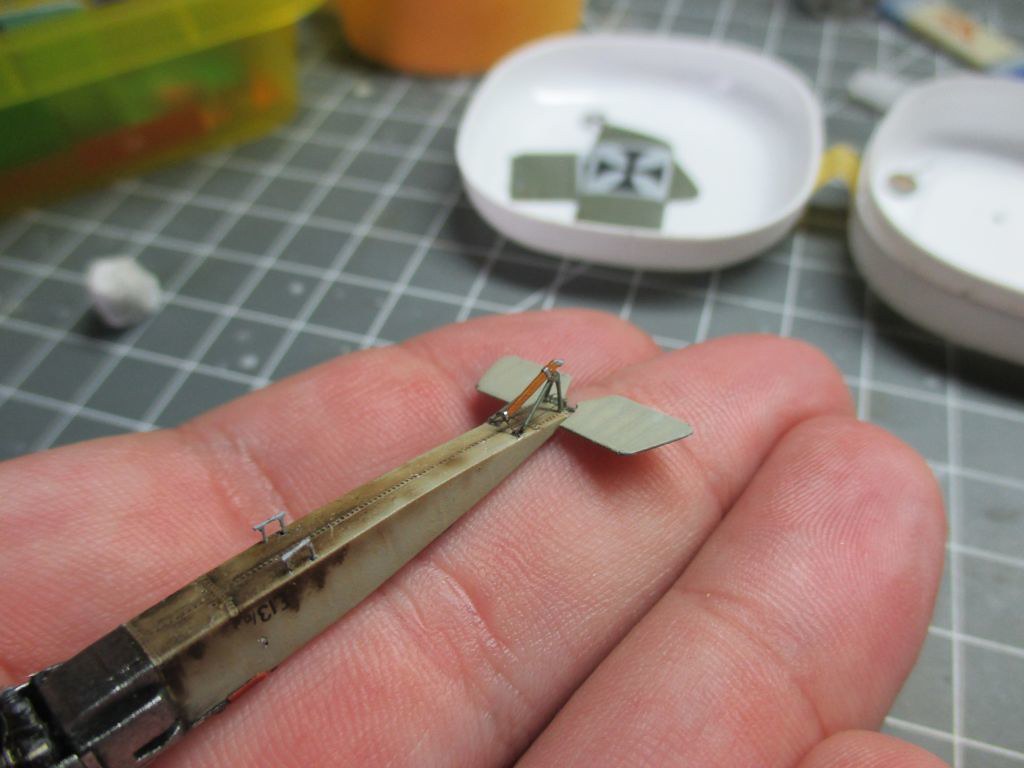
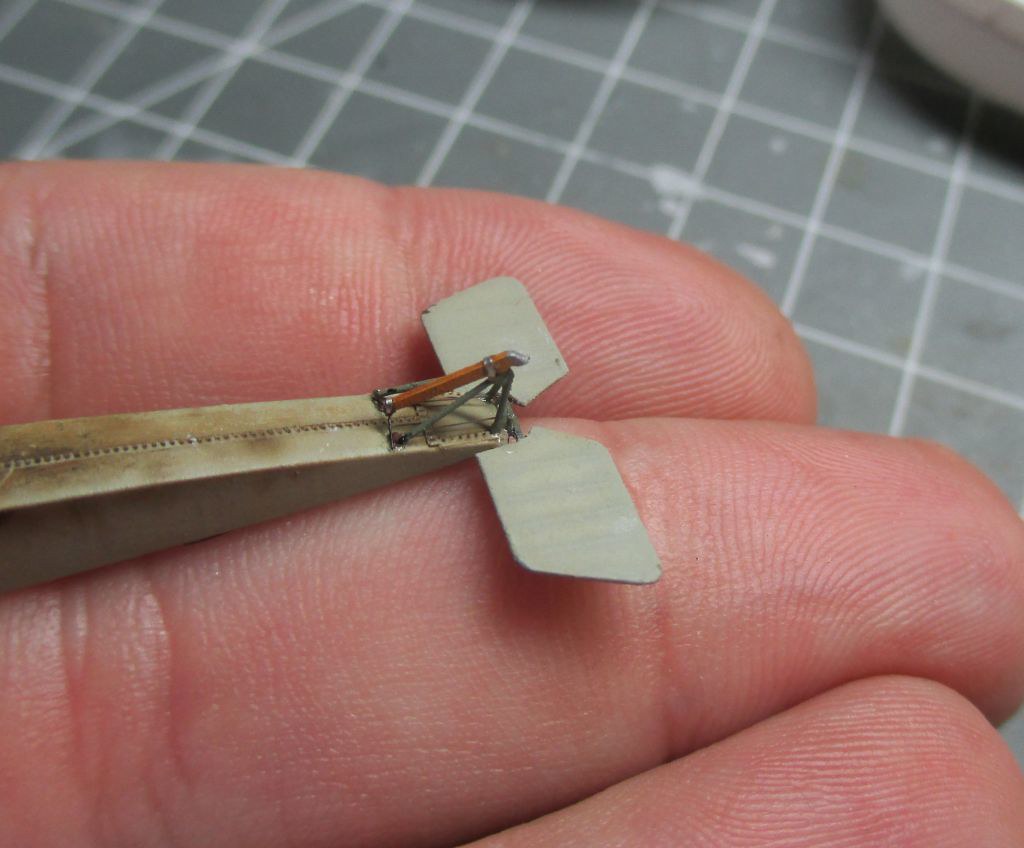
Cheers
Ondra
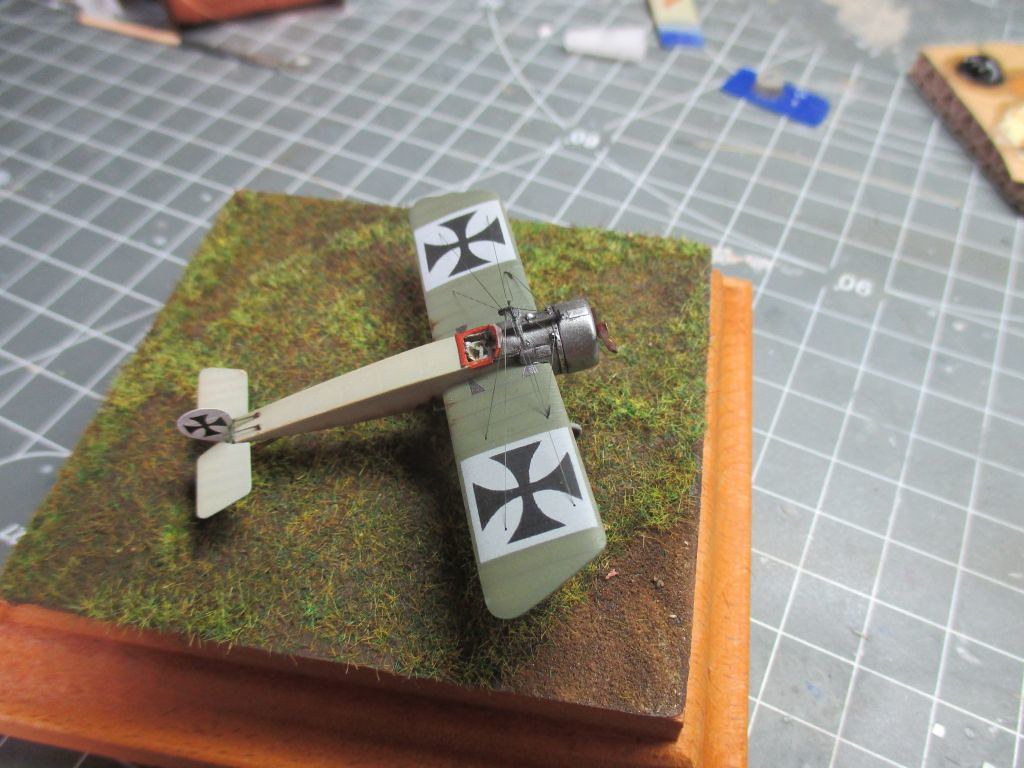
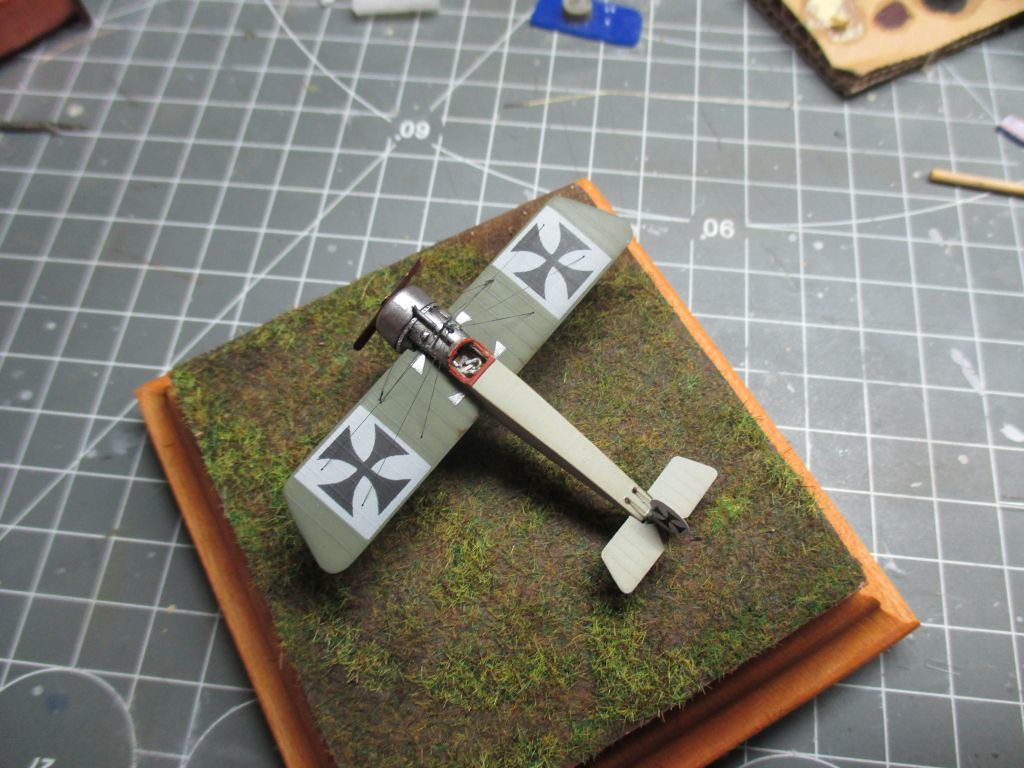
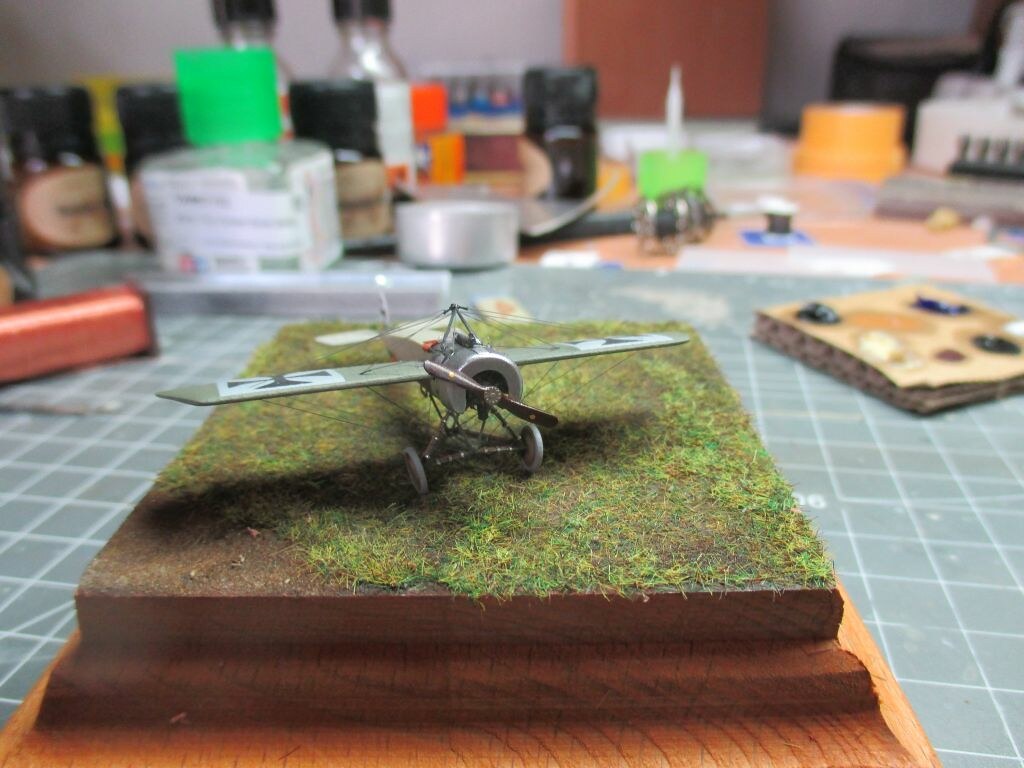
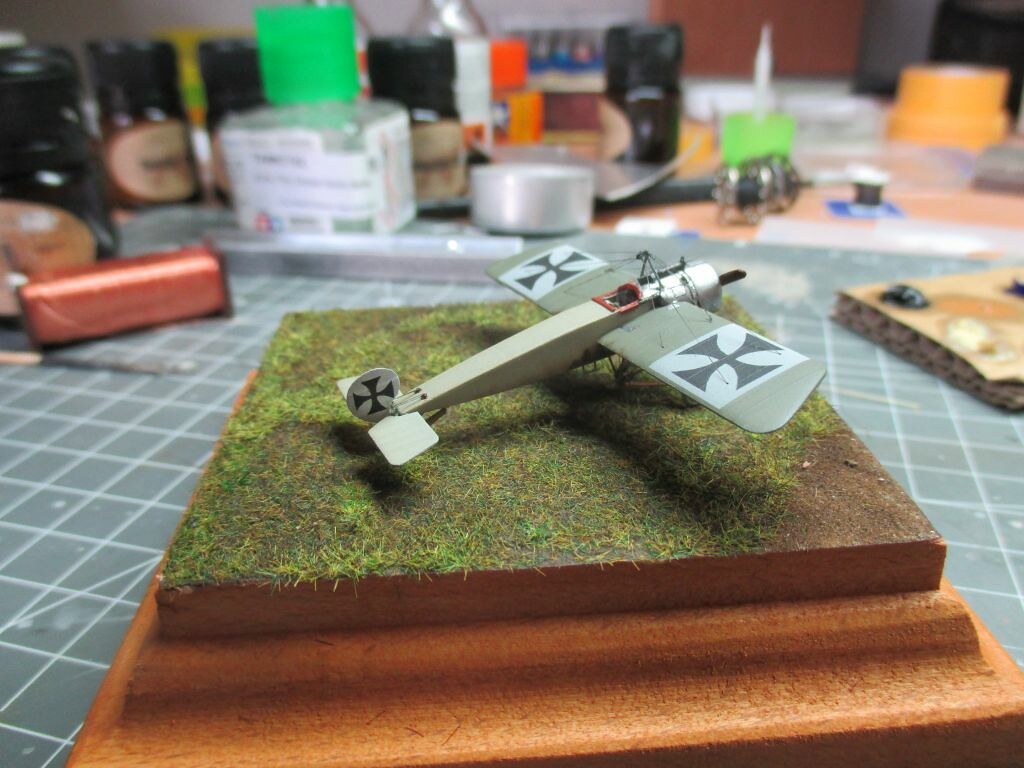
Re: Fokker E.I 1/144 scratch
Posted: Sun Mar 11, 2018 2:05 pm
by ondra
Re: Fokker E.I 1/144 scratch
Posted: Sun Mar 11, 2018 3:23 pm
by Twokidsnosleep
Simply Superb
It has been a pleasure following along and watch you create this.
I thank you for taking the time to show it’s progress
Re: Fokker E.I 1/144 scratch
Posted: Sun Mar 11, 2018 5:12 pm
by TommyKillander
Absolutely gorgeous!
Fantastic work as well!
As a 1/72 scale builder I have found this thread very inspiring, since it shows that what I barely can do in 1/72 is possible in 1/144
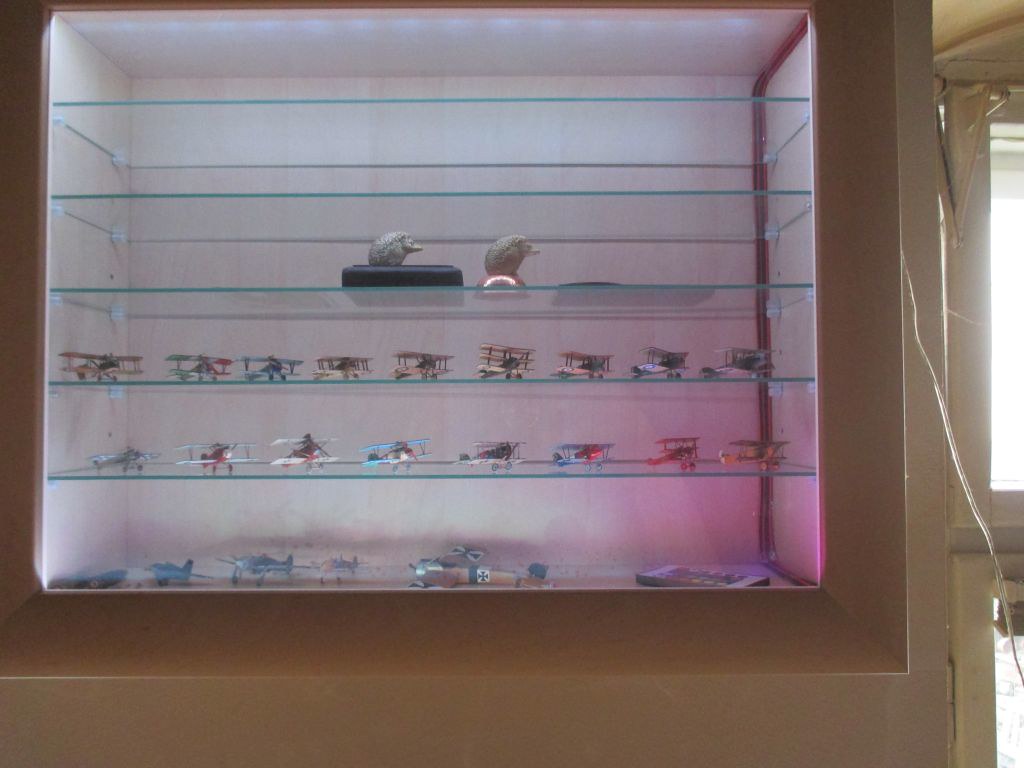
Your cabinet with 18 different objects in the same scale makes it even more impressive

Well done!
Tommy
Re: Fokker E.I 1/144 scratch
Posted: Sun Mar 11, 2018 7:17 pm
by DrSprue
Just fantastic!!
Re: Fokker E.I 1/144 scratch
Posted: Wed Mar 14, 2018 12:07 pm
by Timmie
Just fantastic.
Thanks for taking us through youre building progress.
Youre build has been inspiring.
Grtz Arjan
Re: Fokker E.I 1/144 scratch
Posted: Sun Mar 18, 2018 7:12 am
by Kevthemodeller
The attention to detail on something so small is incredible.

I'm amazed
Re: Fokker E.I 1/144 scratch
Posted: Thu Mar 22, 2018 8:04 pm
by Lysus
So I have a lot of catching up to do, but from the couple posts I stopped in to look at for the finished product...
...holy cow. Amazing!
Re: Fokker E.I 1/144 scratch
Posted: Sat Apr 21, 2018 4:22 pm
by ondra
Many thanks for your positive feedback, gentlemen, it is highly appreciated!
A few days ago I made a few photos of the Eindecker along with my first ever WWI scratchbuild, another Eindecker I build from paper 20 years ago.
IMG_0704.JPG
IMG_0702.JPG
IMG_0700.JPG