Page 2 of 4
Re: Pfalz, One Plane 2 pedrigree's (Wingnut Wings)
Posted: Sat Jan 22, 2022 3:27 pm
by Twokidsnosleep
Hope you are feeling better soon, bugger of a virus
WNW is progressing nicely, keep test fitting!

You guys really got blasted out East with winter
We are considering cleaning up the garden and getting ready for spring
Re: Pfalz, One Plane 2 pedrigree's (Wingnut Wings)
Posted: Mon Jan 24, 2022 12:38 pm
by Garion77
Hello everyone and welcome back !
Time for another small update as I'm concentrating a bit more on the Mig-21 for the GB right now... and had waiting time for the Pfalz. When we left off last time, the fuselage halves were closed with a few fit issues. before attempting to correct them, I wanted to test fit the bottom wing first to see if anything more would be required and do all at the same time... the fit was not good....the fuselage was too wide to fit by not much (that's more on me I think with the paint and all) ; and part of the wing structure was too long to insert into the fuselage. All that being said, in the process of testing everything I split open part of the bottom of the fuselage
 IMG_3483
 by
Francis Pare, sur Flickr
So here went another gluing and clamping session, left for more then 24 hours to set.
 IMG_3484
 by
Francis Pare, sur Flickr
But when doing it, I realize that I could close totally the gap I had there at first because of how I could position my clamps this time

and then voilà !...
 IMG_3491
 by
Francis Pare, sur Flickr
So that's one problem gone ! so only the one on top left, between the engine and the machines guns... And I think they are covers going there that will hide it. I'll have to check and test first before filling it.
 IMG_3492
 by
Francis Pare, sur Flickr
So went back to fit the bottom wing. This time, the widht was barely ok. As everyone says, WnW are pretty tight ! But the length of the insert in the fuselage was still too long... and that's on their part !
 IMG_3493
 by
Francis Pare, sur Flickr
Or trying fitting it the other way around :
 IMG_3494
 by
Francis Pare, sur Flickr
That was an easy repair to do. Decided to sand the rear part as it would be easier. And then perfect fit !
 IMG_3498
 by
Francis Pare, sur Flickr
The sprue points attachment were then cleaned from the wing. Not taking any chance, I taped all the beautiful rib details on them just to make sure I don't go to wide in the process ; as the detail is so delicate.
 IMG_3499
 by
Francis Pare, sur Flickr
Next up, will be cleaning and filling. And starting work on subassemblies like the wheels and other stuff. And attempt another type of wood effect with the propeller.
Take care everyone !
Re: Pfalz, One Plane 2 pedrigree's (Wingnut Wings)
Posted: Wed Jan 26, 2022 10:33 am
by digger303
Re: Pfalz, One Plane 2 pedrigree's (Wingnut Wings)
Posted: Thu Jan 27, 2022 11:19 am
by Tomcat64
Re: Pfalz, One Plane 2 pedrigree's (Wingnut Wings)
Posted: Thu Jan 27, 2022 11:49 am
by Garion77
I was also surprise about that ! Or in PE. I think it is included in the super details kit from HGW. I thought about removing it and doing it myself but didn't have anything for it. And the extremities would have been hard to recreate.
Re: Pfalz, One Plane 2 pedrigree's (Wingnut Wings)
Posted: Thu Jan 27, 2022 12:09 pm
by cor
Just saw your thread and wow, some fabulous work on a great kit.Very inspiring. The engine detail is very nice, and I see the AK metal you were talking about. Love a dry brushing.
Sorry to see you got hit with covid, hope alls well.
Re: Pfalz, One Plane 2 pedrigree's (Wingnut Wings)
Posted: Fri Jan 28, 2022 12:21 am
by Garion77
cor wrote: Thu Jan 27, 2022 12:09 pm
Just saw your thread and wow, some fabulous work on a great kit.Very inspiring. The engine detail is very nice, and I see the AK metal you were talking about. Love a dry brushing.
Sorry to see you got hit with covid, hope alls well.
Yes the AK's true metal does a really great job as I had mentioned in your thread. I love the product. It's suppose to be able to buff it too..
Thank you for the comment !
Yes finally over. for the Covid Only a few symptoms left
Re: Pfalz, One Plane 2 pedrigree's (Wingnut Wings)
Posted: Mon Feb 07, 2022 6:09 pm
by Garion77
Hello all !
Time for an update of my version of my Pfalz, as @Digger made one of his beautiful progress. As I mentioned in my Mig-21 thread, I'm running in circles in both projects having problems with the seams on each ones. So since my last update, most of work time for the Pfalz was on that ; and different few small things. So before getting to my main problem, let's start with the other small things I've done.
First off, I've tested a few things for the wing's fabric and main color on my subject, red. The instructions call for Tamiya's Flat Red but I found it to be too pure of red for my liking. So I decided to go for Tamiya's LP Dull Red. I need to test, and practice, for the fabric texture also. Thanks to WnW, I've got a spare wing. It's was first primed with Tamiya's fine white primer. Then I used a few methods, using fabric colors first and not, and using flat red and not. The shadows were done with Red Brown. My first attempt was too dark and not enough diluted.
 IMG_3601
 by
Francis Pare, sur Flickr
 IMG_3600
 by
Francis Pare, sur Flickr
The last picture being my method of choice.
Also, having done them for a while, a lot of small pieces were painted
 IMG_3593
 by
Francis Pare, sur Flickr
But what's bizarre about those, it's that all the landing gear apparatus and the wings supports are called for either grey-green or silver-gray. As you can see they've been all painted accordingly. But realized afterwards, by looking at my chosen scheme, they all going to be red !!! So why do the instructions call for the first colors ?... may be the factory color was like that ?... May be I'll scratch a bit of the red off to show it beneath.
In the meanwhile I painted the inside of the wheels with a fabric color (AK's 3rd gen grimy grey) and the spoke painted aluminum. Then the interior was weathered with a brown wash and AK'earth effect. I know, I know, we won't see any of it but it was done to practice the effect for the exterior.
 IMG_3582
 by
Francis Pare, sur Flickr
 IMG_3591
 by
Francis Pare, sur Flickr
 IMG_3592
 by
Francis Pare, sur Flickr
Another test I've done is the propeller. Well, I should say several test. I did a few paint samples of wood effect again to try the replicate the propeller I need to use, the Wolff. Picture of the real thing :
 IMG_3568
 by
Francis Pare, sur Flickr
But in the process of testing the paints, I always had in the back of my mind that I would be a hell of a job to mask the paint to create the 2 tones of wood. So I decided to try with Watercolor pencils. After trying out a few on a sheet of plastic, I choose the 2 colors that were closest to real thing in my opinion. Taking advantage of the other 3 propellers in my kit I went and tried everything out. First off, Tamiya's white primer again, followed by flat white to have a proper surface for the pencils. Then I drew the 2 colors, not taking care of having proper width for them, being only a test.
 IMG_3566
 by
Francis Pare, sur Flickr
Then I applied brown ochre oil paint all over it, removed it after half an hour with a brush moistened in white spirit.
 IMG_3570
 by
Francis Pare, sur Flickr
At that point, being happy with the result, I realized that I should have diluted the oil paint with thinner before applying as I did for my plywood, having the texture of whipped butter a bit. And may be applying the watercolors pencils over either an ochre color or buff.
After that, it was all gloss coated, and sprayed with a mix of clear red and orange.
 IMG_3602
 by
Francis Pare, sur Flickr
Pretty close to the real thing. Sorry for the poor quality of the picture but in real it looks much better. Had a problem with the first gloss coat that's why there's kind of a few dark spots. But I will definitely use this technic for my propeller.
Other test that was done, thanks for the update of Digger for reminding me, was the eyelets/turnbuckles for the rigging. I already had done several tests before starting the project and had settled my choice on 0,18 copper wire for the eyelets, 0,5 mm brass tubes for the turnbuckles. But before priming my real wing, I had to test the holes from the kit would be ok
 IMG_3176
 by
Francis Pare, sur Flickr
 IMG_3588
 by
Francis Pare, sur Flickr
 IMG_3587
 by
Francis Pare, sur Flickr
The tube are a bit too long but you see the effect with the wings supports. Now lot's of time require for making them. Digger is ahead of me for that !!


Now for my main problem !!!!! Help needed ! When we left off last time, I had an almost perfect seam almost everywhere. After checking with primer, I had a few spots that needed attention and they were all taking care off :
 IMG_3594
 by
Francis Pare, sur Flickr
 IMG_3597
 by
Francis Pare, sur Flickr
But I have stubborn one !!! being on the underside beneath the engine. I had, at the beginning, a step between the halves. Bad, but that's what made the perfect seam all around the rest of the plane. But now after several sessions of filler, sanding, priming and all that again and again I still have something that shows !!!
When looking at that angle it looks fine :
 IMG_3603
 by
Francis Pare, sur Flickr
But when looking from the sides :
 IMG_3604
 by
Francis Pare, sur Flickr
Hard to show in a picture but you can see a bit what I'm talking about...
DOn't know what To do because it's constantly keep showing up. ANY SUGGESTIONS ?? Because I'm about to leave it like that and abandon. It's hard to say if it's sinks or is elevated
Re: Pfalz, One Plane 2 pedrigree's (Wingnut Wings)
Posted: Mon Feb 07, 2022 6:52 pm
by RangerNeil
Garion77 wrote: Mon Feb 07, 2022 6:09 pm
<snipped>
But I have stubborn one !!! being on the underside beneath the engine. I had, at the beginning, a step between the halves. Bad, but that's what made the perfect seam all around the rest of the plane. But now after several sessions of filler, sanding, priming and all that again and again I still have something that shows !!!
When looking at that angle it looks fine :
But when looking from the sides :
Hard to show in a picture but you can see a bit what I'm talking about...
DOn't know what To do because it's constantly keep showing up. ANY SUGGESTIONS ?? Because I'm about to leave it like that and abandon. It's hard to say if it's sinks or is elevated
Have you tried the thumb nail test? Light pull your thumb nail across the seam both ways and you should be able to feel whether it's a depression or raised. Something that stuck with me from the apprentice days - thumb nails are actually incredibly sensitive for determining surface texture.
Re: Pfalz, One Plane 2 pedrigree's (Wingnut Wings)
Posted: Mon Feb 07, 2022 11:33 pm
by digger303
Run some color down the seam such as a lead pencil and then sand. It will show up then which side is high and low.
Re: Pfalz, One Plane 2 pedrigree's (Wingnut Wings)
Posted: Tue Feb 08, 2022 12:11 am
by Garion77
digger303 wrote: Mon Feb 07, 2022 11:33 pm
Run some color down the seam such as a lead pencil and then sand. It will show up then which side is high and low.
Thank you ! Was always putting primer to see it. But with the lead pencil on top much better. Half the length of it is gone after the first pass and priming again
Tomorrow it should be finally gone !! And I can put my energies in something else that doesn't kills the mojo.
Re: Pfalz, One Plane 2 pedrigree's (Wingnut Wings)
Posted: Tue Feb 08, 2022 5:35 am
by digger303
Re: Pfalz, One Plane 2 pedrigree's (Wingnut Wings)
Posted: Tue Feb 08, 2022 9:25 am
by Tomcat64
Wow that's quite an update - you've been busy
The work on the ribbing with the red really pops out - and the detail showing in the cockpit from above is great.
Re: Pfalz, One Plane 2 pedrigree's (Wingnut Wings)
Posted: Tue Feb 08, 2022 12:24 pm
by Garion77
Tomcat64 wrote: Tue Feb 08, 2022 9:25 am
Wow that's quite an update - you've been busy
The work on the ribbing with the red really pops out - and the detail showing in the cockpit from above is great.
Thank you ! the red looks much better in reality. The picture is awful. Not good at taking pictures with an iPhone and don't have proper lighting around my desk.
Too bad for the cockpit as it won't show at all with the top wing on !! That's why I mentioned in an earlier update that the kit is over engineered. Half of the detail doesn't show even without the top wing on. A few less details for a few less dollars would have helped them stay in business I think.
Re: Pfalz, One Plane 2 pedrigree's (Wingnut Wings)
Posted: Tue Feb 08, 2022 2:16 pm
by Carles
That´s a very realistic job on the seat belts and the global cockpit and other opened ports.
I really like how you painted the wings surface in red colour with the darker shadows where the ribs are.
Please, show us more progress on this..
Carles.
Re: Pfalz, One Plane 2 pedrigree's (Wingnut Wings)
Posted: Wed Feb 09, 2022 12:45 am
by Garion77
Really small update everyone !
Thank you
@digger303 !!
My seam is finally repaired !!! Use the pencil trick, realize that I had a lot to sand
 IMG_3609
 by
Francis Pare, sur Flickr
You can see how I had too when you look at the circled area. That was the price to have an almost perfect fit around the rest of the plane. After that, I check everything with primer and realize that I had 2 small gaps in the filled area (in white) ; just like bubbles in the filler. Then I decide to go with a proven method, even if I don't like using it, CA glue with pigments in it.
 IMG_3611
 by
Francis Pare, sur Flickr
Remove most of it with my file and finished with sanding sponges.
and voilà !!!
 IMG_3612
 by
Francis Pare, sur Flickr
 IMG_3613
 by
Francis Pare, sur Flickr
 IMG_3614
 by
Francis Pare, sur Flickr
Thank you again Digger !!! Because I was so close to let it go like it was... having so much fit issues on my Mig also (go see the upcoming update

)
And to finish on the Pfalz, here is a better picture of my red fabric test (the other one was blurry)
 IMG_3619
 by
Francis Pare, sur Flickr
Re: Pfalz, One Plane 2 pedrigree's (Wingnut Wings)
Posted: Wed Feb 09, 2022 2:38 am
by cor
Looking great. Nice work on the details.
Re: Pfalz, One Plane 2 pedrigree's (Wingnut Wings)
Posted: Wed Feb 09, 2022 4:49 am
by digger303
Re: Pfalz, One Plane 2 pedrigree's (Wingnut Wings)
Posted: Wed Feb 09, 2022 11:26 am
by Garion77
Thanks buddy. No on the other things more fun ! at least for this project ! Top wing, wheels, and, not sure it's that much more fun, making the eyelets and turnbuckles !
Re: Pfalz, One Plane 2 pedrigree's (Wingnut Wings)
Posted: Sat Feb 12, 2022 9:15 pm
by Garion77
Hello everyone !
Not much of an update today but more help needed.
Just realized that I broke a bit of the front engine cowl....

DOn't know when because it's in my storage bin and the broken piece cannot be found so must have been before that it happened.
 IMG_3532
 by
Francis Pare, sur Flickr
Anyone have an idea how I could repair that ?? The only think I'm thinking is using epoxy putty and using the good part to form the replacement and finding a way to hold it in place.
Re: Pfalz, One Plane 2 pedrigree's (Wingnut Wings)
Posted: Sun Feb 13, 2022 12:11 am
by digger303
You could cut it straight then add a small piece of styrene sheet or just dab a bit of sprue goo on it wait 24hrs and then carve the excess off.
It is what I did on my short corners where it was either a small bit or had a curve to it. Sprue goo would want to be not too sloppy. If going the sprue goo method you could add a former to the inside which would help a lot. A piece of metal foil for instance or abs plastic.
I'm in bit of hole dug by procrastination atm.

Re: Pfalz, One Plane 2 pedrigree's (Wingnut Wings)
Posted: Sun Feb 13, 2022 1:27 am
by Garion77
digger303 wrote: Sun Feb 13, 2022 12:11 am
You could cut it straight then add a small piece of styrene sheet or just dab a bit of sprue goo on it wait 24hrs and then carve the excess off.
It is what I did on my short corners where it was either a small bit or had a curve to it. Sprue goo would want to be not too sloppy. If going the sprue goo method you could add a former to the inside which would help a lot. A piece of metal foil for instance or abs plastic.
I'm in bit of hole dug by procrastination atm.
Well the problem with that method, is that the area is curved... I think the picture doesn't show it properly. As for sprue goo... it's pretty large area. Again it doesn't show on the picture. But it would be possible by numbers of filling session.
May be a styrene sheet that's pretty thin and put another one on top to be the some thickness....
I'm not sure I understand your last sentence... limits of my English sorry...
Re: Pfalz, One Plane 2 pedrigree's (Wingnut Wings)
Posted: Tue Mar 15, 2022 7:14 pm
by Garion77
Hello everyone and welcome back to WnW Pfalz project !! yes it's still alive !
But lately, time wasn't spent much at the bench while to much was going on at home. This is going to be an update on small details as nothing much significant was done. A lot got on the way in the last month, including, as spoken of in my Mig-21 project, a little water leak !!
And during the spring break of my son, a little scary moment with him at the hospital. He started to feel sick on the Friday. We made him take a few covid test during the weekend, as he's the only one that didn't get it of the 5 here. They came all negative. On the Sunday night, before going to bed, his respiration started to be really hard. He sounded like Darth Vader... So I made sure to check on him a few times during the night by putting an alarm clock. But I was woken up by a strange noise at one moment. Got up, and he was in the bathroom and just vomited an enormous quantity

and...blood... his respiration after that stared to get really worst. So I decided it was time to go to ER really fast ! I must say, that I've got a lot of training in first aid, and do not get stress easily in those moments. But when we got outside, before getting in the car, it changed ! has he almost stop breathing... and was in the dilemma of calling the ambulance (thus waiting for them a few minutes before heading the same place I was but have oxygen at hand) or going by myself much faster. I decided to go by myself ! So here I went down the highway at 4 in the morning at more then a 160 km/h...pass before a cop car who must have been sleeping in his car

... Got inside and my son was taking care of in matter of 5 minutes. and everything was ok afterward... I really thought at a moment I would have to stop on the side of the road for CPR... thank go it was not required.
So back to modeling. When we left of, I was struggling with a broken piece, the engine cowl.
 IMG_3532
 by
Francis Pare, sur Flickr
I started trying to repair by first gluing in the back a really thin sheet of plastic to have a backing for epoxy putty.. that didn't really worked out so I went with only the putty..
 Sans titre
 by
Francis Pare, sur Flickr
I sanded it down but while doing that, I was searching for other thing in one of my books, which as the exact same model in it... and realized the part wasn't broken at all ! It's made like that !!!
 Sans titre
 by
Francis Pare, sur Flickr
Removed the putty and painted it with a first coat of dull aluminium
I also did several test for the propellers. I think I had spoken about them...

Well, to explain, I decided to go with a technic using watercolor pencils instead of painting and masking that small a piece. After several test, I arrived at what I was looking for
 IMG_3602
 by
Francis Pare, sur Flickr
Sorry for the quality of the picture. I went to heavy on the clear coats on it but the look is what I'm aiming at. So here's my process.
First, flat white, then I used ochre from AK
 Sans titre
 by
Francis Pare, sur Flickr
 Sans titre
 by
Francis Pare, sur Flickr
I then put a few coat of flat clear on it, for getting a good grip for the pencils. The I used the colors I had selected and draw free hand the woodgrain
 Sans titre
 by
Francis Pare, sur Flickr
It's now clear coated. Next up, in the next update, will be the oil work for it. I'm going to use brown ochre and clear coat it again with a mix of clear read and clear orange.
Other testing I had spoken of previously was the wing. That having been done, I decided I would finish the top wing to have practice on the huge decals for the fabrics lozenges. I decided to prime everything and paint the top red using the method I had tested. Primed with tamiya white primer, then loosely painted a fabric color over it
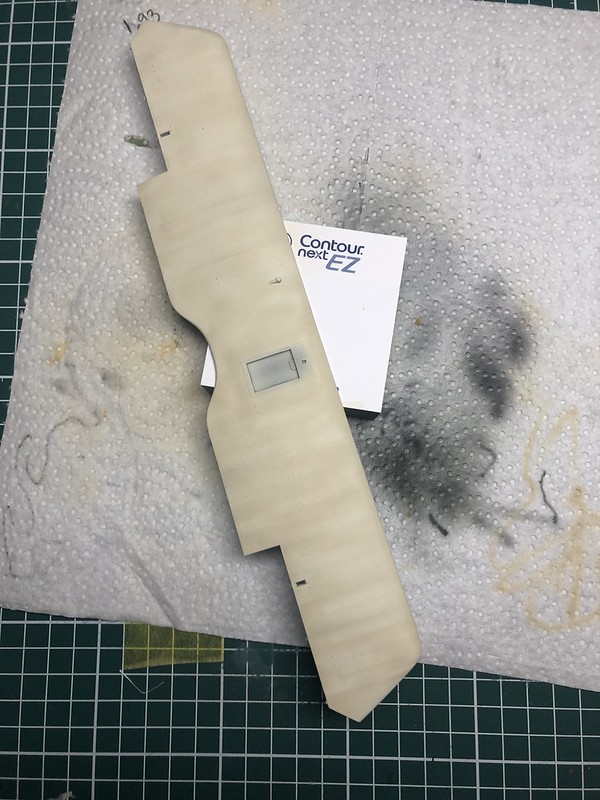 Sans titre
 by
Francis Pare, sur Flickr
Then, I loosely painted a flat red in straight lines, masked the wing for the fabric effect and painted red brown.
 Sans titre
 by
Francis Pare, sur Flickr
I finished by painted with Tamiya LP-18 Dull red and Alclad Aluminum in the center for a kind of exhaust.
 Sans titre
 by
Francis Pare, sur Flickr
I was pretty happy with how it turned out ! I was ready to tackle the lozenge fabric decals on the underside taking advantage of the glossy finish of tamiya's white primer, as I have read it has a recommendation. And then I could move on to the first step of rigging the top wing (eyelets in production at the moment) But then, I had a surprise from WnW !
 Sans titre
 by
Francis Pare, sur Flickr
The decals isn't cut to fit ! I have to do it myself !!! Which I found, let's say insulting at the price those kits are !! The only way I'm thinking of to make it easier would be to make a template using a stiff sheet of paper first then cutting the decal. But I still loose all the holes that are predrilled for the rigging. Let's hope microsol takes care of that last part.
Anyone as a better suggestion ?
And continue staying safe even were finally seeing the end of it !! Book not one but 2 vacations because of that !! Paris for 10 days this summer (my girlfriend is French) and 5 days in Vegas (finally !!!) in October
Take care !
Re: Pfalz, One Plane 2 pedrigree's (Wingnut Wings)
Posted: Tue Mar 15, 2022 7:30 pm
by RangerNeil
The paper template sounds a good, practicable solution to me. I think I'd be shocked too at having to trim that sort of decal down.
In hindsight though there is a kind of logic - I am guessing WnW didn't print the decals so rather than risk it falling short and leaving unsightly gaps they had it printed oversize for the builder to trim??
Re: Pfalz, One Plane 2 pedrigree's (Wingnut Wings)
Posted: Tue Mar 15, 2022 8:43 pm
by BigWall
Superb! Very nice paint work. The wing looks absolutely amazing!
Re: Pfalz, One Plane 2 pedrigree's (Wingnut Wings)
Posted: Tue Mar 15, 2022 11:55 pm
by digger303
I suspect once you fix the decal in place then go over it with the softening agent the decal might conform to the holes. Making them easy to spot then should be OK.
Ps.....I think WNW may have deliberately over sized the decals to allow for placement, just in case the modelers misaligned it a fraction
rather than trying to move such a large decal and it snagging on all those reinforcement strips on the top wing.
Re: Pfalz, One Plane 2 pedrigree's (Wingnut Wings)
Posted: Wed Mar 16, 2022 3:03 pm
by Tomcat64
Wow Francis - I hope your son is all ok now?
It's great to see you back at the bench on this one as well - the first wing looks great & hopefully the softening agents will bring the lozenges into shape.
Maybe you might need a stronger agent for this one, but obviously try it out on a small section (or off cut) first so you can check it doesn't destroy them totally.
Re: Pfalz, One Plane 2 pedrigree's (Wingnut Wings)
Posted: Wed Mar 16, 2022 7:22 pm
by Garion77
digger303 wrote: Tue Mar 15, 2022 11:55 pm
I suspect once you fix the decal in place then go over it with the softening agent the decal might conform to the holes. Making them easy to spot then should be OK.
Ps.....I think WNW may have deliberately over sized the decals to allow for placement, just in case the modelers misaligned it a fraction
rather than trying to move such a large decal and it snagging on all those reinforcement strips on the top wing.
RangerNeil wrote: Tue Mar 15, 2022 7:30 pm
The paper template sounds a good, practicable solution to me. I think I'd be shocked too at having to trim that sort of decal down.
In hindsight though there is a kind of logic - I am guessing WnW didn't print the decals so rather than risk it falling short and leaving unsightly gaps they had it printed oversize for the builder to trim??
I think what they've done is print a generic one for all they German planes. But still, pretty cheap of them. They could had still included a template of their own.
The problem I'm thinking of with the making of my own template is the extremities of the wings. Hard to get it perfect.Because yes they have oversized them but still have to make a perfect fit. You don't want them too short to show the white underneath and don't want them too look and go over the red on top. And if I comprehend the instructions correctly, there's 8 sections (if I remember right) to be cut ; there's a dash line making a separation in the instructions and they mention to make sure of the alignment of the lozenges. and I stil have to cut the vent grill in the middle of one also !
Re: Pfalz, One Plane 2 pedrigree's (Wingnut Wings)
Posted: Wed Mar 16, 2022 7:26 pm
by Garion77
Tomcat64 wrote: Wed Mar 16, 2022 3:03 pm
Wow Francis - I hope your son is all ok now?
It's great to see you back at the bench on this one as well - the first wing looks great & hopefully the softening agents will bring the lozenges into shape.
Maybe you might need a stronger agent for this one, but obviously try it out on a small section (or off cut) first so you can check it doesn't destroy them totally.
Yes he's alright thank you. I don't know the English term for what he had but it's kind of like a pneumonia and they discovered at the same time he has asthma... so that was he's first attack ever. Kind of surprised of that because he's always running everywhere. He only has one speed and that's running !! Even after a hot day at Disney world it was still his only speed.
As for the decal solution I only have micro sol and set and tamiya's. But hate tamiya's ! tested it and did not do much. So I'll stay with micro sol, have no choice. Hard for me to get other brands. In my next Ultimate order I'll try their solution.
Re: Pfalz, One Plane 2 pedrigree's (Wingnut Wings)
Posted: Thu Mar 17, 2022 12:03 am
by digger303
Garion77 wrote: Wed Mar 16, 2022 7:26 pm
Tomcat64 wrote: Wed Mar 16, 2022 3:03 pm
Wow Francis - I hope your son is all ok now?
It's great to see you back at the bench on this one as well - the first wing looks great & hopefully the softening agents will bring the lozenges into shape.
Maybe you might need a stronger agent for this one, but obviously try it out on a small section (or off cut) first so you can check it doesn't destroy them totally.
Yes he's alright thank you. I don't know the English term for what he had but it's kind of like a pneumonia and they discovered at the same time he has asthma... so that was he's first attack ever. Kind of surprised of that because he's always running everywhere. He only has one speed and that's running !! Even after a hot day at Disney world it was still his only speed.
As for the decal solution I only have micro sol and set and tamiya's. But hate tamiya's ! tested it and did not do much. So I'll stay with micro sol, have no choice. Hard for me to get other brands. In my next Ultimate order I'll try their solution.
You should be able to get Solverset from walthers ... being a USA product.
The decal issue sounds awful.

Ps... Is the pneumonia issue likey to be recurring ?
Re: Pfalz, One Plane 2 pedrigree's (Wingnut Wings)
Posted: Thu Mar 17, 2022 11:39 am
by Garion77
Hello,
so here's the first round of fabric decals !
@digger303 the solvaset isn't sold from my local hobby stores. And those I order frequently from (cheap delivery) either don't have it or don't ship it. And for the Mr. Hobby product kind of like the solvaset but a bit easier. The problem is they don't have it in stock most of the time. As for the pneumonia, it's should not come back. As I said, it's just I don't know the English word for the problem he had at the moment. But the problem, added to the fact he had the flu, made that he's first asthma attack was bigger then usual for anybody who as asthma.
On another side note, it was time for my puppy to get sterilized !! She did like a champion but was little bit out of her game !
 Sans titre
 by
Francis Pare, sur Flickr
Back to the main subject ! My first attempt at the lozenge fabrics decals ! As mentioned before, I decided to go with a paper template, made of photo paper. It's stiff, and conform well at the same time to a surface.
 Sans titre
 by
Francis Pare, sur Flickr
I put the wing on the same time you see on the picture and drew around it. Then using the instructions, I drew the separations. I started with the left corner. First attempt when to the garbage bin ! It wasn't cut properly. Put the first corner. Then was time to the section juste beside it. With my template at hand, I cut the decal and putted it on. And realized I didn't cut in the good direction ! Again to the garbage bin ! Cut another one and put it on. And cut a 3rd one with no problem. But at this time, the second decal wrinkled a lot. So a lot of microsol went on it. I realized that even when you think there's no air bubble left, they still is !!! Really hard with the size of the decal. But it did came out not bad. On the following picture, it still shows a bit. I did put another round of solution on it after the picture was taken. And it won't show much because it's the underside. I still believe they should have cut the decals (as they are done Avviaticcs) or give a template of their own. I didn't have that much of problem cutting them but at the price the kits were sold...
 Sans titre
 by
Francis Pare, sur Flickr
You can also see a stain on the decals. ... Not the greatest job but will be acceptable because it's the underside. That's why I showed a closeup. Not afraid to show my mistakes
Now I have to figure out how to cut for the vent in the middle of a decal ! Any suggestion ??
Re: Pfalz, One Plane 2 pedrigree's (Wingnut Wings)
Posted: Thu Mar 17, 2022 1:43 pm
by Donkeywalloper
Our very best to Puppy for a quick recovery, it still evilly makes me giggle when our beloved pets with Collars on pre-op, go around house bumping into furntiure and such.

I haven't been following much lately due to an attack of the Black Dog and the worlds s!^&t getting on my wick.
You really have though done an absolute sterling job on this.
I don't see stains, I see an absolute 1st class job.
Awesome,
DW
Re: Pfalz, One Plane 2 pedrigree's (Wingnut Wings)
Posted: Thu Mar 17, 2022 7:50 pm
by RangerNeil
As DW said - looks a first class job to me. Well done!!
Only suggestion I can make for the vent is measure every thing half a dozen times at least then cut the vent out fractionally undersize before fitting the decal??
Re: Pfalz, One Plane 2 pedrigree's (Wingnut Wings)
Posted: Fri Mar 25, 2022 4:23 pm
by Garion77
Hello all !
time for a small update on my Pfalz, or should I say my top wing of my Pfalz ! never thought putting lozenge fabric decals would take so much time !! As all my bench time since the last update as been on completing it. I wanted to finish this before going back to my Mig but boy ! it was lots of works.. When we left last time I was trying to figure out to cut out the vent from the decals. I'll go step by step of what I've done until the finish piece.
First off, I drew the vent contour on tracing paper sheet. Put it on a thick paper sheet made for printing pictures. Cut it out, taped it to the decal and cut out the decal.
 Sans titre
 by
Francis Pare, sur Flickr
 Sans titre
 by
Francis Pare, sur Flickr
 Sans titre
 by
Francis Pare, sur Flickr
After that I went on with putting on the other sections, one at time, with several sessions of putting on microsol on them before moving on to the next section.
 Sans titre
 by
Francis Pare, sur Flickr
A mist of light grey as been sprayed on it to tone down a bit the bright colors of the decals. Everything was gloss coated for the next stage of decals, the rib stitches. Funny, the instructions calls for the darker one (which is the top of the fabric)
 Sans titre
 by
Francis Pare, sur Flickr
Mist of light grey again on them and gloss coat again.
The rib were then masked to create a false shadow effect of the fabric.
 Sans titre
 by
Francis Pare, sur Flickr
Tamiya Smoke was sprayed
 Sans titre
 by
Francis Pare, sur Flickr
Gloss coated again and then made a dot oil filter on it. Unfortunately, forgot to take picture of that part. After all that finally the last step !! Putted the Matt coat on...but a little problem with the airbrush made a pool of AK's acrylic Matt varnish
 Sans titre
 by
Francis Pare, sur Flickr
I took the good decision to let it sit without touching it in anyways...and thank god I decided that. It shows the quality of the product as it dried perfectly.
 Sans titre
 by
Francis Pare, sur Flickr
Although it isn't perfect because of lots of wrinkles left in the decals, I'm found it looks goods. But that's lots of work for only a wing ! I still have the bottom one to do. Again, I found it cheap as hell from WnW not have precut the decals or give a template to cut them. They are good quality, but hard to remove all the air bubbles under it because of their size, thus the wrinkles left. The problem I had putting them on made me know that I wouldn't try a scheme with that. And since it's the underside of the top wing it won't show. But I'll try putting my hand on a better decal solution before attempting the bottom wing because it would show more.
They shouldn't be any update here for a while as I want to concentrate more on the Mig for the GB if I want to finish in time and I'll start being away a lot with the borders to the US now open.
Stay safe everyone.
Re: Pfalz, One Plane 2 pedrigree's (Wingnut Wings)
Posted: Sat Mar 26, 2022 12:00 am
by digger303
Re: Pfalz, One Plane 2 pedrigree's (Wingnut Wings)
Posted: Sat Mar 26, 2022 1:55 am
by cor
Lookin good.
Re: Pfalz, One Plane 2 pedrigree's (Wingnut Wings)
Posted: Sat Mar 26, 2022 7:43 am
by RangerNeil
Look on the positive side - think of all the masking work you've saved by not having to paint each lozenge individually!!
Re: Pfalz, One Plane 2 pedrigree's (Wingnut Wings)
Posted: Sat Mar 26, 2022 10:55 am
by Garion77
RangerNeil wrote: Sat Mar 26, 2022 7:43 am
Look on the positive side - think of all the masking work you've saved by not having to paint each lozenge individually!!
yes thats true !! But speaking of the cheap side of WnW for that part... I even saw a kit, don't remember which one, that as lozenge fabrics on top. But they did not include the middle part of the decal ! So imagine ! You have to work has I did putting them on and then found the right color match to paint the lozenge yourself !!
@digger303 I wasn't that stress when the pool happened because the varnish is acrylic and my paint is Tamiya Lacquer. So would have been a job of only removing it. But AK's varnish is good stuff !! No matter how much you struggle spraying it, it always comes out good. But now I want to try the VMS products that are supposedly the best varnish and my local hobby store started carrying them.
Re: Pfalz, One Plane 2 pedrigree's (Wingnut Wings)
Posted: Sat Mar 26, 2022 11:25 am
by digger303
Garion77 wrote: Sat Mar 26, 2022 10:55 am
RangerNeil wrote: Sat Mar 26, 2022 7:43 am
Look on the positive side - think of all the masking work you've saved by not having to paint each lozenge individually!!
yes thats true !! But speaking of the cheap side of WnW for that part... I even saw a kit, don't remember which one, that as lozenge fabrics on top. But they did not include the middle part of the decal ! So imagine ! You have to work has I did putting them on and then found the right color match to paint the lozenge yourself !!
@digger303 I wasn't that stress when the pool happened because the varnish is acrylic and my paint is Tamiya Lacquer. So would have been a job of only removing it. But AK's varnish is good stuff !! No matter how much you struggle spraying it, it always comes out good. But now I want to try the VMS products that are supposedly the best varnish and my local hobby store started carrying them.
I have a lot of VMS products, but I haven't used their varnish yet. I have it but have been using other product I have first. Throughly recommend the paper shaper, chipping system is good and different too and the pigment plus different fixers are top notch
@digger303
Re: Pfalz, One Plane 2 pedrigree's (Wingnut Wings)
Posted: Sat Jun 11, 2022 12:42 am
by Garion77
Hello everyone !
I know, I know ! You've all been waiting for an update
Yes the project is still alive ! And know that my friend Digger as finish is Pfalz, I felt compelled to post an update on mine. Altough I'm far from finishing it.
But on a more serious note, not much as been done in the last 2 months. Had to finish my Mig-21 in time for the GB, lots of work to do around the house, started blackjack again with the borders now open with our friendly US neighbors, have to help out a bit more my mom this year and lots of regular work with my real job !
So my goal was to, at least, for this update, to get all the top wing finish with the rigging. As I had left the last update with the painting of it done and the lozenge fabrics decals done also. I'm trying to concentrate on small sections at time not having much time at the bench. So here's the continuation of the top wing saga, mostly of the lozenge fabric decals.
As I said, I'm aiming at finishing it and put the rigging on it before going to main fuselage for painting. But not there yet... First off to achieve this goal was to paint the flaps and put the lozenge fabrics decals on them. Again I have to mention how cheap is WnW not precut them or put template in the kit. This was done using my brand new VMS decals solutions and oh my god what an improvement on Microsol/Microset...they went on very well...except that, by own mistake I left a pool of the second solution and it stained the decals ! Decided to leave it there and use it in the weathering, as I didn't know anyway how to remove it
 IMG_4313
 by
Francis Pare, sur Flickr
At the stage the other side is already painted and then flat coat was used with tamiya flat clear... and when getting ready to mask to paint the markings I realized my color for the flaps was way off the wing itself..

 IMG_4318
 by
Francis Pare, sur Flickr
I later realized, by accident, and don't remember how I find it, but the problem was the tamiya flat clear ! Thus, my post asking about it on the forum. So I carefully removed the flat varnish by llightly wet sanding it. Thanks to the resistance of lacquer paint ! And it came back on how I wanted it !
 IMG_4324
 by
Francis Pare, sur Flickr
Sorry for the blur photo.
 IMG_4325
 by
Francis Pare, sur Flickr
Then it was time to tackle the German crosses... I carefully measure them and drew them on masking sheet and carefully aligned them on the wing.
 IMG_4331
 by
Francis Pare, sur Flickr
 IMG_4333
 by
Francis Pare, sur Flickr
And painting !
 IMG_4351
 by
Francis Pare, sur Flickr
Nicely done I thought but realized they are a bit misaligned... but that was the least of my problem at that moment !! I had put tape to hold the flaps temporarily for the painting.. and when I removed the tapes :
 IMG_4356
 by
Francis Pare, sur Flickr
It lifted the decals even if I had pull the tapes several times on my hands, and the decals where Matt coated !!


One problem I discovered with the WnW decals is that they don't "glue" well on the surfaces, even the smaller ones... Is it their age ? I don't know. So I had no choice to remove it completely from the flaps and patch the wing.
 IMG_4368
 by
Francis Pare, sur Flickr
But that wasn't the end of my problems !! So I cut again a decal for the first flap and then it broke on my while putting it in place
 IMG_4369
 by
Francis Pare, sur Flickr
I decided to keep as I realized at that moment I hadn't lots of decals left and still the bottom wing to do too.
Next was the second flap, cut again. Time to put it on....
 IMG_4370
 by
Francis Pare, sur Flickr
Realize I had cut it the wrong way !!!!
I decided to cut it straight and cut the rest from the decals
 IMG_4371
 by
Francis Pare, sur Flickr
Again, stressed out by the amount of the decals I have left for bottom wing

I also realized that I completed forgot to use my new VMS products and used instead Microsol/Microset. I saw the difference ! And may be the WnW decals don't react well them ?
The finished repairs :
 IMG_4387
 by
Francis Pare, sur Flickr
Only left to put varnish on them again and weather the flaps.
On a good note, I'm quite happy with the crosses (only left to put tamiya smoke on them to accentuate the rib effect) and I have finish all the eyelets that are going on the top wing. Propeller is also almost finish. All that in the next update, I hope at the end of the weekend.
Re: Pfalz, One Plane 2 pedrigree's (Wingnut Wings)
Posted: Sat Jun 11, 2022 1:17 am
by digger303
Re: Pfalz, One Plane 2 pedrigree's (Wingnut Wings)
Posted: Sat Jun 11, 2022 3:39 am
by BigWall
Nice work! Sorry it's fighting you but good job sticking with it!
Re: Pfalz, One Plane 2 pedrigree's (Wingnut Wings)
Posted: Sat Jun 11, 2022 2:31 pm
by RangerNeil
Excellent recovery from the decal disasters. I doubt I would have had the patience. The point about WnW decals is noted, thank you, as I have a Bristol F2B in the stash to be done.
Re: Pfalz, One Plane 2 pedrigree's (Wingnut Wings)
Posted: Sat Jun 11, 2022 11:30 pm
by Garion77
RangerNeil wrote: Sat Jun 11, 2022 2:31 pm
Excellent recovery from the decal disasters. I doubt I would have had the patience. The point about WnW decals is noted, thank you, as I have a Bristol F2B in the stash to be done.
lucky you ! that's a nice one ! They really don't react well microsol and microset. they work better with nothing ! But VMS helps them stick better.
Re: Pfalz, One Plane 2 pedrigree's (Wingnut Wings)
Posted: Tue Jun 14, 2022 10:36 pm
by Garion77
Really fast update...
Propeller is done ! Doing an update only on that part because those WWI planes and WnW kits take a lot of planning.
I was aiming at doing this :
 IMG_4392
 by
Francis Pare, sur Flickr
And came up with this :
 IMG_4395
 by
Francis Pare, sur Flickr
I think I did a pretty good job


Had to tone down a bit the sheen on it as I had put down gloss first and it was really, really too shiny. So I put down a coat of AK's satin varnish. The propeller was done, if someones remember, with watercolor pencils over a coat of wood color. The I put brown ochre oil pain over a gloss coat. Let it dried. Put on a gloss coat again then a mix of orange and red clear.
In the meanwhile, a gloss coat was also done on the wing as I don't know what I'm going to do for further weathering... really hard to know what to do with a WWI plane and even more with my chosen red/white scheme.
Take care everyone
Re: Pfalz, One Plane 2 pedrigree's (Wingnut Wings)
Posted: Tue Jun 14, 2022 11:09 pm
by BigWall
Very nice work on the propeller!
Re: Pfalz, One Plane 2 pedrigree's (Wingnut Wings)
Posted: Wed Jun 15, 2022 12:43 am
by digger303
Re: Pfalz, One Plane 2 pedrigree's (Wingnut Wings)
Posted: Wed Jun 15, 2022 8:42 am
by Tomcat64
Re: Pfalz, One Plane 2 pedrigree's (Wingnut Wings)
Posted: Wed Jun 15, 2022 11:18 am
by Garion77
No I actually used artist pencils. I do have a few colors from AK but I prefer that Artist ones. They become sharper easier and the tip is less "greaser" so I found it easier to work with them for my use, mostly chipping. But AK have great modeling colors and aren't bad too.
Re: Pfalz, One Plane 2 pedrigree's (Wingnut Wings)
Posted: Sat Jun 18, 2022 2:35 pm
by Garion77
Hello everyone !
OPINION NEEDED !
I had last evening all to my self
So time to sat at the bench. My goal was to start the rigging of the top wing but realized it was may be a better idea to paint remaining details and do some weathering on it. So everything was gloss coated at the last update. First off I had to care of the rib effect on the painted crosses. Afterwards, I decided to dry brush all the rib stitches with faded white oil paint to make them pop more. The effect is subtle but is quite worth it, but doesn't show much unfortunately in the pictures.
 IMG_4421 2
 by
Francis Pare, sur Flickr
 IMG_4422
 by
Francis Pare, sur Flickr
But now this is where I need some opinions. So looking at some references photos to help me in the weathering stages I found this one :
 image001
 by
Francis Pare, sur Flickr
You can see a leak from what I found in my research is a fuel pipe exhaust... may be I'm wrong...So I decided to try to recreate the effect with oil paints. And here it is :
 IMG_4423 2
 by
Francis Pare, sur Flickr
 IMG_4424
 by
Francis Pare, sur Flickr
SO what do you think ? Keep it or remove it ? Make it more subtle ? Add more of a brownish color also ? Easy to remove as I'm still on the gloss coat
Thanks for the comments !