Page 1 of 1
Diesel's Hawker Sea Fury
Posted: Sat May 16, 2015 2:23 pm
by DieselPower
Decided to have a crack at this GB, so I got a 1/48 Trumpeter Hawker Sea Fury as my subject for this build.


Now I've got most of the paint required for this, just debating whether to build it OOB or pickup some PE or resin aftermarket bits for it..

Re: Diesel's Hawker Sea Fury
Posted: Sat May 16, 2015 3:04 pm
by SkEeZicks
I love this airplane and was eyeing this kit up myself. I'll be watching with interest

Sean
Re: Diesel's Hawker Sea Fury
Posted: Sat May 16, 2015 7:05 pm
by Willem
Good choice mate. Nearly chose to do one too.
Good luck with the build.

Re: Diesel's Hawker Sea Fury
Posted: Sat May 16, 2015 7:44 pm
by Joesdad
I'm another one Diesel, fantastic aeroplane...

Re: Diesel's Hawker Sea Fury
Posted: Sat May 16, 2015 8:03 pm
by Twokidsnosleep
The paint scheme look super sharp when done like the pic
Re: Diesel's Hawker Sea Fury
Posted: Sun May 17, 2015 2:53 pm
by DieselPower
Began the cockpit today.

Cleaned up all the parts which was straight forward but while cleaning up the pedals I accidently dropped the part, and it was promptly consumed by the carpet monster...
The detail isn't bad, but I suppose I could use this as an excuse to get a resin cockpit instead
Re: Diesel's Hawker Sea Fury
Posted: Sun May 17, 2015 6:14 pm
by ladip63
Sounds like a good reason to me.
You need pedals to fly! Looking good!
Re: Diesel's Hawker Sea Fury
Posted: Thu May 21, 2015 4:03 pm
by DieselPower
Well I got the Aires cockpit and PE set the other day.

I went about cleaning up the parts and getting them ready for test fitting

As expected, these parts don't just drop in..

So i go about removing and sanding away plastic from the inside of the fuselage


I started sanding about 2 hours ago and the end isn't in sight, may need to invest in a dremel!
Re: Diesel's Hawker Sea Fury
Posted: Fri May 22, 2015 4:22 pm
by DieselPower
Well after hours of sanding and test fitting, I've managed to get the resin cockpit to fit reasonably well.
Now I've ran into another snag, In order to fit the resin gunsight I had to remove some plastic from the front cockpit section of the fuselage.

Now the gunsight fits, although I removed a tiny bit to much plastic but that can be filled in.
-
Now into priming the cockpit parts


Re: Diesel's Hawker Sea Fury
Posted: Tue May 26, 2015 6:04 pm
by DieselPower
Finished priming, painting and varnishing the cockpit, and it's not looking too bad.

Base layers and basic details on

Assembled and painted instrument display and gunsight


Fully assembled cockpit, unfortunately I had to leave of the side walls of the cockpit because I miscalculated the amount of sanding I needed to do


Test fit along with canopy before glue
In the next update I should have the fuselage glued together and begin work on the wings.
Sanding and riveting the Fury's fuselage.
Posted: Thu May 28, 2015 5:30 pm
by DieselPower
Got the fuselage together yesterday and started sanding and filling it to get it smooth.

As some of the rivet detail was very soft at the top and bottom of the fuselage, I re-riveted that and it doesn't look to bad I think.


Now just to re-scribe some panel lines and we're set on the fuselage!
Re: Diesel's Hawker Sea Fury
Posted: Wed Jun 03, 2015 8:34 pm
by MarkVerploeg
You make it look easy

Nice progres so far does that kit come with Dutch decals aswell ?
I know we had them for our navy but i never seen a kit for it
Only a model with home made/printed decals
Keep up the good work
Re: Diesel's Hawker Sea Fury
Posted: Thu Jun 04, 2015 6:03 pm
by DieselPower
Decided to have a big push on this build today has I'd not touched this for a good few days,
I decided to use a few techniques I'd learnt from AK Interactive's Aircraft Scale Modelling F.A.Q, such as using superglue as a filler for small gaps, alternative riveting and panel lining techniques and so on.
Anyway, I got the engine assembly built up along with the inner wing section complete and attached to the main body.


Then I completed the outer wings and decided to have them in the folded out position and attached them to the Inner wings.
To be honest, it was a pain getting the wings aligned correctly but I think I nailed it


Next thing on the list is constructing the undercarridge, should get that done tomorrow.
Re: Diesel's Hawker Sea Fury
Posted: Thu Jun 04, 2015 6:09 pm
by DieselPower
MarkVerploeg wrote:You make it look easy
Nice progres so far does that kit come with Dutch decals aswell ?
I know we had them for our navy but i never seen a kit for it
Only a model with home made/printed decals
Keep up the good work
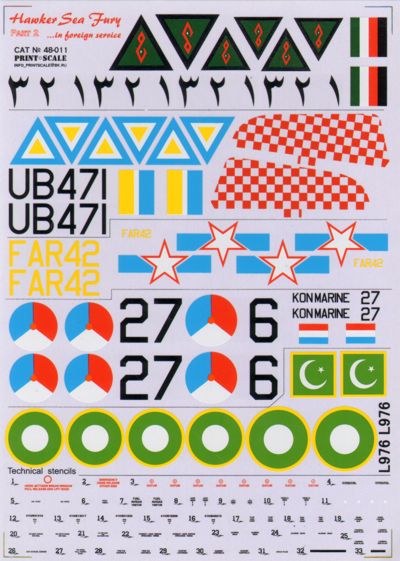
Thanks for the kudos! Unfortunately this kit only comes with Royal Navy decals, but I'd like to think someone does Dutch Decals for this kit
Re: Diesel's Hawker Sea Fury
Posted: Fri Jun 05, 2015 1:10 am
by MarkVerploeg
DieselPower wrote:MarkVerploeg wrote:You make it look easy
Nice progres so far does that kit come with Dutch decals aswell ?
I know we had them for our navy but i never seen a kit for it
Only a model with home made/printed decals
Keep up the good work
Thanks for the kudos! Unfortunately this kit only comes with Royal Navy decals, but I'd like to think someone does Dutch Decals for this kit
Yes there probably is a company or two that makes them
I know that there is Black Lion decals wich is a Dutch company and they have all kinds of decals for Dutch vehicles , units you name it
Re: Diesel's Hawker Sea Fury
Posted: Fri Jun 05, 2015 8:33 am
by shortCummins
Re: Diesel's Hawker Sea Fury
Posted: Fri Jun 05, 2015 9:49 am
by MarkVerploeg
Thanks mate
Now i know where to look for them
Re: Diesel's Hawker Sea Fury
Posted: Thu Jun 11, 2015 3:16 pm
by DieselPower
Big update here, I started on the landing gear, drop tanks, rockets and canopy.


Very easy to put together but a pain to clean up due to where most of the undercarrige door were attached to the sprue

The canopy wasn't too bad, just needed to clean up a seam line on the canopy with some 1200 grit sandpaper and it came out pretty good and after that got the thing masked.

The rockets however are dire, they require a lot of patience to get right but I couldn't be bothered to faff with them so I puttyed over the mounting point and sanded them smooth

Now that most of the building is done, time to prime!
Re: Diesel's Hawker Sea Fury
Posted: Thu Jun 11, 2015 6:46 pm
by patrickroos
Great work so far!
Re: Diesel's Hawker Sea Fury
Posted: Wed Aug 12, 2015 6:59 pm
by DieselPower
I took a break from this build as I wasn't having fun with it, but I've recently got back on it and now have finished painting and varnishing.


Re: Diesel's Hawker Sea Fury
Posted: Wed Aug 12, 2015 8:08 pm
by shortCummins
looking really good so far
rgds
John(shortCummins)
Re: Diesel's Hawker Sea Fury
Posted: Wed Aug 12, 2015 9:45 pm
by Joesdad
Coming on great Diesel
Re: Diesel's Hawker Sea Fury
Posted: Thu Aug 13, 2015 8:59 pm
by patrickroos
Looking good!
Great paintjob
Re: Diesel's Hawker Sea Fury
Posted: Wed Aug 19, 2015 3:56 pm
by waynos
Great work!
Re: Diesel's Hawker Sea Fury
Posted: Wed Aug 19, 2015 7:22 pm
by DieselPower
Finally got the decals, washes and detailing done on the sea fury, now just left to put a coat of matt varnish and it's all done.
The decals were the biggest hurdle as they just weren't up to standard, so I picked up an aftermarket set to replace the dubious trumpeter one.

P.s the finale photo should be a lot better than the one presented!
Re: Diesel's Hawker Sea Fury
Posted: Wed Aug 19, 2015 10:55 pm
by Willem
Looking forward to seeing some more pics mate. Lovely aircraft and it looks like you've nailed it.
Re: Diesel's Hawker Sea Fury
Posted: Thu Aug 20, 2015 1:50 pm
by DieselPower