Page 1 of 1
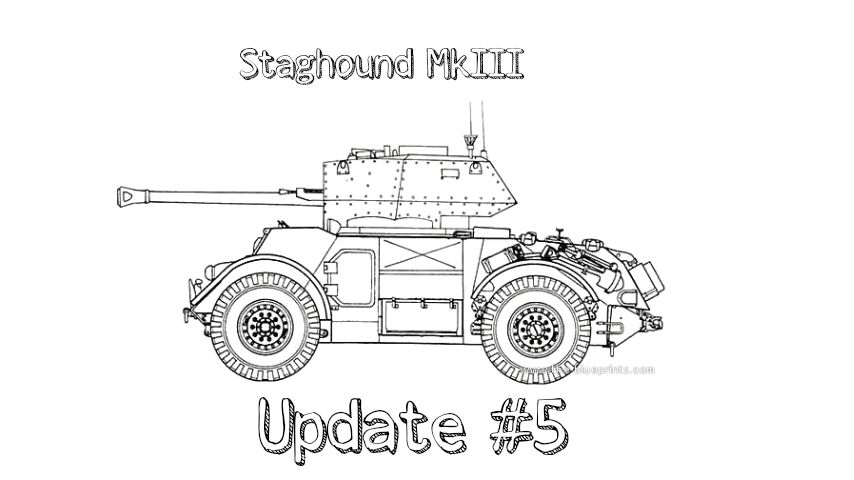
1:35 Italeri Staghound Mk.III
Posted: Wed Jul 22, 2015 6:40 pm
by fly1ngdutchm4n
Hello everyone!
Time for Me to jump in

And as for I did not competed at any GB or SIG this year, It's about time too.... lol
It also will be the only SIG (or GB) I will take part in this year.
I hope I will finish this build on time, for I'm preparing to move out this apartment and move into my new bought house in October.

So we will see where we will end up
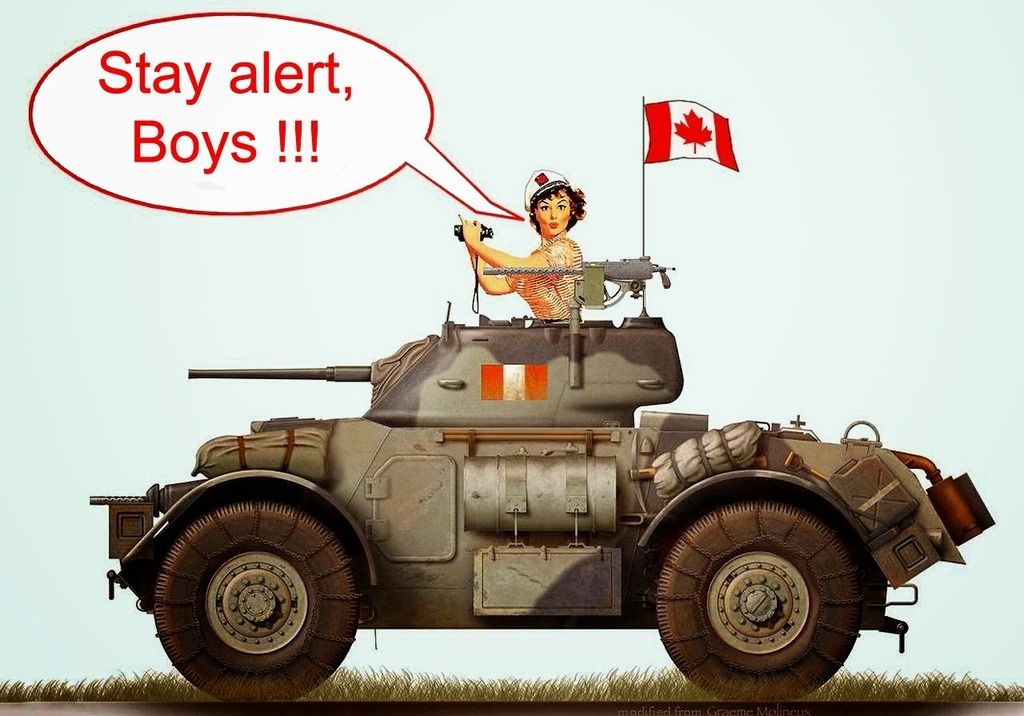
I would love to enter this SIG with a 1:35 Staghound MKIII from Italeri.
It's going to be a OBB without any extras. And by that I mean without a big PE upgrade as most of you are used of me doing that, BUT! There is already a small PE fret in the box along with a shiny aluminium barrel.... And I will add some home made thingies, perhaps a stowage set and maybe a scratch build base too.
So this the kit we are talking about:
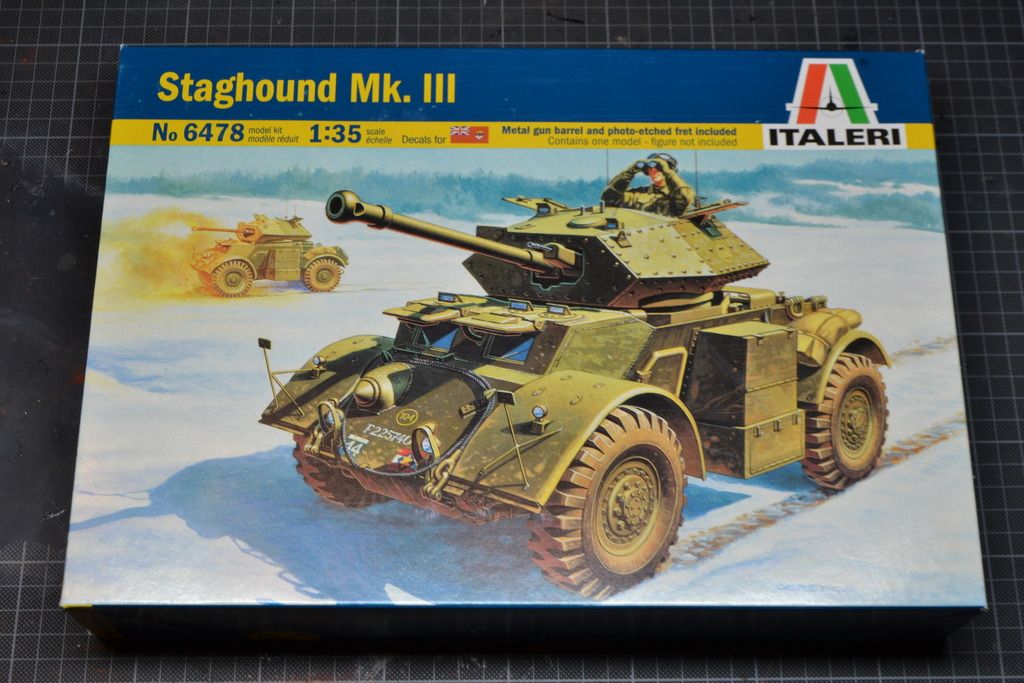
Not a lot of sprue's in sight here...
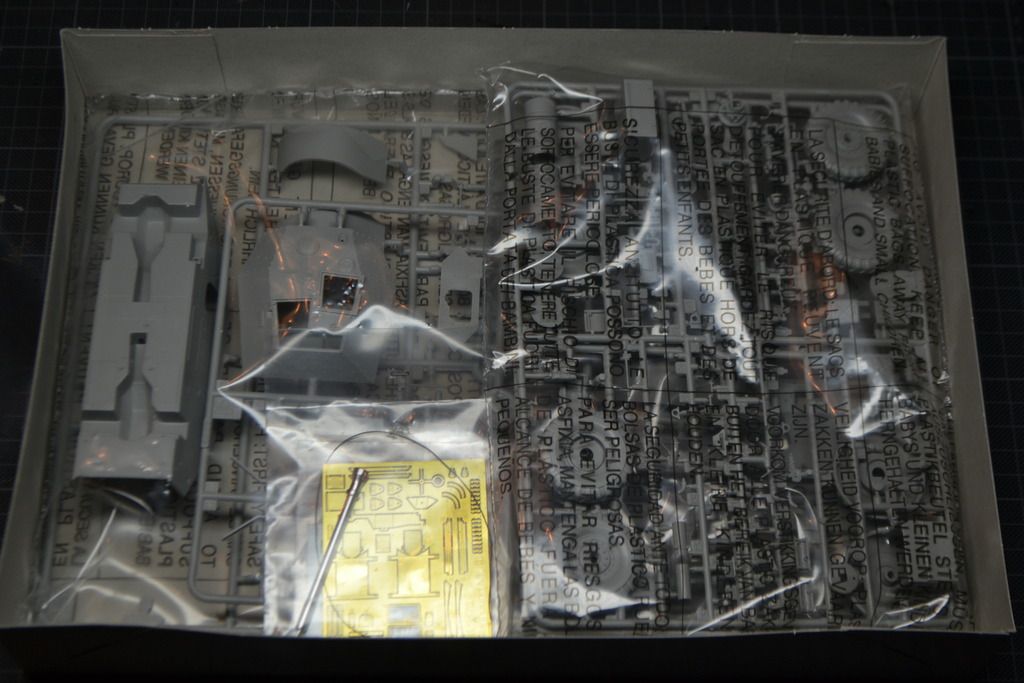
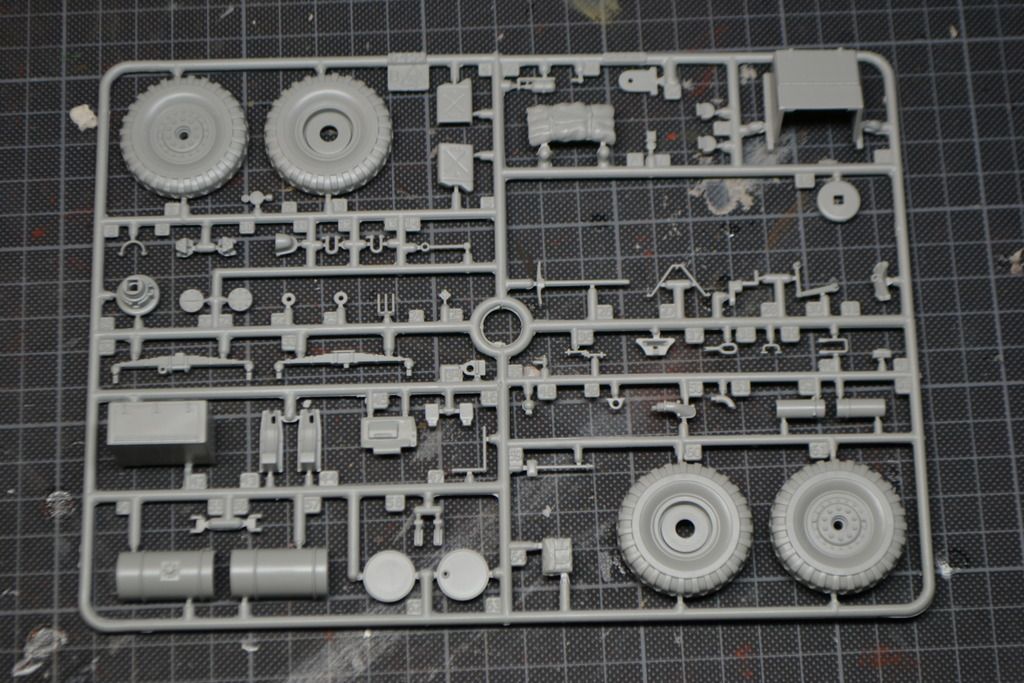
Sprue shots
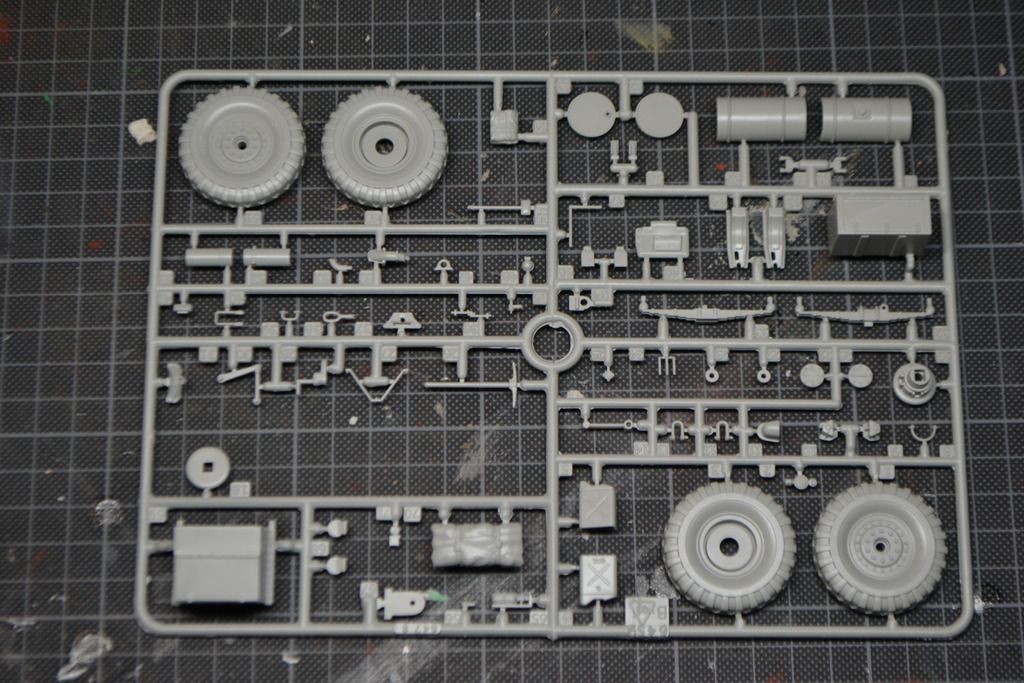
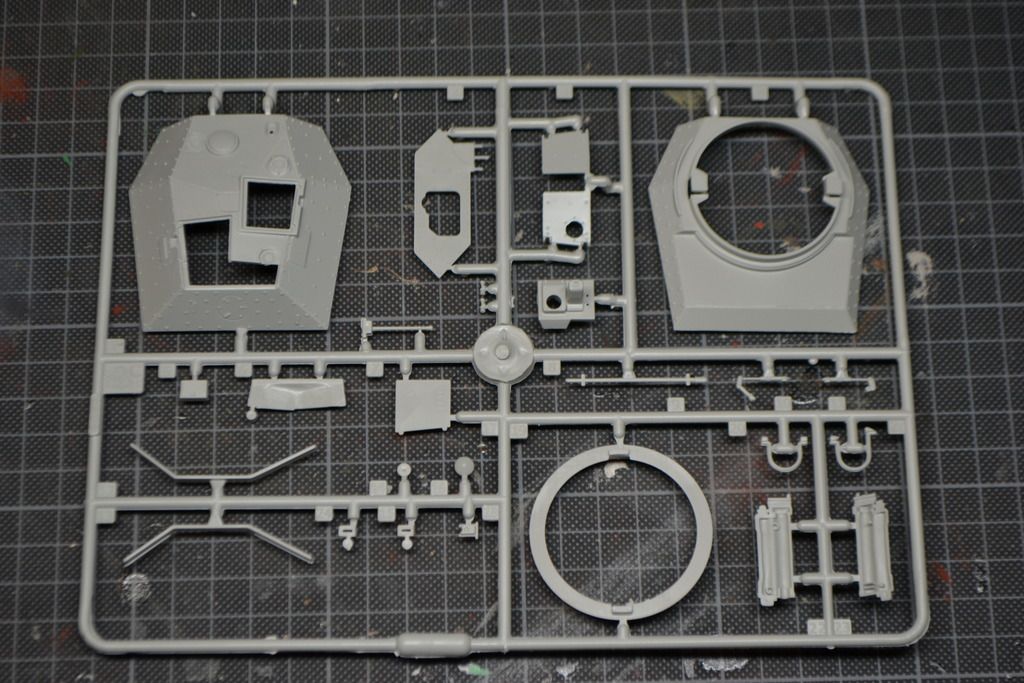
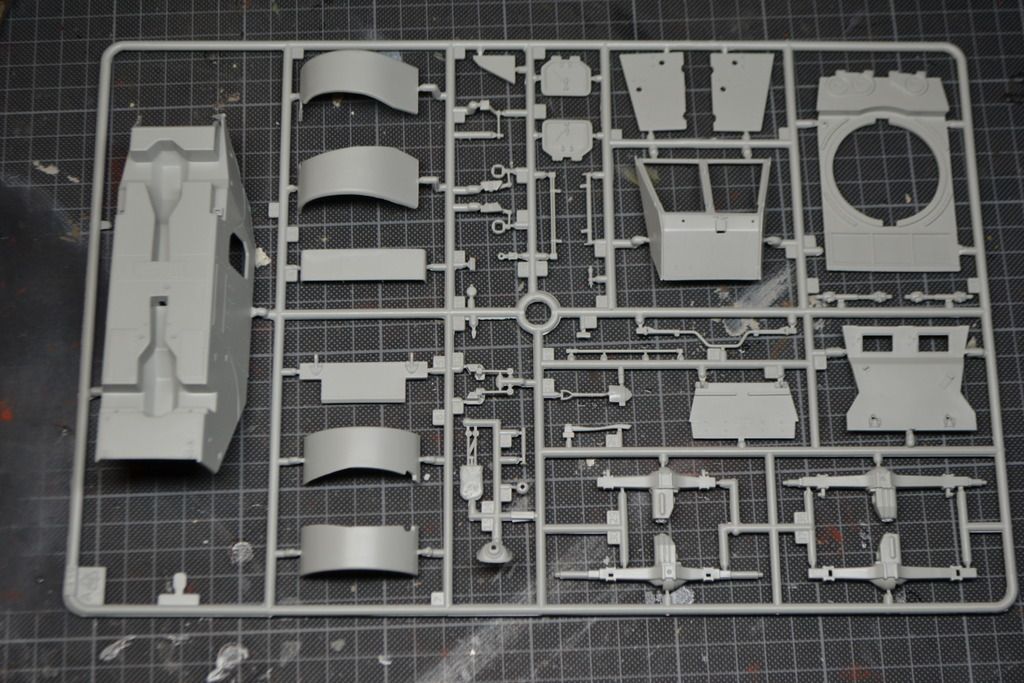
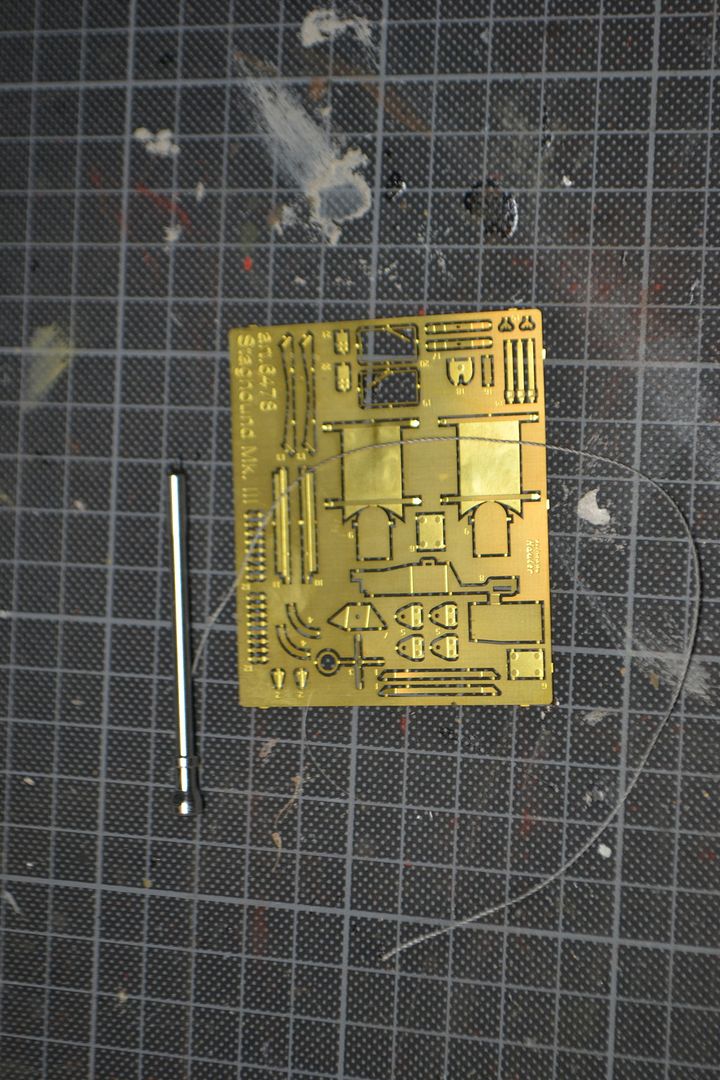
And some reading in the manual tells us that this Staghound was used as a armored reconnaissance vehicle, so I think I'm safe here...lol
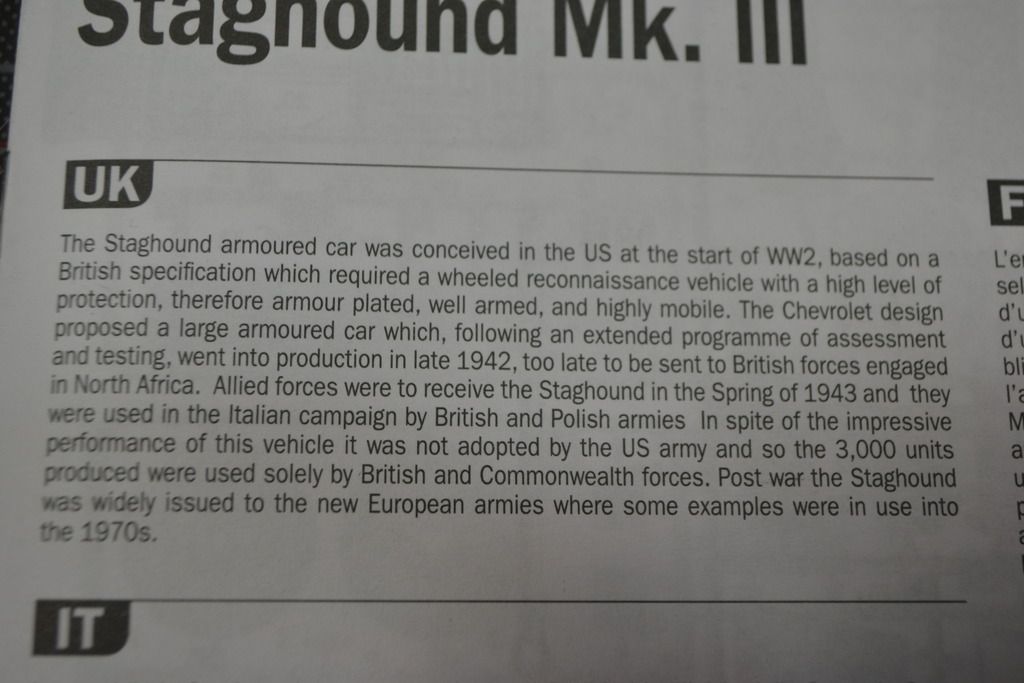
But just to be sure, some WIKI and more stuff I found on the Web.
Staghound Mk III:
Had a turret taken from an Ordnance QF 6 pounder gun armed Crusader tank and 7.92 mm Besa machine gun. Most of these were then re-fitted with the Ordnance QF 75 mm gun.
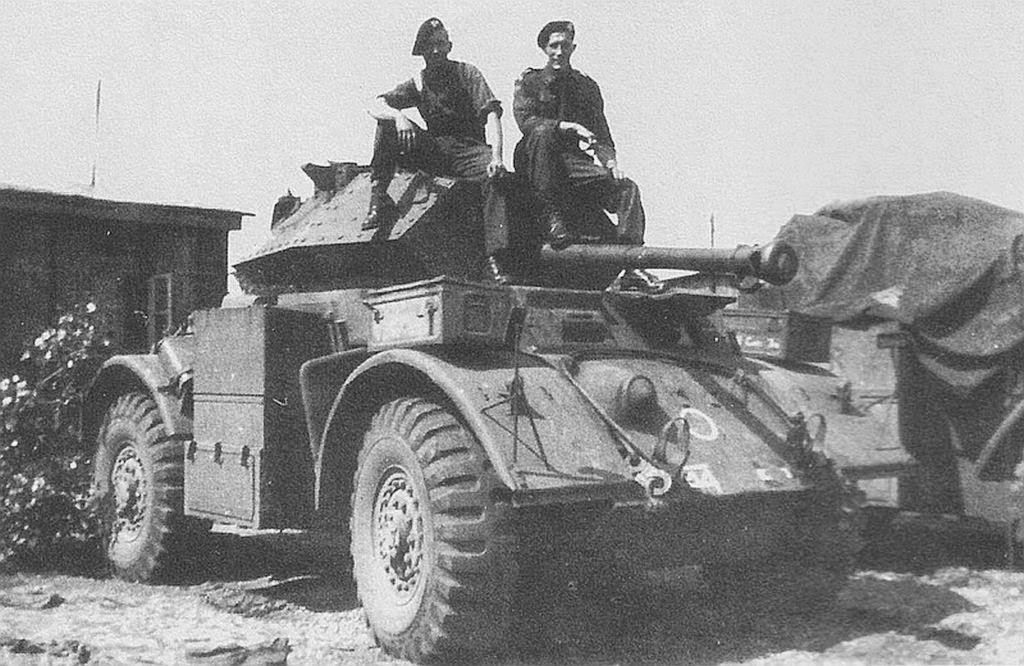
There was no bow machine gun. These had reached the front line by 1945, where it was supplied to heavy troops of armored car regiments.
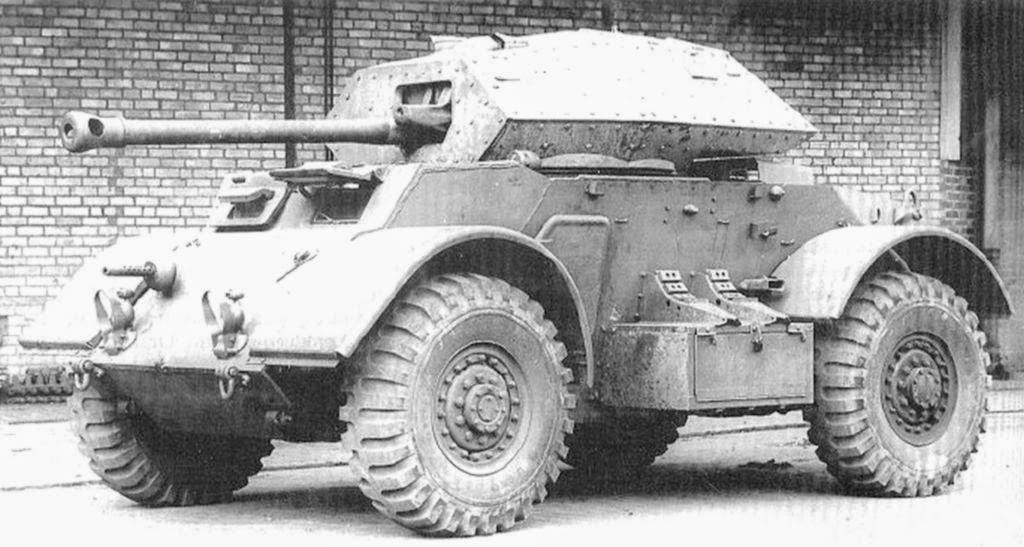
The total number ordered was around 100-300. After WWII, this version saw usage with Denmark and combat in Lebanon.
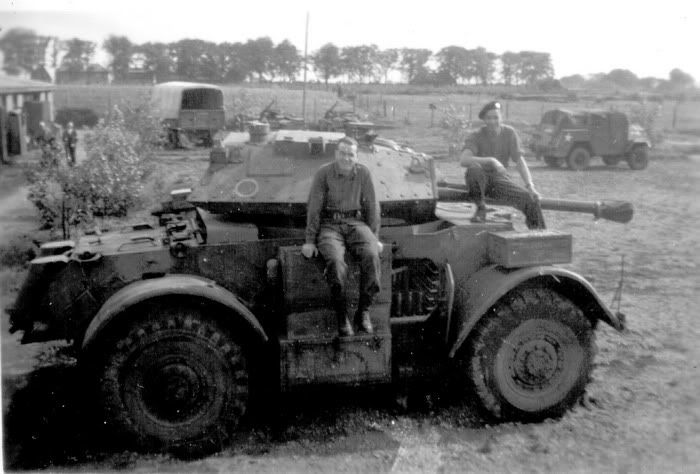
Operational service
The Staghound entered service too late for use in the North African Campaign where its combination of armor, range and main armament would have been an advantage in a light forces reconnaissance role. As a result, it first saw operational service in Italy, where many units found its large physical size too restrictive in the narrow roads, and streets of Europe. It saw most service at squadron and regimental headquarter level an armoured car regiment having three Staghounds with the Regimental HQ and three with each HQ of the four squadrons in the regiment. Conditions for the Staghound improved when the Italian campaign became more mobile in the middle of 1944, and the Staghound was also used in north-west Europe campaign.
After the war, the Staghounds were distributed among smaller NATO countries in Europe and to the Middle East
Some Specifications:
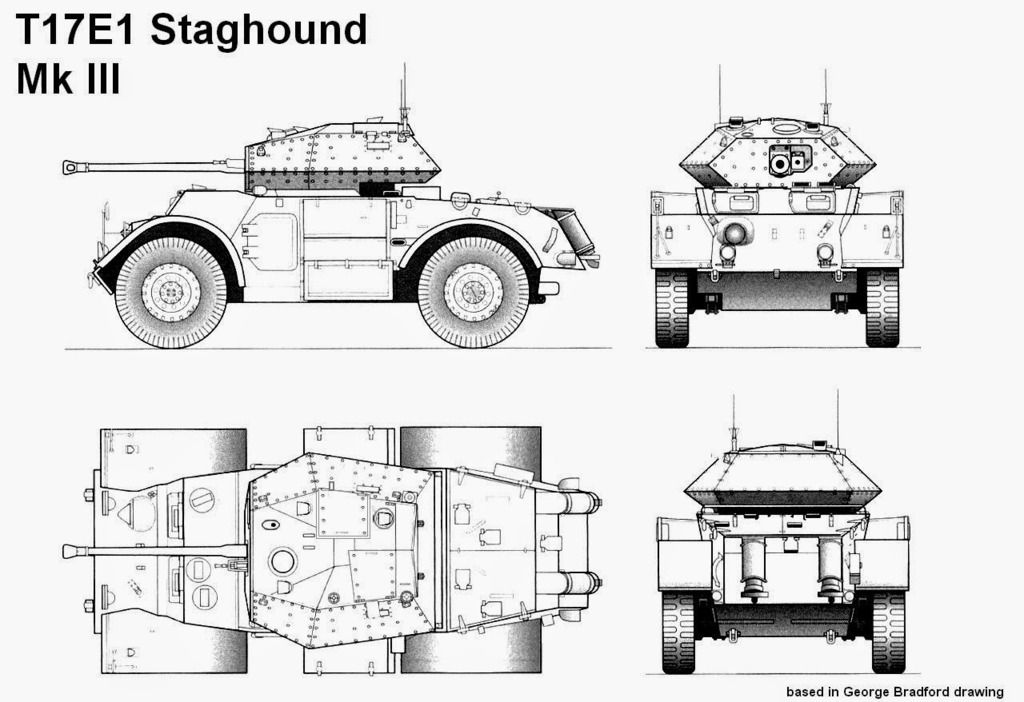
T17E1 Armored Car Staghound Mk I/III
Type Armored car
Place of origin United States
Service history
In service 1944- 1980s
Used by British, Free Polish, Canadian, New Zealand, Indian, and Belgian
Wars World War II
Production history
Designer Chevrolet
Produced 1942-43
Number built 4,000
Specifications (Staghound Mark I)
Weight 14 t
Length 5.49 m
Width 2.69 m
Height 2.36 m
Crew 5 Mk I - 4 Mk III
Armor 9 to 44 mm
Main
armament
37 mm M6 Mk I - 75mm Ordnance QF - Mk III
Secondary
armament
2 or 3 x .30 (7.62 mm) machine guns
Engine 2 x GMC 270
2 x 97 hp (72 kW)
Power/weight 13.9 hp/tonne
Suspension wheels, 4 x 4
Operational
range
724 km
Speed 89 km/h
And A walkaround (not the MKIII)
[youtube]YiHigGo8d08[/youtube]
That's it for now, and I hope I can show you this build soon!

Good luck and happy modelling to all of you

Re: 1:35 Italeri Staghound Mk.III
Posted: Fri Jul 24, 2015 9:13 pm
by fly1ngdutchm4n
Here we go!
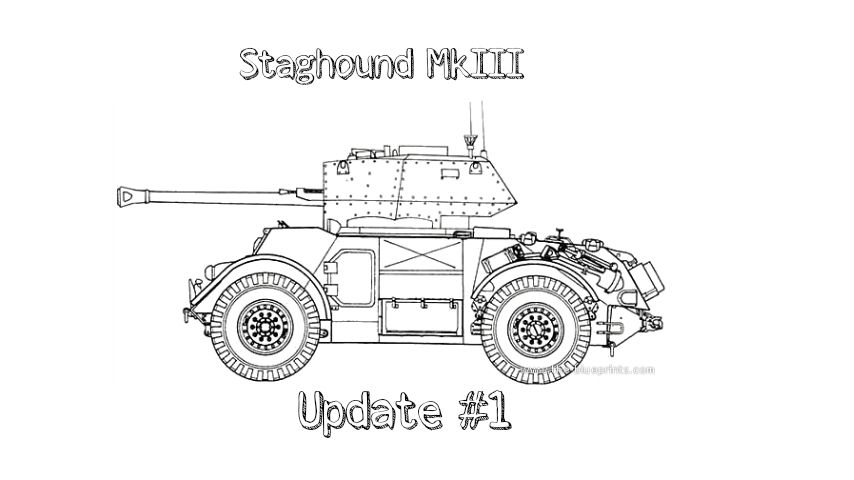
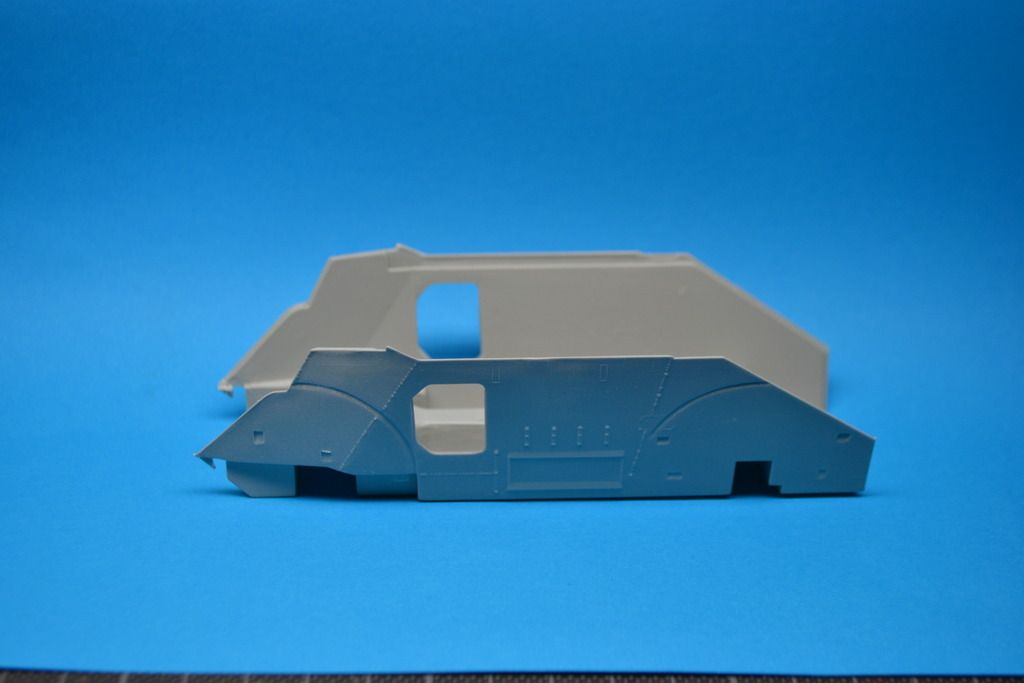
Starting with the hull.
Little cleanup was required, but I do hate the markings at the side that shows where the tools should be.
I remove them Later.
The plastic feels a bit cheapo and is bend very easily, so I must be careful while cleaning and sanding.
Not all parts does have a perfect fit, so I will need to fill them up with liquid putty.

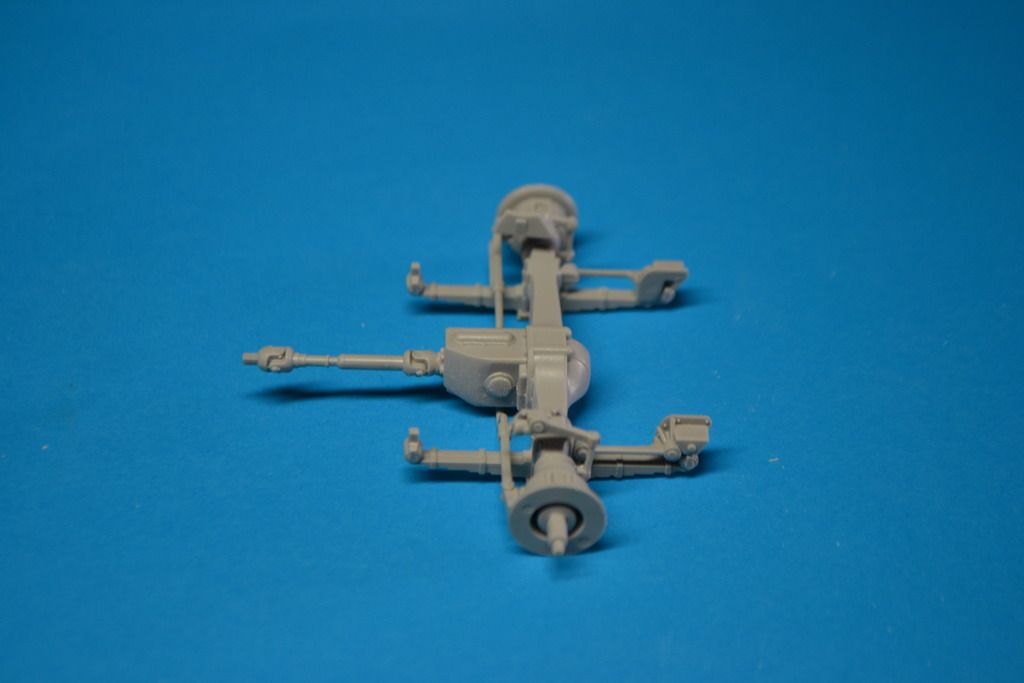
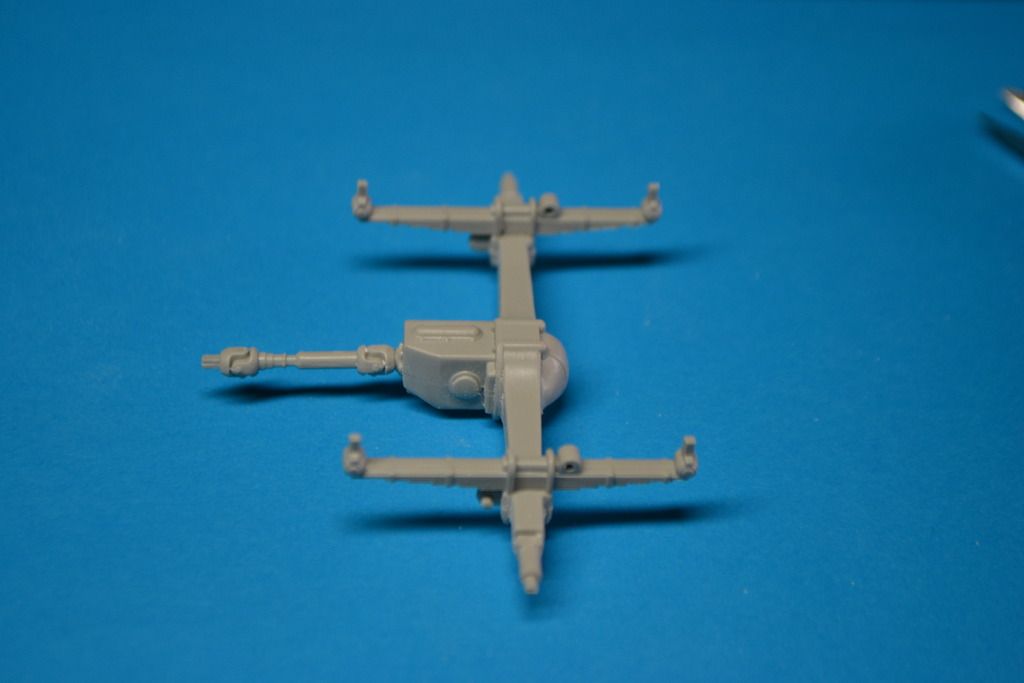
The suspension and gearbox are nicely detailed, but all parts does have a annoying seam line all over them.
It's a real pain to remove them on the spring blades, but It has to be done. And it's worth the effort.
The PE parts supplied with the kit are pretty nice, but the PE fret came loose in a bag without a piece of cardboard behind it, so some parts are slightly bend... 

Front axle done
Rear axle done. Less parts... lol
And the axles are in place here.
Not bad so far I think.
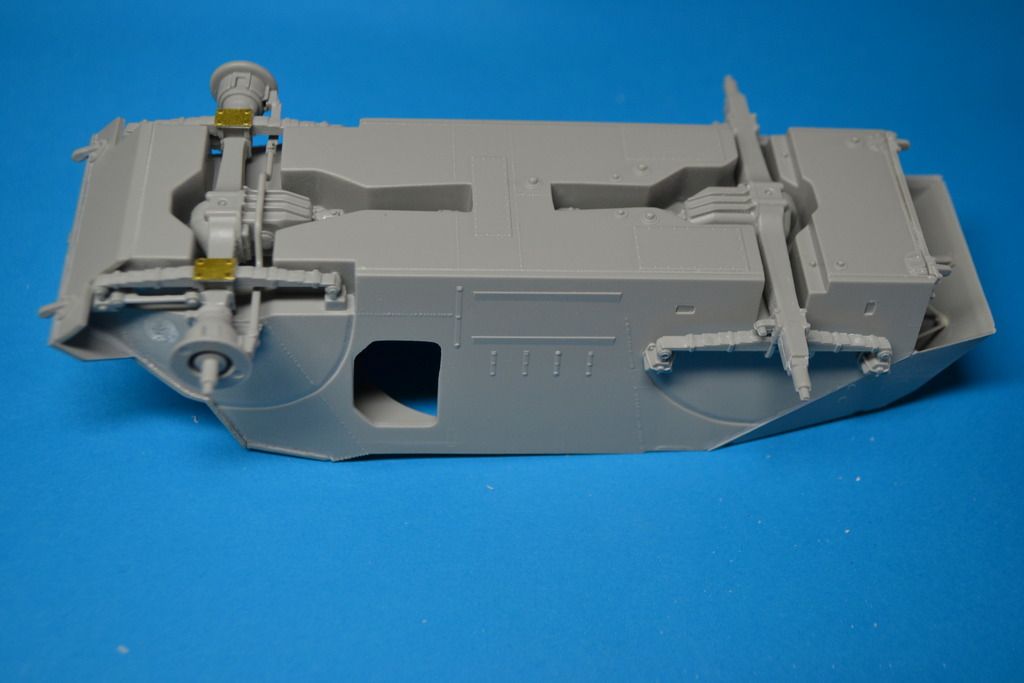
So far A good kit, not the best, but good 
All ready ordered figures and a stowage set to go with it, so hope to do another update soon!
Thanks for visiting guys!
Re: 1:35 Italeri Staghound Mk.III
Posted: Fri Jul 24, 2015 10:19 pm
by Jack
Looks like a great kit so far good luck
Re: 1:35 Italeri Staghound Mk.III
Posted: Fri Jul 24, 2015 11:18 pm
by Nev
Looking good mate
Will be interesting to see how this kits goes together. I recently got gifted a couple of old italeri tank kits so might be good for future reference
Re: 1:35 Italeri Staghound Mk.III
Posted: Sat Jul 25, 2015 10:52 am
by fly1ngdutchm4n
Nev wrote:Looking good mate
Will be interesting to see how this kits goes together. I recently got gifted a couple of old italeri tank kits so might be good for future reference
Jack wrote:Looks like a great kit so far good luck
Thanks guys

So far, this kit is asking a lot of my patience...lol
Working on the mud guards now, those are just not fit correctly.
But I will make it work
Re: 1:35 Italeri Staghound Mk.III
Posted: Sun Jul 26, 2015 6:15 pm
by fly1ngdutchm4n
Sorry guys, but this build is going fast!

Because of there are only 4 Sprues with parts, and a limited amount of PE parts to bend, Im flying through this build.
Here's the state the Staghound is in now.
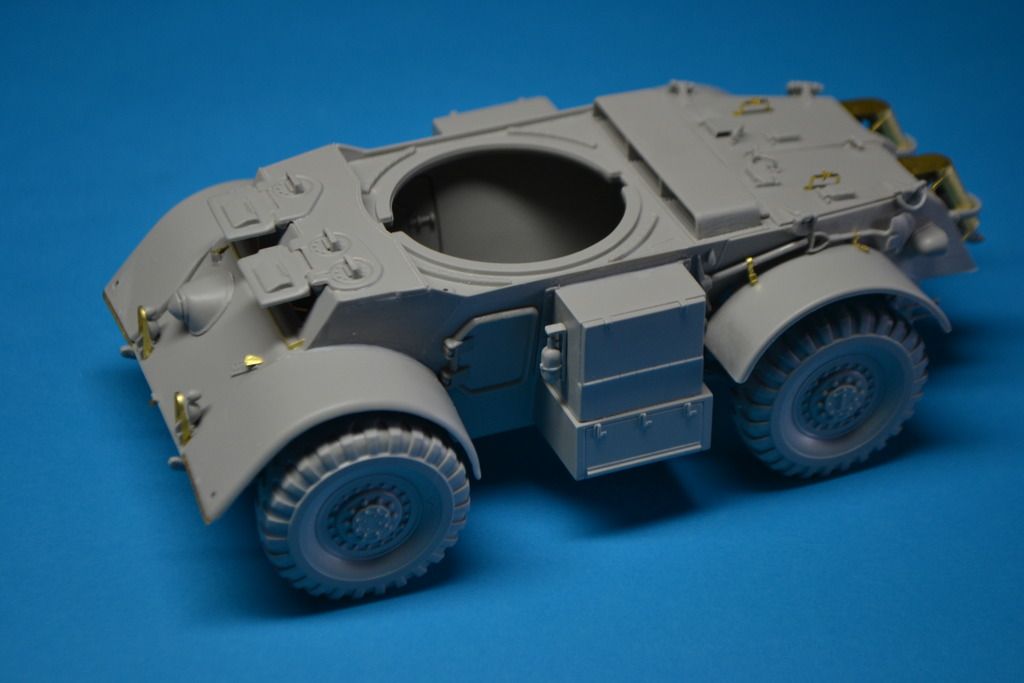
The mud guards needed some plastic surgery, for they did not wanted to fit without it.
So I cut away a small piece in the middle to make it fit to the hull.
Filled up the small gap with liquid putty.
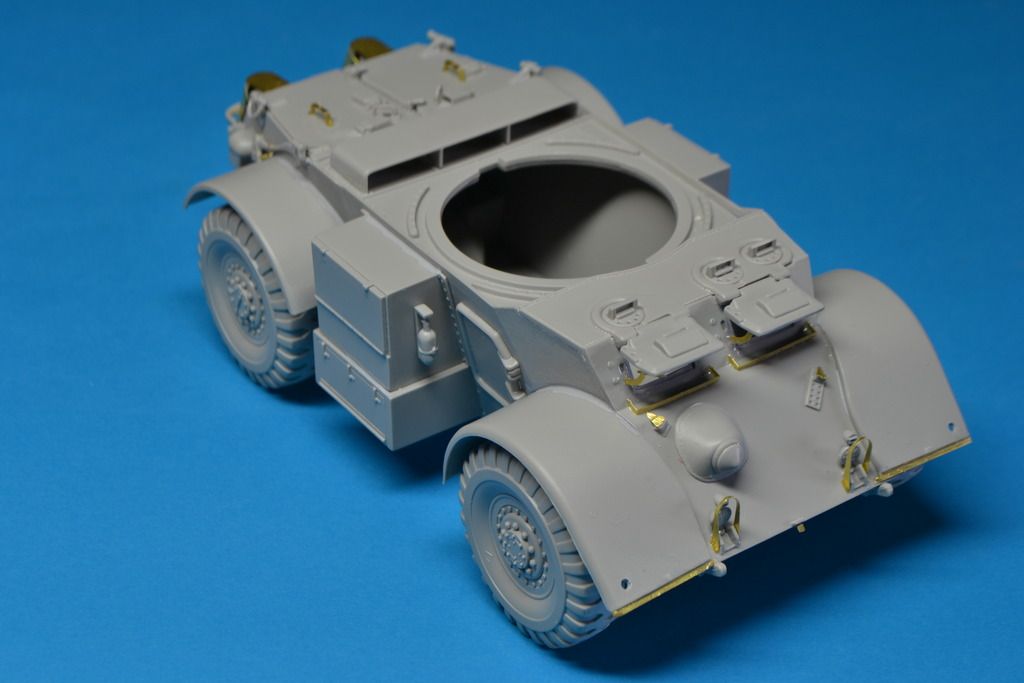
The photo etch parts are thin and easily bend in shape, however they do snap quickly!
There was no bow machine gun. These had reached the front line by 1945, where it was supplied to heavy troops of armored car regiments.
So the bow gun is in closed version on this vehicle.
The head lights could of used more detail, like a piece of clear glass for lenses for instance, but one's painted It will look better.
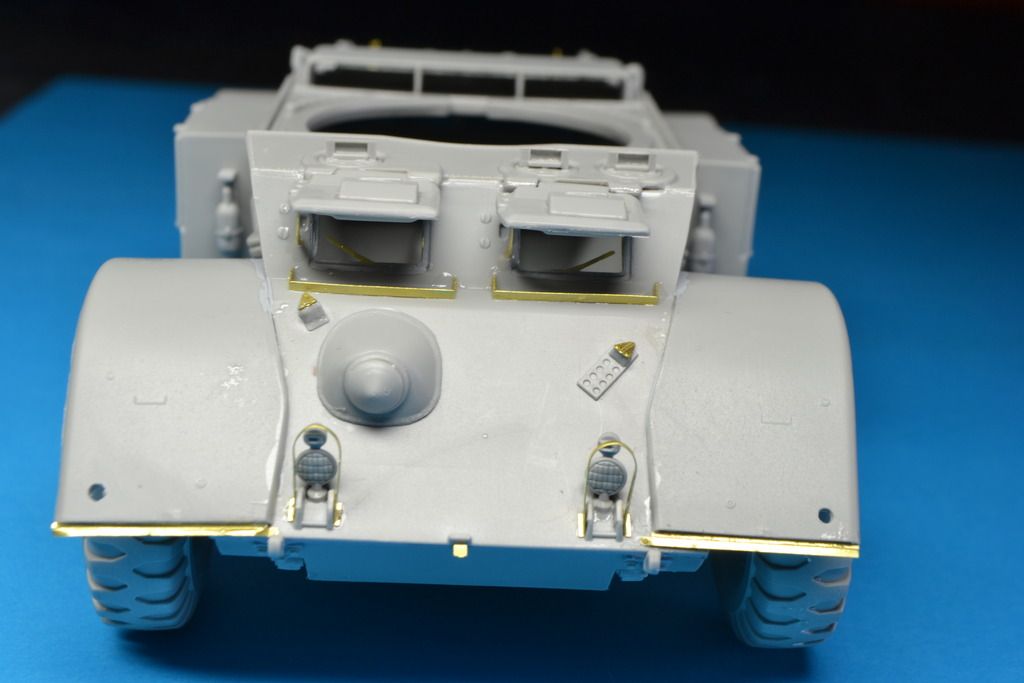
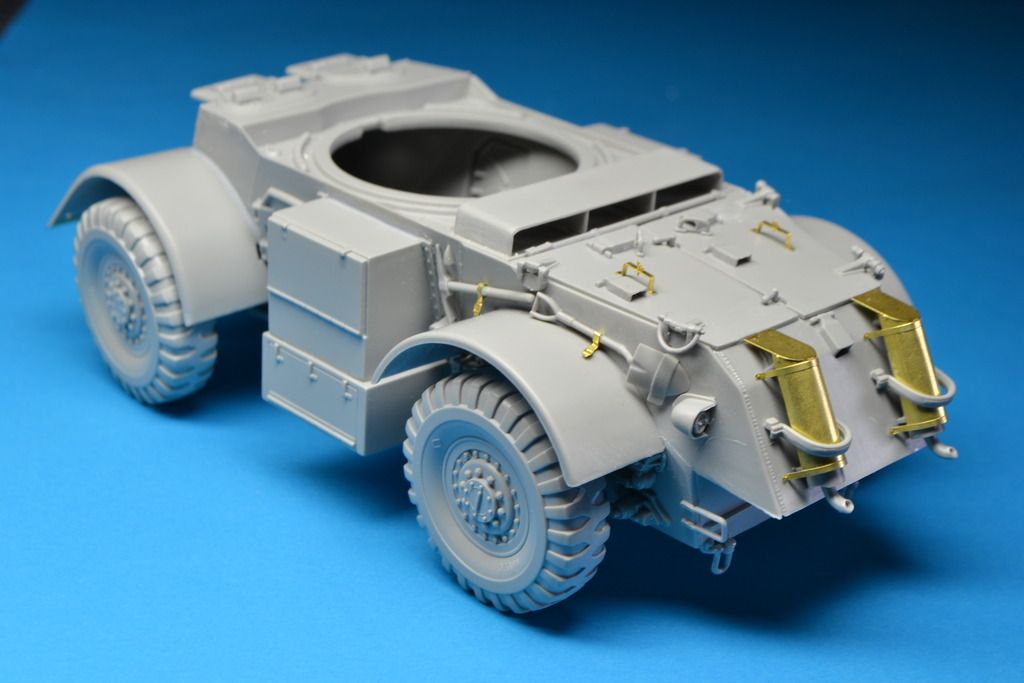
The exhaust covers are good PE parts. They bend with ease and there is enough room for the glue to let it stick on the model.
I thought I made a boohoo for the right exhaust is more to the right, but it;s the same as the real vehicle had, so i'm fine here.
The reason why they placed one exhaust more to the right is unknown to me.
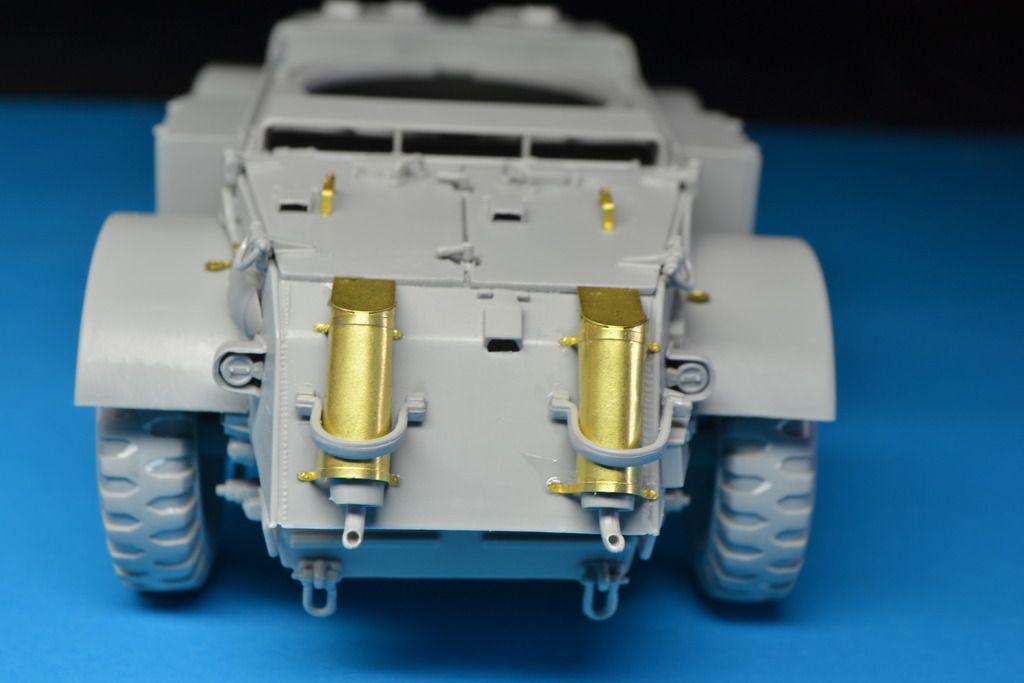
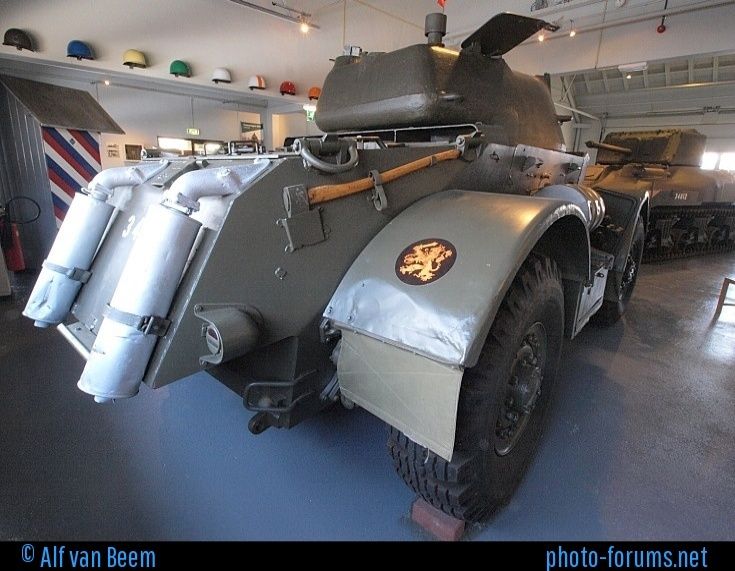
Here's a picture of the rear of a Staghound T17 armoured car on display in Amersfoort, the Netherlands. Note the two large exhaust pointing down, without the covers.
I was given two options (not described in the manual) for the side boxes. The bottom storage box is standard, But the top box was an option.
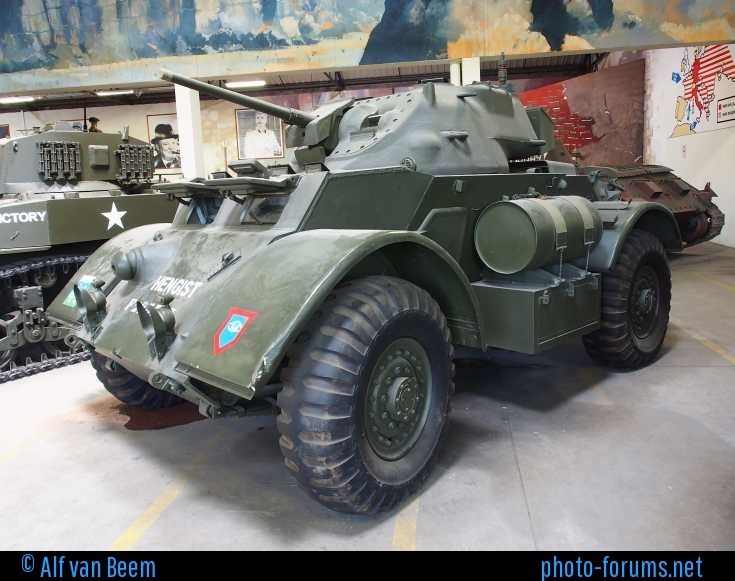
I choose to put an extra storage box on top of it instead of the drums, with I'm guessing those are extra fuel tanks (option two).
I think the extra " fuel tanks" (option two) was for the MkI and I'm building he MkIII, so with the extra storage box.

Heres a picture of the drums on a Mk1
Overall a quick and almost smooth build so far...
The next step will be the turret.
But I will safe that for the next update!
Thanks for dropping by
Cheers, Frans
Re: 1:35 Italeri Staghound Mk.III
Posted: Sun Jul 26, 2015 9:35 pm
by MarkVerploeg
Nice work so far Frans
You really are going fast with this one but if it doesn't have a lot of part that is kind of expected
Keep up the good work
Re: 1:35 Italeri Staghound Mk.III
Posted: Mon Jul 27, 2015 2:31 am
by rodrant
I have a Tamiya Staghound, but not this version it is like the one that you show in the photo in the museum (actually is also from Italiery but in Tamiya box added with some figures and acessories ) and was one of my thoughts to do in this SiG , well now must watch yours ...but I must be fast if not will watch the final Reveal soon !

Like very much your build so far , I was looking in the box after I saw your build and seems that the one that I have also have some PE in it , could be a nice and fast build to me to give it a try ...
Frans ! Keep the good work on this one !
Re: 1:35 Italeri Staghound Mk.III
Posted: Mon Jul 27, 2015 11:57 am
by fly1ngdutchm4n
MarkVerploeg wrote:Nice work so far Frans
You really are going fast with this one but if it doesn't have a lot of part that is kind of expected
Keep up the good work
rodrant wrote:I have a Tamiya Staghound, but not this version it is like the one that you show in the photo in the museum (actually is also from Italiery but in Tamiya box added with some figures and acessories ) and was one of my thoughts to do in this SiG , well now must watch yours ...but I must be fast if not will watch the final Reveal soon !
Like very much your build so far , I was looking in the box after I saw your build and seems that the one that I have also have some PE in it , could be a nice and fast build to me to give it a try ...
Frans ! Keep the good work on this one !
Thank you very much guys, appreciate it
yes this build is fast, but that gives me more time to think about a basee and figures. And off course my moving to our new home is coming up.
Re: 1:35 Italeri Staghound Mk.III
Posted: Tue Jul 28, 2015 8:36 pm
by fly1ngdutchm4n
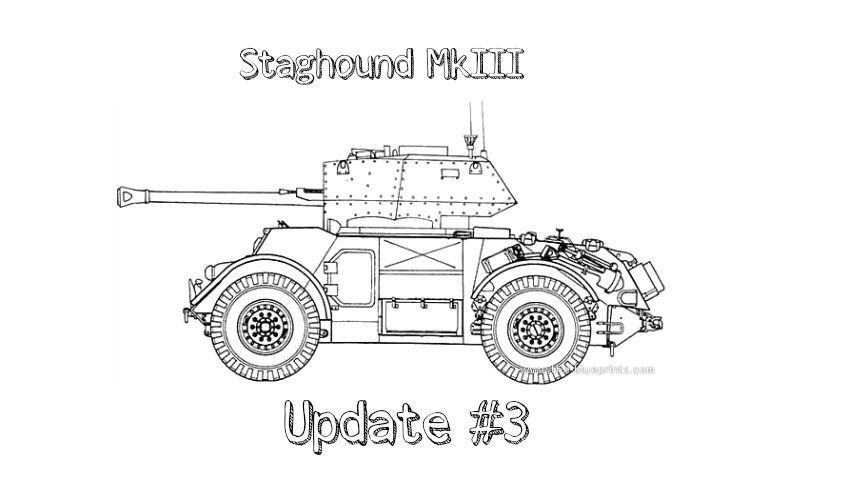
O dear...

Well.... I can talk long story's about this build, but there simply isn't a long story to tell!
The build is finished!
This was a smooth build with a small boohoo of the mud guards.
So the main build is finished, and ready to take the primer and some colour,
it's waiting on the figures and stowage set to arrive from Japan.
So here are the Photo's of one finished Staghound so far.
I have taken a lot more pics, but that will be shown as a bonus in my reveal.
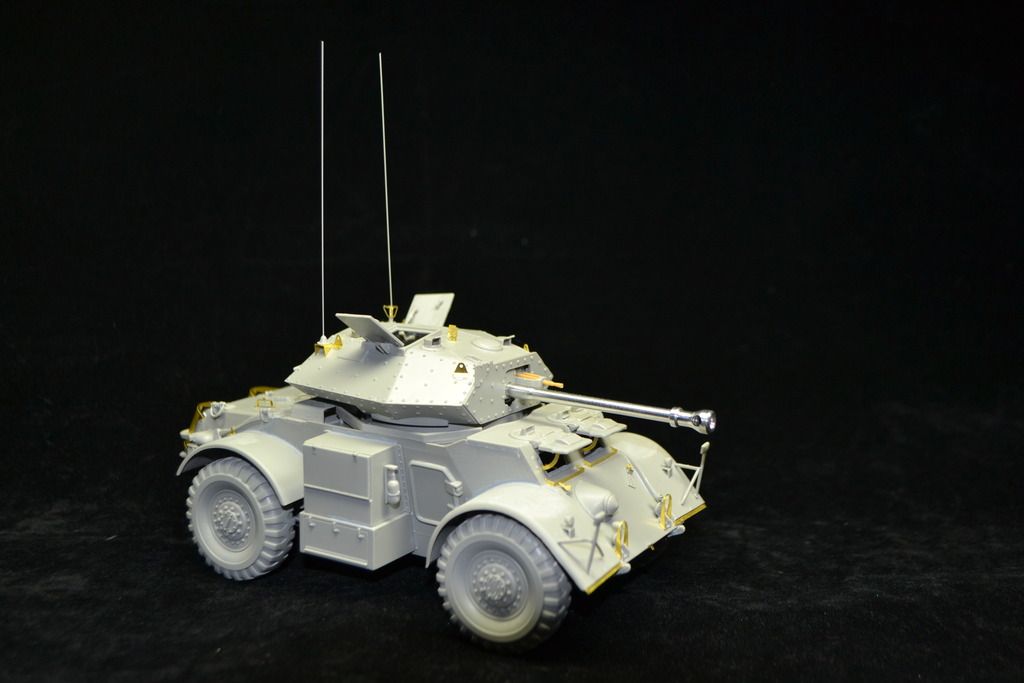
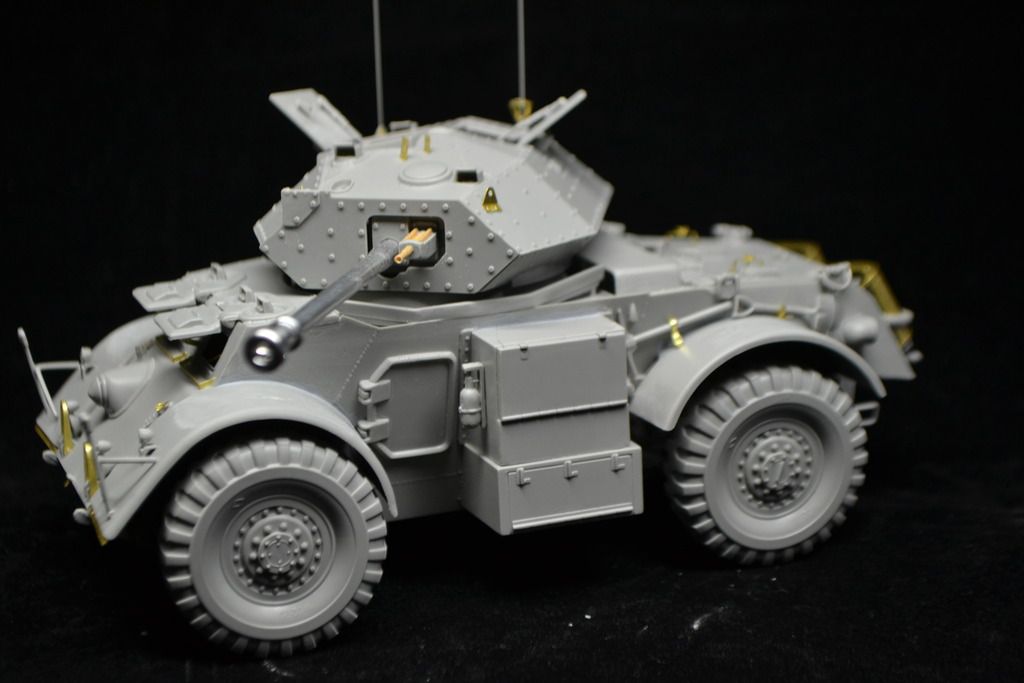
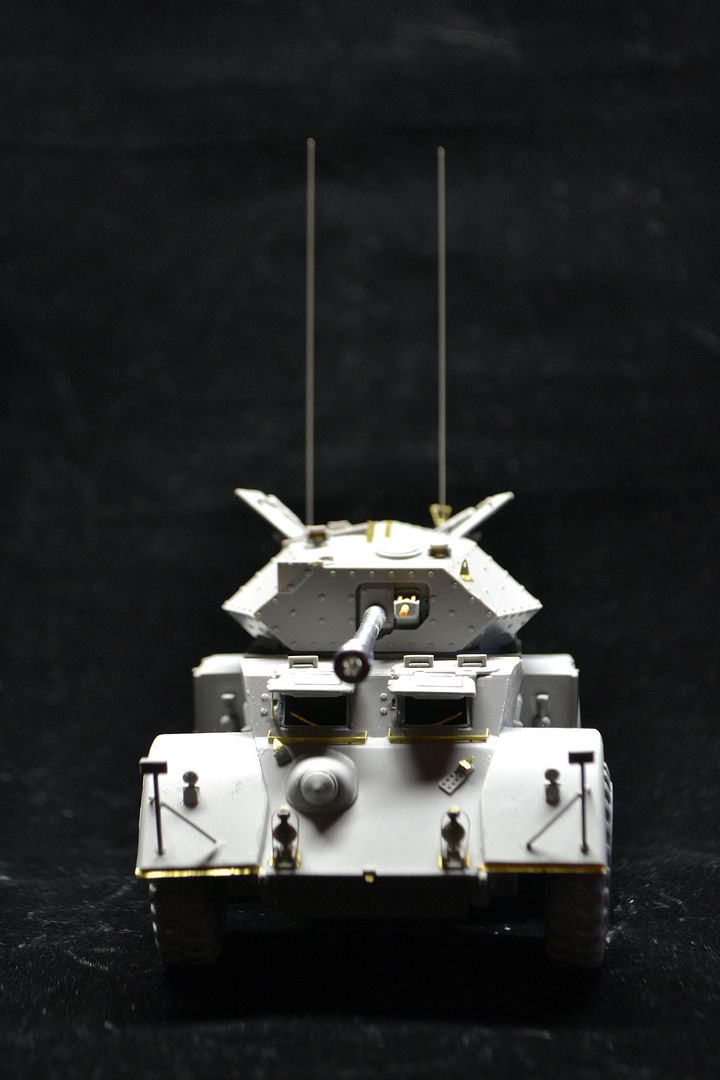
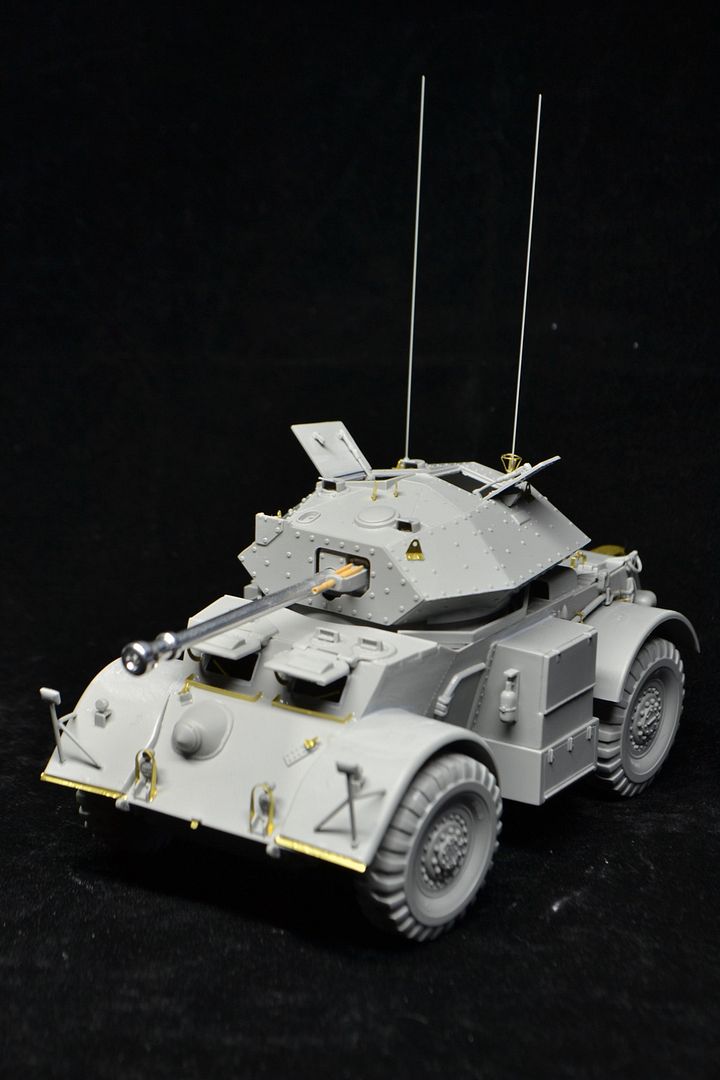
So next update will be adding the stowage and begin painting.
Thanks for looking!
Cheers, Frans
Re: 1:35 Italeri Staghound Mk.III
Posted: Wed Jul 29, 2015 8:55 pm
by chief5437
Nice work Frans!
looks like a great kit, apart from the mudguard fit! Nice job sorting that out btw. Looking forward to seeing some paint on her
Re: 1:35 Italeri Staghound Mk.III
Posted: Thu Jul 30, 2015 4:22 pm
by fly1ngdutchm4n
chief5437 wrote:Nice work Frans!
looks like a great kit, apart from the mudguard fit! Nice job sorting that out btw. Looking forward to seeing some paint on her
Thanks mate!
Can't wait to slap some paint on it myself, but I have to wait for the stowage set to arrive from Korea.
I think that will take up to 6 weeks to arrive

A well.... no rush.
Going to paint the figures first, and I have a small plan for a base.
Re: 1:35 Italeri Staghound Mk.III
Posted: Thu Jul 30, 2015 4:44 pm
by wappynutter
This is superb Frans...... another excellent piece of kit from the "Dutchman's" Bench..
I am going to just quote something you wrote a while back...
Sorry guys, but this build is going fast!
Because of there are only 4 Sprues with parts, and a limited amount of PE parts to bend, Im flying through this build.
Of course you are buddy..... your the "Flying" Dutchman.. hahaha...
Looking forward to seeing more Frans, always a fan of your work so will camp here a while and wait for that slow boat from Korea..


Continued success...


" munch...munch...munch..."
Re: 1:35 Italeri Staghound Mk.III
Posted: Sat Aug 01, 2015 8:45 pm
by fly1ngdutchm4n
wappynutter wrote:This is superb Frans...... another excellent piece of kit from the "Dutchman's" Bench..
I am going to just quote something you wrote a while back...
Sorry guys, but this build is going fast!
Because of there are only 4 Sprues with parts, and a limited amount of PE parts to bend, Im flying through this build.
Of course you are buddy..... your the "Flying" Dutchman.. hahaha...
Looking forward to seeing more Frans, always a fan of your work so will camp here a while and wait for that slow boat from Korea..
Continued success...
" munch...munch...munch..."
Thanks Andy!
Back at a new restock popcorn i see?
Still waiting on the slow boat to arrive... I have started painting the figures, those will be up here soon.
A drink to wash that popcorn away!
Re: 1:35 Italeri Staghound Mk.III
Posted: Sun Aug 02, 2015 2:03 pm
by fly1ngdutchm4n
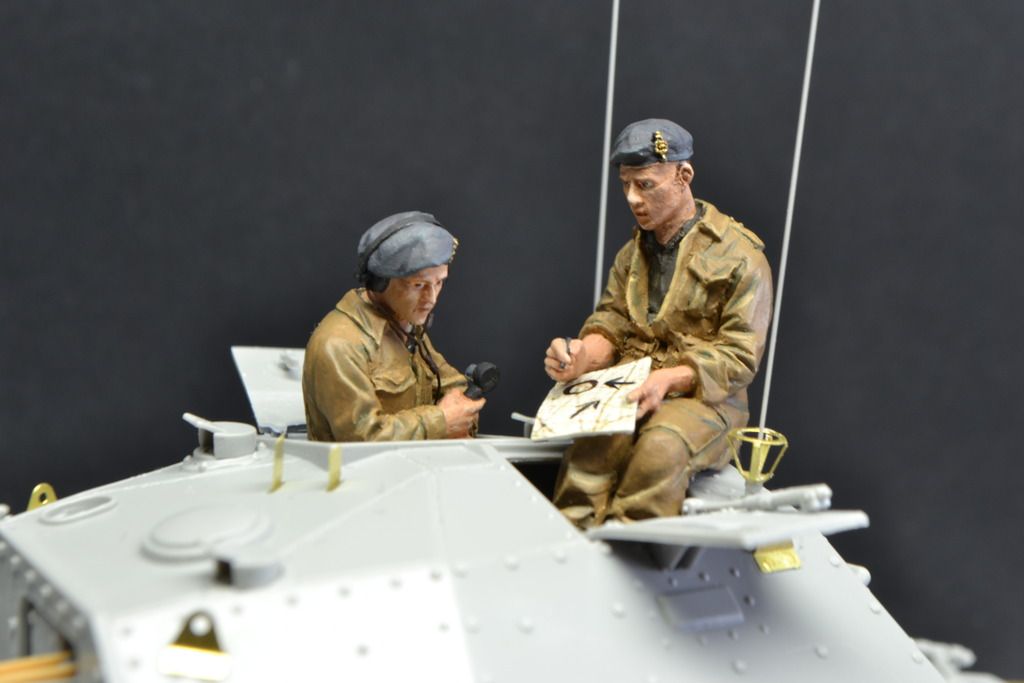
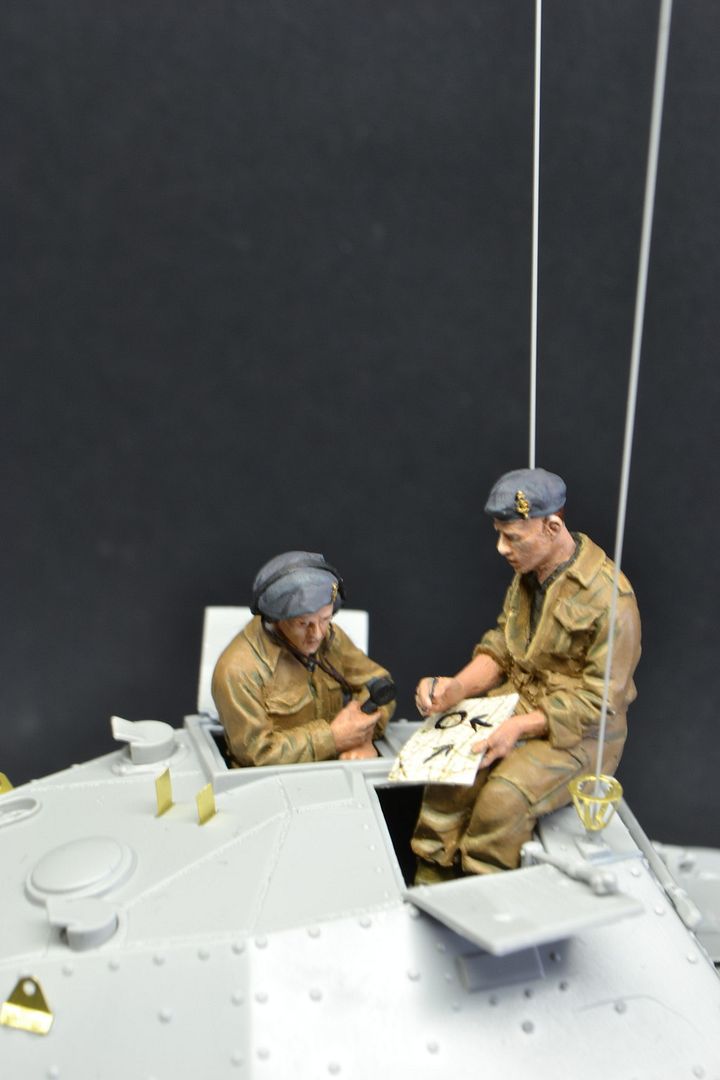
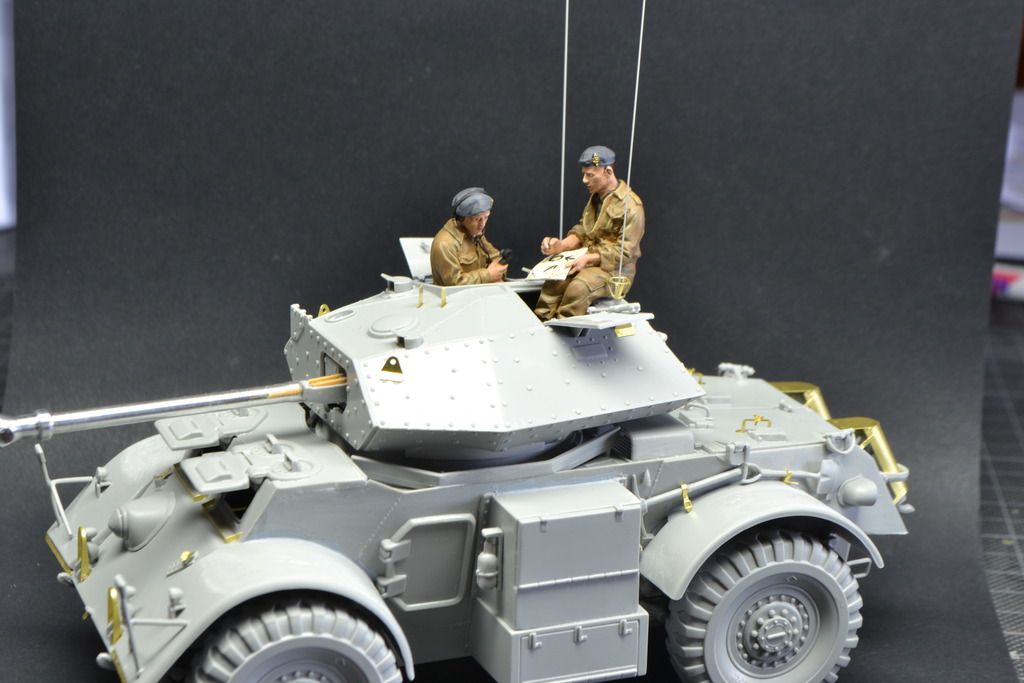
Well, I decided to paint some figures while I'm waiting for the slow boat from Korea to arrive, here are the two crew members.
The figures are from Nemrod and they have cool positions. Good in detail, but not the best.
I painted these figures in Vallejo acrylics.
To give a idea what paints I used, here's a small list
Skin:
Base: 876 brown Sand
1st Highlight: Base color + 845 Sunny skin Tone.
Second Highlihts: Base color + Sunny skin Tone + 918 Ivory
First shade: Base +814 Burnt Cadmium red + 596 Glaze medium
Second shade: Base + 814 Burnt cadmium red + 596 Glaze medium + 960 violet.
Overall:
Base: 65% 921 English uniform + 35% 983 Flat earth.
Highlight: Base + 845 Sunny skin tone
Shade: Base + 30% 965 Prussian Blue + 70% 950 Black
Shoes and cap:
Base: Flat black + Sunny skintone 90/10
Highlight: Base + light grey
Shade: Flat black
And here are some pics.
Not the best pics, I really should invest into a better lens...
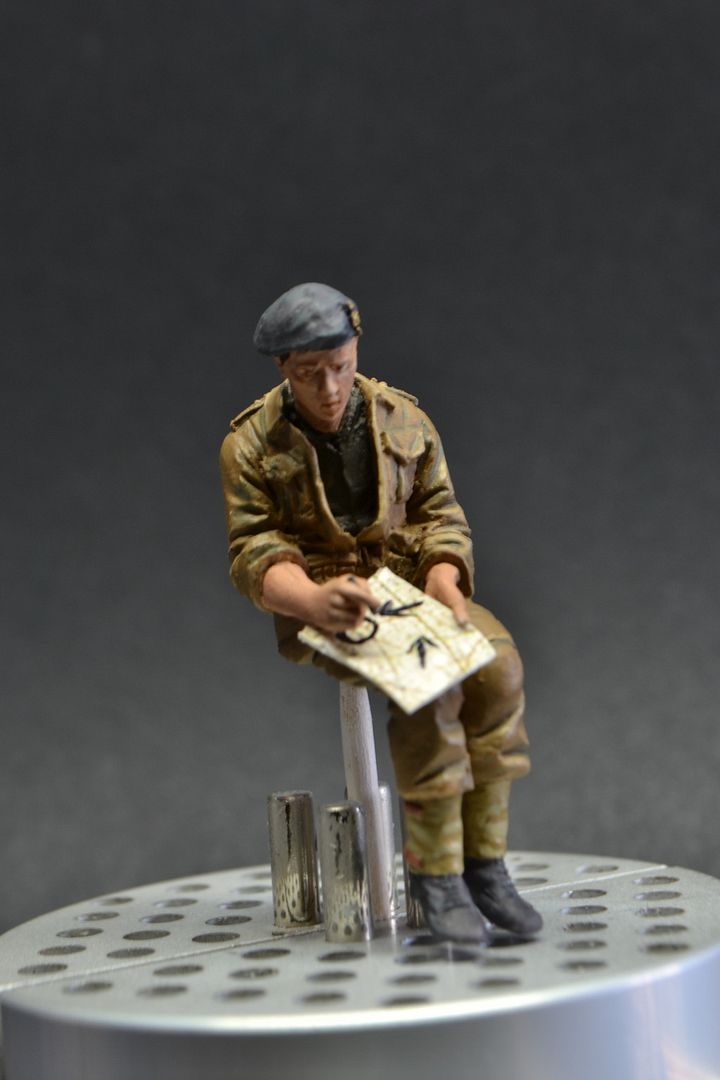
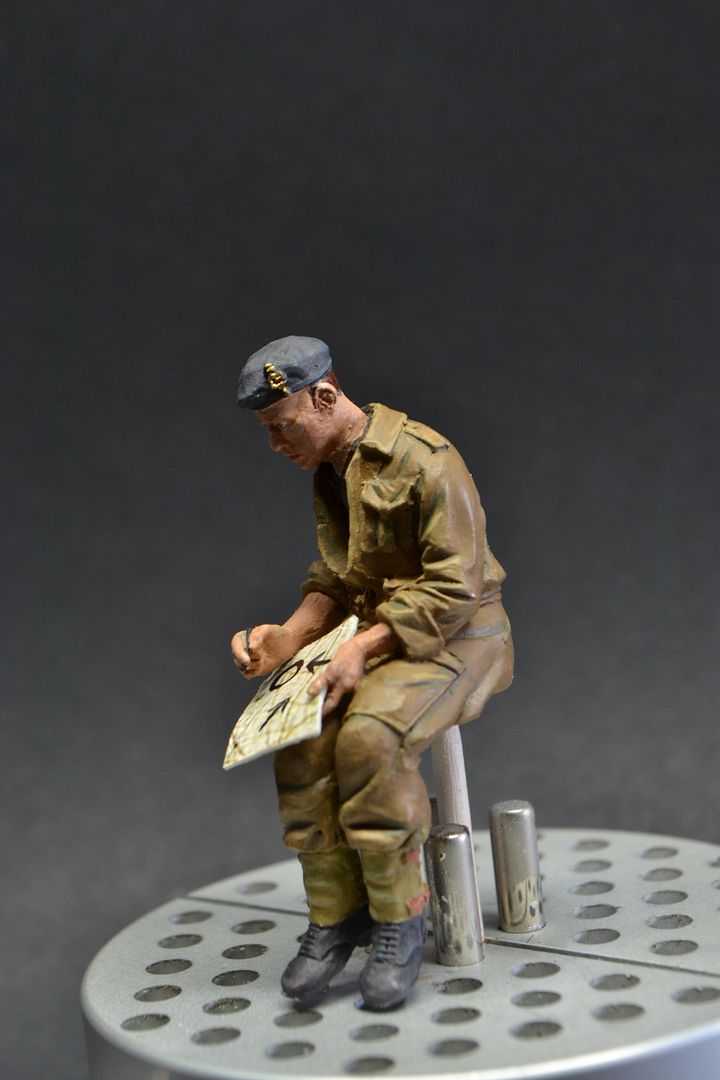
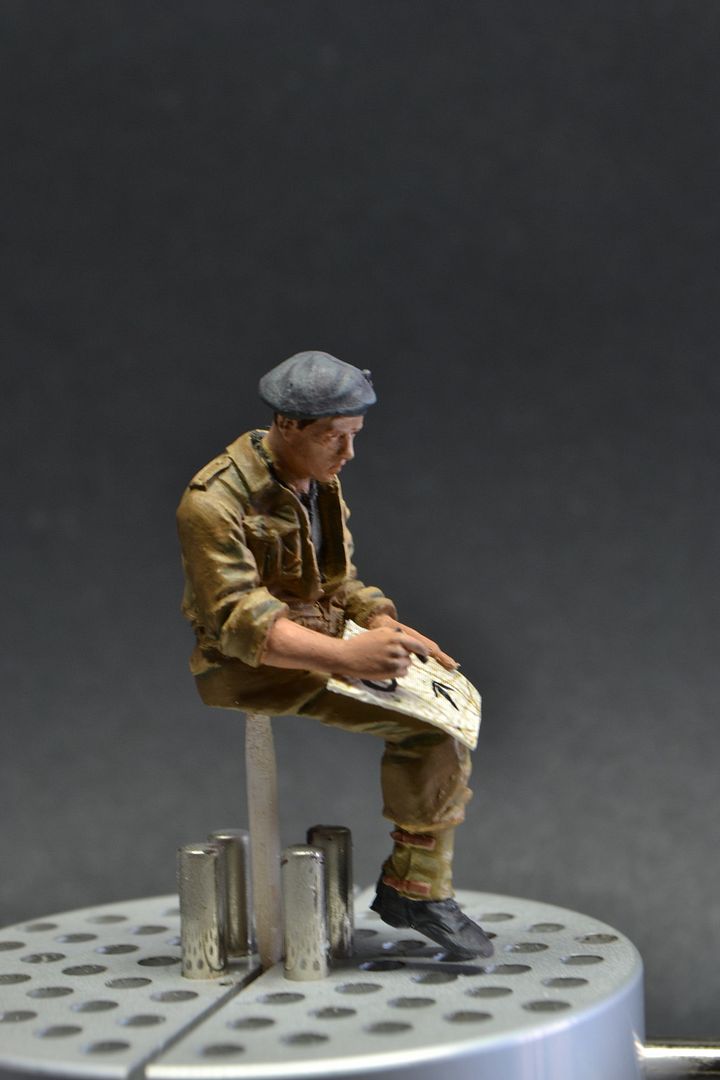
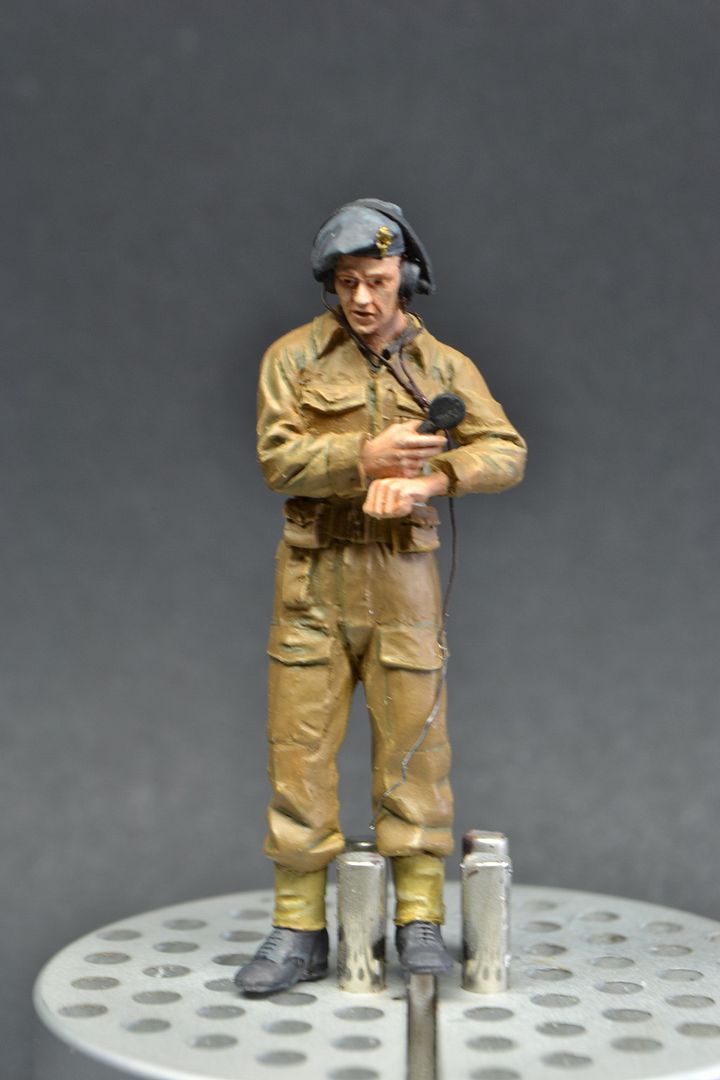
That's it for now!
Stay safe guys!
Re: 1:35 Italeri Staghound Mk.III
Posted: Sun Aug 02, 2015 10:36 pm
by wappynutter
Looking mighty fine Frans....
Thanks for the detailed colour/Paint call outs. Nice to see what others use and the results achieved.
Awesome stuff mate.
All the best, Stay safe and well..

Re: 1:35 Italeri Staghound Mk.III
Posted: Sun Aug 02, 2015 11:27 pm
by MarkVerploeg
Those are some very nice figures Frans
The color list is very helpfull and i am sure i will try these colors when i start a British vehicle
I don't think i ever made something British before so that would be a nice change
Happy modelling
Re: 1:35 Italeri Staghound Mk.III
Posted: Mon Aug 03, 2015 7:41 am
by alextheblue
Great work Frans, looking really good!
Great fix with the mudguards, they look perfect in your pictures. And a big thank you for putting the colours you use for the figures (also looking mighty fine!) - I usually use the Lifecolor skint one set, but I'm definitely going to give your combination a try.
Re: 1:35 Italeri Staghound Mk.III
Posted: Sun Aug 09, 2015 3:27 pm
by fly1ngdutchm4n
Thank you for all nice comments guys!
Time to squeeze another small update
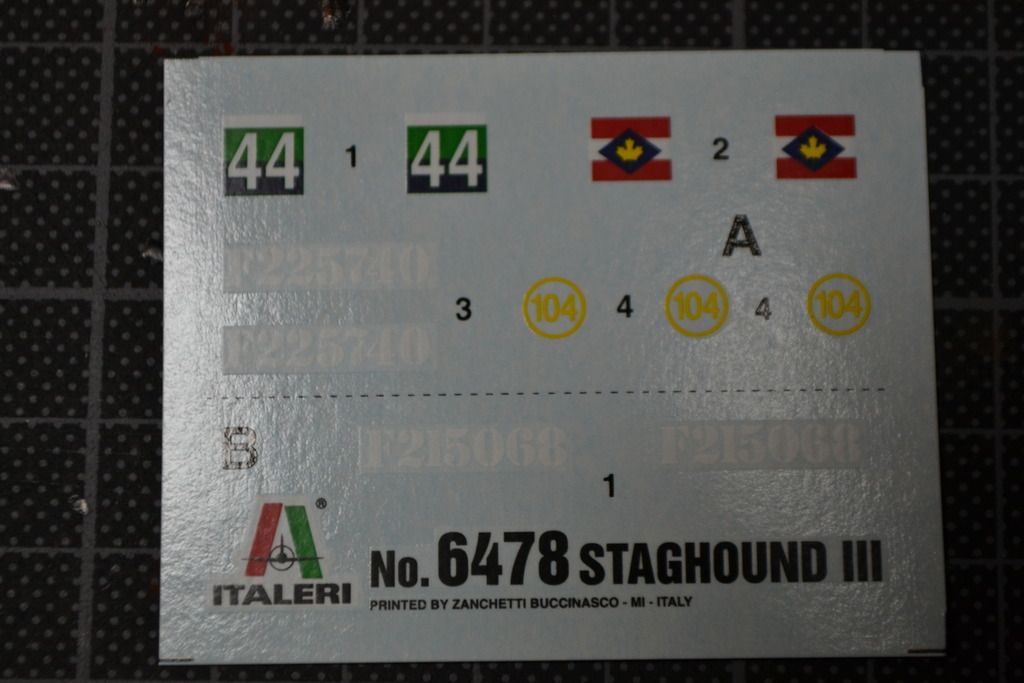
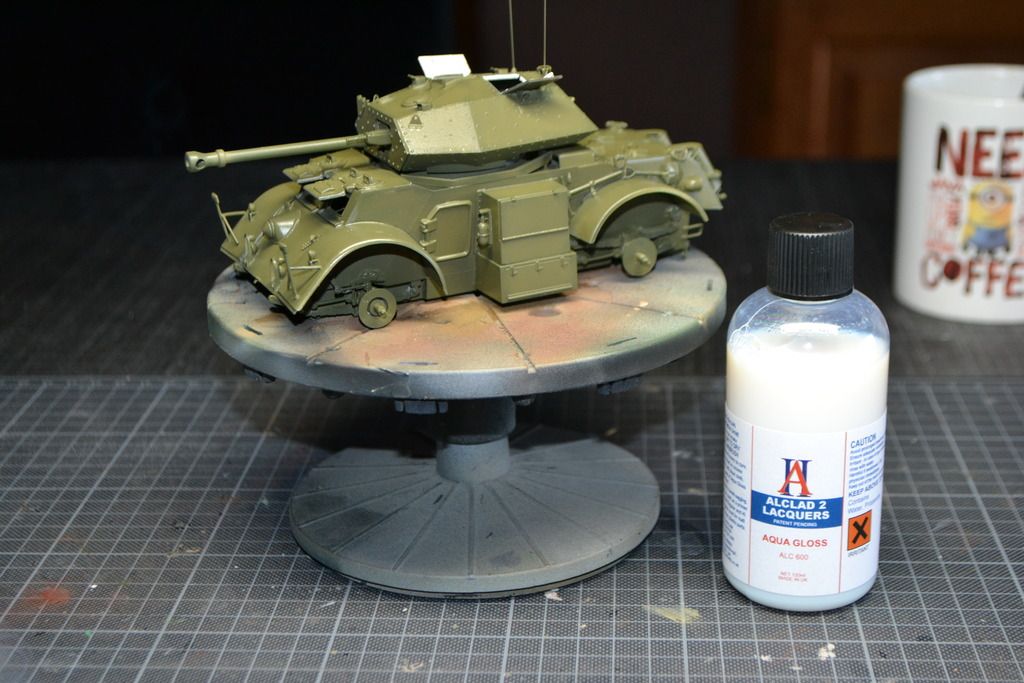
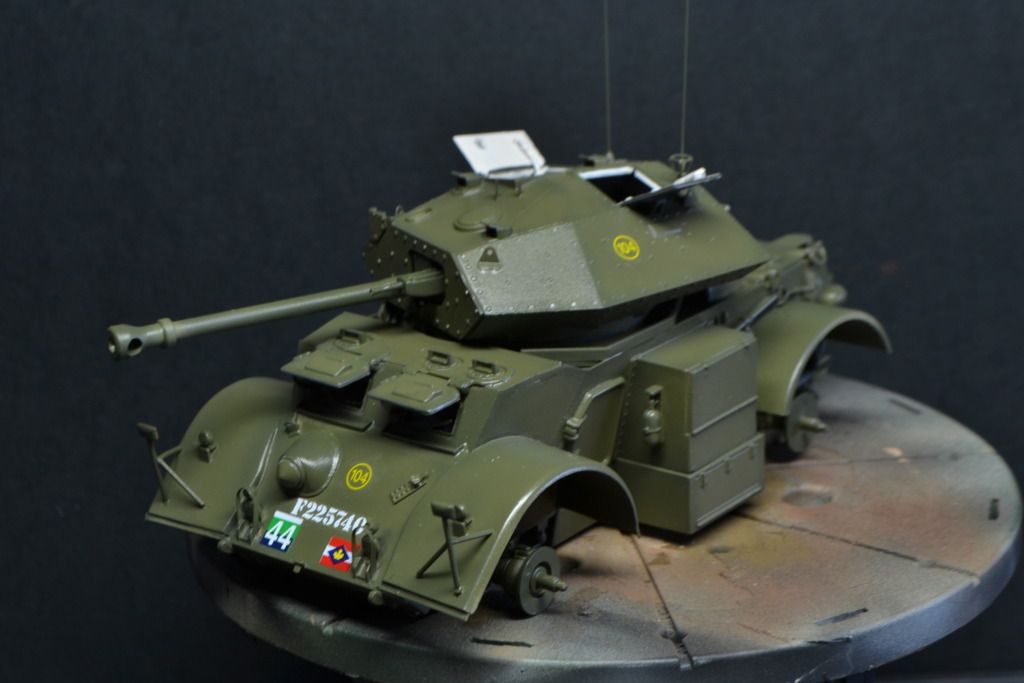
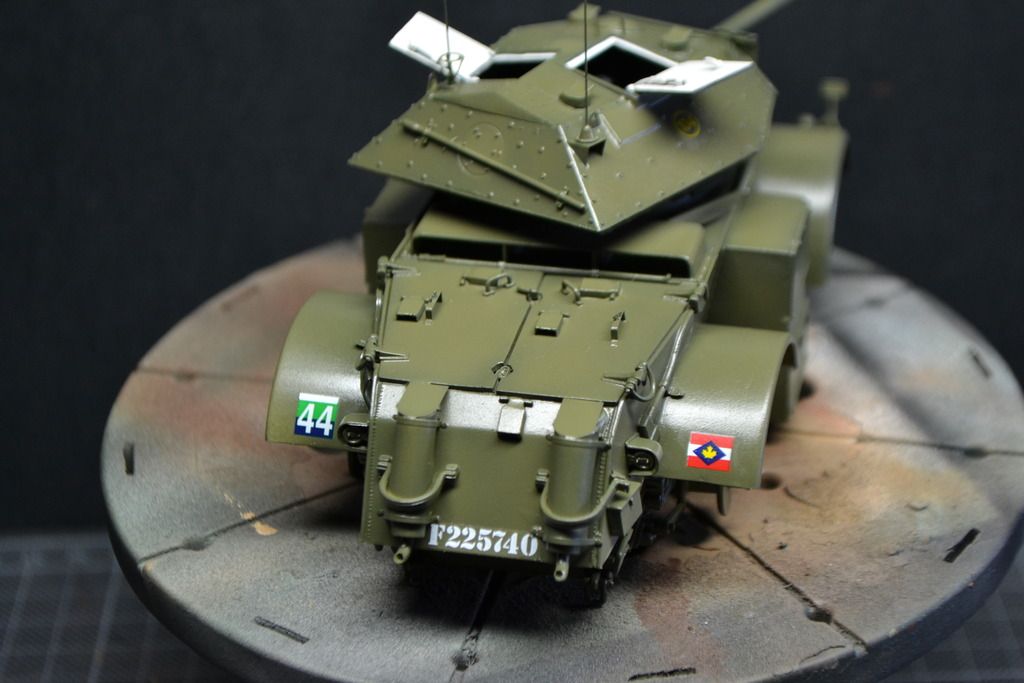
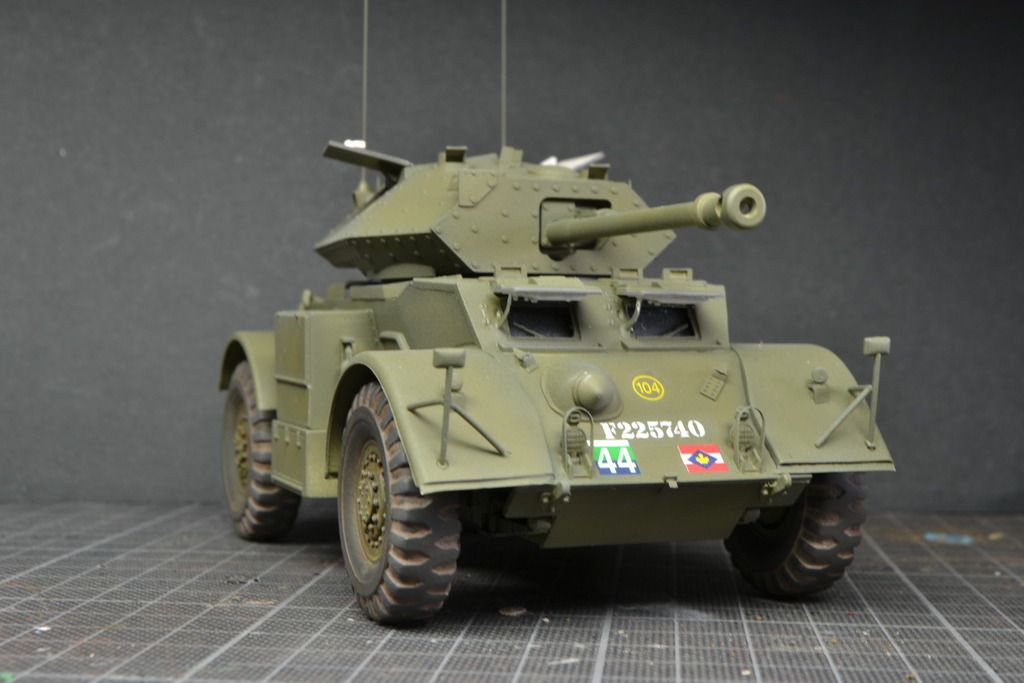
It's time to apply the decals.
I will go for the Manitoba Dragoons Reconnaissance Battalion.

During the Second World War the Regiment mobilized the 18th (Manitoba) Reconnaissance Battalion, CAC, CASF, for active service on 10 May 1941. It was redesignated the 18th (Manitoba) Armoured Car Regiment, CAC, CASF, on 26 January 1942; the 18th Armoured Car Regiment (12th Manitoba Dragoons), CAC, CASF, on 16 December 1942; and 18th Armoured Car Regiment (12th Manitoba Dragoons), RCAC, CASF on 2 August 1945. It embarked for the Great Britain on 19 August 1942. On 8 and 9 July 1944 it landed in Normandy, France as a unit attached directly to II Canadian Corps, where it fought in North-West Europe until the end of the war.
So I will start with a few coats of Alclad aqua gloss.
Front decals,
Rear decals
After sealing the decals with matt varnish, I began paining the wheels with dark rubber mixed with a drop of red brown and black.
The profile was highlighted with the base color mixed with a drop of off white.
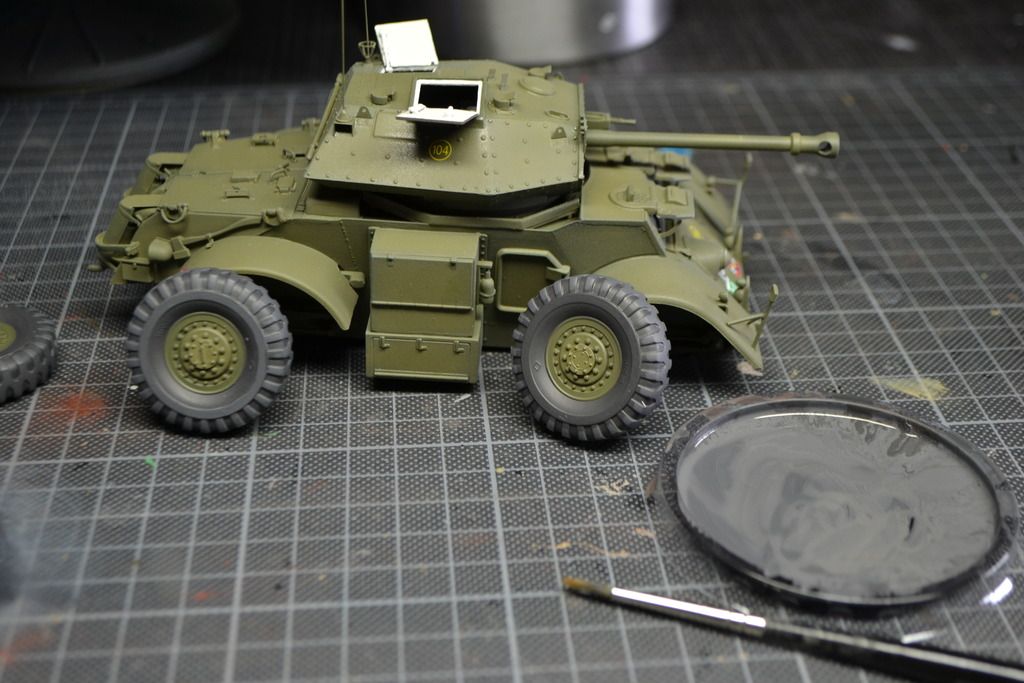
Then I applied a mix of umber pigment and tan earth paint and clean water.
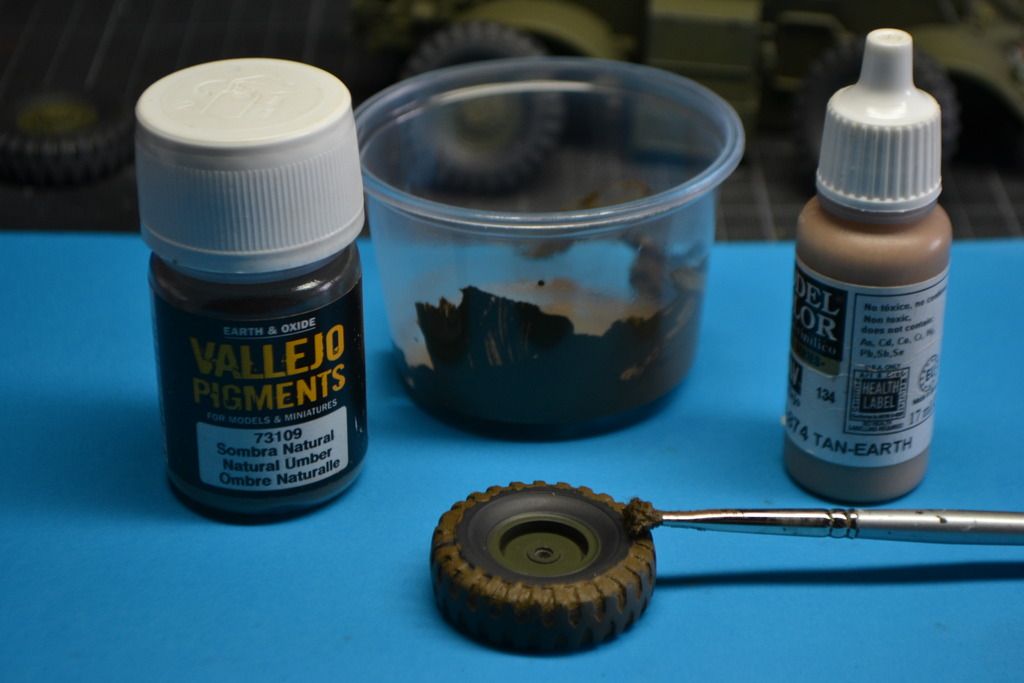
With a clean towel with some white spirit, I wiped of all excess.
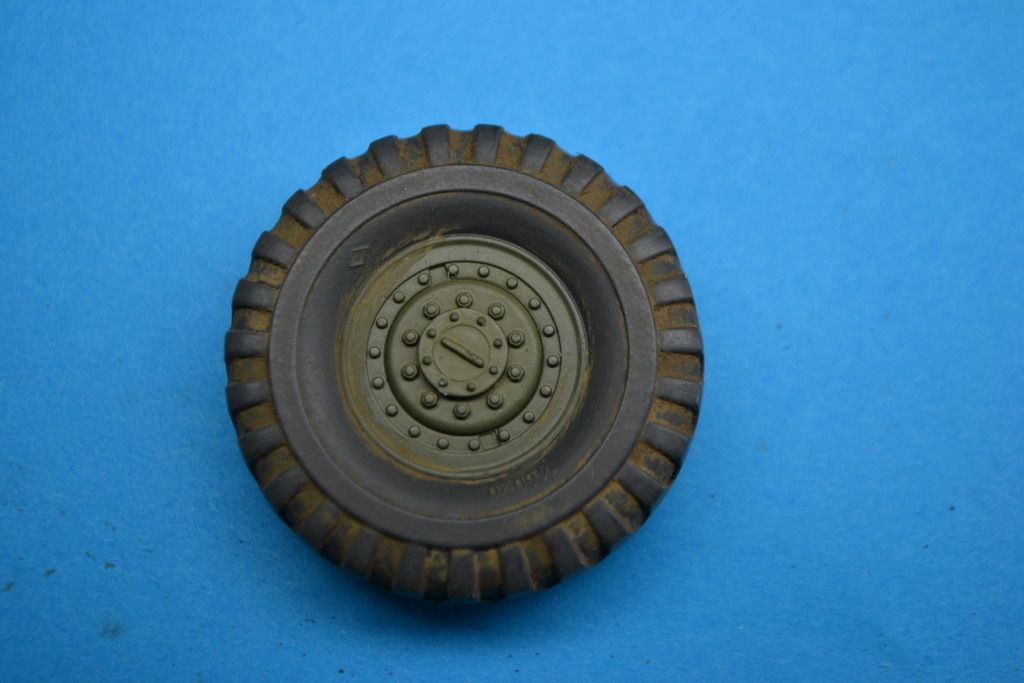
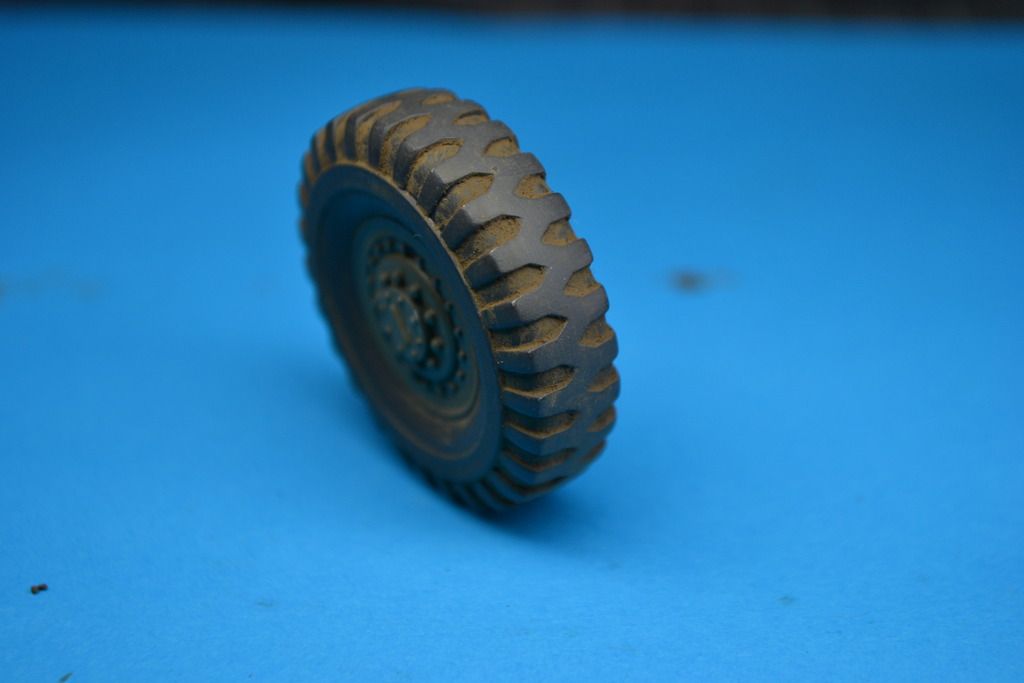
Rust effects and a dark wash around the bolts, and track wash and earth effects between the tire profile.
Highlighted the bolts with olive drab and white.

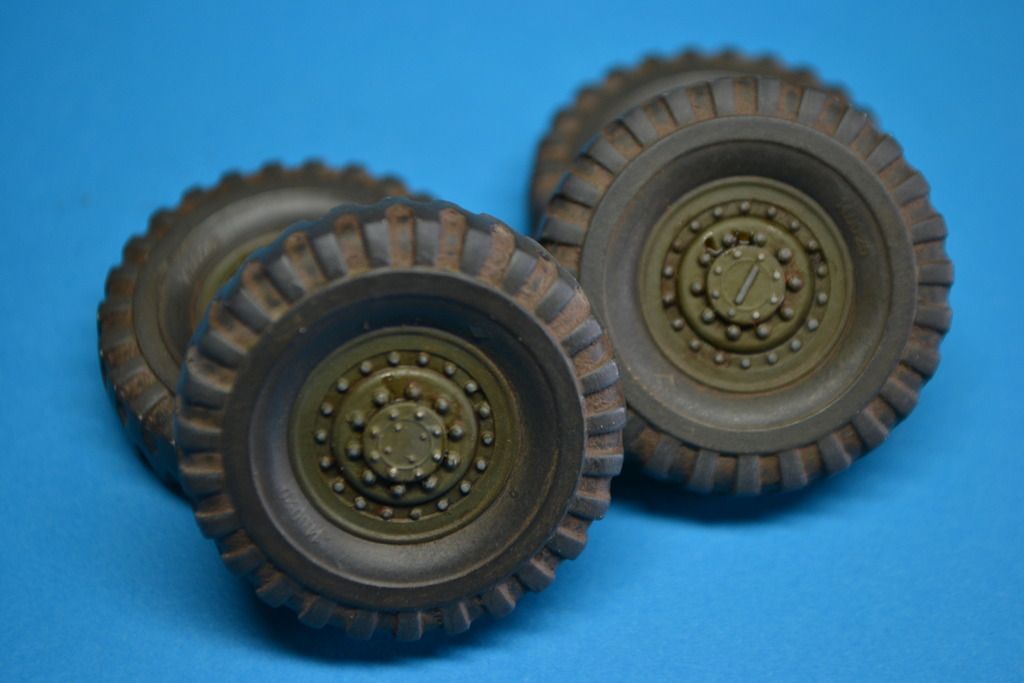
When all dried up I applied a coat of matt varnish, and it looks like this.

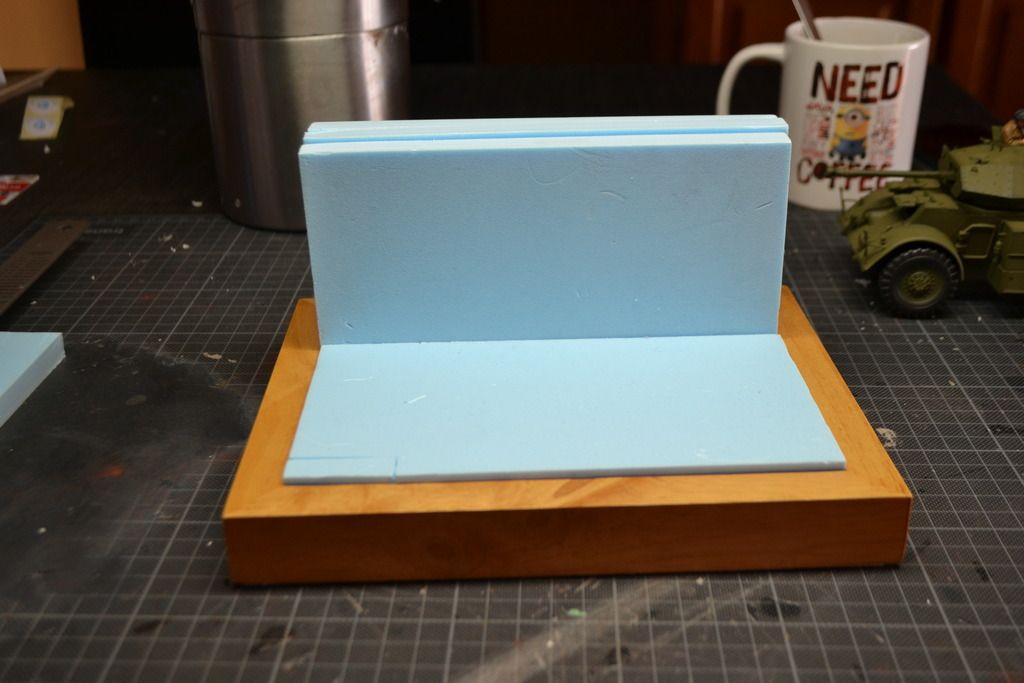
For now this model is drying, so I made a start at the base.
I want to keep it small.
So I took a old picture frame, and put blue foam into it.
3 pieces of foam are standing up straight, that will be a wall.
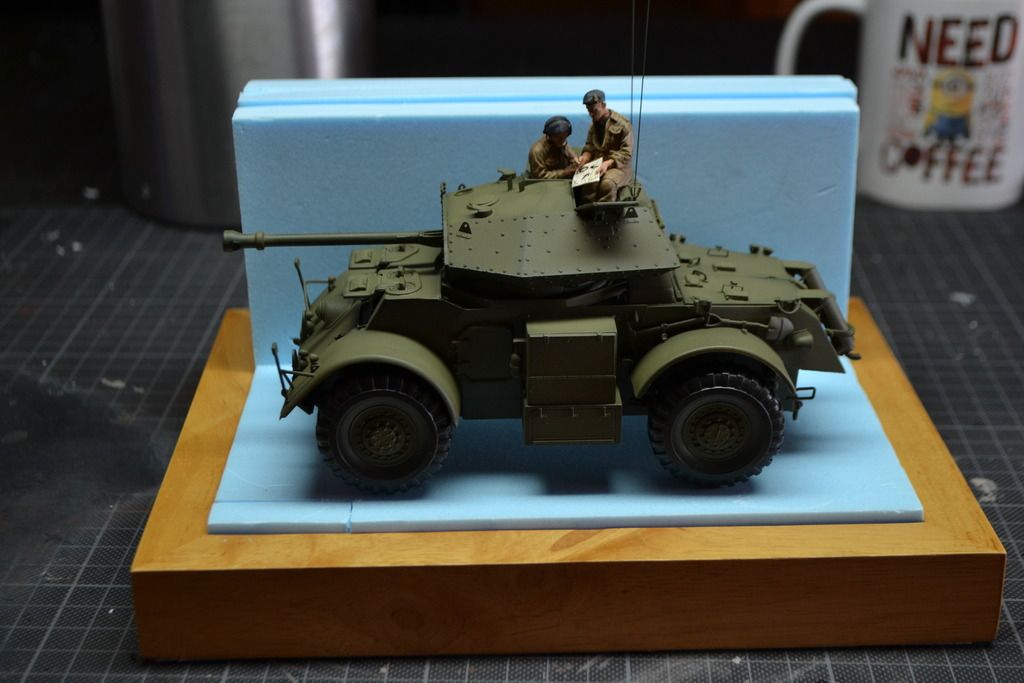
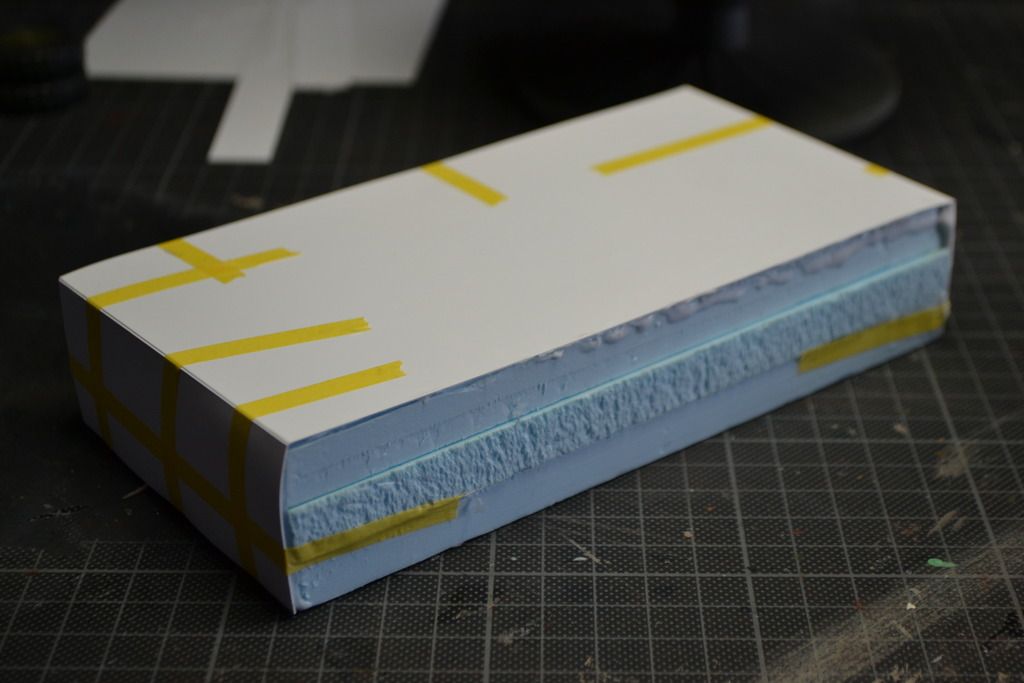
I glued the three pieces for the wall together with wood glue, and glued a piece of plastic card on top of that to give it a smooth finish later.
It looks messy now, but it will look great when finished. No need for sanding the top, for there will be grass on it.
With the Stag in front of it, I find it big enough to display the model.
And here's where this update end for now.
Thanks for dropping by, and hope to see you next time.
Stay safe, and happy modelling.
Re: 1:35 Italeri Staghound Mk.III
Posted: Sun Aug 09, 2015 6:10 pm
by Coen
Just caught up on this... Most awesome and excellent stuf Mr. Frans!
Re: 1:35 Italeri Staghound Mk.III
Posted: Sun Aug 09, 2015 8:28 pm
by fly1ngdutchm4n
Coen wrote:Just caught up on this... Most awesome and excellent stuf Mr. Frans!
Thank you very much Sir, greatly appreciated
Still got a lot of work to do, Packing Mrs and my stuff for the upcoming moving is holding things back a little.
So I'm modelling where and when I can at the moment

Re: 1:35 Italeri Staghound Mk.III
Posted: Tue Aug 11, 2015 11:52 pm
by OliveDrab
Re: 1:35 Italeri Staghound Mk.III
Posted: Wed Aug 12, 2015 9:15 am
by fly1ngdutchm4n
Thank you! I need to weather the wall with moss when all is dry.
Re: 1:35 Italeri Staghound Mk.III
Posted: Wed Aug 12, 2015 10:33 am
by wappynutter
Re: 1:35 Italeri Staghound Mk.III
Posted: Wed Aug 12, 2015 9:22 pm
by fly1ngdutchm4n
Lol... Thank you very much Sir!
Patience of a saint? Meh... not Always, sometimes I'm rushing things..

However, loving this build so far, can;t stop building the base!
But I have to stop now, for I need to figure out a way to make weeds for in the grass.

And Poppies, I really need poppies for in the field
Cheers mate
Re: 1:35 Italeri Staghound Mk.III
Posted: Sat Aug 15, 2015 4:47 am
by Danta2er
Hey Frans would you be kind enough to post a pic of the tools you made for the wall?
~dan
Re: 1:35 Italeri Staghound Mk.III
Posted: Sat Aug 15, 2015 4:26 pm
by fly1ngdutchm4n
Re: 1:35 Italeri Staghound Mk.III
Posted: Sat Aug 15, 2015 4:50 pm
by JudgeDredd
Amazing!!
Re: 1:35 Italeri Staghound Mk.III
Posted: Sat Aug 15, 2015 5:02 pm
by Danta2er
fly1ngdutchm4n wrote:
That's it
LOL, it's still a brilliant idea, can't wait to try it out! Thanks again Frans!
Re: 1:35 Italeri Staghound Mk.III
Posted: Sun Aug 16, 2015 1:10 pm
by fly1ngdutchm4n
Hello everybody! 
I'm not feeling very well lately, really tired and today i'm a bit nauseous, but easy going..
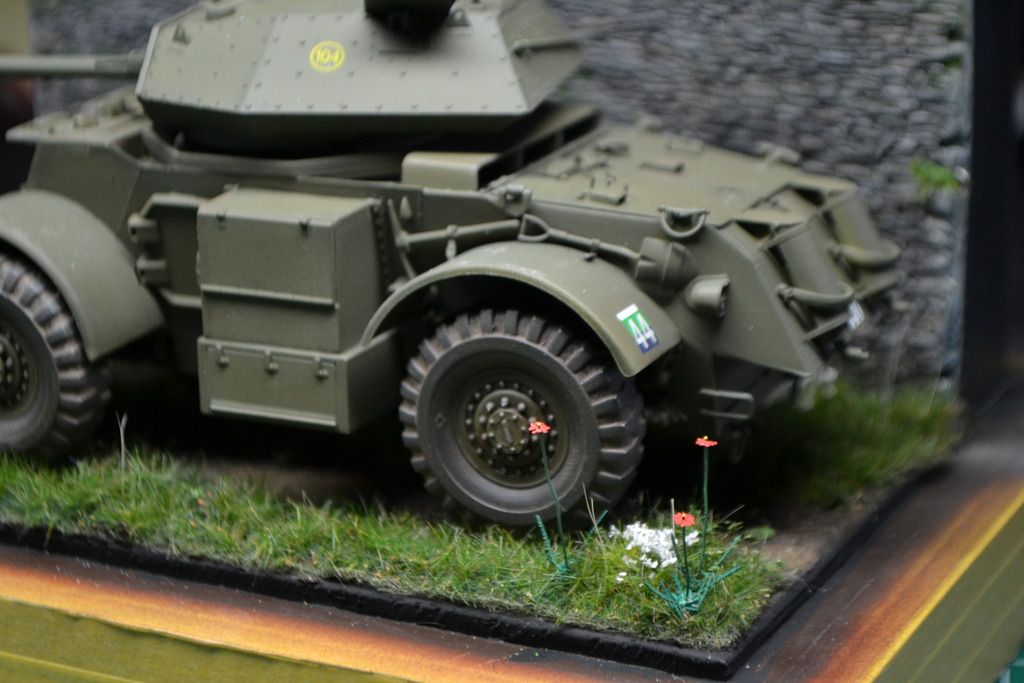
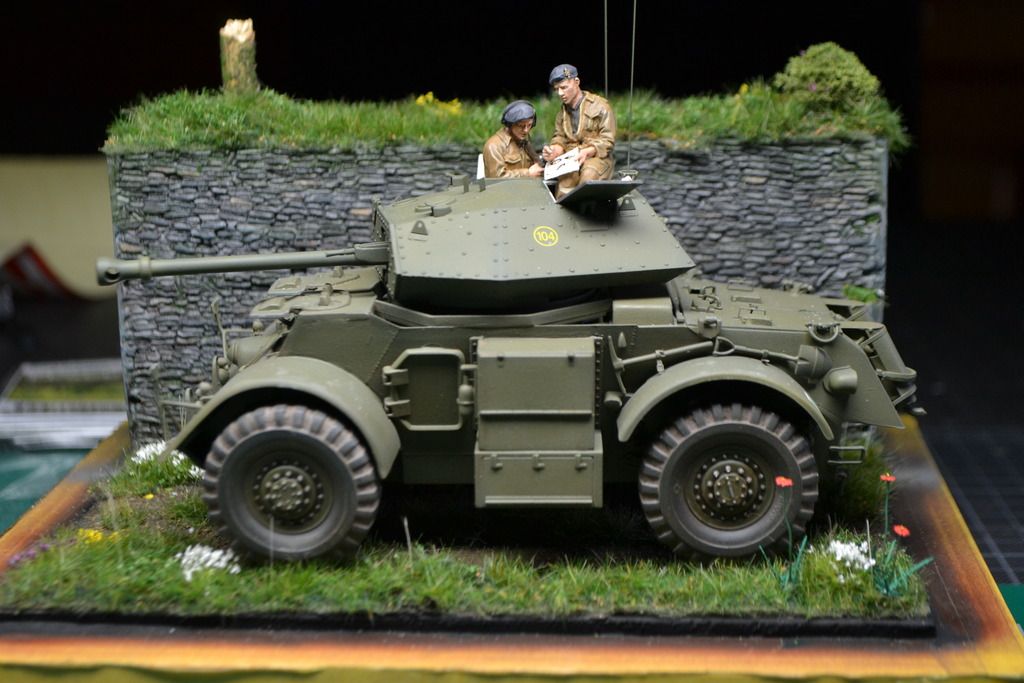
So I managed to squeeze out a update, manly about the diorama base that is finished now.
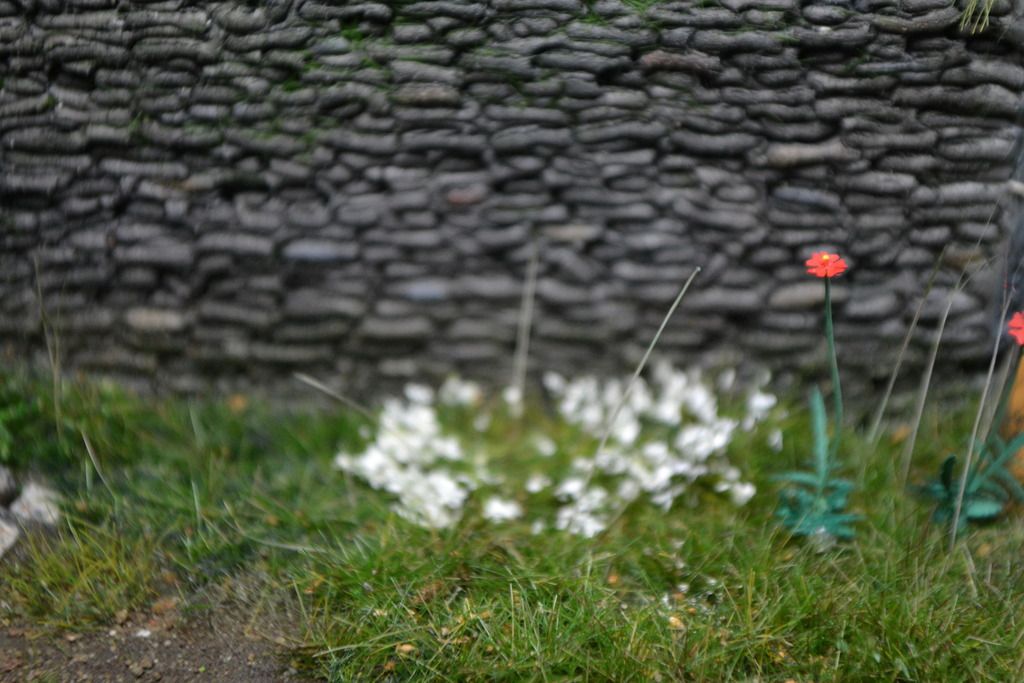
I wanted to make the base like a summer field with weeds and flowers, so I needed to add those.
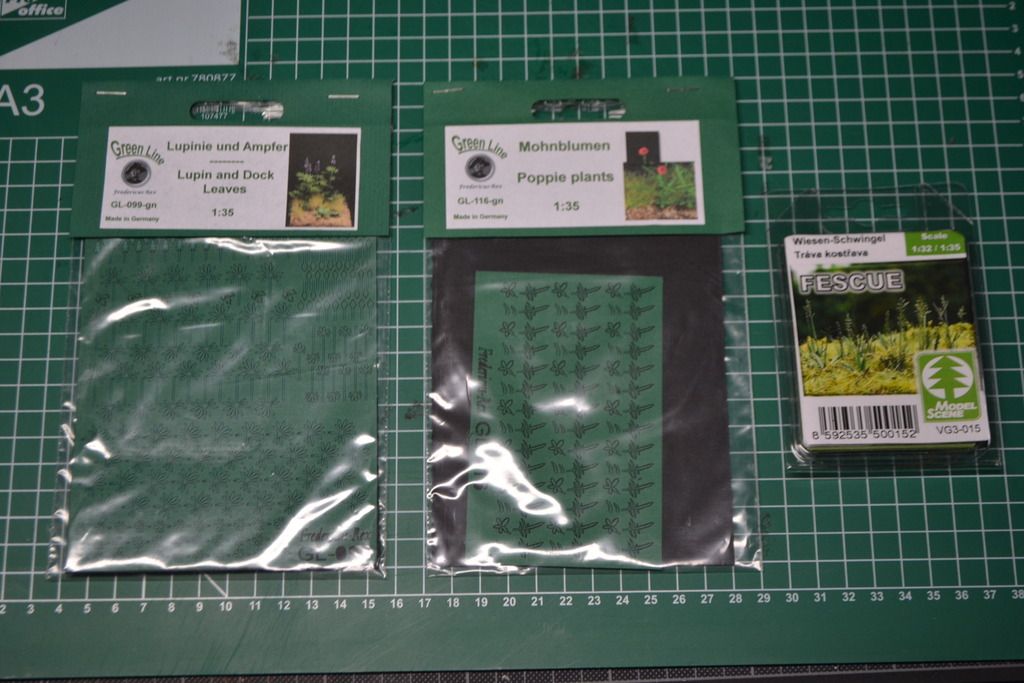
Just for that I bought some poppies, tall grass and wild Lupin.
These a laser cut papers from Green Line, and I have to say they are really nice to work with.
Care has to be taken as well as patience.
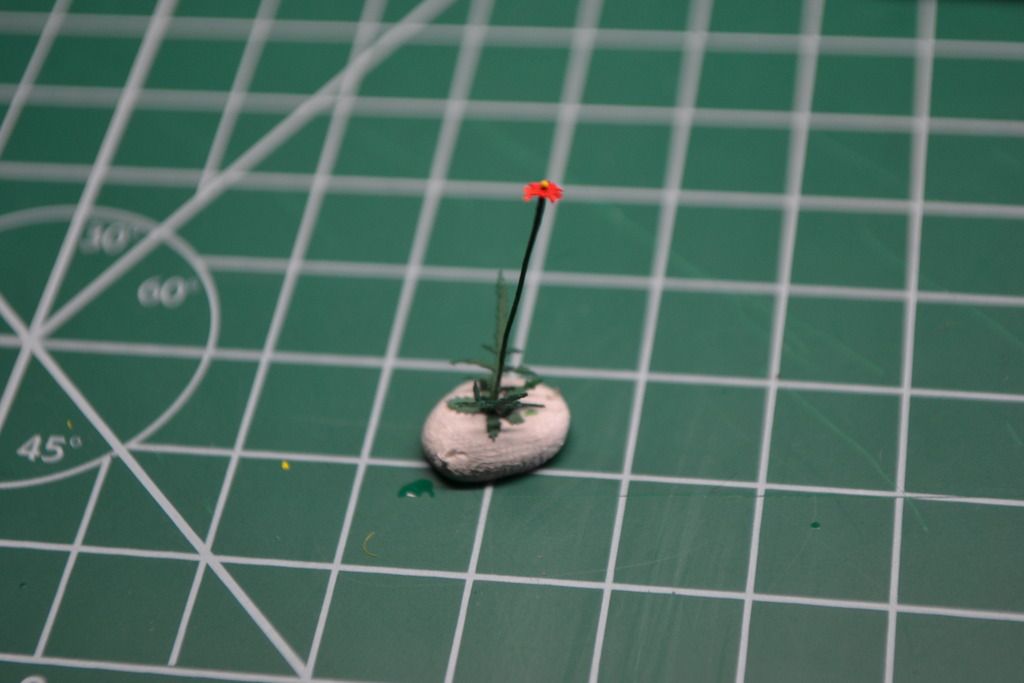
I will start with a poppie.
I cut a wire (that is supplied with the kit) at 2.5 cm and put it on a piece of tack.
I wasn't sure about the length at first, but I looked at a nearby poppie flower field while walking our dog, and some poppies came all the way up to my middle body.
After cutting the flower and leafs loose, I simply put it over the wire.
The bottom leaves and the flower has a tiny hole in them, so it was easy to slide it over the wire.
I secured them with super glue.
The other leafs are attached with white glue.
No need to paint the leafs for they are in the correct color.
The poppie was painted red with a yellow hart.
The stalk was painted grass green. No need for primer, I just painted it right over the wire.
I think it looks pretty cool into the diorama, and adds more interest and color.
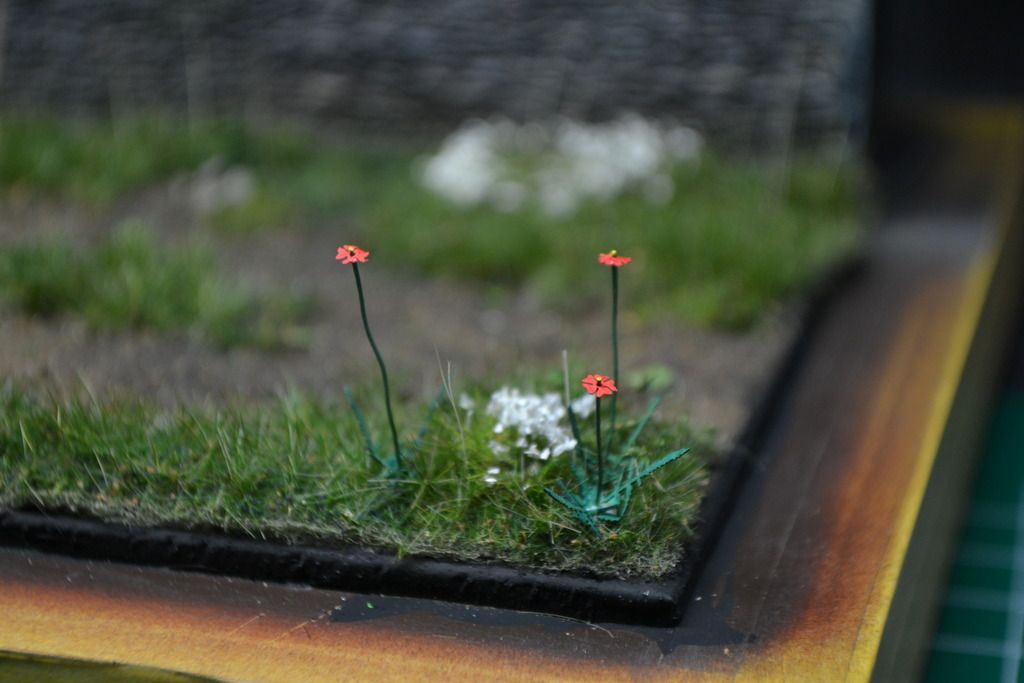
I do not want to put to much poppies in this field, I would be to crowded I think...
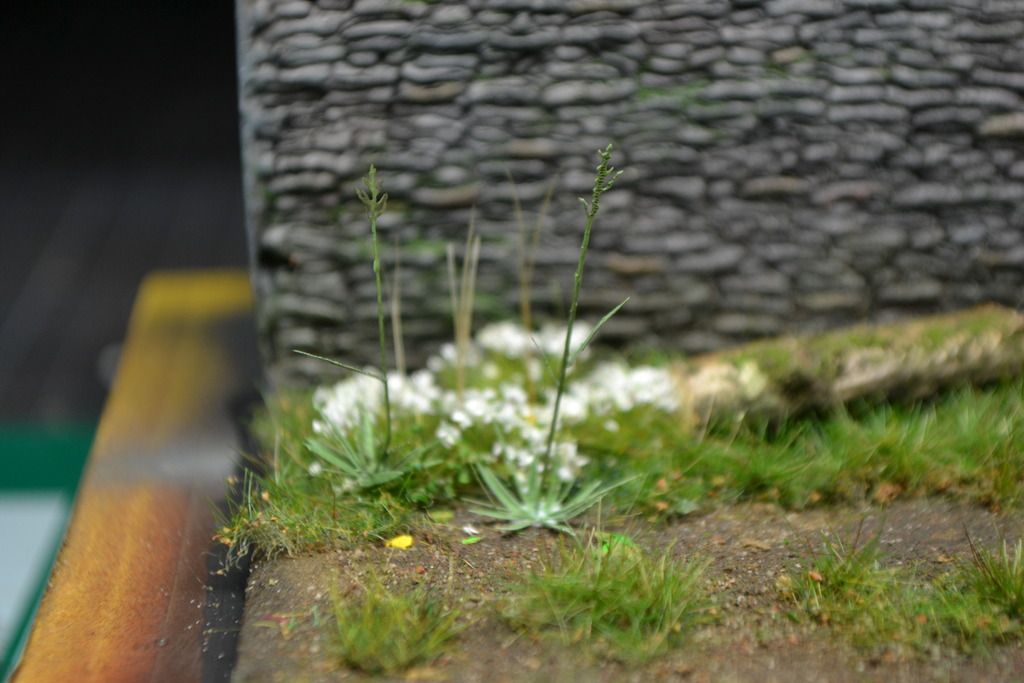
Tall grass pretty much the same thing.
Cut loose and glued with wood glue.
Now, the Lupin flowers where a bit more work, but DANG! the are awesome!
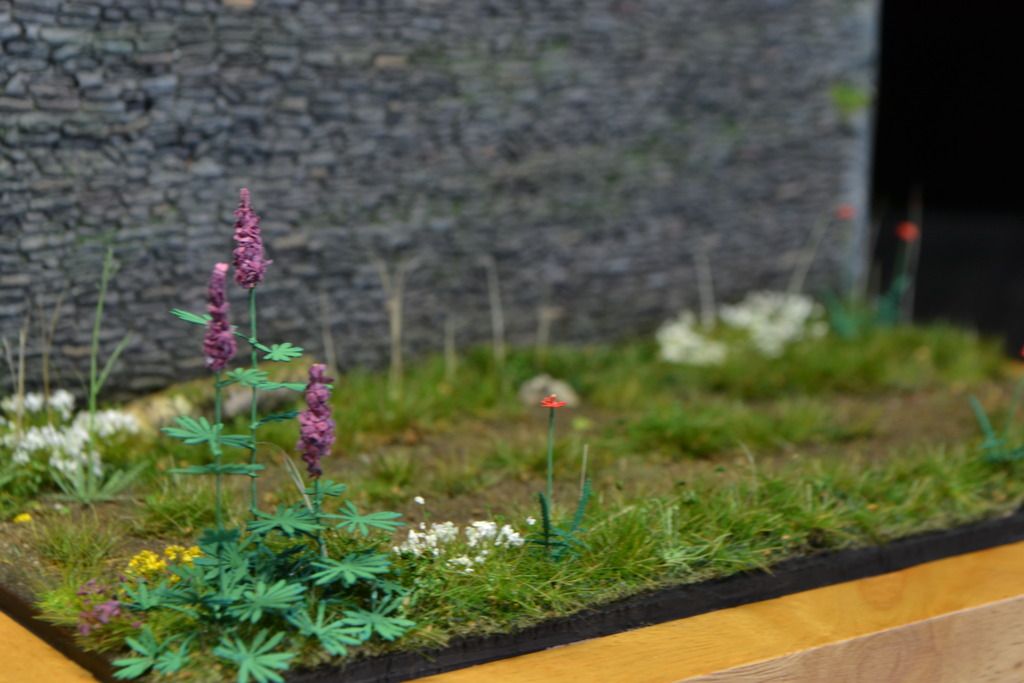
And with the Flowers, I'm calling this base done
I just posting some pics now, and hope you will like this base.
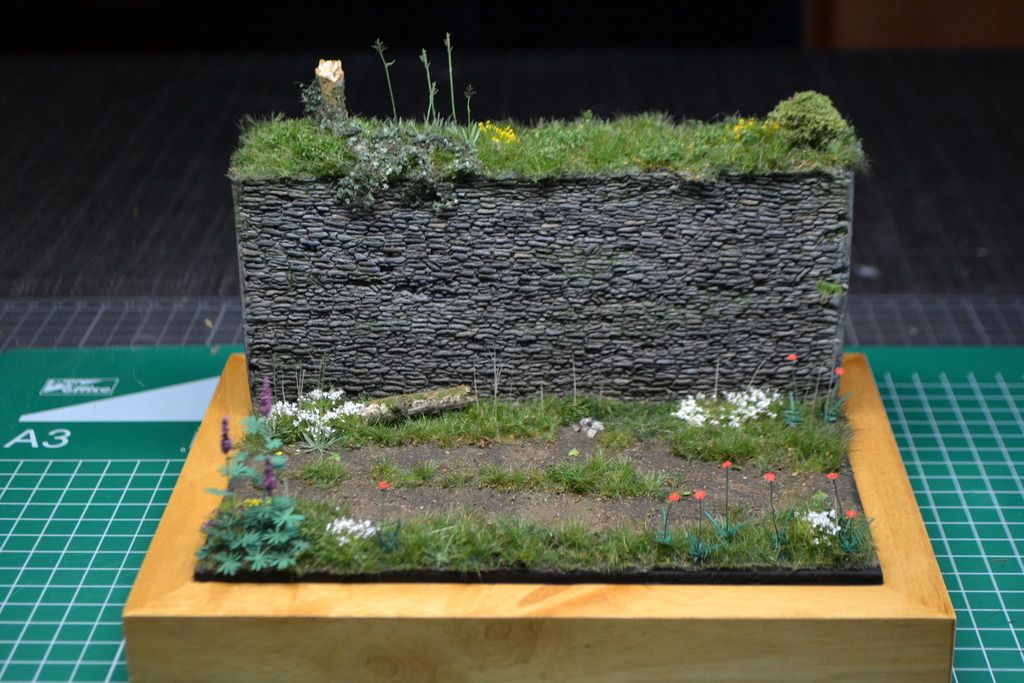
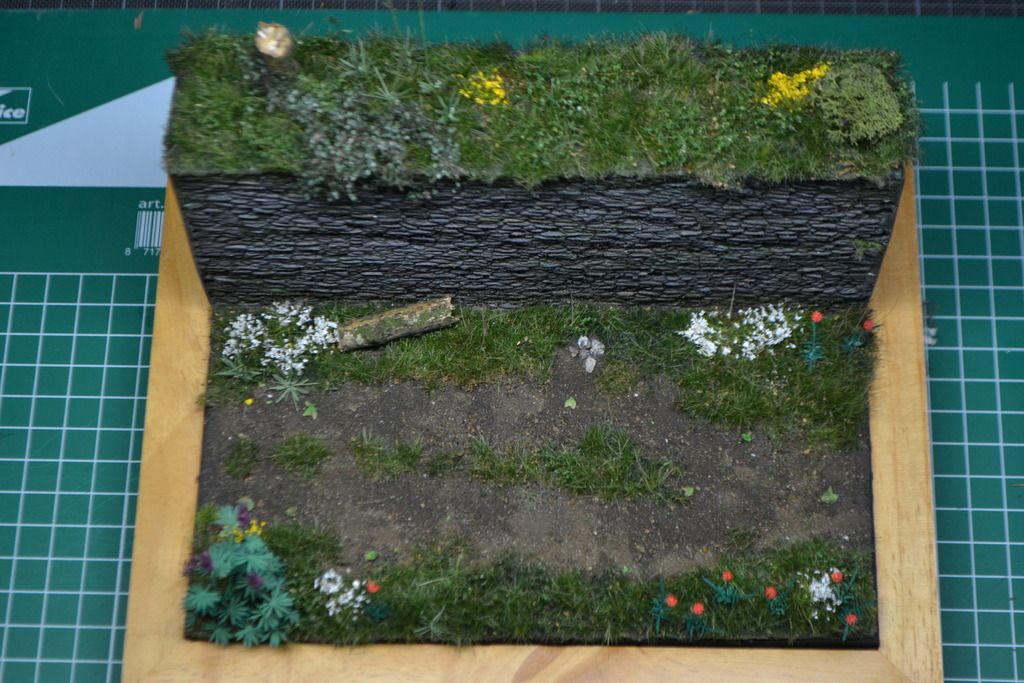
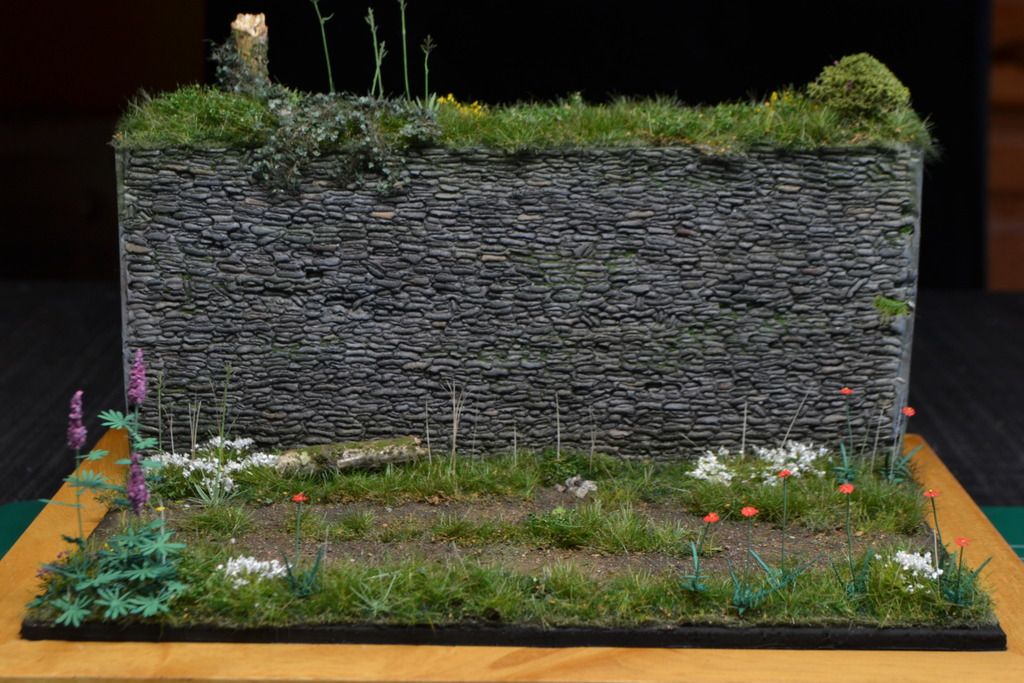
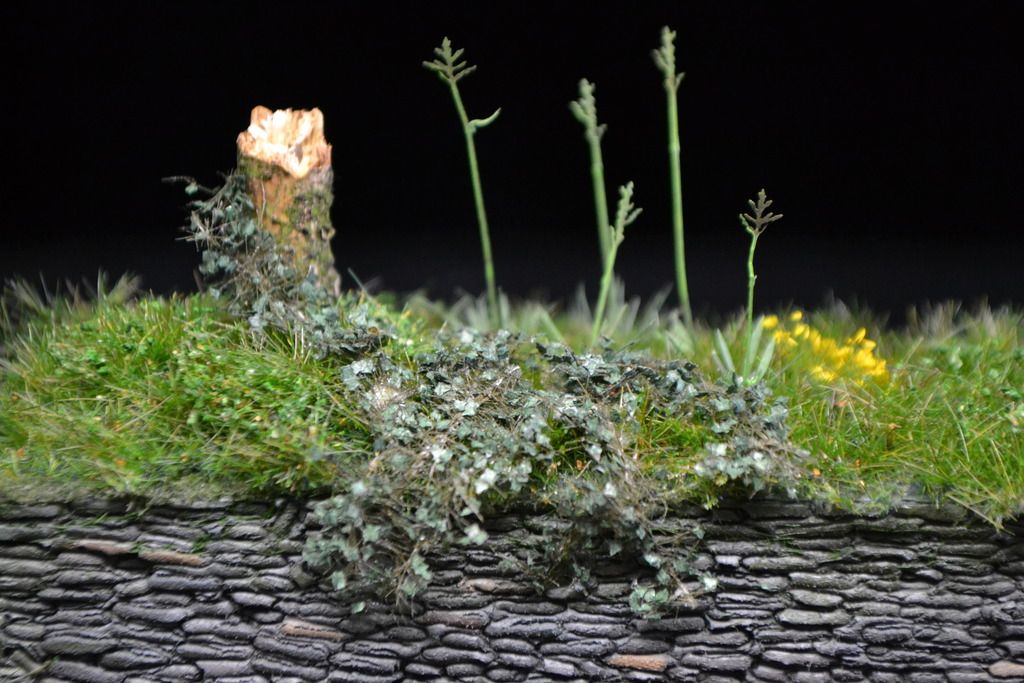
Added a small twig from the woods, and with a mix of fine saw dust, wood glue and green paint, I added moss on top of it.
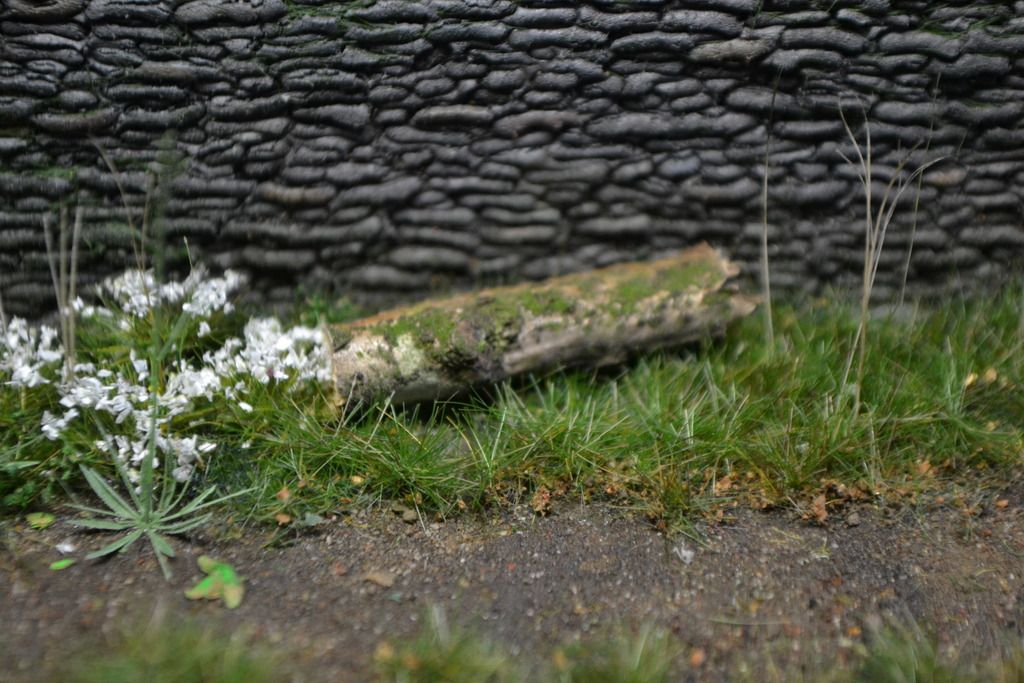
Ivy added around the tree trunk and on the field of the upper level.
Some tall grass was added here too, but again, a few.

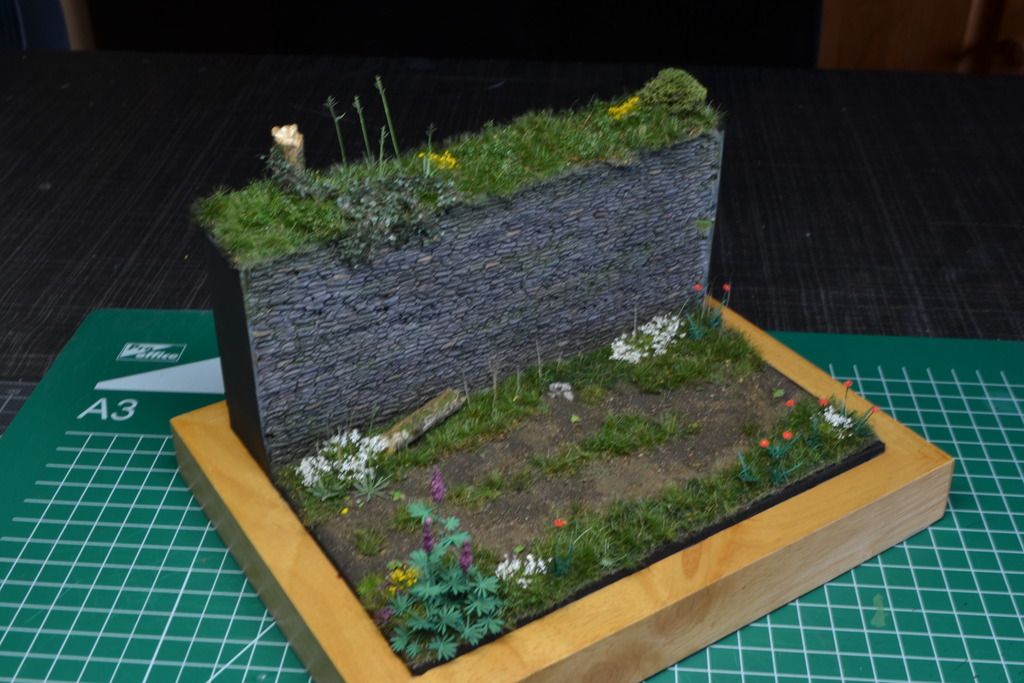
The back of this diorama is painted black.
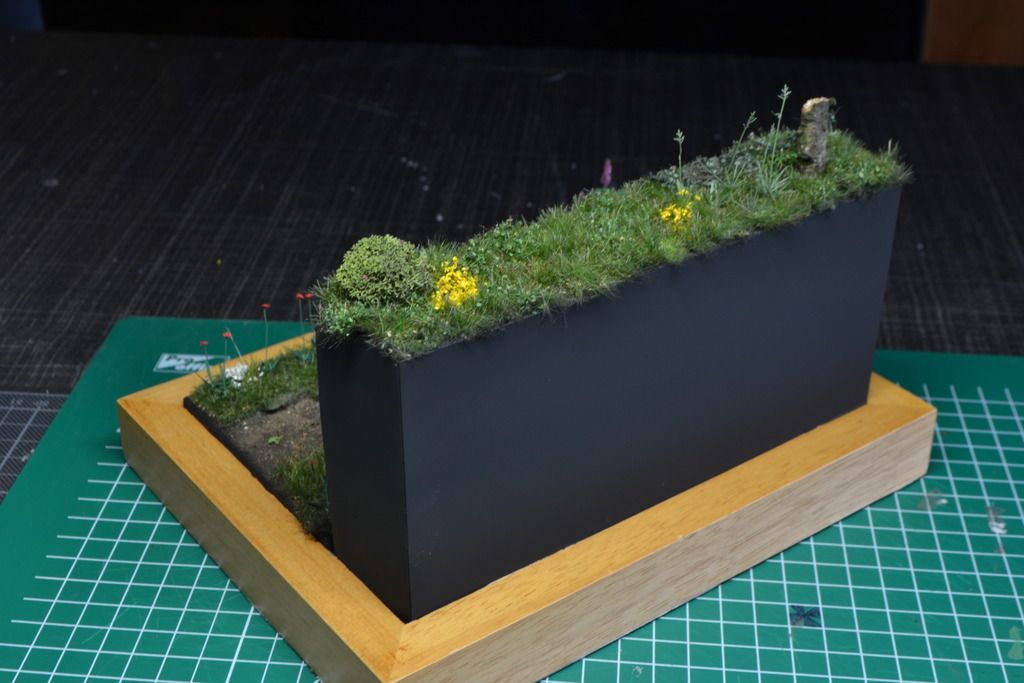
And with the Staghound on it, It would look like this.
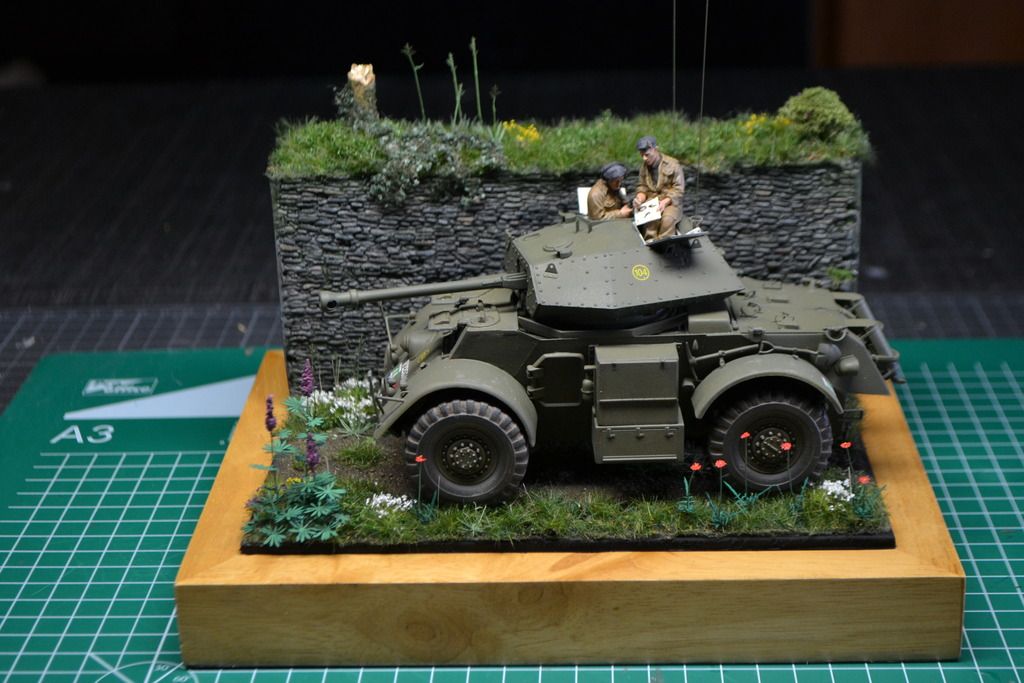
And that is it for now
Now I will need to weather the Stag, and paint the stowage that I have planed for the vehicle.
I hope to see you soon!
Happy modelling to all of ya!
Re: 1:35 Italeri Staghound Mk.III
Posted: Mon Aug 17, 2015 3:58 am
by Danta2er
Holy cow! I love the juxtaposition between the beautiful, natural wall cover and the beauty of the wall construction, with a destructive piece of armor (beautifully done btw)
Re: 1:35 Italeri Staghound Mk.III
Posted: Mon Aug 17, 2015 9:16 am
by MarkVerploeg
The flowers and plants look very nice Frans
I like the ivy the most and that is something i want to get into a build but i never found a good set or tutorial on how to make them
Where did you find these as i don't even know the brand you used
Re: 1:35 Italeri Staghound Mk.III
Posted: Mon Aug 17, 2015 10:45 am
by fly1ngdutchm4n
MarkVerploeg wrote:The flowers and plants look very nice Frans
I like the ivy the most and that is something i want to get into a build but i never found a good set or tutorial on how to make them
Where did you find these as i don't even know the brand you used
Thank you Mark.
That ivy is from Mininature
I will send you a pm with a link to the Dutch shop where I get them. Great stuff, you can tare it apart to make long pieces.
Re: 1:35 Italeri Staghound Mk.III
Posted: Tue Aug 25, 2015 9:59 pm
by fly1ngdutchm4n
Hi guys!
A quick update this time.
I'm very busy with packing my stuff for moving in our new bought house, so I barley have time to maintain my build page and follow all others... I apologize.
This build is going so well, that I keep forgetting to take pictures...

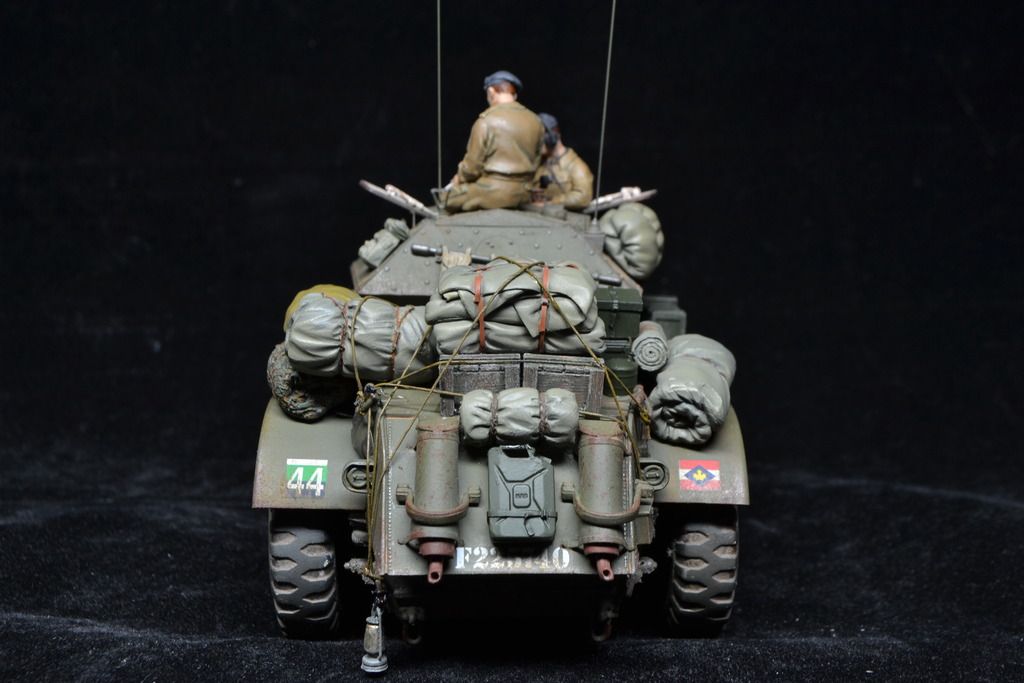
I wanted to add a lot of stowage, so here it is.
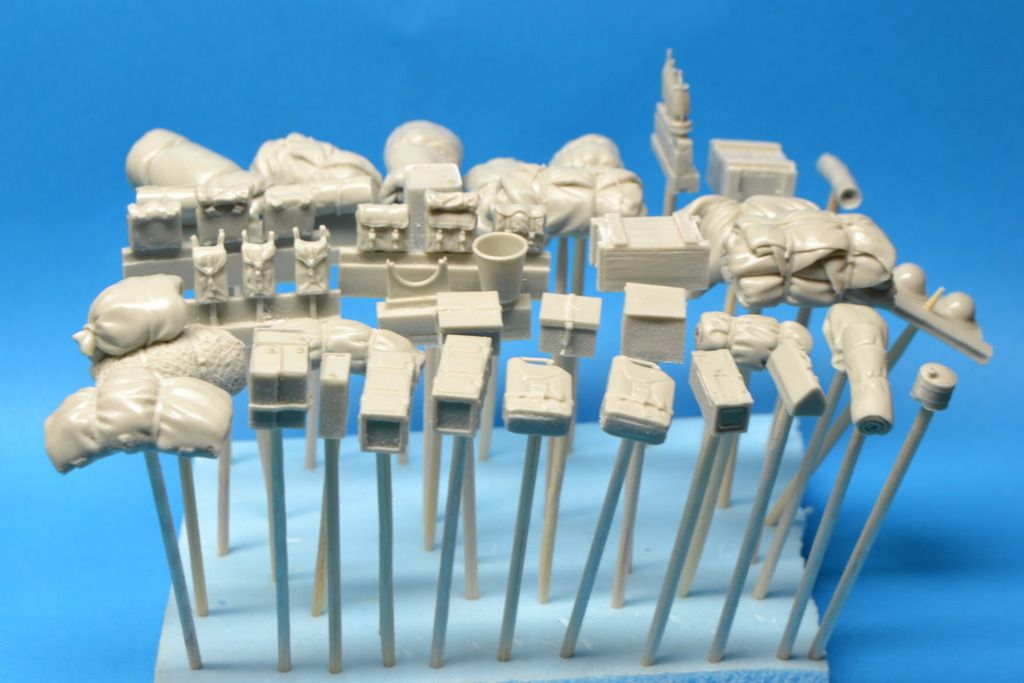
Primed
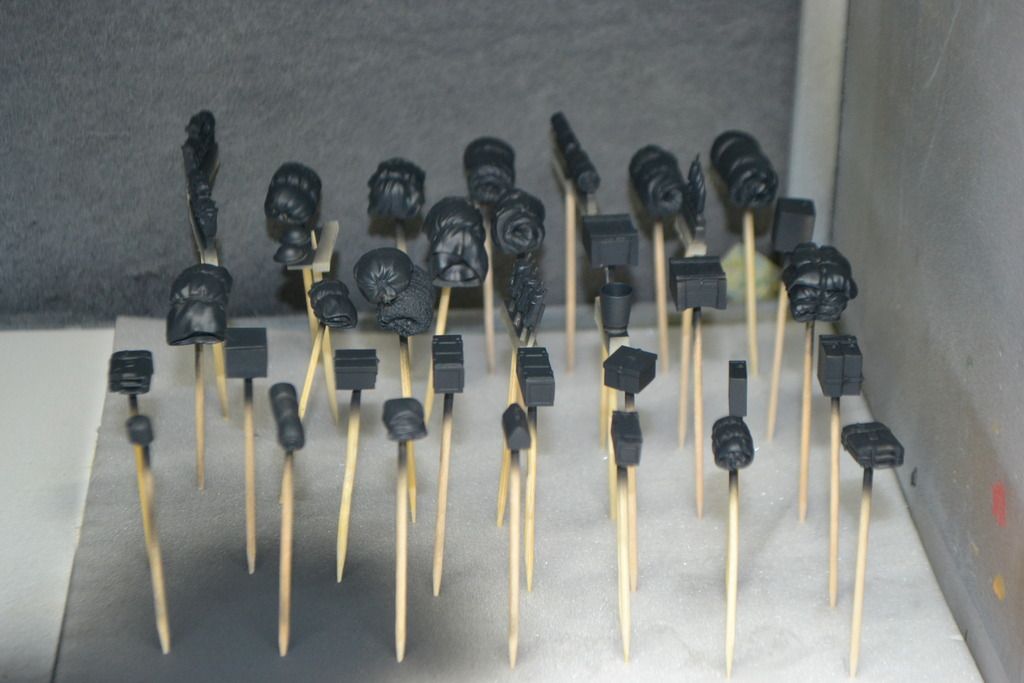
Base colors in Vallejo
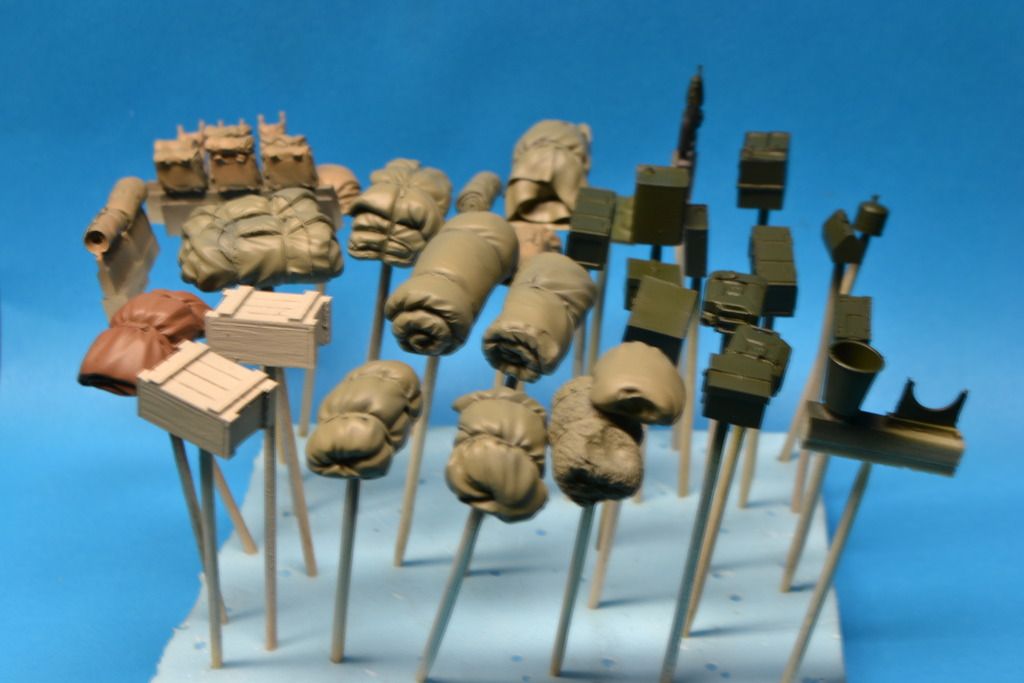
And added to the stag.
The oil lamp was keep breaking of, so I placed it on top of the vehicle later...
I also weathered the stag by chipping paint and adding mud.
I hate over weathering my models, so I kept it subtle as usual.
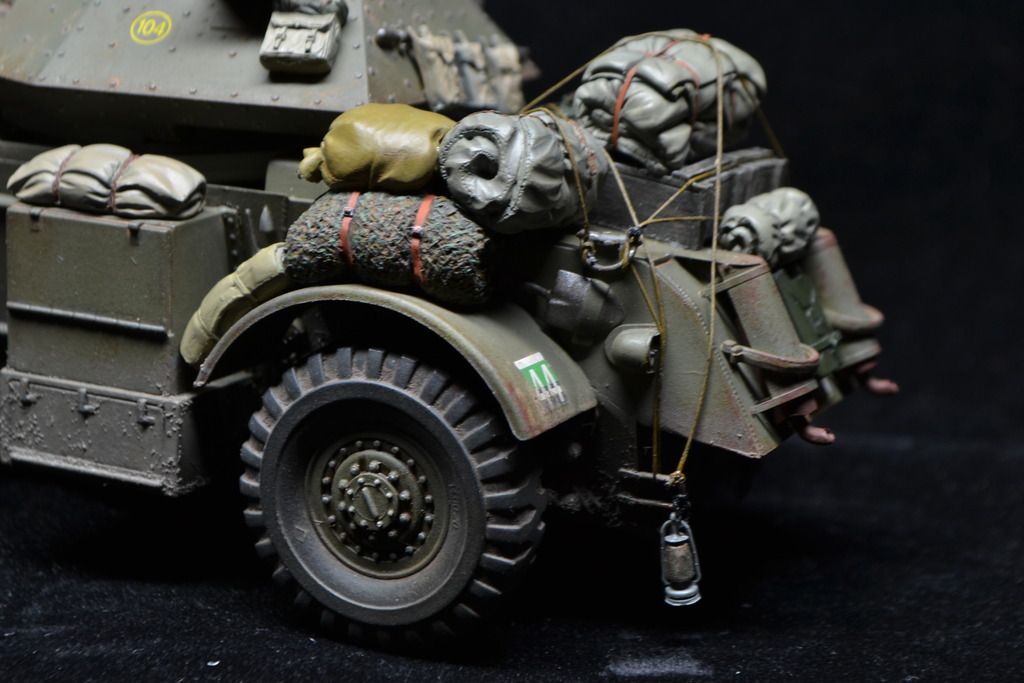

Not all of the stowage is to be seen one the pics, that will be shown in the final update and reveal.
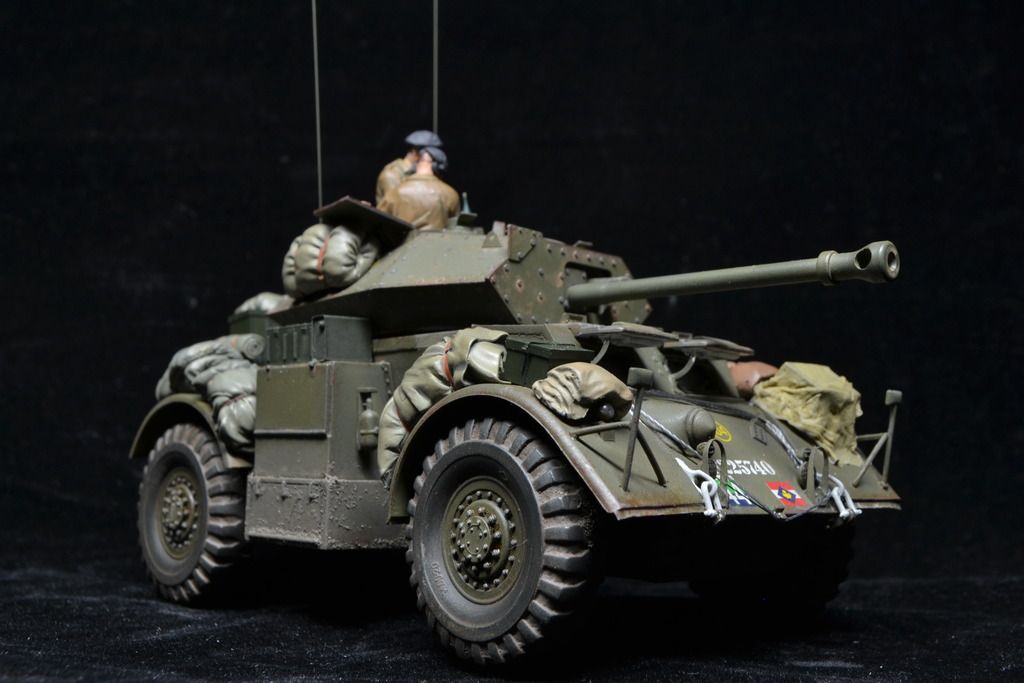
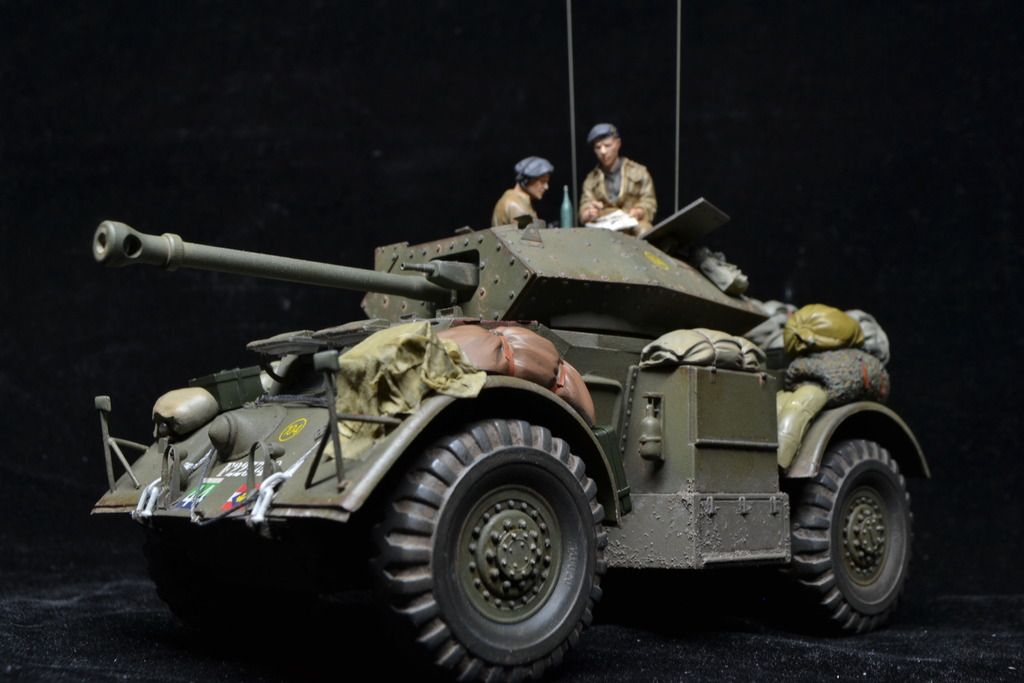
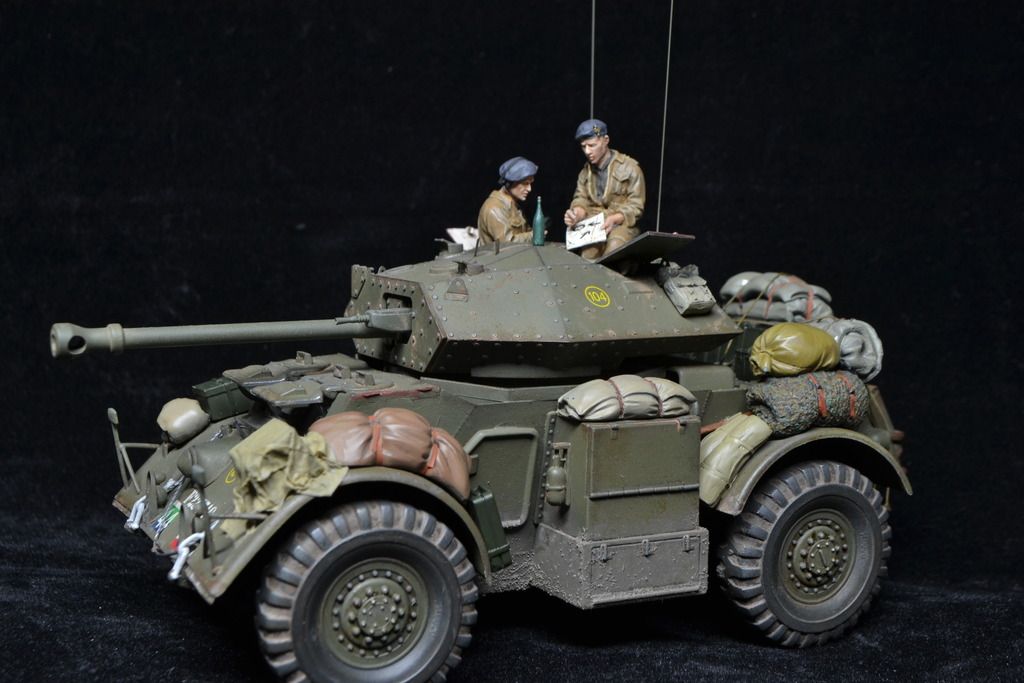
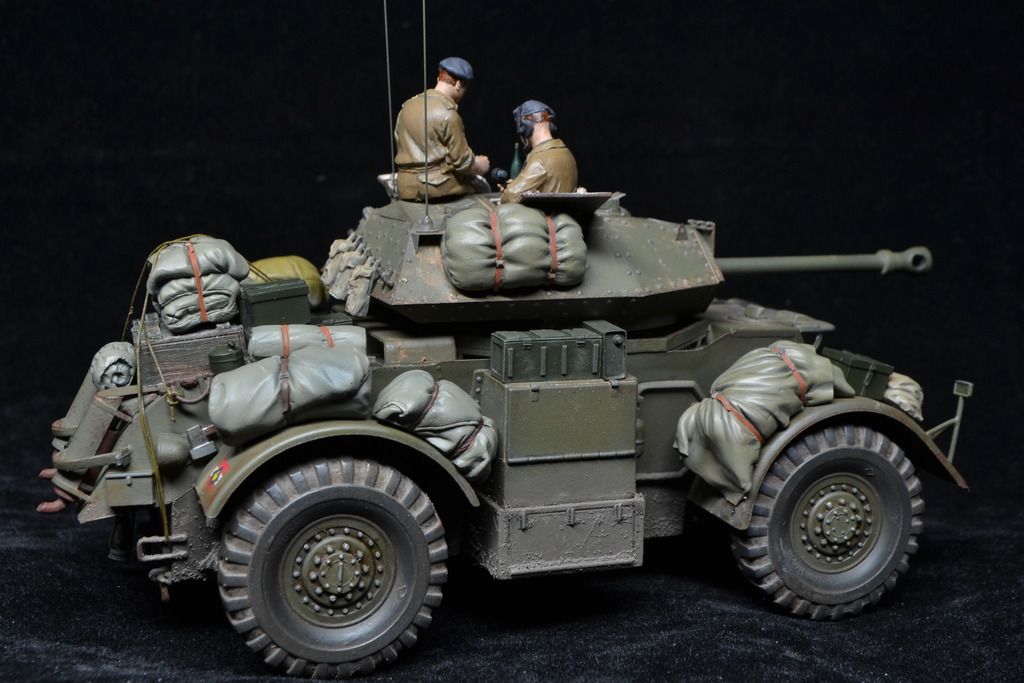
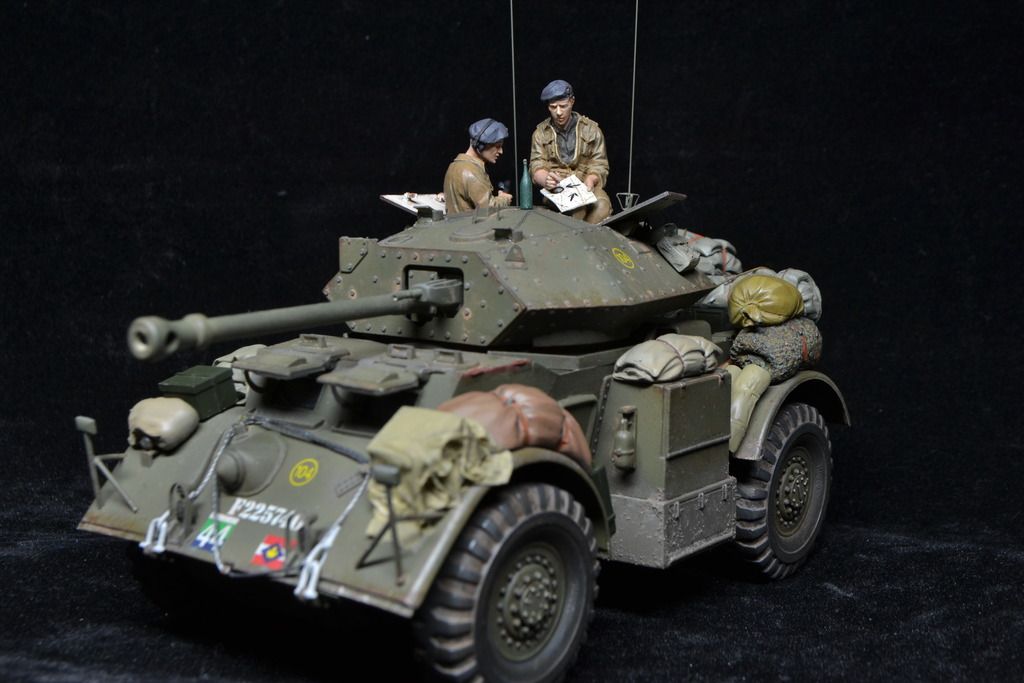
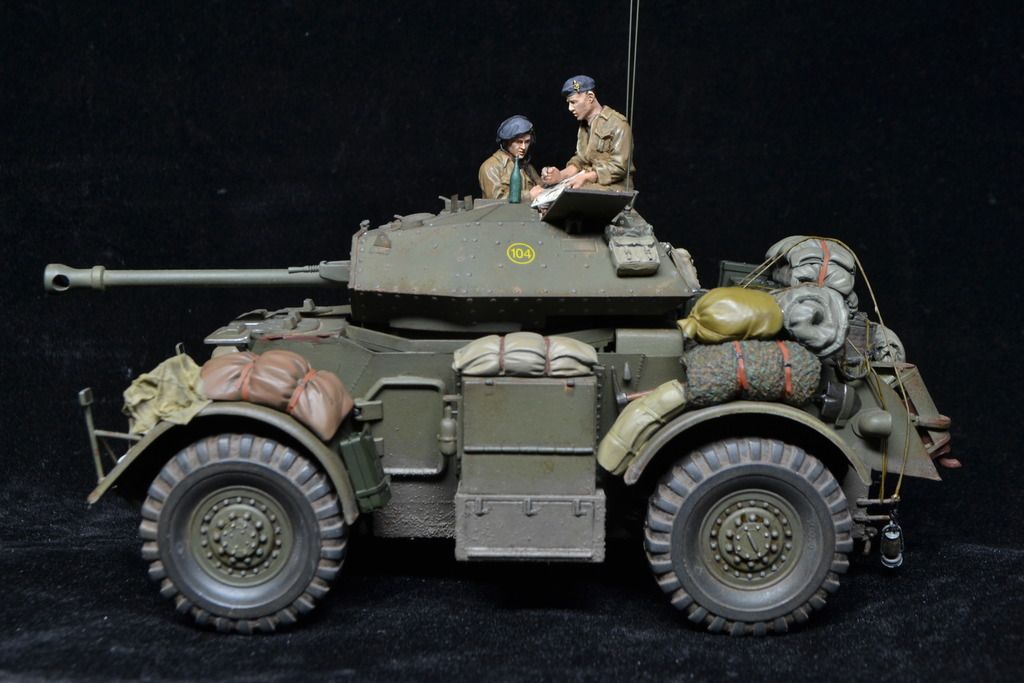
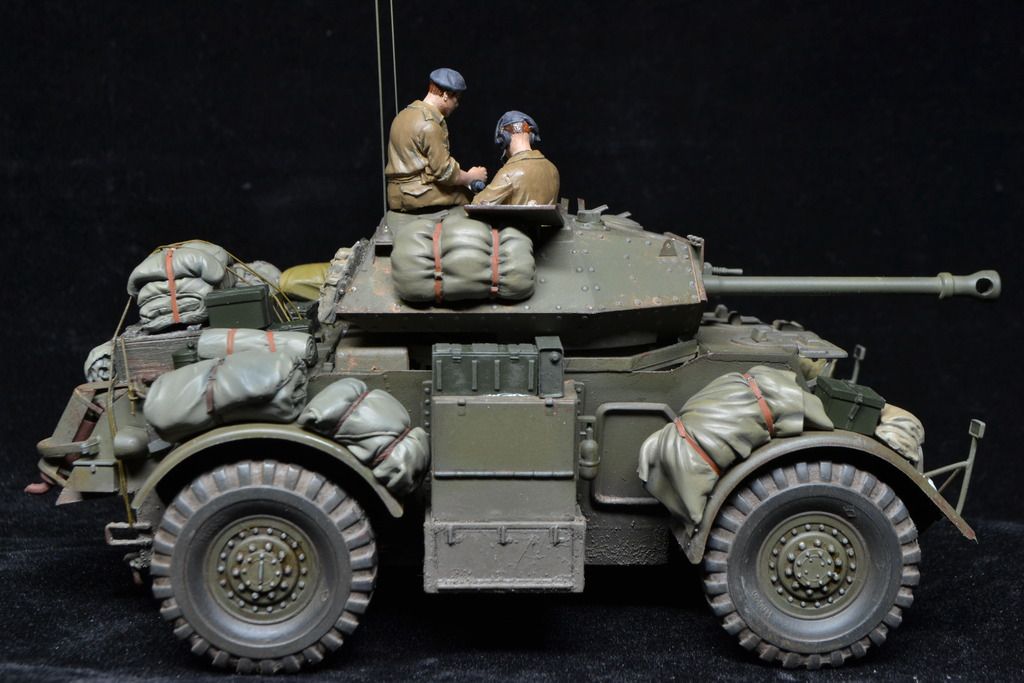
And I had some fun in making a stop motion movie / time laps from the whole build!
Enjoy!
[youtube]c3pUZwiuQbg[/youtube]
Re: 1:35 Italeri Staghound Mk.III
Posted: Tue Aug 25, 2015 10:24 pm
by Liamcraven666
Great looking model, how much did it cost you?
Re: 1:35 Italeri Staghound Mk.III
Posted: Wed Aug 26, 2015 6:02 am
by fly1ngdutchm4n
Liamcraven666 wrote:Great looking model, how much did it cost you?
Thank you.
This model is build out of the box, and cost approximately 28 euro
Re: 1:35 Italeri Staghound Mk.III
Posted: Wed Aug 26, 2015 9:55 am
by Liamcraven666
Only just seen the base!
great job!
Re: 1:35 Italeri Staghound Mk.III
Posted: Sun Aug 30, 2015 12:12 pm
by fly1ngdutchm4n
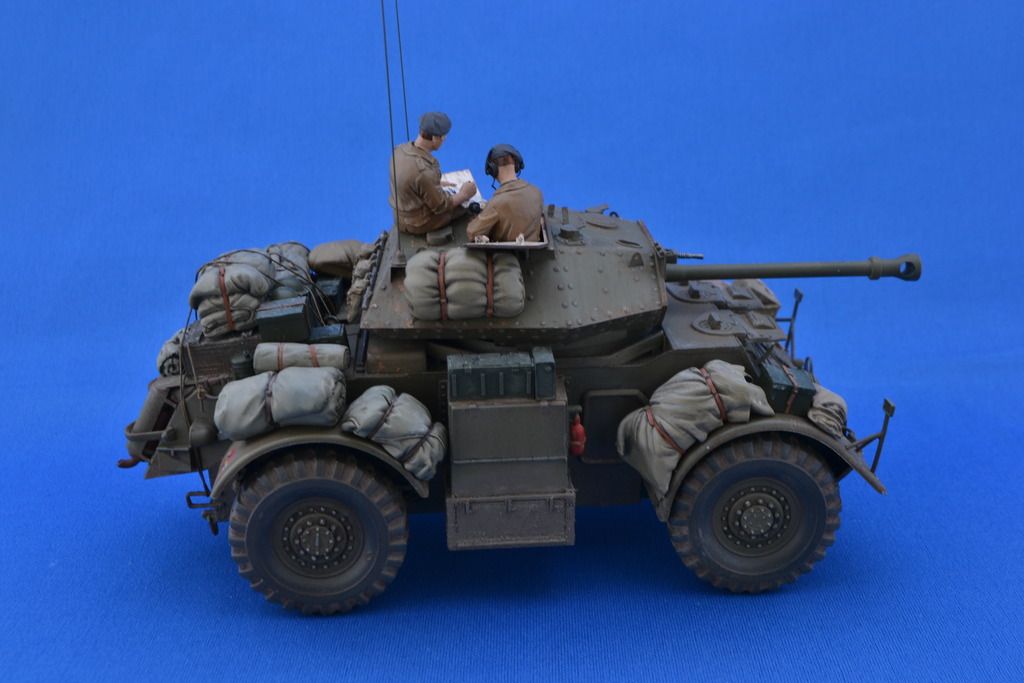
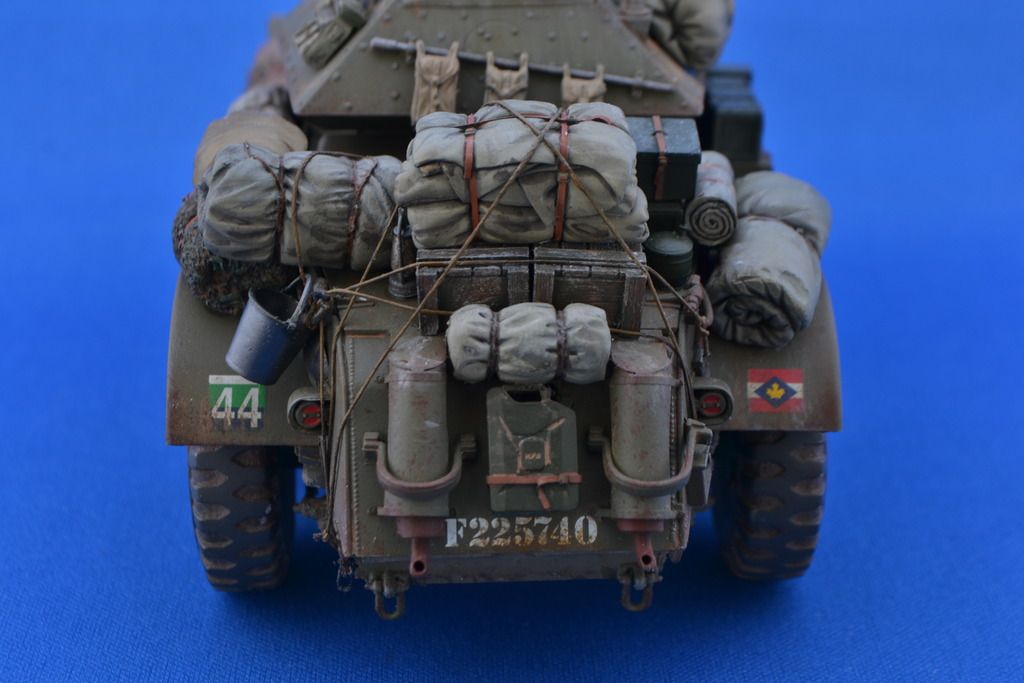
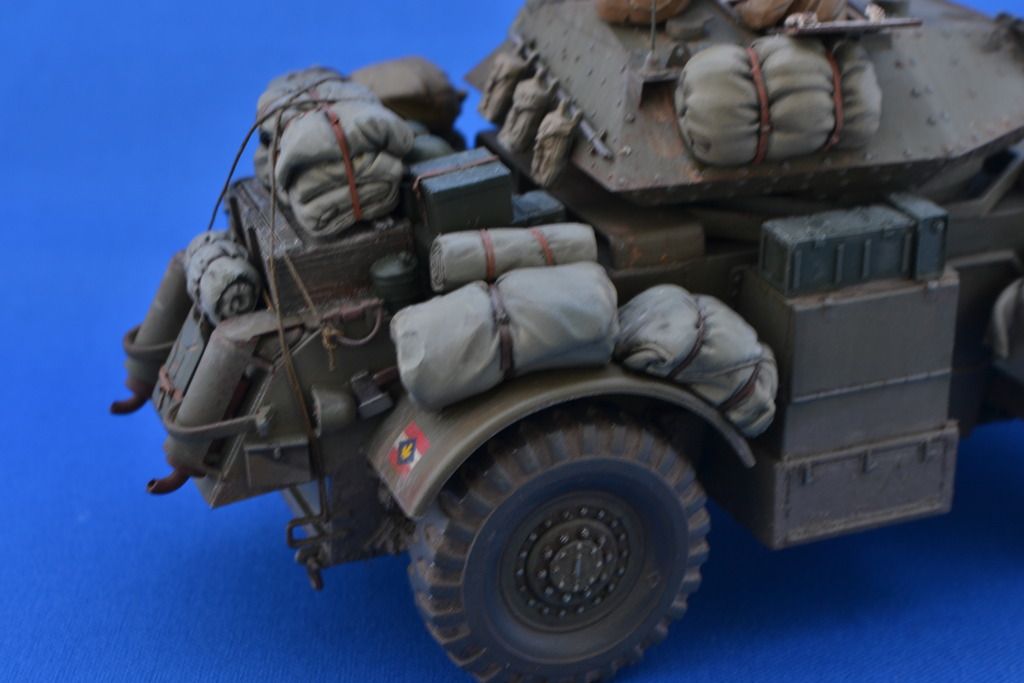
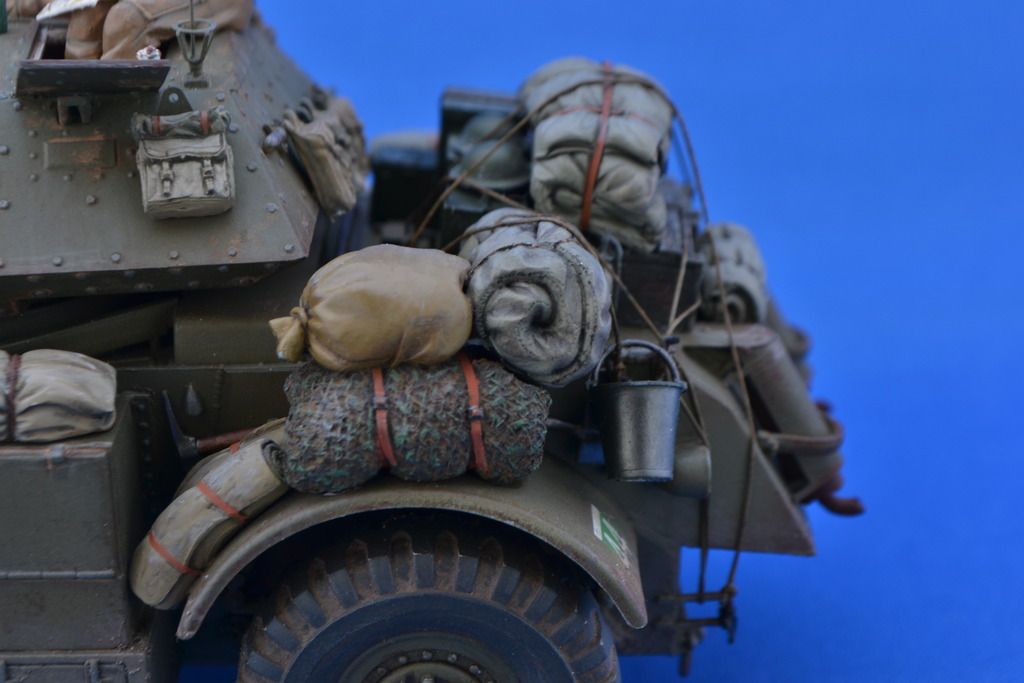
FINAL UPDATE!
Jup.... Finished this lovely kit
So time to squeeze out this final update and a reveal after this update, just in time before moving out of my apartment into our own bought house.
Just some last weathering and detail painting was needed, so lets start with weathering the underside of the vehicle.
I like to keep my weathering subtle, So just a few coats of damp earth was applied.
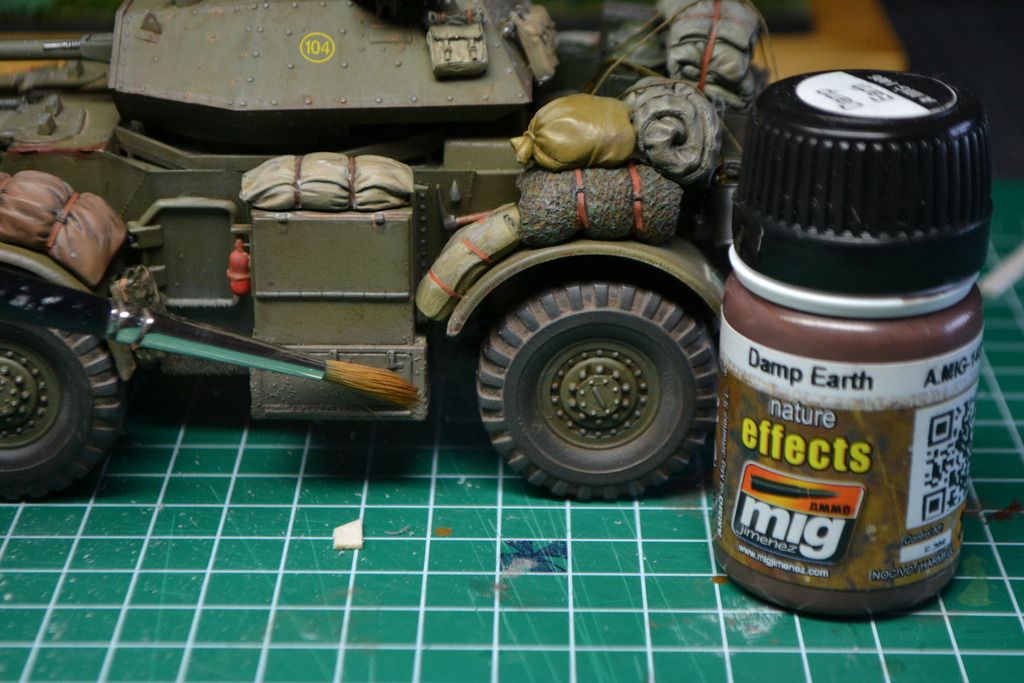
The entire vehicle received 3 coats of brown filter. In corners I applied a bit more, for it leaves a very nice dirt effect.

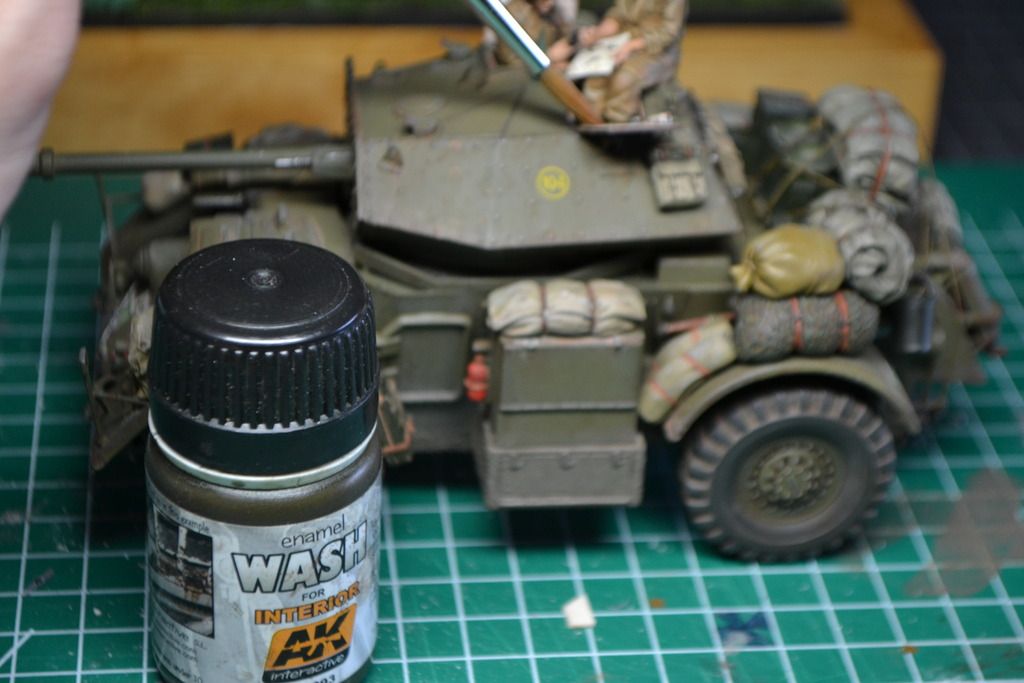
The inside of the hatches were done with interior wash.
Rust streaks added.
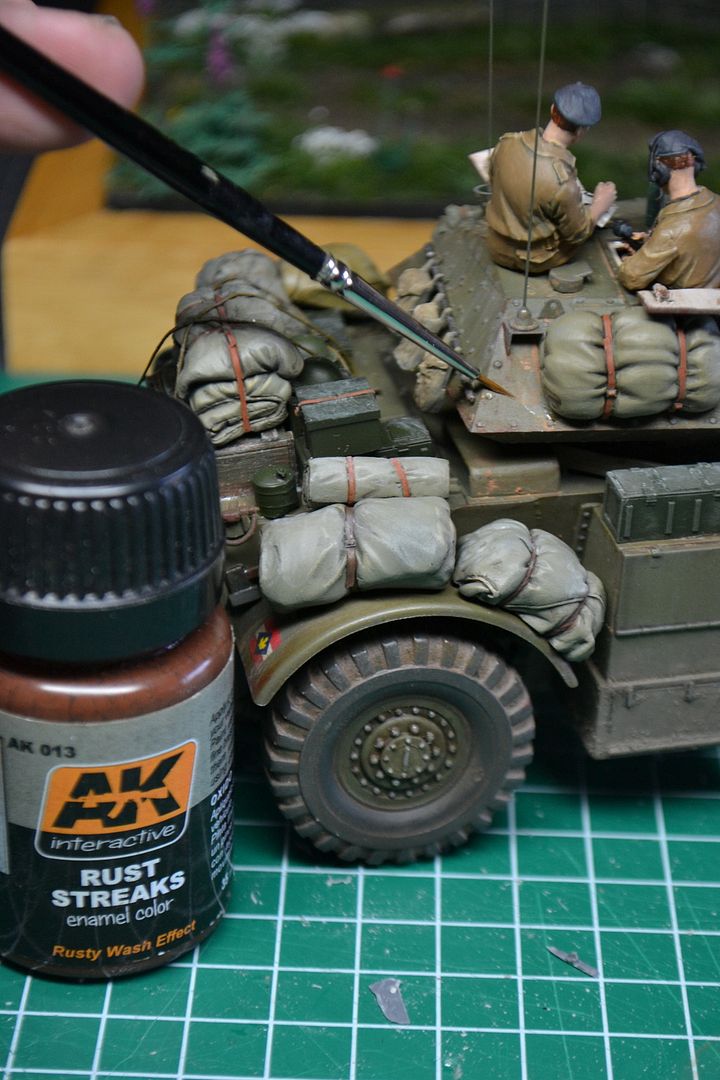
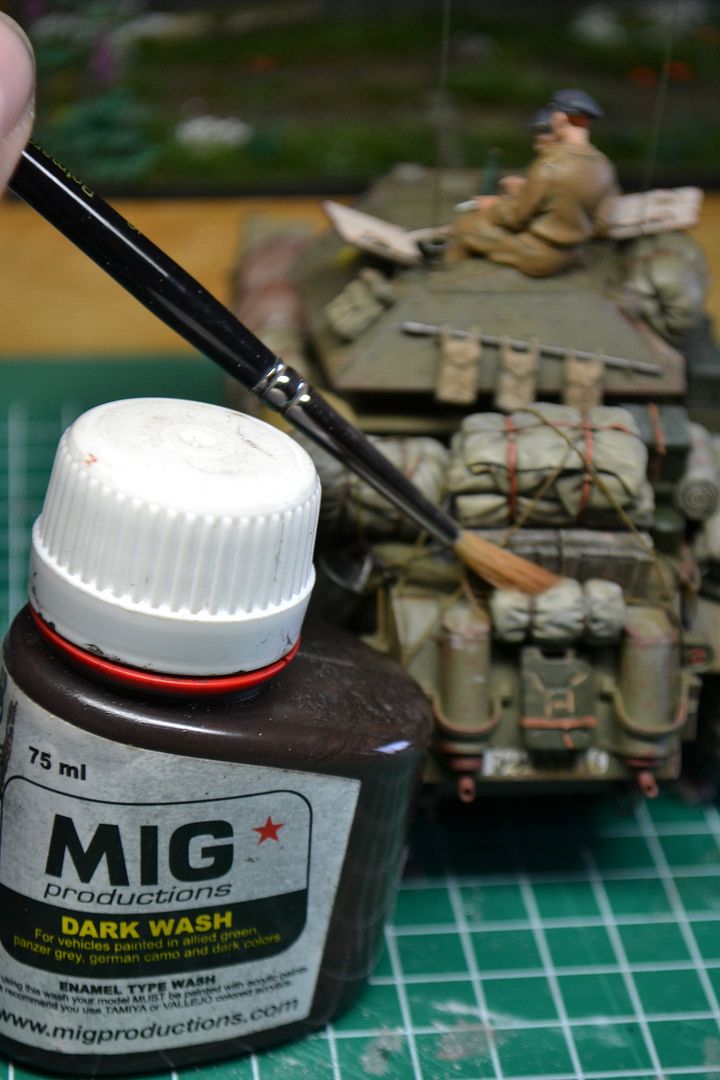
A dark wash onto the stowage to pop out the details.
And when that dried up I added a dust wash.
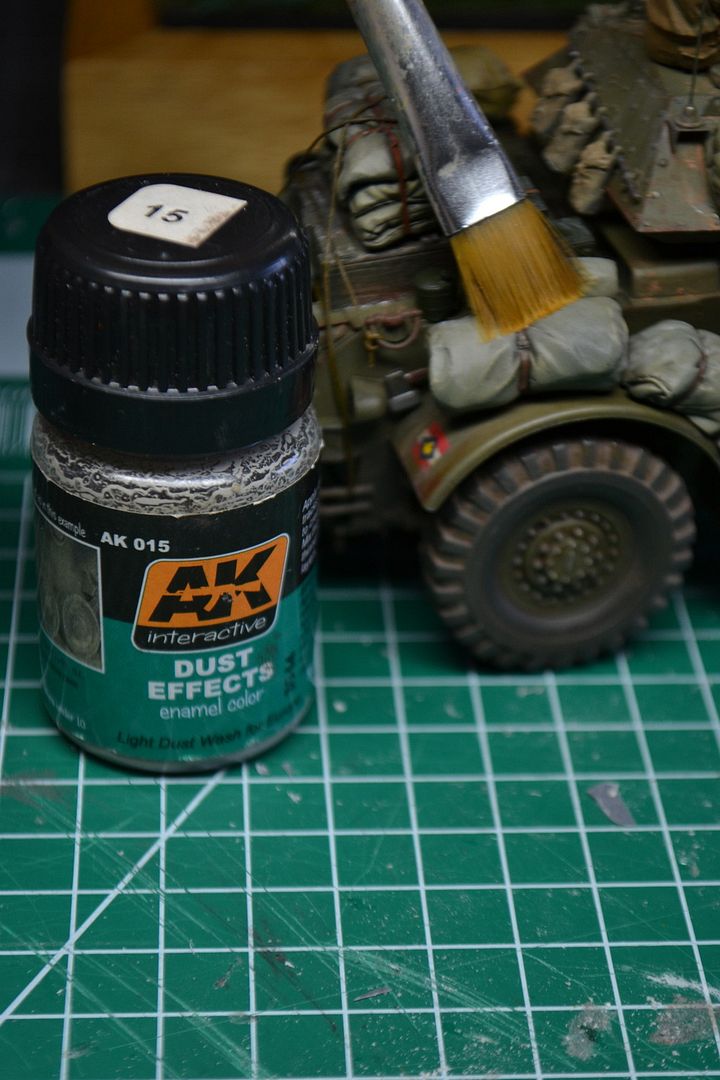
And with that last wash, this build is completed now.
So here are some final pics of the vehicle before going to the reveal section to se the Stag on the base.
I hope you enjoyed this build as I did, and hope to see you all in the reveal section.
Thanks for dropping by, and happy modelling to all of you.
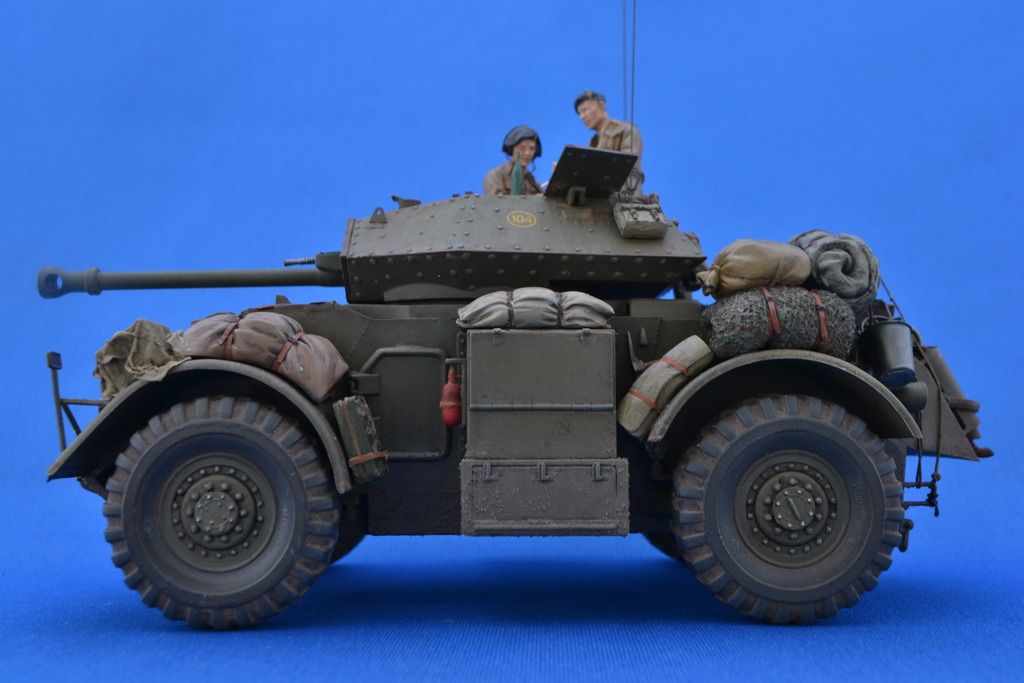
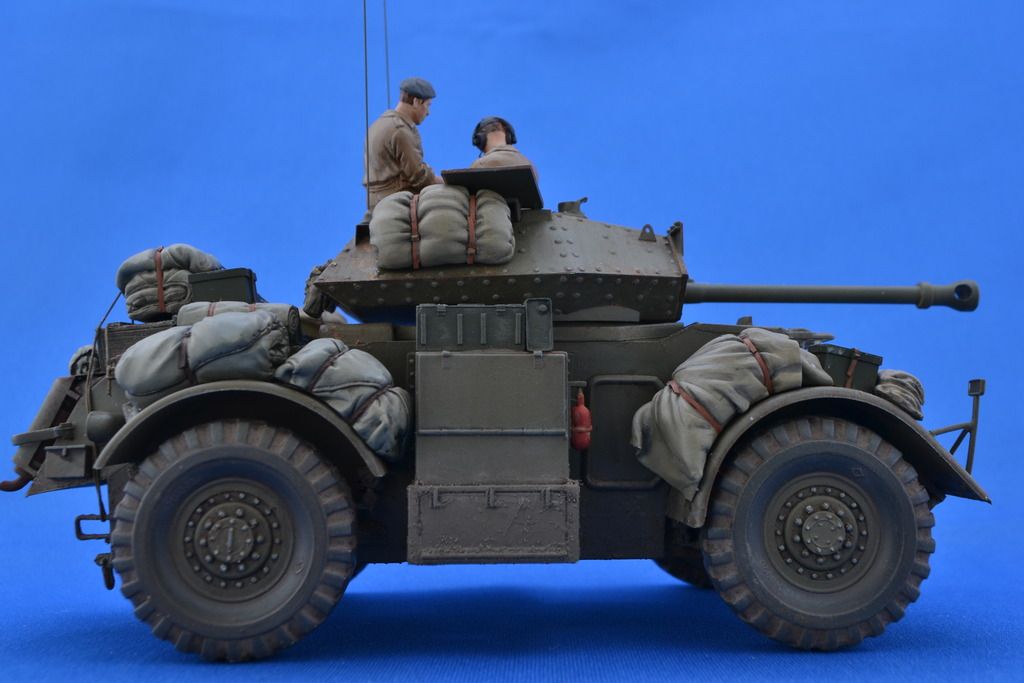
Re: 1:35 Italeri Staghound Mk.III
Posted: Wed Aug 02, 2017 3:50 pm
by Topcat
Nice build, looking at one these in local model shop, hmmmm?


