Page 1 of 1
Re: Coen's Beobs
Posted: Thu Aug 06, 2015 8:59 pm
by ForbesHutton
HeHe!
You were warned.

Terrible kit but it makes such an interesting model. So many strange angles on it, photos don't do it justice. The overall shape reminds me of the Porsche 928 (a favorite):
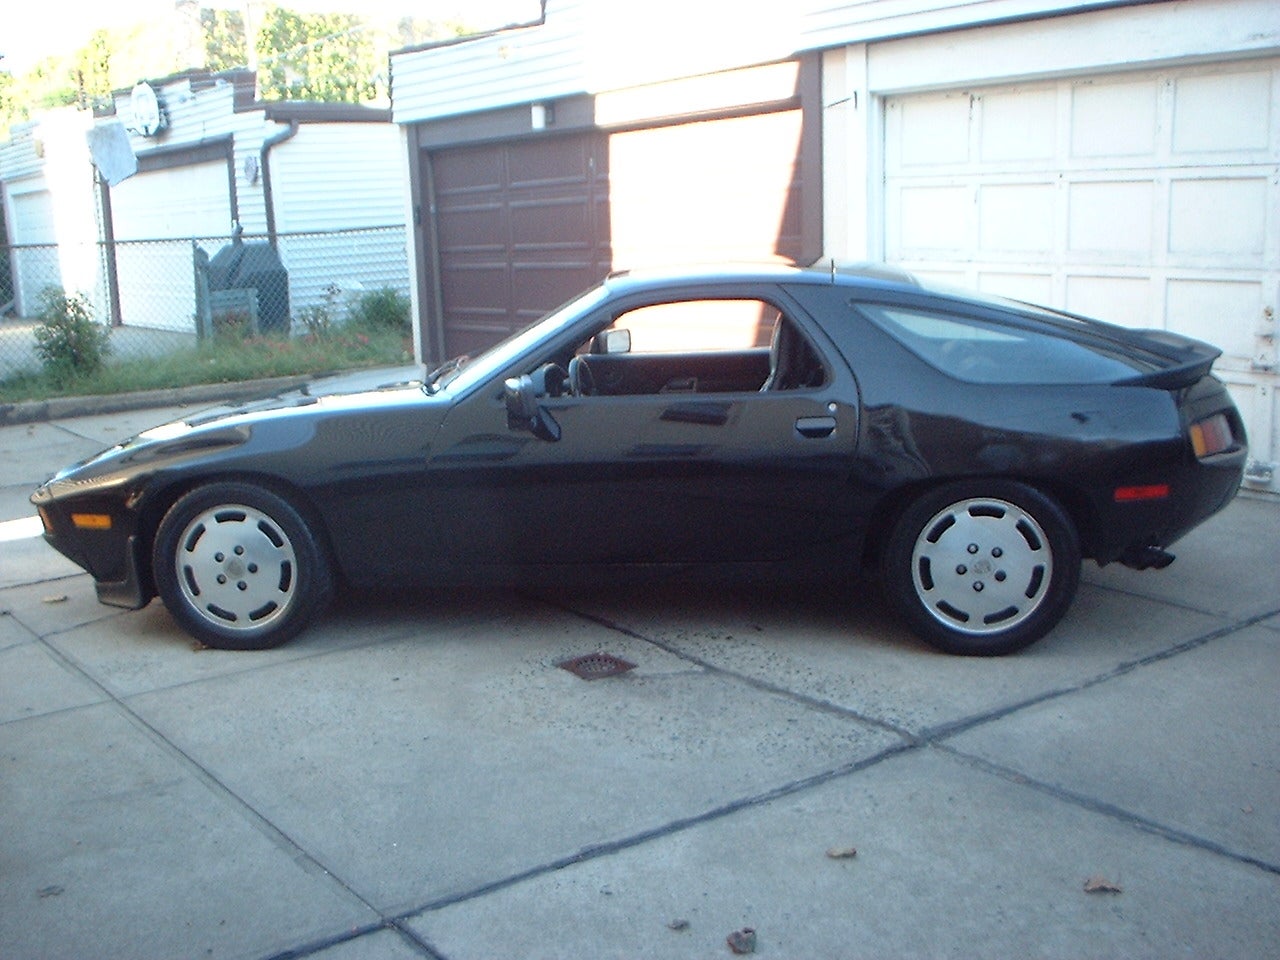
I really like the extra stowage and gas cans.
Didn't I send indy links? Or did you reach your masochist limits with the kit already?
I can't wait to see what you do with paint on it.
Re: Coen's Beobs
Posted: Thu Aug 06, 2015 9:52 pm
by Coen
I haven't seen any indie links bud.
Not like I'm looking to lose any more of my fragile mind haha. I think indie links at that size would do my head in nicely.
Re: Coen's Beobs
Posted: Thu Aug 06, 2015 9:58 pm
by ForbesHutton
Coen wrote:I haven't seen any indie links bud.
Not like I'm looking to lose any more of my fragile mind haha. I think indie links at that size would do my head in nicely.
I was sure I sent a box of indy links with it, looked like:

Tiny things, smallest I've seen, would drive a watchmaker round the bend.
Re: Coen's Beobs
Posted: Thu Aug 06, 2015 10:08 pm
by chief5437
Cool looking vehicle Mike, I like it. Not sure I'd want to build it though, lol! You're doing a great job so far, good luck with the rest of it

Re: Coen's Beobs
Posted: Thu Aug 06, 2015 10:25 pm
by Coen
Thanks Chief... I'll take that luck

ForbesHutton wrote:Coen wrote:I haven't seen any indie links bud.
Not like I'm looking to lose any more of my fragile mind haha. I think indie links at that size would do my head in nicely.
I was sure I sent a box of indy links with it, looked like:
Tiny things, smallest I've seen, would drive a watchmaker round the bend.
Ah yes... I do have those. I know just where they are too.
Of course now I'll have to try to build them thanks to you

Haha.
Re: Coen's Beobs
Posted: Fri Aug 07, 2015 7:01 am
by lucasner
As always, beautiful what you have done!
I actually kinda dig these problem kits...
Dave
Re: Coen's Beobs
Posted: Fri Aug 07, 2015 8:12 am
by Nev
Great start dude! I feel your pain the kit I am building is much the same. Flash city and lots of fit issues. You will still make it look cooler though dude
Re: Coen's Beobs
Posted: Fri Aug 07, 2015 12:20 pm
by wappynutter
Re: Coen's Beobs
Posted: Sun Aug 09, 2015 10:36 pm
by hansolo
Hi Coen,
Interesting model.
Talk about fitting issues! That's awful.
This looks more like a restoration and scratch building exercise than a new build.

You did a great job on it though! You revived it!
Looking forward to more.
cheers
Re: Coen's Beobs
Posted: Sun Aug 09, 2015 11:15 pm
by Coen
Thanks Han!

Coming from you that's a hell of a compliment

Re: Coen's Beobs
Posted: Mon Aug 10, 2015 8:26 pm
by Nige99
That's one ugly vehicle Mike. But what you've done to it to fit right is AWESOME mate

Love the figures and composition your doing.
Re: Coen's Beobs
Posted: Wed Aug 12, 2015 1:49 am
by Coen
I've changed it up quite a bit now Nige, I'll make a post about it later on.
Re: Coen's Beobs
Posted: Wed Aug 12, 2015 4:39 am
by panzerman
Good job on a tough kit Michael. I'm doing the Marder I based on the same Lorraine chassis.
Love the additions you've made.....cool figures too. Happy Modeling.
Bill.
Re: Coen's Beobs
Posted: Wed Aug 12, 2015 10:29 pm
by ForbesHutton
I liked the paint and chipping.
You probably feel less like punching the RPM now that it has paint on it.
Not going to try the indy links?
<runs away>

Re: Coen's Beobs
Posted: Wed Aug 12, 2015 10:46 pm
by hansolo
Awesome work Mike!
I love that chipping and those camo's!
What do you use to give it that silky shine?
Is that a matt varnish? And do you give it that coat
just for protection or also for the shine?
Thanks!
Cheers
Re: Coen's Beobs
Posted: Wed Aug 12, 2015 11:26 pm
by Coen
ForbesHutton wrote:I liked the paint and chipping.
You probably feel less like punching the RPM now that it has paint on it.
Not going to try the indy links?
<runs away>
It's wasn't that bad, there's still some wonkyness to the side plates that I don't like much, but it will do. I have a plan.
As for the tracks... I tried a few.
Not a chance!!


Wow those were awesome haha.
hansolo wrote:Awesome work Mike!
I love that chipping and those camo's!
What do you use to give it that silky shine?
Is that a matt varnish? And do you give it that coat
just for protection or also for the shine?
Thanks!
Cheers
The glossiness is a bit of a byproduct of the AMMO paint, (is a semigloss paint) and the Aqua gloss that I put in the areas where the decals were to go. I'll aquagloss the whole thing tonight and it will be really shiny, then it will fade under the washes,
The final coat of Testors Dullcote will kill any shine in the end.
Re: Coen's Beobs
Posted: Wed Aug 12, 2015 11:35 pm
by hansolo
Aha. I see.
Sometimes I think my models are to matt because I don't use any coating.
Maybe I'll have to look into that.
Thanks!
cheers
Re: Coen's Beobs
Posted: Wed Aug 12, 2015 11:56 pm
by MarkVerploeg
Very nice builds so far
I have seen the small vehicle as a kit but never seen one pop up in a war time photo so it is a bit of a unknown vehicle for me
The Panther looks very nice and huge comparred to the other vehicle
I do need to warn you though
Kevin is walking around on your bench or do you have your own minions
In that case you must be evil , it says so in the movie trailer
They follow the biggest villain they can find

Keep up the good work
Re: Coen's Beobs
Posted: Thu Aug 13, 2015 12:51 am
by ForbesHutton
MarkVerploeg wrote:Very nice builds so far
I have seen the small vehicle as a kit but never seen one pop up in a war time photo so it is a bit of a unknown vehicle for me
The Panther looks very nice and huge comparred to the other vehicle
I do need to warn you though
Kevin is walking around on your bench or do you have your own minions
In that case you must be evil , it says so in the movie trailer
They follow the biggest villain they can find
Keep up the good work


They must have been shy, they didn't pose for photos much.
Re: Coen's Beobs
Posted: Thu Aug 13, 2015 1:28 am
by MarkVerploeg
ForbesHutton wrote:MarkVerploeg wrote:Very nice builds so far
I have seen the small vehicle as a kit but never seen one pop up in a war time photo so it is a bit of a unknown vehicle for me
The Panther looks very nice and huge comparred to the other vehicle
I do need to warn you though
Kevin is walking around on your bench or do you have your own minions
In that case you must be evil , it says so in the movie trailer
They follow the biggest villain they can find
Keep up the good work
They must have been shy, they didn't pose for photos much.
Lol
I should have mentionned my average research time is about 5 minutes though
And my main intrest is aimed at late war vehicles
But they did excist i see
I have a few books on German vehicles but these are not mentionned in them
Re: Coen's Beobs
Posted: Thu Aug 13, 2015 1:38 am
by Coen
You wouldn't need more than 5 minutes Mark... there isn't much to go on for these things.
I've hunted high and low for a few shots of the fighting compartment and haven't found diddly.

It's a really weird and cool looking thing though.
Kevin is very helpful.
Re: Coen's Beobs
Posted: Fri Aug 14, 2015 2:13 pm
by hansolo
I see K2 stands for Kevin 2.

cheers
Re: Coen's Beobs
Posted: Fri Aug 14, 2015 4:09 pm
by Coen
Ahahahaha!
I hadn't actually made that connection hahaha!
Re: Coen's Beobs
Posted: Fri Aug 14, 2015 8:21 pm
by TheTroyster
I really appreciated the time you just spent on posting the weathering of the lower hull, I've turned my attention to that area of my own works, as I have neglected this area in the past, so it helps.
Re: Coen's Beobs
Posted: Sat Aug 15, 2015 2:58 am
by Coen
There's still more layers yet to go yet. Stay tuned then.
Re: Coen's Beobs
Posted: Mon Aug 17, 2015 5:47 am
by kiwigav
Nice Mud Mike
very useful photos for future reference cheers
Re: Coen's Beobs
Posted: Mon Aug 17, 2015 7:19 am
by felisbarcinonensis
Re: Coen's Beobs
Posted: Mon Aug 17, 2015 8:34 pm
by rodrant
Hi Mike !
Really like to watch the thread , some time that I did not visit the forum (I'm ashamed , yes
) , follow some pictures in FB only ...
The beobwagen is great , didn't know this vehicle ...and also the Panther is very nice ! Great Photos and incredible work mate !
oh like the minion also

Re: Coen's Beobs
Posted: Mon Aug 17, 2015 9:36 pm
by Coen
Thanks António!
I'm glad that you liked them.
Re: Coen's Beobs
Posted: Mon Aug 17, 2015 10:29 pm
by hansolo
That's some dirty vehics there Mike!
Just the way I like 'm!

cheers
Re: Coen's Beobs
Posted: Tue Aug 18, 2015 12:28 am
by Coen
Is there any other way?
Haha
Re: Coen's Beobs
Posted: Tue Aug 18, 2015 12:35 am
by hansolo
Coen wrote:Is there any other way?
Haha
How wisely spoken.

B.t.w. Did you check out my Scout Car yet?
http://intscalemodeller.com/viewtopic.php?f=404&t=13923
cheers
Re: Coen's Beobs
Posted: Tue Aug 18, 2015 5:04 am
by Coen
I'm reading it now...
All that I can say is...

Re: Coen's Beobs
Posted: Tue Aug 18, 2015 10:29 am
by hansolo
Coen wrote:I'm reading it now...
All that I can say is...
Looking forward to your dio!
Finished mine yesterday.
Final reveals comming today.
Cheers
Re: Coen's Beobs
Posted: Tue Aug 18, 2015 1:18 pm
by waynos
Absolutely stunning Work! I have learned so much reading your build threads!
Re: Coen's Beobs
Posted: Tue Aug 18, 2015 4:05 pm
by OliveDrab
Re: Coen's Beobs
Posted: Wed Aug 19, 2015 2:17 am
by Coen
Re: Coen's Beobs
Posted: Wed Aug 19, 2015 2:48 am
by Coen
Now that the vehicles are pretty much finished I moved on to finishing the figures and starting the work on the diorama. I'm off camping in a couple of days so I'm hoping to get a lot done before I go, otherwise I'll be planning crap for it while I'm gone.
It sucks sometimes to have an obsessive nature.
The figures were pretty much just in primer the last while. I hadn't touched them in ages now.

My figures are just quicky jobs. I'm not much of a figure painter and I hate them to be honest. So... I cheat when I paint them.
I start with the skin.
Vallejo model colour Flat skin tone with a drop of red cadmium for the base colour.

Then I start with the base colours for the uniforms. I know figure painters do things in dozens of thin layers of paint, slowly building up the colours etc.
But I have the patience of a three year old at christmas for that sort of thing. I just want them done. So One or two coats of paint and done.
I know... sacrilege.
Again... I'm not a figure painter.


Once the large uniform parts are painted I tighten up the details with camo on the uniforms, eyes, hair, and eye brows, details of the equipment, any medals or badges, and clean up of any over painting.


Then I gloss coat them.

Then I wash them.
Normally I'll do an oil wash at this point... burnt umber for the skin and lamp black for the uniforms and equipment, but I wanted to do an experiment this time.
I wanted to see if I could use the new formula of Ultimate Dark Dirt as a replacement for the black oils.
Normally it would take a day for that oil wash to dry before I could do anymore work, but if the Dark Dirt worked I could move on in less than an hour.
I also used a vallejo acrylic wash on the faces to see how well that worked.

It seems to have worked out perfectly to my liking. Here they are with the dark dirt cleaned up.


Then they were drybrushed with some AMMO old wood for a dusty worn look.


Next I flat coated them all and started mocking up the diorama. I ended up choosing to keep the original base. After a lot of messing about I got a layout that I'm happy with.


I started work on the diorama this morning and I'm hoping to get most of the major work done before I go away.
More on that later though.
Re: Coen's Beobs
Posted: Mon Aug 24, 2015 7:55 pm
by Nige99
Another amazing piece of work Mike

this is awesome mate. Great paint job on the armour and your figures are superb!!! Loads of detail to look at.
Re: Coen's Beobs
Posted: Mon Aug 24, 2015 9:35 pm
by Coen
Thanks Nige
Re: Coen's Beobs
Posted: Wed Sep 09, 2015 10:32 am
by gaz45
very nice work as always mate


