Tamiya Syrian T-62
Posted: Sun Jan 31, 2016 12:14 am
Hello Gentlemen,
I joined about a month ago and I've been enjoying seeing the process a lot of you have shared and it inspired me to document my T-62 build. I was inspired by the tanks of the on going Syrian civil war; I wasn't attempting to replicate any particular tank and I know this old Tamiya kit is lacking in a few areas. I picked this one up online for $20 U.S. a few months ago with this concept in mind and wanting a kit to practice one before moving on to some finer armor kits.
I'm sure this kit is well known so I won't bore people with details of the construction. I primed it with black badger stynlrez which I picked up online after watching a video on the ISM youtube channel recommending it. It really is fantastic, sprayed perfectly.
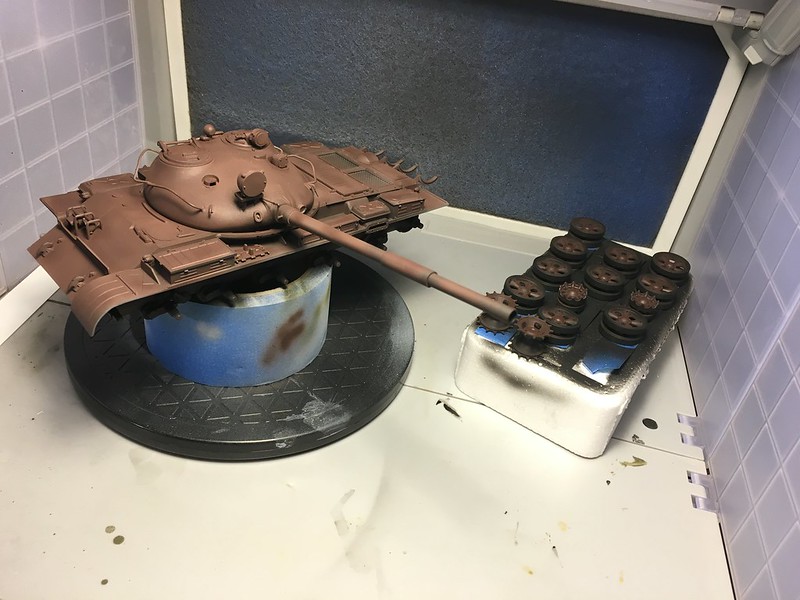
First under coat of paint a was mixture of tamiya dark iron and hull red, I planned to use the hair spray technique so I hit the undercoat with hair spray.
Sprayed tamiya dark green with a hint of buff and went about removing some paint. I actually really liked it at this stage and contemplated keeping it this color.


Moving forward I wanted to replicate some of the green/yellow camo in some of my reference. I protected the green with some future, hit it with the hair spray then I free handed it with my cheapo masters airbrush I got on amazon sometime ago. It works, but this made it apparent to me I need to either perfect my camo masking or invest in a better airbrush as the edge of my pattern was a little too feathered.

Did more chipping on the yellow camo pattern. I still think the yellow pattern was too feathered at this point, but the chipping helped me learn to be ok with it.

I had decided to add some sand bags to the front based on some reference. This was my third attempt to get a result I liked. I made these with super fine miliput.

fairly late in the build I decided I wanted to try individual link tracks (which I have never done) I picked up these trumpeter ones online and got to putting them together, questioning my decision... I should have done this before the hull halves were together. The result was slightly more difficulty in putting them on and getting them to fit convincingly. In all honesty I think I may have used one too many links on both side and as you'll see in my finished pictures I Don't think I nailed the "saggy tracks" I was going for.

Here is my final product; I'm pleased with the result and ready to tackle some more armor projects and apply some more techniques I've read up on here and other places. I used oils, some pastels and tamiya enamel washes to achieve my weathering, as well as lightly spraying some "dust" with tamiya buff. The caked on dirt is acrylic paint baking soda. I think I'm done, but inspiration might strike!


Thanks for looking guys!
I joined about a month ago and I've been enjoying seeing the process a lot of you have shared and it inspired me to document my T-62 build. I was inspired by the tanks of the on going Syrian civil war; I wasn't attempting to replicate any particular tank and I know this old Tamiya kit is lacking in a few areas. I picked this one up online for $20 U.S. a few months ago with this concept in mind and wanting a kit to practice one before moving on to some finer armor kits.
I'm sure this kit is well known so I won't bore people with details of the construction. I primed it with black badger stynlrez which I picked up online after watching a video on the ISM youtube channel recommending it. It really is fantastic, sprayed perfectly.
First under coat of paint a was mixture of tamiya dark iron and hull red, I planned to use the hair spray technique so I hit the undercoat with hair spray.
Sprayed tamiya dark green with a hint of buff and went about removing some paint. I actually really liked it at this stage and contemplated keeping it this color.
Moving forward I wanted to replicate some of the green/yellow camo in some of my reference. I protected the green with some future, hit it with the hair spray then I free handed it with my cheapo masters airbrush I got on amazon sometime ago. It works, but this made it apparent to me I need to either perfect my camo masking or invest in a better airbrush as the edge of my pattern was a little too feathered.
Did more chipping on the yellow camo pattern. I still think the yellow pattern was too feathered at this point, but the chipping helped me learn to be ok with it.
I had decided to add some sand bags to the front based on some reference. This was my third attempt to get a result I liked. I made these with super fine miliput.
fairly late in the build I decided I wanted to try individual link tracks (which I have never done) I picked up these trumpeter ones online and got to putting them together, questioning my decision... I should have done this before the hull halves were together. The result was slightly more difficulty in putting them on and getting them to fit convincingly. In all honesty I think I may have used one too many links on both side and as you'll see in my finished pictures I Don't think I nailed the "saggy tracks" I was going for.
Here is my final product; I'm pleased with the result and ready to tackle some more armor projects and apply some more techniques I've read up on here and other places. I used oils, some pastels and tamiya enamel washes to achieve my weathering, as well as lightly spraying some "dust" with tamiya buff. The caked on dirt is acrylic paint baking soda. I think I'm done, but inspiration might strike!
Thanks for looking guys!
