Page 1 of 1
Tamiya Morris Mini Cooper 1275S Rally
Posted: Sat Feb 13, 2016 2:54 pm
by RicRodrigues
This will be my entry for the Wheelie Good Build.
I choose this kit, a Tamiya Morris Mini Cooper 1275S Rally, 1:24 scale, because I'm a rally fan and this car was a winner in the middle of "big beasts" like the Lancia Fulvia and the Porsche 911. A trully statement of small doesn't quite mean slower!!!
I'll build this straight out the box, as it seems to me the kit is quite good and detailed (as Tamiya always do) and specially because I don't have much experience with after market parts!!!

Re: Tamiya Morris Mini Cooper 1275S Rally
Posted: Sat Feb 13, 2016 3:05 pm
by RicRodrigues
As I started this kit a couple of days ago, but only now decided to enter the sig, I'll leave here what I've done so far...


Re: Tamiya Morris Mini Cooper 1275S Rally
Posted: Sat Feb 13, 2016 3:10 pm
by RicRodrigues
More photos from the engine... There's a small decal going on top of the engine, I'll just assemble all the engine and chassis, clear coat it apply the decals and and seal everything with another clear coat.

I really enjoy the effect of the gun metal in the brakes callipers!!!

Re: Tamiya Morris Mini Cooper 1275S Rally
Posted: Sat Feb 13, 2016 3:17 pm
by RicRodrigues
Those are the seats provided with the kit. It seems this kit is a conversion from a regular Mini Morris and an extra sprue provides the extras to convert it into the rally version. Was a bit skeptic about the competition seat for the driver, but after consulting a friend of mine who knows a guy that was driving rally car during the seventies, he confirmed that during that period thos competition seats were used already. So, I'll use the competiton seat for the driver and the regular seats for the back and for the co-driver.

Re: Tamiya Morris Mini Cooper 1275S Rally
Posted: Sat Feb 13, 2016 3:37 pm
by RicRodrigues
Re: Tamiya Morris Mini Cooper 1275S Rally
Posted: Sat Feb 13, 2016 3:44 pm
by RicRodrigues
The seats are painted already and they look amazing!!! I'll work out on the wheels (let's see if I can get rid of that awfull seam lines in the middle of the rubber tyre threads) and hopefully finish the instrument pannel on the next days. I'll come with more updates when I finish to assemble all the interior!!! Feel free to comment and criticise!!


Re: Tamiya Morris Mini Cooper 1275S Rally
Posted: Sun Feb 14, 2016 2:52 pm
by Homerlovesbeer
Ric that looks awesome! Really nice job on the detaining. You are working MUCH faster than I am as I have a shed load of carbon decals to trace and cut out.

My build thread is in the group build thread.

Re: Tamiya Morris Mini Cooper 1275S Rally
Posted: Sun Feb 14, 2016 4:51 pm
by RicRodrigues
Homerlovesbeer wrote:Ric that looks awesome! Really nice job on the detaining. You are working MUCH faster than I am as I have a shed load of carbon decals to trace and cut out.
My build thread is in the group build thread.
Well, it's an easy kit and I'm really into it. I reckon it's not 100% perfect, but I'm enjoying doing it. What started as a break from the revell 1:32 Mk1 Spitfire is turning into a really fun and enjoyable build!!! Maybe that's why is getting done really fast!!!

I took a look on your McLaren, totally different from my build!!!

Your doing top job, I'm just a newbie still learning the hobby and all its perks!!!
Re: Tamiya Morris Mini Cooper 1275S Rally
Posted: Mon Feb 15, 2016 12:22 am
by Homerlovesbeer
Thanks Ric,
My first car build since I was a teen, my first time cutting out and applying carbon decals, my first time at spraying a body using an airbrush and my 4th build since returning to the hobby in the last year (Revell 1:48 FA-18E Super Hornet, Airfix 1:72 Spitfire and Zero)
Re: Tamiya Morris Mini Cooper 1275S Rally
Posted: Mon Feb 15, 2016 4:30 am
by RicRodrigues
Homerlovesbeer wrote:Thanks Ric,
My first car build since I was a teen, my first time cutting out and applying carbon decals, my first time at spraying a body using an airbrush and my 4th build since returning to the hobby in the last year (Revell 1:48 FA-18E Super Hornet, Airfix 1:72 Spitfire and Zero)
What confirms you're doing a top job!!!!
Re: Tamiya Morris Mini Cooper 1275S Rally
Posted: Mon Feb 15, 2016 5:31 pm
by RicRodrigues
Re: Tamiya Morris Mini Cooper 1275S Rally
Posted: Mon Feb 15, 2016 5:39 pm
by RicRodrigues
Now, the wheels are done, primed with tamiya rattle can grey primer and painted with tamiya flat aluminium (xf16). After a coat of aqua gloss I realized they were supposed to be painted with Chrome Silver (x11)!!!
I'll later decide if I'll repaint it or leave like that...

And then there's the rubber tyres... they look really nice, with the exception of that flash line in the middle of the threads... Tried to sand it with no visible result... any ideias???


Re: Tamiya Morris Mini Cooper 1275S Rally
Posted: Fri Feb 19, 2016 7:22 pm
by RicRodrigues
Re: Tamiya Morris Mini Cooper 1275S Rally
Posted: Fri Feb 19, 2016 7:34 pm
by RicRodrigues
Re: Tamiya Morris Mini Cooper 1275S Rally
Posted: Sat Feb 27, 2016 1:46 pm
by PrivateMansoor
Looking great so far.
Re: Tamiya Morris Mini Cooper 1275S Rally
Posted: Wed Mar 02, 2016 6:37 pm
by RicRodrigues
PrivateMansoor wrote:Looking great so far.
Thanks, PrivateMansoor!!!

Re: Tamiya Morris Mini Cooper 1275S Rally
Posted: Wed Mar 02, 2016 7:13 pm
by RicRodrigues
A quick update: had to leave the Mini for a while, a family situation plus work didn't left much time for modeling. And, as we say in Portugal, when you're down even the birds will crap on you, I made a mess painting the hood and had to strip paint and primer!!!
So, for now, the hood is taking a bath in order to get rid of the awfull paintjob I did. Still, managed to take care of small bits and bobs and let's hope they survived away from the carpet monster until I finish the bodywork.
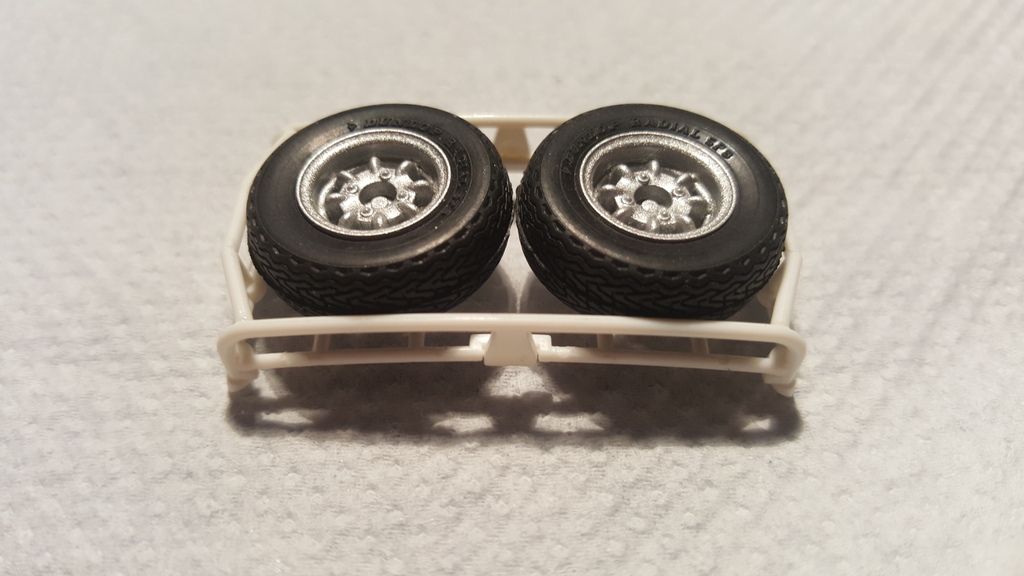
First, assembled the grill that will go on the roof with the spare tires.
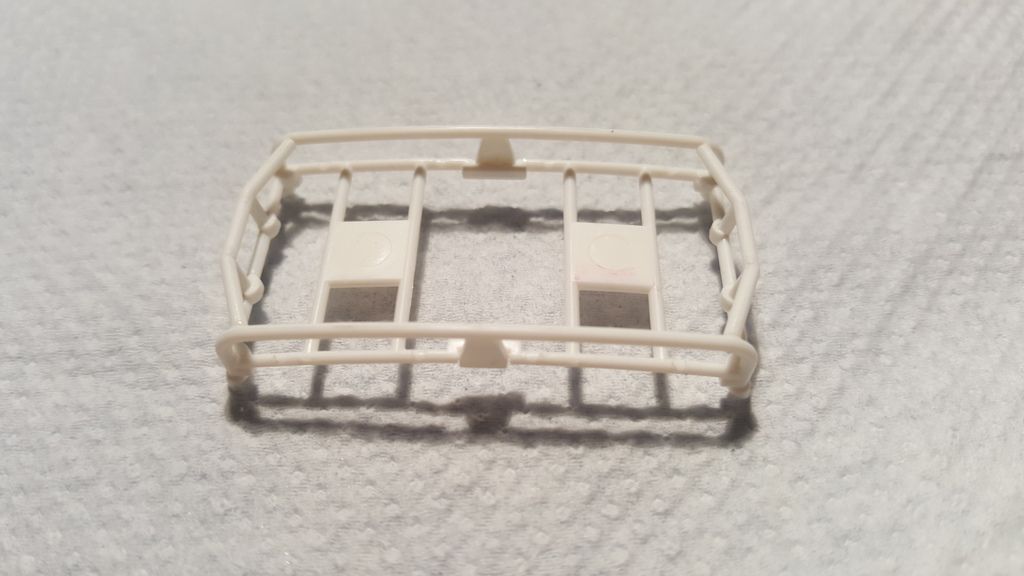
I was tinking if I should paint it or leave it bare plastic white... I'll sort it out later... With the tires on, it doesn't look bad!
The windshields have some decals, de-icing system(?), or something like that. Those went really well on top of the clear parts.

Started aswell with lights. The auxiliary lights are attached to the front bumper which is cromed. Instead of striping the chrome, I left it and just touched it up where it was linked to the sprue. It's not perfect, but those are not too much visible, so I'm ok with that. Glued the clear parts with pva glue and it came out good.
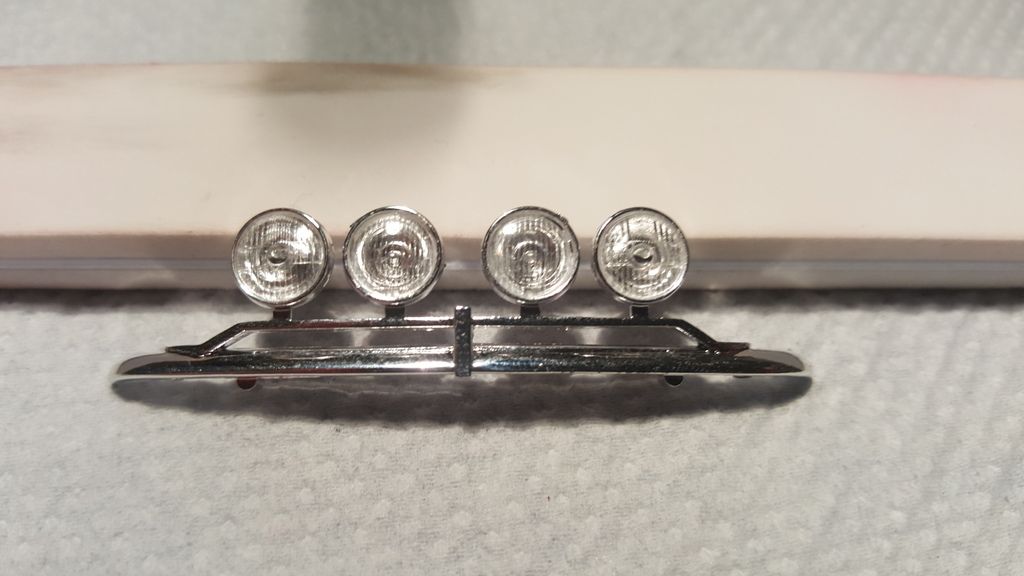
The main lights are composed of three parts each, one chromed frame and two clear parts. It sounded like a huge pain, but it was ok to assemble! The same situation with the chromed frame, just touched up the black plastic from the sprue, and can be barely noticed.
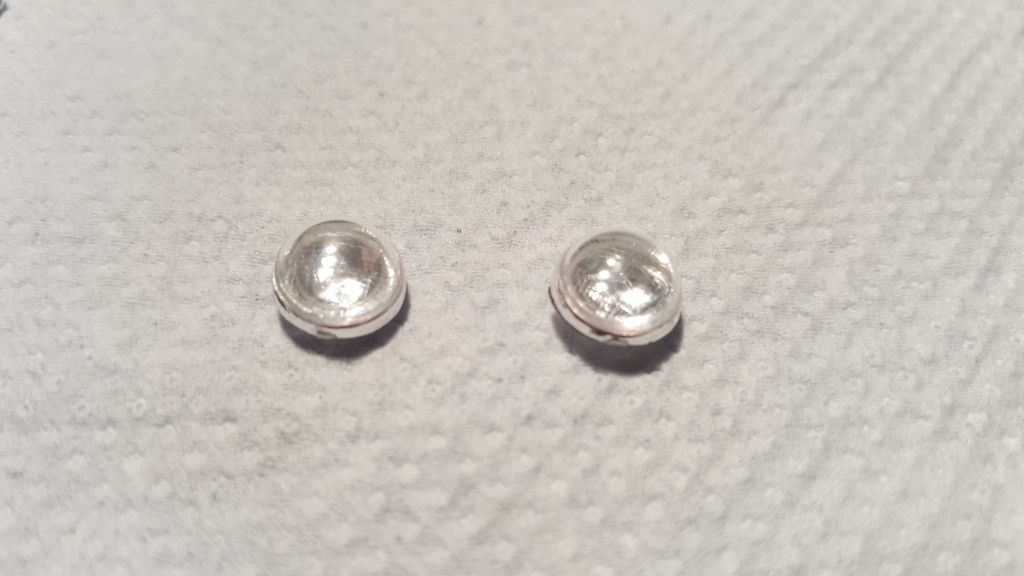
The tail lights were tricky, all clear (tiny) parts that needed to be painted Chrome, Clear Orange and Clear Red! With a surprinsigly steady hand, managed to brush painted it without any problem!!!
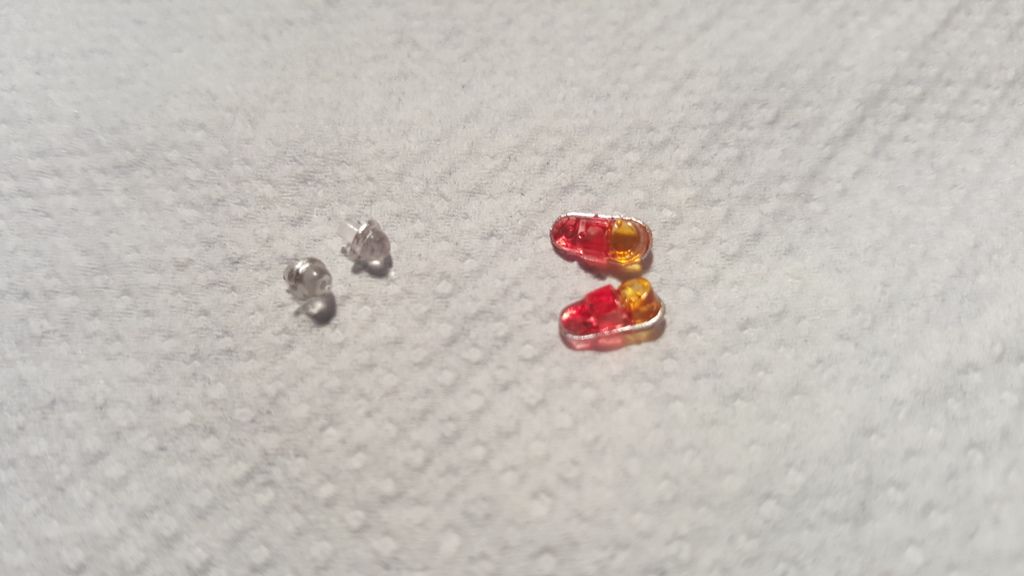
The front indicators went well without any problem as well! For the Euro users, that's how tiny these parts are!!!


Finally, the side wheels race bumpers, primed, painted black and masked for the Chrome strip.
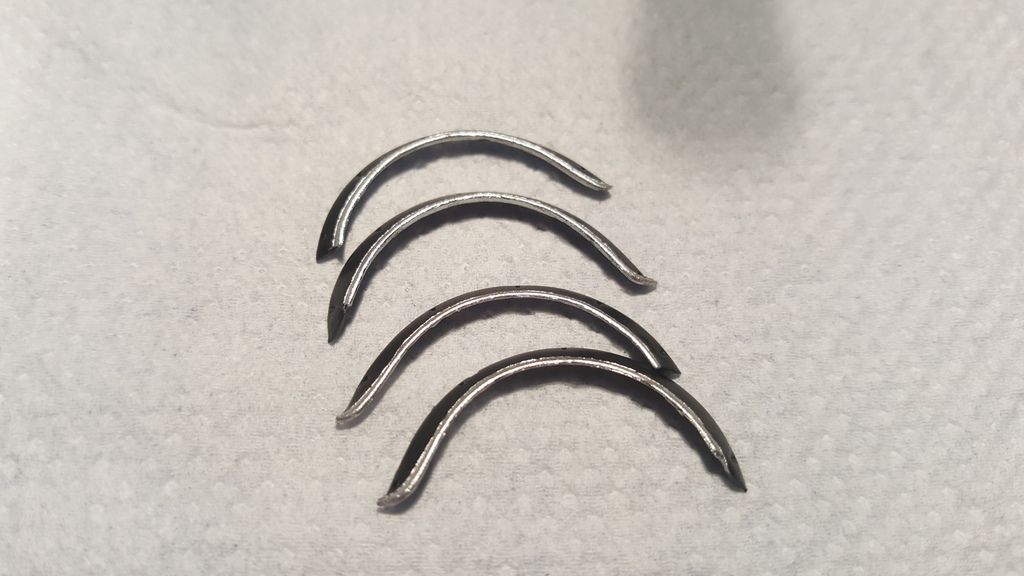
And that's all for now!!! Hopefully on the next few days, I'll managed to sort out the hood and finish painting all the body shell!!!
Re: Tamiya Morris Mini Cooper 1275S Rally
Posted: Thu Mar 03, 2016 7:53 am
by Smiffy
Great looking Mini so far
Looking so much nicer than the BMW Mini's too.
Re: Tamiya Morris Mini Cooper 1275S Rally
Posted: Thu Mar 03, 2016 4:46 pm
by Lysus
Smiffy wrote:Great looking Mini so far
Looking so much nicer than the BMW Mini's too.
Original Mini is to the Cadbury chocolate egg as the BMW Mini is to the Cadbury chocolate egg made with Hershey's chocolate.
Re: Tamiya Morris Mini Cooper 1275S Rally
Posted: Thu Mar 03, 2016 5:28 pm
by Twokidsnosleep
That is awesome

For your wheel seam, if you have a drill and can attach the wheel hub to say a wood stick (or some mandrel), can rotate the tire and hold against sanding stick. I did it here with a dremel to true up these round brake hubs and sand the tire

Hope that makes sense
Re: Tamiya Morris Mini Cooper 1275S Rally
Posted: Thu Mar 03, 2016 5:52 pm
by RicRodrigues
Twokidsnosleep wrote:That is awesome
For your wheel seam, if you have a drill and can attach the wheel hub to say a wood stick (or some mandrel), can rotate the tire and hold against sanding stick. I did it here with a dremel to true up these round brake hubs and sand the tire
Hope that makes sense
Thanks!!! It makes all sense, but I just don't want to loose the thread pattern on the tires... I wouldn't had a problem to do that if it was a race track car that use "slick" tires, but a rally car usually uses deep thread tires. That's why I'm so reluctant to sand it. But anyway, thanks for the suggestion.
Honestly, I wish that was my biggest concern. As I tried to give a coat of paint to the body shell yesterday, I managed to do an huge mess with the paintwork!!!
So the body shell will follow the same path as the hood: strip the paint and start all over again!!!

Guess I should practice more using the airbrush!!!!
I'm almost tempted to start another kit just to get over this huge mess!!!
About the original Mini or the BMW Mini... My humble opinion is, the original, the classic has always its charm and charisma and no "updated version" will ever compared to the original. But it's always nice to see that the classic cars don't end up just as memories from the past, but are used as inspiration for the present and managed to prolong the magic and the charisma from their ancestors!!!
Re: Tamiya Morris Mini Cooper 1275S Rally
Posted: Thu Mar 03, 2016 6:16 pm
by Twokidsnosleep
These are rally cars, so muck it up and weather it and no one will see the paint problems
Re: Tamiya Morris Mini Cooper 1275S Rally
Posted: Thu Mar 03, 2016 6:46 pm
by RicRodrigues
Twokidsnosleep wrote:These are rally cars, so muck it up and weather it and no one will see the paint problems
Hummm, I think there's no way to weather this!!!!

Re: Tamiya Morris Mini Cooper 1275S Rally
Posted: Thu Mar 03, 2016 7:39 pm
by Twokidsnosleep
Ahh, to that bad....That is just a quick putty repair from last week's accident...adds to the realism
Or how about a little rusting detail there, make it an older rally car
Or chuck it in the oven cleaner and start over

Re: Tamiya Morris Mini Cooper 1275S Rally
Posted: Thu Mar 03, 2016 7:44 pm
by RicRodrigues
I think I'll strip the paint and keep practising my airbrush skills! Try, try and try until I get a decent paint job! Or until melt the body shell with chemical stuff!!!

Re: Tamiya Morris Mini Cooper 1275S Rally
Posted: Thu Mar 03, 2016 8:40 pm
by Lysus
RicRodrigues wrote:Twokidsnosleep wrote:These are rally cars, so muck it up and weather it and no one will see the paint problems
Hummm, I think there's no way to weather this!!!!

Re: Tamiya Morris Mini Cooper 1275S Rally
Posted: Thu Mar 03, 2016 8:56 pm
by RicRodrigues
Re: Tamiya Morris Mini Cooper 1275S Rally
Posted: Thu Mar 03, 2016 9:09 pm
by Smiffy
Shame about the paint job, but its a Morris - true to real life its just one huge rust bubble

Re: Tamiya Morris Mini Cooper 1275S Rally
Posted: Thu Mar 03, 2016 9:13 pm
by Lysus
I have faith in you.

Re: Tamiya Morris Mini Cooper 1275S Rally
Posted: Thu Mar 03, 2016 9:21 pm
by RicRodrigues
Now I'm tempted! I have some Ultimate rust wash, I'll apply it and see the result. Just for the laugh!

Re: Tamiya Morris Mini Cooper 1275S Rally
Posted: Thu Mar 03, 2016 9:23 pm
by Lysus
RicRodrigues wrote:Now I'm tempted! I have some Ultimate rust wash, I'll apply it and see the result. Just for the laugh!
Maybe a diorama?

In all seriousness I think you're doing great, I'm sure you can pull this out in the end!
Re: Tamiya Morris Mini Cooper 1275S Rally
Posted: Thu Mar 03, 2016 10:57 pm
by RicRodrigues
Re: Tamiya Morris Mini Cooper 1275S Rally
Posted: Sat Mar 12, 2016 4:09 pm
by RicRodrigues
Re: Tamiya Morris Mini Cooper 1275S Rally
Posted: Mon Apr 11, 2016 6:07 pm
by Lysus
Hope all is well, I'm really rooting for this little guy!
Re: Tamiya Morris Mini Cooper 1275S Rally
Posted: Tue Apr 12, 2016 11:04 am
by RicRodrigues
Lysus wrote:Hope all is well, I'm really rooting for this little guy!
Thanks, Lysus, the small Mini is alive and well!!!
Just been busy the past few weeks, work and holidays (can holidays count as being busy???!!!
) and I had to move place in the begining of the month... But after settled down on my new place, I managed to do something with the Mini. After the "Bath of Doom" (which actually was extended to all the body, including bonnet and rooftop), the body was re-primed, again using Stynylrez grey, and started the paint job. First the interior.

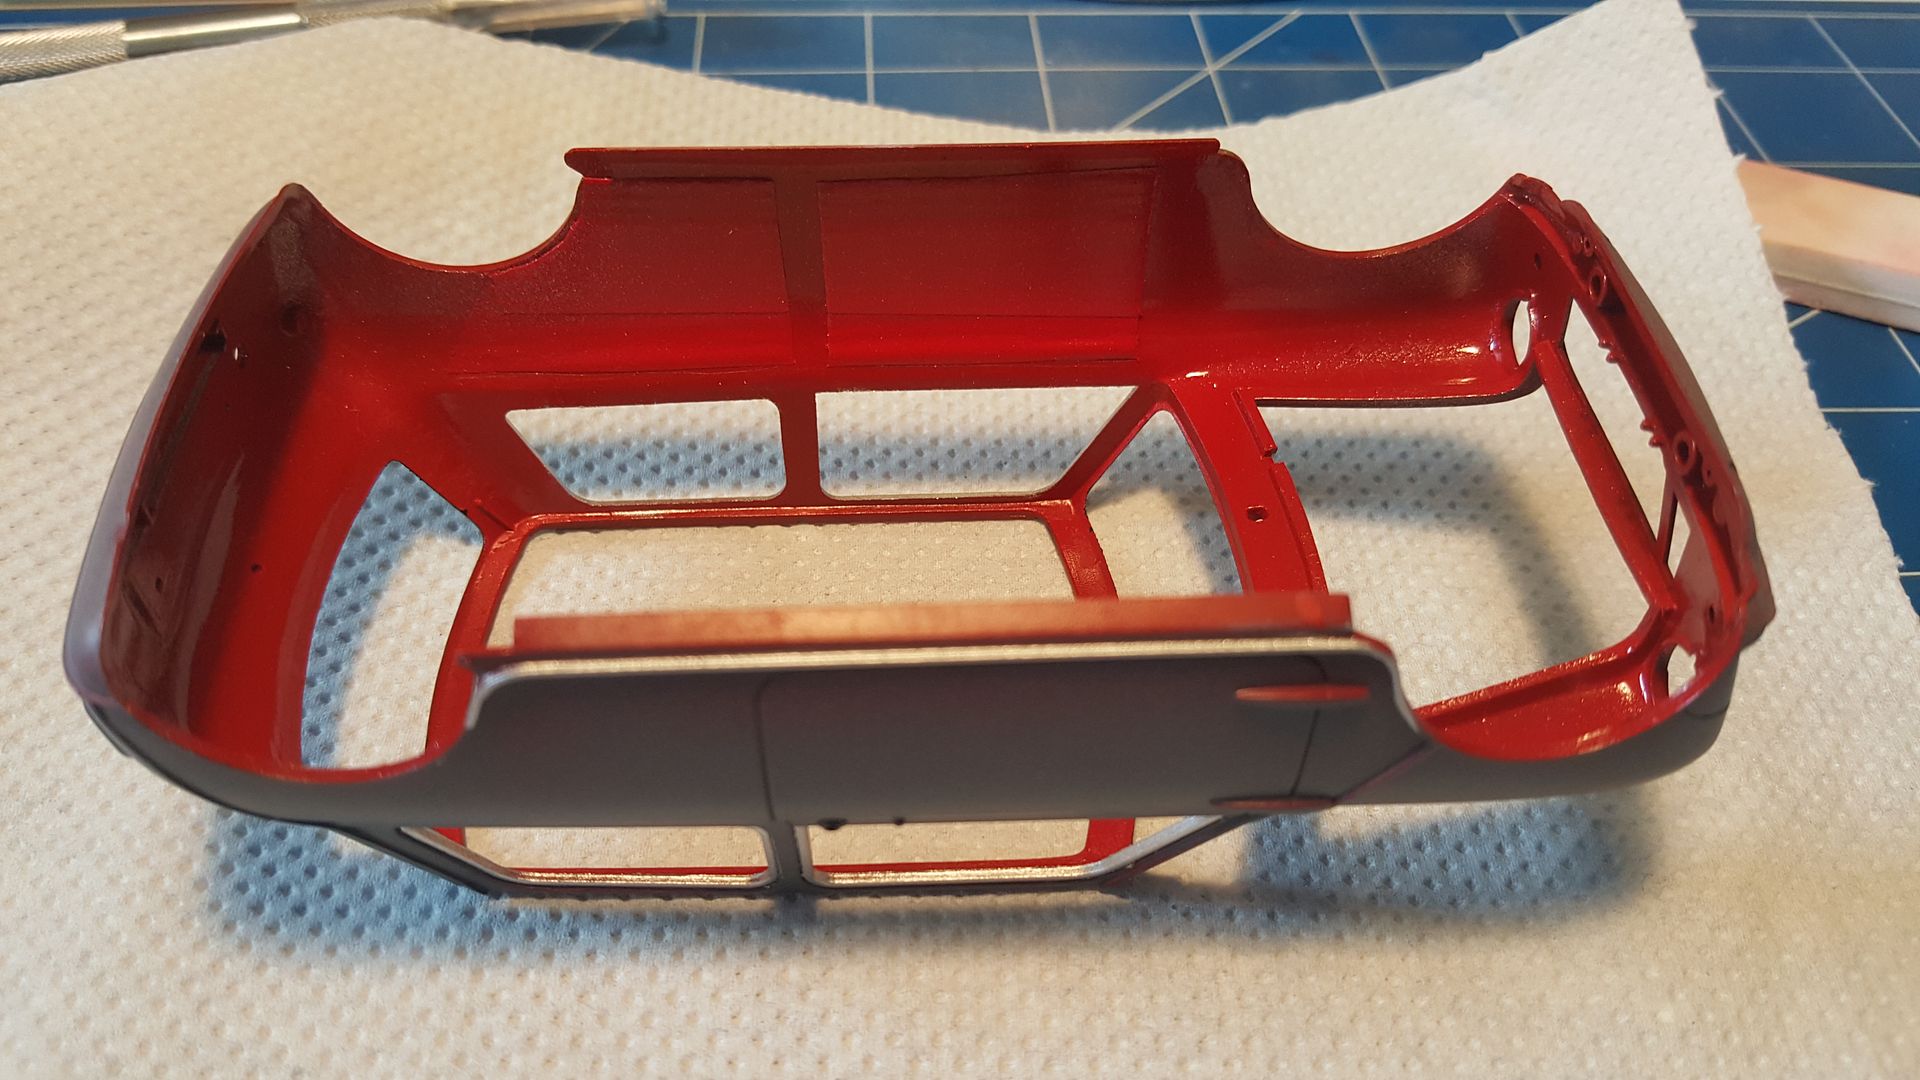
The doors interiors are painted with Tamiya Sky Grey XF19, but I'll keep it masked until the outside paintjob is sorted.
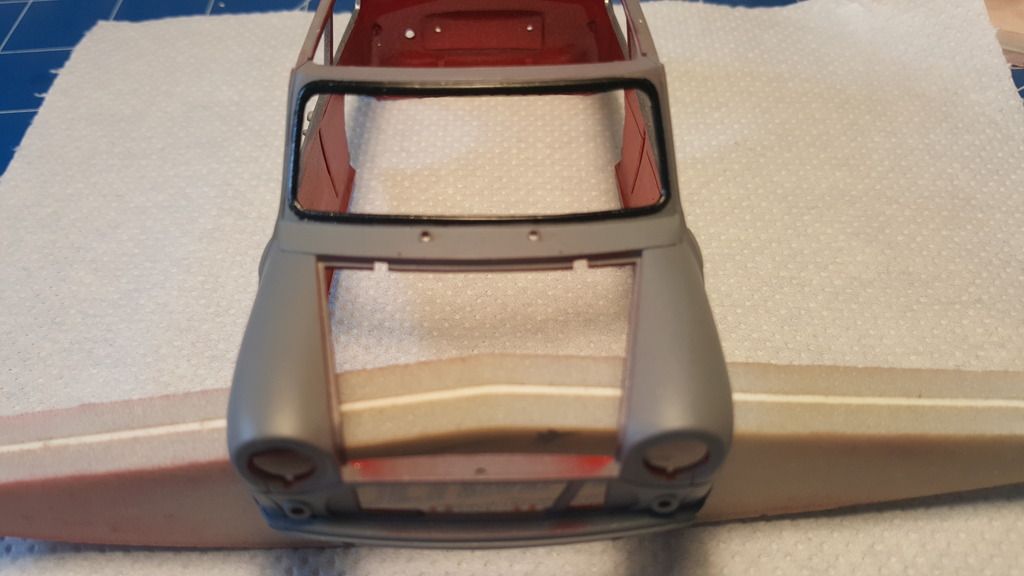
From the outside part, I managed to spray aswell small details as the windshield rubbers (Tamiya semi-gloss black X18) and the side windows rims and bottom chrome details (Tamiya Chrome Silver X11).


Re: Tamiya Morris Mini Cooper 1275S Rally
Posted: Tue Apr 12, 2016 11:13 am
by RicRodrigues
Re: Tamiya Morris Mini Cooper 1275S Rally
Posted: Sun Apr 17, 2016 7:52 pm
by RicRodrigues
Re: Tamiya Morris Mini Cooper 1275S Rally
Posted: Mon Apr 18, 2016 11:36 am
by RicRodrigues
Re: Tamiya Morris Mini Cooper 1275S Rally
Posted: Mon Apr 18, 2016 2:20 pm
by Icemannique
Looking good so far !
Re: Tamiya Morris Mini Cooper 1275S Rally
Posted: Mon Apr 18, 2016 5:42 pm
by Lysus
Nice! Great work, man. Starting over like that would kill my mojo but you soldiered on. It's going to feel so good once you've finished.
Re: Tamiya Morris Mini Cooper 1275S Rally
Posted: Fri Apr 22, 2016 12:27 pm
by RicRodrigues
Last update before the final reveal!!!! Yes, the Mighty Mini is done!!!

The final assembly didn't went as smooth as I wished... The left side windows, the back one was a little bit cracked while removing it from the sprue and the front one caught a bit of glue from the inside door and "fogged up" a little bit. The fog issue was extended to the right side main light, but with a bit of patience and sanding sponges, I managed to minimize the problem. There was a few more little issues with glue leaking into the paintjob (revell contact professional), but in the end they're not that visible (I should start to learn to go easy on the glue).
After finishing the final assembly, I got my bottle of Aqua Gloss and clear coated the chassis and interior and the body. One last look on the interior and engine before hiding everything under the body!!!!
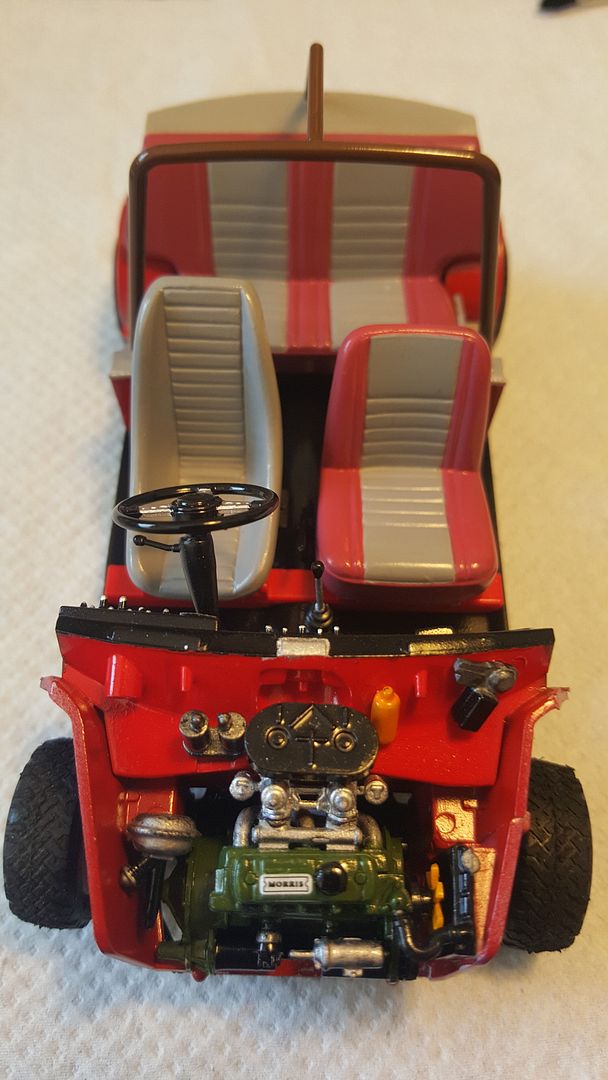
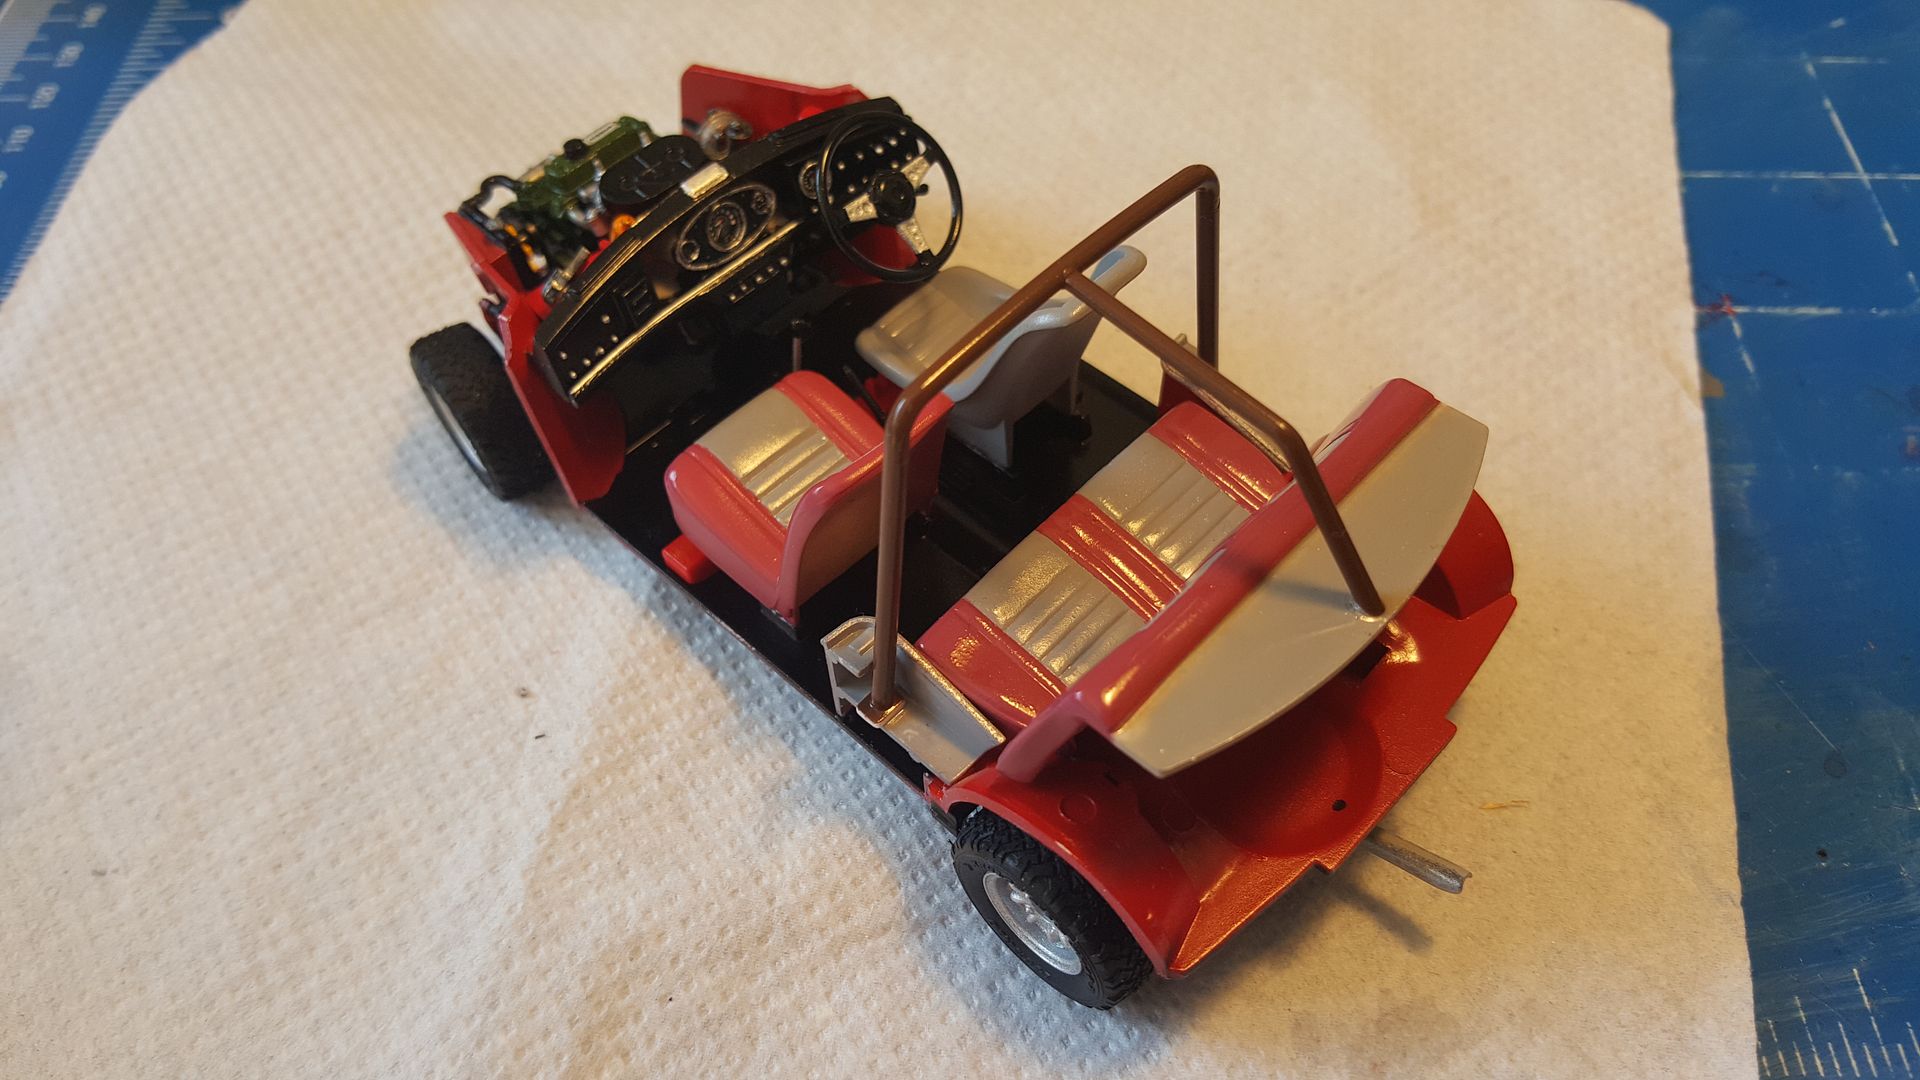
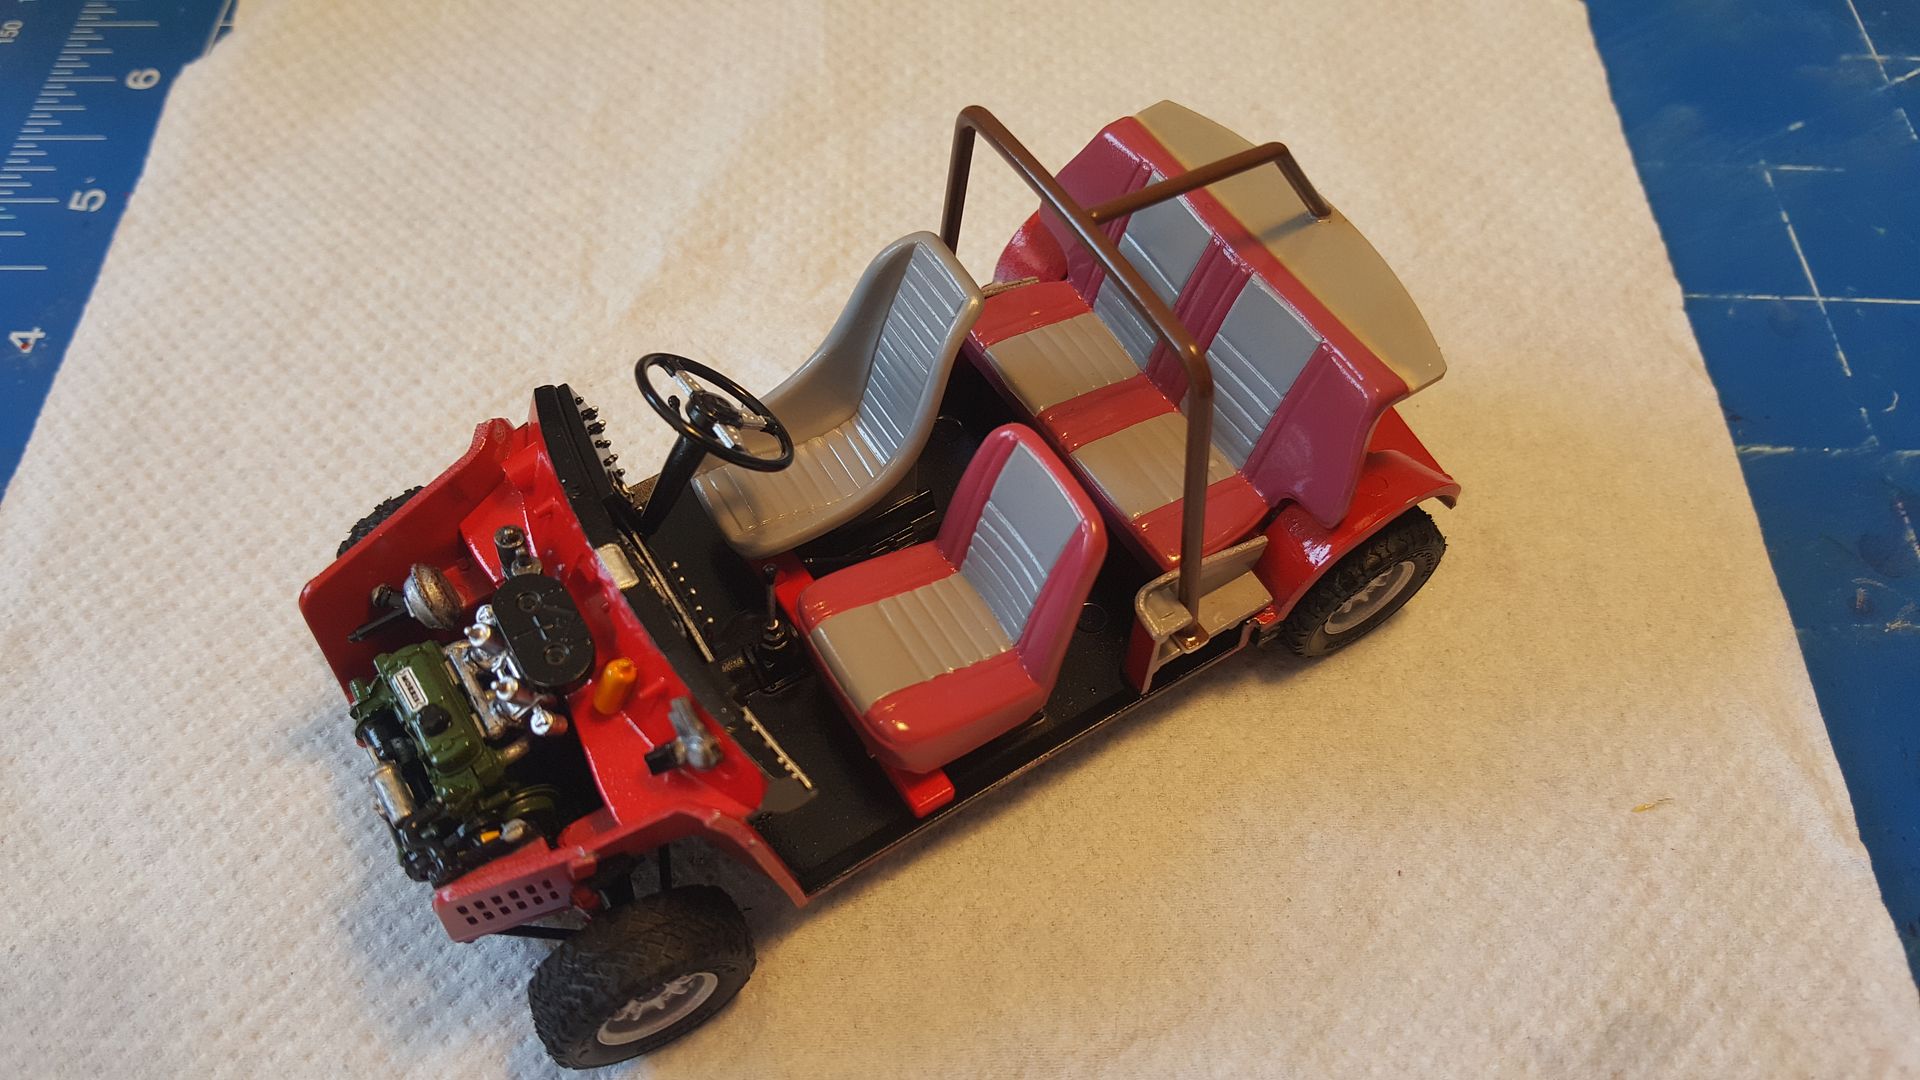
Once the clear coat was dried, decalling went really quick: there was only 10 decals to go. For Tamiya decals, they went well really good, no problems at all, all applied using Micro Sol and Set.
A quick pin wash on the doors and boot to bring up the recessed lines, using Ultimate dark dirt.
And finally, I gave this morning one last coat of Aqua Gloss. I'll let it dry properly and start to improvise a photo booth for the photos of the final reveal!!!
Re: Tamiya Morris Mini Cooper 1275S Rally
Posted: Fri Apr 22, 2016 3:22 pm
by Lysus
Sweet! I can't wait, been quite the journey for you and it looks great.
Re: Tamiya Morris Mini Cooper 1275S Rally
Posted: Fri Apr 22, 2016 4:06 pm
by Liamcraven666
looks good,
Re: Tamiya Morris Mini Cooper 1275S Rally
Posted: Fri Apr 22, 2016 10:27 pm
by Homerlovesbeer
That looks fantastic! Great work


