Page 1 of 1
Dragon 1/35 Strumpanther II Conversion
Posted: Tue Mar 08, 2016 8:15 pm
by Darklen
Re: Dragon 1/35 Strumpanther II Conversion
Posted: Sat Apr 30, 2016 9:25 pm
by Darklen
Re: Dragon 1/35 Strumpanther II Conversion
Posted: Sat Apr 30, 2016 9:45 pm
by Darklen
Re: Dragon 1/35 Strumpanther II Conversion
Posted: Sat Apr 30, 2016 9:46 pm
by Darklen
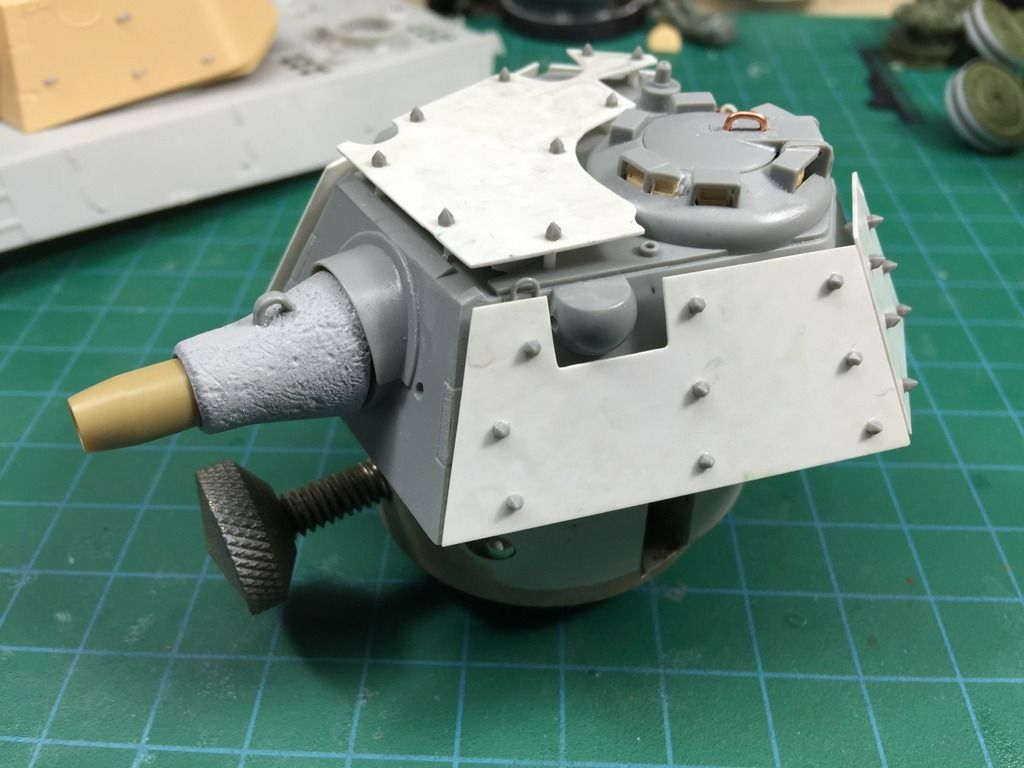
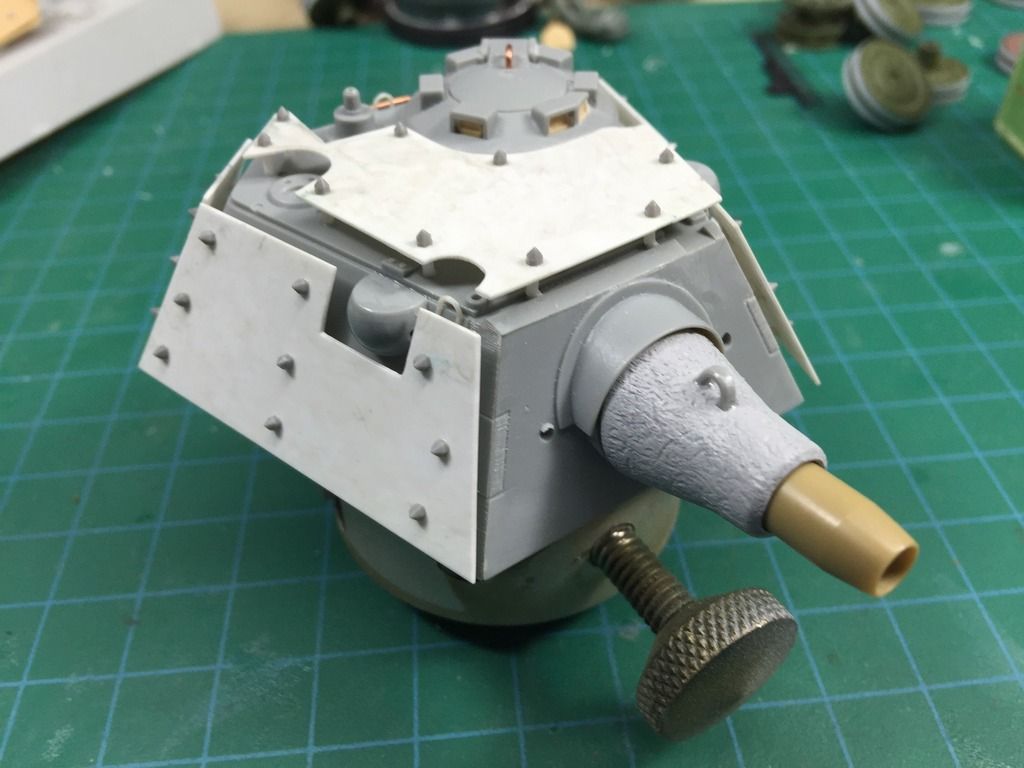
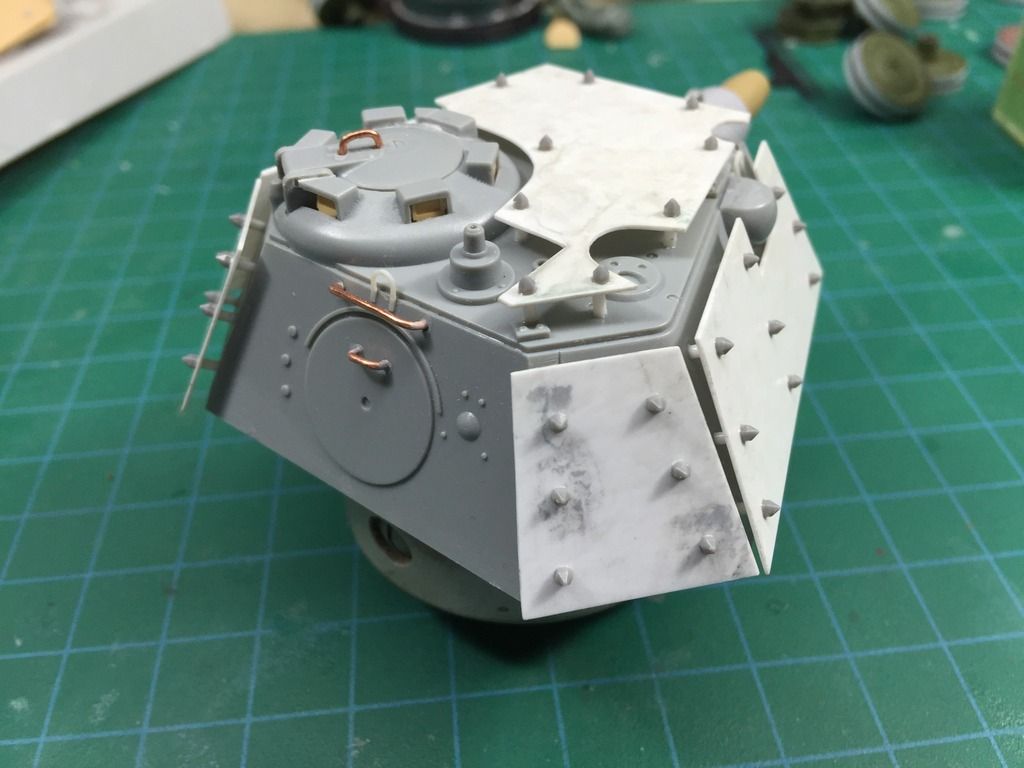
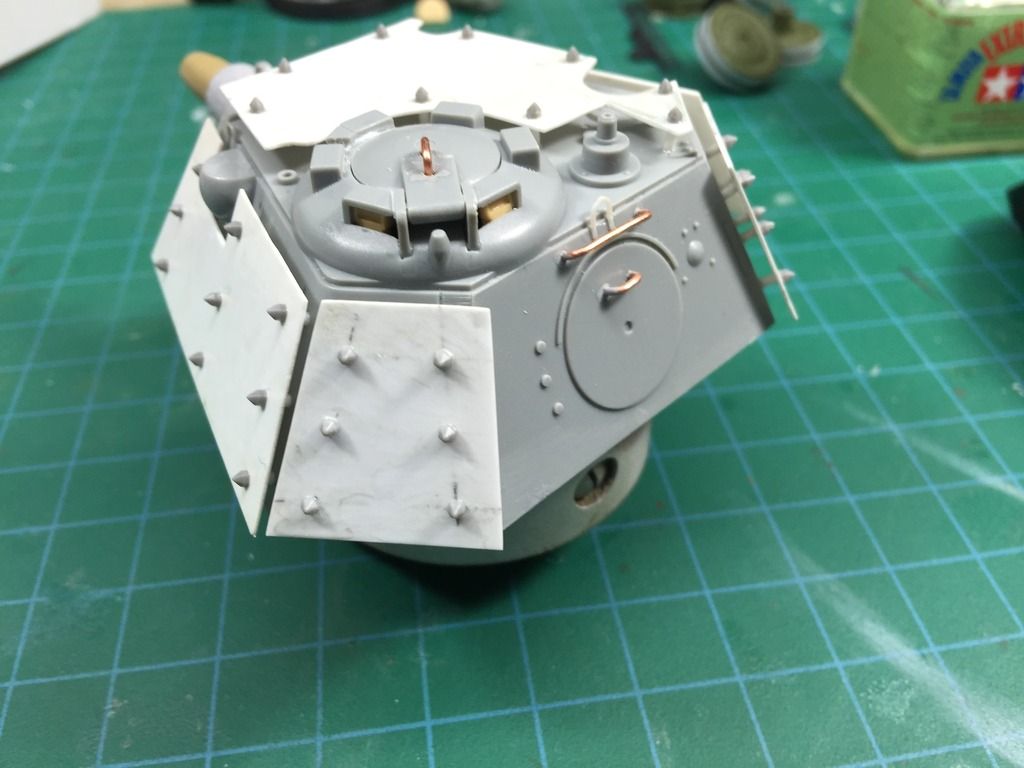
Heavily armored side skirts. Approx 2" thick (1.5mm to scale), secured with the same MENG conical bolt heads. Wheels are not the ones to be installed on this kit. They are for a Panther II Late I'm also working on. This kit will be in RAL 6003 (German OD)
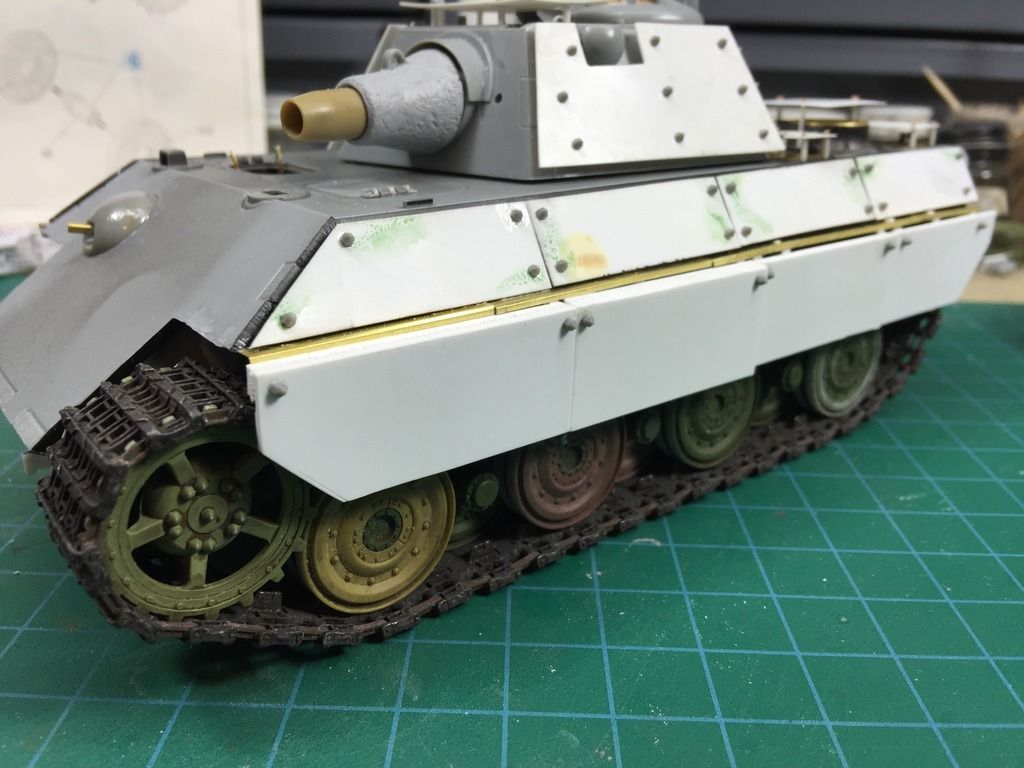
Armored box to come.
Re: Dragon 1/35 Strumpanther II Conversion
Posted: Sat Apr 30, 2016 9:46 pm
by Darklen
Re: Dragon 1/35 Strumpanther II Conversion
Posted: Sat Apr 30, 2016 9:47 pm
by Darklen
Got the side tool racks done. I'm pretty much stuck here until the rear tool bin PE arrives.
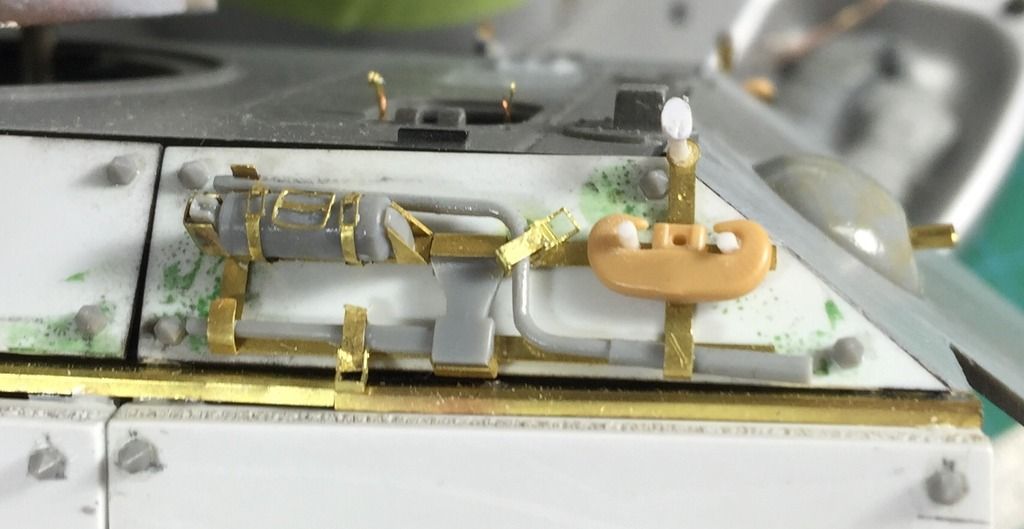
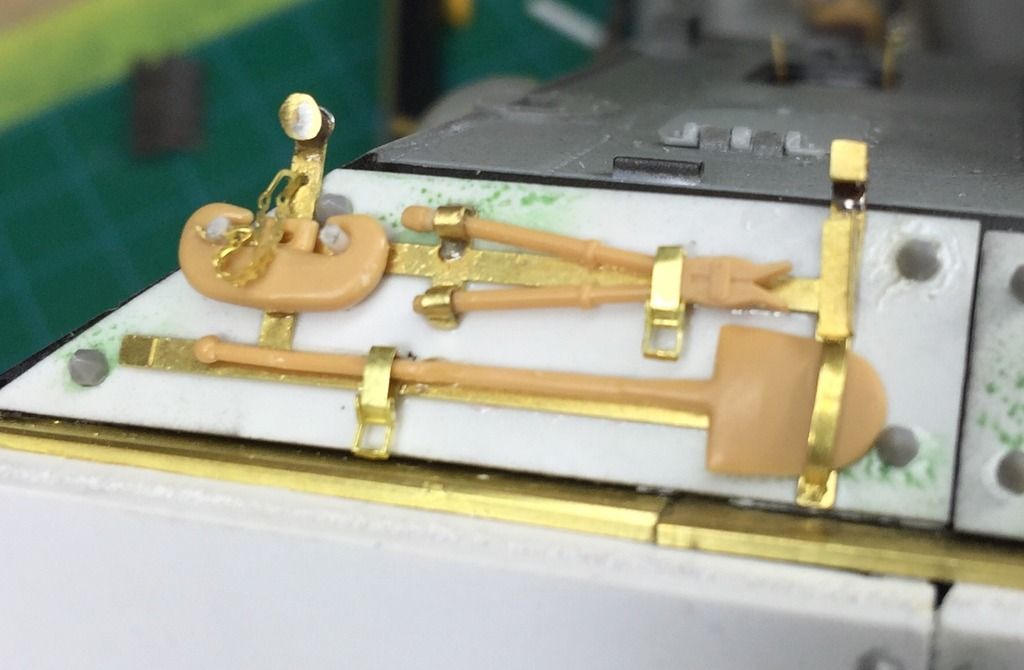
Re: Dragon 1/35 Strumpanther II Conversion
Posted: Sun May 01, 2016 1:54 am
by InitialProduction1
Really amazing work Darklen, this is why I love models, I get to watch artists bring kits to life.
Re: Dragon 1/35 Strumpanther II Conversion
Posted: Sun May 01, 2016 7:16 am
by gustavlekstal
Some outstanding skills. Keep up the posting.
Re: Dragon 1/35 Strumpanther II Conversion
Posted: Sun May 01, 2016 7:42 am
by OneSmallStep1966
This is great and I look forward to following the build.
Re: Dragon 1/35 Strumpanther II Conversion
Posted: Sun May 01, 2016 8:28 am
by mick
great work
Re: Dragon 1/35 Strumpanther II Conversion
Posted: Tue May 10, 2016 5:09 am
by Darklen
A quick video update. Finally got all the PE and metal barrels I needed to go forward with my three Panther II builds.
[youtube]VQJWQ9zxoPY[/youtube]
Re: Dragon 1/35 Strumpanther II Conversion
Posted: Tue May 10, 2016 4:13 pm
by InitialProduction1
Great video I have barrels around here that I have no idea who made them, but I'll make them work. Again Very cool,
Re: Dragon 1/35 Strumpanther II Conversion
Posted: Fri May 20, 2016 7:11 pm
by Darklen
Re: Dragon 1/35 Strumpanther II Conversion
Posted: Fri May 20, 2016 7:15 pm
by Icemannique
Very cool conversion.

Re: Dragon 1/35 Strumpanther II Conversion
Posted: Fri May 20, 2016 7:21 pm
by Darklen
Thanks. It's been fun so far, when I have time. I forgot to mention, I had annealed the brass to make it easier to work with and damage. I used a blow torch with a low flame and kept it on just long enough to heat the brass wit a dull red. Too much heat will melt or vaproize it.
Re: Dragon 1/35 Strumpanther II Conversion
Posted: Fri May 20, 2016 7:29 pm
by Cymru
Masterful stuff

Re: Dragon 1/35 Strumpanther II Conversion
Posted: Sun Jun 05, 2016 7:24 am
by Darklen
Working on a different muffler for the Sturmpanther II. Liking the looks of it. Needs some "damage" though.

Re: Dragon 1/35 Strumpanther II Conversion
Posted: Tue Jun 07, 2016 1:25 am
by Darklen
Re: Dragon 1/35 Strumpanther II Conversion
Posted: Tue Jun 07, 2016 2:56 am
by mannloon
So cool. Your work is seriously some of my favorite.
Re: Dragon 1/35 Strumpanther II Conversion
Posted: Sat Jun 25, 2016 12:12 pm
by Darklen
Re: Dragon 1/35 Strumpanther II Conversion
Posted: Sat Jun 25, 2016 1:53 pm
by InitialProduction1
Wow just an AMAZING build Darklen.
Re: Dragon 1/35 Strumpanther II Conversion
Posted: Sun Jun 26, 2016 2:46 am
by Darklen
Thanks. It's been a drag on my modelling mojo doing three of the same kit but different variants all at the same time. Turns out the two Panther II's will have to wait for accessories until I can move forward while the Sturmpanther II has to wait now until I get the groundwork done so I can mount the suspension and road wheels to be articulated with it.
Re: Dragon 1/35 Strumpanther II Conversion
Posted: Sun Jun 26, 2016 3:06 am
by InitialProduction1
Yikes! man your in one of those busy build, those are the ones where I run my head into the wall, just to start thinking again. You know like, eat, drink, restroom breaks, Lol.
Re: Dragon 1/35 Strumpanther II Conversion
Posted: Wed Jun 29, 2016 10:16 pm
by Darklen
A short video update for my Sturmpanther II and Panther II (Early) builds.
[youtube]zmdiy-u3af0[/youtube]
Re: Dragon 1/35 Strumpanther II Conversion
Posted: Tue Sep 27, 2016 6:25 am
by Darklen
Re: Dragon 1/35 Strumpanther II Conversion
Posted: Mon Oct 10, 2016 12:14 am
by Augustus
Beautiful work mate.
Re: Dragon 1/35 Strumpanther II Conversion
Posted: Thu Oct 13, 2016 7:18 pm
by chalkyw
Very nice, looking forward to seeing the rust effects
Re: Dragon 1/35 Strumpanther II Conversion
Posted: Tue Dec 13, 2016 5:41 pm
by Darklen
Re: Dragon 1/35 Strumpanther II Conversion
Posted: Tue Dec 13, 2016 6:48 pm
by privatepete
Some really top skills,love the scratch building,well the muffler brilliant idea.
Pete

Re: Dragon 1/35 Strumpanther II Conversion
Posted: Thu Dec 15, 2016 6:18 pm
by Darklen
Got the rest of the tank scrubbed. Guess I didn't layer the Dull coat on well enough in some spots as the over, base and primer coats all came off. The armoured shield on the back will just be bare, rusted metal.
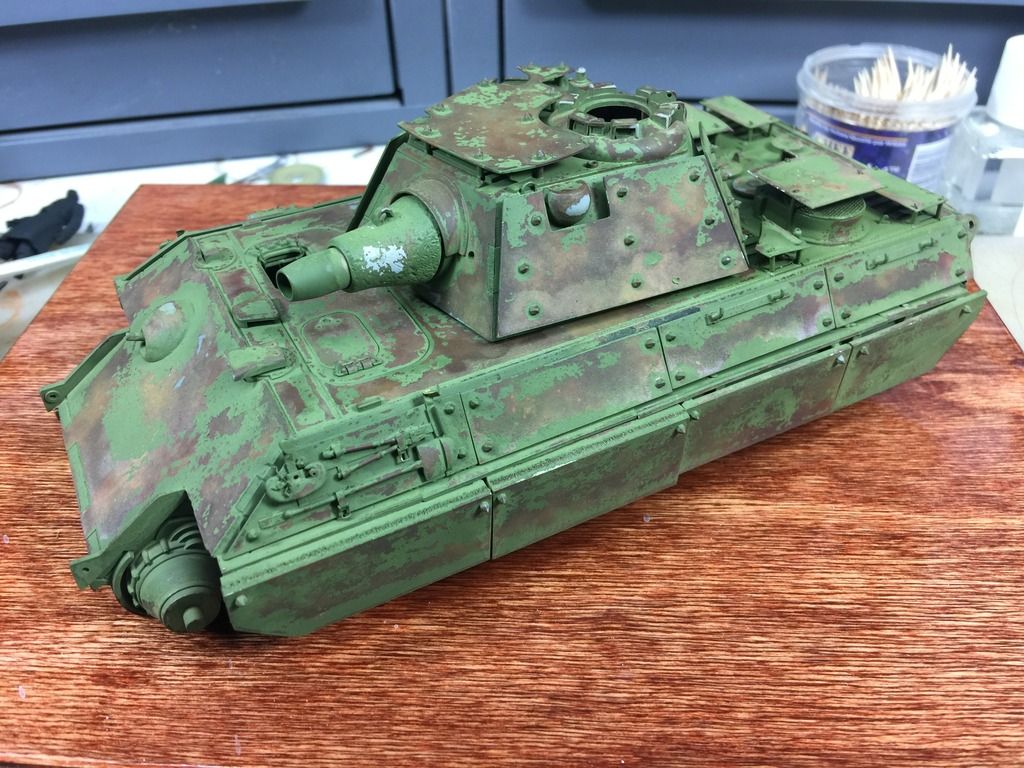
Re: Dragon 1/35 Strumpanther II Conversion
Posted: Thu Dec 15, 2016 9:18 pm
by Liamcraven666
Looking amazing so far. A very nice conversion job, keep it up.
Re: Dragon 1/35 Strumpanther II Conversion
Posted: Thu Dec 15, 2016 10:41 pm
by digger303
The heavy worn effect has come out well. Not a brush wear mark to be seen. Very realistic.
Re: Dragon 1/35 Strumpanther II Conversion
Posted: Fri Dec 16, 2016 7:40 pm
by Davethepitch
I like the battle damage.
Re: Dragon 1/35 Strumpanther II Conversion
Posted: Wed Jan 11, 2017 1:52 am
by Darklen
Re: Dragon 1/35 Strumpanther II Conversion
Posted: Wed Jan 11, 2017 1:51 pm
by Bissyboat
The chipping and the rubble. Fantastic!
Re: Dragon 1/35 Strumpanther II Conversion
Posted: Thu Jan 19, 2017 3:44 am
by Darklen
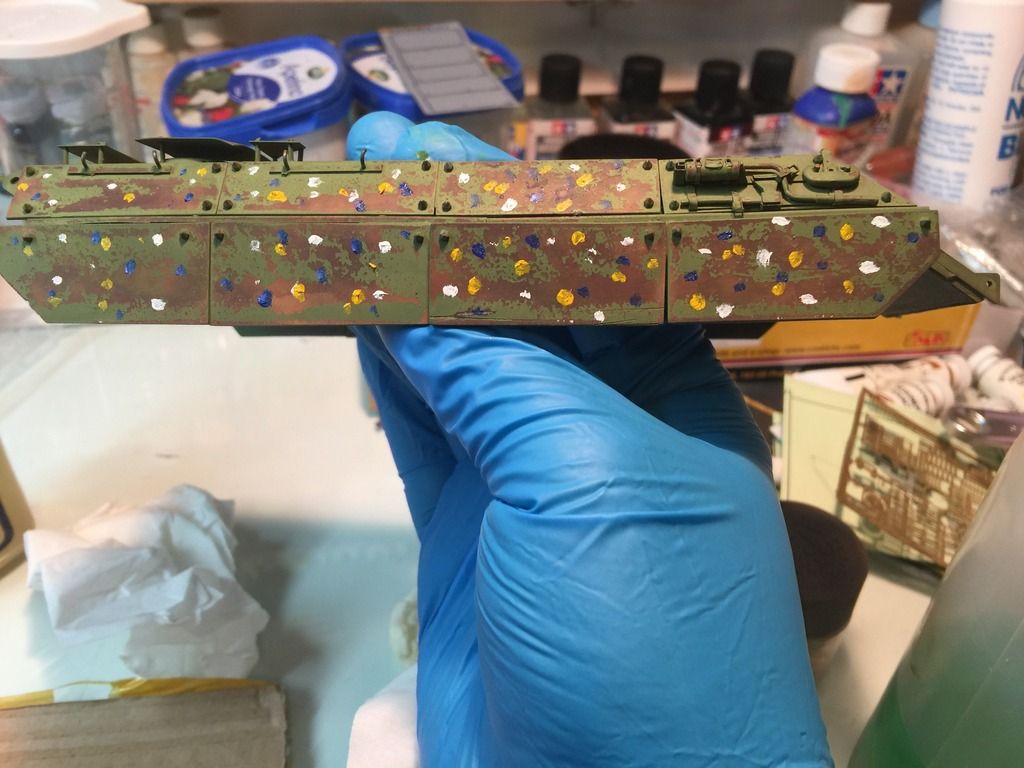
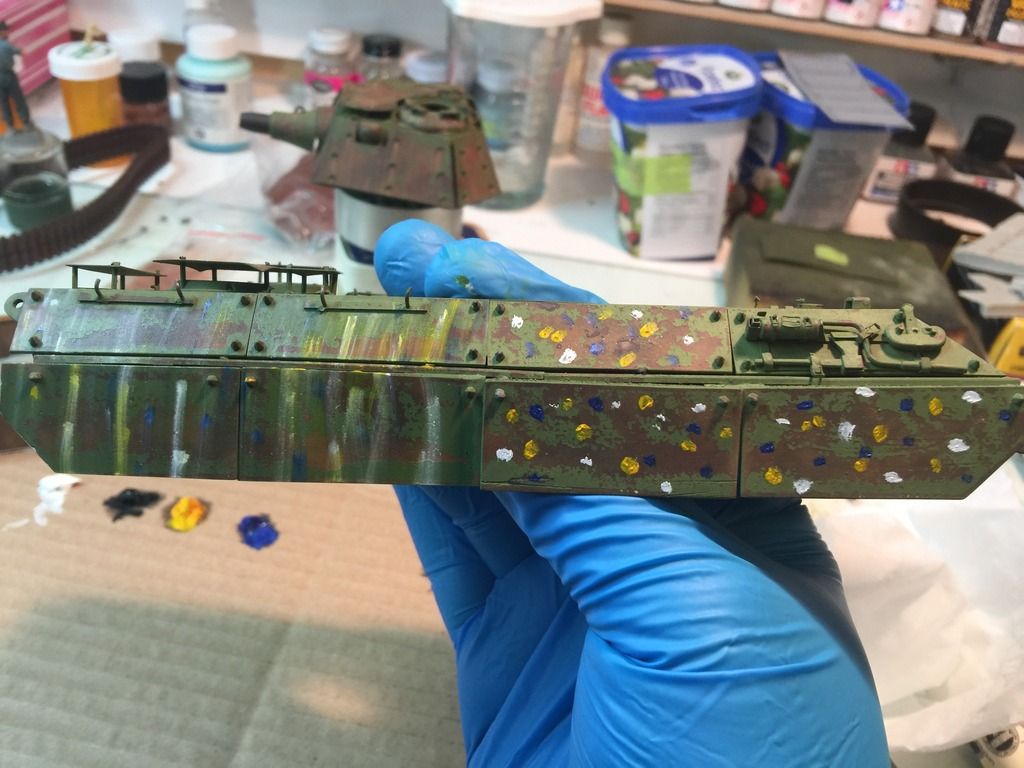
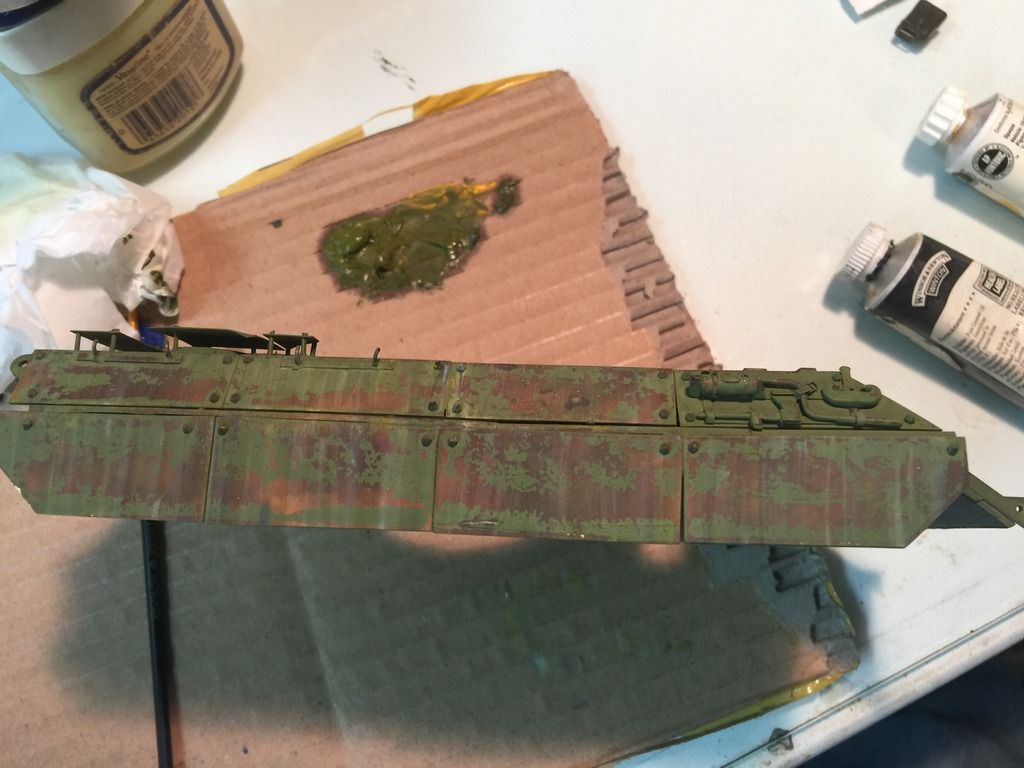
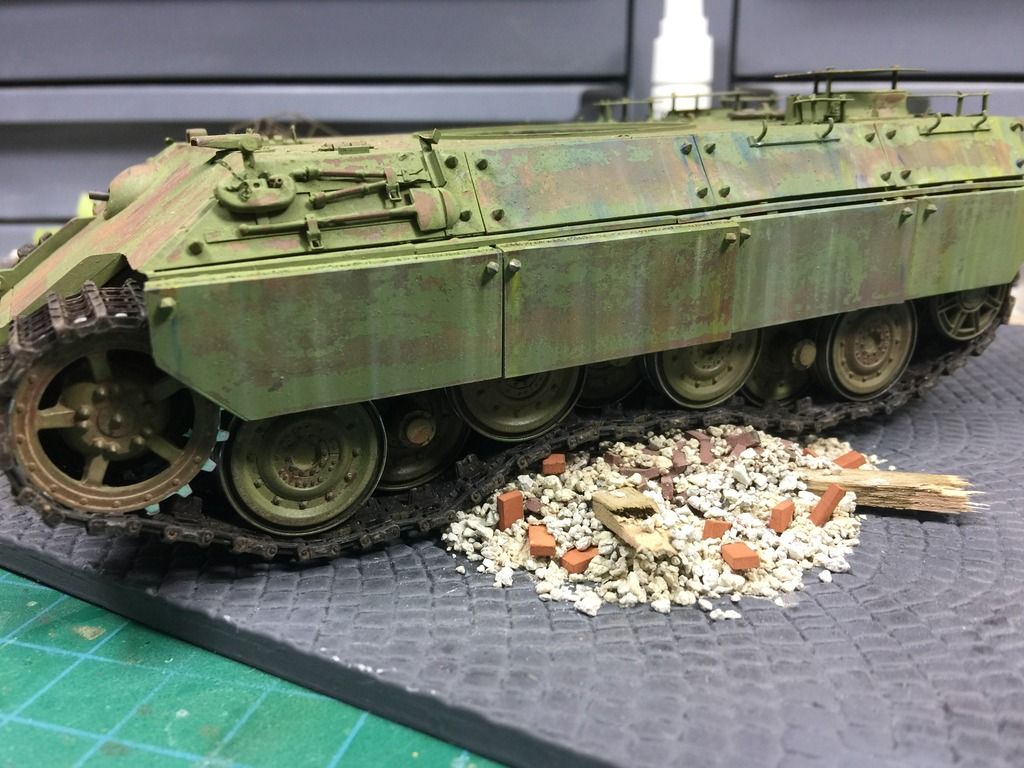
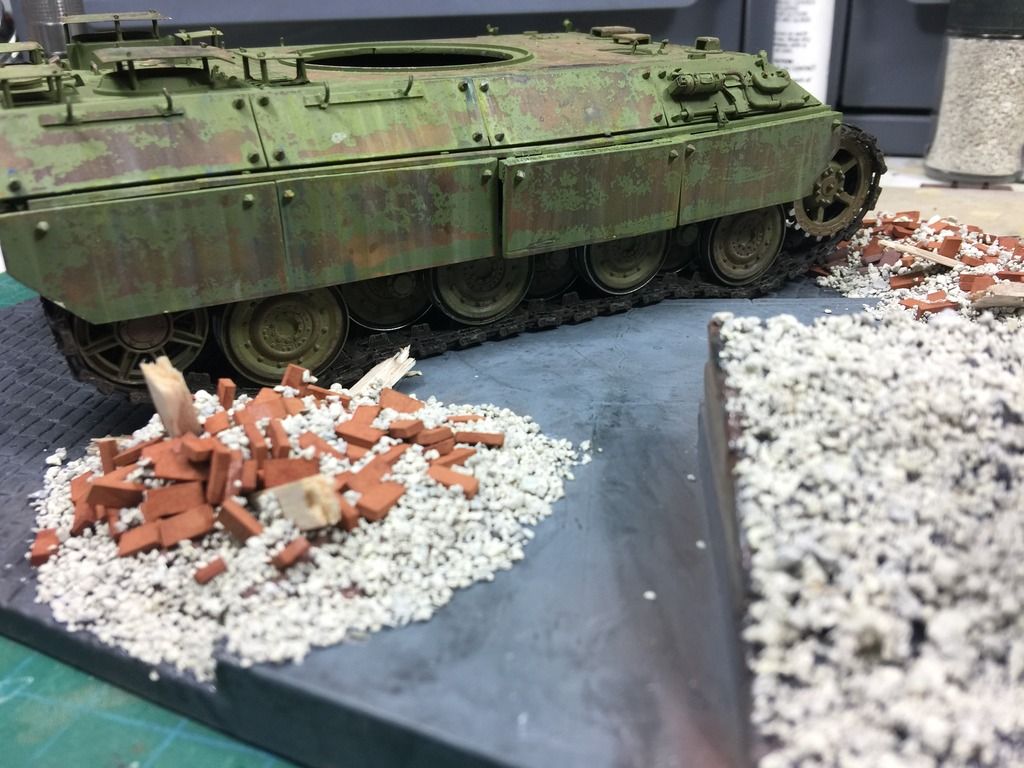
Moving on, Did dot filtering on the hull sides using white, yellow, blue and green artist oils and a wide flat brush dampened with paint thinner. Just drag it down and off until I got the effect I wanted. When dry, I'll seal and then do the same with a rust dot filter.
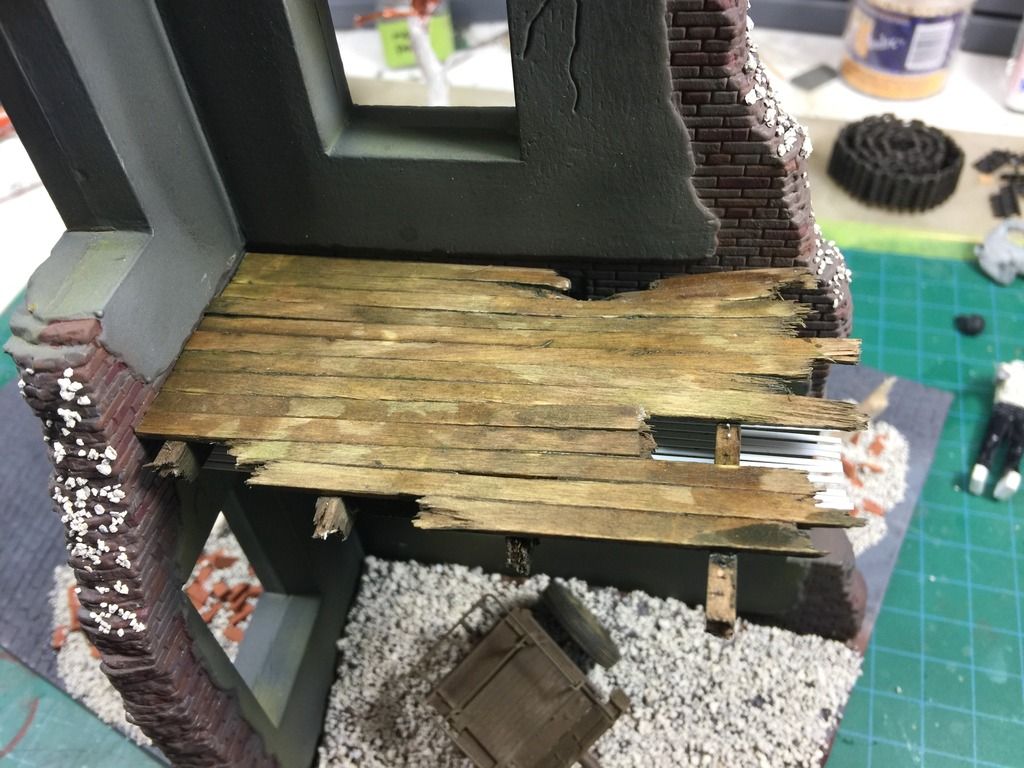
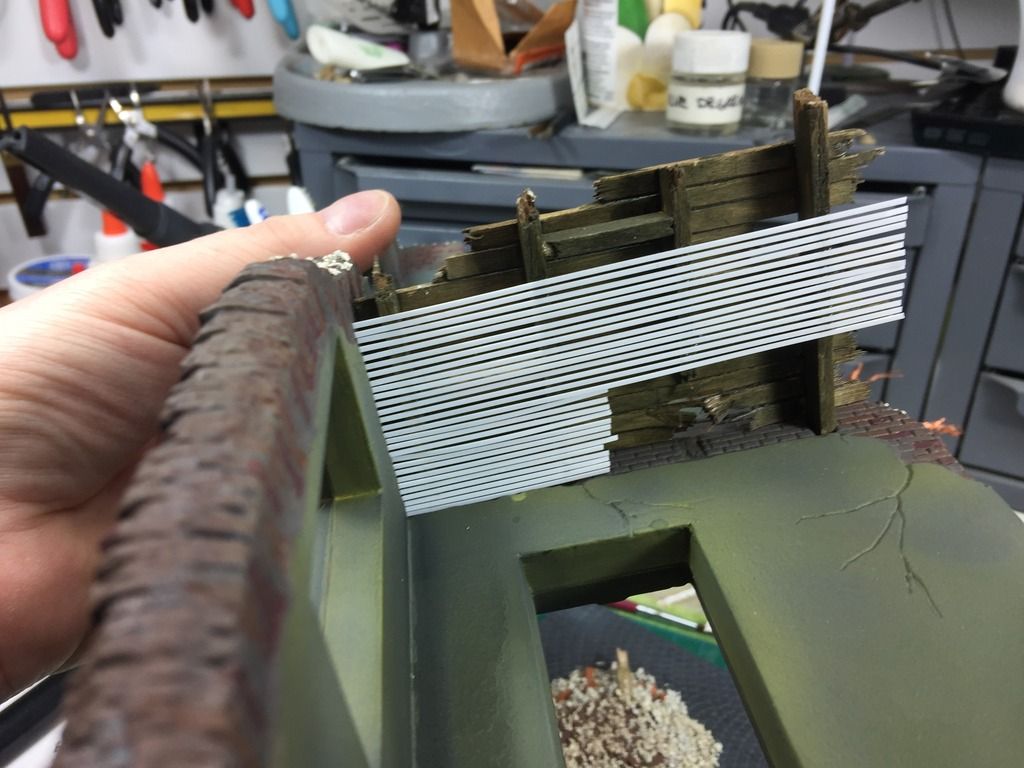
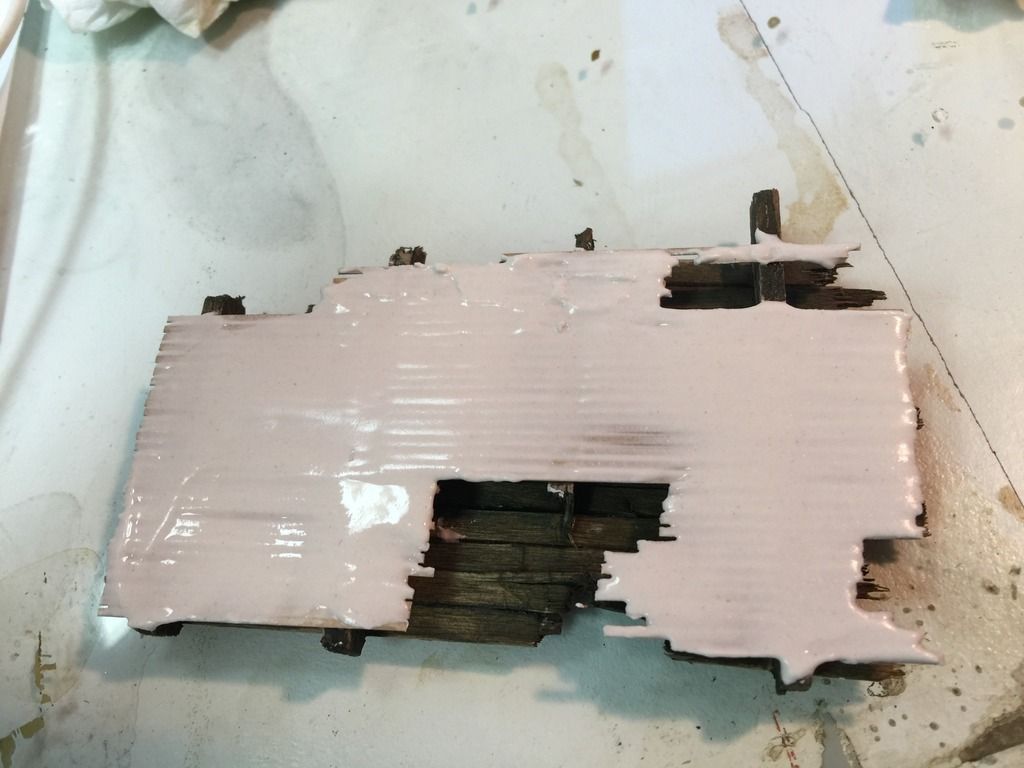
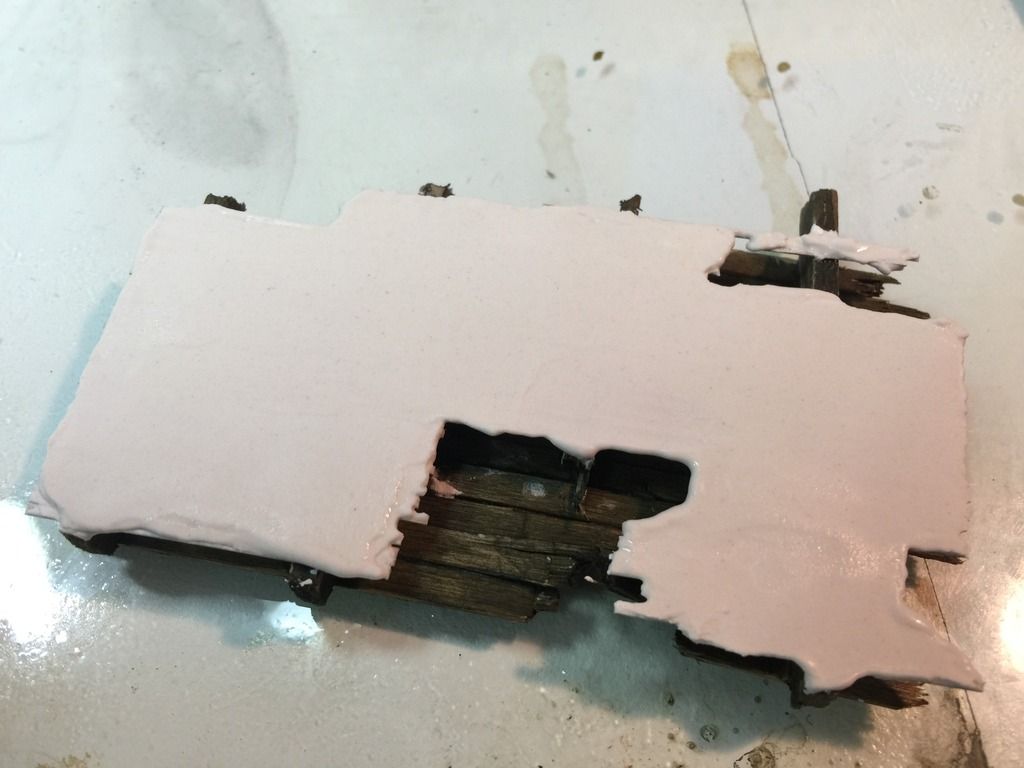
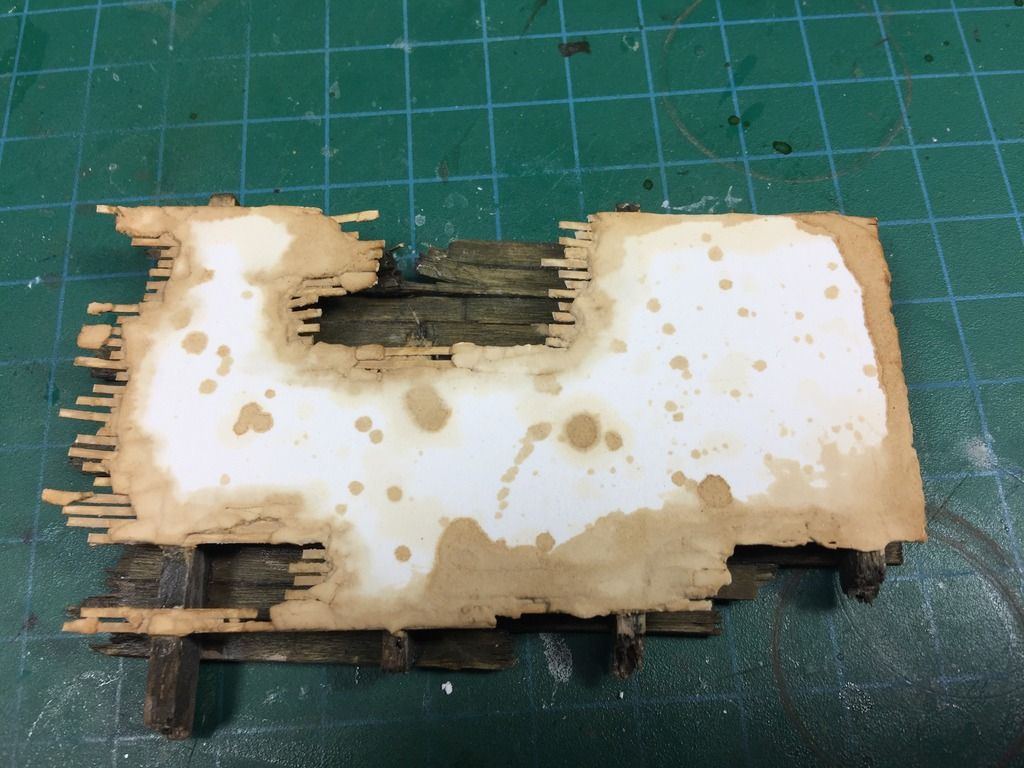
Going to the Miniart ruin. I scratch built a floor from balsa wood and Popsicle sticks. Painted with an array of Vallejo Environmental Effects. Then figured it was missing something. A ceiling! Added old school lathe & plaster starting with some Evergreen 0.10 x 0.40 strip for the lathe, glued on with CA. Once done, I painted quickly with Tamiya XF-57 Buff. Once that was dry, I put a thin coat of drywall mud, let that dry and put on a second coat. Once all that had set up over night, I lightly sanded the dried mud, "damaged" the exposed sections with tweezers, pliers, fingers, etc., to get the effect I wanted. Finally, staining it with various concentrations of tea and coffee.
And, finally some additional shots of the finished suspension with the upper hull and tracks fitted. Still ots of ground work to do.
Re: Dragon 1/35 Strumpanther II Conversion
Posted: Thu Jan 19, 2017 12:08 pm
by Bissyboat
This looks incredible! Nice tip on the weathering. btw.
Re: Dragon 1/35 Strumpanther II Conversion
Posted: Tue Feb 21, 2017 8:05 pm
by Darklen
Just an FYI, I'm still alive, just been really ill. All better now so I've been working on the figures and hope to have a update later this week. Thanks for your patience.
Re: Dragon 1/35 Strumpanther II Conversion
Posted: Wed Feb 22, 2017 5:40 am
by aur0ra145
Glad you're not dead. Great looking build, your work is amazing! Which artist oils did you use? Like just any that are lacquer based? I've been trying to figure out the best way to do a dot filter.
Re: Dragon 1/35 Strumpanther II Conversion
Posted: Wed Feb 22, 2017 6:18 pm
by Darklen
The oils were just regular Windsor & Newton and Grumbacher artist oil paint in a tube I just bought them at a local artist store. nothing special or expensive. I thin with odorless paint thinner, never lacquer/cellulose thinner.
I did try some cheap oils I got from Walmart a few months ago just to see how they were (12 or so different colors for $10) and they were junk. They had a lot of trouble sticking to anything and wouldn't blend at all. Tried using them for dot filters, washes, figures, etc. They didn't' work for anything. they'd just peel off and the blending was always streaky. Ended up just tossing the whole works.