Page 1 of 3
Italeri 1/35 LVT Landing Vehicle Tracked (X2)
Posted: Tue May 03, 2016 3:45 am
by OliveDrab
The Amphibious Tractor (Amtrac or Landing Vehicle, Tracked LVT) was the solution to a military problem: how to bring Marines across open water, coral reefs, and interior water onto the beach with maximum shock against the defenders and minimal casualties to the attacking force. Ordinary small craft would founder on the coral and could not move off the water line once the beach was reached. The LVT amphibious tractor solved the problem so well that it became a legend, as it performed its mission starting at Guadalcanal and continuing across the Pacific against beaches that were fanatically defended. Eventually the Japanese, Germans, North Koreans, and North Vietnamese came to understand that when they saw the LVTs coming with guns blazing, their end was near.
Limited numbers of the LVT(2) were used at Tarawa in the Gilberts, the landmark battle of the Central Pacific.
Tarawa taught the Marine Corps bitter lessons, paid for in blood. But the Amtrac stood out as a success and the subsequent changes in amphibious doctrine became standard practice throughout the remainder of the war. The LVT(2) demonstrated Its worth as a troop carrier and production moved ahead.
In the campaign for the Marshall Islands, invaded 31 January 1944, the full range of the LVT models became available, including the armored Amtrac LVT(A)1, based on the proven LVT(2) chassis with the addition of a 37mm tank gun in its turret. The armored LVT was introduced to provide close-in firepower as the cargo LVTs neared the beach. The LVT(2) and the LVT(A)1 together helped to capture the Marshalls far ahead of schedule, thus allowing acceleration of the timetable for the attack on Saipan.
Saipan, invaded in June 1944, was the most massive use of the LVTs in the Central Pacific with six battalions of cargo LVT, including the new ramped LVT(4), and two battalions of armored Amtracs, employing the new LVT(A)4 with a 75mm howitzer. The loading ramp represented one of the greatest single design improvements in the history of the LVT.
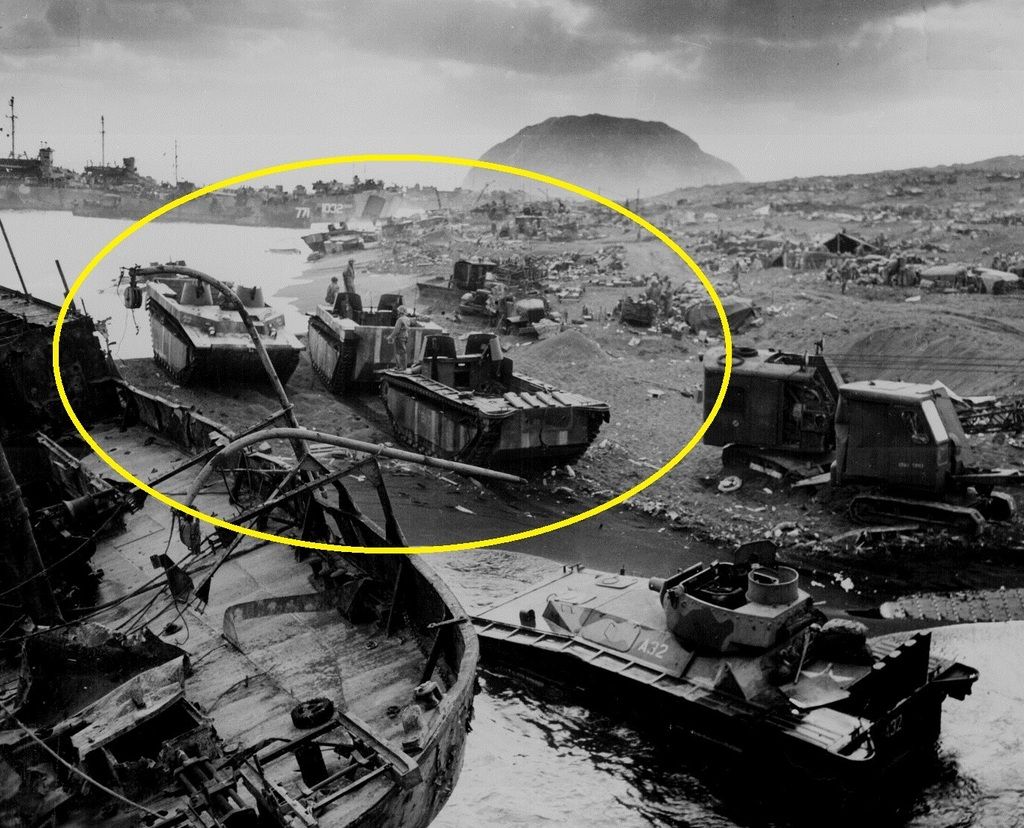
Iwo Jima, February 1945, was the Marine Corps' toughest battle. The LVT(4) played a crucial role both as the assault vehicle to carry troops and as the chief logistical vehicle in the battle's first days. Okinawa, April to June 1945, was the largest landing in the Central Pacific drive. The new LVT(3), a redesign of internal arrangements, was used successfully through the long campaign.
As experience accumulated with the use of LVTs, tactics and operational plans for their use improved. One constraint was the need for extensive maintenance, a fault common to all the models of LVTs as well as other tracked vehicles. This did not improve over the course of the war and few LVTs lasted through the end of the war. Text Referenced from:
http://olive-drab.com/idphoto/id_photos_lvt_ww2.php

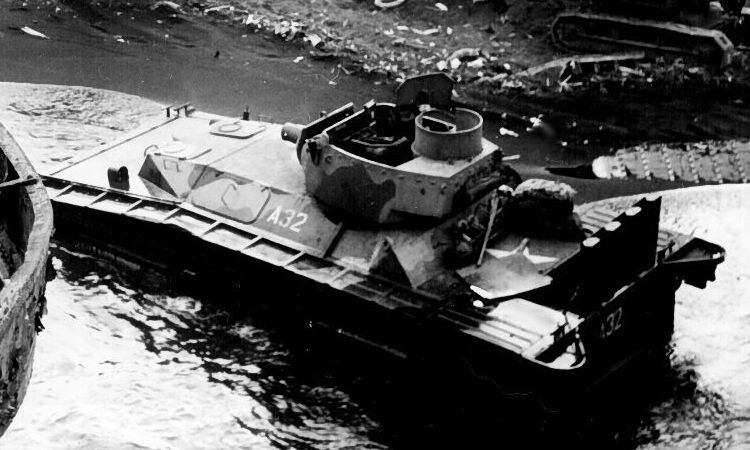
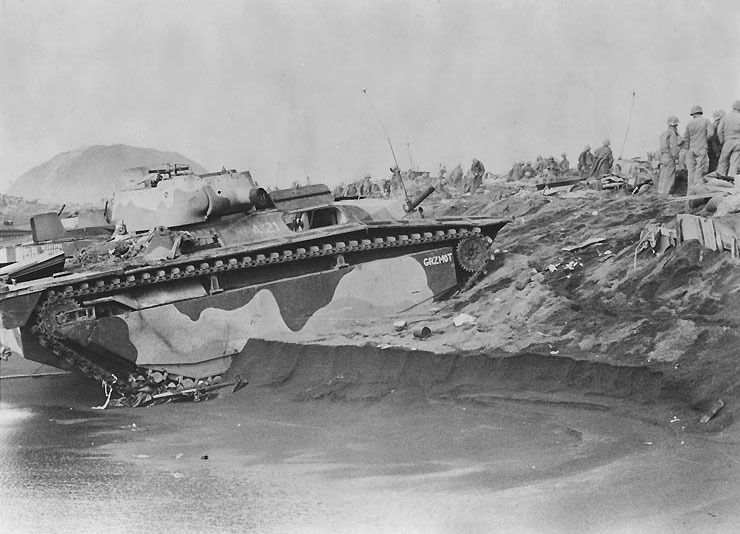
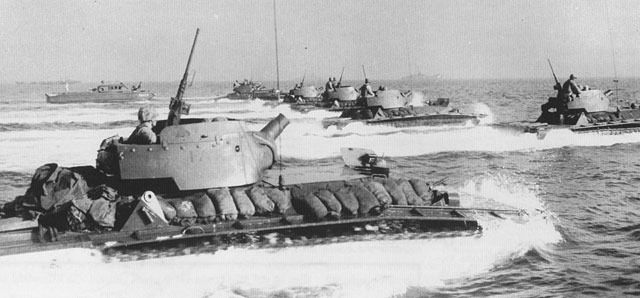
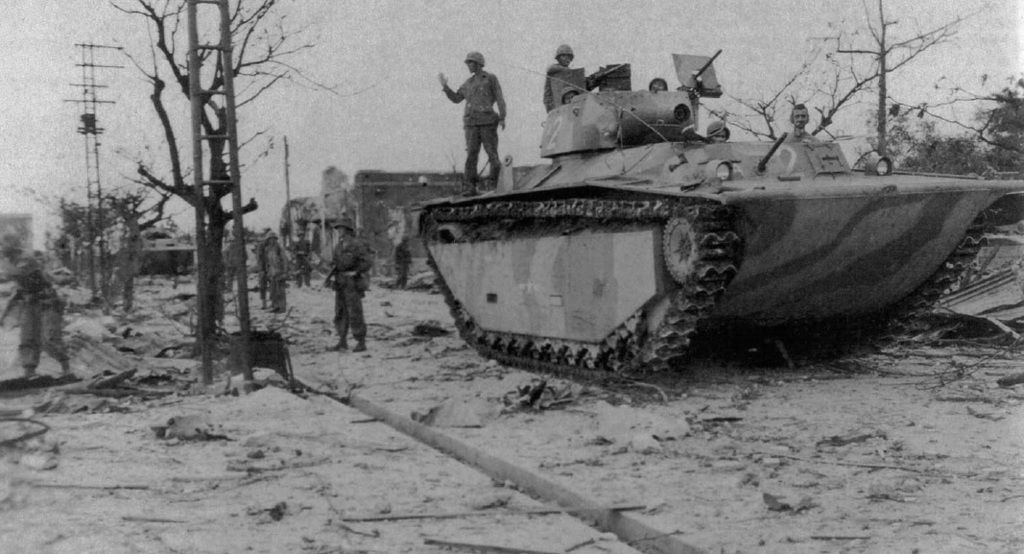
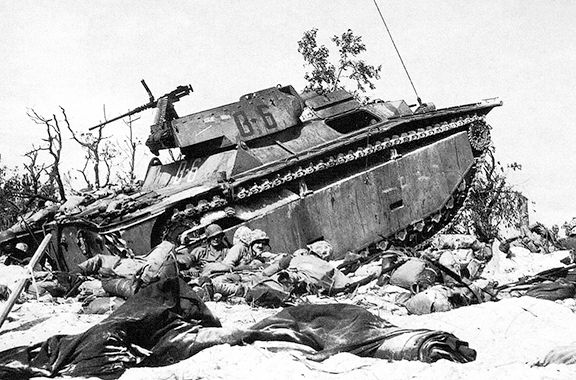
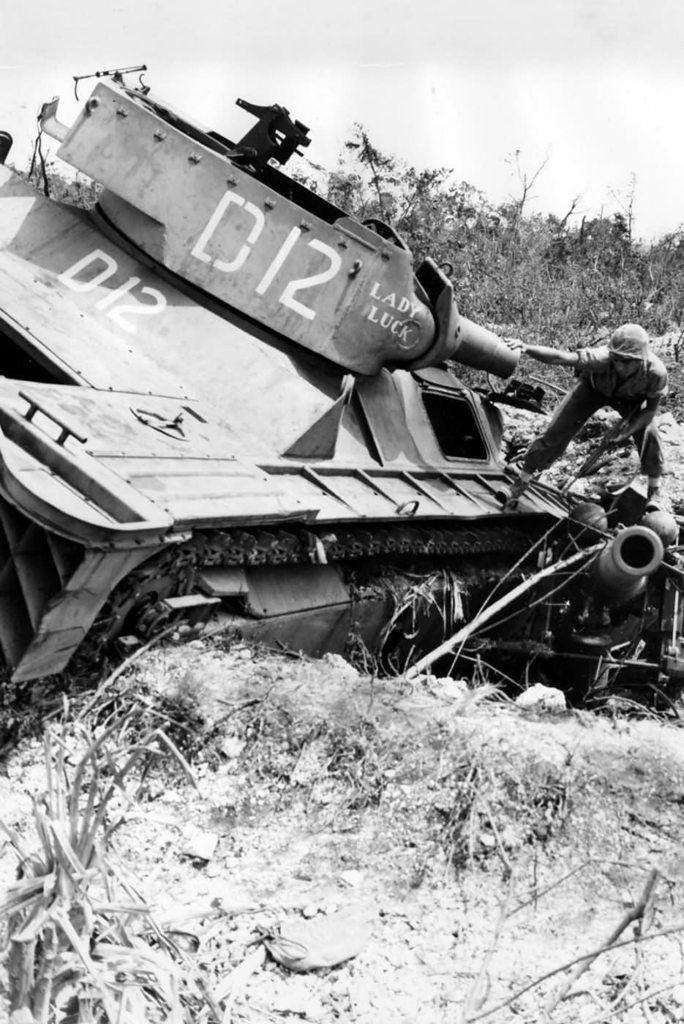 This last pic of Iwo Jima is beyond my comprehension of the utter devastation and harsh realities of war. My participation in this GB build is dedicated to all the soldiers, sailors, pilots, and everyday grunts who were part of the Pacific Campaign, especially those who never made it home.
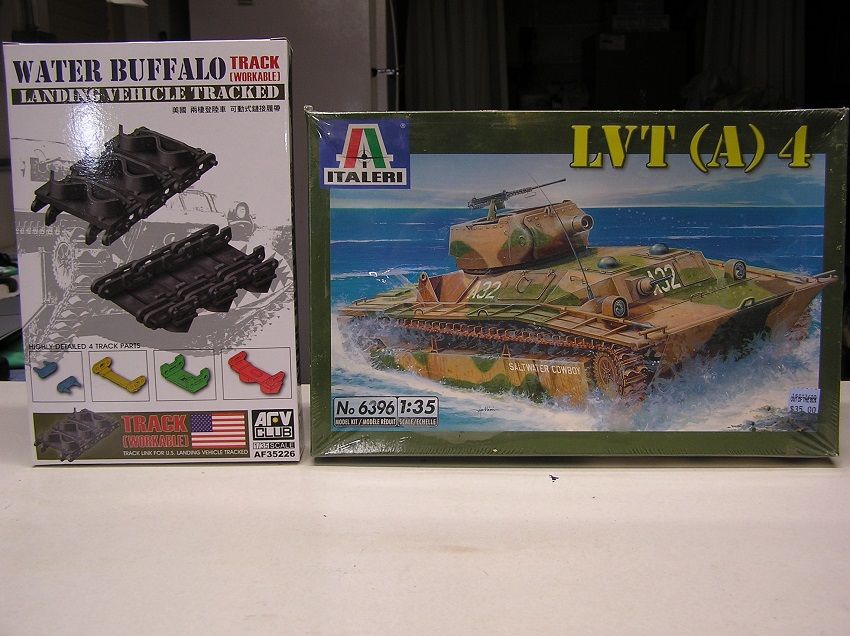
And finally the kit:
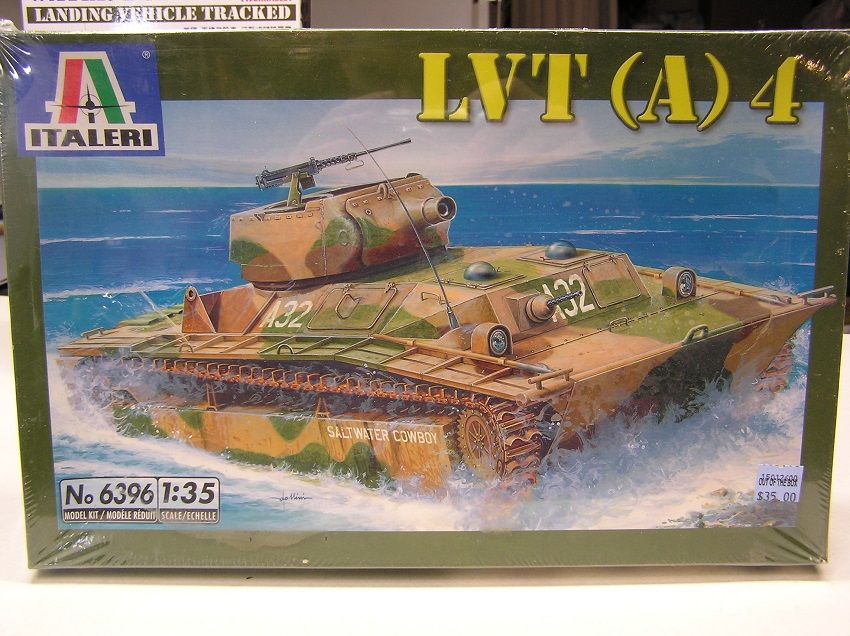
Italeri LVT (A) 4, kit no. 6396
The plan is to replace the kit tracks with the AFV Club set
 Sprue shots coming soon!

Re: Italeri LVT (A) 4, Landing Vehicle Tracked 1/35 scale
Posted: Tue May 03, 2016 1:08 pm
by Richp1969
Awesome looking kit. Should be a fun build.

Sincerely,
Richard
Re: Italeri LVT (A) 4, Landing Vehicle Tracked 1/35 scale
Posted: Tue May 03, 2016 10:40 pm
by OliveDrab
Re: Italeri LVT (A) 4, Landing Vehicle Tracked 1/35 scale
Posted: Tue May 03, 2016 10:42 pm
by Vleugelmoer
nice looking kit will be enjoying watching this unfold

Re: Italeri LVT (A) 4, Landing Vehicle Tracked 1/35 scale
Posted: Mon May 09, 2016 3:48 am
by OliveDrab
Lets build a World War II LVT!!!
After a quick peek at the AFV Club tracks, I soon realized they were going to take a whole lot of work and time. The actual LVT tracks are quite complicated when compared to most other tracks, and it looks like AFV Club did a fine job replicating the actual LVT tracks.
With the expected monstrous job of building the AFV Club tracks, I decided to build the tracks first then move on to the LVT. This also will allow for test fitting the tracks to the stock Italeri kit parts and not slow down the build of the LVT too much once started.
The track assembly instructions are printed on the back of the box. The pretty illustrations make the track assembly look
SO easy!
I soon found out this was definitely not the case.
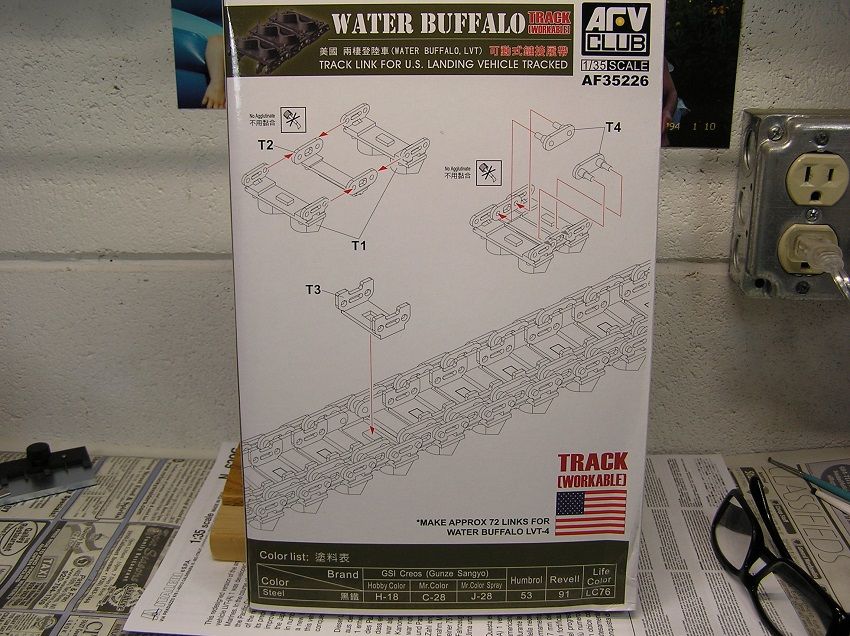
Yup, about 700 tiny parts in there

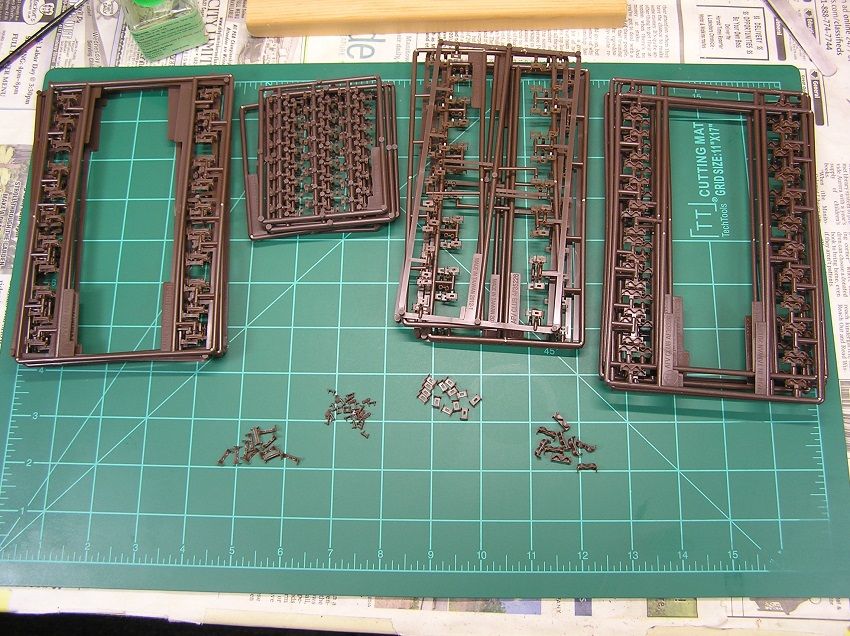
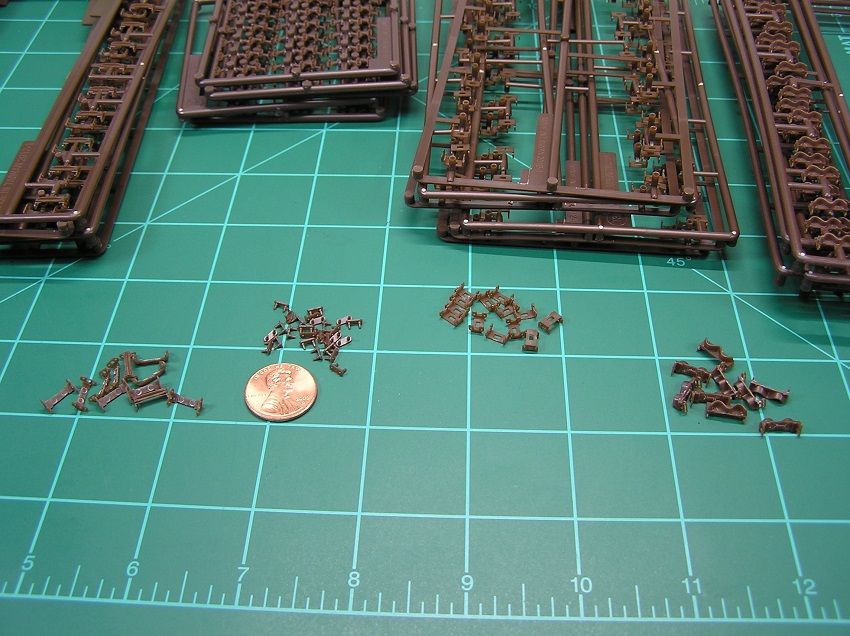
With great enthusiasm to start this Pacific GB, the track assembly was started...and after nearly three hours at the bench, a mere 2.5 inches (63mm) of track was assembled. You need at least three hands to assemble these buggers!!! It became painfully clear I needed to build a fixture to hold the links in place while inserting the two connecting pins. All track construction halted until I build an assembly fixture.
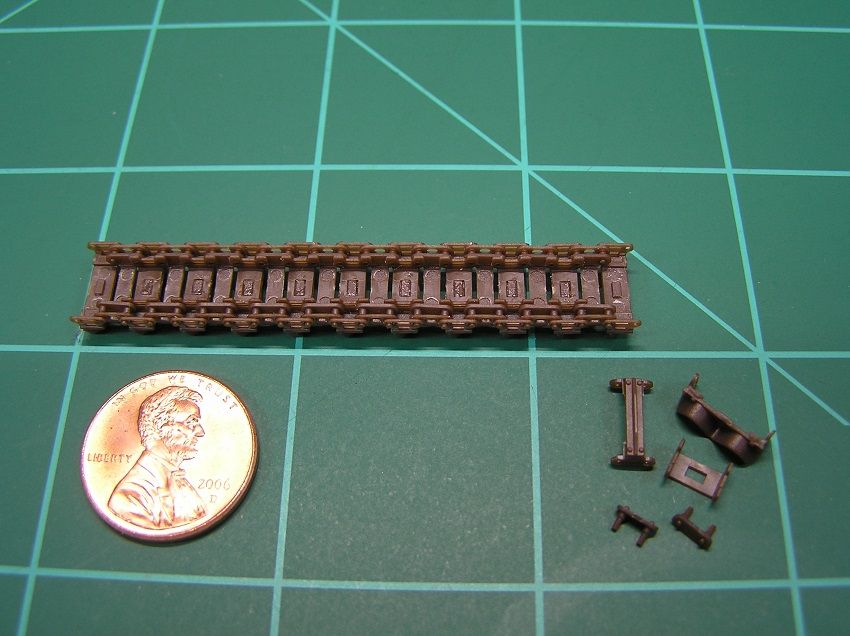
The good news is the AFV Club tracks have tremendous detail compared to the Italeri kit supplied tracks. The AFV Club tracks really are an excellent representation of the actual LVT tracks.
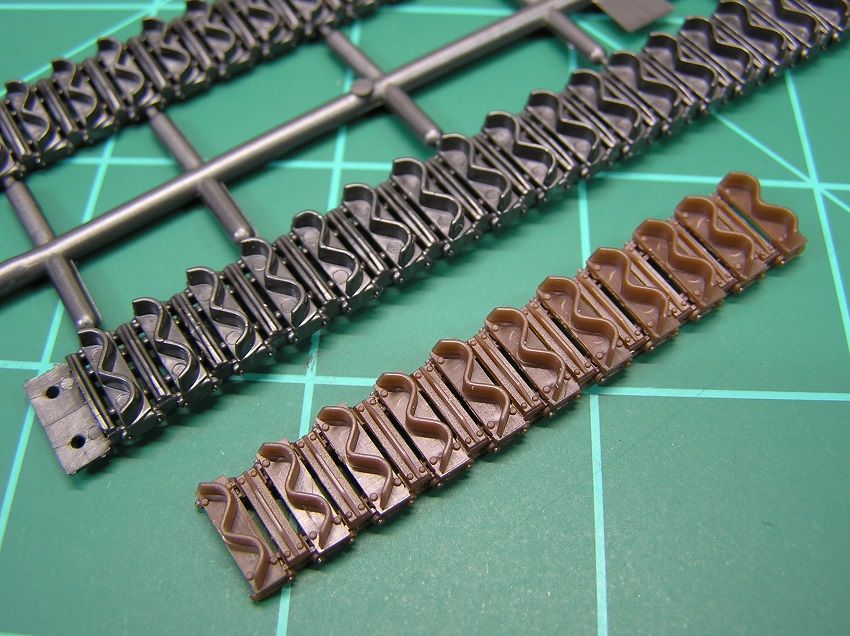
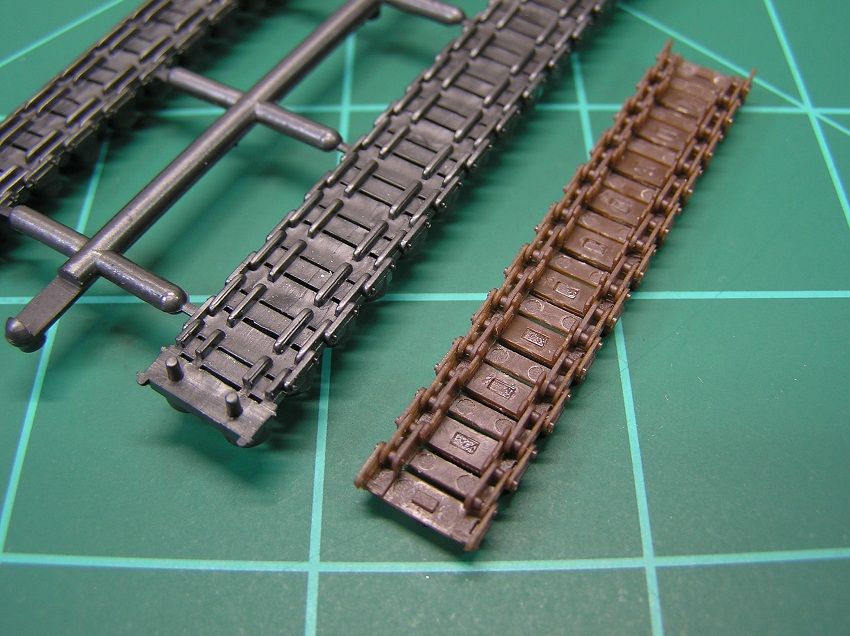
And they are completely workable.
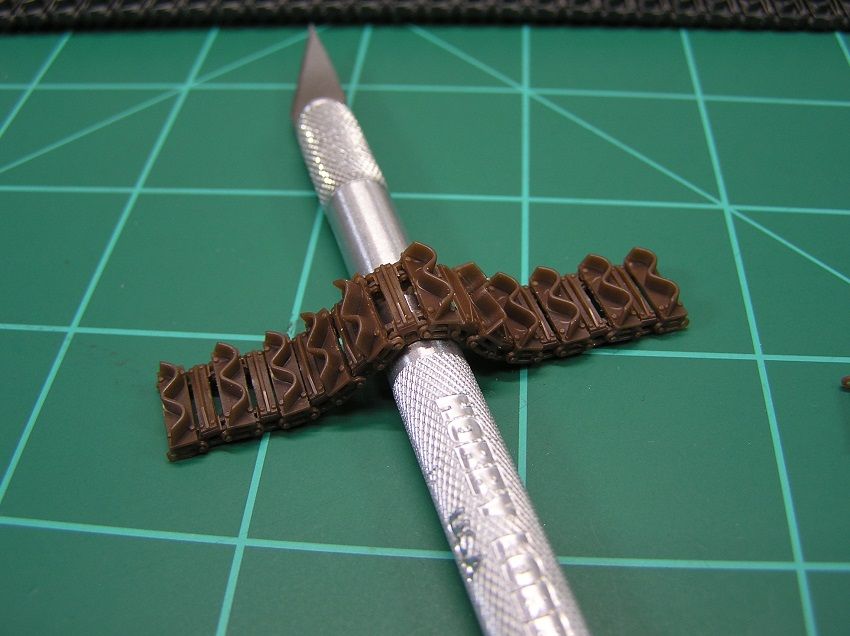 Next update coming soon - building a track assembly fixture.
Re: Italeri LVT (A) 4, Landing Vehicle Tracked 1/35 scale
Posted: Mon May 09, 2016 7:53 am
by Stokesy44
Beautiful looking tracks. Got to be worth the misery!
Re: Italeri LVT (A) 4, Landing Vehicle Tracked 1/35 scale
Posted: Mon May 09, 2016 8:02 am
by Novorus
Wow looks a really nightmare, but looks great.
Looking forward to watching this build as have a buffalo in the stash.

Re: Italeri LVT (A) 4, Landing Vehicle Tracked 1/35 scale
Posted: Mon May 09, 2016 8:03 am
by burnie43
and that's why I hate individual track links....great job pal
Cheers
Mark
Re: Italeri LVT (A) 4, Landing Vehicle Tracked 1/35 scale
Posted: Tue May 10, 2016 2:10 am
by OliveDrab
Stokesy44 wrote:Beautiful looking tracks. Got to be worth the misery!
Thanks Stokes, I sure hope so!
Novorus wrote:Wow looks a really nightmare, but looks great.
Looking forward to watching this build as have a buffalo in the stash.
Thanks Novorus, I too have the LVT-4 waiting to be built and I may be losing my mind because I've been thinking about pulling the LVT-4 from the stash and building it in tandem with the LVT (A) 4 here

Not sure if I could complete both in the allotted time though.
burnie43 wrote:and that's why I hate individual track links....great job pal
Cheers
Mark
Thanks Bernie, hopefully the upgrade in tracks will be worth the effort, besides whats a 50 year old guy supposed to do with his free time

Re: Italeri LVT (A) 4, Landing Vehicle Tracked 1/35 scale
Posted: Tue May 10, 2016 2:16 am
by OliveDrab
Before any more track assembly would be attempted, I would need to build a track assembly fixture.
The fixture will need to hold the links in place and also space them correctly in order to insert the connecting pins. The thought occurred that maybe a fixture cast with RTV silicone just might do the job. I had made some molds to cast some spare ammo crates and boxes with the RTV silicone before, but never a track building fixture. Hope this works!
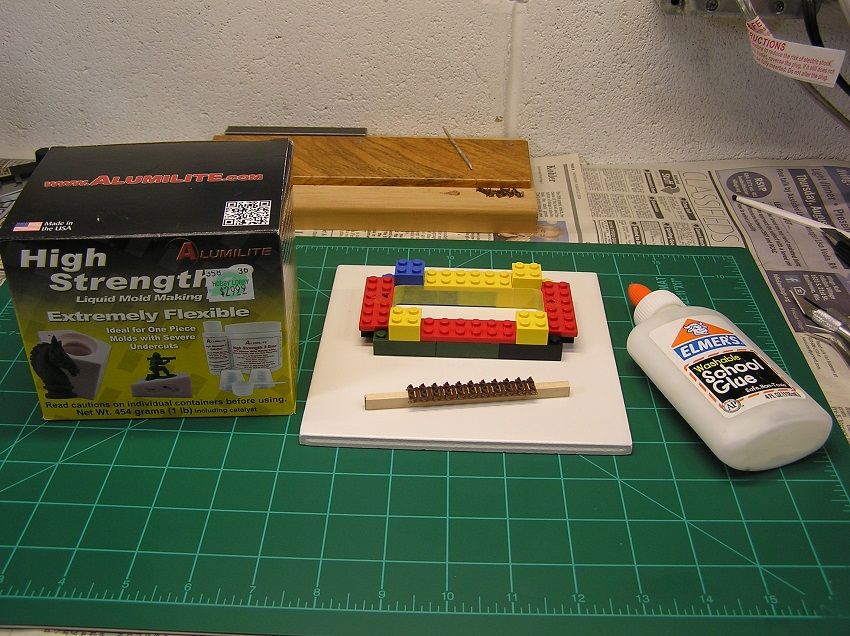
The materials needed: mold base (ceramic tile), mold box (legos), straight piece of wood, white glue, masking tape, RTV silicone, and a track section.
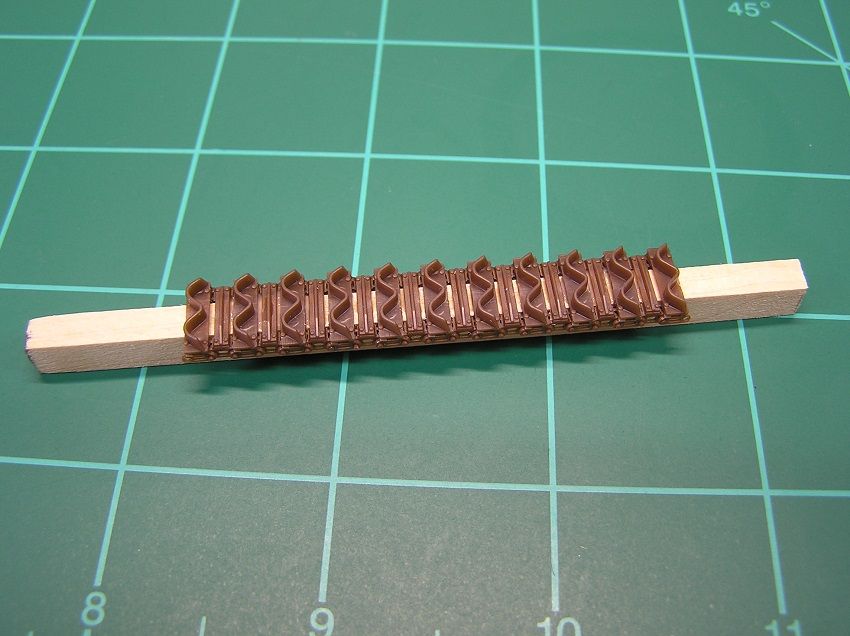
Step 1 - Glue the section of track to a straight piece of wood or plastic. Use a removable PVA so the track is easily removable after molding the fixture.
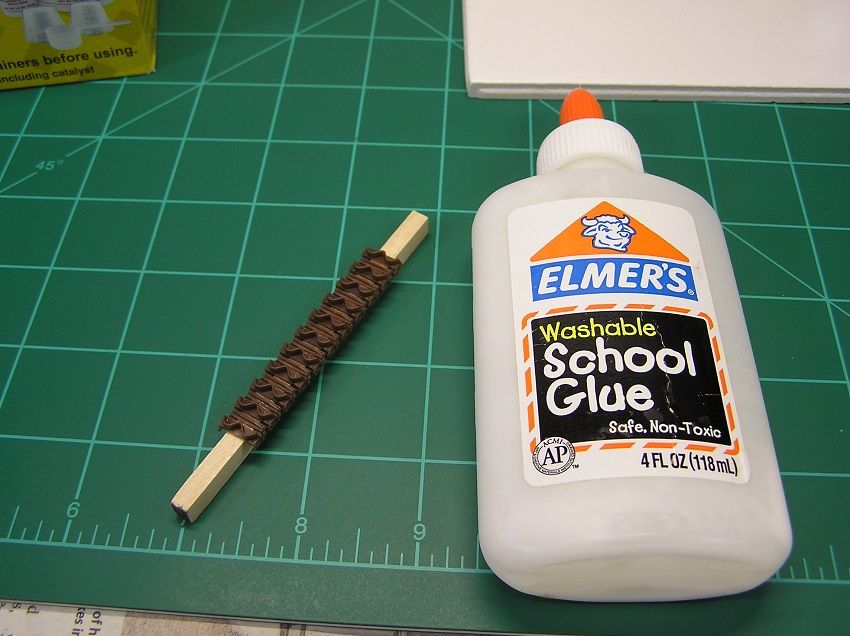
The track section glued to the wood and ready to be glued to the mold box:
Step 2 - Build the mold box (Legos work well

). Tape the sides of the mold box, and glue the box to the mold base with the PVA glue. The tape and glue is to prevent the RTV silicone form seeping into every crevice. (A spare tile works well for the mold base). Then glue the ends of the wood strip to the top of the mold box.
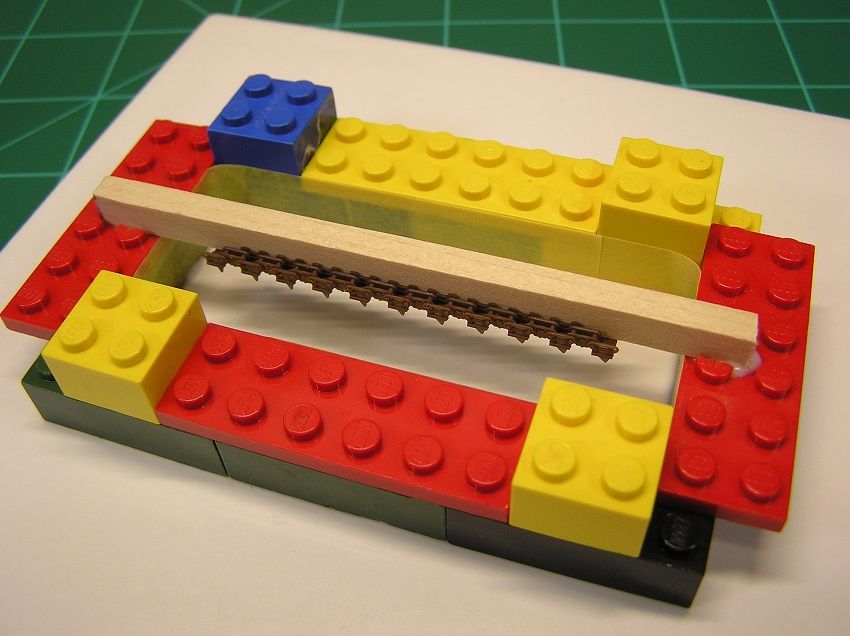
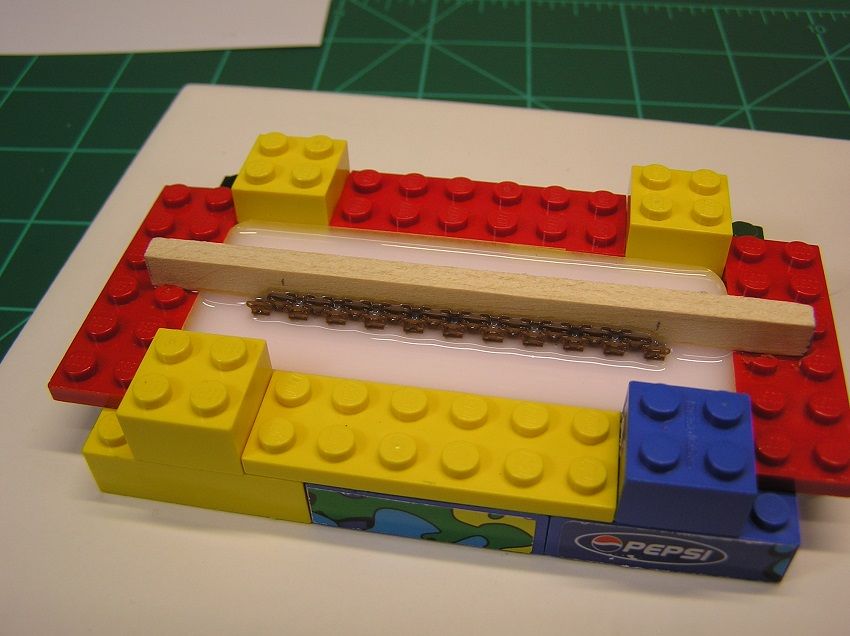
Step 3 - Mix the RTV silicone per instructions, then pour slowly into the edge of the mold. Fill the mold until the RTV reaches the bottom side of the tracks only, and maybe just up the sides of the track a tad. The RTV will seep up into all joints of the track, but we don't want the RTV to flow over the top surface of the tracks.
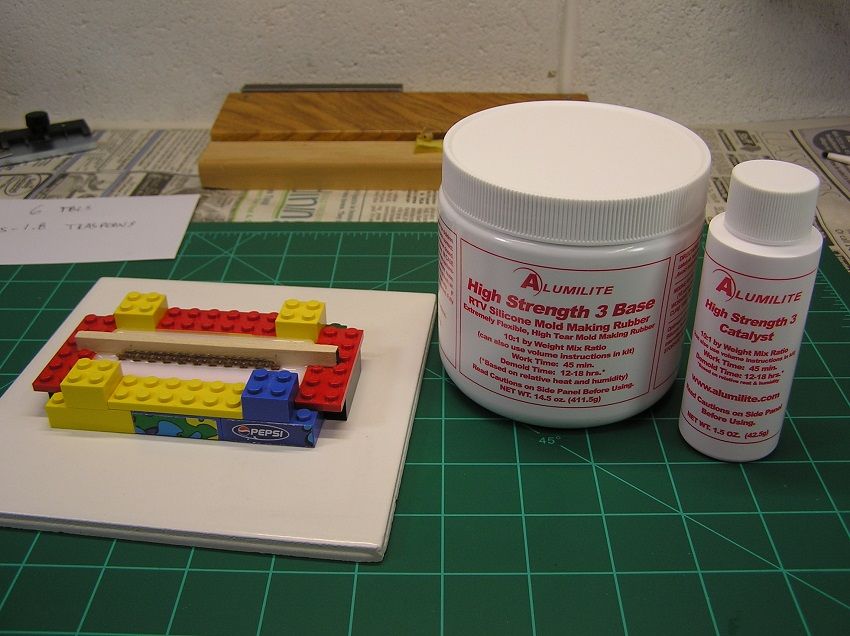
Step 4 - Let the RTV silicone cure per the instructions. I waited 48 hours just to be sure.
Step 5 - Carefully remove the track section from the mold. I needed to use an X-acto knife to cut parts of the RTV loose due to the RTV flowing up into the joints of the tracks.
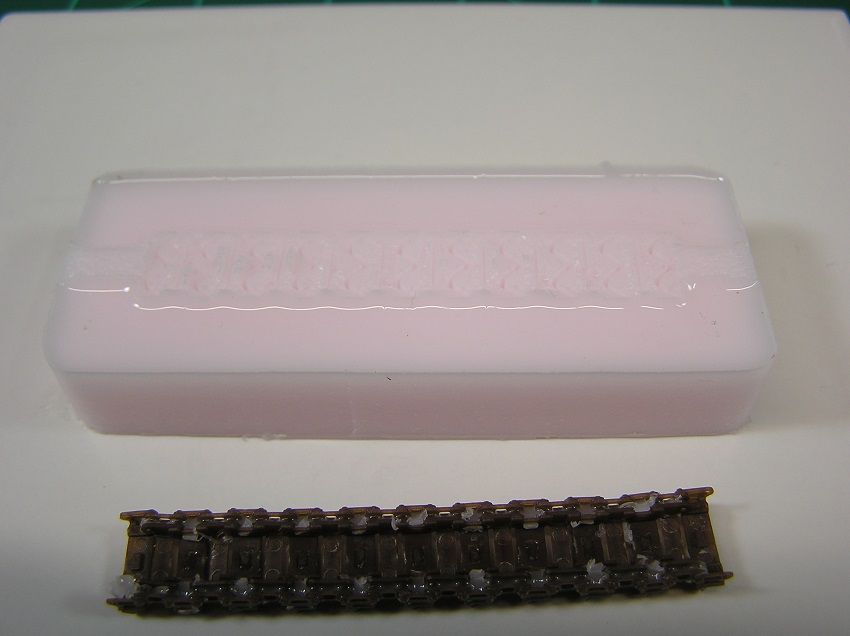
The track joints needed to be cleaned of all the excess RTV, again being careful not to damage the tracks because they are needed to complete the kit!
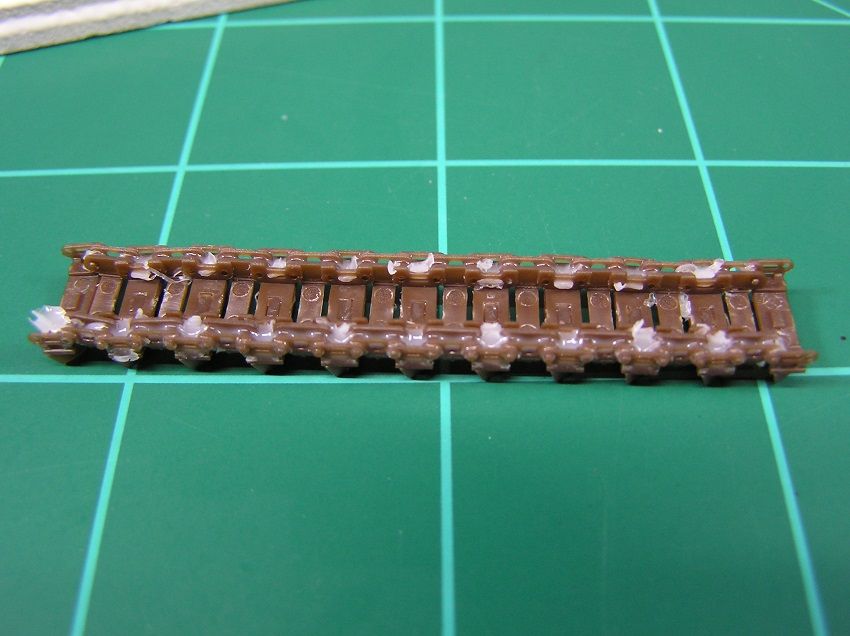
And now for the real test...will the fixture work???
It looks good so far, the fixture holds the 'paddle' sections of track nice with the correct spacing.
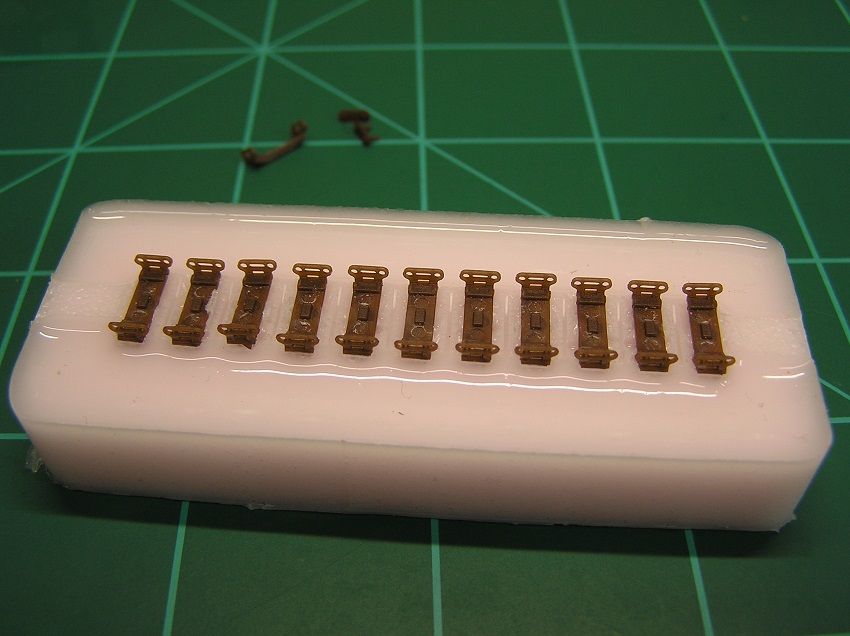
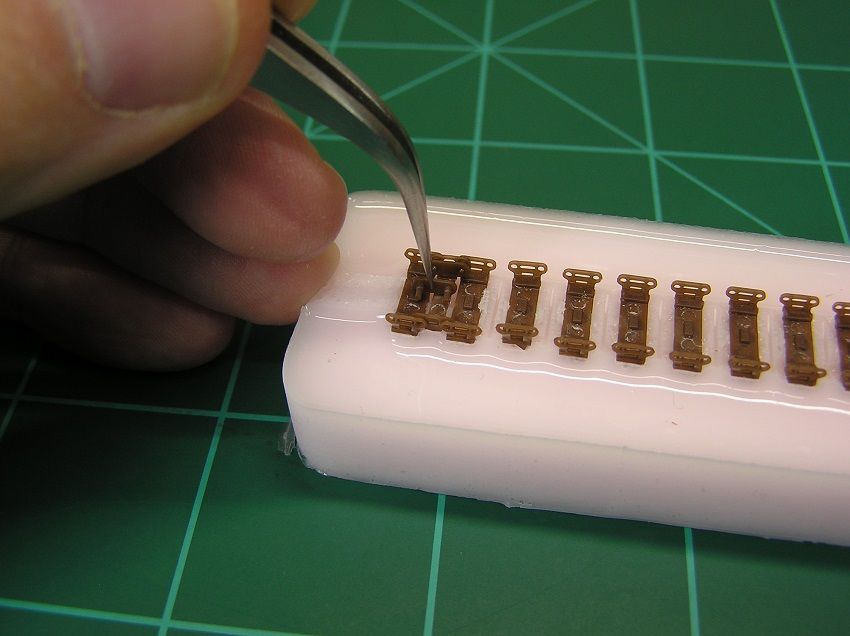
The joining link is then dropped into place, which the fixture also holds and centers. The connecting pins were a breeze to assemble as compared to trying to get them in place with no fixture
Celebration time!!! I'm normally not a drinker, but just had to pull one of these from the fridge!
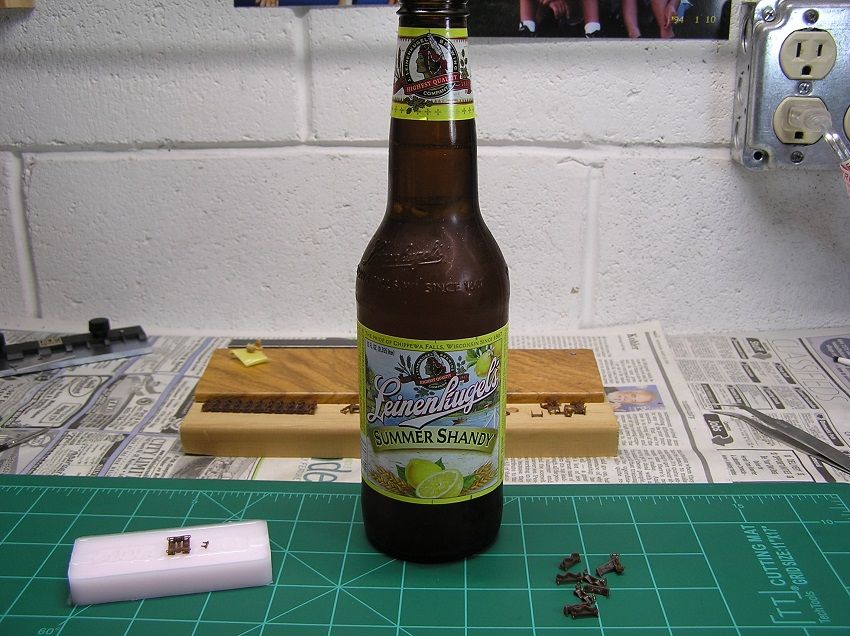 The celebration lasted only a short while, I soon realized there are still about 266 links to assemble yet...
Model On everyone!
The celebration lasted only a short while, I soon realized there are still about 266 links to assemble yet...
Model On everyone!
Re: Italeri LVT (A) 4, Landing Vehicle Tracked 1/35 scale
Posted: Tue May 10, 2016 6:24 am
by pir8hntr
Good looking build. It was a great way to come up with a fixture to help in the assembly of a complicated track. Looking forward to seeing the end of this build.
pir8hntr
Re: Italeri LVT (A) 4, Landing Vehicle Tracked 1/35 scale
Posted: Tue May 10, 2016 3:35 pm
by martin57
Nice kit, great idea with the track mould .
best of luck with the rest .
Re: Italeri LVT (A) 4, Landing Vehicle Tracked 1/35 scale
Posted: Tue May 10, 2016 8:04 pm
by Novorus
Re: Italeri LVT (A) 4, Landing Vehicle Tracked 1/35 scale
Posted: Wed May 11, 2016 5:31 pm
by pourquoi61
Re: Italeri LVT (A) 4, Landing Vehicle Tracked 1/35 scale
Posted: Thu May 12, 2016 2:46 pm
by privatepete
Hi nice choice of vehicle, noticed the sprue come pre rusted that's handy
.Nice idea the mold jig

.I think most of us have Lego stashed away some where very handy stuff good luck with the rest of the build
Re: Italeri LVT (A) 4, Landing Vehicle Tracked 1/35 scale
Posted: Thu May 12, 2016 10:55 pm
by OliveDrab
Thank you all for stopping by, so much appreciated!!
Re: Italeri LVT (A) 4, Landing Vehicle Tracked 1/35 scale
Posted: Thu May 12, 2016 10:58 pm
by OliveDrab
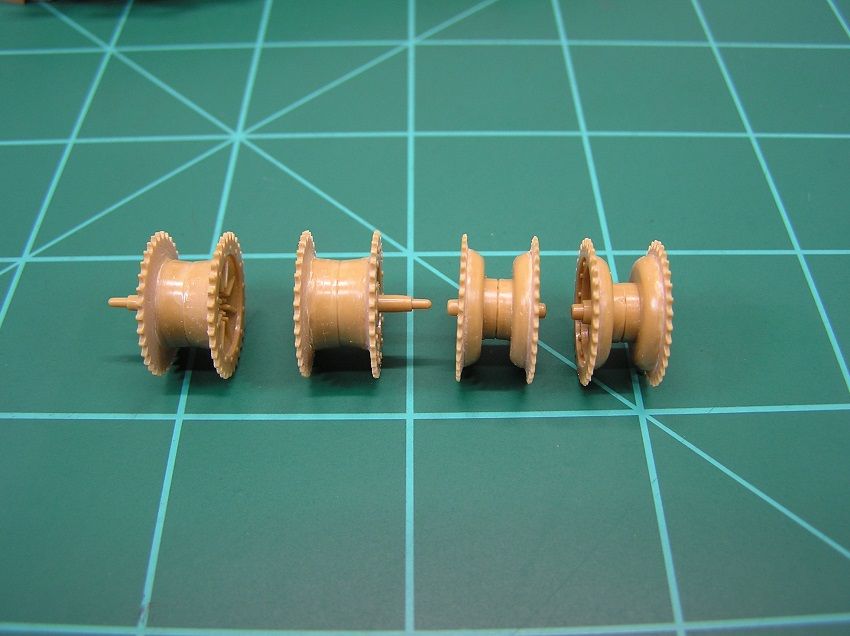
With the track construction coming along fine now, it was time to take a look at the sprockets and idlers.
No surprise here, as expected the sprockets and idlers would need some work to adapt to the AFV Club tracks.
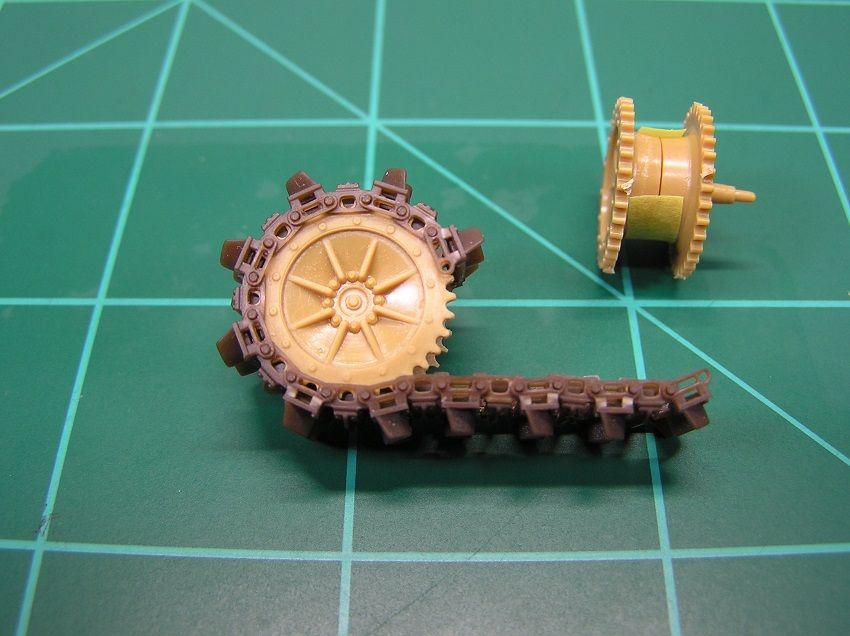
The stock sprocket and Idler plates are much too thick and the teeth are also too wide.
(A modified sprocket shown on the left, the stock sprocket shown on the right)
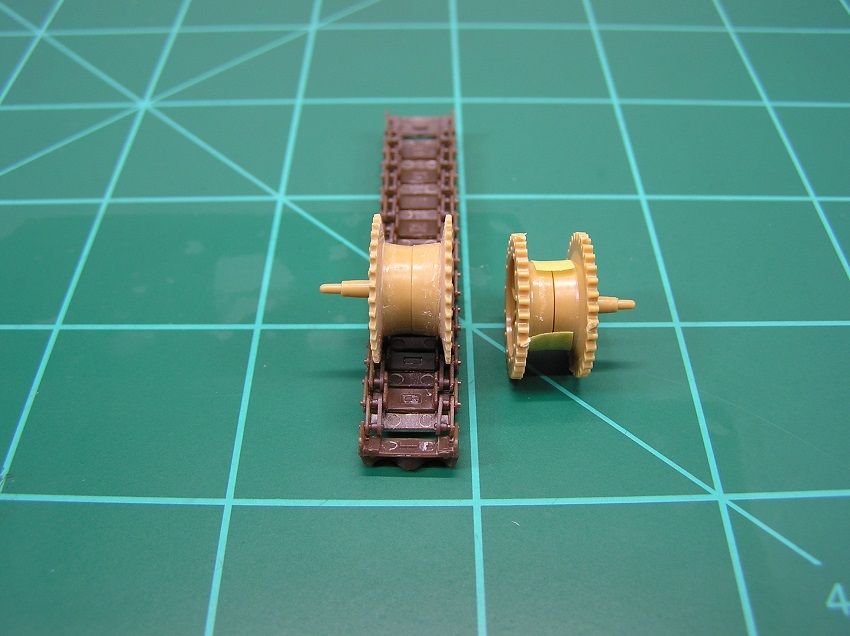
Step 1: Thin the inside surface of the sprocket plate with a hobby knife. (Very important to cut just the plastic, not your finger
)
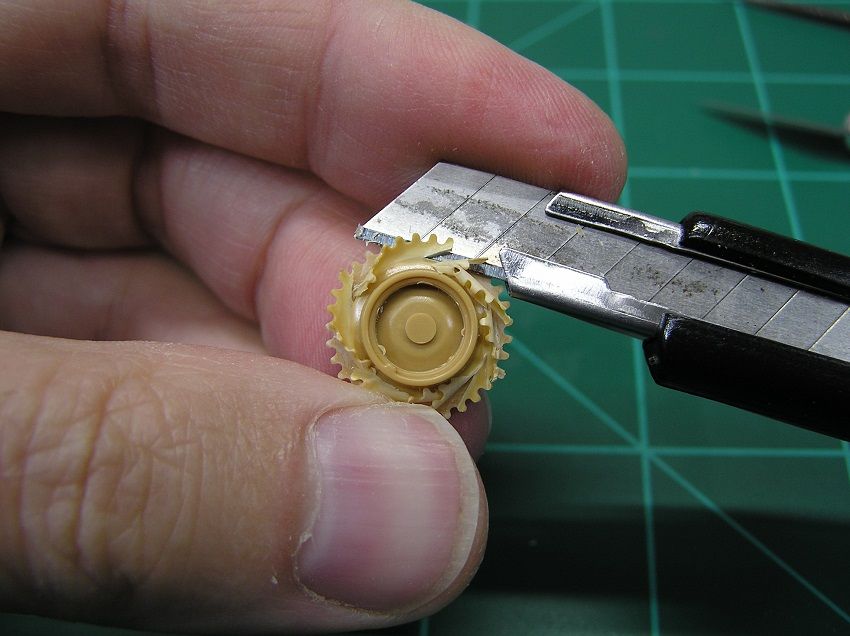
Step 2: Sand the surface to even out the cuts and further thin the sprocket plate to a uniform wall thickness.
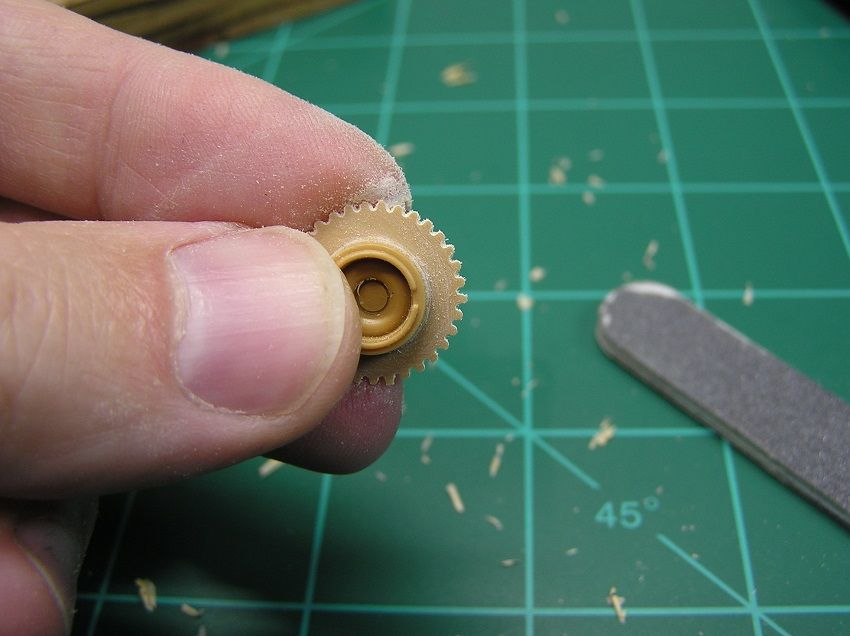
Step 3: Thin the sprocket teeth with drill bit. Drag the drill bit back and forth to 'cut' the teeth.
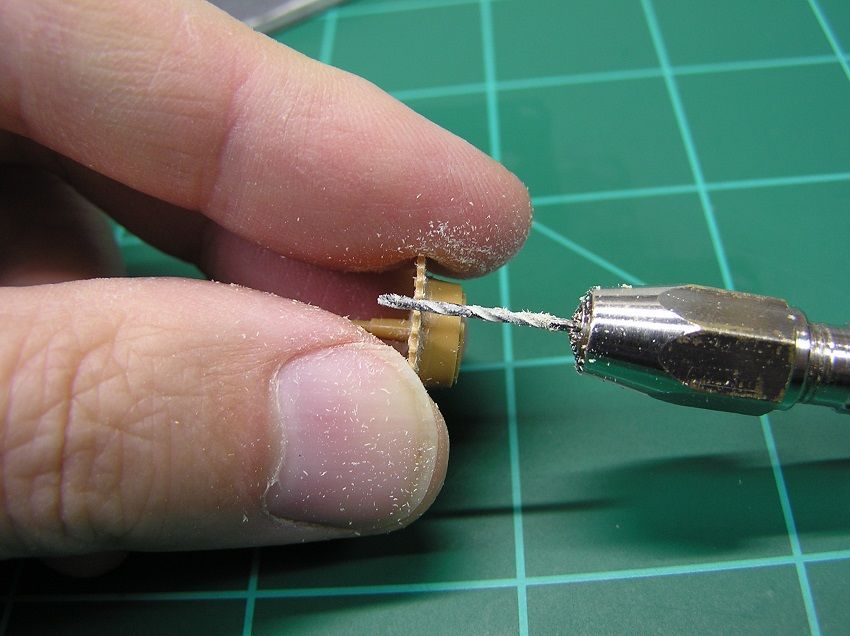
Step 4: Clean any remaining flash with a file or hobby knife.
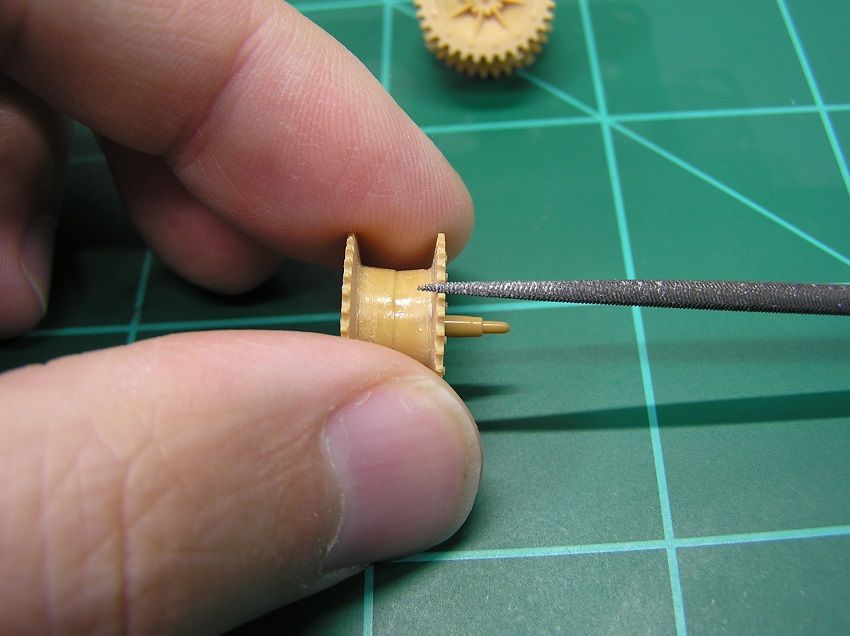
After the modifications, the sprockets and idlers were a perfect fit with the AFV Club tracks! (unmodified sprocket shown on right, the thick teeth certainly were not going to fit the tracks)
 Sprockets and Idlers all complete and ready to go
 Now, back to the bench for some more track construction....
Re: Italeri LVT (A) 4, Landing Vehicle Tracked 1/35 scale
Posted: Thu May 12, 2016 11:08 pm
by privatepete
Very nicely done sir, some fine modification work
Re: Italeri LVT (A) 4, Landing Vehicle Tracked 1/35 scale
Posted: Fri May 13, 2016 3:23 am
by OliveDrab
privatepete wrote:Very nicely done sir, some fine modification work
Thanks a bunch Pete!!!
Take care and get well, we want you back building soon

Re: Italeri LVT (A) 4, Landing Vehicle Tracked 1/35 scale
Posted: Sat May 14, 2016 8:47 pm
by OliveDrab
LVT assembly Step 1 - Adding the return rollers to the hull sides.
A really easy step, or at least it should have been

The parts assembled fine and was happy to finally be working on the LVT.
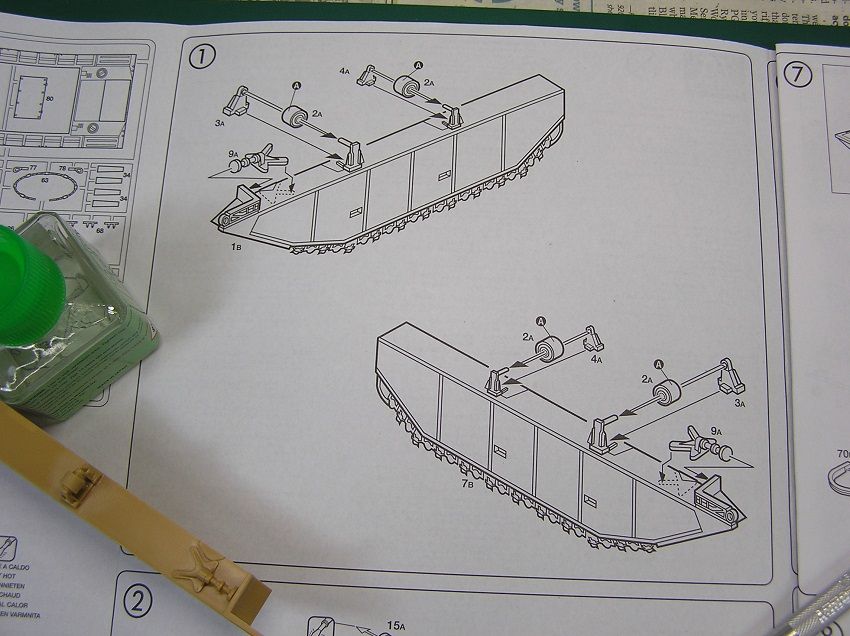
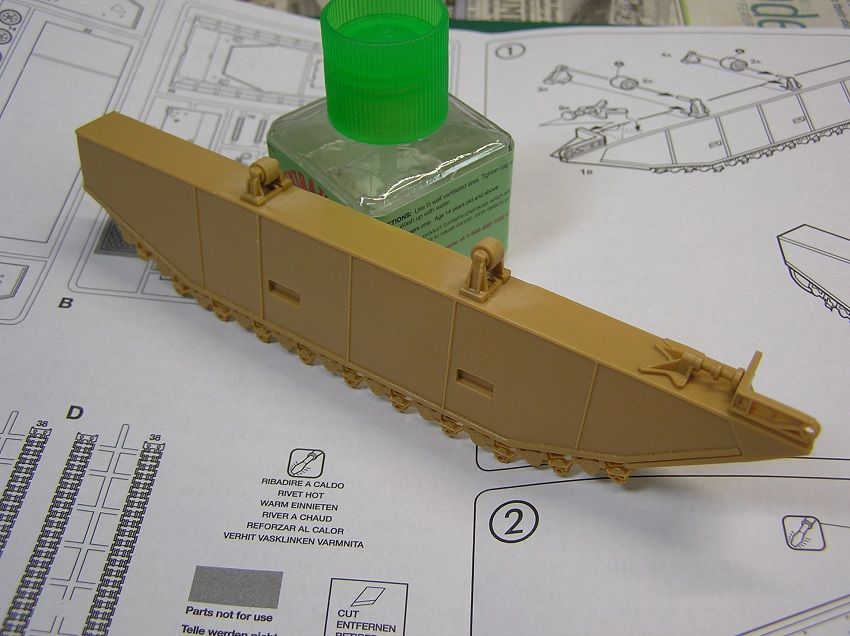
You might have thought I would have checked the fit of the AFV Club tracks before gluing the parts up

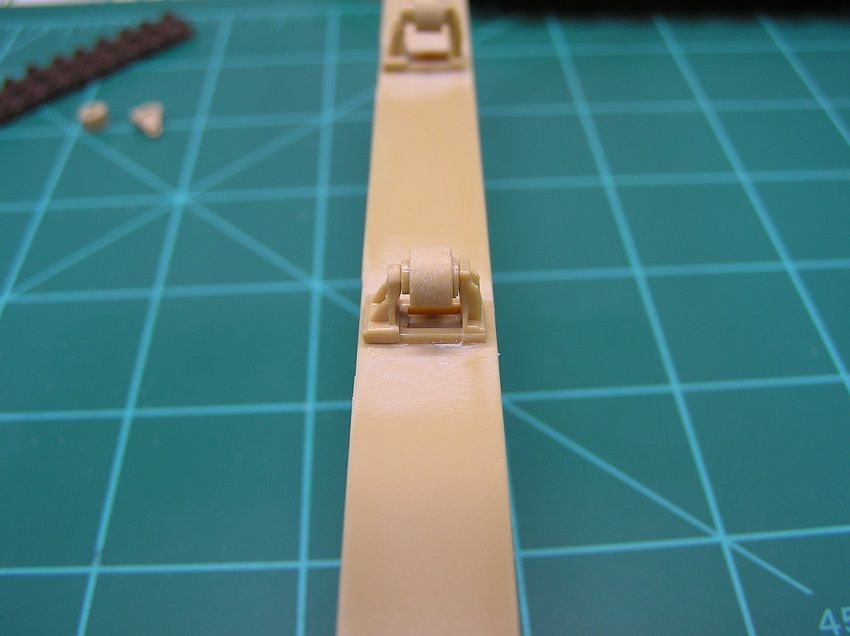
Turns out the rollers and upper sections of the brackets are too wide for the AFV Club tracks. The tracks then rode too high and would likely not have any clearance with the upper hull fender. The stock assembly shown here:
In reality, it should look like this with the tracks overlapping the upper section of the return roller brackets.
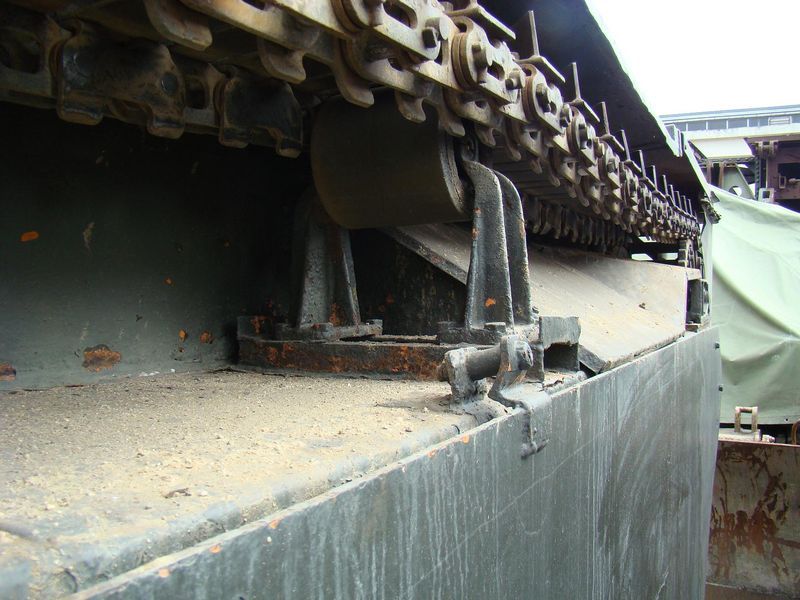
Fixing my mess was going to take some surgery, and needed 3 steps to correct the fit issue.
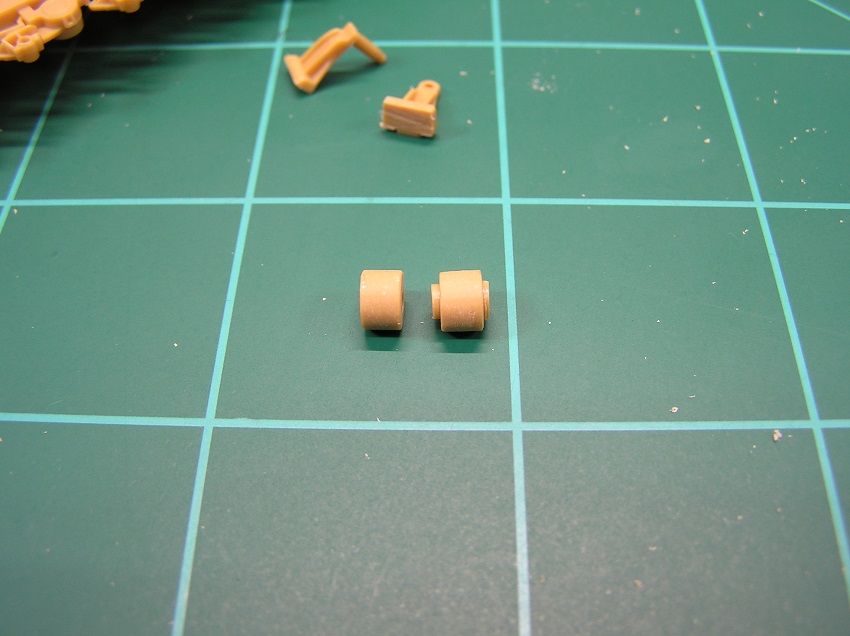
1. The return rollers need to be narrowed by removing the flange on both sides of the roller.
2. The brackets need to be removed and re-positioned inboard from the hull edges for the narrower return roller.
3. The upper section of the brackets need to be thinned.
Modified roller on left, stock roller on right:
Cutting the brackets off the outer side hull:
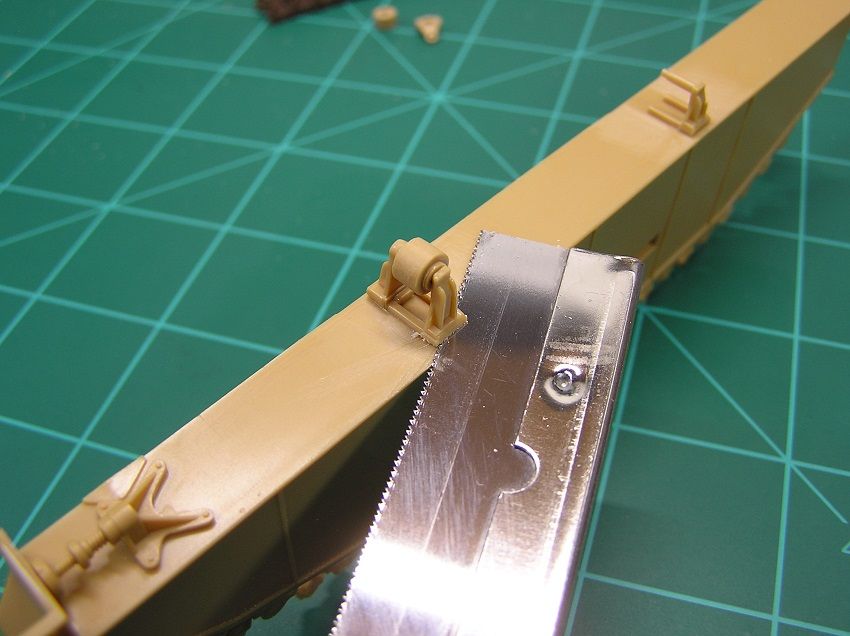
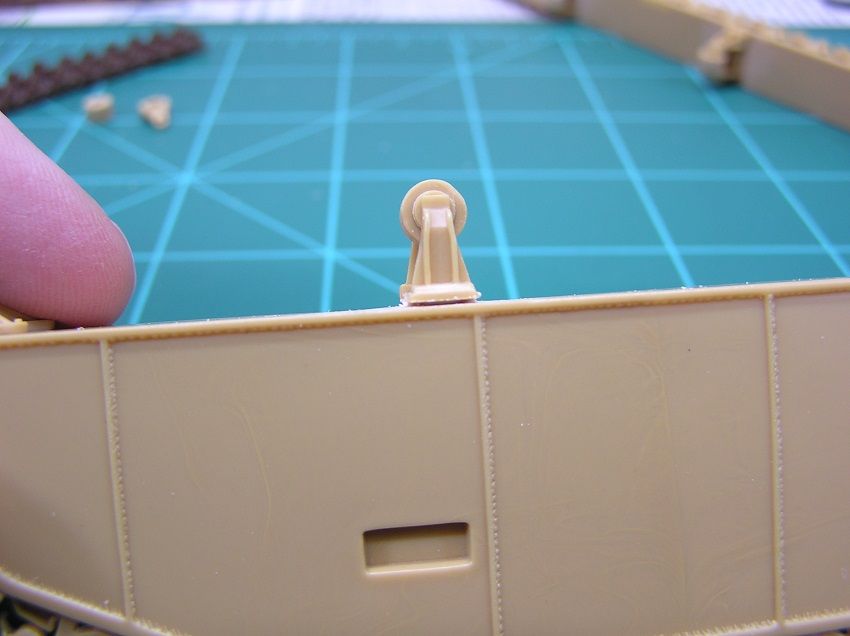
And then re-assembled with the modifications complete:
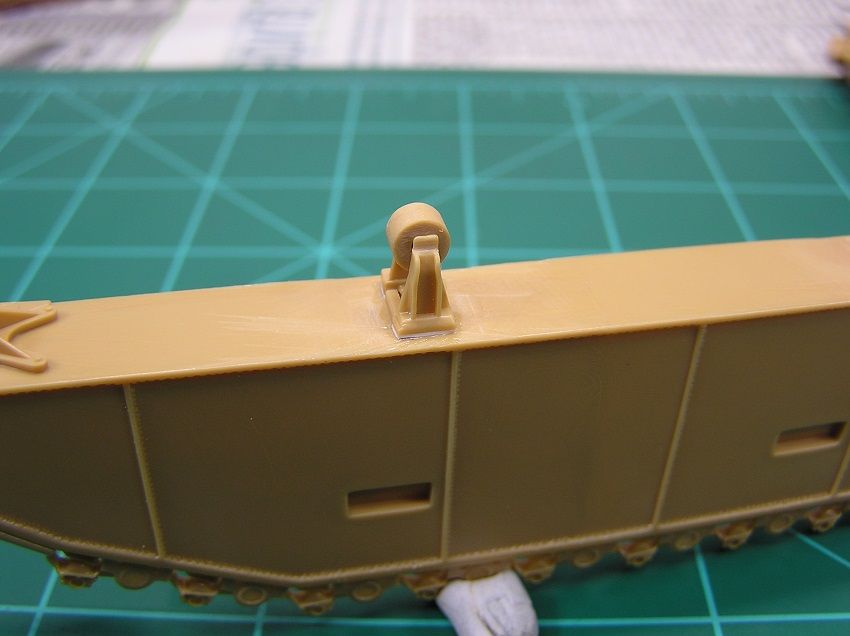
And the completed side hull on the the left, the stock side hull on the right:
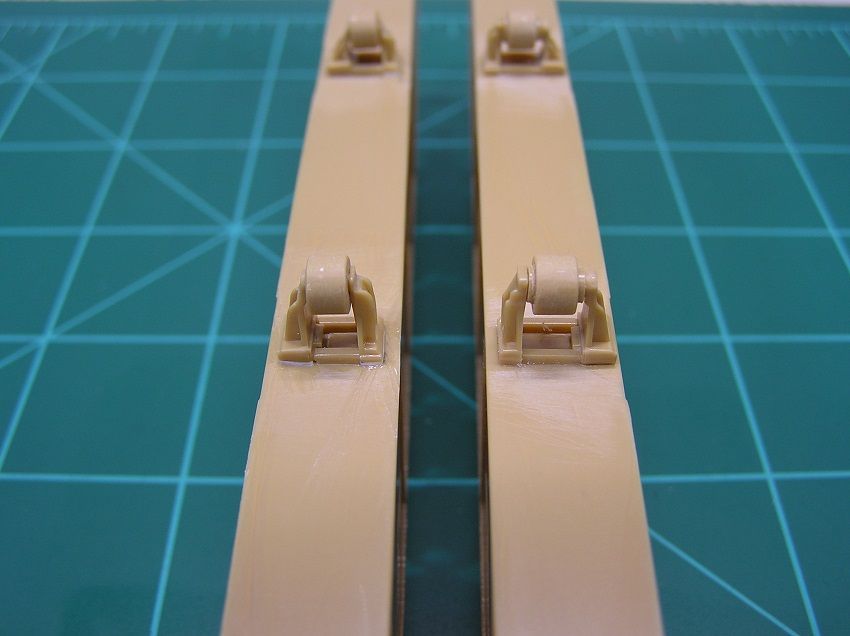 Thanks for viewing, Model On!
Re: Italeri LVT (A) 4, Landing Vehicle Tracked 1/35 scale
Posted: Sat May 14, 2016 10:24 pm
by privatepete
Hi I think you just love doing modification work
which odiously you've got the skill and known how
, hope the rest of the build is straight forward.
Re: Italeri LVT (A) 4, Landing Vehicle Tracked 1/35 scale
Posted: Sun May 15, 2016 4:20 am
by OliveDrab
privatepete wrote:Hi I think you just love doing modification work
which odiously you've got the skill and known how
, hope the rest of the build is straight forward.
Your probably right about liking the modification work Pete, but some of the mod work is done just out of necessity like the sprocket/idler mods done here. I'm thinking the rest of the build should go rather smooth...(fingers crossed).
Re: Italeri LVT, Landing Vehicle Tracked (X2)
Posted: Sun May 15, 2016 5:12 am
by OliveDrab
Bring on the roadwheels!
All the roadwheels were cleaned of flash and the outer diameter lightly sanded with a coarse sanding stick. Sanding the outer diameter leaves the surface slightly scratched to simulate roadwheel wear.
But wait, whats up with those green roadwheels???
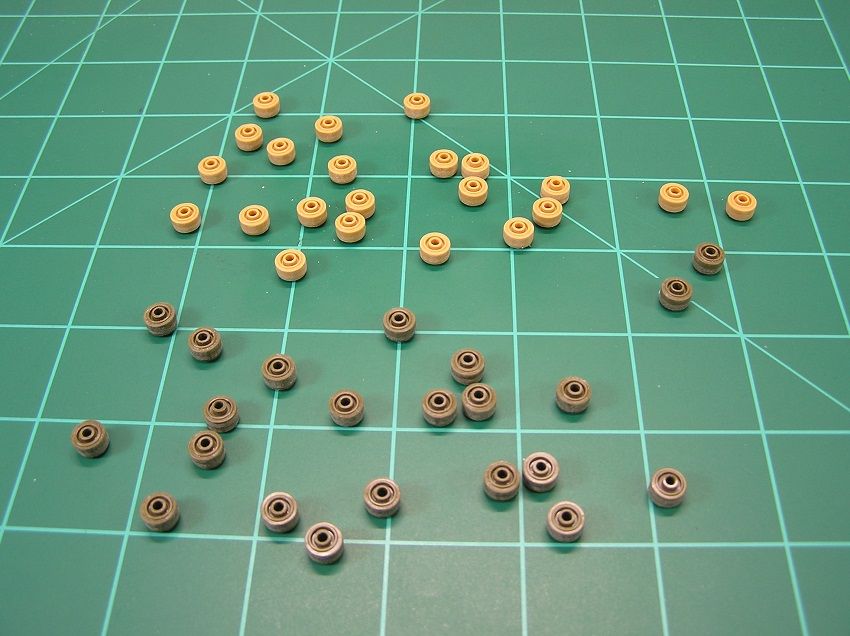
I've been contemplating pulling the other LVT out of the stash and building it in tandem here with the LVT (A) 4. Well, why not I thought, besides it should be twice the fun right?

I'm not sure if both will be completed in time, but we'll give it a good shot anyway. A set of Friulmodel LVT metal tracks are on order for this one.
This will be my first experience with a Friul track set, so I am looking forward to trying them out here! (Hope they don't take too long to arrive, as they are coming from Poland).
The Italeri LVT-4 Water Buffalo:
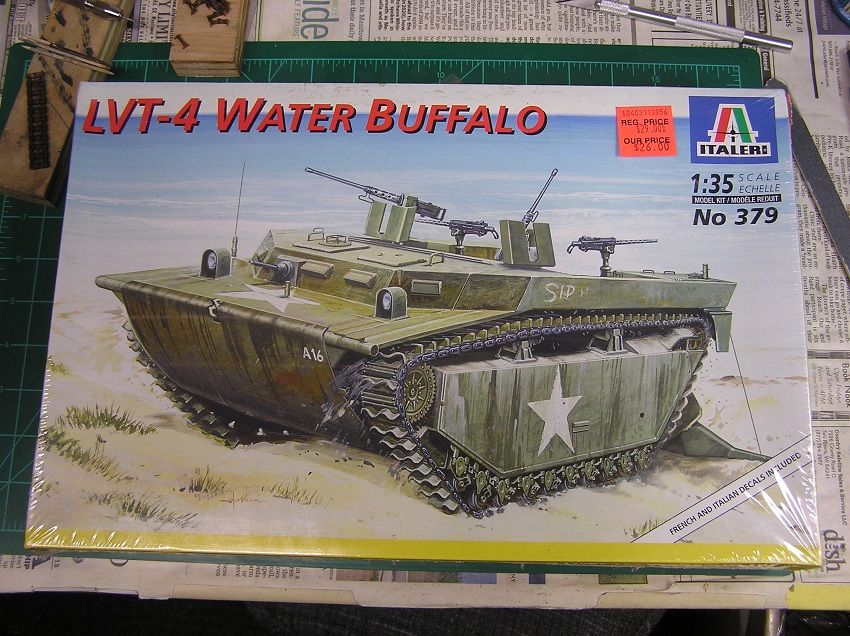
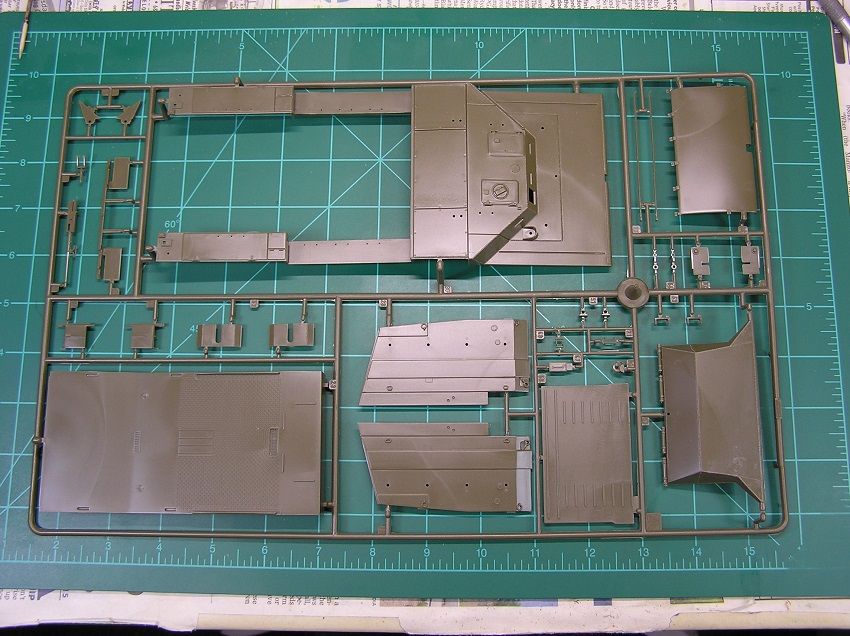
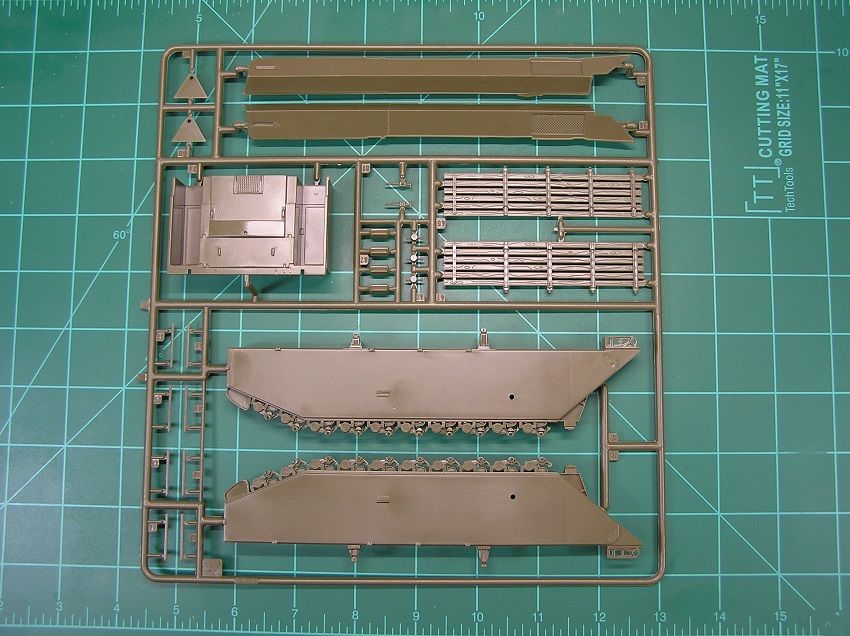
Like the LVT (A) 4, there are three large sprues in the box, the instructions, decals, the vinyl tracks and a small rope to model the rear gate open.
The first two pics are entirely different sprues from the LVT (A) 4 version:
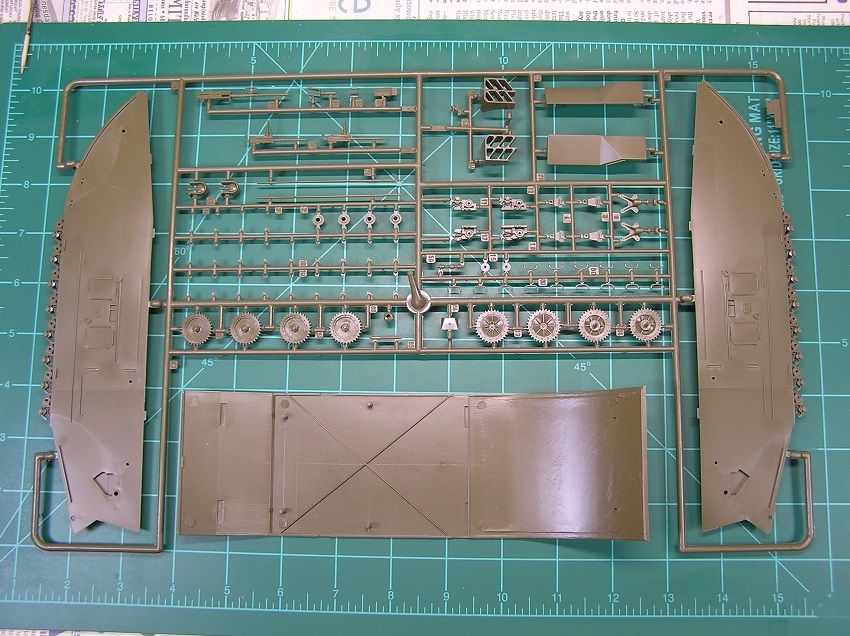
This sprue is common between the two LVTs. (Note: roadwheels missing since I already removed them for cleanup)
 Thats all for now, I better get cracking!
Re: Italeri LVT (A) 4, Landing Vehicle Tracked 1/35 scale
Posted: Sun May 15, 2016 9:51 am
by fly1ngdutchm4n
That's some great modeling shown here, love that track mold.
Got a Revell LVT (a) 1 amtank in my stash, maybe entering it as a second entry.
But that kit is very simple and no way as nice as yours. Should be fun doing a OOB with it.
Looking forward to see more of your progress, love it so far!
Re: Italeri LVT (A) 4, Landing Vehicle Tracked 1/35 scale
Posted: Sun May 15, 2016 8:06 pm
by OliveDrab
fly1ngdutchm4n wrote:That's some great modeling shown here, love that track mold.
Got a Revell LVT (a) 1 amtank in my stash, maybe entering it as a second entry.
But that kit is very simple and no way as nice as yours. Should be fun doing a OOB with it.
Looking forward to see more of your progress, love it so far!
Thank you Frans

I believe the Revell kit is a re-box of the Italeri kit, so it should be from the same family of tools as both Italeri kits I have here in this GB.
Re: Italeri LVT (A) 4, Landing Vehicle Tracked 1/35 scale
Posted: Sun May 15, 2016 9:25 pm
by OliveDrab
Moving on with the LVT (A) 4 build:
Step 3 of the Italeri instructions would have you assemble the roadwheels and side pontoons to the hull plate. With the pontoons assembled, the roadwheels are permanently in place, which would make them difficult to paint. I'm going to deviate from the instructions and leave the pontoons loose for now. I'd rather airbrush the roadwheels separately before assembly, which means I'll need to paint the lower hull section before assembly also.
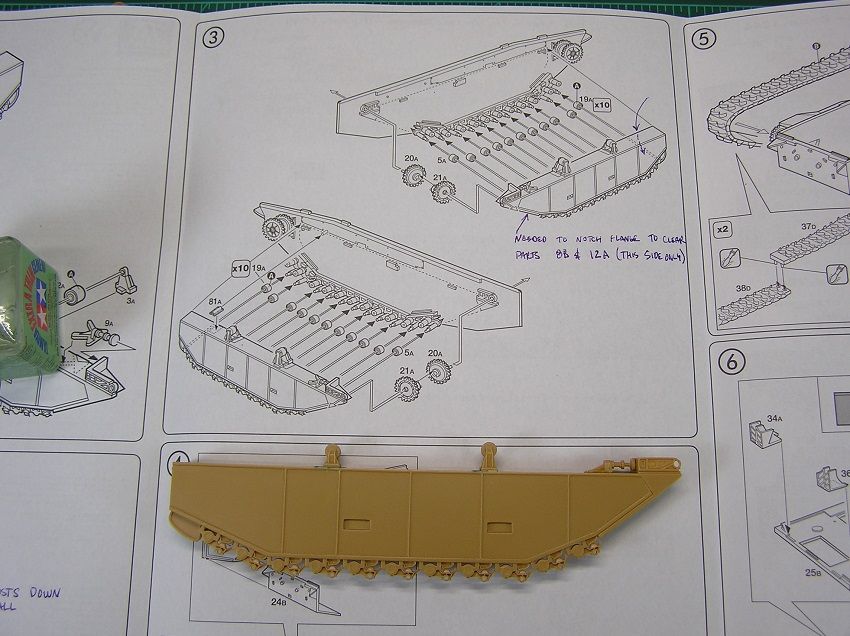
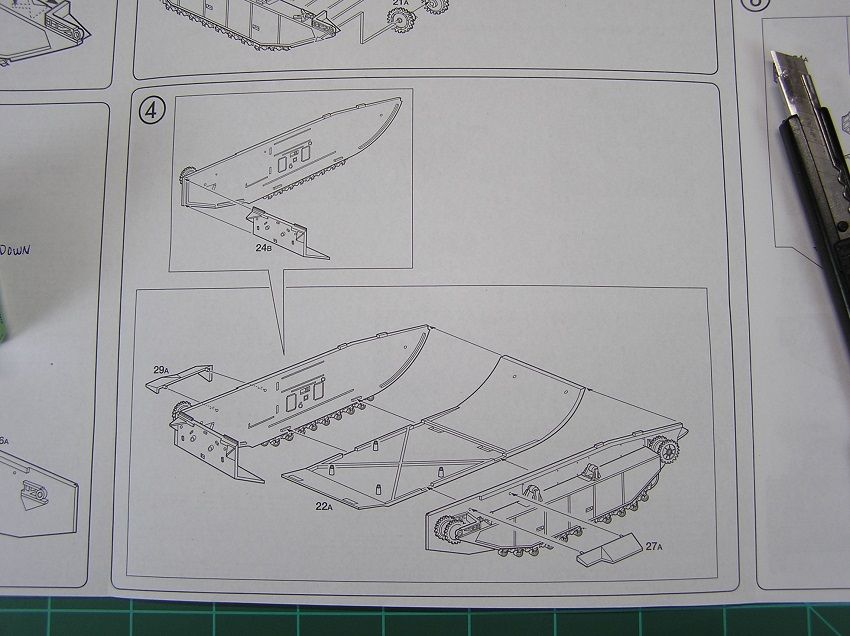
Moving ahead to Step 4 brings us to the assembly of the lower hull plates. Really no issues here at all, although some masking tape and clamps will come in handy to help hold things in place while gluing everything up.
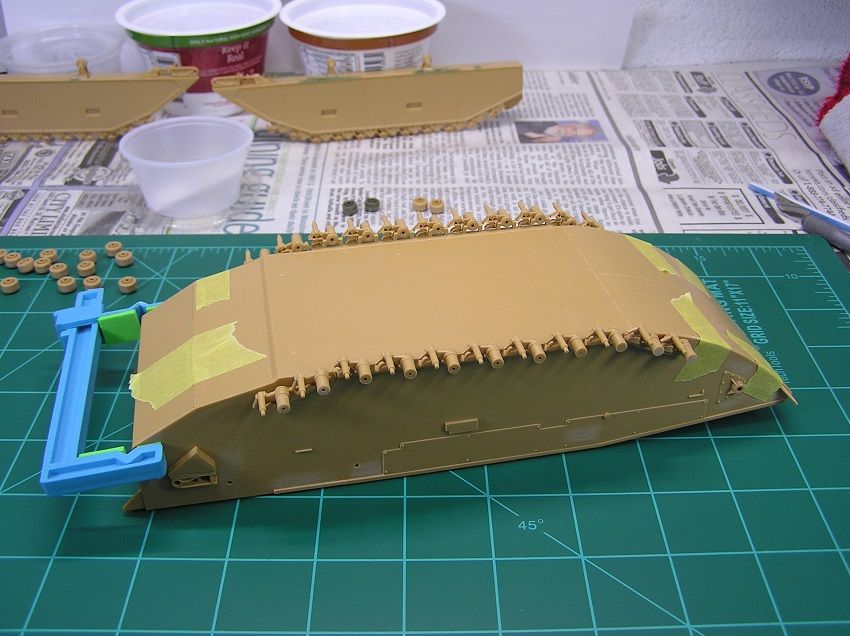
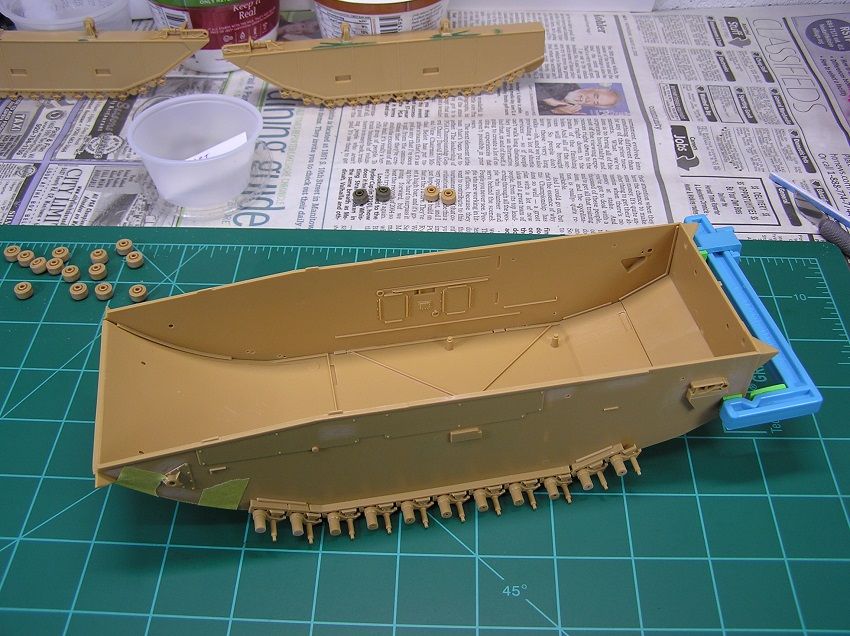
And then a dry fit of the top plate: Fits and looks good except for a gap at the front of the hull. (hidden by all the masking tape
)
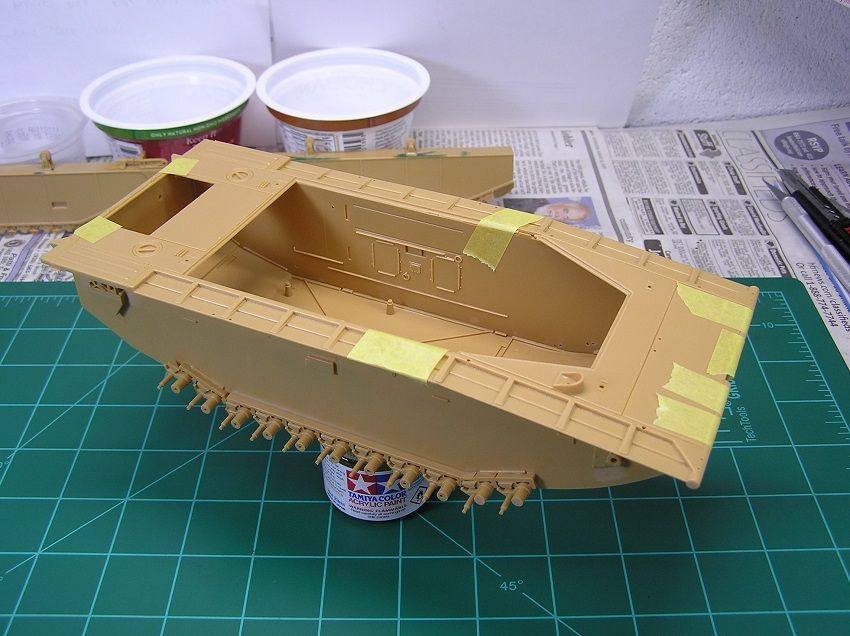
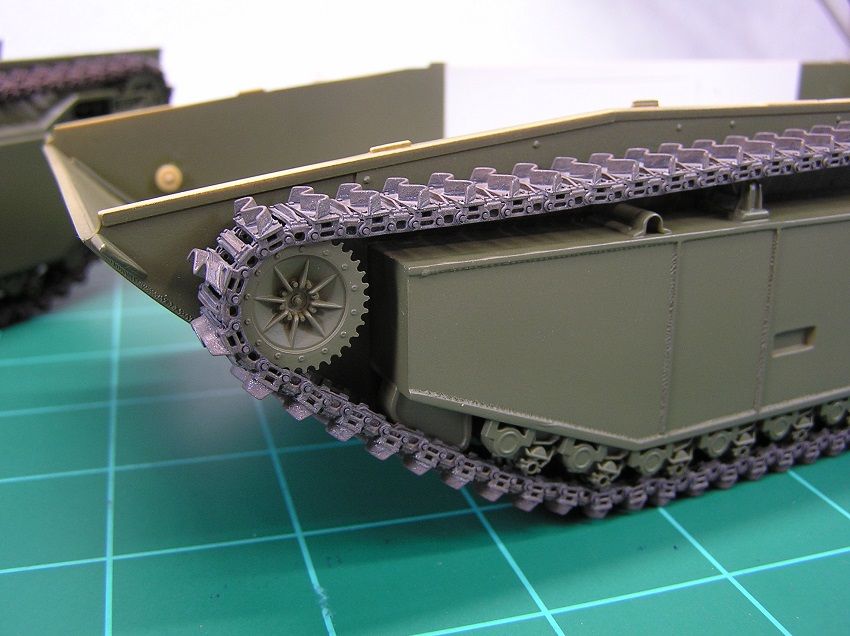
With the lower hull complete, now the tracks could be fitted. AFV Club recommends 72 'paddle' links per side, however the tracks were extremely tight with 72 paddle links, almost to the point of breaking. I finished the right side tracks with 73 paddle links, which might be a tad too long, but overall was darn happy with the looks of them
Note: It will not be possible to install the tracks with the top deck in place. I'll need to paint and assemble all of the lower hull (tracks, roadwheels, etc) before the top plate gets glued in place.
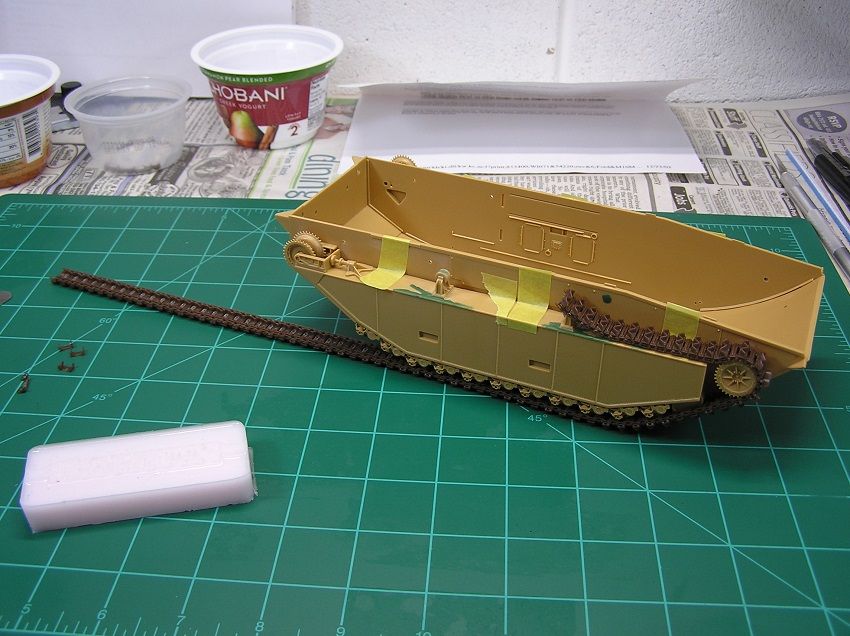
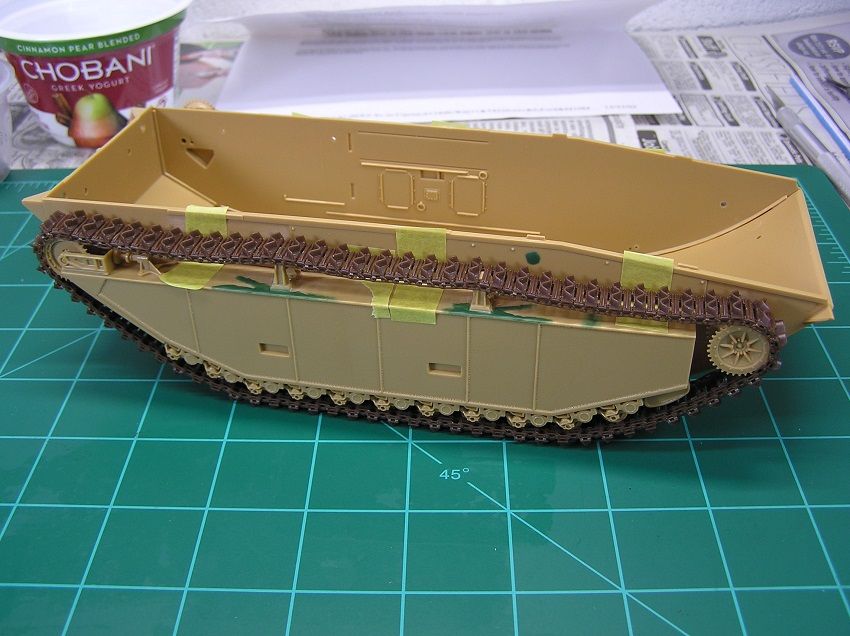
The fit over the modified return rollers was perfect!
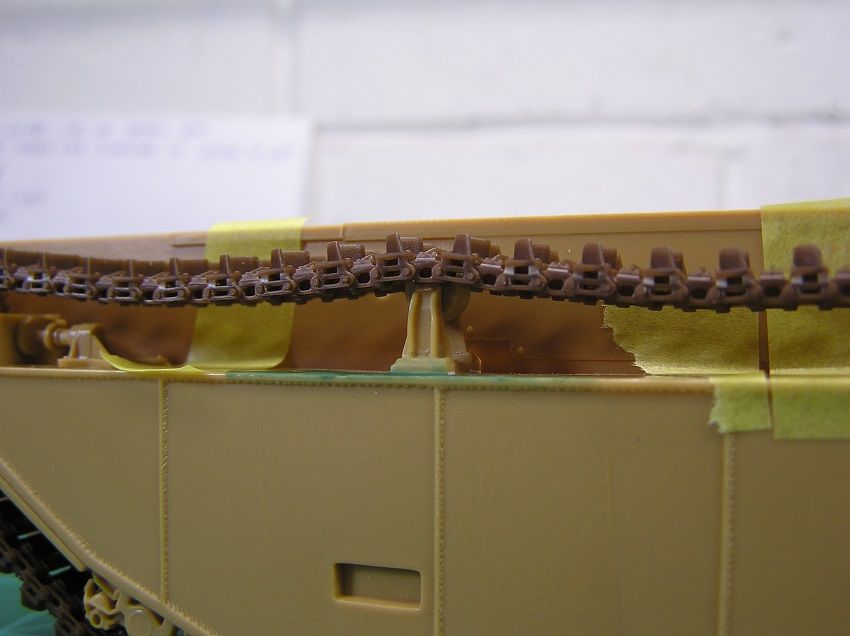
And that's the last of the good news for this update. As mentioned earlier, AFV Club recommends 72 paddle links per side for good reason. They only include enough track pins for 72 paddle links per side!!!

There are extras of all other track parts, but not track pins, so I'm stuck until I get my paws on a measly 4 track pins

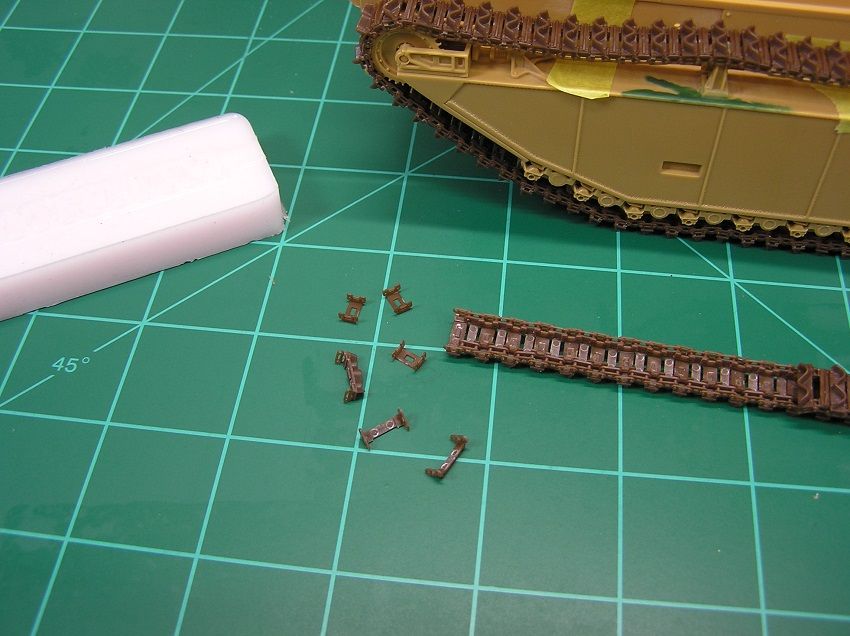 Thanks for viewing, Model On!
Re: Italeri LVT (A) 4, Landing Vehicle Tracked 1/35 scale
Posted: Sun May 15, 2016 10:08 pm
by Always48
Thats coming along great fella, love those tracks
Re: Italeri LVT (A) 4, Landing Vehicle Tracked 1/35 scale
Posted: Fri May 20, 2016 12:48 am
by OliveDrab
Always48 wrote:Thats coming along great fella, love those tracks
Thank you Alan!
Re: Italeri 1/35 LVT Landing Vehicle Tracked (X2)
Posted: Fri May 20, 2016 1:29 am
by OliveDrab
Work has begun on LVT number 2, the LVT-4.
Assembly steps 1 thru 3 are basically the same as the LVT(A) 4.
Step 4 is where we start to see some major differences.
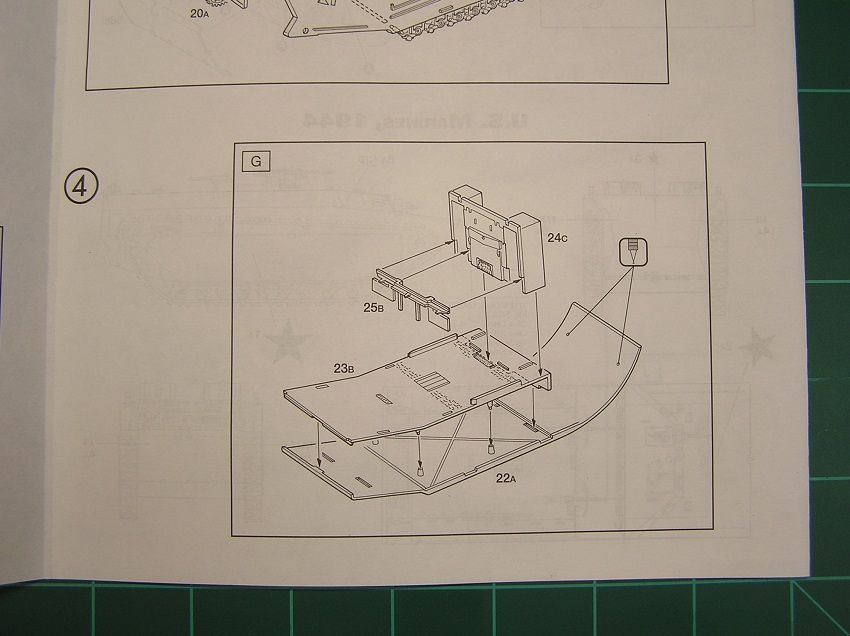
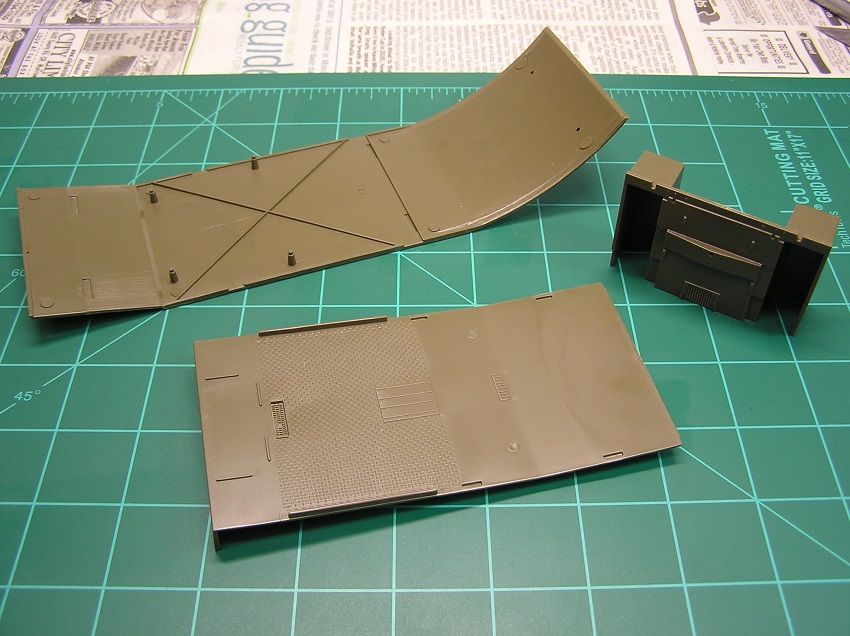
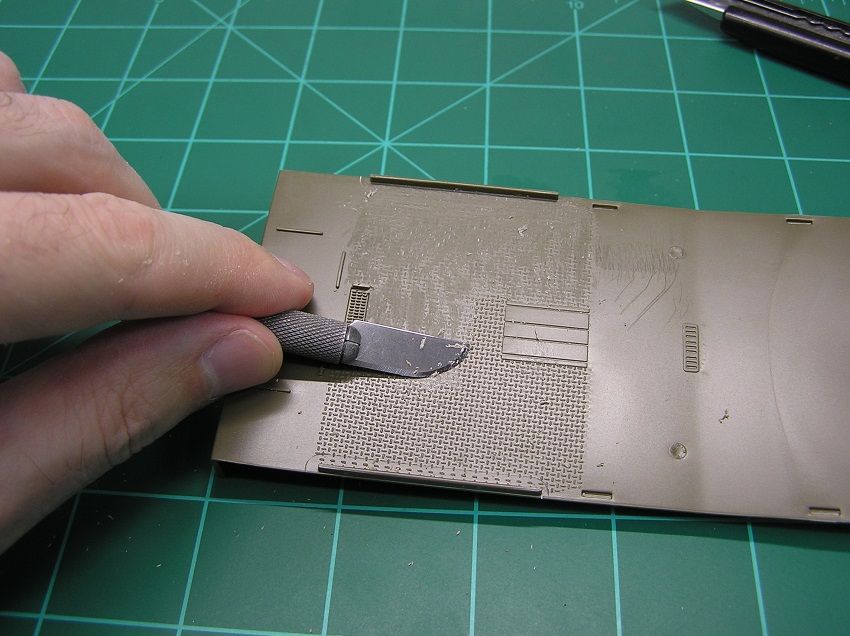
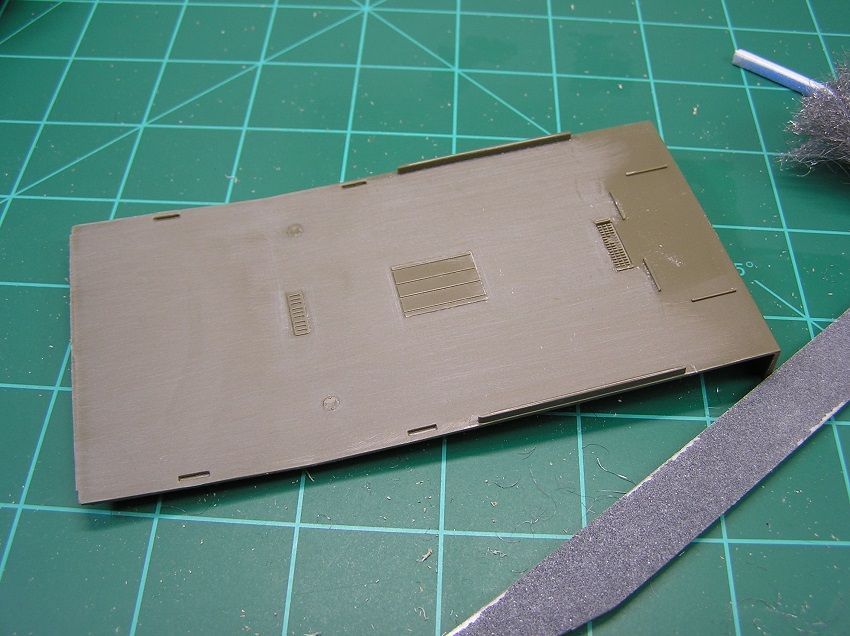
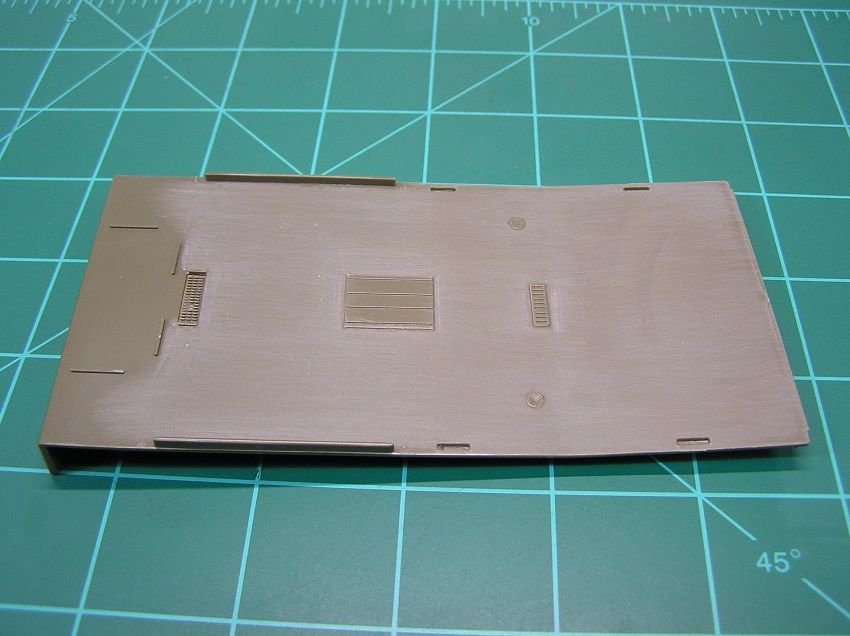
Italeri molded the forward section of the floor plate for the LVT-4 with tread-plate. From the references I found the tread-plate was a post World War II change. The World War II versions are believed to have just steel plate with non-slip paint applied.
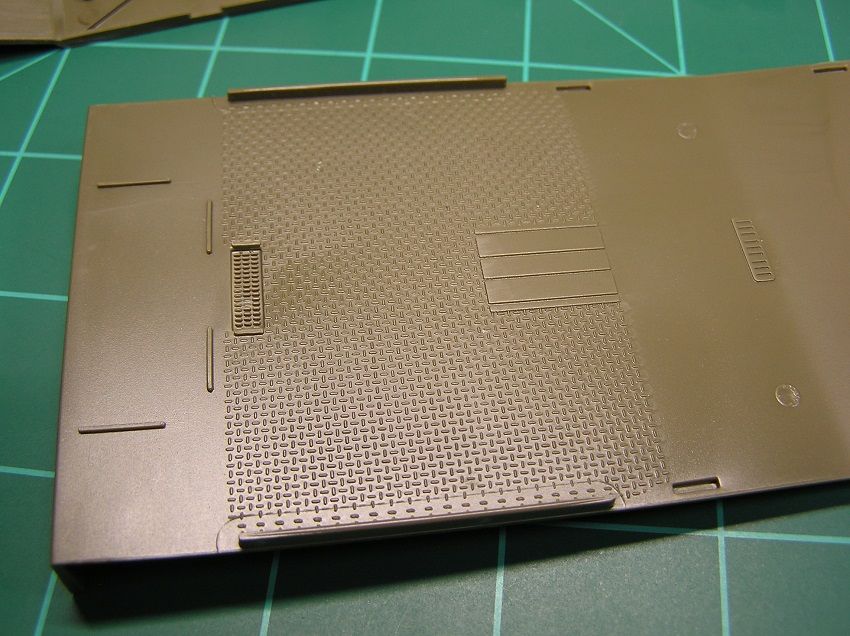
Step 1 to backdate the floor plate: Cut the tread-plate details nearly flush to the floor plate with a hobby knife. You don't need to remove all of the raised detail as sanding will remove and level any remaining tread detail.
Step 2: Sand with a course sanding stick.
Step 3: Rub the surface lightly with some steel wool to complete the floor plate.
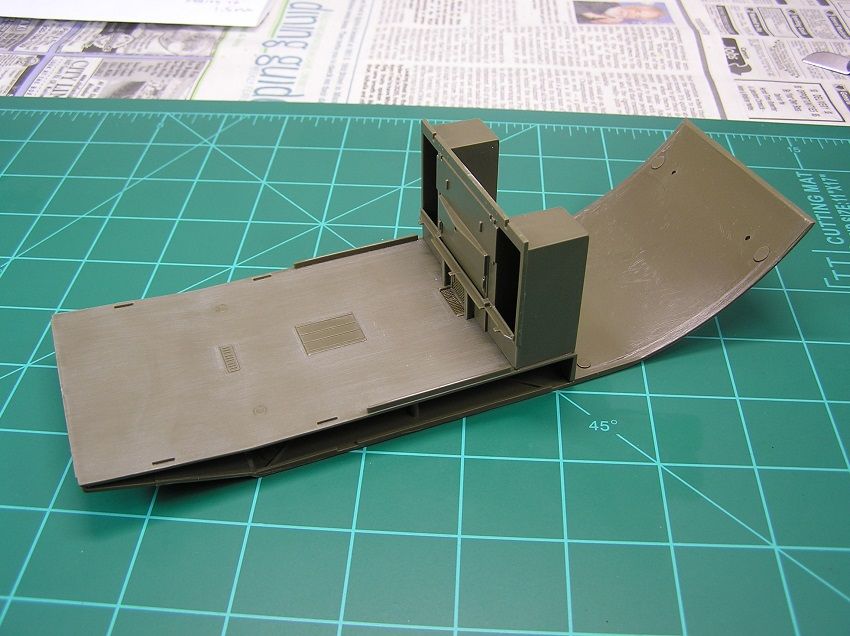
Assembly step 4 completed with the backdated floor plate:
Then the addition of the side hull plates. Just a
few clamps made the job easier
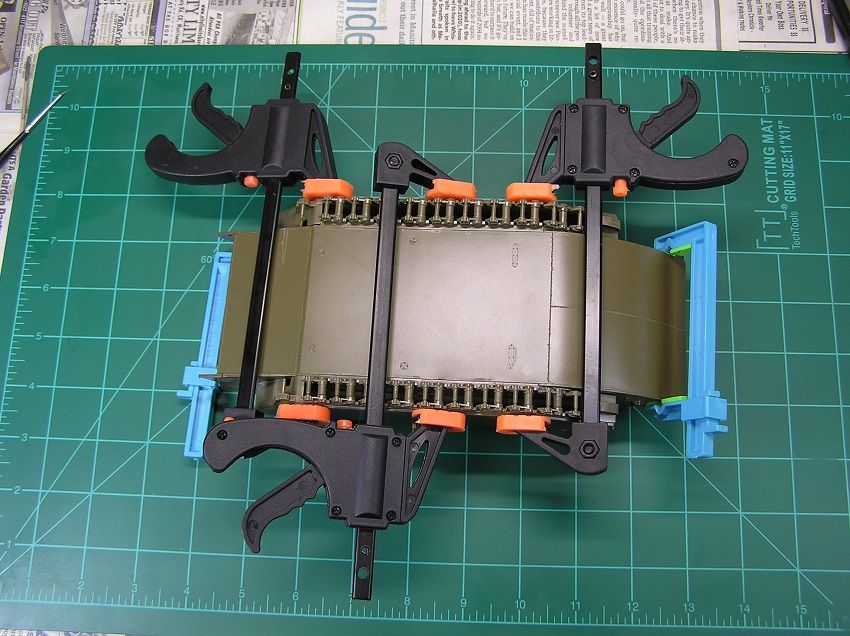
And the lower hull glued up, with the exception of the pontoons being kept loose for assembly of roadwheels and tracks after they get painted up.
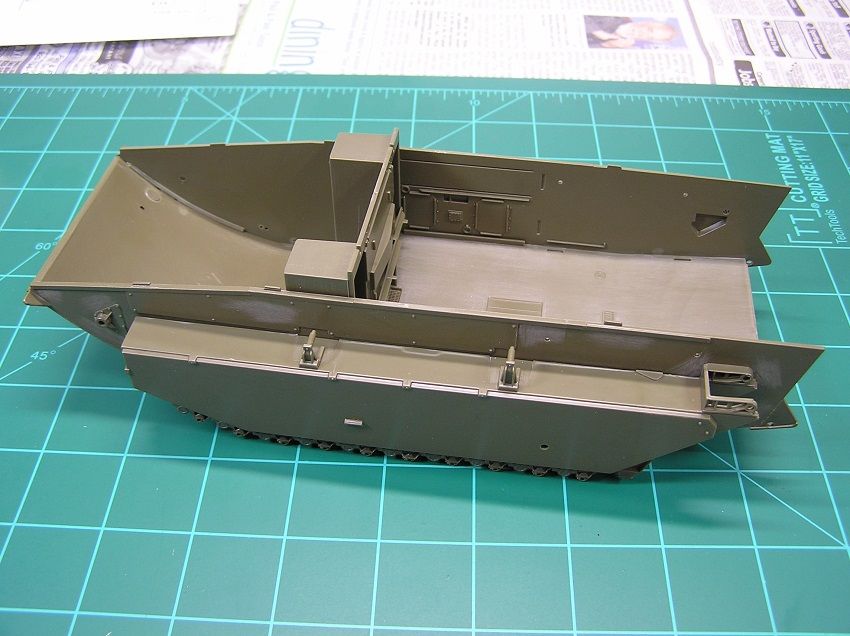
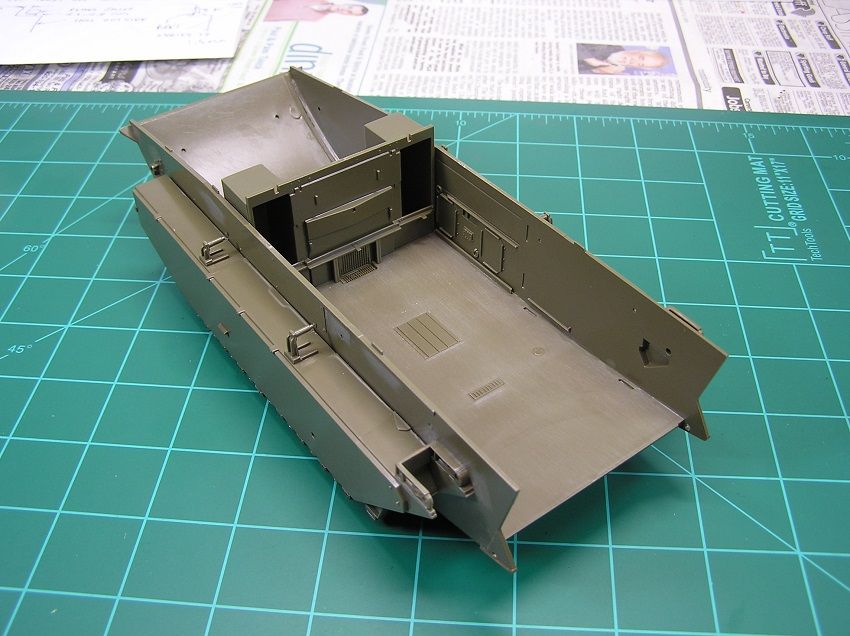
This is about as far as I can go on both of the lower hulls until the tracks are completed. (The Friuls have not arrived yet, nor have I heard from AFV Club about obtaining a few extra connecting pins). Until then I'll work on other areas, like the turret for the LVT (A) 4.
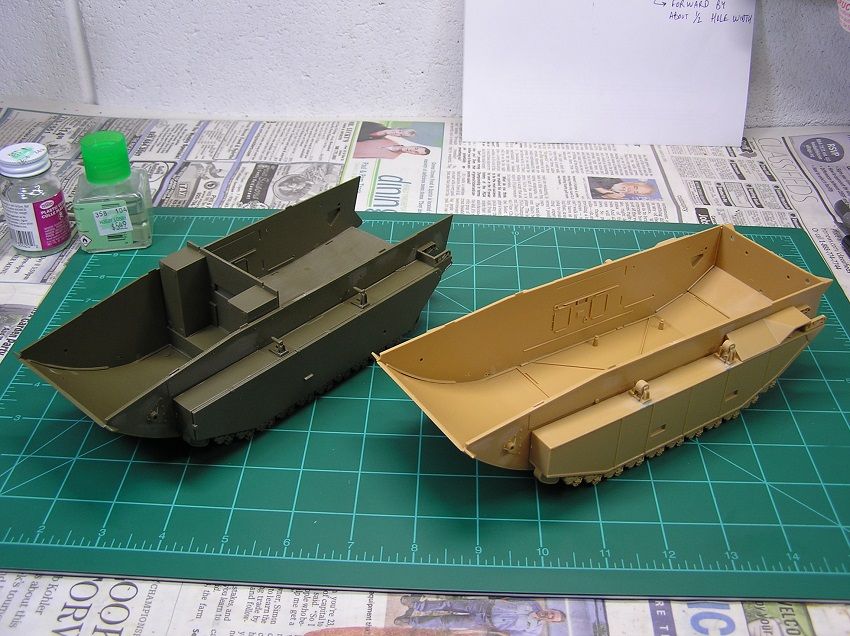 Thanks for viewing!
Re: Italeri 1/35 LVT Landing Vehicle Tracked (X2)
Posted: Sat May 21, 2016 3:23 am
by OliveDrab
Just a quick update this time.
More work done on the LVT-4

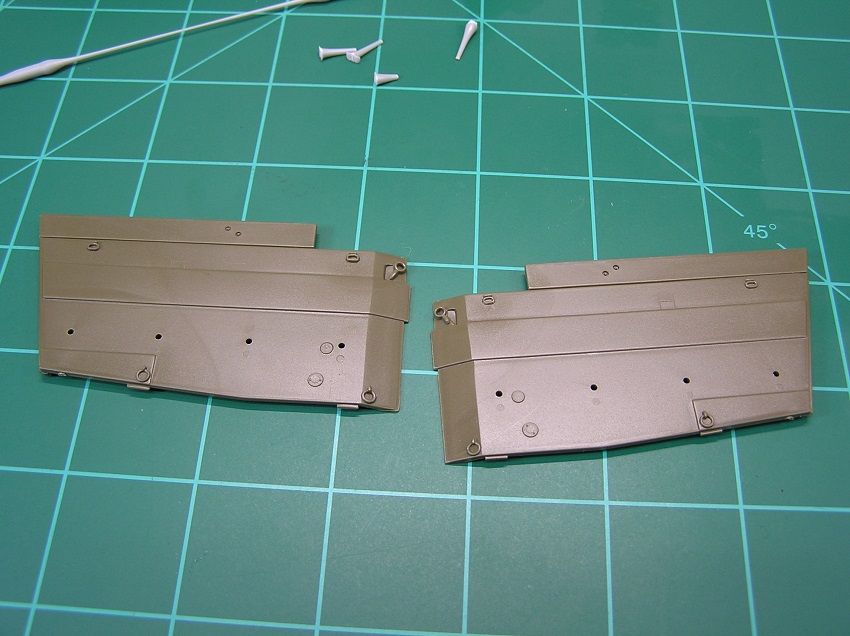
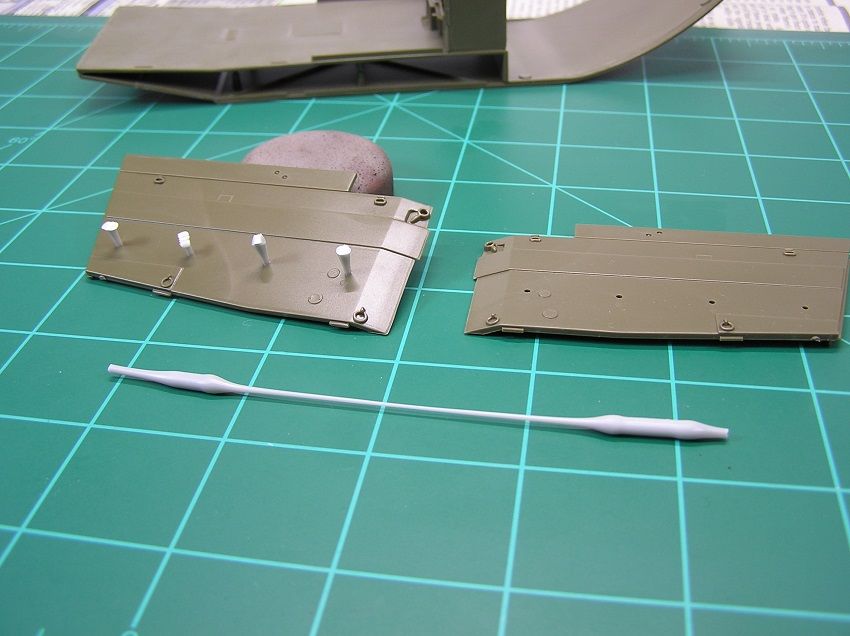
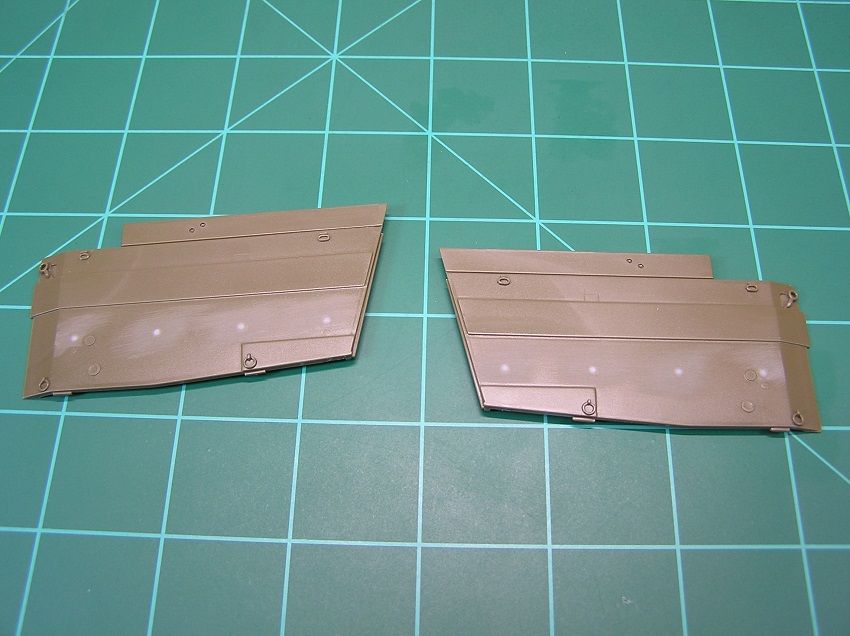
There are 4 holes in each of the cargo side plates. These holes are for mounting wooden troop benches in the cargo area. The wooden benches are believed to be another post World War II feature, so they'll be left out of the build.
Stretched sprue is glued into the holes and then cut nearly flush when dry. A little bit of sanding completes the job.
 Thats all for now, Model On!
Re: Italeri 1/35 LVT Landing Vehicle Tracked (X2)
Posted: Sun May 22, 2016 8:58 am
by Novorus
Re: Italeri 1/35 LVT Landing Vehicle Tracked (X2)
Posted: Sun May 22, 2016 10:12 pm
by OliveDrab
Thank you James, with some luck hopefully both LVTs can get built by Aug. 31!
Re: Italeri 1/35 LVT Landing Vehicle Tracked (X2)
Posted: Sun May 22, 2016 10:59 pm
by OliveDrab
Re: Italeri 1/35 LVT Landing Vehicle Tracked (X2)
Posted: Mon May 23, 2016 7:54 am
by Novorus
Re: Italeri 1/35 LVT Landing Vehicle Tracked (X2)
Posted: Sat Jun 04, 2016 6:58 am
by OliveDrab
Friul Tracks - Anyone familiar with Friuls know they can be tedious and time consuming, and for my first try at Friul tracks I just happened to select the LVT tracks. Probably not too smart as the LVT tracks are a complicated design compared to many others
First task is to clean the flash and sprue gates from the links.
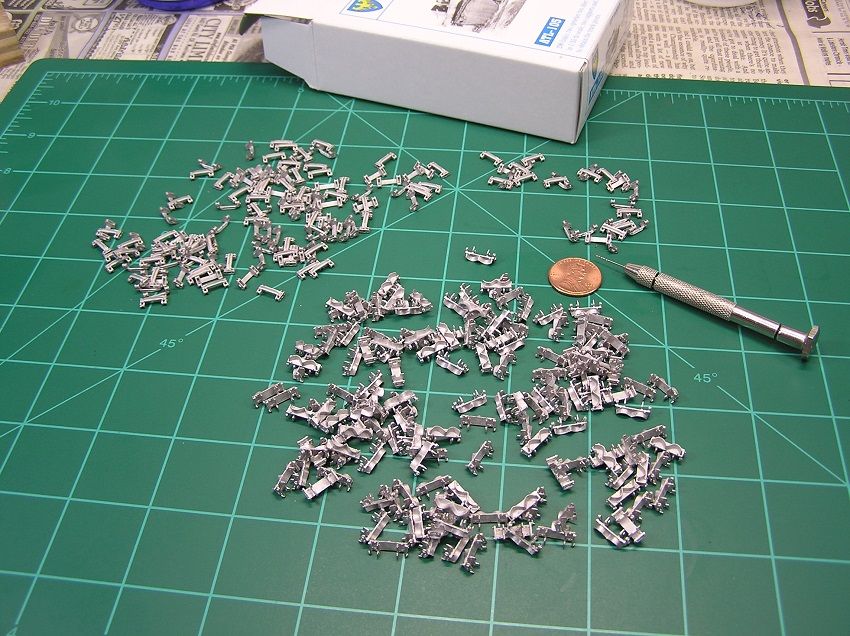
Then drilling holes,
LOTS and
LOTS of holes! (4 holes on each and every link)
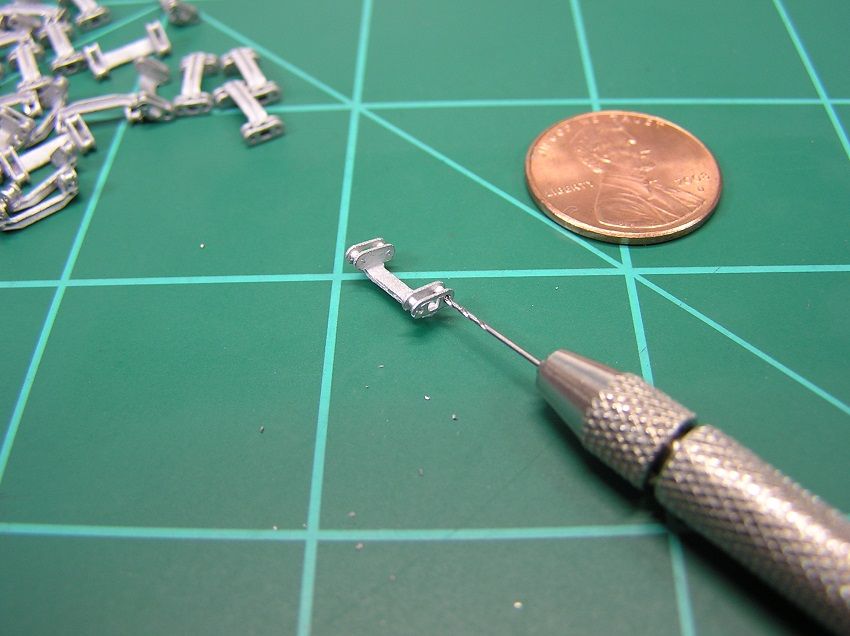
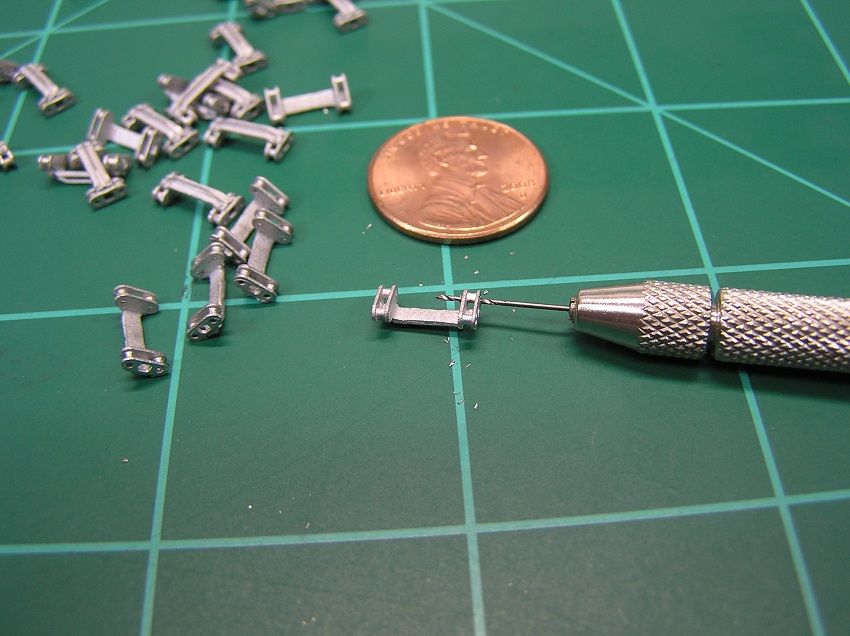
Drilling the paddle links needs to done at a slight angle. There is no direct inline access.
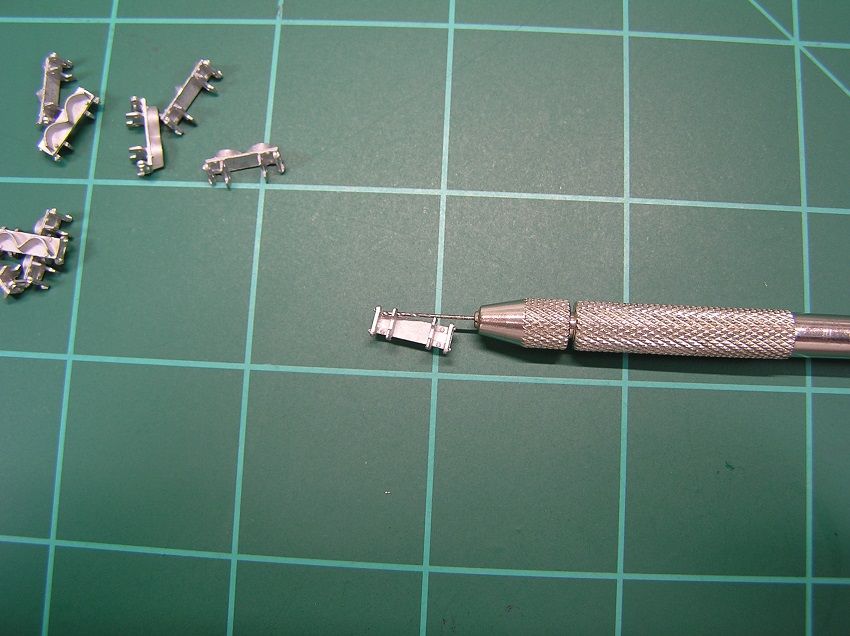
With the clean up and hole drilling complete it was time for a bath! The links were soaked in acetone overnight.
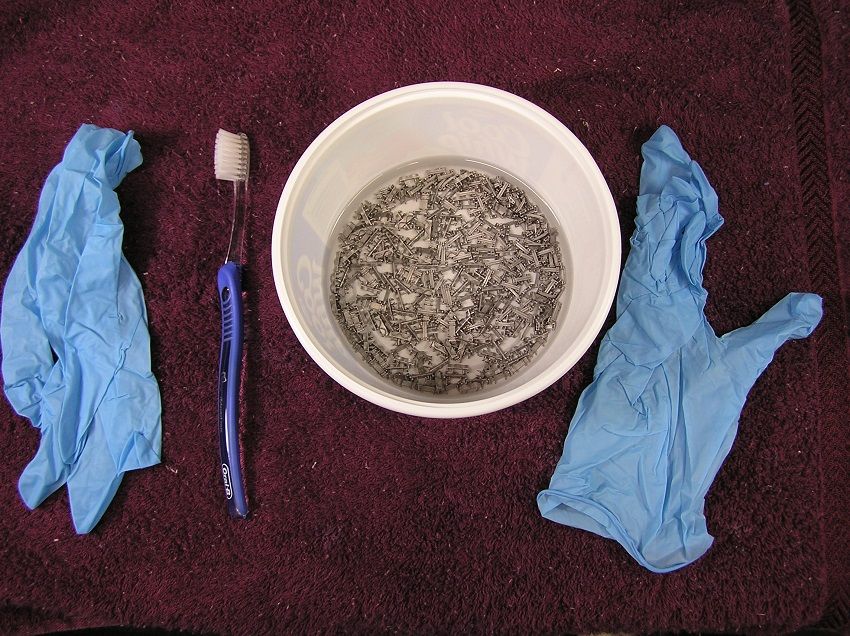
The following morning the links were ready for a scrub.
The toothbrush was a struggle to use...just too large for the small links. Cleaning the links with a old paintbrush while holding them with the tweezers worked well.
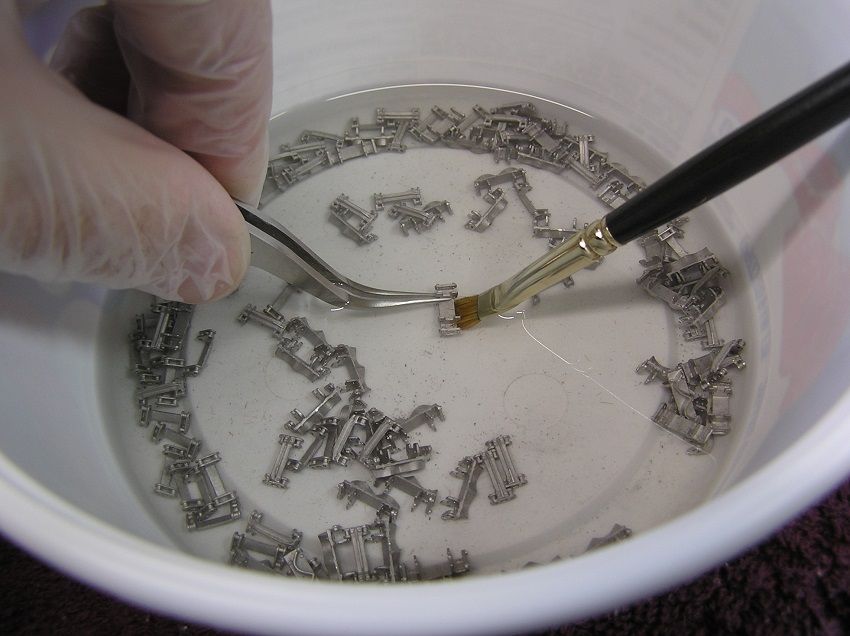
Only two links left to clean! The links didn't look dirty but the bottom of the container tells a different story.
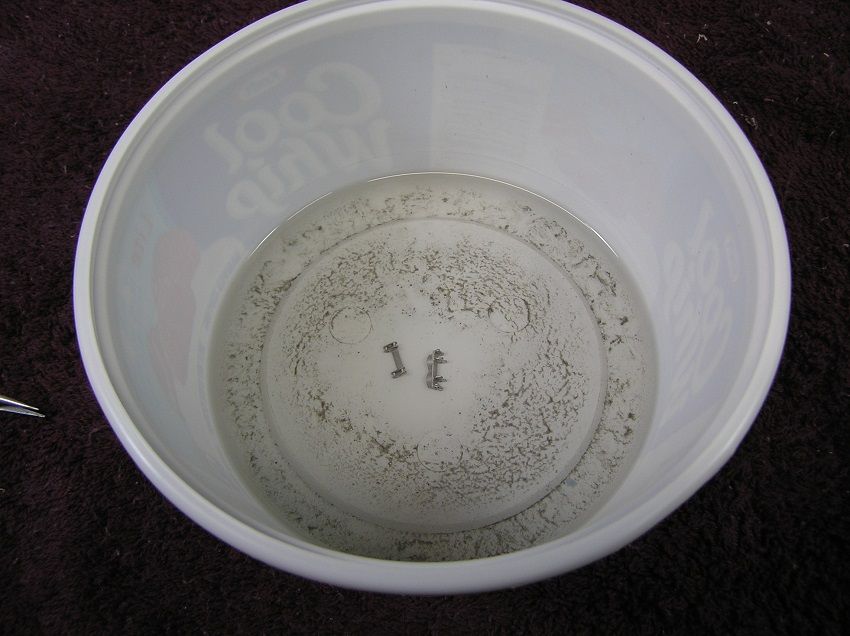
Clean up, drilling, and cleaning occupied my evening hours for about a week
Now on to the assembly stage!
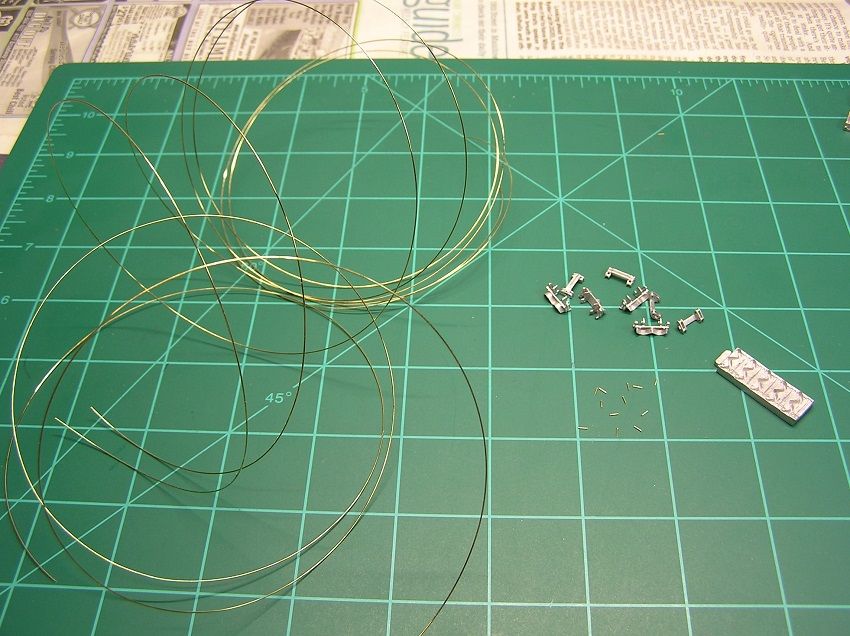
The wire needed to be cut to 2.5mm lengths.
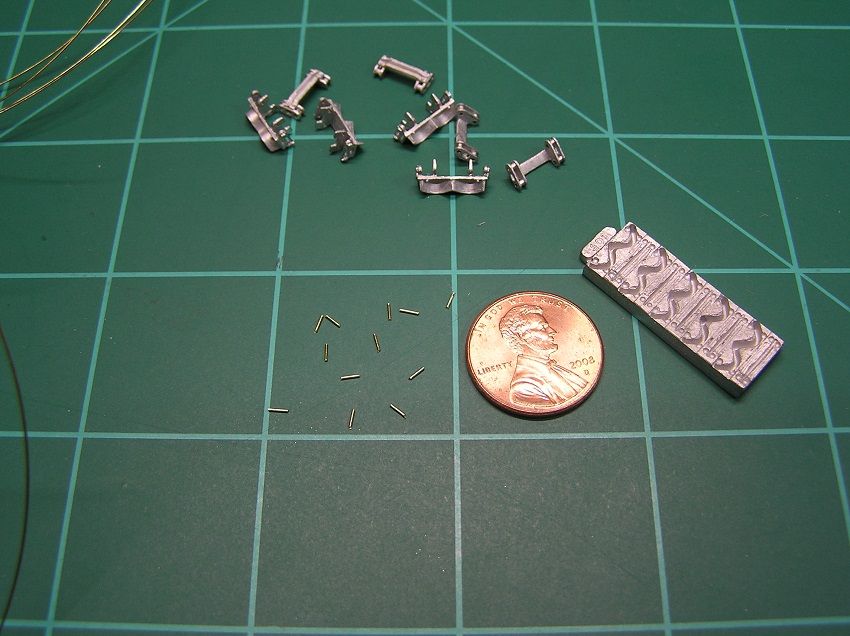
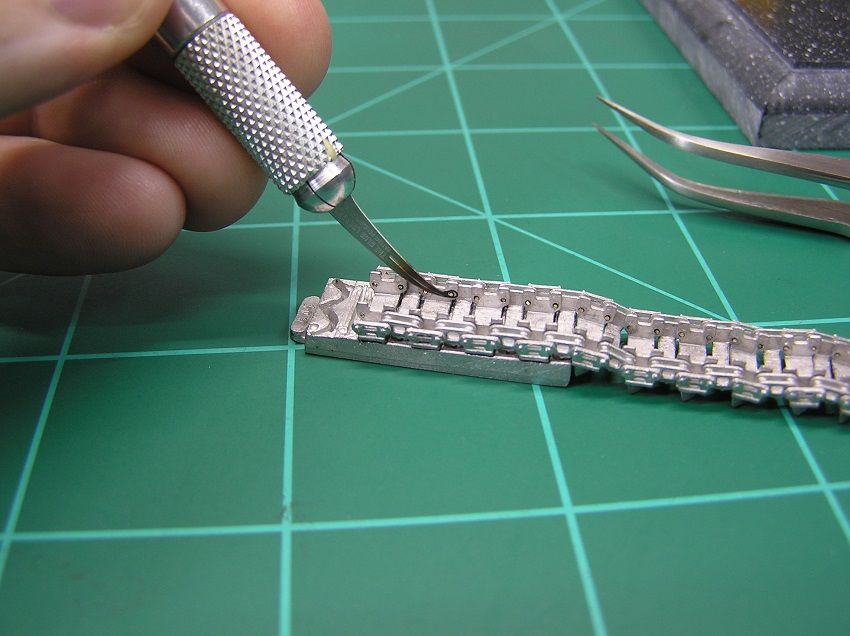
Inserting the wire proved to be a challenge!!! To keep from going insane, I build sections of 7 links at a time, that's about all one can handle until the frustration meter is pegged
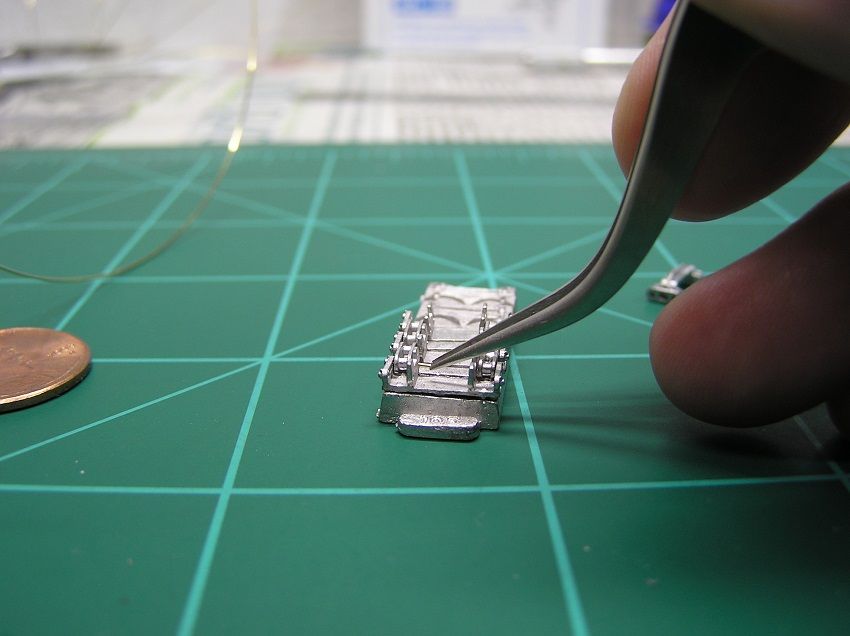
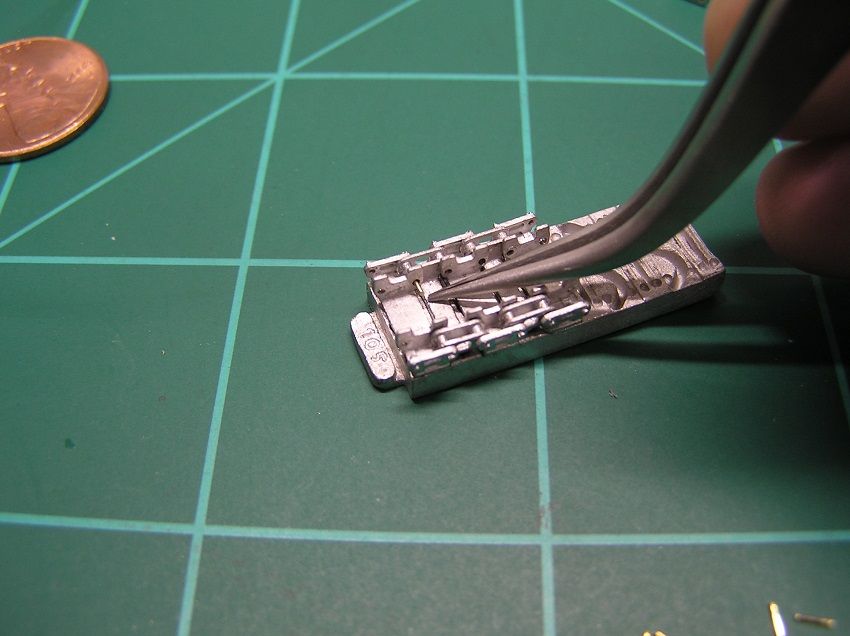
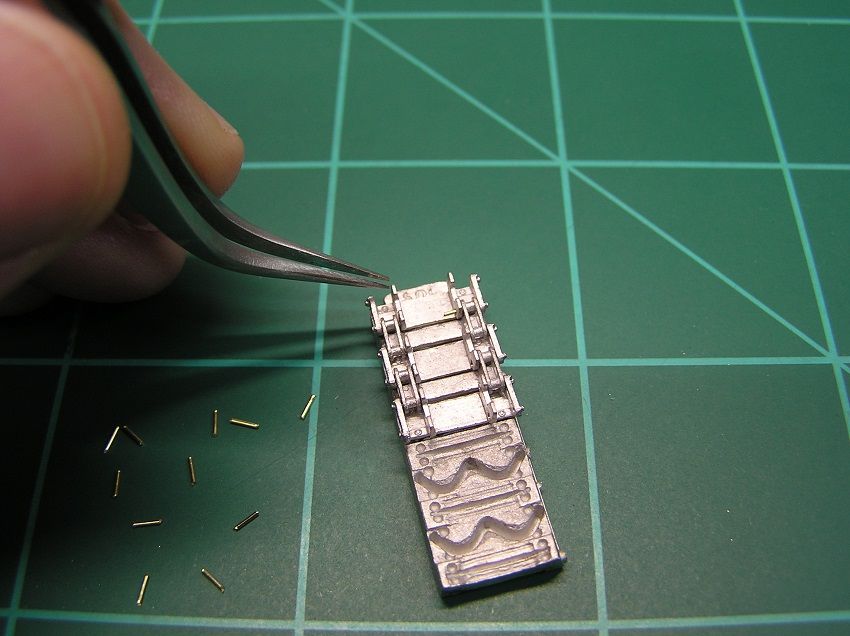
Once the pins are in place, they definitely need a small drop of super glue to hold them in place, a task which really worried me. With the pins being small it would be difficult to apply a consistent and controlled amount of glue on each and every pin.
Then I remembered picking up The Glue Looper at a model show recently. This would be the perfect opportunity to try it out!
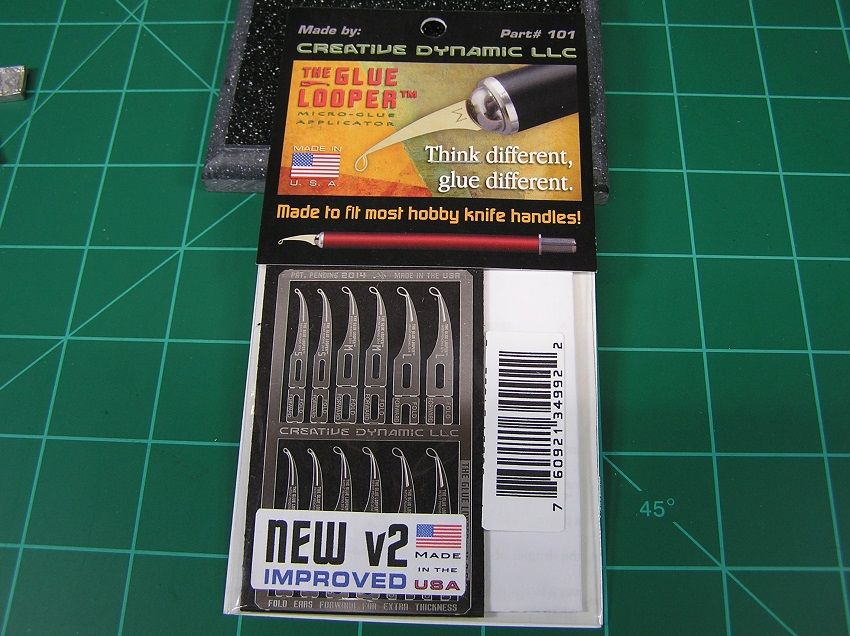
The Glue Looper worked wonderfully for applying the super glue. The Glue Looper works so well, gluing the links is actually the easiest part of building these buggers
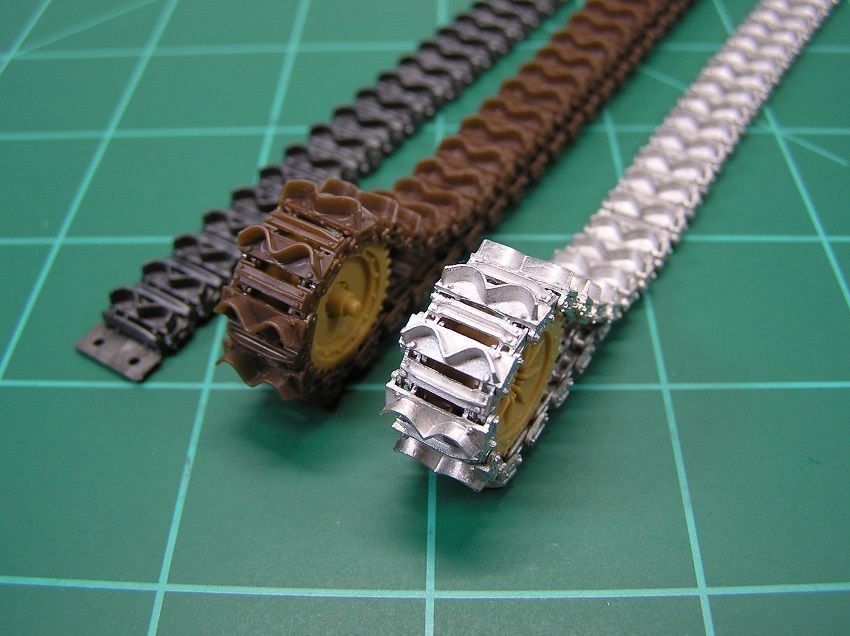
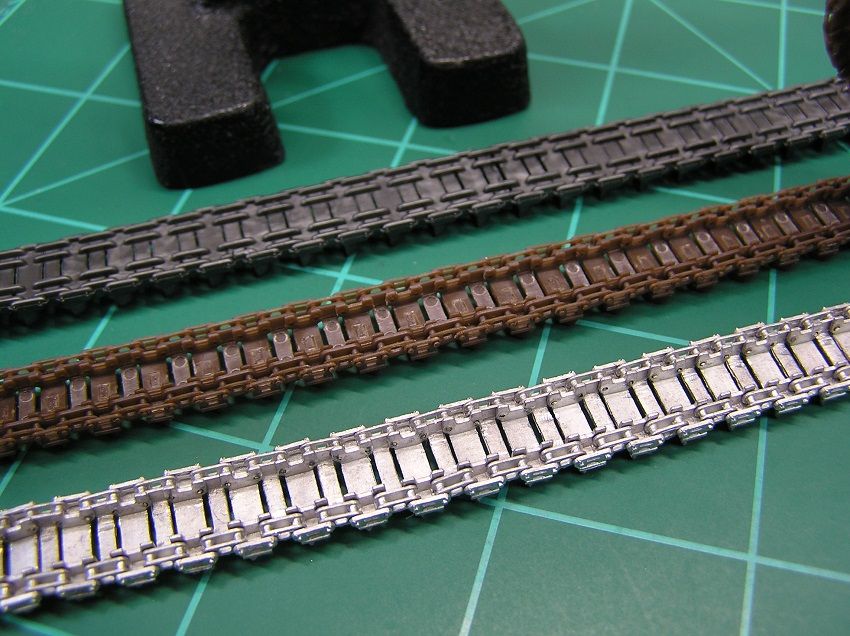
Just one run of the Friuls assembled so far, but a quick comparison of the Italeri, AFV Club, Friul tracks.
From left to right, Italeri kit tracks, AFV Club aftermarket, and Friul aftermaket.
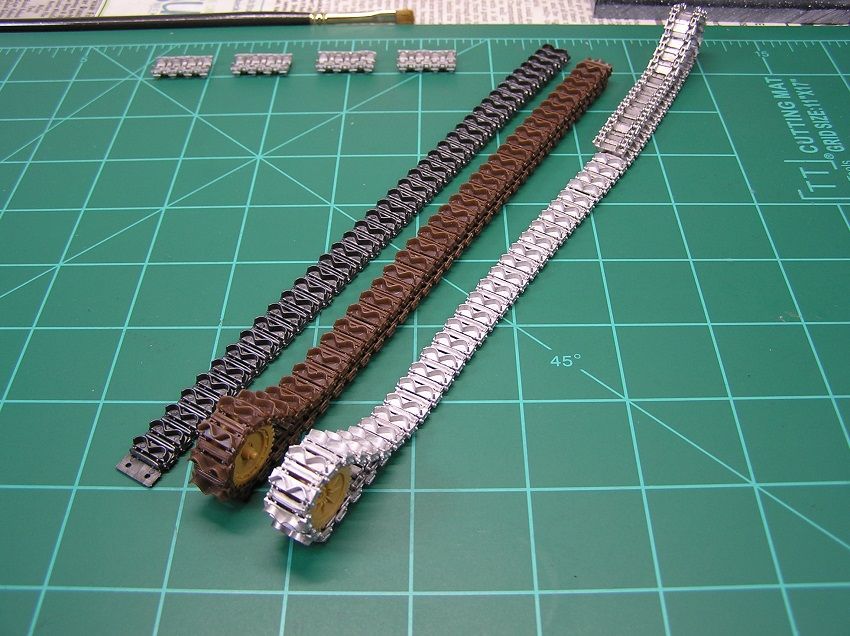
The AFV Club and Friuls both look very good!!! Both the AFV Club and Friuls require a
whole lot of TLC to assemble, with the Friuls taking more time to build than the AFV Club tracks. The AFV Club tracks are obviously more fragile than the Friuls, and AFV Club does not include enough track pins in the kit. I needed 73 paddle links per side, AFV Club only includes enough track pins for 72 paddle links per side.
Until next time, Model On my friends!
Re: Italeri 1/35 LVT Landing Vehicle Tracked (X2)
Posted: Sat Jun 04, 2016 5:55 pm
by TheTroyster
I love that glue looper! Those tracks look great.
Re: Italeri 1/35 LVT Landing Vehicle Tracked (X2)
Posted: Sat Jun 04, 2016 9:28 pm
by Lysus
Seriously, how the hell you have the patience for those tracks is beyond me...they look excellent.

Re: Italeri 1/35 LVT Landing Vehicle Tracked (X2)
Posted: Sat Jun 04, 2016 10:42 pm
by OliveDrab
TheTroyster wrote:I love that glue looper! Those tracks look great.
Thanks Troy, yeah its the first time I've used the glue looper and it works great!
Lysus wrote:Seriously, how the hell you have the patience for those tracks is beyond me...they look excellent.
Maybe I really am nuts after all
The LVT kits haven't been touched in over two weeks, all the modeling time has been on the AFV Club and Friul tracks!!
Re: Italeri 1/35 LVT Landing Vehicle Tracked (X2)
Posted: Thu Jun 09, 2016 12:49 am
by GazVickers
Wonderful work, just cught up and i'll be following this with gusto.
Re: Italeri 1/35 LVT Landing Vehicle Tracked (X2)
Posted: Sun Jun 12, 2016 12:52 pm
by Novorus
Re: Italeri 1/35 LVT Landing Vehicle Tracked (X2)
Posted: Sun Jun 12, 2016 7:17 pm
by OliveDrab
GazVickers wrote:Wonderful work, just cught up and i'll be following this with gusto.
Thanks guys, I'm not sure how I've kept my sanity working on these tracks, but today is a
GREAT day...both sets of tracks are
DONE!
Re: Italeri 1/35 LVT Landing Vehicle Tracked (X2)
Posted: Sun Jun 12, 2016 8:32 pm
by OliveDrab
Both sets of tracks are complete
Time for a quiz, which tracks are Friul and which are AFV Club?
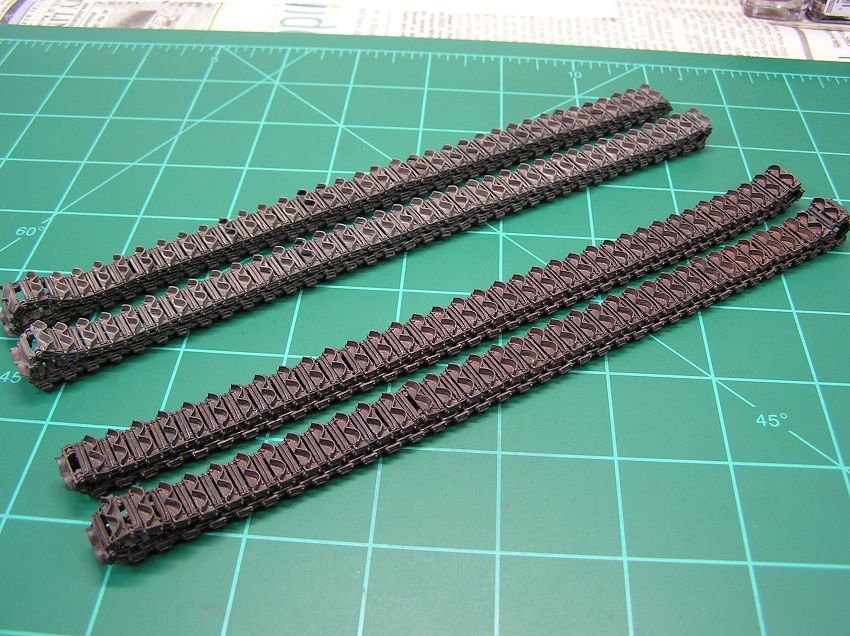
The set in the foreground are the Friuls, the set in back are the AFV Club tracks.
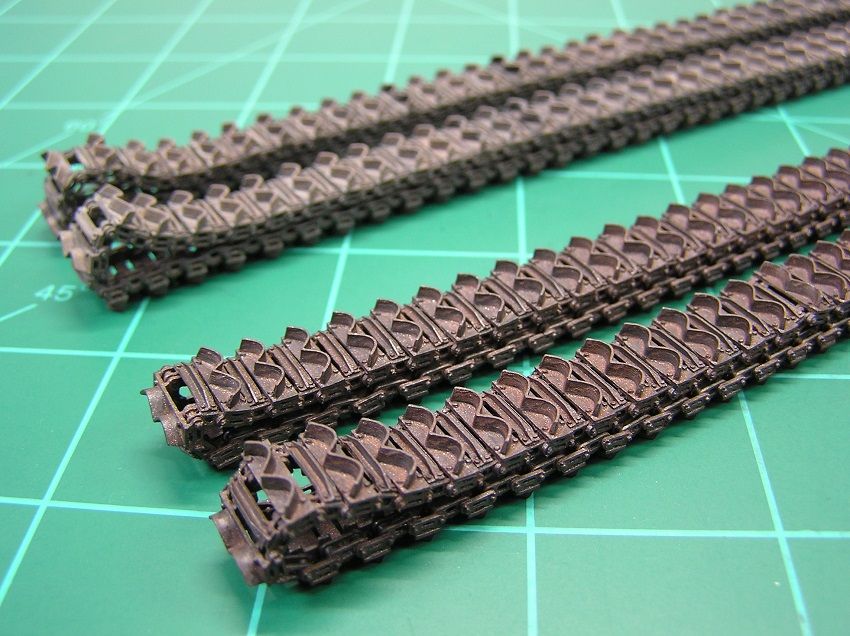
You may recall I did not have enough track pins to finish the AFV Club tracks. My e-mails to AFV Club went unanswered so to keep the build going I ordered a second set of AFV Club tracks

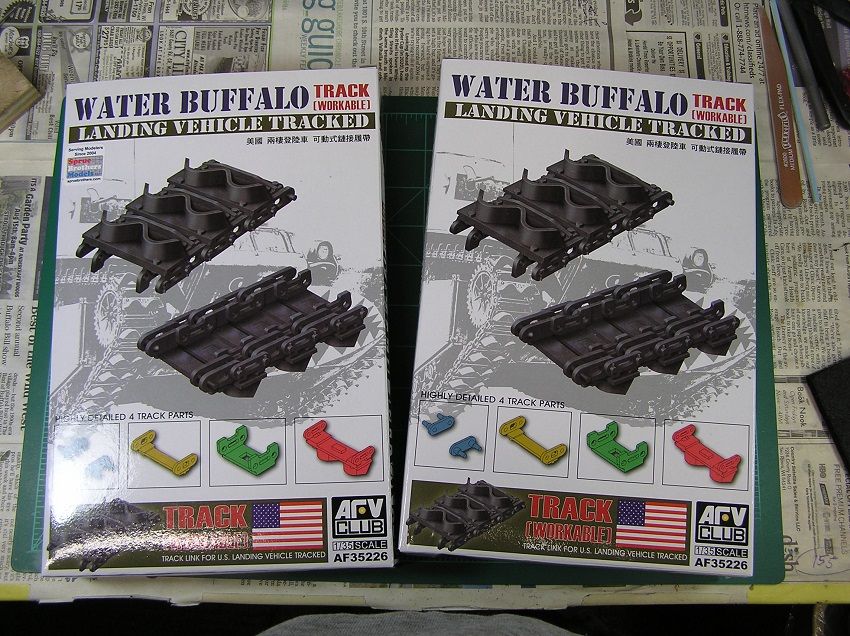 AFV Club track finishing:
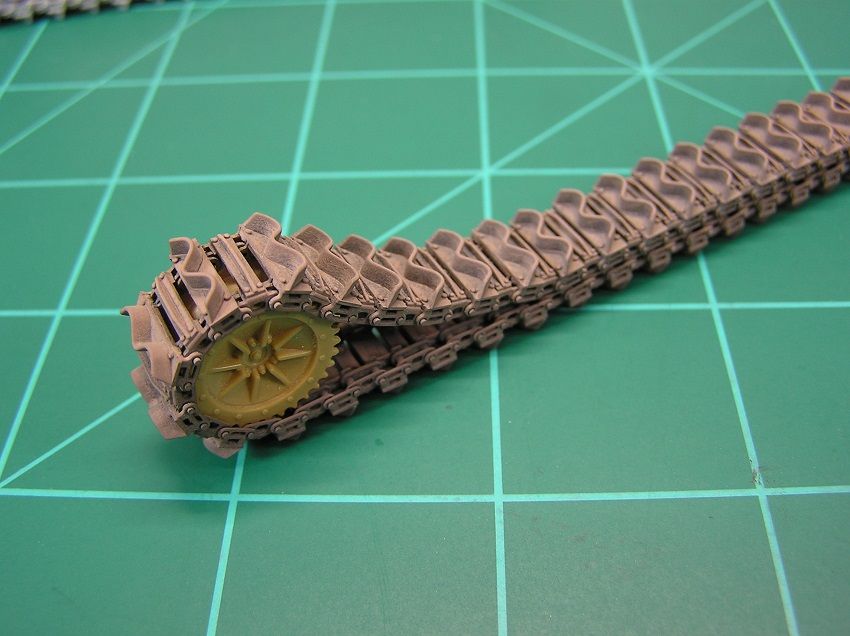
Painting of the AFV Club tracks started with a light airbrushed basecoat of Model Master Gunmetal Metalizer.
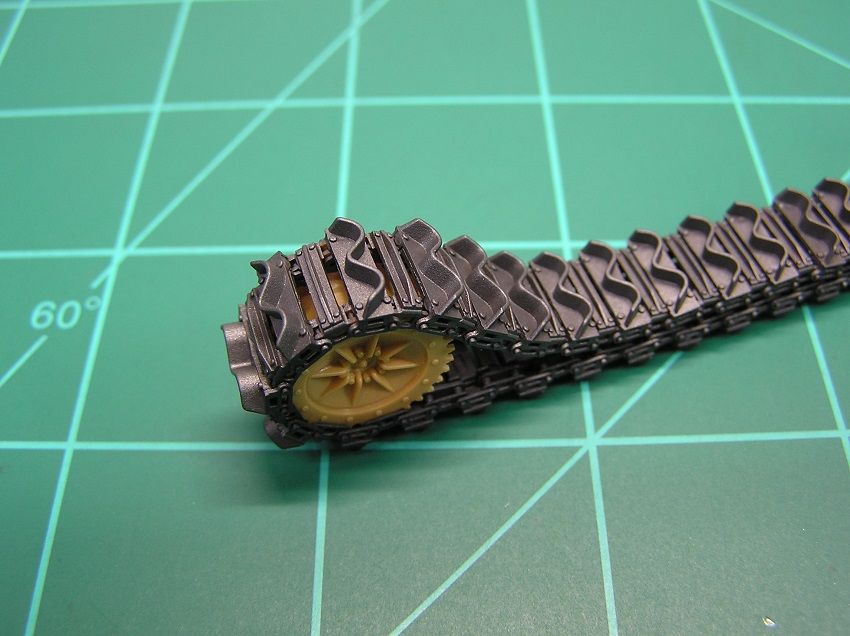
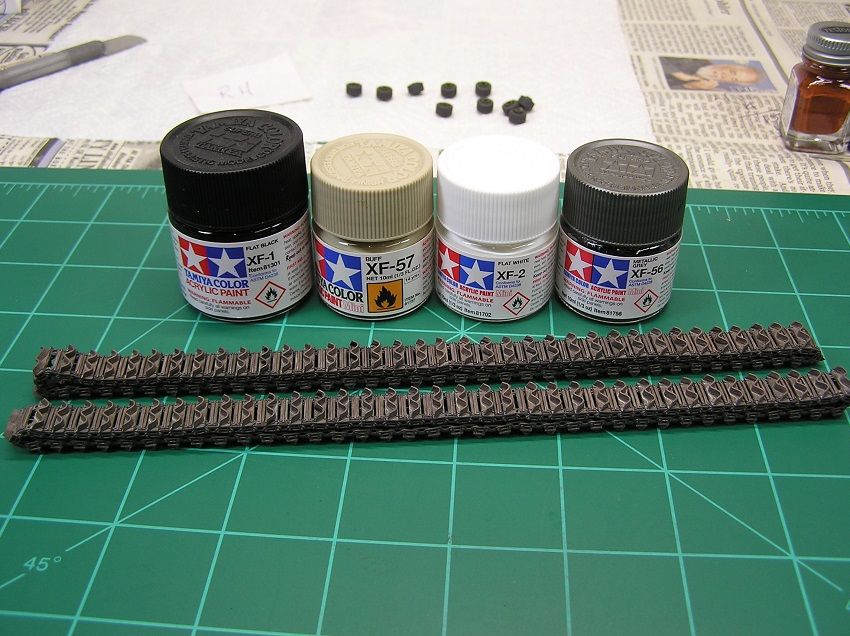
The Metalizer basecoat was followed by a light aibrushed coat of Tamiya acrylics. The paint mix: XF-64 (5 parts) XF-2 (3 parts) XF-52 (1part) X-21 (1 part)
Then came a wash with mix of Tamiya acrylics, and the AFV Club tracks are ready for assembly
 Friul track finishing:
First up is my first time using a burnishing fluid. My 'local' shop (its almost a 2 hour drive) carried the Ammo brand.
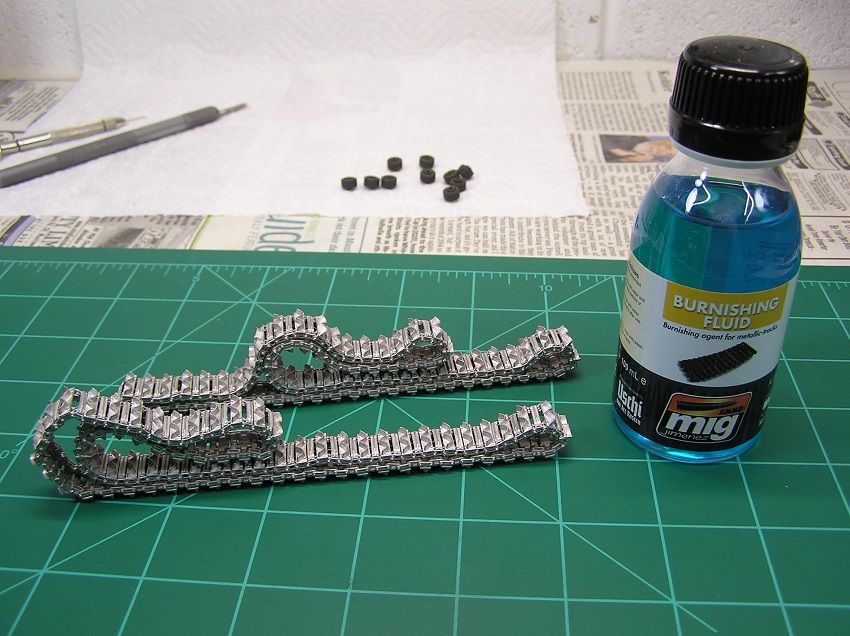
The tracks were removed from the burnishing fluid after 30 minutes. I brushed the tracks with an old paintbrush the entire time in an effort to remove all the air pockets from the tracks. Overall, the burnishing fluid did its job, there are areas of tracks that were not treated due to trapped air bubbles (mostly on inside sections of the tracks), but these LVT tracks have complex geometry which made it difficult to remove all the trapped air pockets.
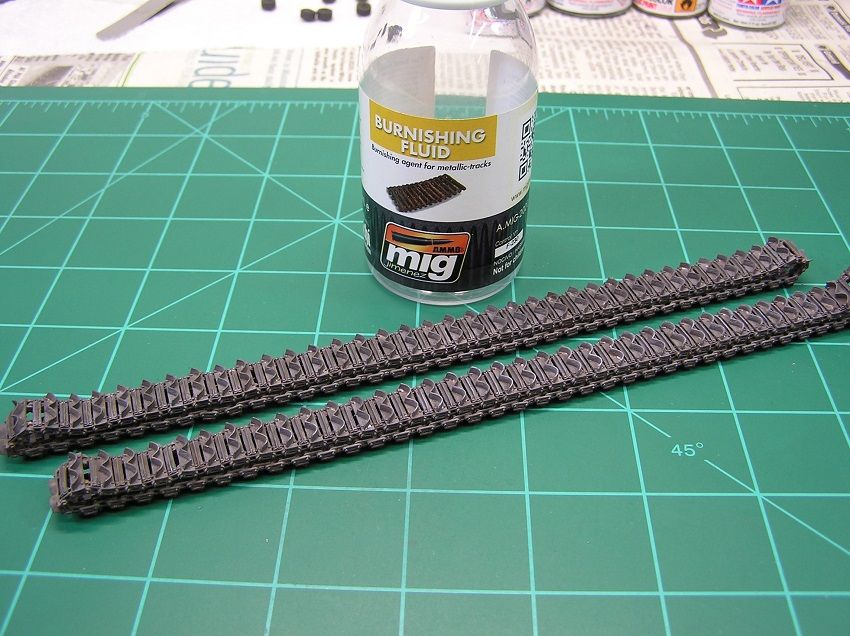
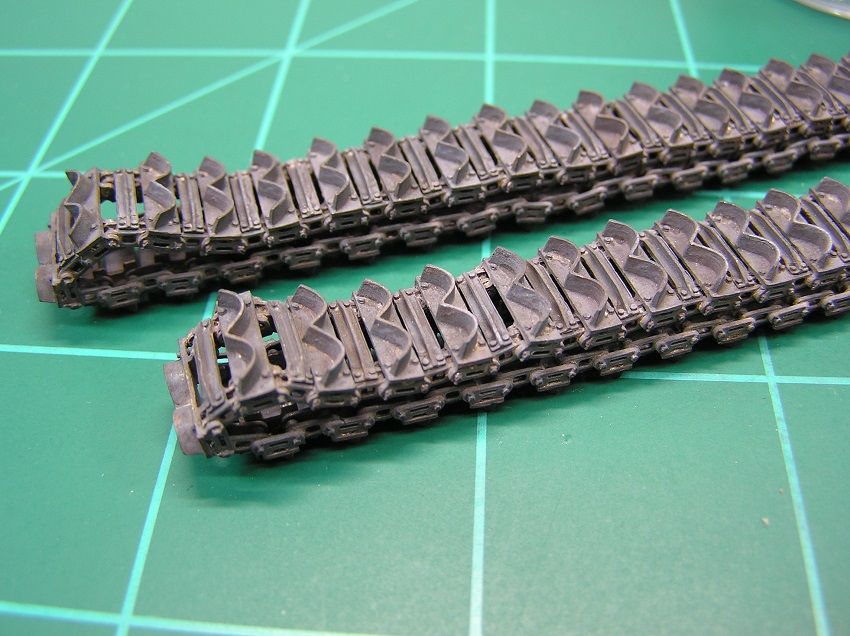
The burnished Fruils up close:
To finish off the Fruils, they were given a wash with a mix of good old Testors enamels with a bit Model Master Steel.
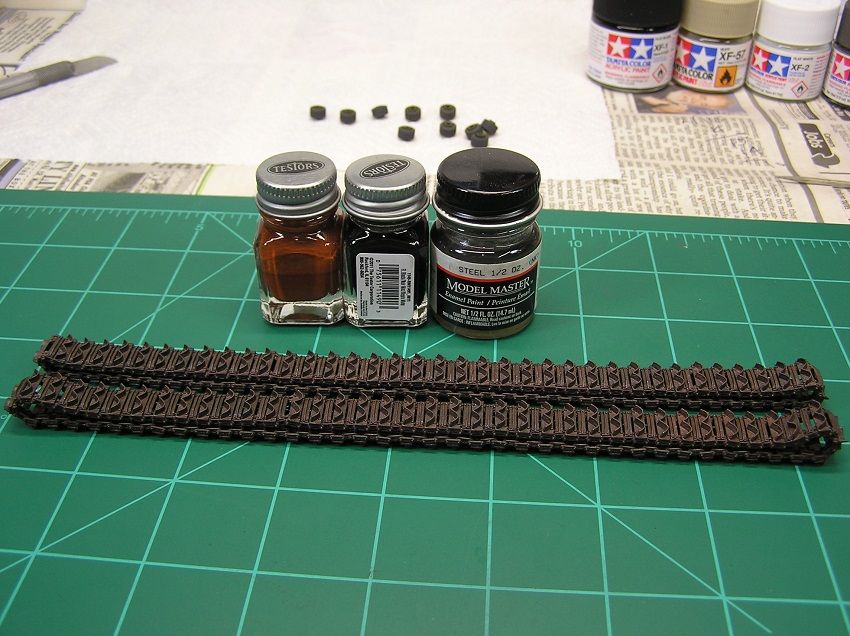
With the tracks
finally built, there was some work done on the LVT's.
The next steps will be permanently mounting the roadwheels, side pontoons and tracks to the lower hull.
Painting will be done in stages to make it easier to paint the roadwheels before they get permanently mounted. The roadwheels were airbrushed with a mix of Testors enamels (flat black/flat tan) to represent a tire black color. The wheel centers will be painted Olive Drab using a circle template.
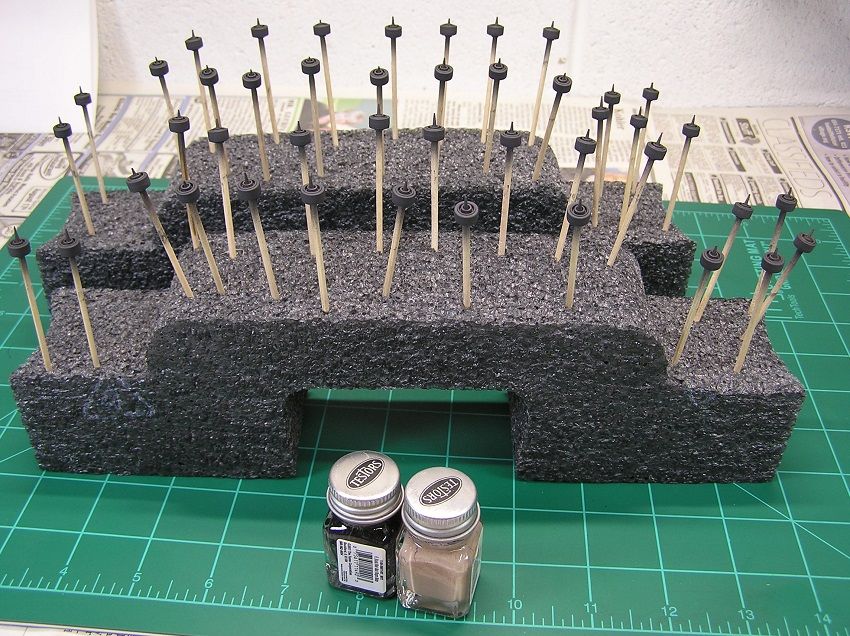
White glue was used to mask the roadwheel axle tips prior to painting the lower sections of the hulls.
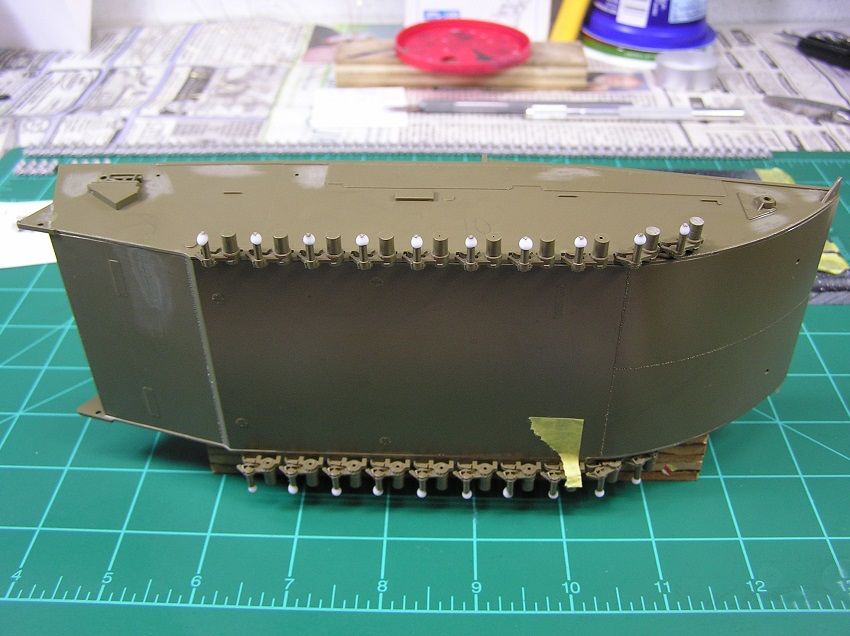
The bottom hull and roadwheel details are sprayed Olive Drab, and white glue axle mask removed. The lower hulls are ready for roadwheel and side pontoon assembly.
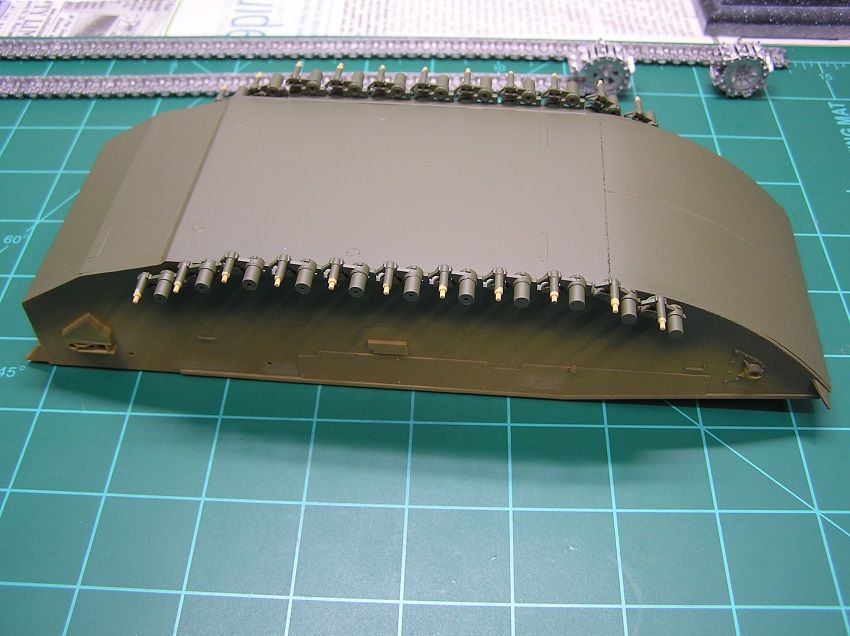 Thanks for viewing, Model On!!
Re: Italeri 1/35 LVT Landing Vehicle Tracked (X2)
Posted: Sun Jun 19, 2016 10:02 pm
by OliveDrab
LVT update time!
The front 'bumper' on the LVT was a hollow steel tube. The references I've found suggest the ends of these tubes were left open on the LVT-4, while the photo references for the LVT (A) 4 has them closed, perhaps with a welded cap. The kits are molded with the tube closed for ease of molding, but its a relatively simple detail to add to the LVT-4.
The stock part with the tube molded solid:
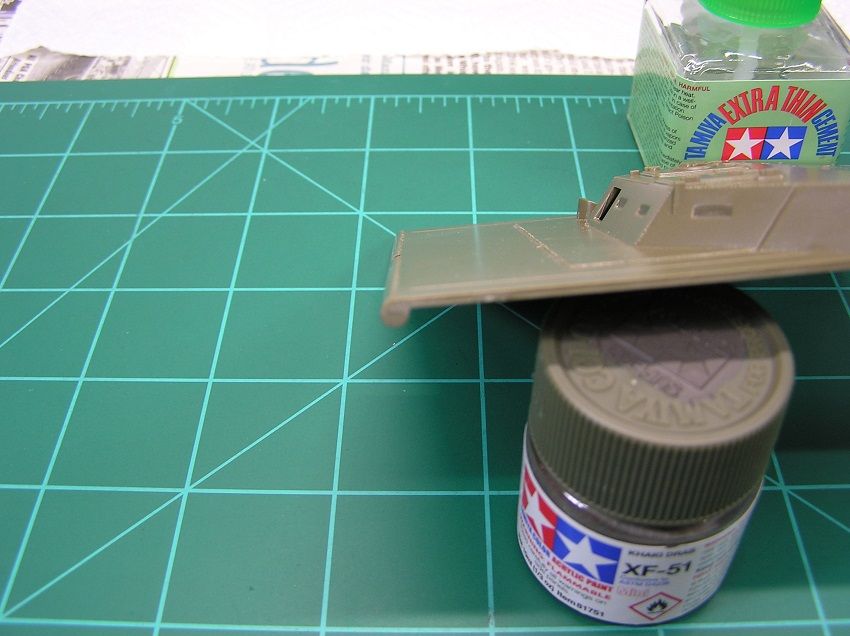
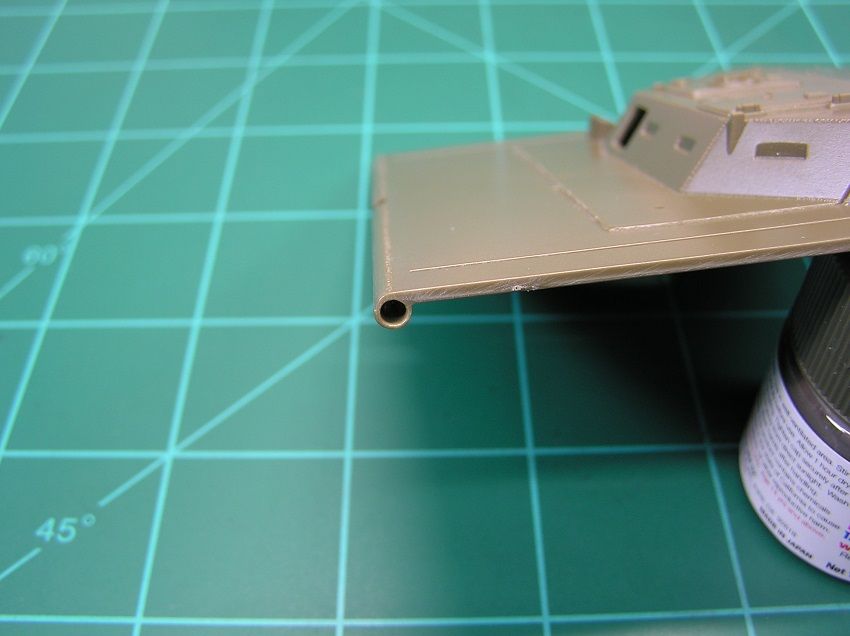
The recess on the bottom and back side of the tube was first filled with putty on the kit part. Then simply drill out the tube. Start with a small diameter drill bit and work your way up to the final size of the hole.
The completed front tube:
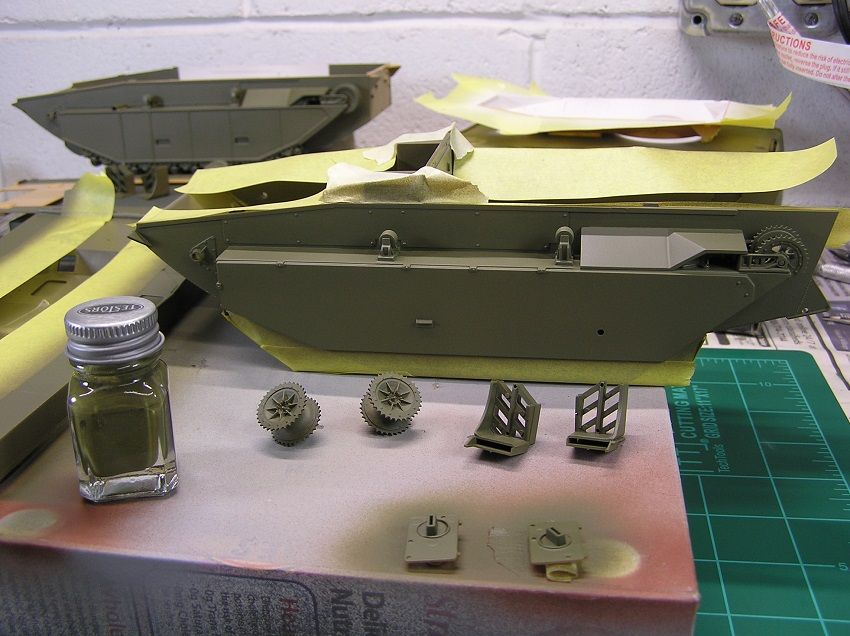
The pontoons and roadwheels were permanently assembled to the lower hulls. Then came time for some painting
For the basecoat on both LVTs, I'm using none other than Testors #1165 Flat Olive enamel.
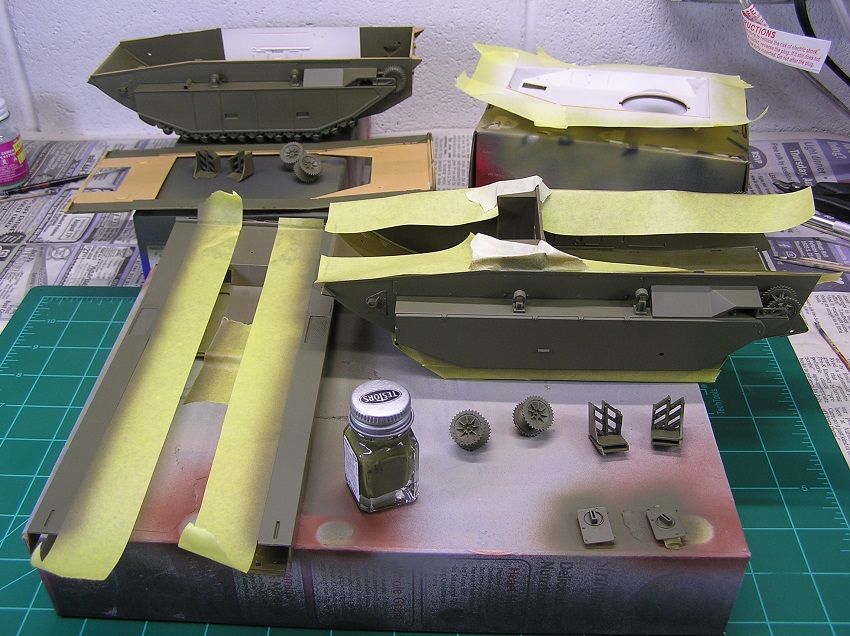
The pre-painted roadwheels and miscellaneous glue joints were masked to keep them free from paint.
The mask removed from the lower hulls. (A circle template was used to paint the center of the roadwheels before they were assembled in place).
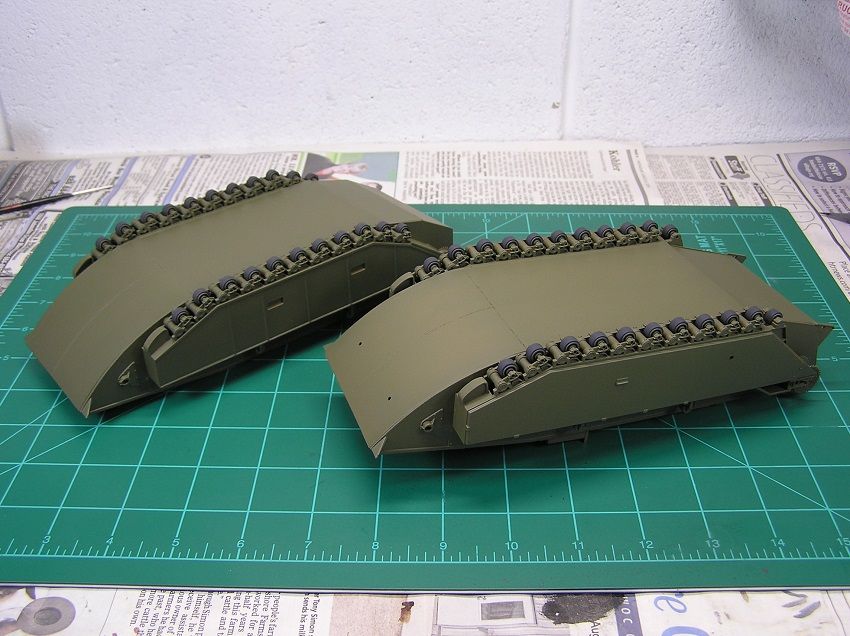
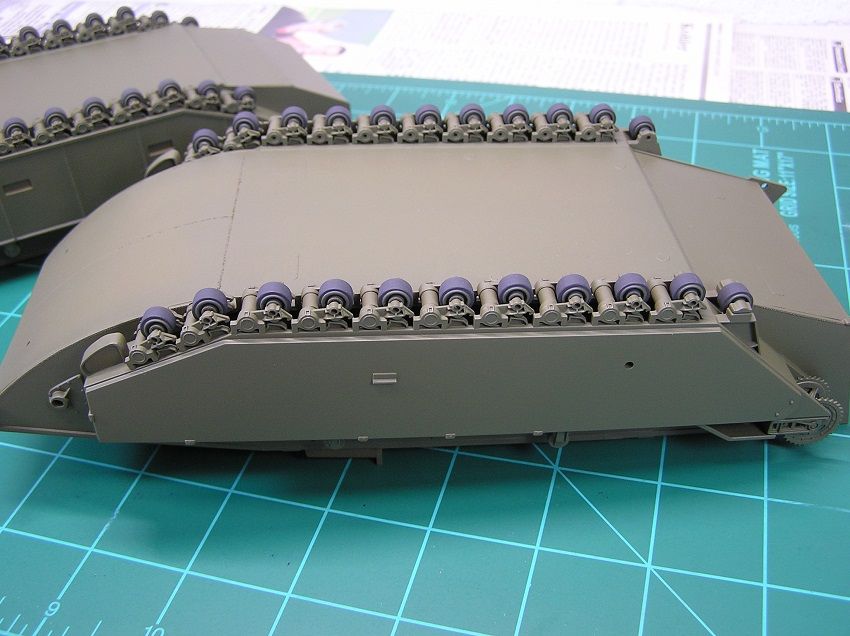
Wow, Step 5 of the instructions of the LVT (A) 4. Assembly of the tracks to the lower hull...it only took about 7 weeks to get to this step
Now I would normally prefer to leave the tracks off the model and add them later after most of the assembly and painting is complete,
BUT these LVTs are a different animal. With the upper hull in place there is no clearance to fit the tracks over the sprockets/idlers, and the track assembly itself is done from the inside section of the tracks which also adds to the difficulty level.
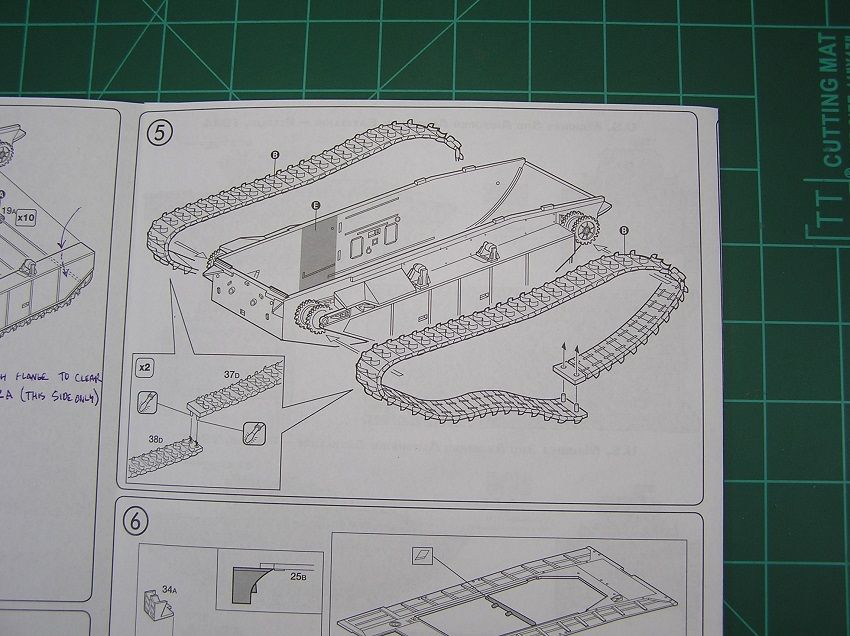
Assembly of the tracks to the hulls went very well (It darn well should have, nearly the entire build so far has been on tracks and making sure they would fit
)!
The drive sprockets were super-glued in place. I needed to cheat the drive sprockets forward a little bit to get the track tension where I was happy with it. (The mounting hole for the sprocket was slotted to allow the sprocket to move forward).
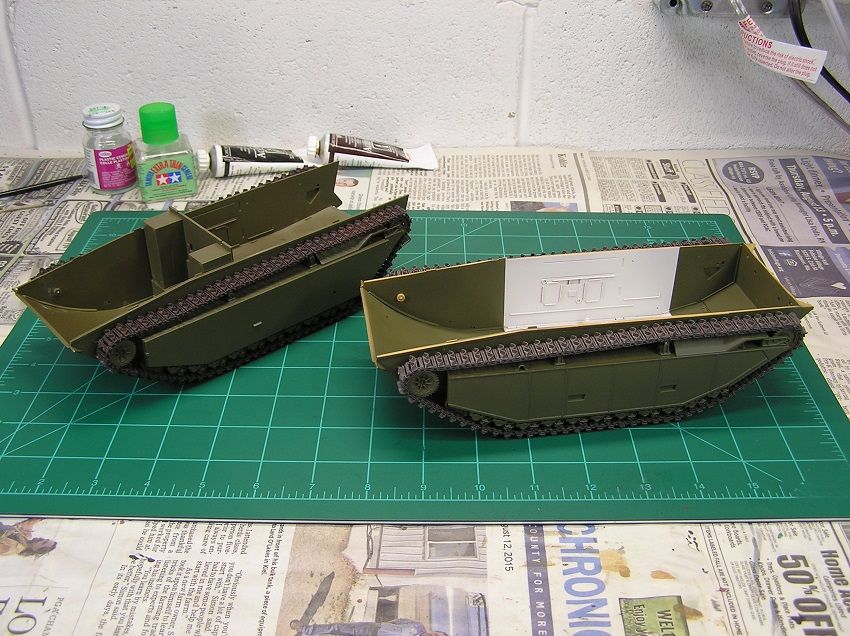
The AFV Club track on the LVT (A) 4 hull:
The Friul tracks on the LVT-4 hull:
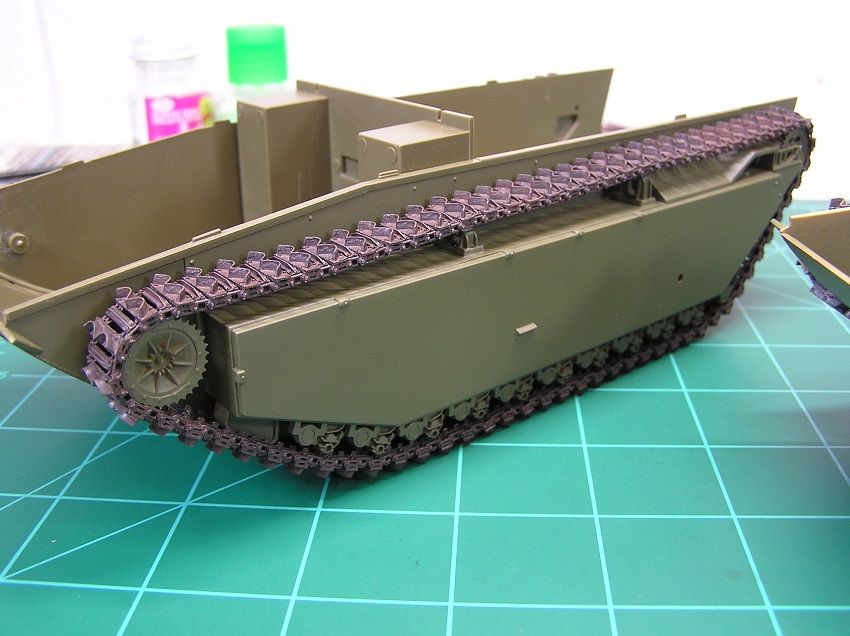
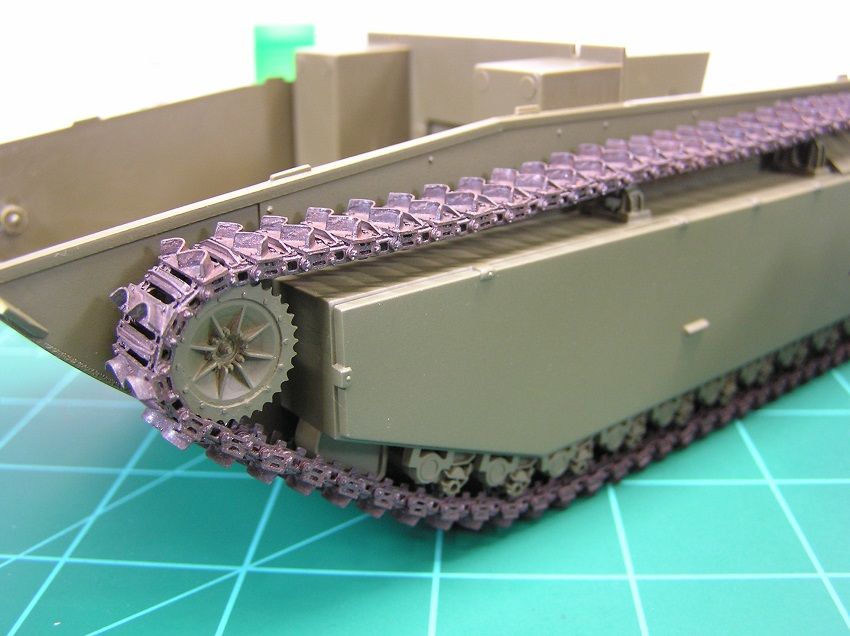
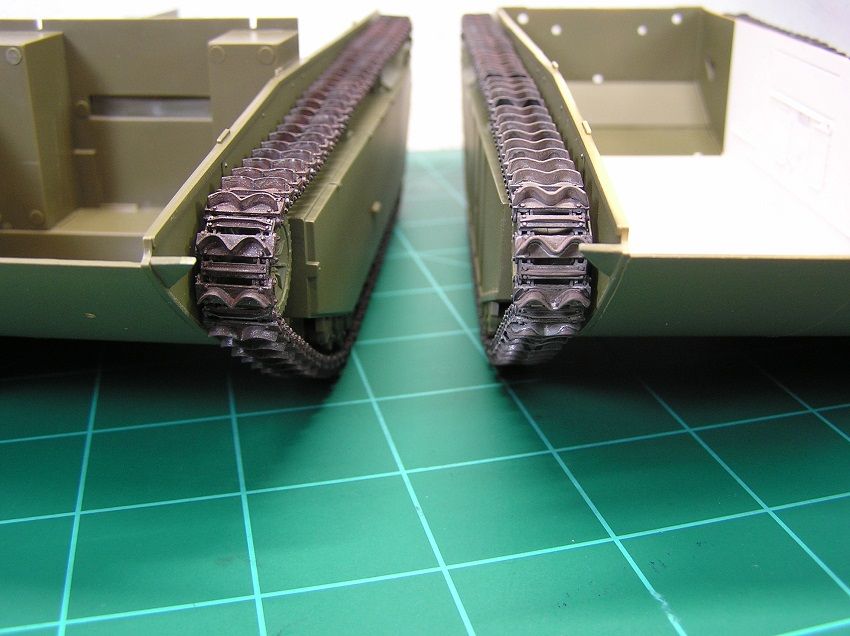
The LVT-4 with Friuls on the left, and the LVT (A) 4 with the AFV Club tracks on the right:
With the tracks on, step 6 for the LVT (A) 4 is adding the top hull plate.
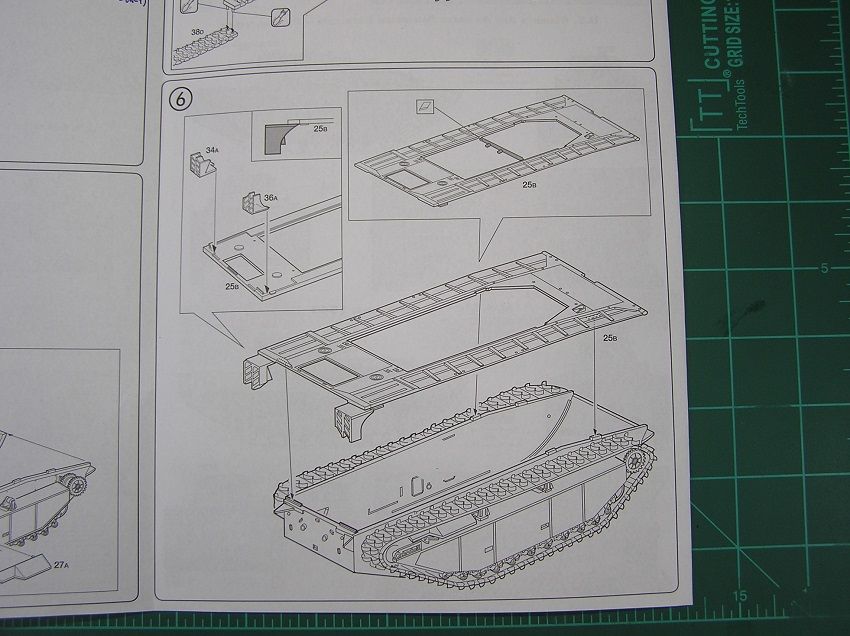
The top hull plate was a bit stubborn to get glued in place correctly, due to the top hull plate having some warp and being a relatively large part to handle.
It needed to be glued in about 3 sections, and once one section was dry I could glue another section.
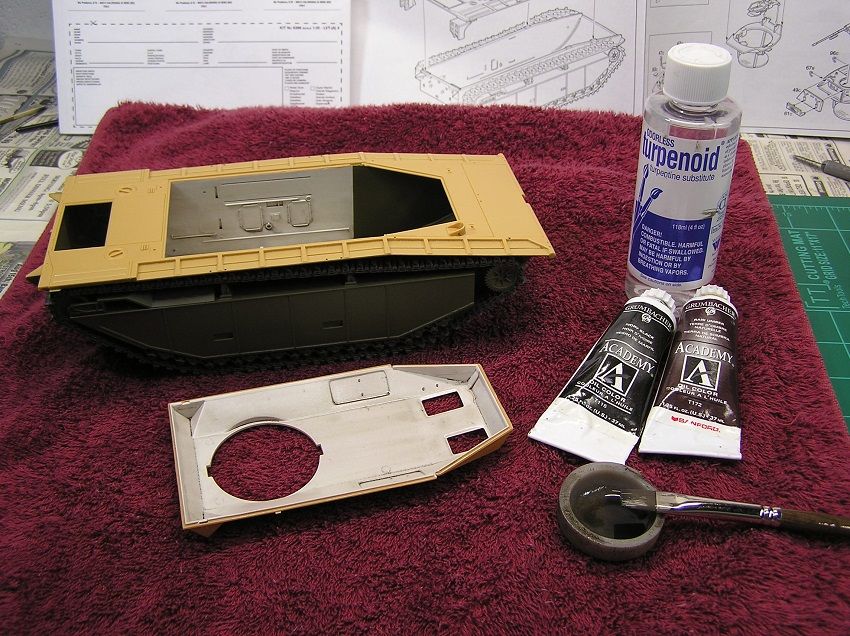
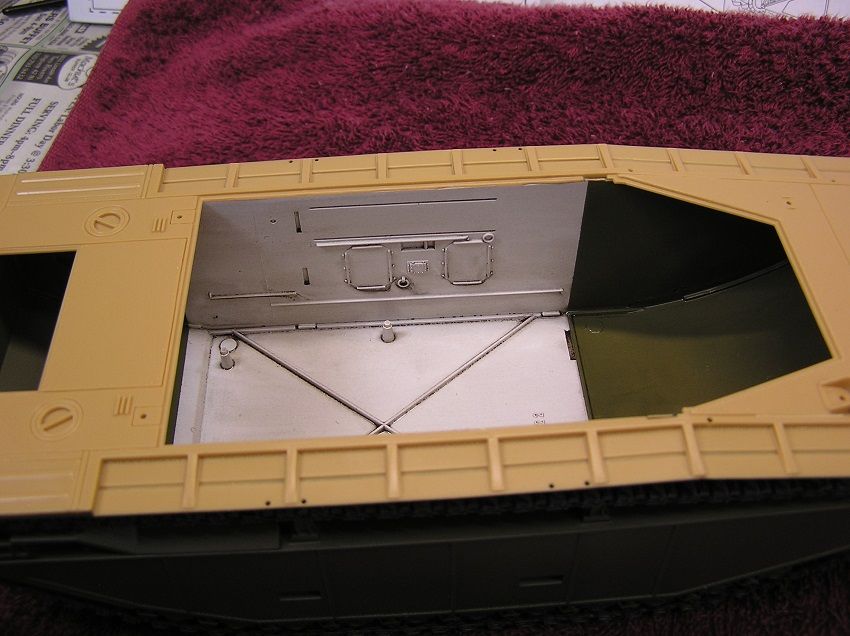
After the top hull plate dried, a light oil paint wash was done to the interior to 'age' it some.
 Thanks for stopping by!
Re: Italeri 1/35 LVT Landing Vehicle Tracked (X2)
Posted: Mon Jun 20, 2016 2:17 pm
by GazVickers
Looking good man, personally I prefer the Fruil tracks for looks. Stunning build so far though, keep up the good work.
Re: Italeri 1/35 LVT Landing Vehicle Tracked (X2)
Posted: Tue Jun 21, 2016 4:04 am
by OliveDrab
GazVickers wrote:Looking good man, personally I prefer the Fruil tracks for looks. Stunning build so far though, keep up the good work.
Thank you Gaz, the Friuls really do look nice, and wow they add some weight to the model!
Re: Italeri 1/35 LVT Landing Vehicle Tracked (X2)
Posted: Wed Jun 22, 2016 12:16 pm
by OliveDrab
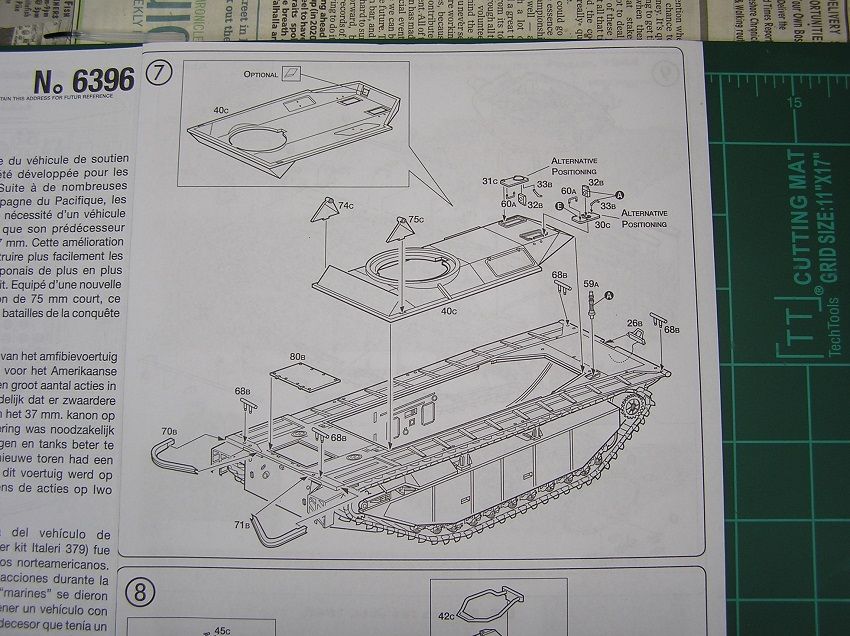
LVT (A) 4 -Moving on to assembly step 7 - upper hull details
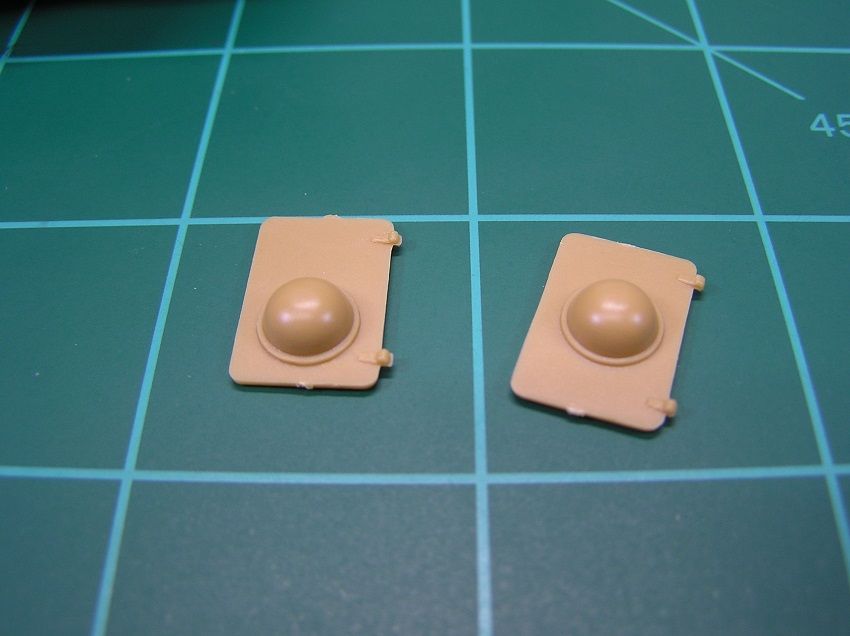
What in the world are these mounds on the forward hull hatches???
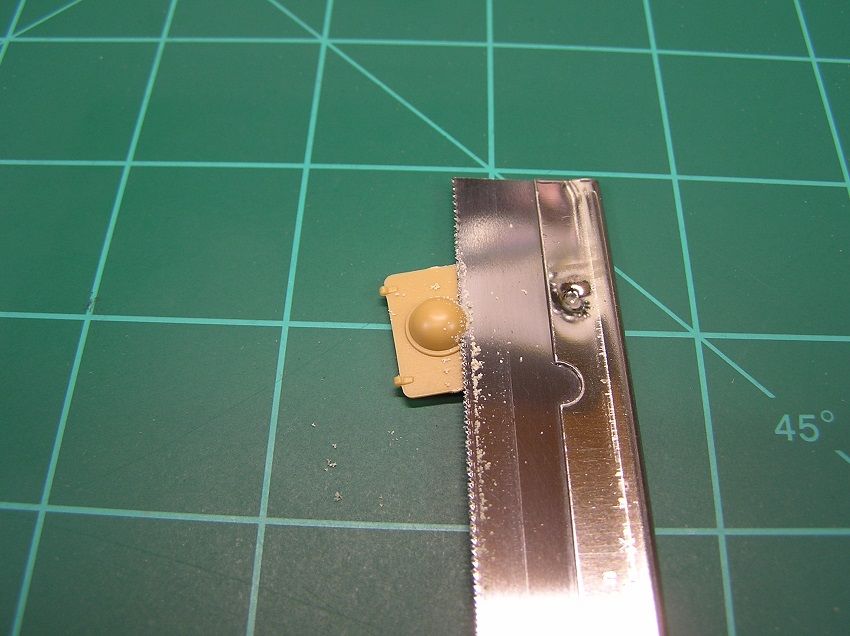
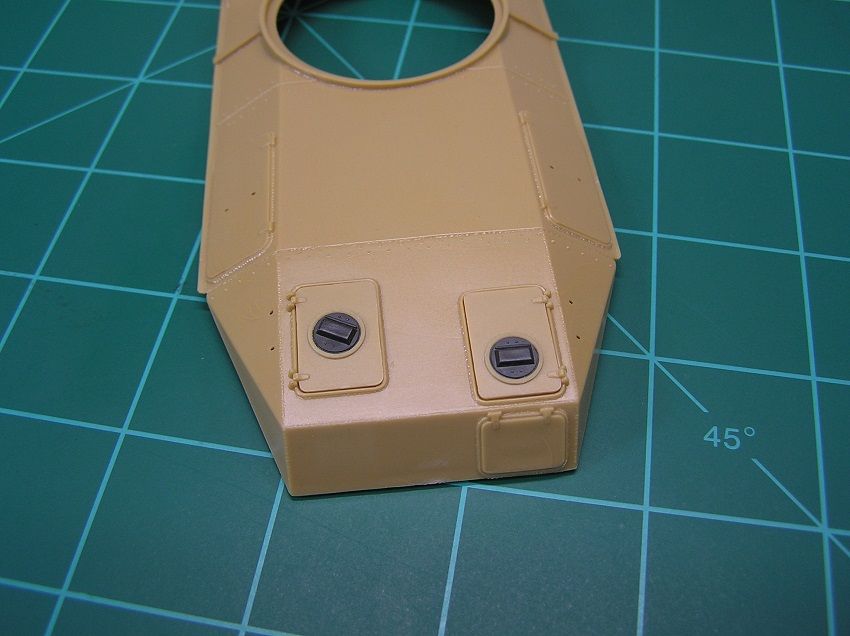
Well a little research revealed that some LVTs were equipped with clear 'domes' over the hatch periscopes. So Italeri got the 'dome' shape right but missed on the 'clear' detail!! The clear domes do not seem to be present in photo references that I found either, so my own judgement says they were either not used very often/removed by the crew/lost in combat. Yep, the domes are coming off!
Time to bring out the old bench mule Sherman to scavenge some periscope detail.
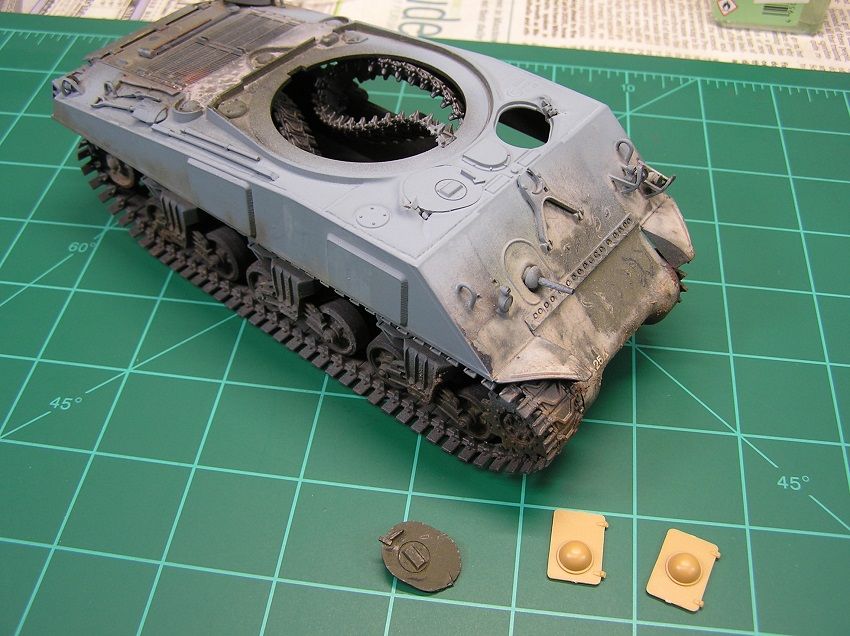
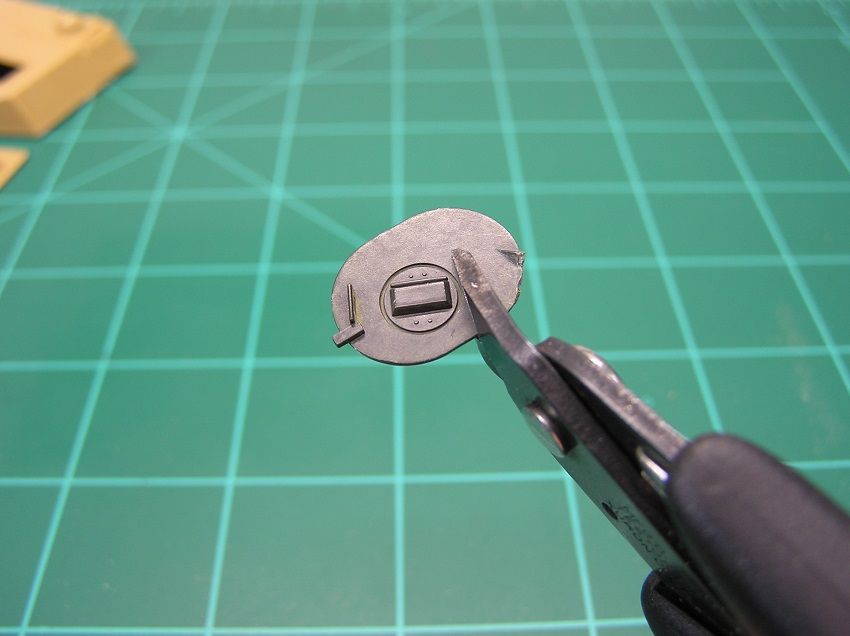
The plan: cut off the dome detail on the Italeri hatch and replace with the periscope detail from the Sherman hatch.
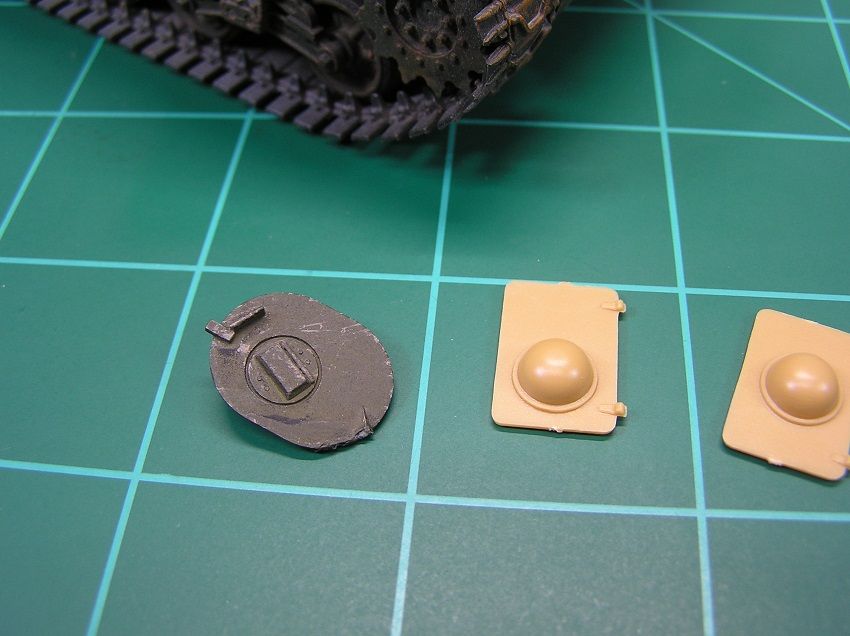
Cutting the dome off the Italeri hatch with a razor saw:
The old paint was stripped from the Sherman hatches, then most of the surrounding hatch was cut away from the periscope.
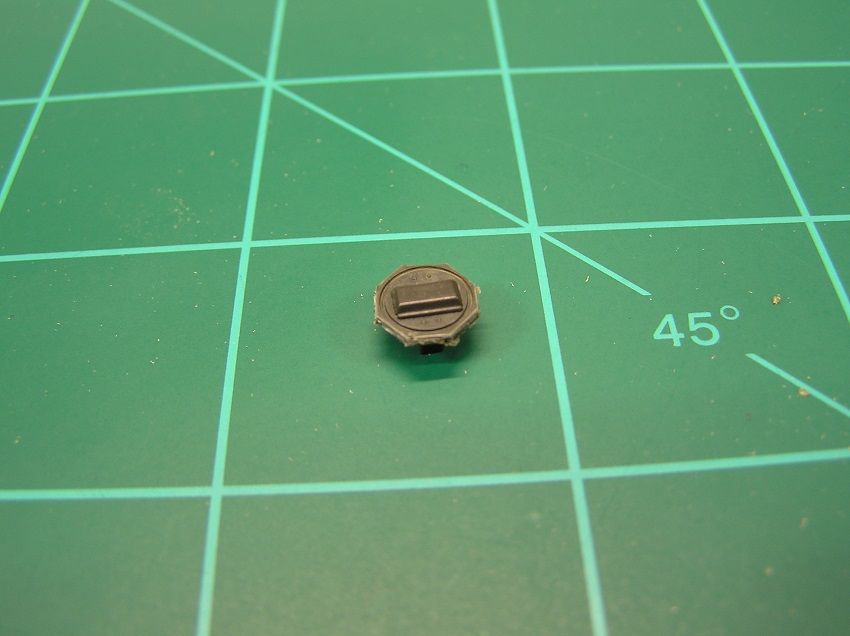
Then sand and file the parts until the periscope fits snug into the Italeri hatch.
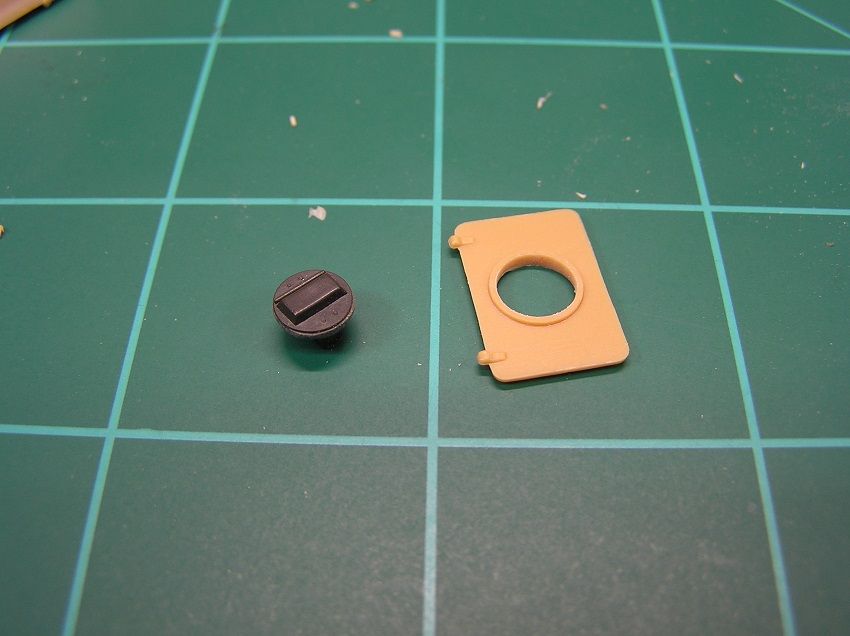
One down, one to go.
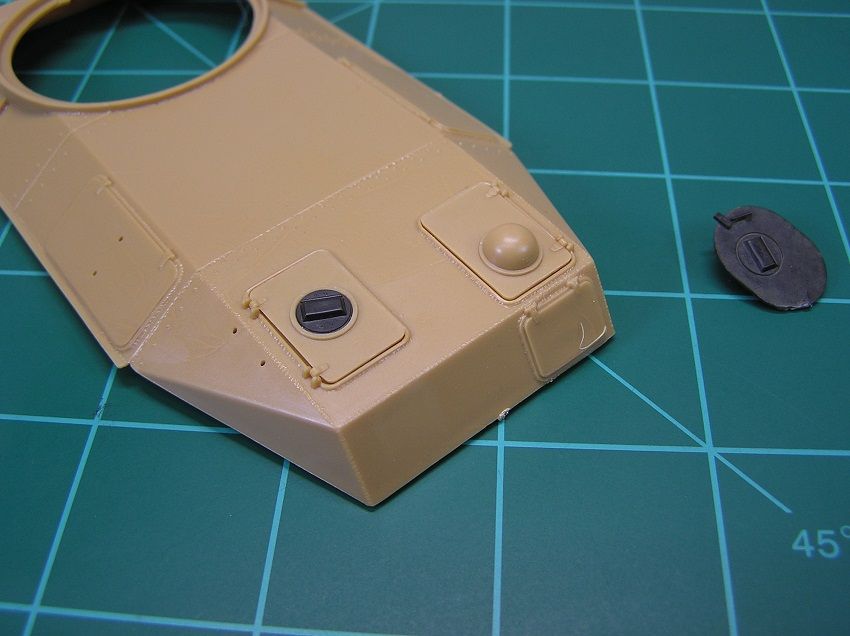
Yup, I like the periscope detail better than the domes (and painting the domes to make them appear clear was not going to work for me
)
Re: Italeri 1/35 LVT Landing Vehicle Tracked (X2)
Posted: Wed Jun 22, 2016 6:46 pm
by HIghAltitudeScale
Really enjoying the work you've done so far, especially on the tracks. Keep up the good work, i think you're onto something.
Re: Italeri 1/35 LVT Landing Vehicle Tracked (X2)
Posted: Wed Jun 22, 2016 7:33 pm
by Novorus
Re: Italeri 1/35 LVT Landing Vehicle Tracked (X2)
Posted: Sun Jun 26, 2016 4:20 am
by OliveDrab
thetechcowboy wrote:Really enjoying the work you've done so far, especially on the tracks. Keep up the good work, i think you're onto something.
Thank you for the nice comments and for following along!!!
Re: Italeri 1/35 LVT Landing Vehicle Tracked (X2)
Posted: Sun Jun 26, 2016 5:38 am
by OliveDrab
Moving along with the build of the LVT (A) 4, there are a few sloppy seams and details which can use some attention.
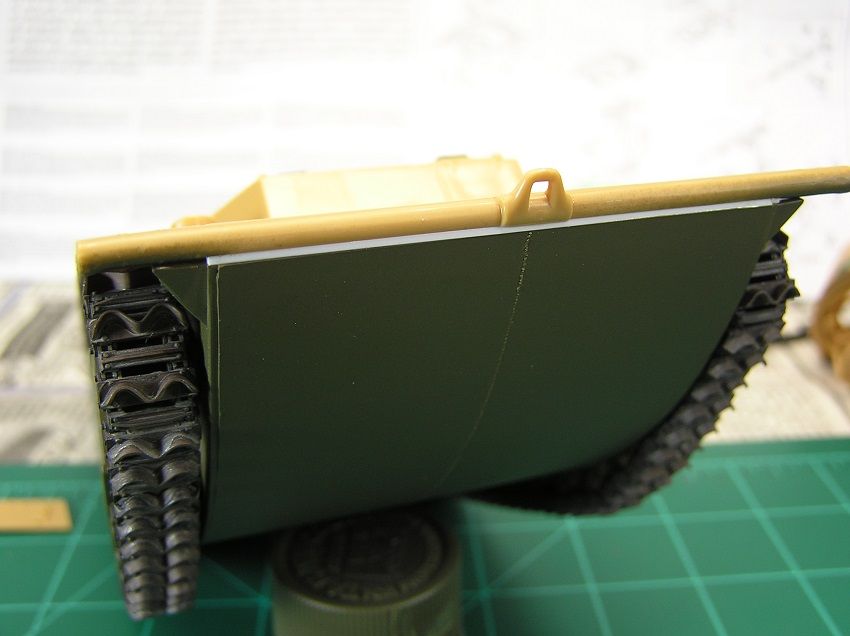
First is the front hull seam between the lower hull and front tube bumper. The lower hull plate should extend up to the front tube bumper and is welded to the tube. A bit difficult to see in the pic below, but there certainly should
not be any gap:
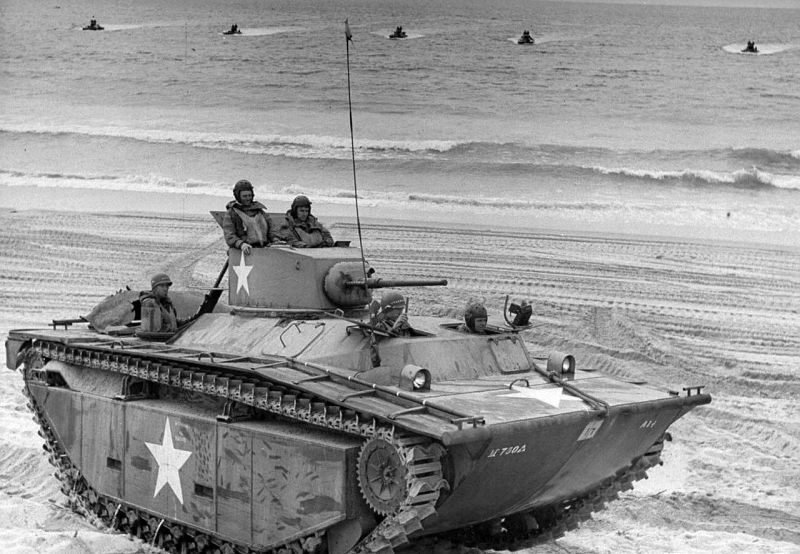
The kit has a rather large and noticeable gap:
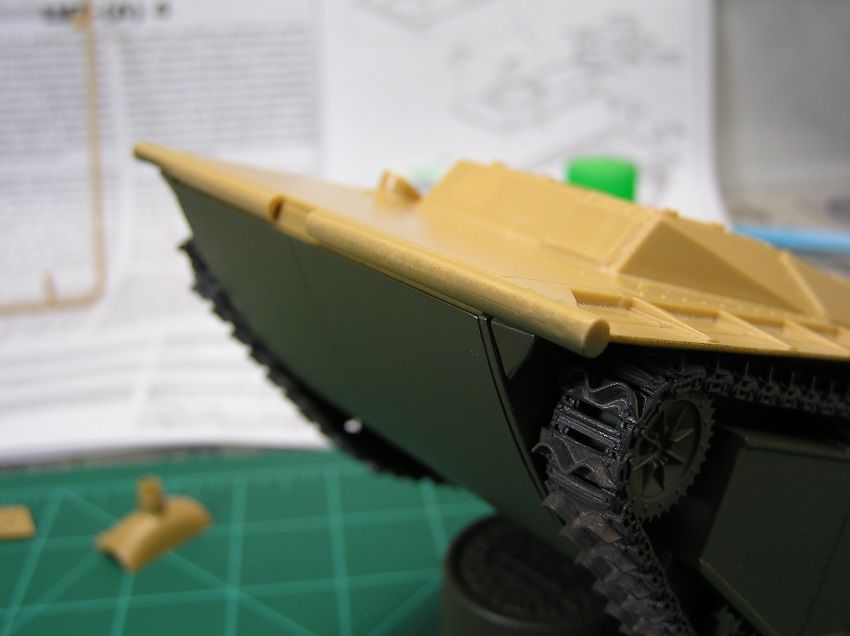
A .030" plastic strip filled the gap perfectly:
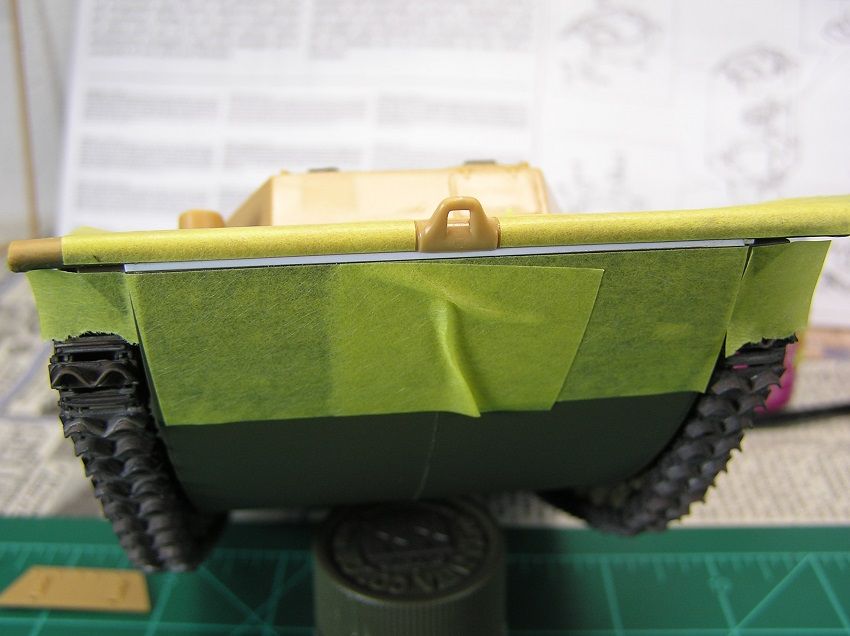
Then some masking before application of some thinned green putty:
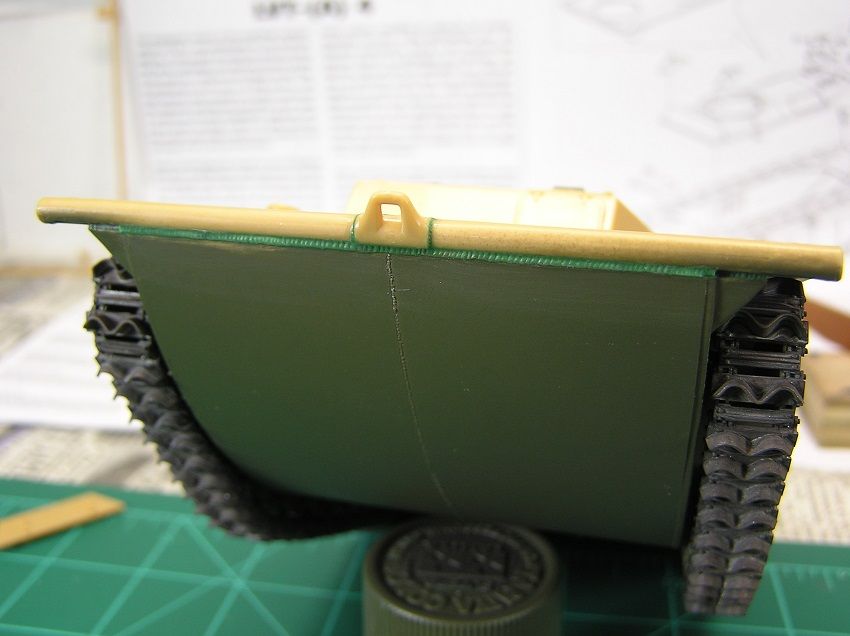
The putty was allowed to set for a short while, then given a weld texture with a toothpick:
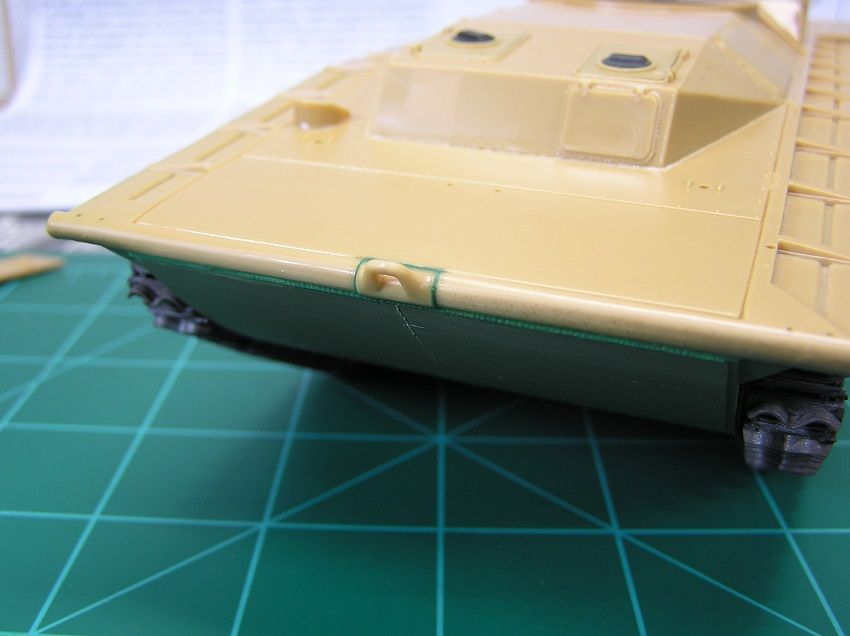
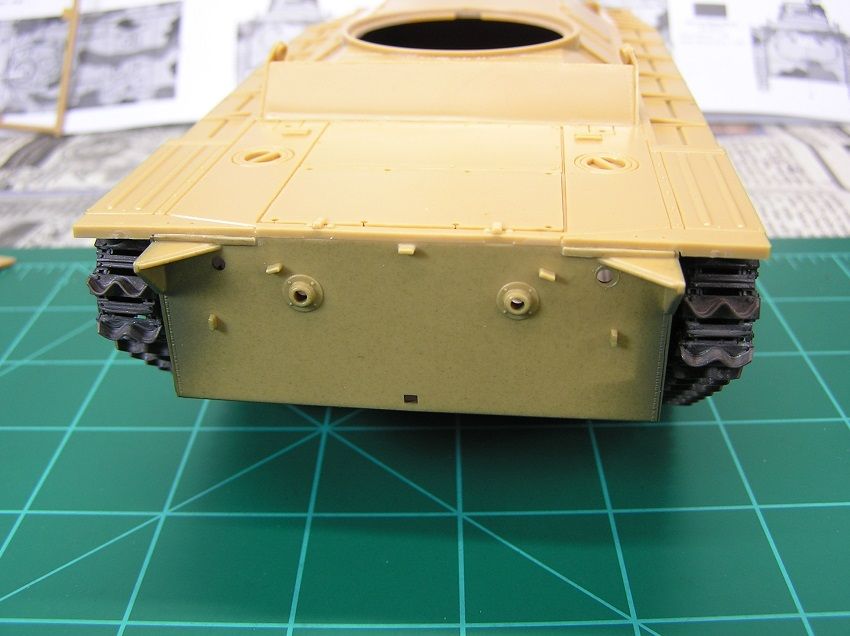
Moving the rear of the LVT, there are some simple "L" brackets for mounting a tow cable.
The bracket and tow cable detail as molded is very simplified, and can be improved without too much hassle.
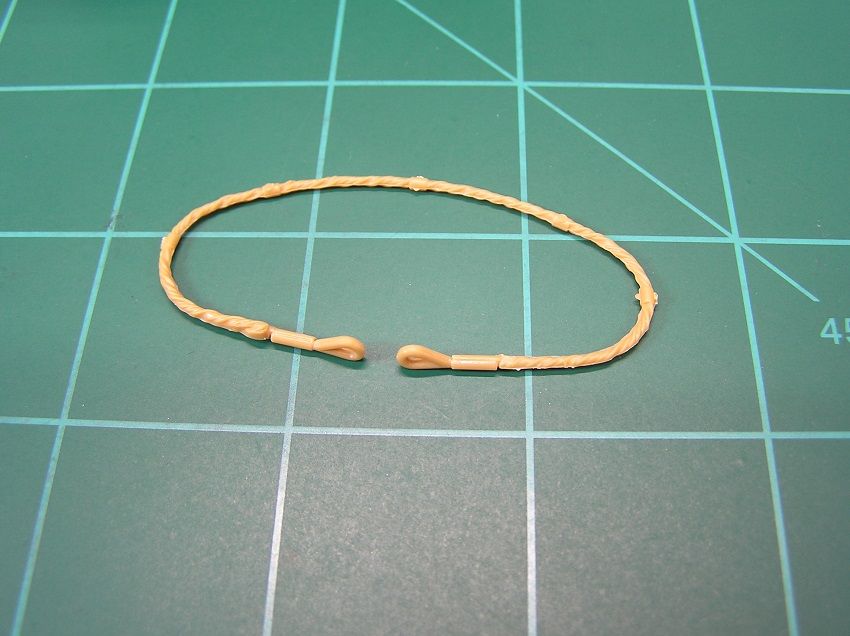
The stock tow cable, not very pretty...
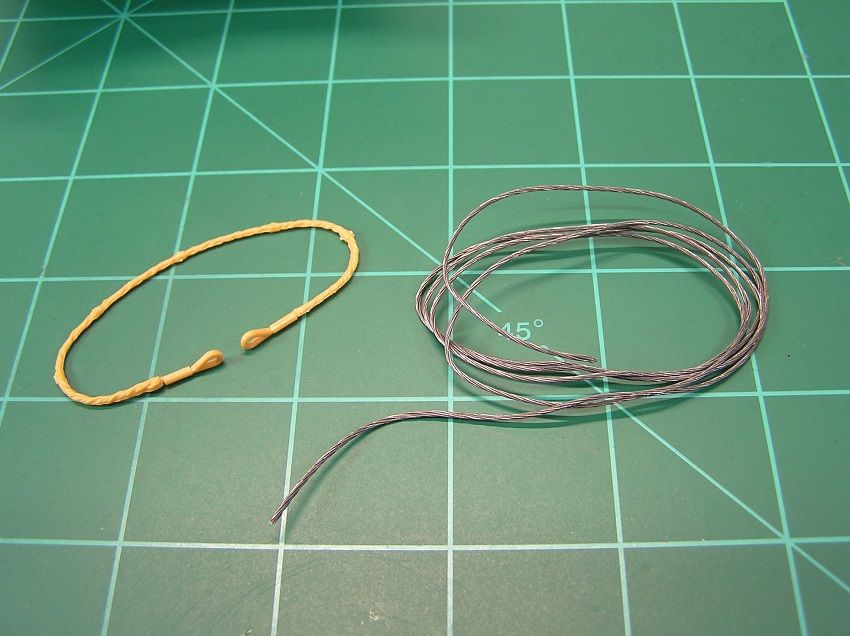
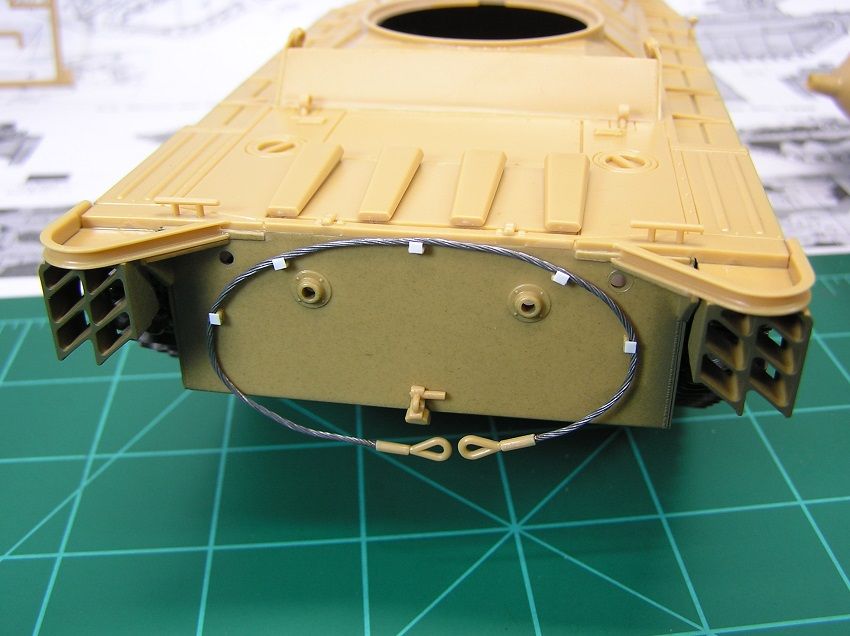
A new tow cable can be made from picture hanging wire. (Copper wire would probably be easier to work with but I'm using up my supply of the picture wire for now.)
.010" strip plastic was glued to the existing molded on pegs, and now we have some nicer looking "L" brackets. Then the wire is formed to shape.
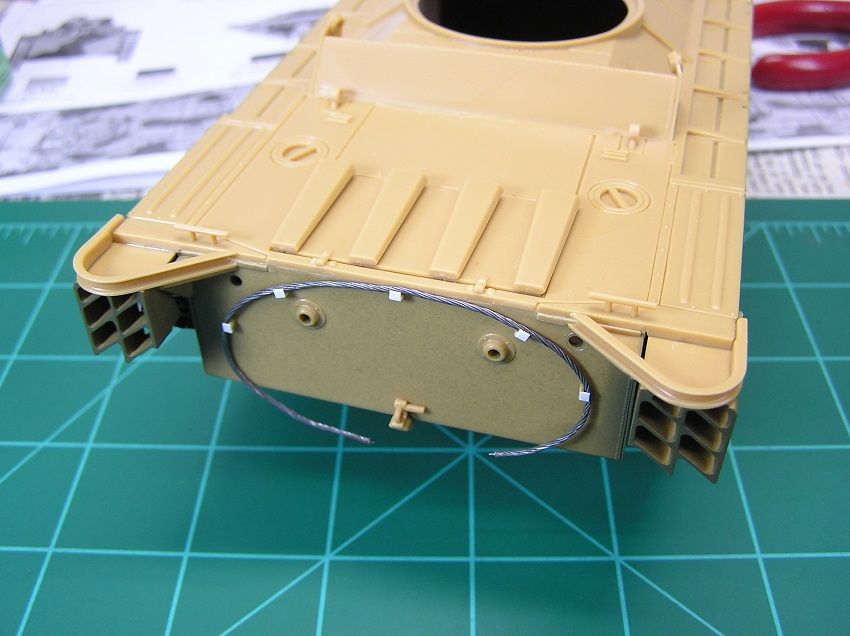
With the wire formed to shape, the tow cable ends were cut from the molded cable, drilled, and super-glued to the new wire cable.
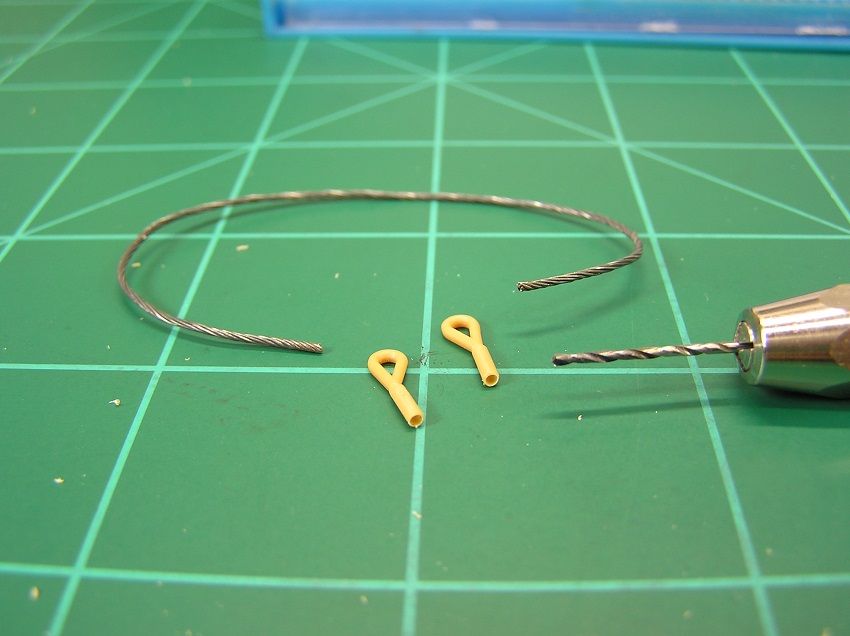
The completed tow cable. (The final addition will be a thin wire or rope tying the cable ends together.)
And then the turret. A simple and basic build of three sub-assemblies.
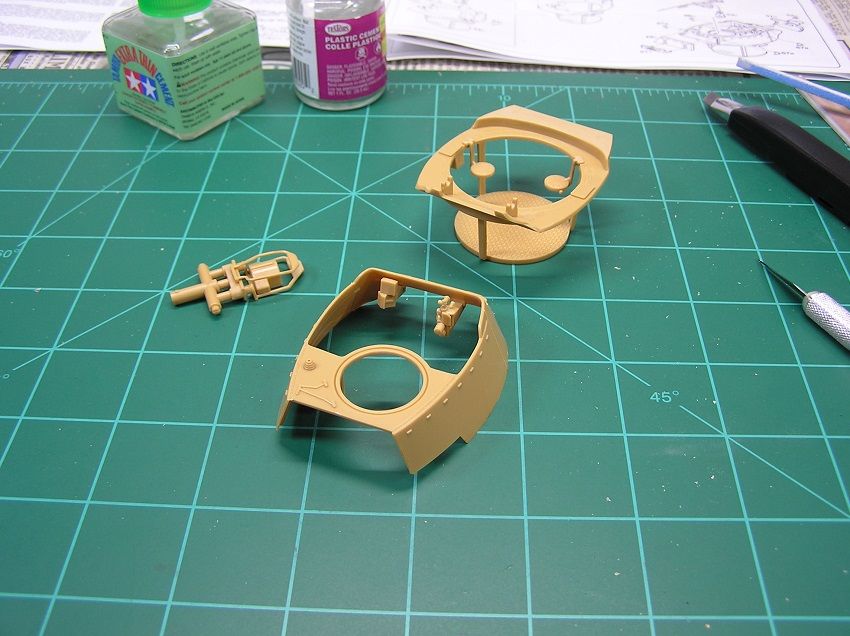
However, the assembly seam between the upper and lower turret parts leaves another opportunity for improvement!!
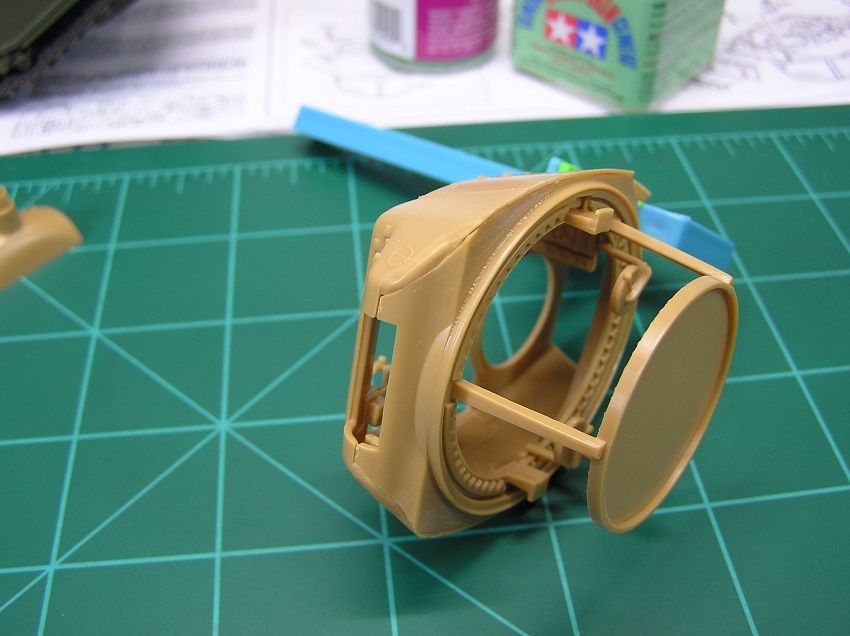
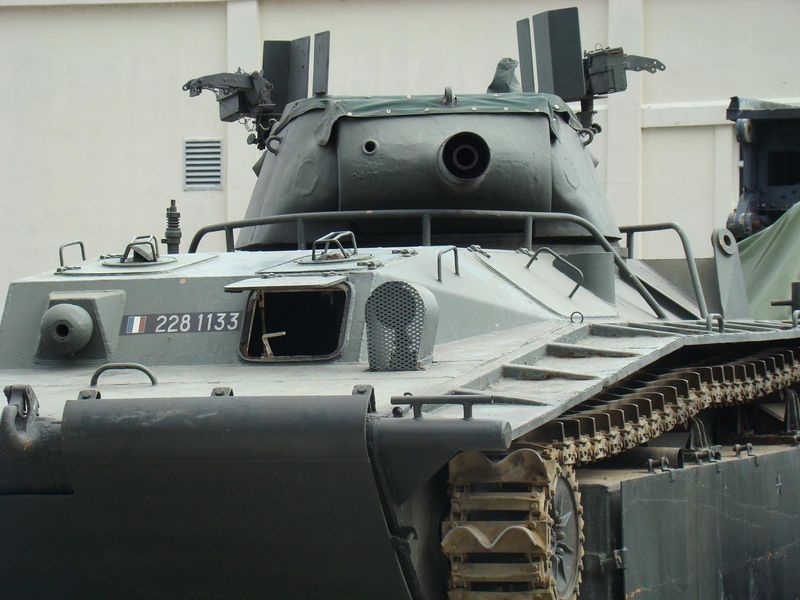
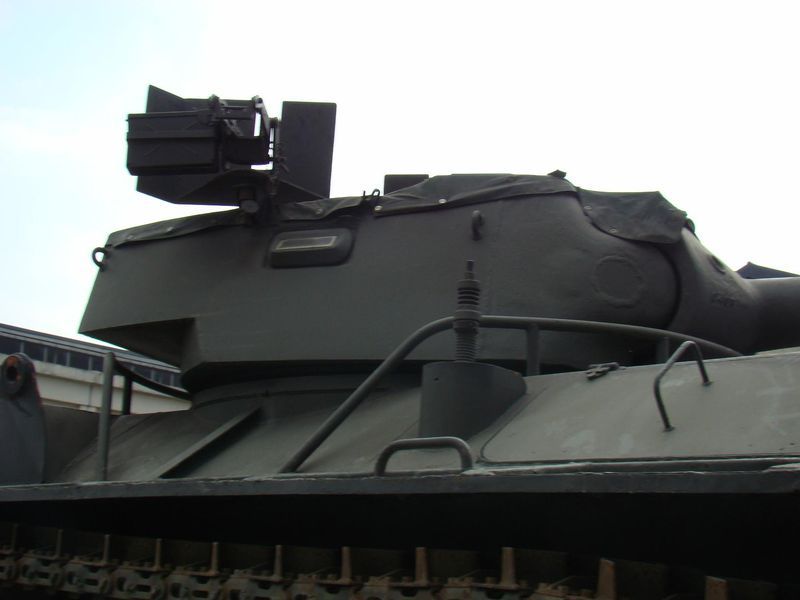
Some photos of the turret. Notice the front area of the turret looks to be a one-piece casting.
More thinned green putty to fill the seam, then wet sanded.
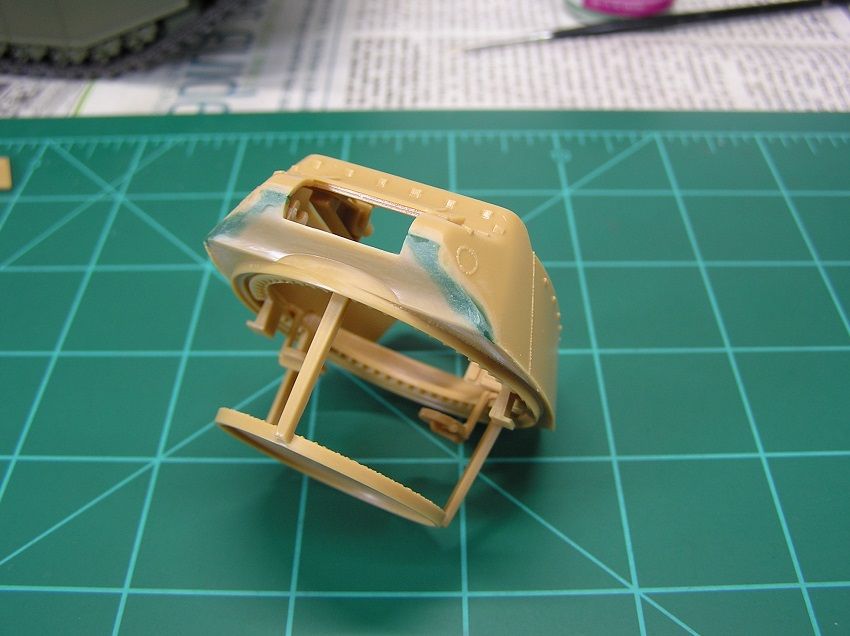
And then a brush coat of Tamiya surface primer and another session of wet sanding, and I'm happy with it now
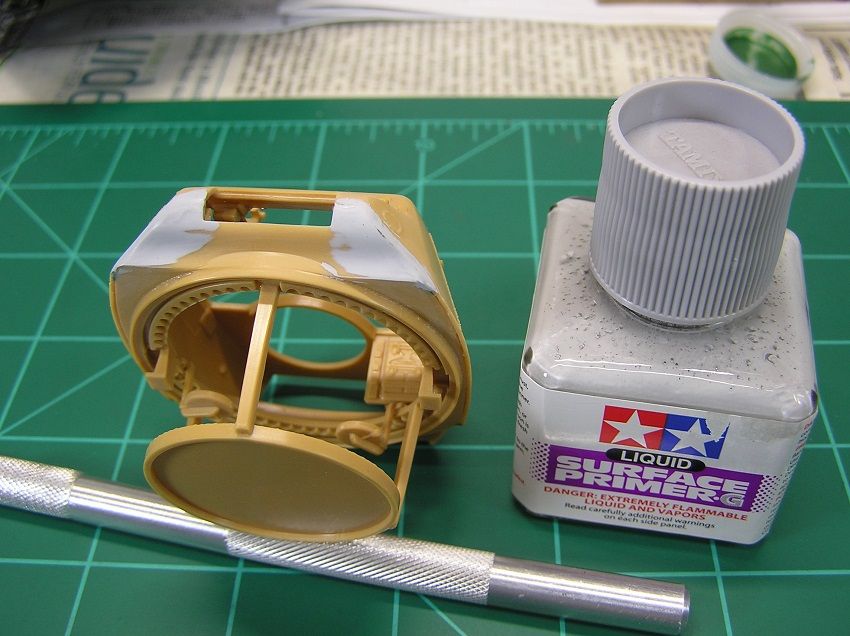 And thats all for now, take care and Model On!


