Page 1 of 1
1/72 US Airbase [Finished]
Posted: Sun May 08, 2016 7:36 am
by PrivateMansoor
My entry into this GB will be a 1/72 US airbase modelled on the various airbases used during the Pacific War. The main airbase I have used for inspiration is Kunming Airfield from WW 2.
The airbase will have significant land based elements as well, which would be either used to service the base, defend the base or being readied for deployment
The goal is to create a Diorama to use as a display base i.e. as a shelf. This will then be used to display my future 1/72 US aircraft on.
With this in mind, I do not plan to make many aircraft, but rather all the appropriate buildings, personnel, and ground vehicles to make it a great display base for future aircraft builds.
I have calculated that I would be able to place a maximum of 8 mid sized aircraft on it
The models to be built are of only those aircraft and vehicles used during the Pacific War.
This is my vision of the airbase:

Most of the kits being used haven't arrived yet, so I have images of their box art here:


This kit will be partially used to create the allied jeep,some ammo boxes, drums and jerry cans

I have commenced work on the base and the allied jeep, will post pictures soon.
Re: 1/72 US Airbase
Posted: Sun May 08, 2016 8:15 am
by Vleugelmoer
Cool idea and lots of stuff going on. What are the dimensions of the mdf base so I can mentally picture it. I'm currently doing a diorama of a Bell P-39 in 32nd scale and that base is already 50 x 60 cm..
As always happy modeling and keep sticking styrene.
Paul
Re: 1/72 US Airbase
Posted: Sun May 08, 2016 8:33 am
by Always48
This is exciting as it's a great idea that i would like to do oneday when the space permits. that sheet of Mdf looks huge im guessing 1mtr by 2mtrs
Re: 1/72 US Airbase
Posted: Mon May 09, 2016 8:19 am
by PrivateMansoor
Vleugelmoer wrote:Cool idea and lots of stuff going on. What are the dimensions of the mdf base so I can mentally picture it. I'm currently doing a diorama of a Bell P-39 in 32nd scale and that base is already 50 x 60 cm..
As always happy modeling and keep sticking styrene.
Paul
Always48 wrote:This is exciting as it's a great idea that i would like to do oneday when the space permits. that sheet of Mdf looks huge im guessing 1mtr by 2mtrs
Thanks!
The size of the orginal wooden board was 90cm X 60 cm I think, I have though cut it down as you will see below to about 90cm in length and being 38cm at its widest point.
Here is the update on the diorama base:
The board had to be cut so it could fit onto my shelf.

I then use photos of 1/72 tarmac bases, you can get these easily off the internet and then just print them off in photo format from a photo store or Officeworks / BIG W / Target if you live in Australia.

These are cut in different shapes, in some cases individual squares, so I can put some grass in between.
I use 800 grit sand paper to create the road.

Before I lay on some grass, I need to put some dirt on, to give the grass a realistic look. I put some PVA glue in some water and paint it on using a thick brush. I then put some dirt on to the base where I want grass.

I then put on some Woodland scenics grass, followed by hairspray and some static brown grass is sprinkled on, and finally some static light green grass is sprinkled on to give it the multicoloured look you see below.
I have also painted white stripes on each side of the road. I plan to place a zebra crossing on the road.
The base has also been matte coated using a commercial matte coat called helmar matte coat

Re: 1/72 US Airbase
Posted: Mon May 09, 2016 1:15 pm
by Richp1969
Looks interesting. Thank you so much for the detailed explanation. Really nicely done.

Sincerely,
Richard
Re: 1/72 US Airbase
Posted: Tue May 10, 2016 3:55 pm
by martin57
That looks great so far , it looks like it will be a busy dirama ,
good luck with it .

Re: 1/72 US Airbase
Posted: Wed May 11, 2016 8:22 am
by privatepete
Hi brilliant start, nice idea with the tarmac base's I'll be keeping a eye out for up date's,

Re: 1/72 US Airbase
Posted: Wed May 11, 2016 5:37 pm
by pourquoi61
Re: 1/72 US Airbase
Posted: Wed May 11, 2016 5:41 pm
by Twokidsnosleep
I am always up for a diorama project, especially someone else's

Gonna sit and watch

Re: 1/72 US Airbase
Posted: Thu May 12, 2016 4:08 am
by PrivateMansoor
Re: 1/72 US Airbase
Posted: Thu May 12, 2016 5:43 pm
by Richp1969
Good looking jeep. Great work.
I can't wait to see this all come together.

Sincerely,
Richard
Re: 1/72 US Airbase
Posted: Sun May 15, 2016 2:52 am
by PrivateMansoor
Richp1969 wrote:Good looking jeep. Great work.
I can't wait to see this all come together.
Sincerely,
Richard
Thanks Richard!
Lots of work done on the weekend
I have weathered the jeep and added decals. I have not put on the steering wheel yet, as I am waiting for some figures to arrive so that I can put one on the seat.
The tyres were weathered using Tamiya Weathering Master - Sand, as well as some of the side and interior.


The bottom was weathered using tamiya weathering master- rust, burnt blue and yellow


Some silvering on the decals is present, will wait to see if it goes away before matte coating.
I have started work on the Cargo truck and will have those pictures up soon.
Re: 1/72 US Airbase
Posted: Sun May 15, 2016 3:10 am
by PrivateMansoor
Re: 1/72 US Airbase
Posted: Sun May 15, 2016 3:17 am
by Twokidsnosleep
Cool stuff, I like your little test set
You could do a backdrop in behind as well...photo printed off the computer and hang it on the wall or clip it to the shelf
Would add a ton of realism when you take photos
Re: 1/72 US Airbase
Posted: Sun May 15, 2016 9:56 am
by fly1ngdutchm4n
Building a entire airfield is amazing!
Love what you did so far, really great job an the small scale modelling!
Re: 1/72 US Airbase
Posted: Sat May 21, 2016 5:17 am
by PrivateMansoor
Twokidsnosleep wrote:Cool stuff, I like your little test set
You could do a backdrop in behind as well...photo printed off the computer and hang it on the wall or clip it to the shelf
Would add a ton of realism when you take photos
Thanks twokids mate! I will look into that, might have to print it off on an A5 paper.
fly1ngdutchm4n wrote:Building a entire airfield is amazing!
Love what you did so far, really great job an the small scale modelling!
Its tedious at times, but love the small scale as it fits almost anywhere
More work done, I did up some figures using the Airfix 1/72 USAAF Personnel set.
I had to cut the figures arms and legs and mix and mash with some other figures to make a seated driver for both the Allied Jeep and the Towing Tractor.
The jeep has been finished, here are the final pics. I decided to do the jeep without windows... that might change in the future.
Here are some final build and pics of the Academy 1/72 Ground Vehicle Set 1 - Allied Jeep:
Cutting up figures to make a driver


The Jeep was weathered using Tamiya Weathering Master sets


The Corsair in the background is not part of this build but is just there for show at the moment.
Re: 1/72 US Airbase
Posted: Sat May 21, 2016 5:31 am
by PrivateMansoor
Re: 1/72 US Airbase
Posted: Sat May 21, 2016 5:59 am
by Twokidsnosleep
Oh, really fantastic!!! love the tow tractors
I can see a cool rolling green field with blue sky background maybe glued to cardboard so it will stand up
I did that with a Star Wars scene of the Dagobah swamp, it just gives the dio some depth and looks great in photography
Keep on going, really looking the part

Re: 1/72 US Airbase
Posted: Mon Jun 13, 2016 8:07 am
by Les
Wow! This is going to be a big project when you are finished. Keep up the great work on this.
Re: 1/72 US Airbase
Posted: Thu Jul 14, 2016 3:06 am
by PrivateMansoor
Les wrote:Wow! This is going to be a big project when you are finished. Keep up the great work on this.
Thanks Les
Twokidsnosleep wrote:Oh, really fantastic!!! love the tow tractors
I can see a cool rolling green field with blue sky background maybe glued to cardboard so it will stand up
I did that with a Star Wars scene of the Dagobah swamp, it just gives the dio some depth and looks great in photography
Keep on going, really looking the part
Thanks twokids, cant really find the perfect background yet.
In any case
I have done a lot more work on this since my last post.
The truck is complete and I have also started a new build on an aircraft. I made the accessories that can with the kit. I painted the boxes with Tamiya Deck Tan first then with Tamiya Clear orange, matte coated them and game them a wash with Vallejo Black wash to create the wood look. It doesnt look perfect but I like it.
First off here are the final build pictures of the Academy 1/72 US 2.5 Ton Truck


Re: 1/72 US Airbase
Posted: Thu Jul 14, 2016 3:43 am
by PrivateMansoor
Re: 1/72 US Airbase
Posted: Thu Jul 14, 2016 3:53 am
by OliveDrab
Excellent project, and Wow great detail
My favorite has to be the 2.5 ton truck!
Re: 1/72 US Airbase
Posted: Mon Jul 25, 2016 4:45 am
by PrivateMansoor
OliveDrab wrote:Excellent project, and Wow great detail
My favorite has to be the 2.5 ton truck!
Thanks Olivedrab,
I have now completed the Diorama base. Here are the latest Updates.
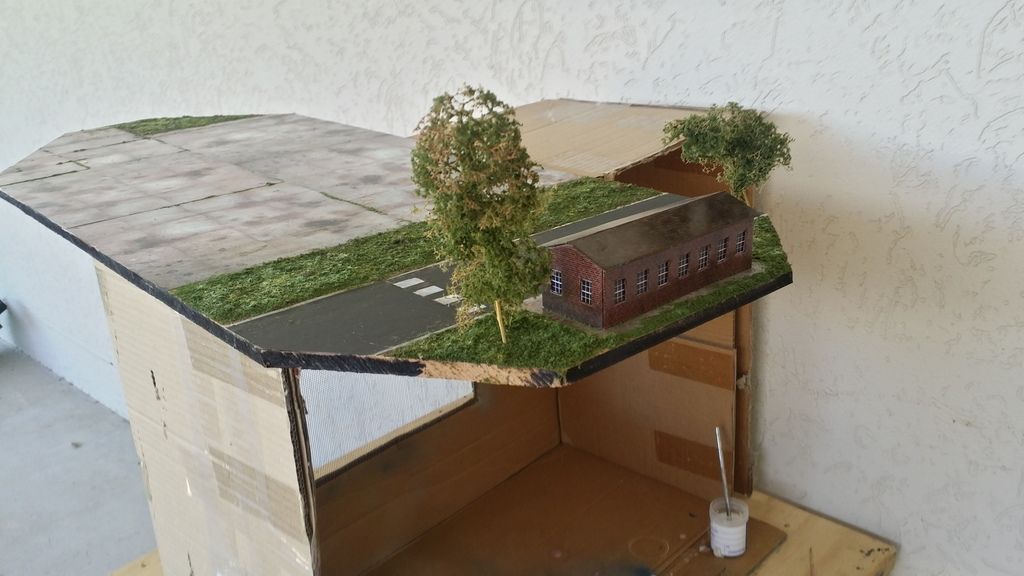
I had to put a Hut on the side of the diorama base.
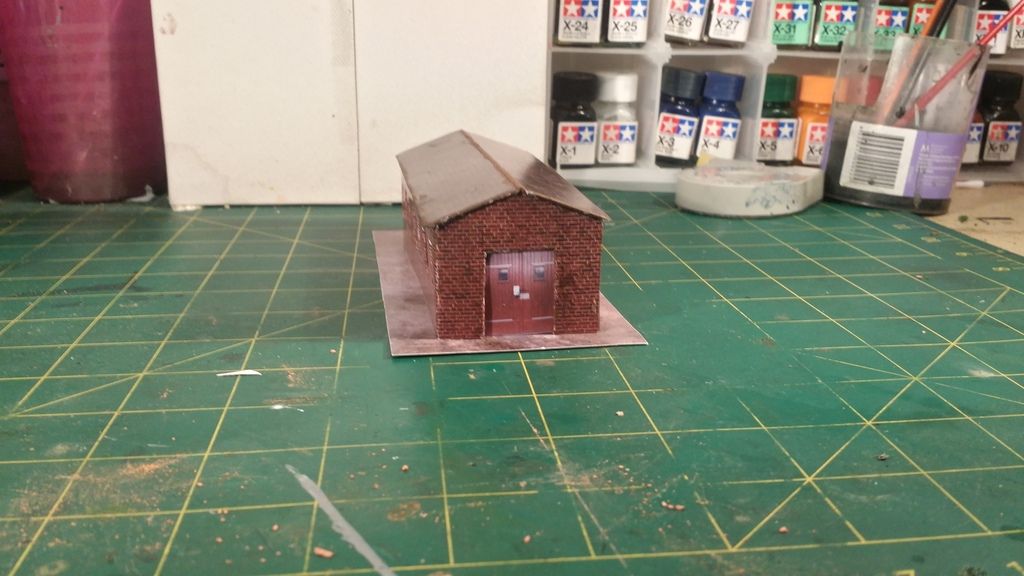
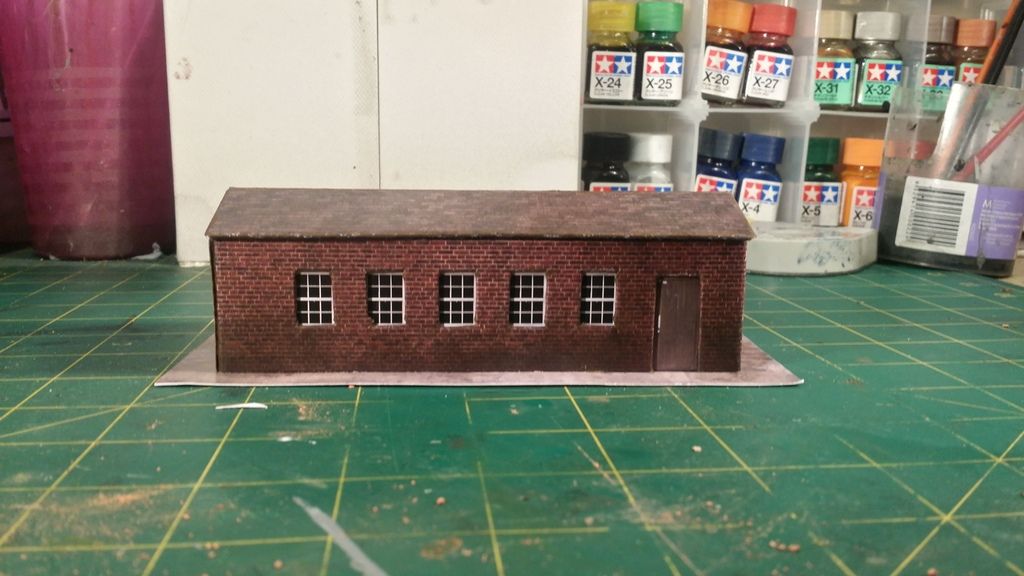
I purchased 1/76 Airfield Huts from Model Railway Scenery- online. You get a PDF file which you can print off and create a card model kit. This particular purchase lets you build 4 buildings - two large huts, a medium hut and small hut.
Once you buy it, you can print it as many times as you like. Very convenient and I think it looks the part too.
Here is the link to the kit
http://www.modelrailwayscenery.com/2014 ... -oo4mm176/
I printed the various pieces on paper and then went on to cut, glue and build the vaious pieces. I still have enough to build a medium Hut a small Hut and another large Hut


This was printed on 300 gsm card paper. I then glued it to another 300 gsm card paper to increase the thickness.
Once this was done, cutting out the various portions began.

Here is the walls and the roof before attaching the inside windows and doors


Windows and doors then glued to the inside - using a glue stick (UHU)

Walls put together using PVA Glue


Roof glued on using PVA Glue
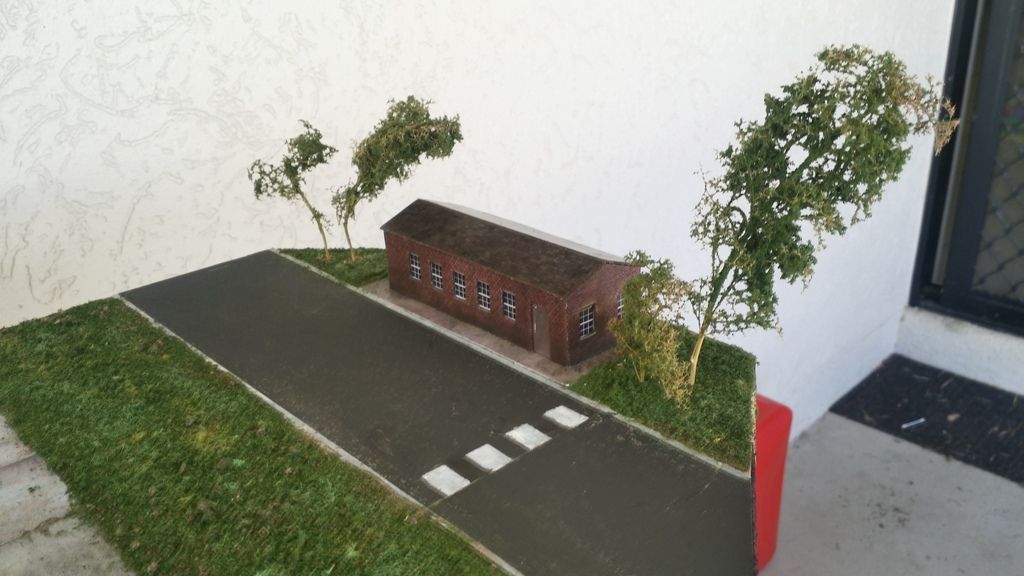
I then began making some trees to place on the side of the Hut. I used fine branches which I bought online. These were sprayed with hairspray and then sprinkled with Woodland Scenics Fine Turf. Also more grass was laid down and some Joefix static grass was used - brown - to represent dead grass.
This was sprinkled on after the base was sprayed with Spray Adhesive- so all products used were:
The fine branches:

The turf, static grass, and spray adhesive:

The above picture is from another Sig but I used the same products on this base as well.
I also laid down a zebra crossing on the road.

The hut was glued on to the base, and the trees were put in after drilling holes and using superglue.
Here is the final completed Diorama base
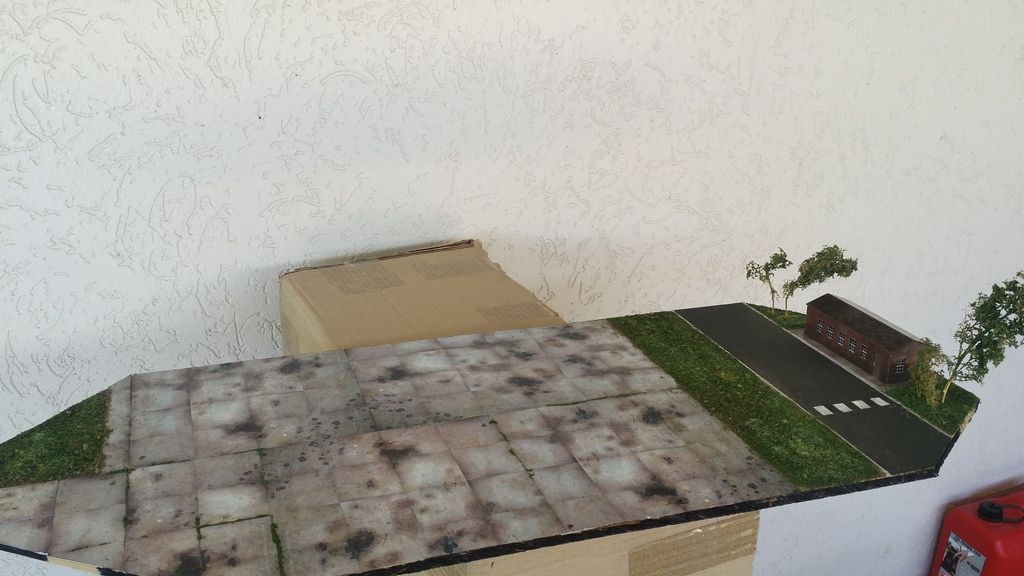

Next up is the final build which is an Airfix 1/72 P47 Curtis Hawk. I have started this and will post pics soon.
Re: 1/72 US Airbase
Posted: Mon Jul 25, 2016 8:22 am
by PrivateMansoor
Here is the final build of this project.
The Airfix 1/72 Curtis Hawk 81-A-2 AKA the P-47B
Kit Details:
Kit Name: Airfix 1/72 Curtiss Hawk 81-A-2
Product Number: A01003
Kit History: Released in 2011 as a new tool. One of the new Airfix Toolings.
Kit Marking options: One option for aircraft of the American Volunteer Group.
Scalemates link:
https://www.scalemates.com/kits/131395- ... awk-81-a-2
Box Art:

Kit Contents:

Kit Instructions:

Build begins
Interiors painted with some side panels hand painted

Cockpit assembled and painted:


Propellar attached and fuselage glued, rear wings also attached.


Bottom painted first Tamiya deck tan:

Chamo scheme painted with Tamiya Flat earth and Dark green

I did a wash using Vallejo Model Wash Black


Underside light panel wash using Vallejo Model wash - Grey

Decals were applied then


The canopy and clear parts were then done

I lost the decal for one of the eyes, so I had to make one myself from a spare white decal. I had to cut it exactly to shape of the other eye ... which took lots of time. I used red marker to paint the pupil.
I marked panel lines over the decals with a lead pencil.
All put together then and here she is:


Here are some pics of the Aircraft on the Diorama:


The Build Video is here:
[youtube]nzxtCCQIBkM[/youtube]
I wanted to keep this model as clean as possible, whilst still looking realistic - hence the panel line wash. Its sitting on an airbase, it will be cleaned up regularly and painted on occasion too.
Now before the final reveal here are some pictures of the figures I have done up.

Ammo boxes left over from the truck build

Jerry cans and fuel drums

Heres a few pics of the final Diorama.


More pics in the Final Reveal here:
http://www.intscalemodeller.com/viewtop ... 92&t=18979


