Page 1 of 1
1/24 MPC/Airfix JU 87B Chips and Grime.
Posted: Wed Jul 06, 2016 3:59 am
by fightnjoe
This is part 2 of biting off more than I can chew.
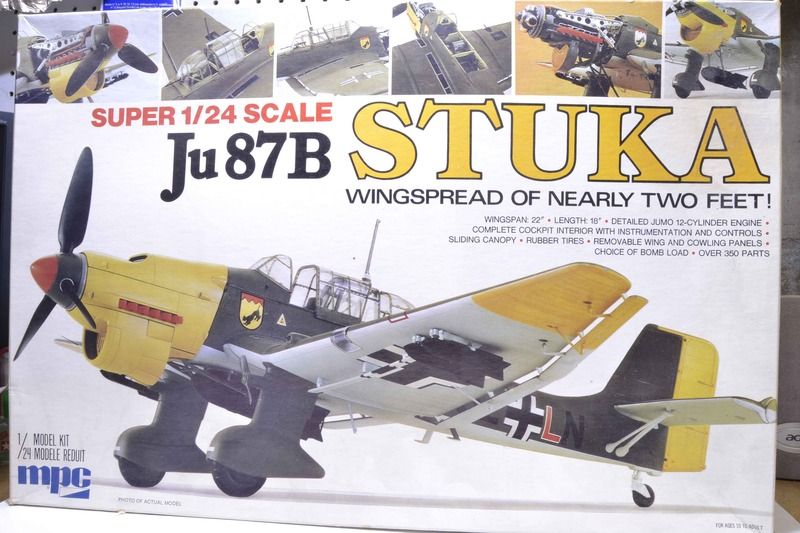
This will be my tribute to the late Dan Jayne. This will be constructed as a cut away build and I will attempt to present it in a style that he did.
Stay tuned folks.
Joe
Re: 1/24 MPC/Airfix JU 87B
Posted: Wed Jul 06, 2016 7:47 am
by Cymru
Oooooh.....

Re: 1/24 MPC/Airfix JU 87B
Posted: Thu Jul 07, 2016 7:12 pm
by fightnjoe
Many thanks for looking in.
Joe
Re: 1/24 MPC/Airfix JU 87B
Posted: Thu Jul 07, 2016 10:24 pm
by RicRodrigues
I'll be following this one!!!
Re: 1/24 MPC/Airfix JU 87B
Posted: Tue Jul 12, 2016 7:08 pm
by CJSomerset
Re: 1/24 MPC/Airfix JU 87B
Posted: Thu Jul 14, 2016 5:36 am
by fightnjoe
Many many thanks.
CJ I need to check yours out for sure.
Joe
Re: 1/24 MPC/Airfix JU 87B
Posted: Thu Jul 14, 2016 10:34 pm
by Tat2bhoy
Will follow along as well
Re: 1/24 MPC/Airfix JU 87B
Posted: Fri Jul 15, 2016 11:39 pm
by fightnjoe
Appreciate that. Thank you.
Joe
Re: 1/24 MPC/Airfix JU 87B The Beginning
Posted: Wed Aug 17, 2016 3:35 pm
by fightnjoe
The prep work begins.
The first step is to decide where to make the cuts. What do I want to show on this. i sat and stared at the kit for several hours over several days before I felt comfortable enough to mark out the sections with a sharpie. Next is some actual fabrication. Using sections of a large styrene sign I rough cut and then fine tuned the bulkheads from the rear of the cockpit to the tail.
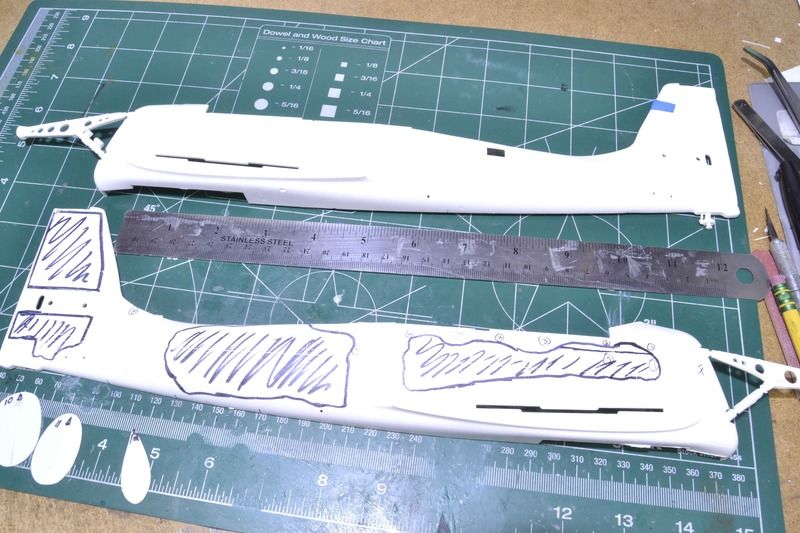
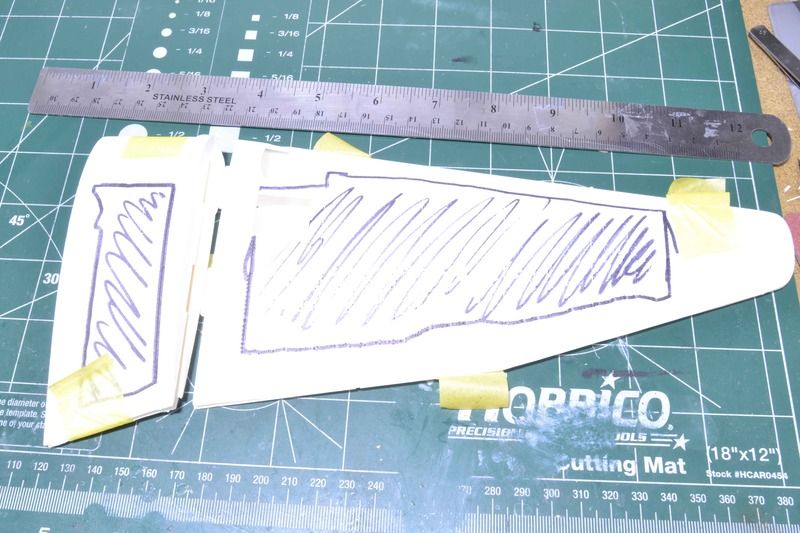
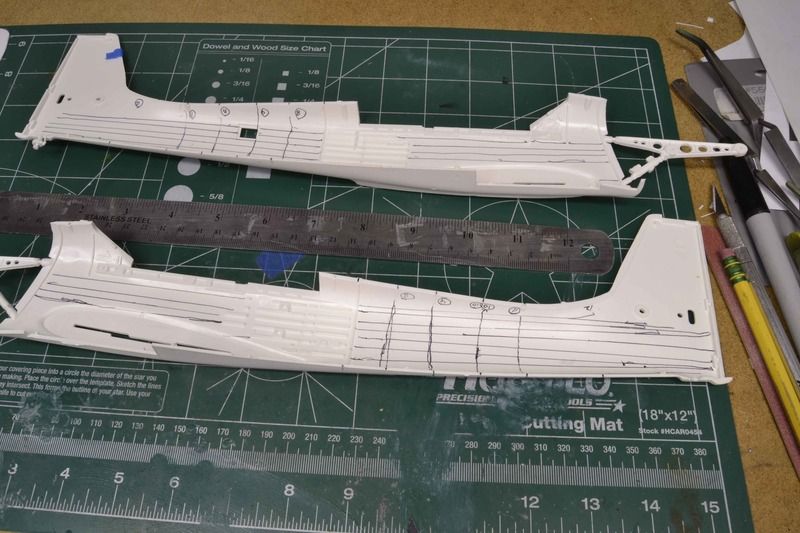
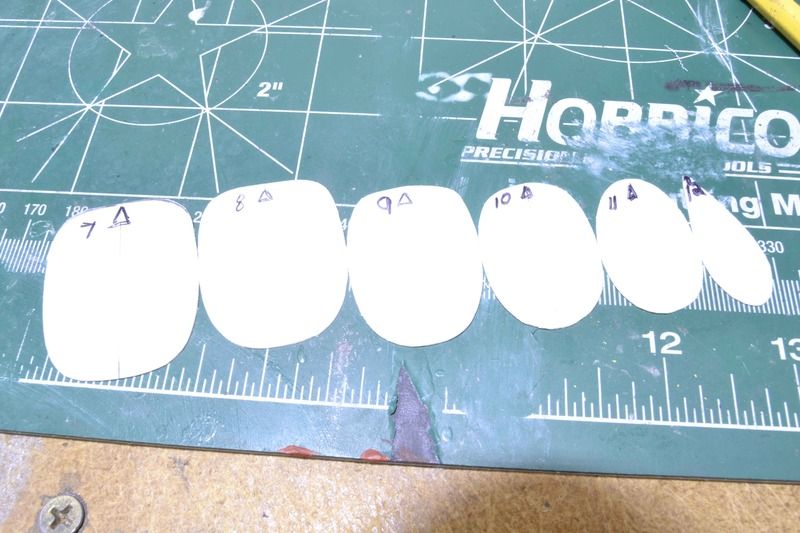
My next step will be to overcome that fear and actually cut into the plastic to open up the sections.
Not much yet but all comments, critiques, and criticism are encouraged.
Joe
Re: 1/24 MPC/Airfix JU 87B The Beginning
Posted: Wed Aug 17, 2016 7:34 pm
by shortCummins
its going to be a big bugger isn't it
Re: 1/24 MPC/Airfix JU 87B The Beginning
Posted: Thu Aug 18, 2016 6:40 pm
by 1975GinjaNinja
Really enjoy watching your builds the derail in the scratch building is brilliant. How do you get the correct shape for the bulkheads?
Re: 1/24 MPC/Airfix JU 87B The Beginning
Posted: Thu Aug 18, 2016 10:00 pm
by fightnjoe
Many many thanks for looking in.
It is going to be a big one for sure. Nigel that is most likely one of the easier steps. Using a contour gauge I get the general shape and then sand/trim until I get the fit I am looking for.
Joe
Re: 1/24 MPC/Airfix JU 87B Not Forgotten
Posted: Wed Nov 02, 2016 12:37 am
by fightnjoe
It has been a while
How about I bring this back to the bench.
First up is to take a good look at the kit parts. The interior looks pretty dang good actually.
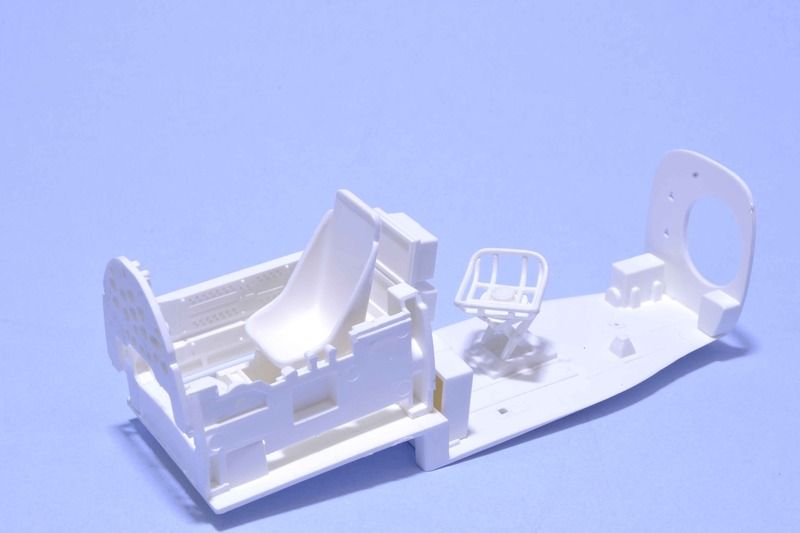
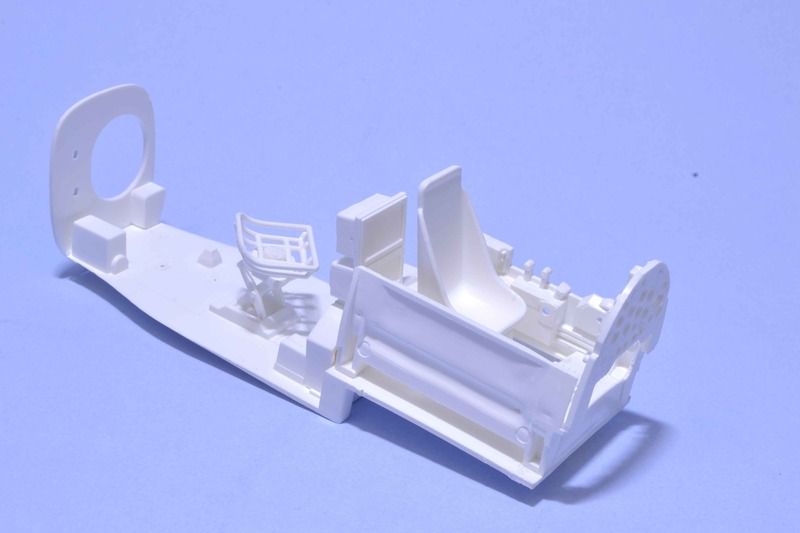
I am thinking I will go with this for the most part. There is a bit I want to cut off to open it up a bit and I do want to add just a bit.
More soon I hope. This is back and ready to be worked on.
All comments, critiques, and criticism are encouraged.
Joe
Re: 1/24 MPC/Airfix JU 87B A Little Tail (Work)
Posted: Mon Nov 07, 2016 4:29 pm
by fightnjoe
Before I can really get into the detailing on the interior of the fuselage I need to prep the interior of the fuselage a bit.
The tail is framed, this may not be accurate but it does match up with the rivets on the exterior. The stringers are also in. Still a touch more to do but nearly ready.
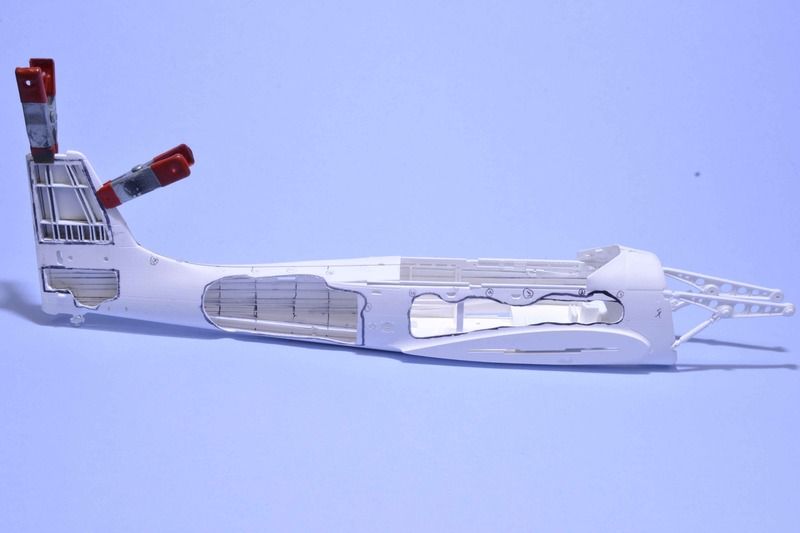
Sorry just one picture this time around.
All comments, critiques, and criticism are encouraged.
Joe
Re: 1/24 MPC/Airfix JU 87B A Little Tail (Work)
Posted: Mon Nov 07, 2016 10:11 pm
by PhilsModelMaking
nice! i've had a 1/24 stuka semi built, on my shelf of doom for maybe a couple of years now, and its only being built oob! i'll certainly be keeping an eye on your interesting take on this kit.
Re: 1/24 MPC/Airfix JU 87B A Little Tail (Work)
Posted: Wed Nov 09, 2016 1:00 am
by fightnjoe
Glad to have you along for the ride.
Joe
Re: 1/24 MPC/Airfix JU 87B Working the Interior.
Posted: Sun Nov 27, 2016 5:27 am
by fightnjoe
Ok here I go again.
Kind of a jump in progress this time around. Although it did seem to be more of one step forward followed by a dozen backwards.
First up, the interior got its paint. Gloss Grey followed by Alclad Chrome. I then went to work on the pit. First the color is Model Master RLM 02 Enamel. Some scratched parts for a number of reasons and then a shot of them together.
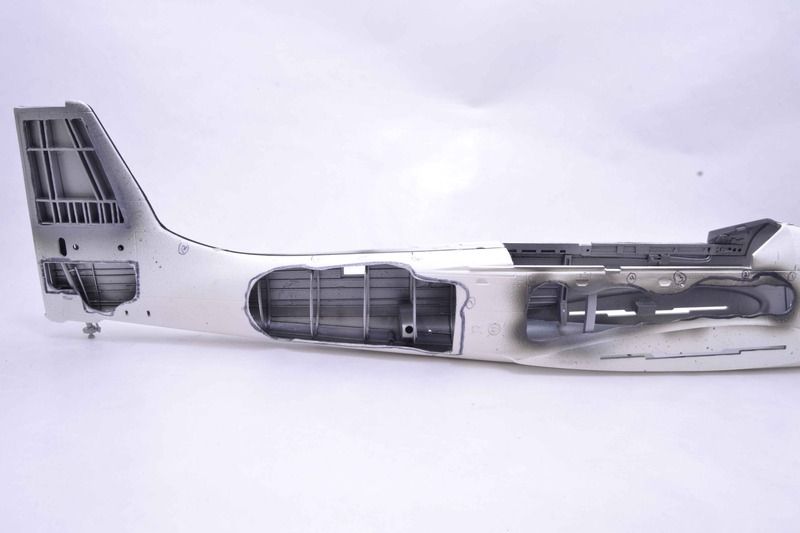
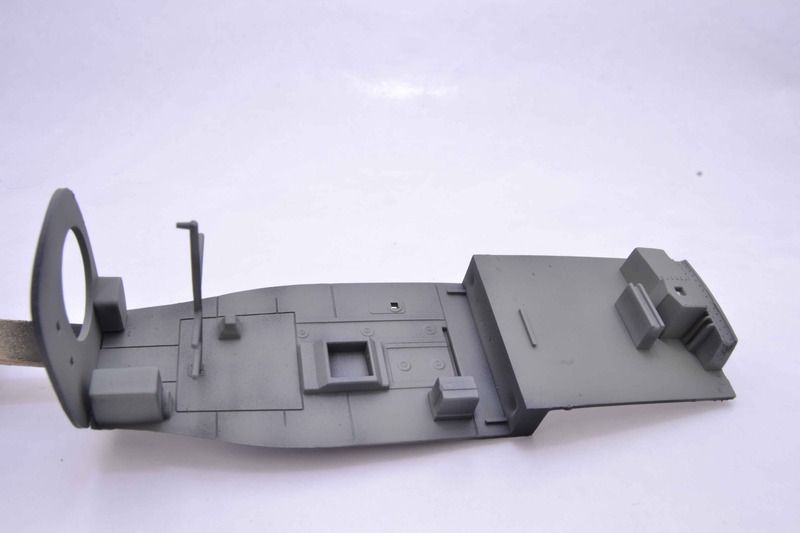
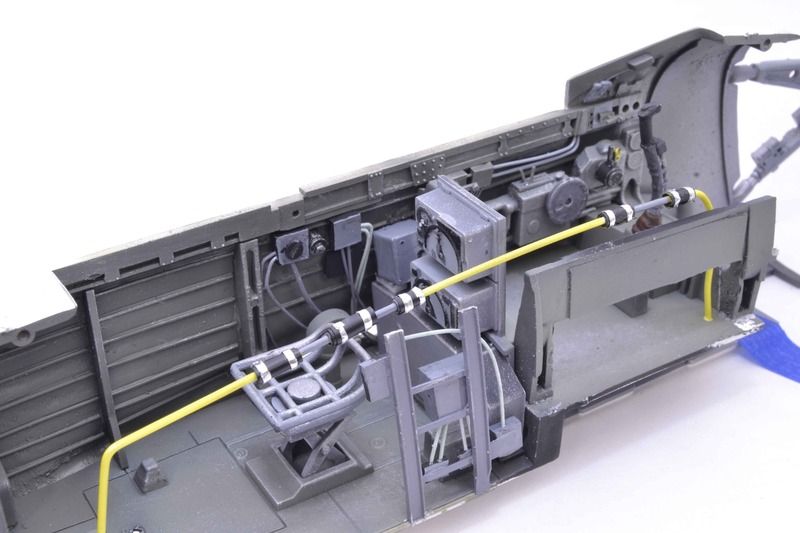
And then something I rarely do. Figures. I cleaned up and then sprayed Flat Black.
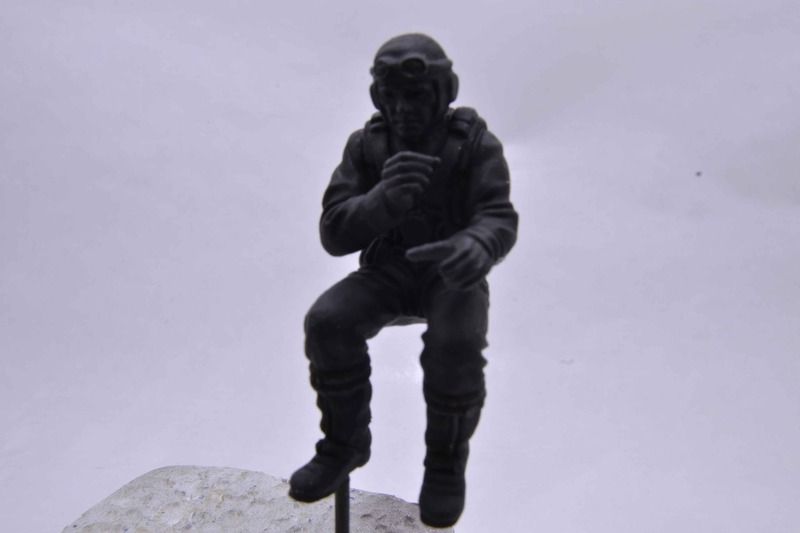
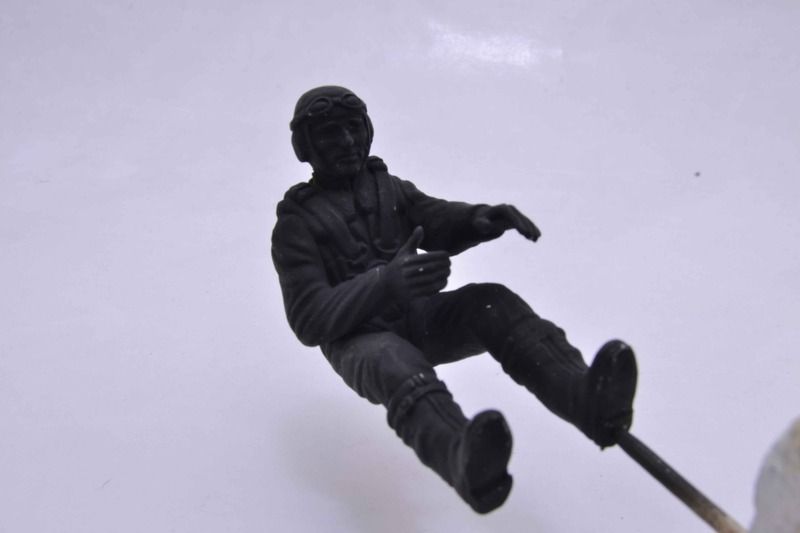
I shall, for the moment, call them Hans and Franz. Not sure they will end up in the final edition as the poses do not seem to fit very well with the interior.
All comments, critiques, and criticism are encouraged.
Joe
Re: 1/24 MPC/Airfix JU 87B All Aboard..Crew
Posted: Wed Dec 07, 2016 5:32 am
by fightnjoe
How about a really quick update on the 1/24 JU-87. Still filling out the detail on the interior, this update shows Hanz and Franz are now occupying the positions that they are required to. There were some minor things like the Morse set that is just too small for me to get a good pic of and a couple of cables. I still need to add more cables and a cross brace. However I am getting anxious to get to painting. I know that the easiest way to do these is to paint the areas that have the cutaway prior to completing the closure of the fuselage. But even with the eagerness to paint I do not wish to run before I walk. I want to make sure all is as complete as I can get it. Thus the documentation of the very minor progress.
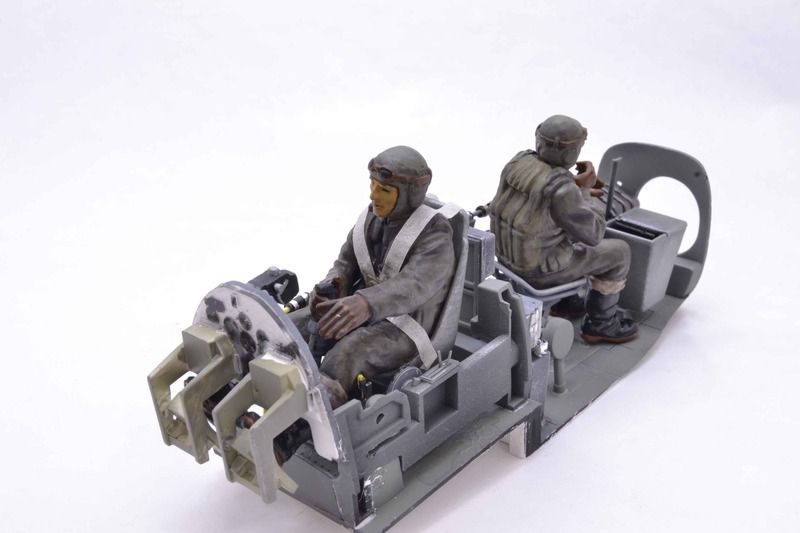
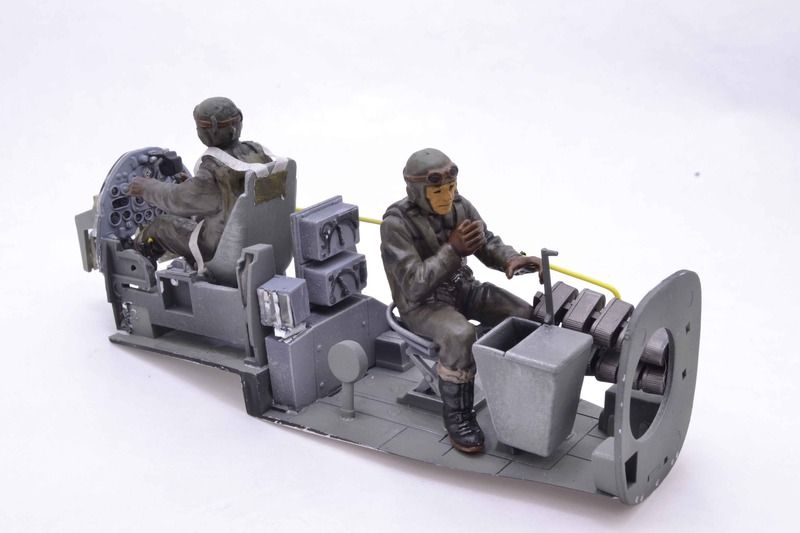
I must admit I am finding myself siting and staring at this build. I find myself wondering what Dan would do, how he would approach some of these things. Somewhere in the back of my mind I am sure of one thing. He would encourage to just do it.
All comments, critiques, and criticism are encouraged.
Joe
Re: 1/24 MPC/Airfix JU 87B Good Nature Ribbing
Posted: Sun Dec 11, 2016 5:05 am
by fightnjoe
Today was a productive day.
The day began with the skeleton of two pieces of wing and one tail feather. It ends with ribs and details. The ribs are a mixture of .010 x .040, .020 x .020, and .010 x .030 strip. I began to fabricate the two fuel cells and the inner bulkheads and such. In the outer wing the shinny round pieces are BB's and the larger blue pieces are craft beads.
Let the ribbing commence.
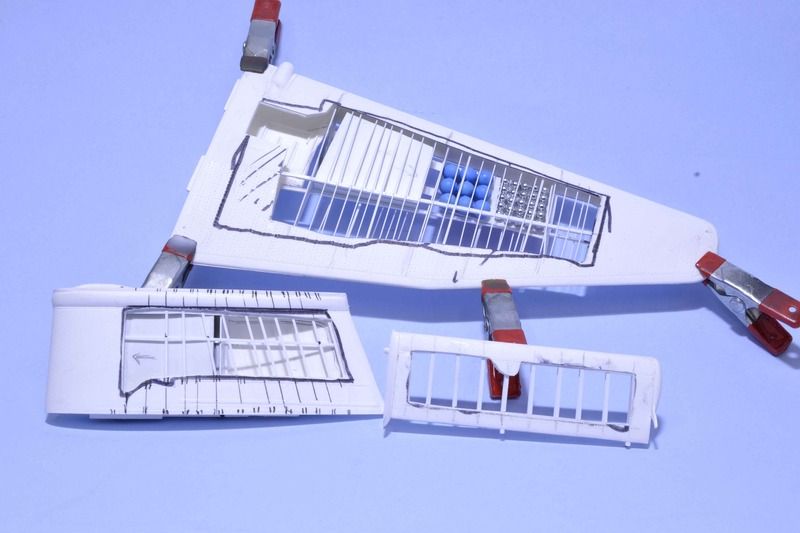
There they are in all their glory.
I do need to finish up a bit of the detail work but then I can go forward with the firewall and the engine compartment.
All comments, critiques, and criticism are encouraged.
Joe
Re: 1/24 MPC/Airfix JU 87B Good Nature Ribbing
Posted: Tue Dec 13, 2016 10:06 pm
by demarcation
Fantastic scratch building buddy. Great work!!

Re: 1/24 MPC/Airfix JU 87B Good Nature Ribbing
Posted: Thu Dec 22, 2016 9:16 pm
by fightnjoe
You are very kind. Thank you.
Joe
Re: 1/24 MPC/Airfix JU 87B Some Color
Posted: Wed Jan 04, 2017 4:27 am
by fightnjoe
After nearly two weeks of being sick I am able to show a bit of progress.
I began the process of preparing to get some color on the build. I did this just a bit different than previous builds. I began with a Gloss Black base. I then shot Alclad Polished Aluminium. Mind you this was not done to be a high gloss, mirror finish. Just a base for the color to come.
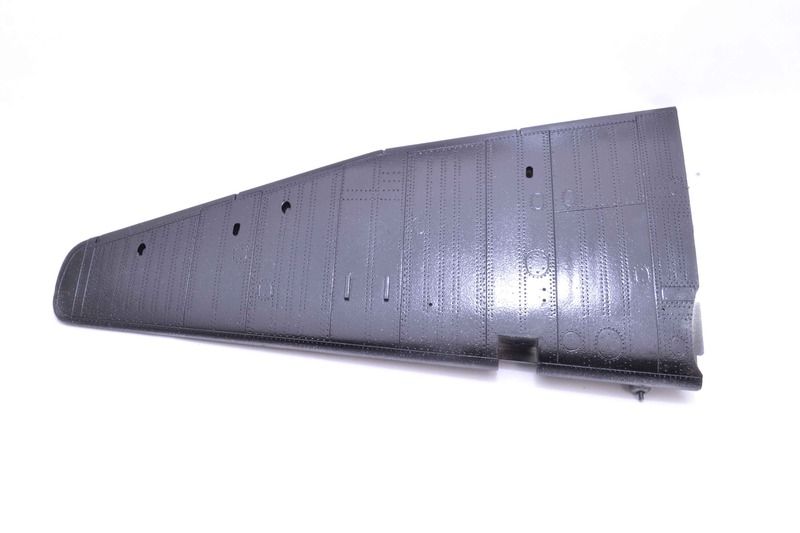
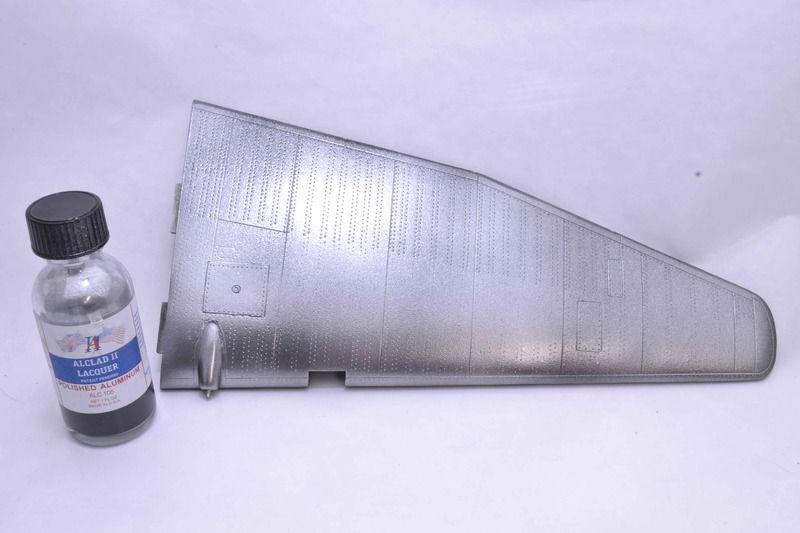
Once dry the real colors make their appearance. RLM 70 and 71 for the upper and RLM 65 for the lower. I began by taping off the shapes and then shot a lightened version of each of the top colors to get a first color. I then went back through with thinned coats of the colors to darken up the cammo. For the lower I shot several layers of thinned color.
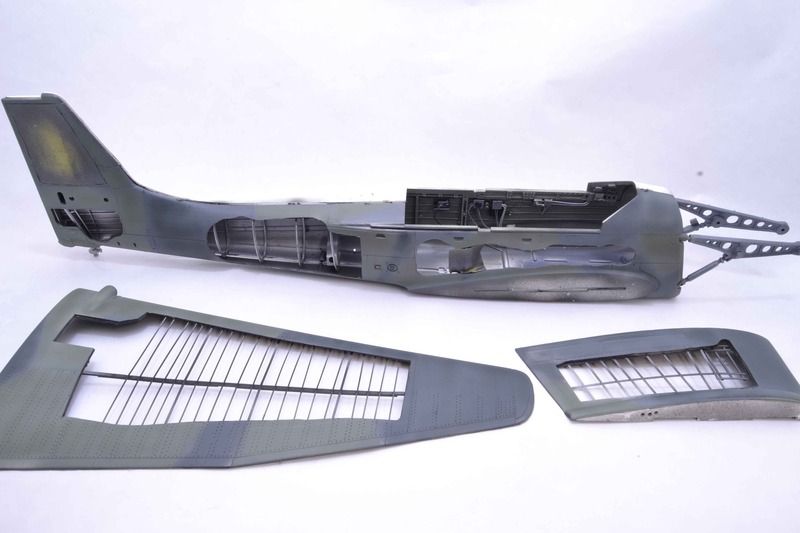
This was done over the cut away sections. I did this to try to minimize any overspray to the interior.
I did have a bit of a mishap. Prior to getting sick I scanned the decal sheet. My son touched up the image to give the best possible color. I then printed off the decals on two sheets, my only two sheets, of decal paper. Once I thought it was dry I sprayed decal bonder. Once I felt up to doing anything again I checked on the decals and found that they had a reddish tint. Not sure if the ink had not dried or what happened. I do need to redo these.
This is good progress and hopefully the momentum can continue for a while.
All comments, critiques, and criticism are encouraged.
Joe
Re: 1/24 MPC/Airfix JU 87B Some Color
Posted: Wed Jan 04, 2017 8:00 am
by ElCapitan
Really impressed by your work so far!
Re: 1/24 MPC/Airfix JU 87B Some Color
Posted: Thu Jan 05, 2017 4:46 am
by fightnjoe
Many many thanks.
Joe
Re: 1/24 MPC/Airfix JU 87B Gap and Putty Show
Posted: Mon Jan 09, 2017 12:06 am
by fightnjoe
Time for just a very brief update.
Big news as the fuselage is now closed and the inner wing sections are attached. Not so happy news is the gaps for the fuselage halves and the wing roots were at the very least and eighth of an inch in width. This thing needed about a third of a container of putty to actually fill them. That was even after using some styrene to try to fill the gap.
In the end though the inner wings are on and the fuselage is closed. I did add the detail to the interior of the cut wing section. More on that later.
Pictures of the gap and putty show.
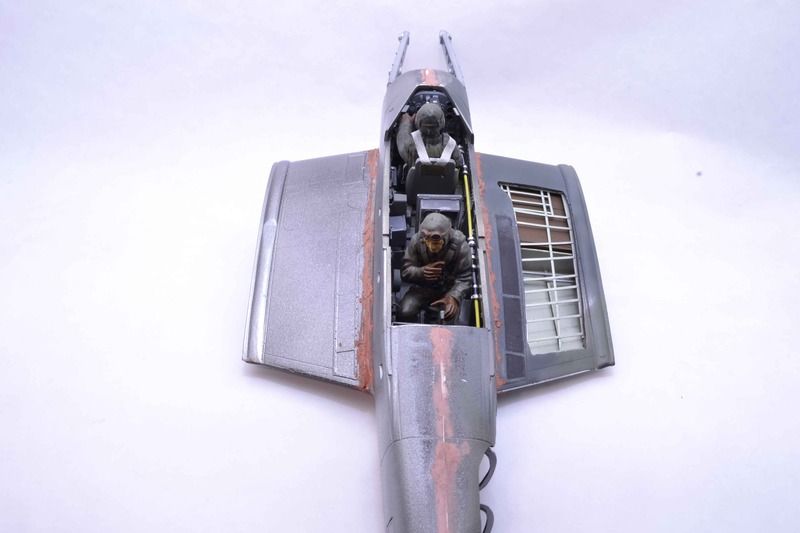
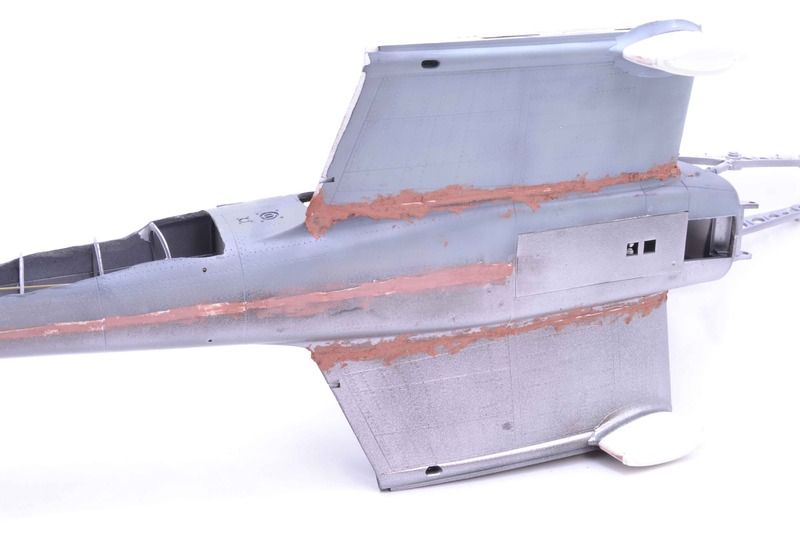
I did spend a little time on the engine. Nothing worthy of pictures yet but soon I hope.
All comments, critiques, and criticism are encouraged.
Joe
Re: 1/24 MPC/Airfix JU 87B Gap and Putty Show
Posted: Mon Jan 09, 2017 12:49 am
by Timplastic
That's going too look mighty impressive when finished
Keep it up

Re: 1/24 MPC/Airfix JU 87B Gap and Putty Show
Posted: Mon Jan 09, 2017 9:26 am
by peppie
Loving it up to now..
Re: 1/24 MPC/Airfix JU 87B Gap and Putty Show
Posted: Mon Jan 09, 2017 12:40 pm
by PhilsModelMaking
Started working back on mine last week, I know what you mean about the figures! The way i got the pilot to look like he's holding the controls was to put metal pins in the shoulder end of his arms, so I could get them positioned, then fully glue them. The gunner may be even trickier and will be my next job.
Your interior detail looks great, but has shown up the fact I may have missed out the big fuel pipe on mine! Lol!
Re: 1/24 MPC/Airfix JU 87B Gap and Putty Show
Posted: Fri Jan 13, 2017 4:30 am
by fightnjoe
You have all been so very kind and encouraging. Thank you.
Phil the pilot figure seems to fit very well it is the gunner that has worried me. It is almost too big for the spot. I have had to omit a couple of things to make room. I may have misread it but when I finally put them together he just was too large for the cockpit area.
Joe
Re: 1/24 MPC/Airfix JU 87B On to the Engine
Posted: Wed Jan 18, 2017 1:11 am
by fightnjoe
We have progress.
Yes my friends we have progress. The pictures show the tale.
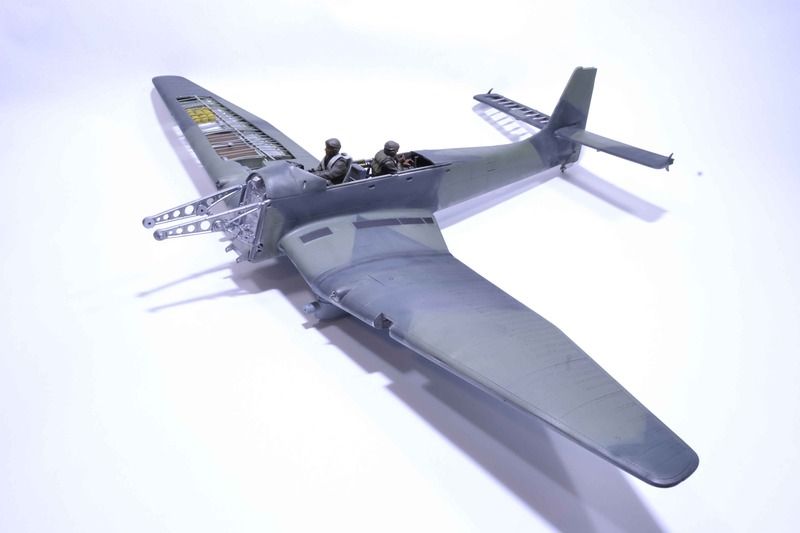
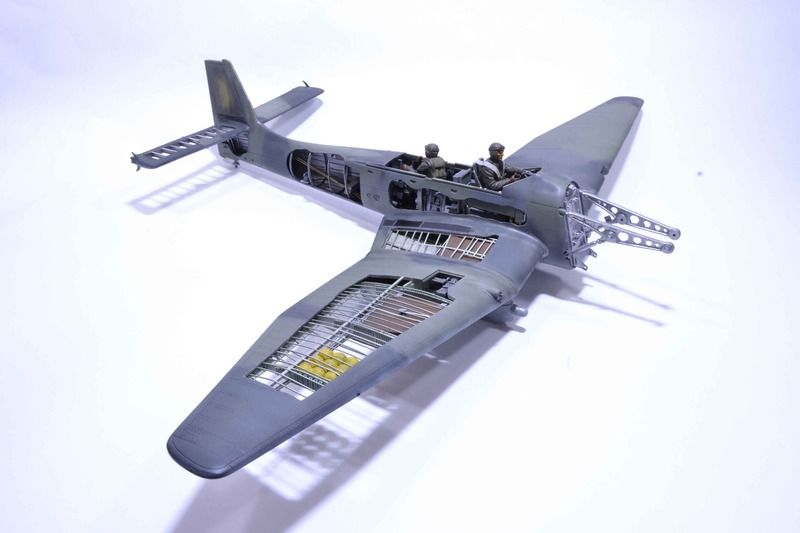
The fuselage and wings are attached. The gaps, and there were some interesting gaps, were puttied and then sorted. The paintwork was then touched up. While I waited for the putty to dry I spent some time on the landing gear.
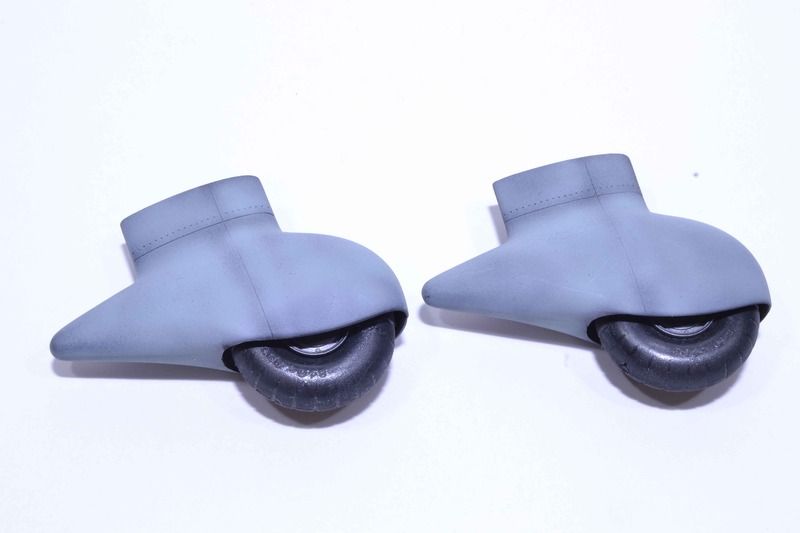
And just a bit to prep for the next step. The engine and the engine compartment.
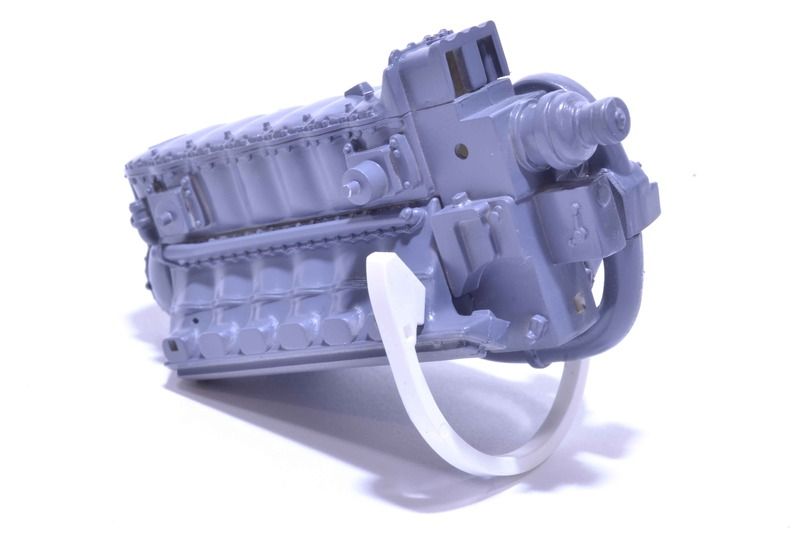
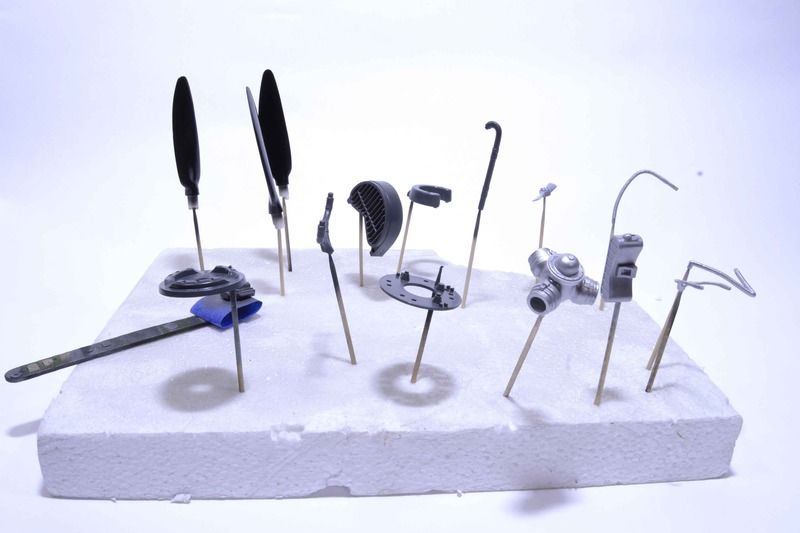
And that is now ready for my attention. I have a few things to finish prepping but I am ready to move forward.
All comments, critiques, and criticism are encouraged.
Joe
Re: 1/24 MPC/Airfix JU 87B Legs and VROOOOOM
Posted: Sun Jan 22, 2017 2:13 am
by fightnjoe
Well I have been a bit fortunate in that I have had some quality time at the bench over the last couple of days. With that how about an update.
The Stuka now has her main legs as well as her engine.
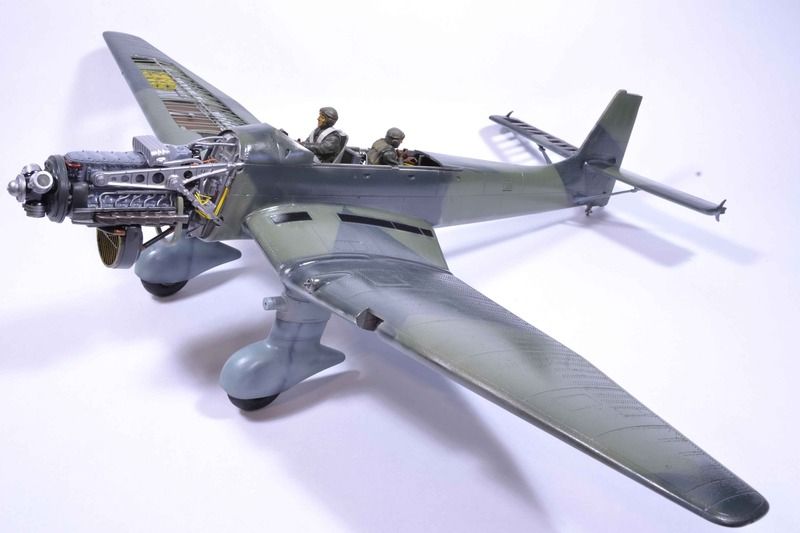
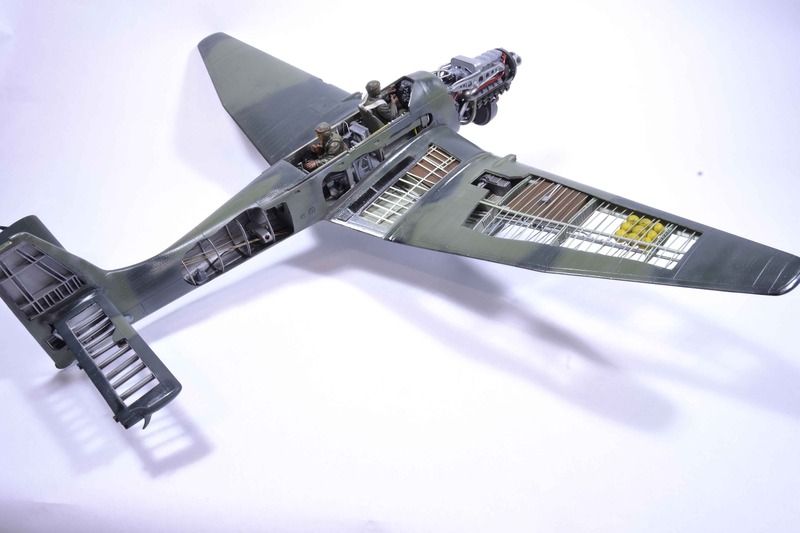
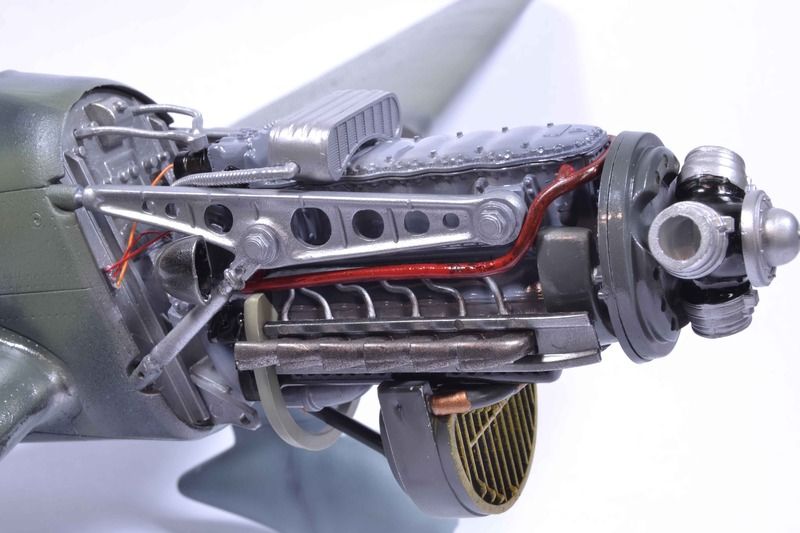
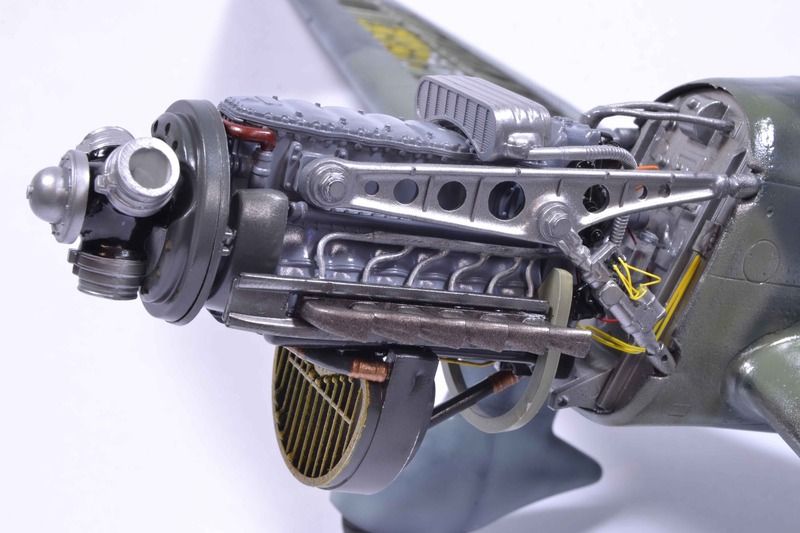
I did add a few things to the frame and the firewall. A few things to give the illusion of wires and hoses. Today was the big day. It was sink or swim. Time to see if my homemade decals were up to the game or not.
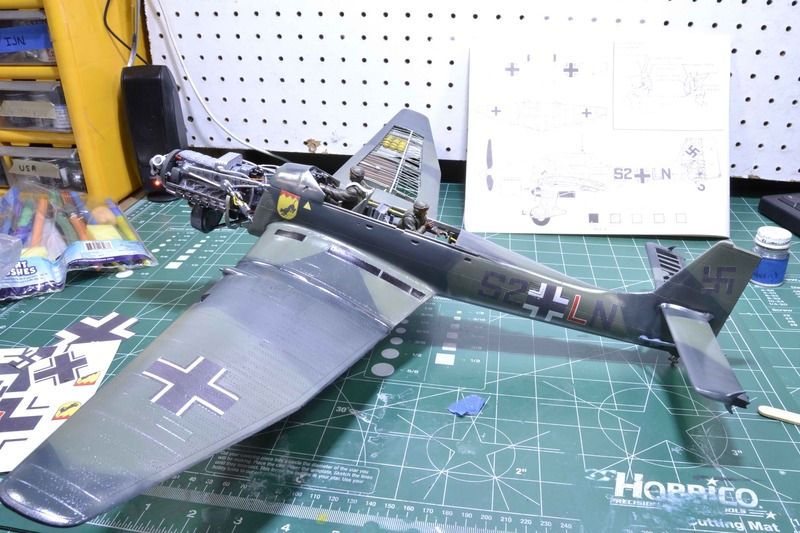
Honestly they are not very good. The letters other than the "L" should have been on a clear sheet but I only had the white backing sheet. Still they should work for my purposes and I should be able to hide the issues caused by my jumping to them too quickly.
Now to let these dry for a day or two. You see they did not want to lie down without a fight. One in particular may not even play nice after a generous amount of solvent was applied. Homemade decals are generally very thin and react well with the surface. These did not.
Next up however after they dry is to seal it in with a nice coat of clear and then I can work on weathering the fuselage, engine, and wings.
All comments, critiques, and criticism are encouraged.
Joe
Re: 1/24 MPC/Airfix JU 87B Chips and Grime.
Posted: Sun Jan 29, 2017 4:10 am
by fightnjoe
Back with a quickie type of update.
A couple of hours has been spent with oils, paint, and pastels. Streaking, chipping, and a bit of grime and streaking is the result. To be honest it is not over the top. I had to make sure I didn't take it too far. I did use caution.
First the engine. Oils and pastels were used. Oils for the grime and dirty look and pastels for the exhaust stubs.
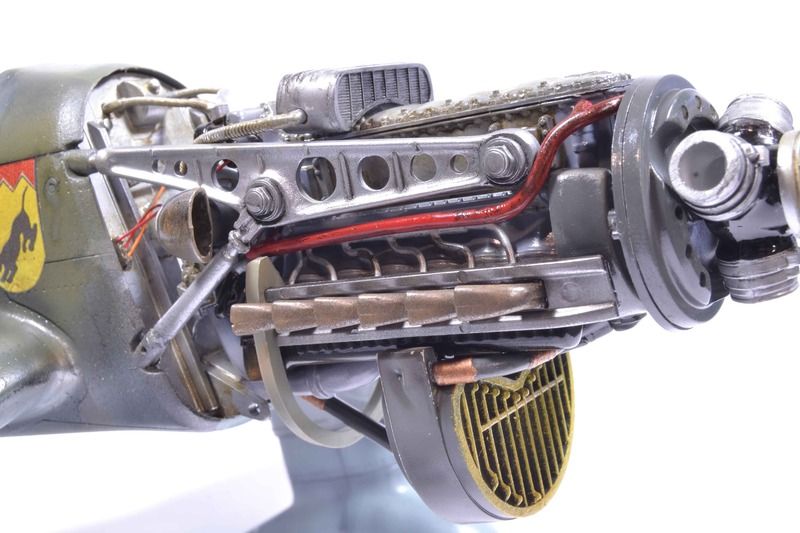
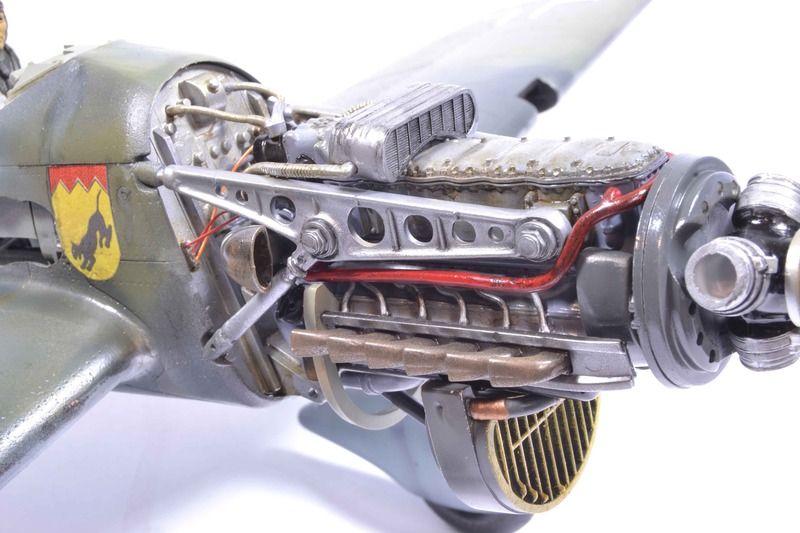
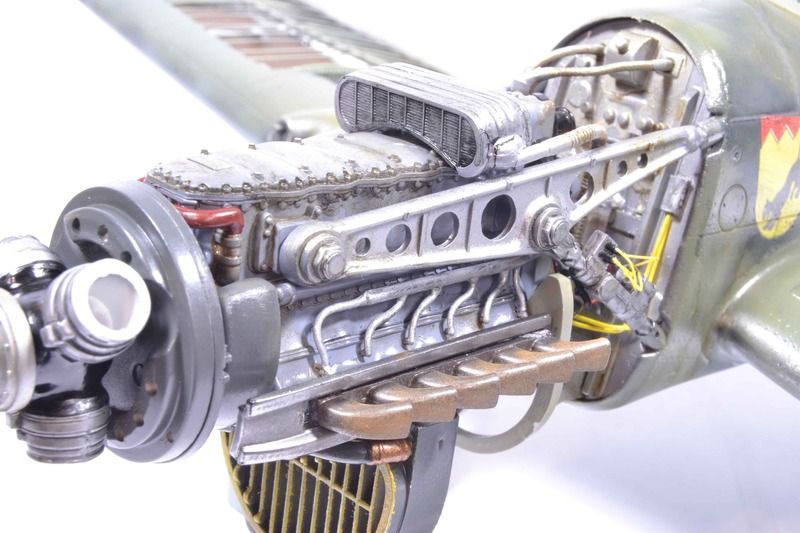
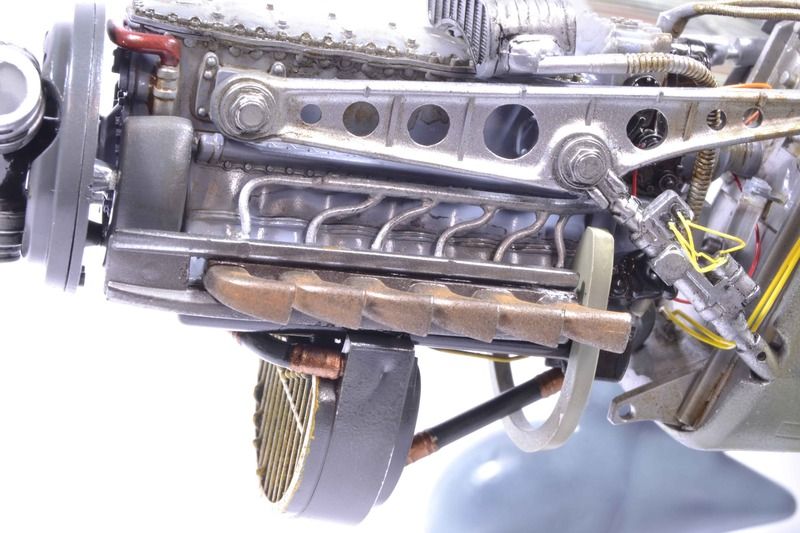
I used oils and enamels to do the chipping and the streaking. The streaking is tough to see in the pictures.
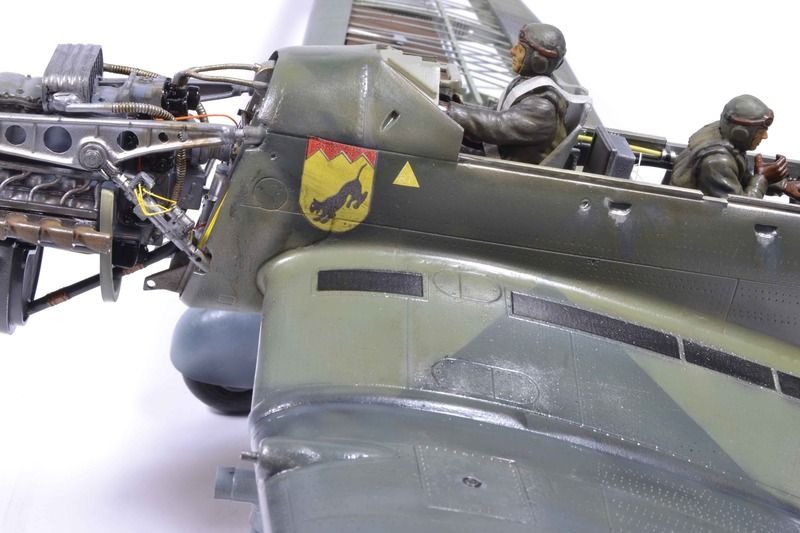
Now to let that dry out so I can hit it with a flat coat.
All comments, critiques, and criticism are encouraged.
Joe
Re: 1/24 MPC/Airfix JU 87B Chips and Grime.
Posted: Sat Feb 04, 2017 4:40 am
by fightnjoe
The build is finished and in the appropriate gallery.
Thank you for following along.
Joe
