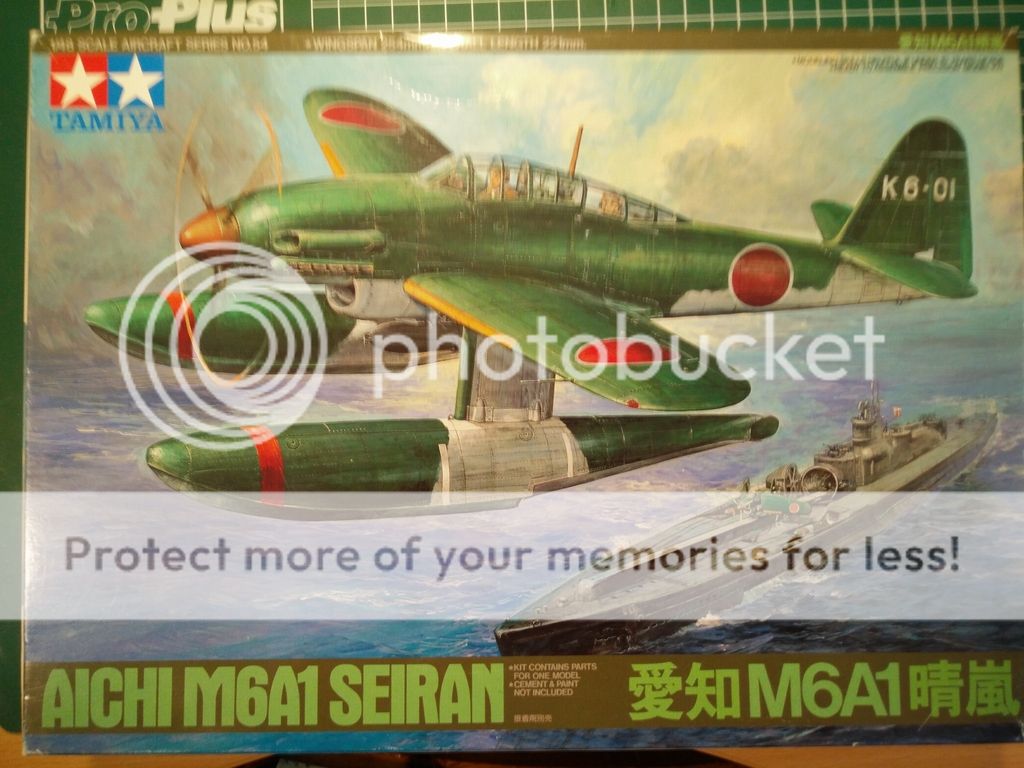
A slow builder with a late entry so I decided to pick something that should build op in a relatively short time span. I've always had a soft spot for floaty flyers so I'd like to enter this Seiran:
Pics are a bit crappy, sorry about that.
A tiny bit of background information on the plane, from Wikipedia:
The Aichi M6A Seiran (晴嵐?, "Clear Sky Storm" or "Mist on a Fair Day") was a submarine-launched attack floatplane designed for the Imperial Japanese Navy during World War II. It was intended to operate from I-400 class submarines whose original mission was to conduct aerial attacks against the United States.
Re: Tamiya M6A1 Seiran
Posted: Tue Aug 23, 2016 3:30 am
by arilo76
That is a nice subject you picked. Looking forward to seeing it complete
Re: Tamiya M6A1 Seiran
Posted: Thu Aug 25, 2016 12:48 am
by mincemeat
I've been eying this kit! Can't wait to see it built up here. Have fun.
Re: Tamiya M6A1 Seiran
Posted: Fri Aug 26, 2016 3:34 pm
by EvilCarrot
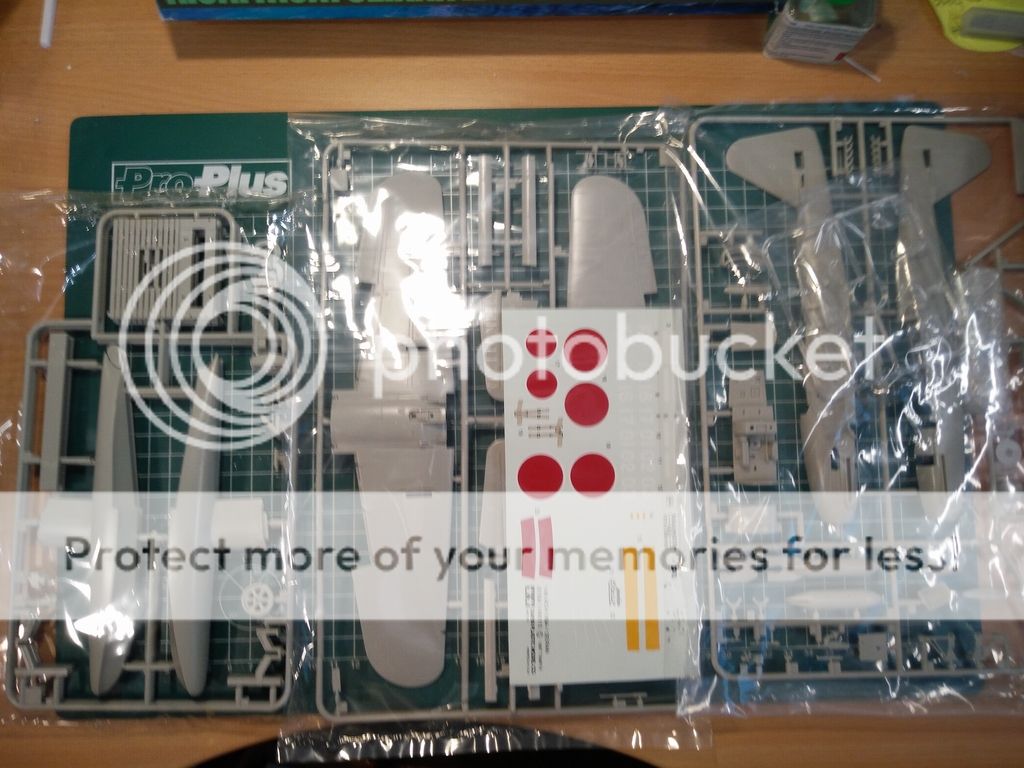
Not much work done yet but I'm hoping to get some more done today, here's a couple of shots to give you an idea of the detailing, looks very nice to me:
A first test fit of the floats shows some warping, nothing a couple of clamps won't solve (hopefully)
So far it doesn't seem to be the usual shake and bake kind of kit we've come to expect from modern day Tamiya, but for a kit that's almost 20 years old I'd say it's looking really good. More coming soon.
Re: Tamiya M6A1 Seiran
Posted: Sat Aug 27, 2016 12:40 am
by EvilCarrot
Did some research on the colors of the interior, looks as if at least two or three different types of green were used. These are pictures from the Seiran at the Smithsonian and the colors are supposedly accurate.
Also did a bit of sprue cutting and sticking things to other things, not much to show yet, but did like how this turned out:
Before:
After:
The real thing:
Not perfect but still better than a solid block
Re: Tamiya M6A1 Seiran
Posted: Sat Aug 27, 2016 1:20 am
by mincemeat
Lookin good!
Re: Tamiya M6A1 Seiran
Posted: Mon Aug 29, 2016 2:09 am
by EvilCarrot
Small update,
Stuck the float halves together and applied some filler:
I brushed on three to four layers of Mr White Putty, thinned with Lacquer thinner, while avoiding the panel lines as well as I could. Something I learned from Will Pattison's excellent video on Fillers:
[youtube][/youtube]
The Putty I used (because I don't have any Bondo) didn't seem to dissolve very well in the thinner but I was able to apply it without problems. I'm letting it harden overnight and tomorrow we'll see if it sands well.
After a lot of pondering I decided on these three greens for the interior:
Probably not in the least bit accurate but It's hard to tell from the pictures. If I can get it to look nice I'll be happy. Hoping to get some paint splattering done tomorrow.
Re: Tamiya M6A1 Seiran
Posted: Mon Aug 29, 2016 12:02 pm
by arilo76
Your doing some really great work there, I really like the reference photos. this photos might also help some other modeller that is or will be building the Serian.
Re: Tamiya M6A1 Seiran
Posted: Mon Aug 29, 2016 7:24 pm
by EvilCarrot
arilo76 wrote:Your doing some really great work there, I really like the reference photos. this photos might also help some other modeller that is or will be building the Serian.
So, the day my camera refused to focus, here it goes.
Most of the sink marks in the sidewalls will not be visible once the cockpit is installed, but I still tried to fill a couple of them up. My first time trying Perfect Plastic Putty and it failed.
Seems to be great stuff but I'm still learning to work with it. Will try to fix that later.
Continued working on the floats, the putty worked like a charm, most of the seam line has disappeared entirely but you are left with a little ridge where it used to be:
So more "sand, polish, check, repeat" until that's gone.
As you can see in this dusty pic some rescribing will be needed but nothing too bad:
And here's the end result:
In the float that contains the weight the gap was a bit larger and I was left with a couple of "pinpricks":
So some more filler was needed, this time I brushed on a couple of layers of Alclad microfiller (once again, thanks, Will ) This seams (pun intended) to be working. One more coat should do the trick:
I was also about to start masking the canopy today, bit of a chore, I know, but as long as you make good use of the...uhm...corners?
Eduard masking set has been ordered.
Re: Tamiya M6A1 Seiran
Posted: Tue Aug 30, 2016 1:25 am
by mincemeat
Looking good there Evil! I'll have to try the Alclad microfiller for seams, I've got some in the closet somewhere. Had a tough time spraying it as a primer. I use Mr. Dissovled Putty for sink marks like that and it's worked pretty well for me. I use a blunt end of a toothpick to take it from the jar to the sink mark, I'm not going to be spending brushes left and right. Looking forward to seeing more!
Re: Tamiya M6A1 Seiran
Posted: Tue Aug 30, 2016 1:32 am
by EvilCarrot
mincemeat wrote:Looking good there Evil! I'll have to try the Alclad microfiller for seams, I've got some in the closet somewhere. Had a tough time spraying it as a primer. I use Mr. Dissovled Putty for sink marks like that and it's worked pretty well for me. I use a blunt end of a toothpick to take it from the jar to the sink mark, I'm not going to be spending brushes left and right. Looking forward to seeing more!
Thanks! Have a look at Will's video if you haven't already, couple of interesting tips in there. I've got a couple of old brushes lying about that aren't suitable for painting anymore. I use them for tasks like these and weathering.
Re: Tamiya M6A1 Seiran
Posted: Thu Sep 08, 2016 1:00 am
by EvilCarrot
Small update:
Canopy mask arrived this Monday so I did a bit of sticky sticky, these Eduard masks are wonderful!
Also did some work on the Dolly:
That just doesn't look right!
Strips of Evergreen styrene added
Ahhhhh, much better, so much for an OOB build...oh well
Still pondering what to do with these:
The dolly at the Smithsonian has three smaller boards instead of one big one but upon closer inspection it seems to be a different beast altogether. The steel construction is different and so is the position of the wheels:
The big wheels that, according to Tamiya, go between the wooden boards are absent as well:
Pictures from the WWII era are scarce and not very clear, here's one of the better ones I managed to find:
Some similarities between both the Smithsonian and the Tamiya Dolly but hardly conclusive evidence. Any thoughts on this, I'd be glad to hear 'em.
Re: Tamiya M6A1 Seiran
Posted: Thu Sep 08, 2016 1:07 am
by mincemeat
Great update. That reminds me, I need to go to the Air and Space museum again, it's been over 10 years. I work across the river from Washington D.C. so I should have no excuses. Other than I hate going into D.C. which is a pretty strong excuse.
Re: Tamiya M6A1 Seiran
Posted: Thu Sep 08, 2016 10:04 pm
by EvilCarrot
mincemeat wrote:Great update. That reminds me, I need to go to the Air and Space museum again, it's been over 10 years. I work across the river from Washington D.C. so I should have no excuses. Other than I hate going into D.C. which is a pretty strong excuse.
Man, if I were that close to it I'd probably visit a lot, so many rare planes in there. Sadly I have to cross a lot more water to get there.
Aaaaaaanyways, next update! A bit more cockpit stuff this time. I decided to add some detail to the part between the pilot and the navigator because that will be the most visible part and I found it to be a bit sparse. Here's some reference shots I captured from the 360° cockpit view.
I decided to rotate the ?radio antenna? by 90 degrees (Tamiya seems to have it wrong here) so I had to cut it loose again. First I drilled out the hole in the support.
Then I carefully cut it off, sanded the area a bit and glued it back on. I wanted to add the the metallic instrument thingamabob (boy I sound like such a professional) that sits near the window. I cut a small disc styrene disc off an evergreen rod and glued two tiny strips to it as supports. It looks rather crude but it's just for hinting at detail.
I glued it in place, together with two small styrene rods that represent the silvery support thingies. I added the two black lines/cables and the silvery cable that goes to the antenna using some metal wire. The black lump to the left of the control stick was also missing, added that using a styrene rod I cut in half.
The entire cockpit was primed in Stultimynatylreze grey primer and given a coat of the primary green color. I forgot one part and only noticed it after I finished cleaning my airbrush, typical... The two sidewalls look different in color but it's just a trick of the light. The grey lines you see are the mating surfaces for the cockpit floor, I masked them with 0.7mm Aizu tape
Finding it really hard to write today, I hope everything was clear.
Re: Tamiya M6A1 Seiran
Posted: Tue Sep 13, 2016 4:29 pm
by EvilCarrot
Aaaand we're back.
Did some detail painting on the cockpit. Far from perfect but I'm satisfied with it. Not too happy with contrast between the different greens but we'll fix that in a minute.
I created a lighter shade of green with blue and yellow oil paints to do some drybrushing on the ribbed detail. As a side effect it also modified the main cockpit color, which created a very nice look and blended in nicely with the other colors.
I liked it so much I used it on the entire cockpit
The reference photos show a black floor in the navigator compartment so I also resprayed that.
Seats got a lick of paint, followed by a drybrushed coat of my oil paint mix. Again, I like the tonal variation it creates.
The rear gun, painted in semi gloss black and given a rub with a pencil.
And now, time to enter the much dreaded world of the Tamiya decal. What I used: some very hot water, Micro set and Daco products strong setting solution.
for the pilot's instrument panel I dipped the decal in the hot water with a pair of tweezers.
While it was soaking I brushed some Micro set onto the instrument panel.
Positioned the decal with the help of a cotton bud
Applied a layer of the setting solution and let it dry a bit
Applied another layer of the setting solution and let it dry a bit
Applied another layer of the setting solution and let it dry a bit.
I noticed some air bubbles under the decal so, using a hobby knife, I poked some holes in the decal between the instrument faces.
Carefully dabbed on the decal with a cotton bud to push out any bits of air left underneath and
Applied another layer of the setting solution and let it dry a bit.
The result:
Apart from some missing or incorrectly placed instruments, which happens too often with these kind of decals, I'd say I've conquered this decal.
The rear instrument panel only required one coat of Daco but I ended up butchering the right part a little.
Started on the pilot figures, nice detail on the faces but is it me or do they look like Putin?
BOO!
Too bad I ruined some of the detail because of several failed attempts to paint the eyes. In the end I gave up and decided to use an oil wash instead. The color used was brown ochre.
This was another exciting episode of Pilots in Pain, will try to get more done later today but first I need to get on with the Neverending Story
Re: Tamiya M6A1 Seiran
Posted: Wed Sep 14, 2016 2:44 am
by mincemeat
Great update! Glad to see your hard work on the decals turned out. I never tried those yet, I was always skeptical of the results. The pilots must be twins.
Re: Tamiya M6A1 Seiran
Posted: Thu Sep 15, 2016 7:19 pm
by EvilCarrot
Whew, the cockpit is almost done, which is good because it's starting to drain me a bit, want to move on.
Tuesday evening was pilot painting time, I gave the "Putin twins" some color using these paints
In the order of the picture they were used for belts, life vest & sash, gloves & flight helmet, boots & goggles, suit
and when slapped on, that looks like this:
With a bit of mixing I lightened the base colors and added some highlights, for the belt buckles I used Vallejo Metal Color Aluminium adding up to about 12 different colors, not including the ones on the face.
My makeshift palette to give you an idea of the colors used:
To finish up I made an oil wash with burnt umber and white spirit to add some more depth and shadows. Makes quite the difference.
Cleaned up the excess with a cotton bud and let it dry overnight. Next day I wanted to add some extra highlights to the faces but I screwed up badly. The color I used was too pale. Managed to fix it a little but one of the faces is kinda ruined now. In the end I settled for a light grey on the nose and cheeks and a bit of dark red for the lips. Here's the result
Left guy looks okay but the right guy is a mess. I'm leaving it like this though. It's passable to me and I don't want to make it worse.
On to the cockpit, I gave the whole thing a dry-brush with Vallejo Metal Color Aluminium, then made a very dark green oil wash using prussian blue mixed with a bit of yellow
Here's a before and after with the sidewalls:
And here's the rest of the cockpit all done:
Tomorrow I'm giving this a coat of semimatte varnish and then it's time to seal things up.
Re: Tamiya M6A1 Seiran
Posted: Wed Sep 21, 2016 8:46 am
by arilo76
You are doing a really great work on the Seiran and the pilots a really well done!!!
Re: Tamiya M6A1 Seiran
Posted: Thu Sep 22, 2016 1:00 am
by EvilCarrot
Update time! The fuselage halves have finally been stuck together and most of the details have taken a course of Monty Python's "how not to be seen". Let's hope John Cleese doesn't blow up my plane.
Had some trouble installing the screen between the two cockpit compartments. The layers of paint caused it to bend backwards a bit. A bit or q-tip creativity while the TET was drying solved the problem.
Pilot figures where put in their seats with a bit of white glue, cockpit was glued in place, two halves clamped together aaaaaaaaaaaaand:
HUZZAH! Will need to do a bit of touching up on the pilot's arm but other than that I'm finally done with the cockpit!
On to the dolly! I decided to take "what's given in the box", blend it with "what I like" and add a tiny dose of "what I've seen in photos". Most of the dolly will be wood colour with a couple of painted steel parts
First I turned that ugly big board into three smaller ones, similar to the Smithsonian Dolly
Looking at it assembled (minus the wheels and the supports) I found it a bit boring to look at. I decided to add some bolts where "wood" meets "steel".
I cut off several pieces of styrene rod and glued them in place with TET
Also used some copper wire and CA glue to add a tow ring to the draw bar. I drilled two holes on each side of the cylinder to provide some grip for the ring.
After the glue was dry I used a sanding stick to flatten the bolts and a sanding sponge to round them off
Had to start over on two of them, and I thought this would make a nice before and after comparison.
Primed the whole thing and sprayed a wood base color:
Brushed on a couple of similar colors to create a bit of tonal variation
When this has all dried I will give it a clear coat and then it will be time for some oil paint magic!
Re: Tamiya M6A1 Seiran
Posted: Fri Sep 23, 2016 1:51 am
by EvilCarrot
Very small update, this is one of the reasons I love oil paints: They give me wood!
If the rest of the model fails, at least I'll have a nice looking dolly!
really nice
did the oils take a long time to dry?
rgds
John(shortCummins)
Re: Tamiya M6A1 Seiran
Posted: Sat Sep 24, 2016 9:56 pm
by EvilCarrot
Still drying right now They're definitely becoming more solid, feeling a bit rubbery right now. I think they'll need one or two more days before I can put a clear coat over them.
Re: Tamiya M6A1 Seiran
Posted: Sat Sep 24, 2016 11:46 pm
by EvilCarrot
Update: The day disaster struck! *OMINOUS THUNDER*
So the air intake fell on the floor and met a wheel of my desk chair. OH NOES!
Luckily I managed to find the piece that broke off, not too badly damaged either.
Fixed it!
And attached it! the big radiator was painted flat black and drybrushed with Vallejo Metal Color Aluminum. Small Radiator was painted with Metal Color Gunmetal, I loaded up a small brush with the paint and let it flow where it needed to go, a bit like a wash. I'm quite happy with the result.
I haven't used the Metal Colors for airbrushing yet (what they're meant for :p) but I love them for drybrushing and they also flow really well.
A GAP??? IN A TAMIYA KIT??? WHAT HERESY IS THIS???
Put on some Perfect Plastic Putty and used a damp brush to work it into the gaps a bit.
After it had dried I took a damp cotton bud and gently wiped away the excess.
The stuff that went into the panel lines and rivets was cleared out with the tip of a hobby knife.
Masked of the rest of the canopy and sprayed on the interior color.
After which I noticed ANOTHER GAP??!!?? AAAAAARGH!
Will fix it tomorrow with some more PPP. (you, at the back, stop sniggering! )
Last and also least, filled in some EPM's on the flaps with thinned MR. White Putty.
Will sand tomorrow, how exciting!
Re: Tamiya M6A1 Seiran
Posted: Fri Sep 30, 2016 3:53 pm
by EvilCarrot
So, here we are again! The good news is it's almost done! The bad news is I still have to add and comment on a crap-ton of pics so let's get started:
Let's start with Dolly Parton, had loads of fun masking her up...NOT!
This was very frustrating!
But worth it in the end.
And the final result:
Gave the "metal" parts a drybrush with aluminum and also used it to paint the bolts, DOLLY DONE! Yay!
Next up the plane:
I found these flaps to be a little too wide open so I sanded the sides off a bit.
Looks a bit less excessive:
For painting I used the black basing technique (described here: https://doogsmodels.com/2014/07/03/tech ... ck-basing/) but on a grey primer. I'm not very much into preshading, I prefer a bit of random color variation. Before putting on the top coat of the main color I did a bit of mottling with slightly lighter and darker colors to add a bit more variety.
The results, quite subtle but still visible:
Did I mention I love masking? I love unmasking even more, you get these fun little surprises that make you go AAAAAAAARGH!
Managed to fix it by sanding it down and respraying, but with some not so subtle color variation:
Good thing nobody will ever see this unless I post a picture of it and point it out...oh wait...
Re: Tamiya M6A1 Seiran
Posted: Fri Sep 30, 2016 4:14 pm
by EvilCarrot
Now that everything was more or less the right color, I gave the whole thing a clear coat with Aqua Gloss, let it dry and buffed it a bit with the Ultimate buffer, after that it was time for some decals...
...which did not go without a hitch...
...but I'm happy with the end result
I used a combination of hot water, Micro-set and a couple of coats of Daco strong setting solution. After the decals had set I used a hobby knife, cut the decal along the panel lines and added another coat of Daco. The decals conformed nicely enough but some of them still have some wrinkles which I can't get out. Hope they won't stand out too much...
After another coat of Aqua gloss I gave the whole thing a wash of Ultimate Dark Dirt, below you can see the result on one wing:
after cleanup:
The plane was then topcoated with Tamiya flat clear, after that I masked of and sprayed the wingtip lights. First a coat of aluminium followed by a coat of clear green/red.
Also did the exhausts, with lifecolor paints
First a base coat of Rust Base Color, then by some drybrushing with the three shades and finally a bit of smoke weathering powder.
Re: Tamiya M6A1 Seiran
Posted: Fri Sep 30, 2016 4:22 pm
by EvilCarrot
And finally, a bit on the floats:
Had to do some rescribing and riveting
Used a scribing template from Eduard for the hatches:
Riveting was done with an RB-productions riveting wheel:
Some more masking fun, the white tape is the curvy Tamiya tape, really happy with it:
Detail of the rescribed and reriveted hatches after the wash is put on. Looks better than I expected:


 Still awesome reference material, though:


 ) This seams (pun intended) to be working. One more coat should do the trick:


 The two sidewalls look different in color but it's just a trick of the light. The grey lines you see are the mating surfaces for the cockpit floor, I masked them with 0.7mm Aizu tape


 Looks just like the real thing.
 *OMINOUS THUNDER*


 )
)


