Panzer III Ausf. L (Tamiya 1/35) and a Winter Diorama
Posted: Wed Oct 11, 2017 10:59 pm

Hello, it's me again with a new build. This time I wanted to use the Tamiya figure set "German Assault Infantry w/ Winter Gear" in a diorama. While inspecting the contents of the box I saw that the inside flap of the box had a picture of the Panzerkampfwagen III Ausf. L, and it sparked with me, so I decided to go ahead and combine these two on a diorama.
The Diorama
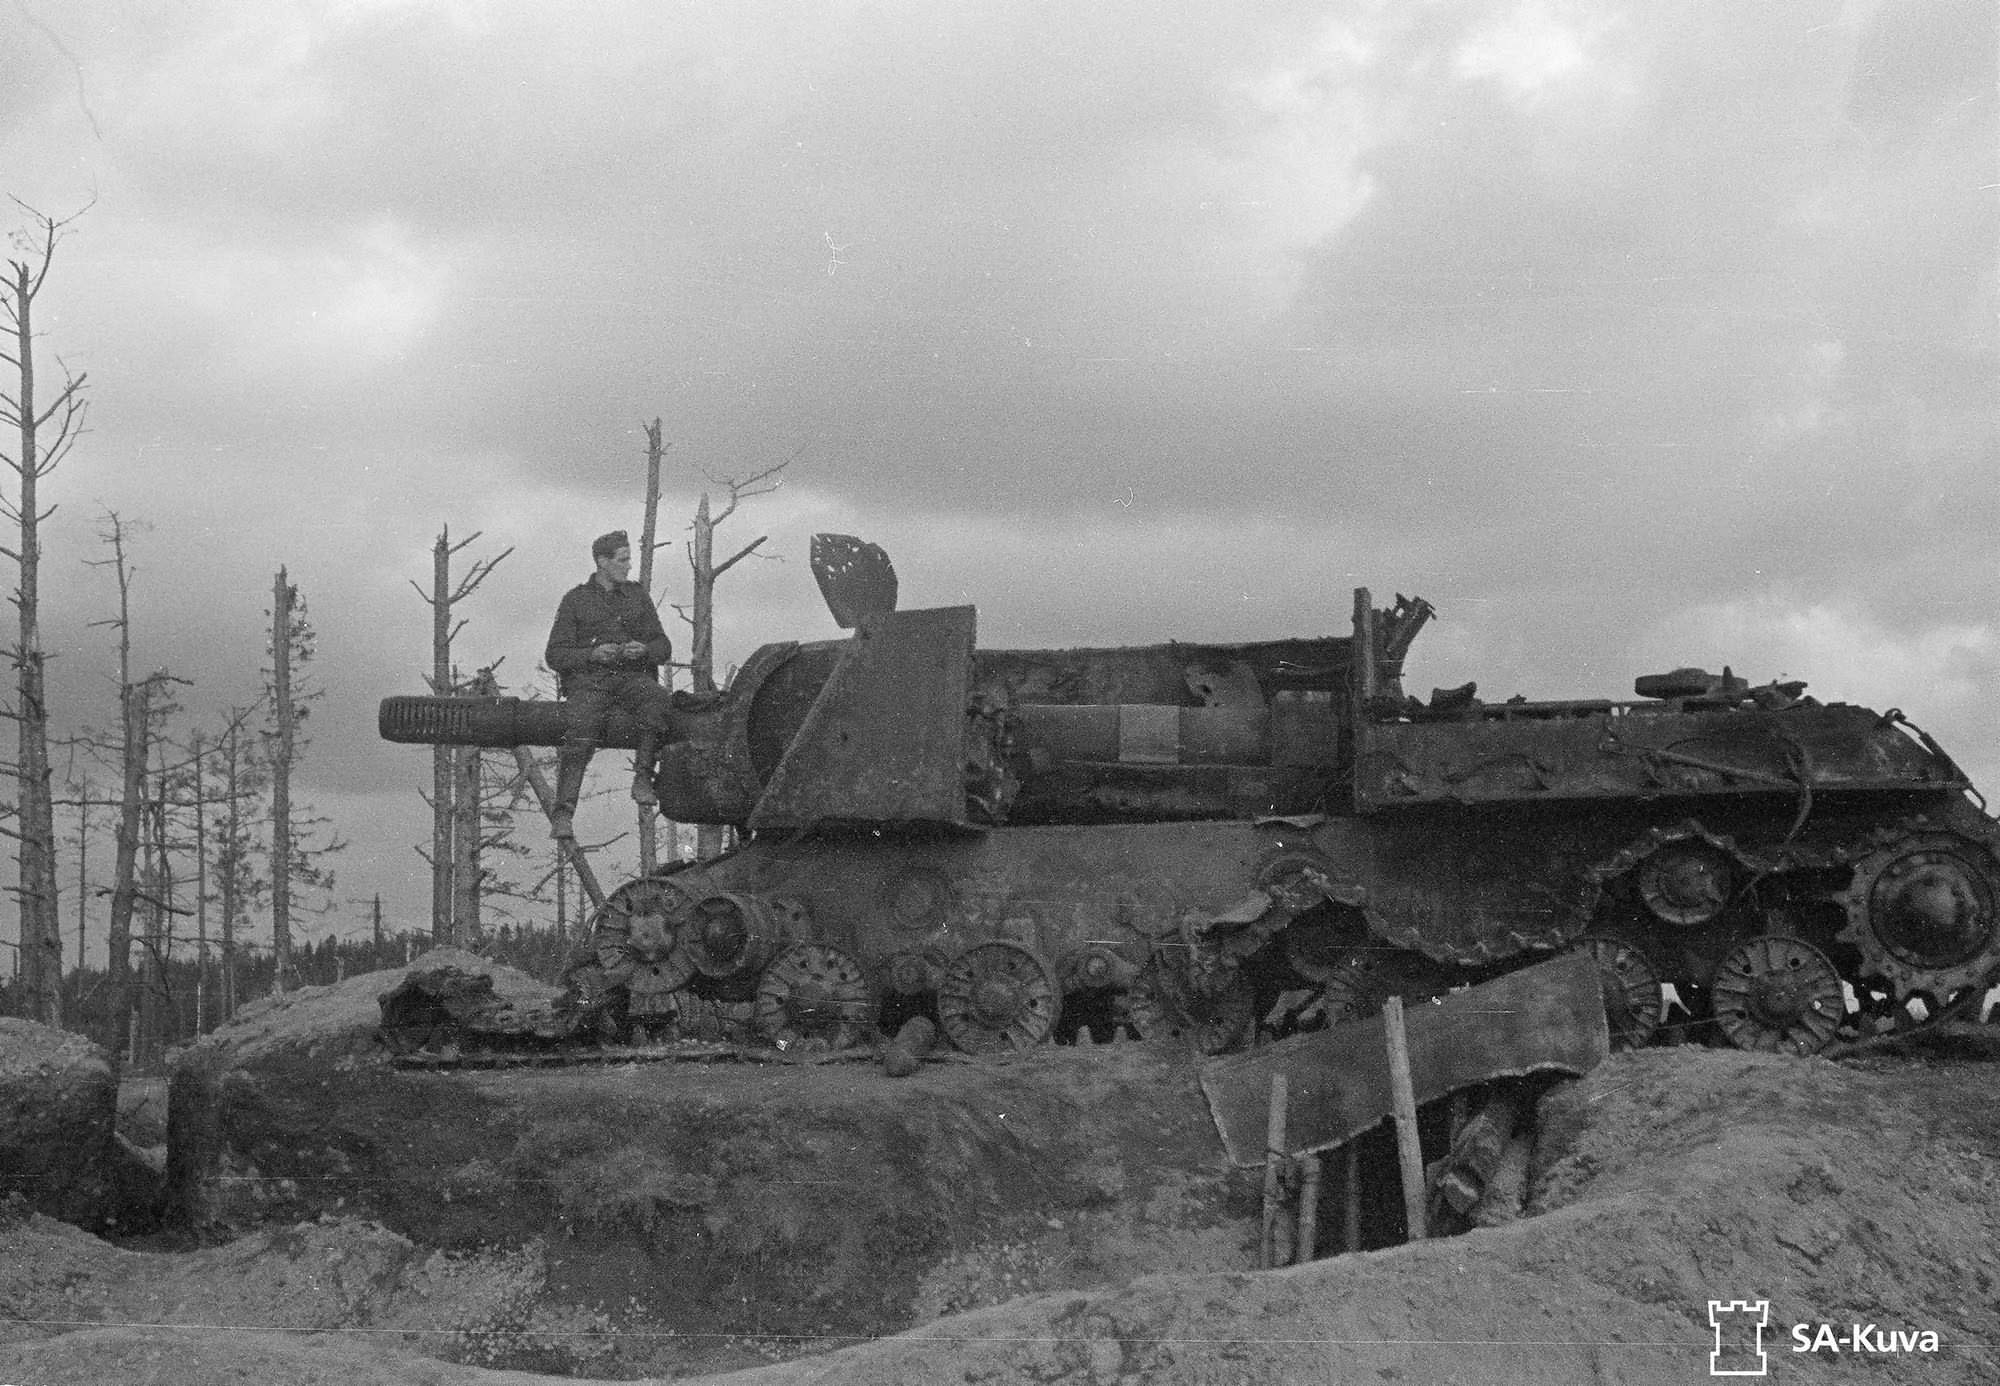
(Photo courtesy of Worldwarphotos.info) So for the diorama, I was initially inspired by this photo of a blown-up ISU in Finland. It seemed to me like it had blown up while driving over a tunnel in the trenches, and I wanted to do a similar diorama base. (Upon closer inspection, the "tunnel" is probably just the ISU having driven over a regular trench.)


Here you can see the original diorama, where I had built and planked a small bit of diorama. I used insulation foam to create the majority of the ground shape, and then added the first layer of ground with DAS air drying clay. However, I started thinking, did they really make such tunnels in World War 2 or have I just been watching too many World War 1 videos? I asked some friends for opinions, and since the exit hole of the tunnel looked so stubby and cut off, I decided to fill in that end.

I decided to then to change the tunnel into a regular old dugout. I fashioned a door from a bit of wire and some Popsicle sticks, which I have loads of. I intend to write something in Cyrillic on the plank above the door, like "stavka" or "склад боеприпа́сов". I don't speak a bloody word of Russian though, so I'm not sure what would be appropriate. I intend to have the soldiers inspecting the trench and door while the Panzer III looks over them on the top.
The Tank
This kit is an old classic from Tamiya. I think the detail still holds out (at least if you buy the optional photo-etch kit) and you get a lot of good plastic in it. In my opinion this kit is better value for your money than the Dragon offerings. Now if only Tamiya produced more variants. I'll be surprised if I won't get this kit to a paint able state tonight.

I found this bit in the instructions a bit odd though. They call for you to paint a tank from the 18th Panzer Division on the Russian front in Dunkelgelb, even though that colour wasn't issued until spring/summer 1943. Incidentally I think this is the tank I will paint, albeit in Panzer Grey with a whitewash. I would have liked to post my reference photos here, but I haven't managed to find a picture of a Panzer III with the turret number 200.

Of course there are plenty of winterized Panzer III photos available. I chose most of my options based on this picture, and plenty of other model builds you get when you google "Panzer III Winter"

Overall look of the hull with the bottom hull mostly done. I'm gonna have to fit the suspension to the diorama, so I haven't fitted the torsion arms in yet.

As mentioned, I got the Tamiya Photo-etch set for this kit. I love this grille in particular. You'll never see it when looking at the tank from above but just knowing it's there appeases me. I also think it adds to the identity of the Panzer III.


Here's some more shots of how far I've gotten in the build. The Tamiya Photo-etch is simple but effective. As always, I've left off the tools that I want to paint in colour other than the hull colour. Incidentally, I don't believe a word of that hogwash that the tools were left on the tank while it was being painted.

Here's the detail on the other side of the hull. About the turret spaced armour: the only thing I knew for sure before building this tank was that I wanted to leave off the front spaced armour from the turret. I love the look it gives this tank. It kinda reminds me of some British mantlet designs from the desert war.

Is this a cool look or what?
As always, comments and criticisms are welcome. Cheers!


