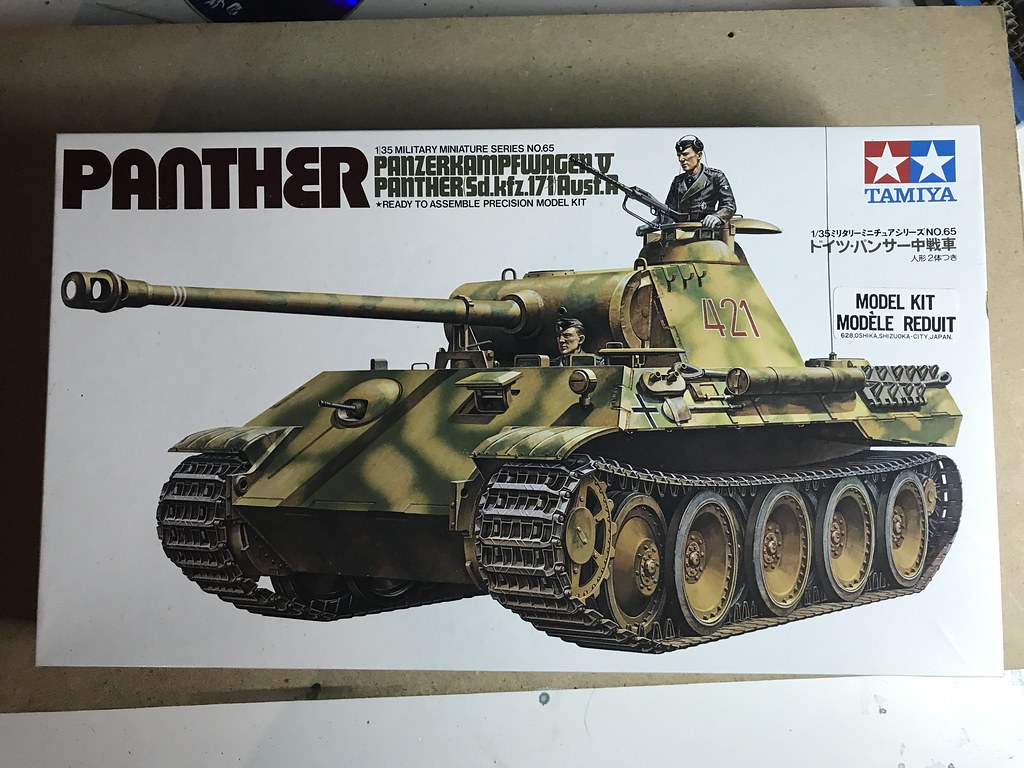
Many historians consider the Panther one of the finest medium tanks of the second world war. Despite some initial problems, it held it’s own particularly on the Eastern front. It’s 75mm gun has a very high muzzle velocity which allows it to ‘punch above its weight’. Wikipedia has a very detailed article on the Panther.
This kit by Tamiya is a very old offering dating from 1975. It has its share of inaccuracies and for those who want a more accurate model should look to later kits by Dragon and Tamiya. In my case, such things don’t concern me as this is going to be built out of box to further refine my weathering skills. I picked it up at a show several years ago for $15 so good value no matter what.
Construction begins with the back end of the main hull. After gluing the exhaust pipes on, one of the first tasks is to drill some holes in these pipes.
I also glued the 2 part barrel together and left it to dry overnight. There will be some work needed to make it passable as the fit was not impressive.
Love the panther and for $15 you can't go wrong. Nice detail with the exhausts, looking forward to seeing this one being built.
Re: Tamiya 1/35 Panther Ausf. A
Posted: Sun Jul 22, 2018 7:50 pm
by barrythornton
For the price you can get these old Panthers for now, you could use it for any manner of testing .... Zimmeritt, oils, battle damage,
and they still build into a good finished kit.
Win win situation.
Re: Tamiya 1/35 Panther Ausf. A
Posted: Tue Jul 24, 2018 12:14 pm
by Paul
Think i built this a while ago and although its an old one it goes together fine
Re: Tamiya 1/35 Panther Ausf. A
Posted: Fri Aug 17, 2018 3:30 am
by StuartClark
A large update here.
The main gun barrel was next. Doing a test fit of the two pieces I knew it would have its challenges. Glued and clamped it up in sections and left it for 24 hours to set.
There was quite a bit of sanding to be done to get this looking reasonable. In the end, I came up with an idea to use my cordless drill as a poor man’s lathe to assist with the sanding. Using this and my Flex-I-files, it now looks far better.
Part B11, the commander’s hatch is not on the sprue or in the box. The bags were sealed when I got the kit so it’s likely it fell out at the factory back in the mid 70’s. I’ve reached out to my local IPMS group to see if anyone has an extra one, but that killed the mojo for the night.
I put the word out and a fellow modeler in my city has the same part they are willing to part with.
Re: Tamiya 1/35 Panther Ausf. A
Posted: Fri Aug 17, 2018 3:34 am
by StuartClark
Also, a bench update featuring the Panther.
Re: Tamiya 1/35 Panther Ausf. A
Posted: Sun Aug 26, 2018 3:01 am
by StuartClark
Another small update. Working on all the smaller bits that go onto the main hull.
Then started working on the lower section with the wheels. The way it goes together makes sense once you go through the instructions and start to put it together.
Tamiya 1/35 Panther Ausf. A Part 5
Started working on the lower section with the wheels. The way it goes together makes sense once you go through the instructions and start to put it together.
After 2 sessions the wheels were done it was time to test fit the upper and lower part of the hull and the turret.
Time to start priming. I’m using Vallejo German Dark Yellow straight from the bottle. I’m always happy how well this goes on.
You're doing a good job, I'm impressed with your solution for sanding the barrel down. Can't wait to see how it will look painted.
Unfortunately I've found that this tank only looks like a panther in photographs, or when built by other people. Every time I pick one up (I've tried twice) I can only build it, look at it from a few angles and then I end up throwing it in the trash.
Re: Tamiya 1/35 Panther Ausf. A
Posted: Sun Aug 26, 2018 6:47 pm
by StuartClark
I'd probably have similar comments about a bad kit of a Spitfire etc. I can understand it from that perspective and in the end, it's why I support people at all levels of the hobbies, one builds to how one wants it.
Painting will be starting soon and I'm looking forward to that.
Re: Tamiya 1/35 Panther Ausf. A
Posted: Tue Sep 04, 2018 2:05 am
by StuartClark
After I primed it, I noticed a very obvious seam that needs to be fixed at the front. I put some Mr. Surfacer 500 in the gap, left it to dry then used isopropyl alcohol with some Q-tips to get the excess off, followed by some sanding. Here is a picture during that process. I then shot more Vallejo Primer into that section and left it to dry,
Now onto the colors for the big cat. Like in the airplane world there is no shortage of debate for accurate colors. I looked at quite a few sources and did the final comparison by looking at color charts and going down to my local hobby shop to compare some of the paint in the bottles or jars. The base Tamiya colors I will be using are XF-60 Dark Yellow, XF-64 Dark Brown and XF-67 NATO Green. From what I’ve seen these will make a ‘close-enough’ for me scheme.
Using my Badger Patriot 105 and a 50/50 mix of XF-60 and thinner I applied 2 light coats onto the tank. and left it to dry for several days. (I normally give it at least a day for the base coat, it’s probably overkill but works for me). I’ve got the combination nailed down fairly well with this airbrush and Tamiya acrylics.
For the first of the camouflage colors, I decided it was a good time to use my Badger Sotar 20/20 airbrush with the fine tip. I picked this up earlier this year and I have done some playing around to learn the differences between it and my other airbrushes, this would be the first time I would use it on a kit for camouflage.
Certainly not a perfect job, but better then what I was expecting the first time out. I will be doing some touch ups on the tank with a second coat.
The paint ratio was not perfect. In this case, I over thinned the paint thinking it would need that to get through the smaller tip. Noticed the signs of over thinning on the tank in places.
My compress can run for about 15 min non-stop before overheating and shutting down. I was taking my time and to be honest I could have done this first camouflage with my Badger 105.
Still, an excellent learning experience in getting better performance out of the Sotar. Looking forward to using it for some other weathering techniques as I move forward on the build.
 Untitled by Stuart Clark, on Flickr
 Untitled by Stuart Clark, on Flickr
 Untitled by Stuart Clark, on Flickr
 Untitled by Stuart Clark, on Flickr


 I can understand it from that perspective and in the end, it's why I support people at all levels of the hobbies, one builds to how one wants it.


