Page 1 of 1

Airfix 1/48 Ju87-B(R) Stuka

Posted: Wed Aug 22, 2018 3:21 am
by Panzergrau
HI, guys!
I've been stuck for some time with a not so friendly MPC kit. Eventually I have reach the point where I can start confidently a new build. My personal objectives for this build are:
1. Complete another campaign;
2. Build my first Airfix kit;
3. Build my first Stuka;
The build is going to be mostly OOB because starting with September I am already enrolled in two campaigns!
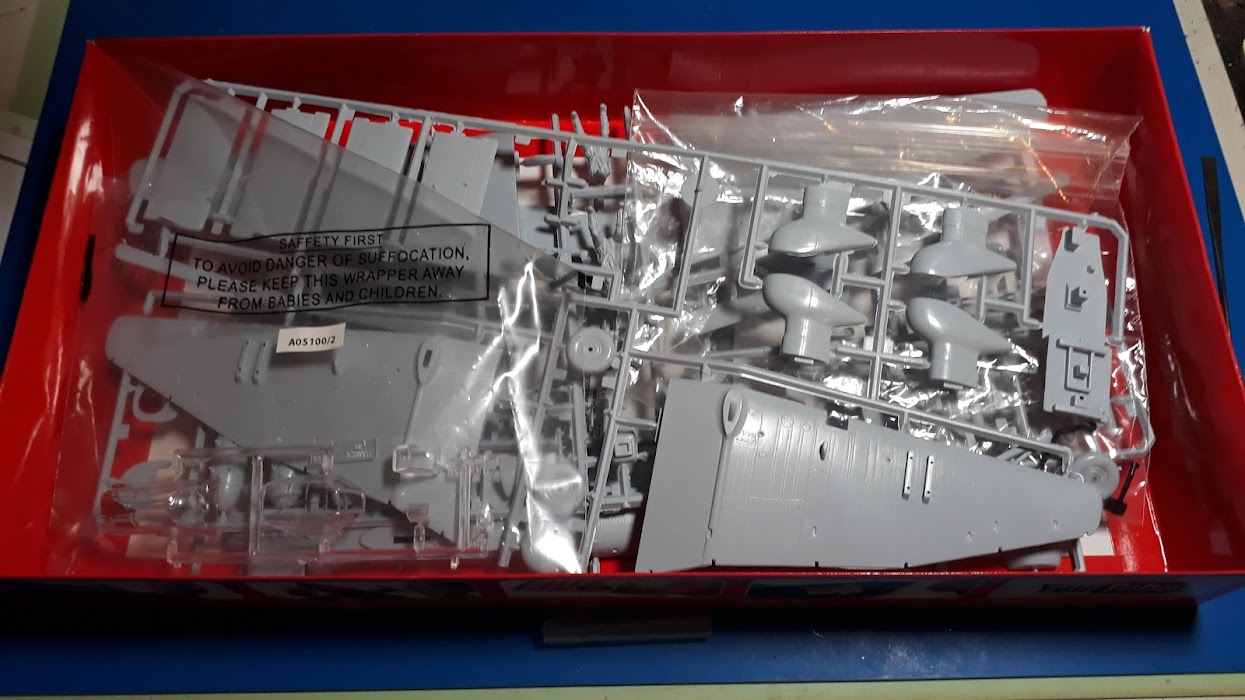
Image

This is going to be Airfix Junkers JU 87-B in 1/48 scale. I chose the Italian markings.
Image

Image

Some parts were already rattling inside the box - fortunately they broke from the injection gates and no scars will be visible after removing the burrs and the mold lines. You might note that the mold lines are quite present, especially on the small parts:
Image

Although it's one of the older Airfix kit, the surface detail it's rather good, a mix of raised and recessed detail. I know already I might encounter some fitting issues with this kit but I think I will be able to save most of the exterior detail.
Image

I am pretty much satisfied with the detail level, but in some places this is rather soft, like the radiator flaps. I think I'm going to deepen these recessed lines between flaps:
Image

I encountered problems with the first parts already: the pilot seat had a sunken ejection pin mark, while the navigator seat carried a raised one! I removed the raised one with a chisel blade and I filled the recessed one with Vallejo acrylic putty:
Image

I installed the navigator's seat and I prepared the other interior parts for painting:
Image
Image

I might try my hand on scratch-building some seat belts, because I'm not going to add the pilots provided with the kit. This is the actual stage of my build.

Cheers!
Gabriel :-H

Re: Airfix 1/48 Ju87-B(R) Stuka

Posted: Fri Aug 24, 2018 12:46 am
by Panzergrau
OK, guys!

UPDATE
I think I haven't mentioned it in my first post: this is a "relaxation build" so please do not expect too much from it. I am aware of many of the kit's shortcomings, but I'm going to address only and only what just cannot be passed. In this category is the over-simplified pilot's seat. My best guess is that the aircraft was a Ju87-B2 refurbished as R2; hence the pilot's seat should have a semicircular frame instead of head armored plate. However, I have only opened a slit so I can pass the seat belts - which I have to scratch-build:
Image

The cockpit walls were primed with TCP 010 Black and then airbrushed with Vallejo Air RLM02:
Image

Same went for the cockpit floor:
Image

The other parts to be installed into the cockpit were primed with TCP 010 and sprayed with Vallejo Air RLM 66:
Image

Next steps: scratch-build the seat belts and brush paint the details inside cockpit.

Cheers!
Gabriel :thumb2:

Re: Airfix 1/48 Ju87-B(R) Stuka

Posted: Sat Aug 25, 2018 5:22 am
by Panzergrau
Hi, guys!

UPDATE
I started detailing the cockpit. One of the very few add-ons planed for this kit was scratch-building the seat harnesses. I used for this scope textured masking tape painted with acrylics:
Image

Image

I also brush-painted some interior details; once the acrylics will dry, I will apply an oil wash:
Image
Image

I'm working right now on finishing the instrument panel and soon enough the interior will be ready for buttoning up

Cheers!
Gabriel :thumb2:

Re: Airfix 1/48 Ju87-B(R) Stuka

Posted: Sat Aug 25, 2018 9:34 pm
by DoubleDigit12
Looking sweet so far Gabriel!

Re: Airfix 1/48 Ju87-B(R) Stuka

Posted: Sun Aug 26, 2018 5:01 am
by Panzergrau
James, thank you!

I have noticed your profile photo is the Fascias. This Stuka it's going to be a Picchiatello but I cannot find the exact photo - I found plenty artistic profiles, but they add to the confusion. It belongs to 219 Squadriglia probably during Malta operation. I'm not sure of the mode the yellow nose strip was applied and also if was a hand-over aircraft or a B-2 converted to R-2 and delivered as refurbished. Any ideas?

UPDATE

I finished detailing the interior and applied a light oil wash (sorry for the quality of the first picture - it's a bit out of focus):
Image

Image

Image

Instrument panel complete, waiting to be installed:
Image

Cheers!
Gabriel :thumb2:

Re: Airfix 1/48 Ju87-B(R) Stuka

Posted: Sun Aug 26, 2018 11:24 am
by SMAddict66
Lovely work Gabriel, the wash really pulls everything together. :thumb1:

Re: Airfix 1/48 Ju87-B(R) Stuka

Posted: Sun Aug 26, 2018 10:15 pm
by Panzergrau
Thank you, Phil! Probably the best description of the procedure is filter-wash because unifies the shades as well as gives three-dimensional appearance :)

UPDATE
The propeller airbrushed with Vallejo Air RLM70 Schwarzgrun as per instructions. Unfortunately, there are no decals for the propeller.
Image

Meanwhile I have buttoned up the fuselage (no pictures) and, waiting for the glue to set, I fiddled with the "peripherals":

I added breather tubes to the fuel tanks from stretched plastic tube:
Image

Image

The same went for the machine-gun barrels:
Image

Image

The ordinance (SC 250 or 500?) was primed with Rust-oleum aluminum, then parsimoniously sprayed with Vallejo Air RLM70, letting some "metal" shine thru:
Image

Some witty armorer thought to send a message to Royal Navy "Limeys". The writing was done with acrylic red, using a 00 taklon brush:
Image

I dry-fitted the wings and stabilizers... I'm a little disappointed - there is a lot of filling / sanding / re-scribing ahead... :(

Cheers!
Gabriel :thumb2:

Re: Airfix 1/48 Ju87-B(R) Stuka

Posted: Wed Aug 29, 2018 1:33 am
by Panzergrau
Hi, guys!

UPDATE

I am using the "peripherals" to test my combination of paint / weathering / clear coats. The first one to fall victim to the weathering was the propeller, which have seen some chipping with the sponge method:
Image

The bomb embraced the same fate:
Image

To add some diversity to the build, I chose to weather extremely one of the external fuel tanks and to keep as good as new the other one:
Image

More weathering follows for all those above parts: oil washes, oil staining... so on

As said in the previous post, the fuselage fitting is bad. The following picture shows the underside of the fuselage between the sanding sessions, the "step" between halves being already eliminated, and so the riveting detail :(
Image

The worst problem is here, around the oil cooler intake: I installed the intake too early and now I don't have full access to the join line - I'm afraid I can't do too much in that spot:
Image

In complete defiance to the fuselage problems, the wing halves fit superbly, with the tiniest amount of flash to be removed. No putty was needed there. The landing light glass was also installed:
Image

In the same note with the wings, the horizontal stabilizers are just too easy to assemble :)
Image

I am going to use silver enamel for this build as primer and here are the wheels being prepared for round two. Actually the fit of the wheel fairings halves is not as bad as the picture indicates - it was just a hairline join line which I failed to see it on bare plastic - another advantage of priming with silver!
Image

Here's the rear half of the canopy masked. That expoit stretched my skills to maximum but in fact I realized that I cannot glue it in place because the MG isn't ready. And dealing with the machine gun took me the whole of this evening session, because the part is in this edition of the kit a big chunk of flash...
Image

Looking forward to sealing the cockpit and priming the fuselage. On this build I am going to apply the primer on the fuselage before adding the wings, because I am still anticipating sanding and puttying...

Cheers!
Gabriel :thumb2:

Re: Airfix 1/48 Ju87-B(R) Stuka

Posted: Fri Aug 31, 2018 12:54 am
by Panzergrau
Hi, guys!

UPDATE

The canopy masked with Tamiya masking tape 10mm and attached to the airframe with Micro Krystal Klear:
Image

Although the fitting is good, there are still a couple of places where the canopy doesn't seal completely. No problem for the modeler that wants to represent the canopy open - I thing the kit was design with that intention in mind:
Image

Talking about the gaps: here you can see the most obvious of them, where the rear of the canopy meets the fuselage. Not a problem to seal it up, thanks to Airfix clever engineering:
Image

I masked off the prepainted areas and the transparent surfaces using pieces of household sponge (no, pink it is not my colour :D )
Image

Image

After Micro Kristal Klear set, I sprayed Vallejo Air RLM02 over the canopy:
Image

Finally (for today that is) I primed the fuselage. I chose to prime the fuselage alone first, because I was still expecting some sanding and puttying and the wings are much better with regard to the fitting. I will attach them before the second primer coat. To be honest, I have less problems than anticipated: only the canopy edges that I knew about already and a seam line to the bottom of the fuselage so thin that I cannot get a decent picture of it but needs to be addressed nonetheless:
Image
I really like how Mr. Hobby Finishing Surfacer 1500 works!

Next I need to re-scribe the lost detail and to deal with the hairline join lines and attach the wings and stabilizers.

Thanks for following - more updates in the making!

Cheers!
Gabriel :thumb2:

Re: Airfix 1/48 Ju87-B(R) Stuka

Posted: Sat Sep 01, 2018 9:25 am
by DoubleDigit12
Panzergrau wrote: Fri Aug 31, 2018 12:54 am Hi, guys!

UPDATE

The canopy masked with Tamiya masking tape 10mm and attached to the airframe with Micro Krystal Klear:
Image

Although the fitting is good, there are still a couple of places where the canopy doesn't seal completely. No problem for the modeler that wants to represent the canopy open - I thing the kit was design with that intention in mind:
Image

Talking about the gaps: here you can see the most obvious of them, where the rear of the canopy meets the fuselage. Not a problem to seal it up, thanks to Airfix clever engineering:
Image

I masked off the prepainted areas and the transparent surfaces using pieces of household sponge (no, pink it is not my colour :D )
Image

Image

After Micro Kristal Klear set, I sprayed Vallejo Air RLM02 over the canopy:
Image

Finally (for today that is) I primed the fuselage. I chose to prime the fuselage alone first, because I was still expecting some sanding and puttying and the wings are much better with regard to the fitting. I will attach them before the second primer coat. To be honest, I have less problems than anticipated: only the canopy edges that I knew about already and a seam line to the bottom of the fuselage so thin that I cannot get a decent picture of it but needs to be addressed nonetheless:
Image
I really like how Mr. Hobby Finishing Surfacer 1500 works!

Next I need to re-scribe the lost detail and to deal with the hairline join lines and attach the wings and stabilizers.

Thanks for following - more updates in the making!

Cheers!
Gabriel :thumb2:
Hi Gabriel,
Im glad you notice my avatar, and it is nice to see some italian planes being built, especially to such a high standard! I do not know about specific aircraft markings but I do believe the r2s were direct handovers from Germany constructed as r2s. :thumb1:

Re: Airfix 1/48 Ju87-B(R) Stuka

Posted: Sun Sep 02, 2018 11:02 pm
by Panzergrau
@DoubleDigit12 James, thank you for following around and for your king words. There are two decals in the kit with serial numbers, of which one is crossed over. That made me think the aircraft is a converted B-2. It doesn't matter all that much, because the external differences between B and R were impossible to tell when the drop tanks not attached.

UPDATE
I know I had some three days of absence, but only because I was too taken with the build :)

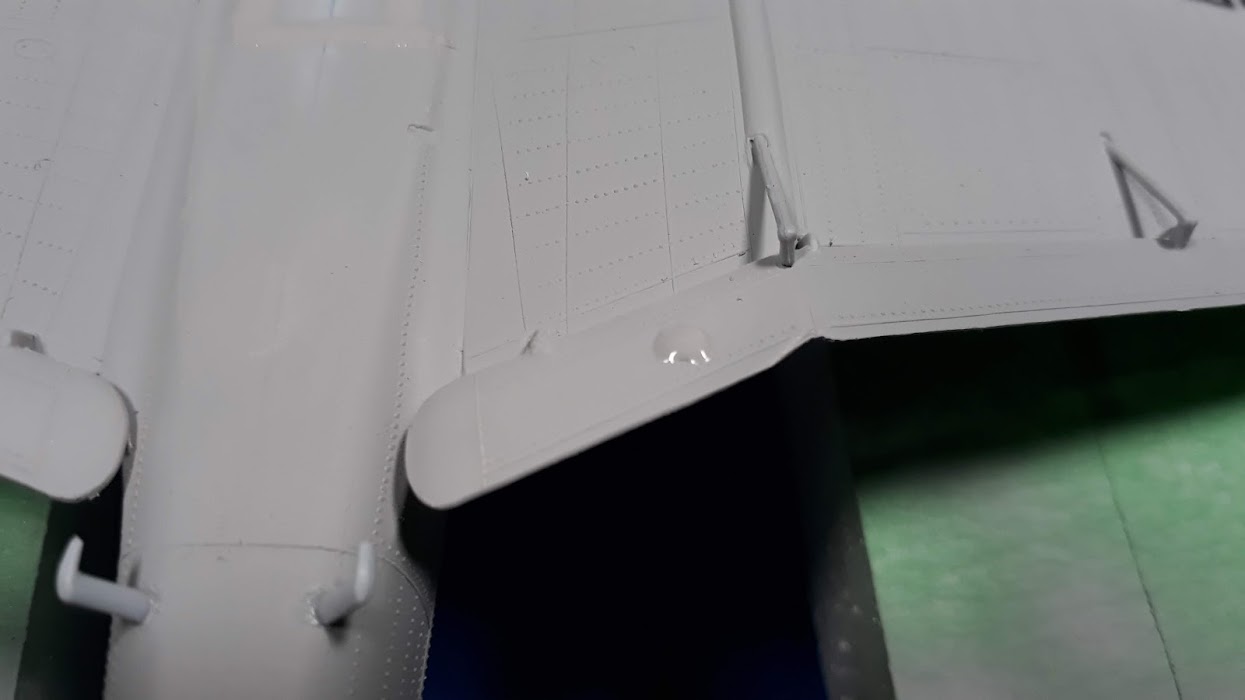
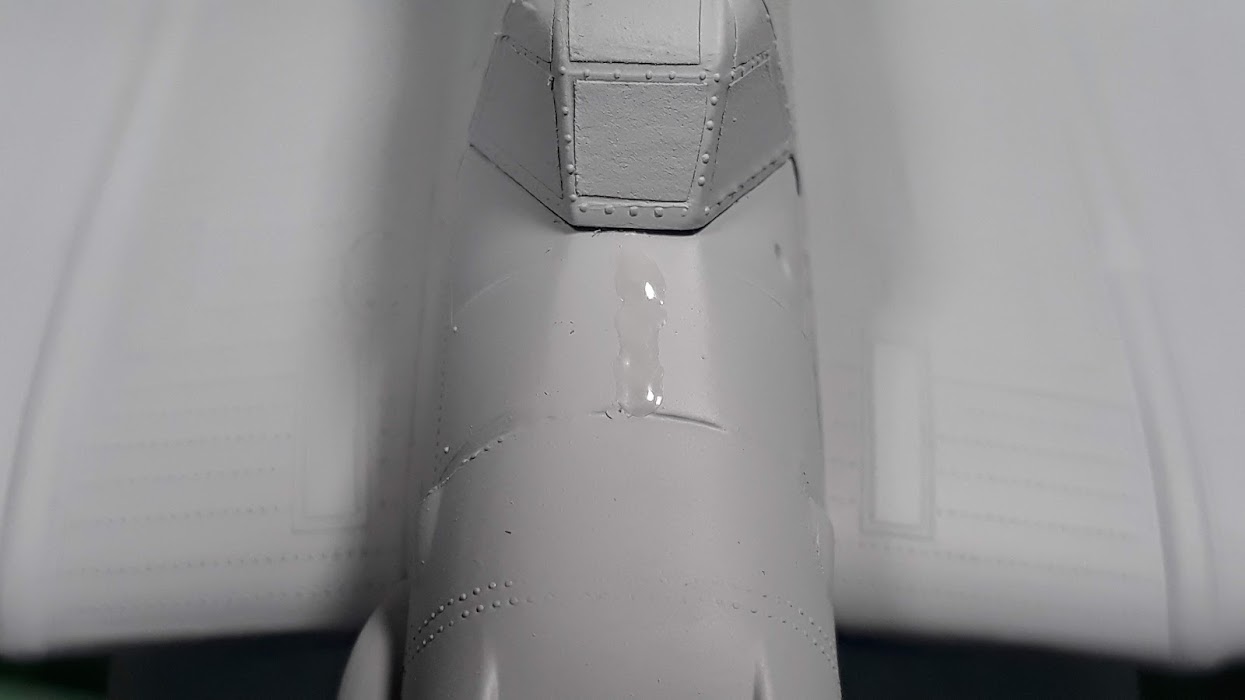
I had a persistent seam line on the ventral part of the fuselage, which I needed to deal with:
Image

Image

Some other bits and pieces needed some attention as well:
Image

Image

After I sanded the excess putty, I attached the wings and the stabilizers. A minimal gap remained on the underside part of the joint, easily sorted out with Vallejo acrylic putty
Image

One of the stabilizers also needed the tiniest amount of acrylic putty:
Image

I applied to the superior wing joints from the principle "better safe than sorry" but I don't think was all the necessary - barely any putty was left behind the cotton swab:
Image

I glued then the ailerons / flaps. These are one of the worst parts from the kit, with lots of flash, uncertain shape and prominent pin marks on the underside. One of the "hinges" also does not align properly on the right wing.
Image

I tried out some re-scribing. I didn't manage the best of the jobs, but at least I didn't cause a catastrophe! ;)
Image

The riveting fall also short of perfect :( still learning the trade:
Image

With all that done, I primed the entire model with Mr. Finishing Surfacer 1500 50% with MLT
Image

Image

To be honest, I was anticipating a worst result :) I have still a few spots to fiddle with and I will be ready for a under-coat of Rust-oleum Aluminum!

Thank you for following up!

More updates in the making!

Cheers!
Gabriel :thumb2:

Re: Airfix 1/48 Ju87-B(R) Stuka

Posted: Mon Sep 03, 2018 12:17 am
by barrythornton
Doing well with the kits shortcomings. :clap:
What are the 3 symbols on the Italian markings ? Always wondered what they represent . :?

Re: Airfix 1/48 Ju87-B(R) Stuka

Posted: Mon Sep 03, 2018 12:29 am
by Panzergrau
@barrythornton : Thanks for coming aboard, Barry. Actually I was surprised with the results myself - I heard (and seen) mostly unfavourable things about the kit :)

They are called fascias and are the stylized representation of an small ax in a middle of a bunch of twigs (very old Roman symbol of authority). They suggest power and unity. Mussolini revived the Old Republic symbol with the same signification: unity around the leader (Il Duce is also a Latin term = the one that leads, leader). The revival of fascias was meant also to awake the Roman Imperial pride in the modern Italian nation.

Cheers!
Gabriel

Re: Airfix 1/48 Ju87-B(R) Stuka

Posted: Mon Sep 03, 2018 10:32 am
by barrythornton
"small ax in a middle of a bunch of twigs"
Now I see it :doh:
Everydays a schoolday. :cheers2:

Re: Airfix 1/48 Ju87-B(R) Stuka

Posted: Mon Sep 03, 2018 2:00 pm
by Johnj
your doing some amazing work there Grabriel, in spite of the kit issues. the seatbelts look superb as does the cockpit.
you have inspired me to finish my own airfix stuka that has been sitting for a couple of years, so thank you for that :thumb1:

Re: Airfix 1/48 Ju87-B(R) Stuka

Posted: Mon Sep 03, 2018 5:10 pm
by DoubleDigit12
Gabriel
That crossed over decal is interesting maybe I am wrong? You are right though without the drop tanks there are no external differences only the internal airframe I think. :th: Keep up the good work!

Re: Airfix 1/48 Ju87-B(R) Stuka

Posted: Thu Sep 06, 2018 1:37 am
by Panzergrau
@Johnj John, welcome abroad my Stuka!
Thank you for your very kind words - very much appreciated. To be honest, I feel I could have done better with the pilot's seat and with the belts but I am a little under time pressure here and I cut it short to "take the build from the way".
I don't consider by any means my work inspirational but I am mightily glad if it whetted your appetite! I think is a fair enough model kit which can be built relatively easy in a good display if a modicum of attention is paid to it. Now you made me curious to see your build! :D

@DoubleDigit12 James, indeed, it caught my attention right away. That's why I was asking if is a hand-down aircraft; some of them had swastikas crudely painted over under Italian markings. If would have been a fully refurbished aircraft, probably the new serial number would have been painted anew. Unless the tail was changed that is... I'm a little confused and, since I couldn't find the original picture, I have to trust Airfix. I've seen other aircraft from the same bomber group / period and the markings seem to be accurate - same about the group insignia!

UPDATE
I had a case here of re-appearing seam line, caused probably by the solvent in the primer etching the solvent based Tamiya white putty. I opted this time for Tamiya Surface Primer to fill the minute gaps and some ejector pins:
Image

Image

Image

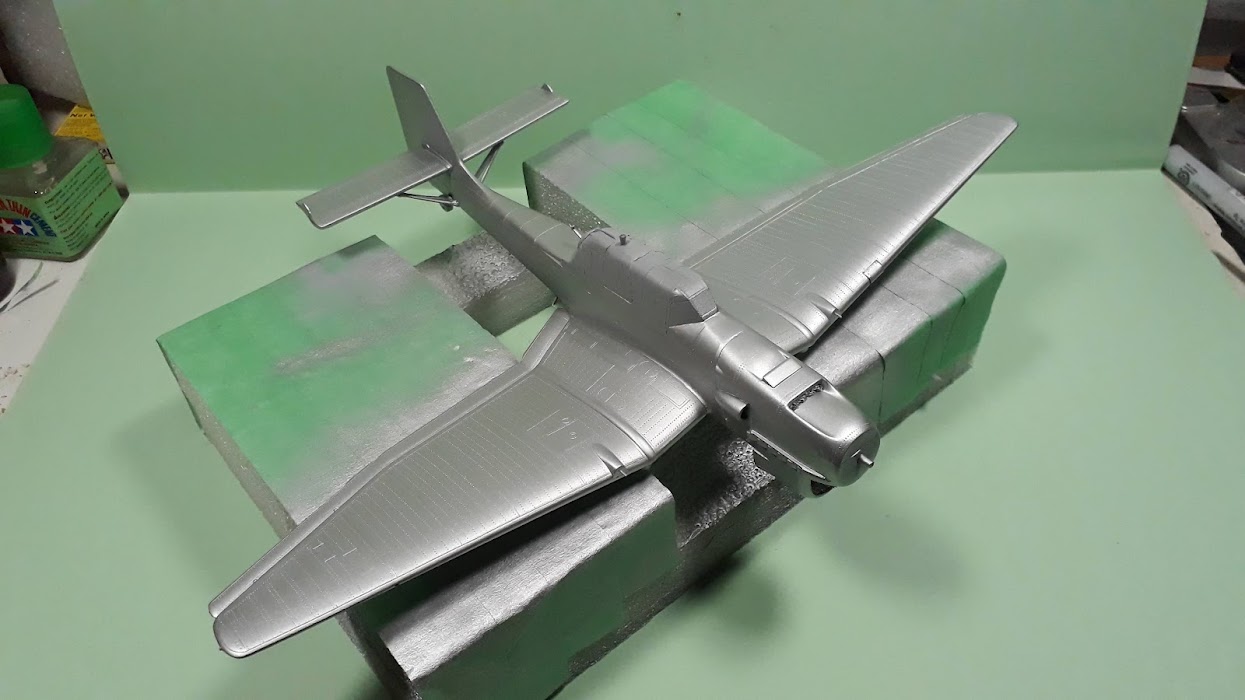
I decided to follow an "obsolete" method in painting this aircraft - undercoating with silver. I have tried it prior to this on another build and I swear it makes a difference! Camera won't show that much, but naked eye can "guess" the "metal" underneath the paint. I have used Rust-oleum enamel in this purpose:
Image

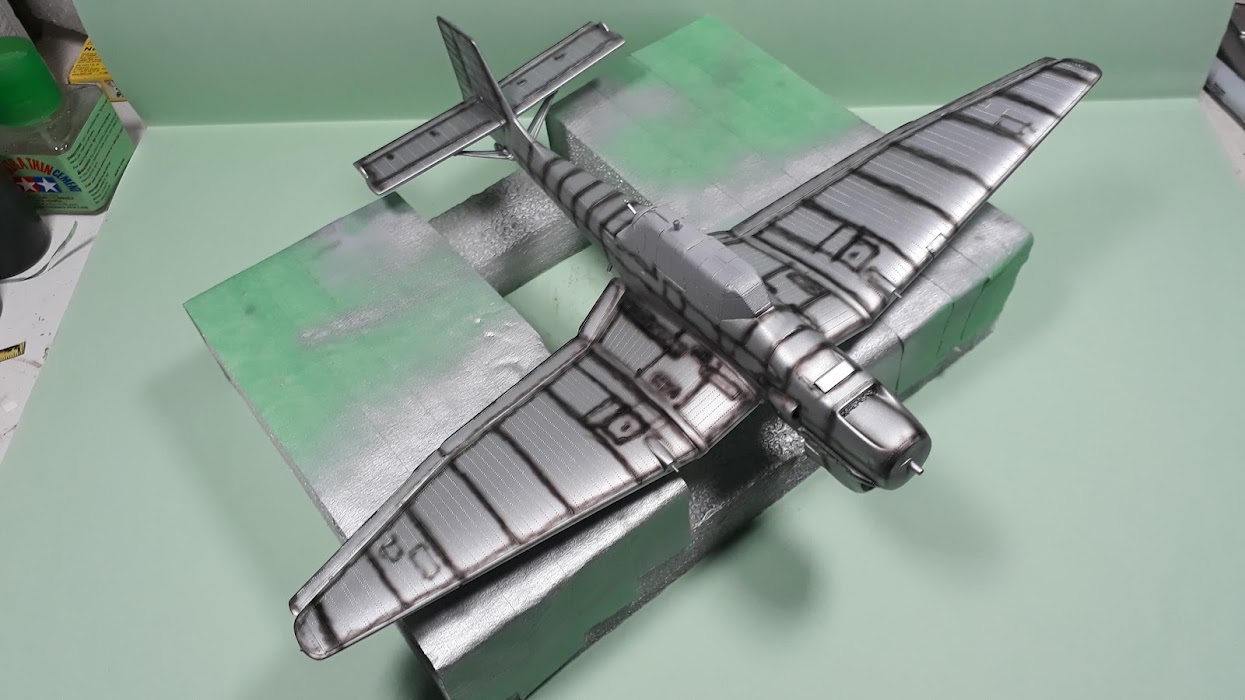
The enamel takes some 48 hrs to become sandable, but was dry enough to touch after 24 hrs and I could apply some pre-shading. Most of it probably will get lost under dark colors of the splinter camouflage, but I'm trying nonetheless:
Image

Image

I painted already the areas where the identifications marks will be masked over - pictures to follow with the next update.

Thank you for following!

Cheers!
Gabriel :thumb2:

Re: Airfix 1/48 Ju87-B(R) Stuka

Posted: Thu Sep 06, 2018 4:19 pm
by DoubleDigit12
Looking good. Excited to see the paint!

Re: Airfix 1/48 Ju87-B(R) Stuka

Posted: Fri Sep 07, 2018 12:50 am
by digger303
As you learn the riveting trade any tips and do not do's you can pass on pass on would be very useful to those of us who haven't tried our hand yet. What riveting and scribing tools did you use ?

Re: Airfix 1/48 Ju87-B(R) Stuka

Posted: Fri Sep 07, 2018 2:05 am
by Panzergrau
James, me too! I enjoy very much this stage of the build! And, of course, I always "fear" it the most, because it can make or break a model. What I'm looking for is a "moderate" weathering - you know - the operationally used aircraft but not completely wrecked. I sort of don't like freak shows - see infra.

@digger303: well, the best I can do in this stage of my evolution is to make reference to my modest experience and the tools I've used.
I had a Trumpeter riveter which I tried first on another build but the lock system and the roller guards are blocking the view and don't permit access to all nooks because of the big diameter of the wheel. In conjecture with my lack of skill, that experience was pretty much disastrous :D. I modified the named riveter by sawing off the lock mechanism and roller guard for better visibility but I have misplaced it somewhere. Meanwhile I ordered another tool from RB Productions in Ireland, together with some photo etched scribers. The tools are much better designed than Trumpeter and even than Tamiya - I have the scriber with Olfa-P blade from Tamiya - but the customer service was terrible - I went that far that I almost cancelled the order thru PayPal. Anyhow, I hope I'm the only one with bad luck here.
For scribing I used RB Productions Scriber , 15 degrees right hand angle. As guide I have used a piece cut from a measuring tape (the small ones sold as key chains). It is very flexible and has very strong edge. The scriber is very sharp and basically the first scoring was made under the own weight of the tool. On the second pass I used more pressure (remember - less is more in modeling). I'm quite happy with the way it worked out, but much practice still needed.
For riveting I was forced to use the "RB Productions Rivet-R", because I couldn't find my modified Trumpeter. Here the things weren't all that good on the curved surfaces, my lines being a little off. For tool to work properly needs a steady hand and firm pressure (again, do not use extra force). I will definitely recommend the rows of rivets to be sketched first with a soft pencil (and maybe next time I will mind my own advice too).
And about that is - I need more practice and perhaps some more patience as well...

UPDATE
As announced in previous posting, I sprayed the areas where the identification stripes were on the aircraft, then masked off:
Image

I used in this scope Tamiya masking tape 10mm:
Image

Over the previously pre-shaded under surfaces I have applied Vallejo Air RLM65 Helblau, careful to let some pre-shading show thru. I then added some post-shading and highlighting with the same base paint, to which I added generic acrylic white, respectively black approx 10%. This time I also thinned the blend with IPA (approx 50%). Here's the result:
Image

Image

A wash will follow, but I need first to paint the splinter camo on the upper surfaces.
The next step will be adding the wheels and moving to painting dorsal parts of the aircraft.

More updates in the making - I'll be back soon!

Cheers!
Gabriel :thumb2:

Re: Airfix 1/48 Ju87-B(R) Stuka

Posted: Mon Sep 10, 2018 9:13 pm
by Panzergrau
Hi, guys!

UPDATE:

When the undersides were dry, I have applied the masks to protect the surfaces and to delimit the camouflage sections:
Image

I have airbrushed after Vallejo Air RLM71 Dunkelgrun and I have done some post-shading and highlighting:
Image

A closer picture to help you see better the detail:
Image

With the first shade of green dry, I masked off the camouflage pattern. It is not excatly as in the instructions manual, but I haven't strayed too far either :D :
Image

Hard edges and good contrast - that I was after:
Image

Detail with the white identification band:
Image

Close-up with the yellow identification band (some re-touching needed there - already done see infra)
Image

Close-up with the tail:
Image

The underbelly after removing the masking; again, some corrections required and done:
Image

A light wash of van Gogh 'Payne's Gray' oil applied. I like the bluish tinge of this paint and I find it complements very well RLM65 Helblau:
Image

Detail picture with the rivets - that's for the rivet-counter, not for you ;)
Image

I am on applying oil wash on the upper surfaces right now, and soon a new update will be available!

Cheers!
Gabriel :thumb2:

Re: Airfix 1/48 Ju87-B(R) Stuka

Posted: Tue Sep 11, 2018 3:56 pm
by Johnj
Panzergrau wrote: Thu Sep 06, 2018 1:37 am @Johnj John, welcome abroad my Stuka!
Thank you for your very kind words - very much appreciated. To be honest, I feel I could have done better with the pilot's seat and with the belts but I am a little under time pressure here and I cut it short to "take the build from the way".
I don't consider by any means my work inspirational but I am mightily glad if it whetted your appetite! I think is a fair enough model kit which can be built relatively easy in a good display if a modicum of attention is paid to it. Now you made me curious to see your build! :D

@DoubleDigit12 James, indeed, it caught my attention right away. That's why I was asking if is a hand-down aircraft; some of them had swastikas crudely painted over under Italian markings. If would have been a fully refurbished aircraft, probably the new serial number would have been painted anew. Unless the tail was changed that is... I'm a little confused and, since I couldn't find the original picture, I have to trust Airfix. I've seen other aircraft from the same bomber group / period and the markings seem to be accurate - same about the group insignia!

UPDATE
I had a case here of re-appearing seam line, caused probably by the solvent in the primer etching the solvent based Tamiya white putty. I opted this time for Tamiya Surface Primer to fill the minute gaps and some ejector pins:
Image

Image

Image

I decided to follow an "obsolete" method in painting this aircraft - undercoating with silver. I have tried it prior to this on another build and I swear it makes a difference! Camera won't show that much, but naked eye can "guess" the "metal" underneath the paint. I have used Rust-oleum enamel in this purpose:
Image

The enamel takes some 48 hrs to become sandable, but was dry enough to touch after 24 hrs and I could apply some pre-shading. Most of it probably will get lost under dark colors of the splinter camouflage, but I'm trying nonetheless:
Image

Image

I painted already the areas where the identifications marks will be masked over - pictures to follow with the next update.

Thank you for following!

Cheers!
Gabriel :thumb2:
Hi gabriel, yeah, time can be the enemy with building time unfortunatly but your stuka is coming on a treat and i like the idea of the silver base coat. maybe some kind of reverse chipping could be acheived ?
As for my own stuka, i think the build thread will be buried in the bowels of the forum as it was started in 2016 although when i get the Enzo out of the way i will finish the stuka build thread.

Re: Airfix 1/48 Ju87-B(R) Stuka

Posted: Tue Sep 11, 2018 9:46 pm
by DoubleDigit12
Splinter camo looking great!

Re: Airfix 1/48 Ju87-B(R) Stuka

Posted: Wed Sep 12, 2018 2:24 pm
by barrythornton
DoubleDigit12 ยป Tue Sep 11, 2018 9:46 pm
Splinter camo looking great!
Yeah, beginning to look the part now :th:

Re: Airfix 1/48 Ju87-B(R) Stuka

Posted: Wed Sep 12, 2018 2:30 pm
by ElCapitan
Looking great! I really fancy building a Stuka one day.

Re: Airfix 1/48 Ju87-B(R) Stuka

Posted: Thu Sep 13, 2018 7:51 am
by Kevthemodeller
Some very nice work going on here, the fit is not that great bit your skill is sorting that out mate :th:

Re: Airfix 1/48 Ju87-B(R) Stuka

Posted: Thu Sep 13, 2018 2:24 pm
by Panzergrau
@Johnj : Unfortunately, you're right, buddy - I am behind my modeling schedule on all fronts and the same goes for my YT channel :( . I always bite more than I can chew but it seems I cannot learn ever from it :D

@DoubleDigit12 & @barrythornton : Thanks, guys! Honestly, I would have preferred a better contrast between RLM70/71 but it's the first time I use the colors from Vallejo Air in this combination. I am aware for the future builds what "tweaks" I need do do.

@ElCapitan : Isn't all that hard after all! Why not! For what I understood, the new Stuka from Airfix it's better and it had solved the issues the old one (the one I'm building that is) had.

@Kevthemodeller : Thanks, Kev! As stated earlier, I think the negative aura of this kit was over-projected. The main issue is the positive detail, but the modeler with a modicum of experience can work his way around it, with minimal loss on flat surfaces - easy to address after!

UPDATE
Perhaps this update should be a stand-alone feature under the title of:

Beware of "fake silvering"! - I couldn't find a better term for it!

Here's the story:
I have applied as per my habit some "test decals" on the "peripherals": fuel tanks, bombs etc. - all good. I then started decaling the air frame, again, starting with the under-surfaces, just to make sure all goes smooth. And it was going smooth until I reach to the fascias on the upper wings. To my complete dismay, bewilderment and disappointment, as the Micro Sol was drying slowly, that was the image it appeared:

Image
It was perhaps the most spectacular case of silvering from my entire modelling career. I start fumbling for contingency "plan B" - robbing another kit of decals - and the victim would have been the Fiat CR-42 from Italeri or contingency "plan C" - switch to German markings, which meant the applying of a third camouflage coat - sand. But the voices in my head kept repeating: "silvering not possible... silvering not possible..." because the surfaces were properly prepared, the decals were darn good and the Micro Gloss / Micro Set / Micro Sol triangle always worked for me. With the panic slowly wearing off, I re-evaluate the problem, and I figured out that "the silvering" is not coming from the contact zone between the decals and the model, but from the matte surface of the decal! Following the updated diagnostic, I prescribed the recipe: Pledge. I administered some Pledge externally to the infected patient, and it started curing:
Image

After a second application of "snake oil", there we go!
Image
Wonders still happen! Guys, I realized only then how many times I missed the opportunity to achieve better decaling, especially with older Tamiya kits! I still have my old BMW R-75 which I am ashamed to show it to anybody just because of that :(

From there on, everything else went "by the book":
Image

Image

Image

Image

Image

After all decaling, I went on with a solid coat of Micro Gloss again to seal the decals. The ones that appear too white now will receive a wash to blend them into the color scheme.
I still have to paint the exhaust stubs and to fiddle a bit with the landing gear "pants" and then I'm moving further to the satin coat and weathering.

P.S. I'm not sure I am fully recovered after the "scare" :D Let's see how the "post traumatic shock" will affect me! :)

Cheers!
Gabriel :thumb2:

Re: Airfix 1/48 Ju87-B(R) Stuka

Posted: Fri Sep 14, 2018 1:55 pm
by Panzergrau
Hi, guys!

UPDATE

I have applied some washes over the decals to blend them in:

Image

Image

I also painted the exhaust stubs with matte Homefront acrylics:
Image

The satin coat applied - solvent based polyurethane: I find the result a little too glossy but a oil dot filter follows. If still too glossy, I will apply a coat of satin over again:
Image

Image

Image

Image

Image

Image

Thanks, guys!
More updates in the making!

Have fun!
Gabriel :thumb2:

Re: Airfix 1/48 Ju87-B(R) Stuka

Posted: Sun Sep 16, 2018 2:33 am
by Panzergrau
Hi, guys!

UPDATE
Dot oil filter applied. I was worried a little about the lack of contrast between RLM70 and RLM71 and I am quite content I regained it:
Image

The following picture is slightly out of focus - sorry!:
Image

Close-up with the horizontal stabilizer:
Image

Close-up with the vertical stabilizer:
Image

The bad news is that I need another coat of satin coat, because I have patches of different finish (satin and semi-gloss) all over the aircraft. Not big deal - just another day delay :D

Cheers!
Gabriel :thumb2:

Re: Airfix 1/48 Ju87-B(R) Stuka

Posted: Sun Sep 16, 2018 11:19 am
by DoubleDigit12
Oil weathering looks great!

Re: Airfix 1/48 Ju87-B(R) Stuka

Posted: Sun Sep 16, 2018 12:16 pm
by Johnj
That looks really sweet gabriel :thumb1: if my own comes out anything close to the finish you have managed to create i'll be punching the air in delight !
you should be well chuffed. Well done :dance:

Re: Airfix 1/48 Ju87-B(R) Stuka

Posted: Tue Sep 25, 2018 2:15 am
by Panzergrau
@DoubleDigit12 James, thank you! It's a technique I am exercising since long time, and I use it virtually everywhere :)

@Johnj Thanks, John! It is motive for jubilation - for sure, but it didn't went as I intended from the first try. I had to re-do basically the last two steps of the weathering (chipping and chalks) because I wasn't happy with the original result. Anyhow, now I'm pretty much satisfied.

LAST UPDATE

Finally there, guys! I had some trouble with the chipping - I didn't like the way the aluminum contrasted with the dark color scheme and I re-did the last steps of weathering, fixing another small issue on the way, and there's the completed Picchiatello

Image

Image

Image

Image

And here a few close-ups:
Image

Image

Image

Image

Image

Image

Thank you very much for following up any any criticism welcome!

Cheers!
Gabriel :thumb2:

Re: Airfix 1/48 Ju87-B(R) Stuka

Posted: Tue Sep 25, 2018 9:22 pm
by DoubleDigit12
Great finish Gabriel, nice to see some italian birds being built, especially one as good as this!

Re: Airfix 1/48 Ju87-B(R) Stuka

Posted: Sat Oct 13, 2018 7:10 pm
by Panzergrau
Thank you, @DoubleDigit12! Sorry for late answer - I've been really busy lately.

Here's the final presentation of the model as short video:


Thank, folks!

Cheers!
Gabriel :thumb2: