Page 1 of 1
AIRFIX 1/24 HAWKER TYPHOON
Posted: Sun Apr 21, 2019 12:07 pm
by hairypotter

Welcome all.
It's time for me to push along with this beast as it has only taken me 2 years to get thus far,so i thought if i do a build thread i have to get her finished.

I will be painting her in No.245 squadron but will use some artistic licence and ad some invasion stripes on the fuselage and underside of the wings.
The engine has been painted in Mr Metal Dark Iron and AK Extreme Dark Aluminium,once the fuselage is painted i will ad a panel line wash to pick out the detail.


The cockpit has had some photo etch parts included i.e side panels and seatbelts.
I used the kit dash dials and added some Micro Kristal Klear to replicate the glass.


The gun bays have been painted in Tamiya acrylics and again after painting the aircraft i will pick out the detail with washes.

The wheel wells i used AK Extreme Aluminium,detail painting to follow.

All the other parts are cleaned waiting for primer.

Her she is patiently waiting to have a wipe over with airbrush cleaner to get all dust off before a primer coat goes on.

As i mentioned at the start i need to get her finished so i'm hopefully aloud to carry on with a build thread,if not i understand as she is already started.
Re: AIRFIX 1/24 HAWKER TYPHOON
Posted: Sun Apr 21, 2019 1:10 pm
by digger303
Mr Hairy Potter, I'm loving the build and have always wondered about this kit. It being a airfix and not having ever completed one of theirs. Hows the overall fit and engineering ? I can see you have used some putty in the seam lines. Is it all over or just in the odd spot ?
I shall continue to follow this build with glee.


Re: AIRFIX 1/24 HAWKER TYPHOON
Posted: Sun Apr 21, 2019 1:33 pm
by hairypotter
digger303 wrote: Sun Apr 21, 2019 1:10 pm
Mr Hairy Potter, I'm loving the build and have always wondered about this kit. It being a airfix and not having ever completed one of theirs. Hows the overall fit and engineering ? I can see you have used some putty in the seam lines. Is it all over or just in the odd spot ?
I shall continue to follow this build with glee.
The fit in general is honestly great,as always with most kits the wing roots and seems need attention.
I have noticed though that if one part is not properly cleaned of flash(there is quite a bit being Airfix) or if a part is not seated/lined up correctly it can lead to other parts later on not fitting right,hence a bit of filler around the intake area.
Steve.
Re: AIRFIX 1/24 HAWKER TYPHOON
Posted: Sun May 05, 2019 9:00 pm
by hairypotter
The cockpit is now finished and weathered.
Seam lines checked with a light spray of flat black and all is okay.


Just to be different i sprayed Tamiya XF-19 Sky Grey thinned 50/50 with MLT as a primer.
A gentle rub over here and there with a buffer was used just to make sure to paint was nice and smooth.
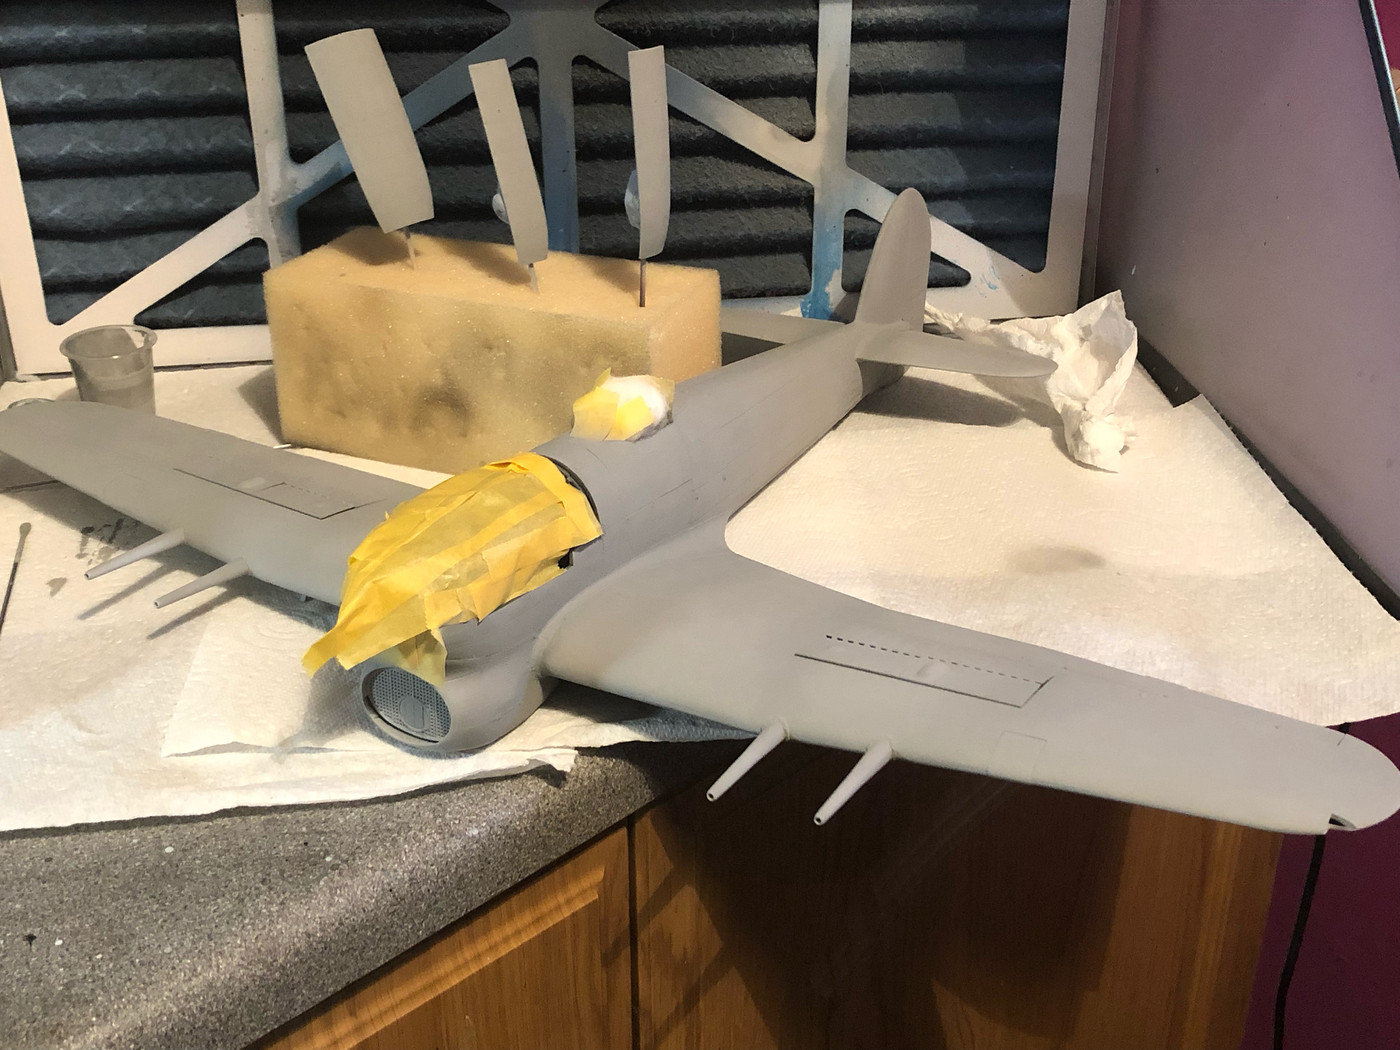
Once dried a base layer of Mr Hobby Aqueous H332 was sprayed on the underside,then to try and recreate bleaching i added a small amount(a paint brush full) of Tamiya Flat White to the paint that was left in the colour cup and added a bit more thinner.
I turned the air pressure down a bit and lightly sprayed inside of panel lines and hatches.


She was then left alone for couple of days before i used the same process with the grey on the upper surface camo,which was Mr Hobby Aqueous H335.
I think i may have over done the bleaching affect,but will see how it looks when the green i on.
[URL=
https://public.fotki.com/SteveYam/model ... 79507.html]

[/URL
Thanks for looking Steve.
Re: AIRFIX 1/24 HAWKER TYPHOON
Posted: Sun May 05, 2019 10:14 pm
by SMAddict66
Lovely bleaching technique and more importantly results Steve.
Looking forward to seeing you finish her off
Re: AIRFIX 1/24 HAWKER TYPHOON
Posted: Mon May 06, 2019 11:58 am
by hairypotter
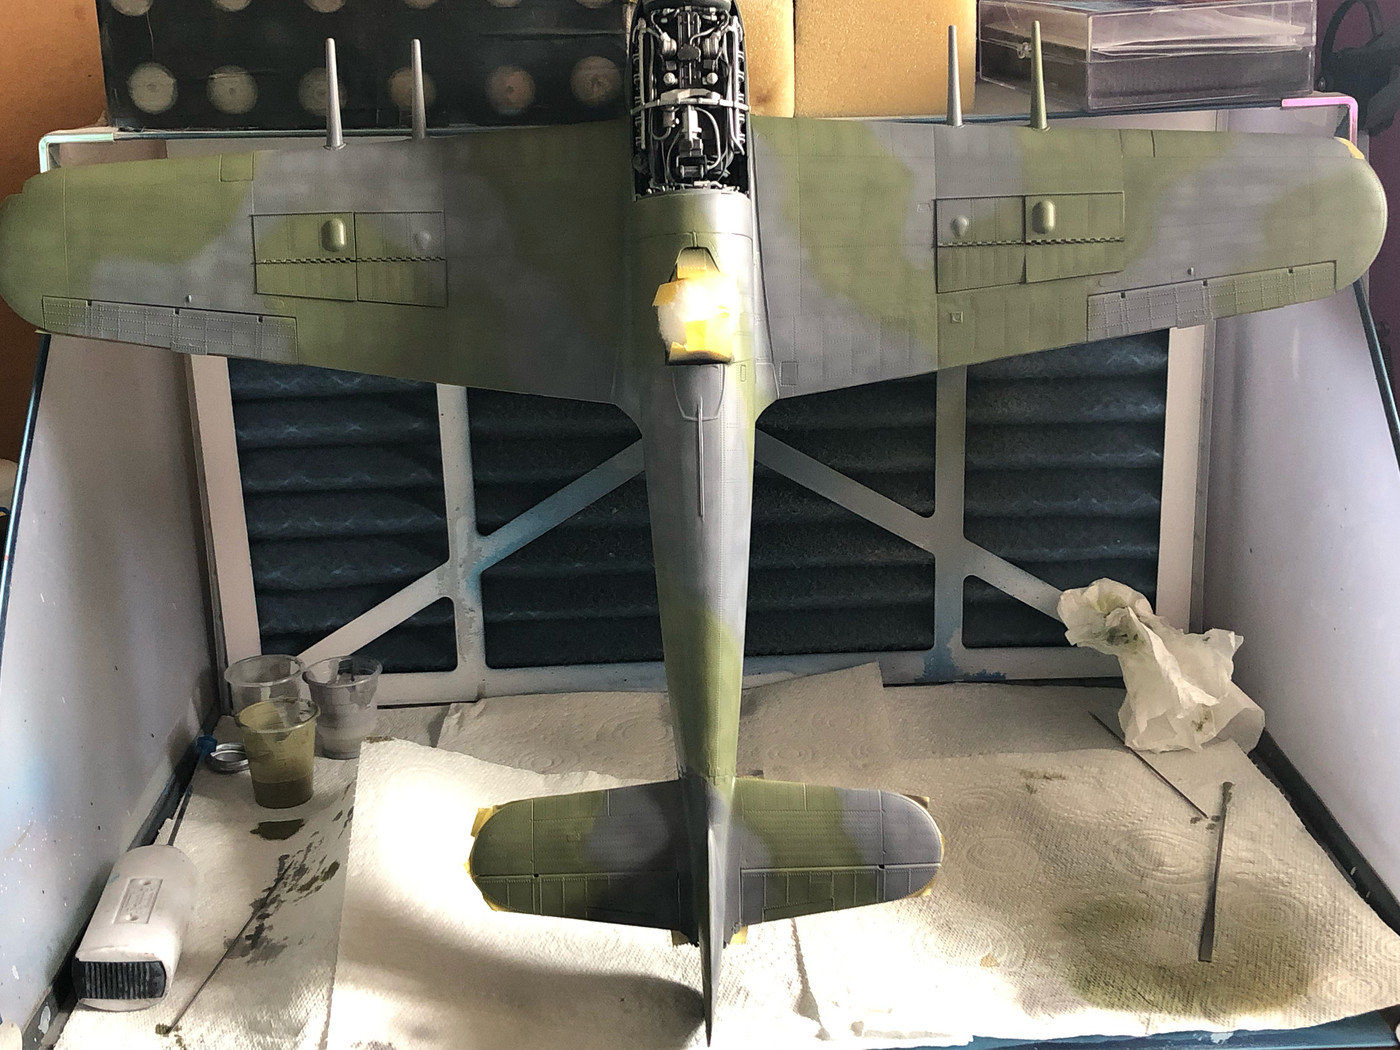
Green camo now on.
I used Mr Hobby Aqueous H320 in the same way as the base colours but when it came to the bleaching affect instead of using Tamiya XF-2 i used Tamiya XF-57 Buff.
I'm happy with the overall look,i was a bit worried i had over done the dark grey but all seems good.
Now onto the invasion stipes.


Re: AIRFIX 1/24 HAWKER TYPHOON
Posted: Mon May 06, 2019 1:36 pm
by digger303
hairypotter wrote: Sun Apr 21, 2019 1:33 pm
digger303 wrote: Sun Apr 21, 2019 1:10 pm
Mr Hairy Potter, I'm loving the build and have always wondered about this kit. It being a airfix and not having ever completed one of theirs. Hows the overall fit and engineering ? I can see you have used some putty in the seam lines. Is it all over or just in the odd spot ?
I shall continue to follow this build with glee.
The fit in general is honestly great,as always with most kits the wing roots and seems need attention.
I have noticed though that if one part is not properly cleaned of flash(there is quite a bit being Airfix) or if a part is not seated/lined up correctly it can lead to other parts later on not fitting right,hence a bit of filler around the intake area.
Steve.
Thanks Steve
Re: AIRFIX 1/24 HAWKER TYPHOON
Posted: Thu May 09, 2019 2:47 pm
by hairypotter
So here we go with the invasion stripes.
I roughly masked off area using the panel lines/rivets on kit rather than measuring the 95mm guide Airfix states in the paint guide.
Mr Hobby Aqueous H11 flat white was spayed in light layers but not fully covering the grey underside as i wanted to keep the weathered look.

Once dried it was time to mask off for the black.
I used 18mm Tamiya tape to mask off white area,it isn't 100% accurate and a couple of the lines are not straight but that is the look i was going for as looking at reference photos of invasion stripes they were applied with what ever the crew had with them at the time.
Tamiya XF-85 rubber black was spayed in the same way as i did the white.

While i had the black in the colour cup i sprayed the walk ways.

Lastly i sprayed Mr Hobby Aqueous H34 cream yellow neat for the identification lines on the leading edges of the wings.
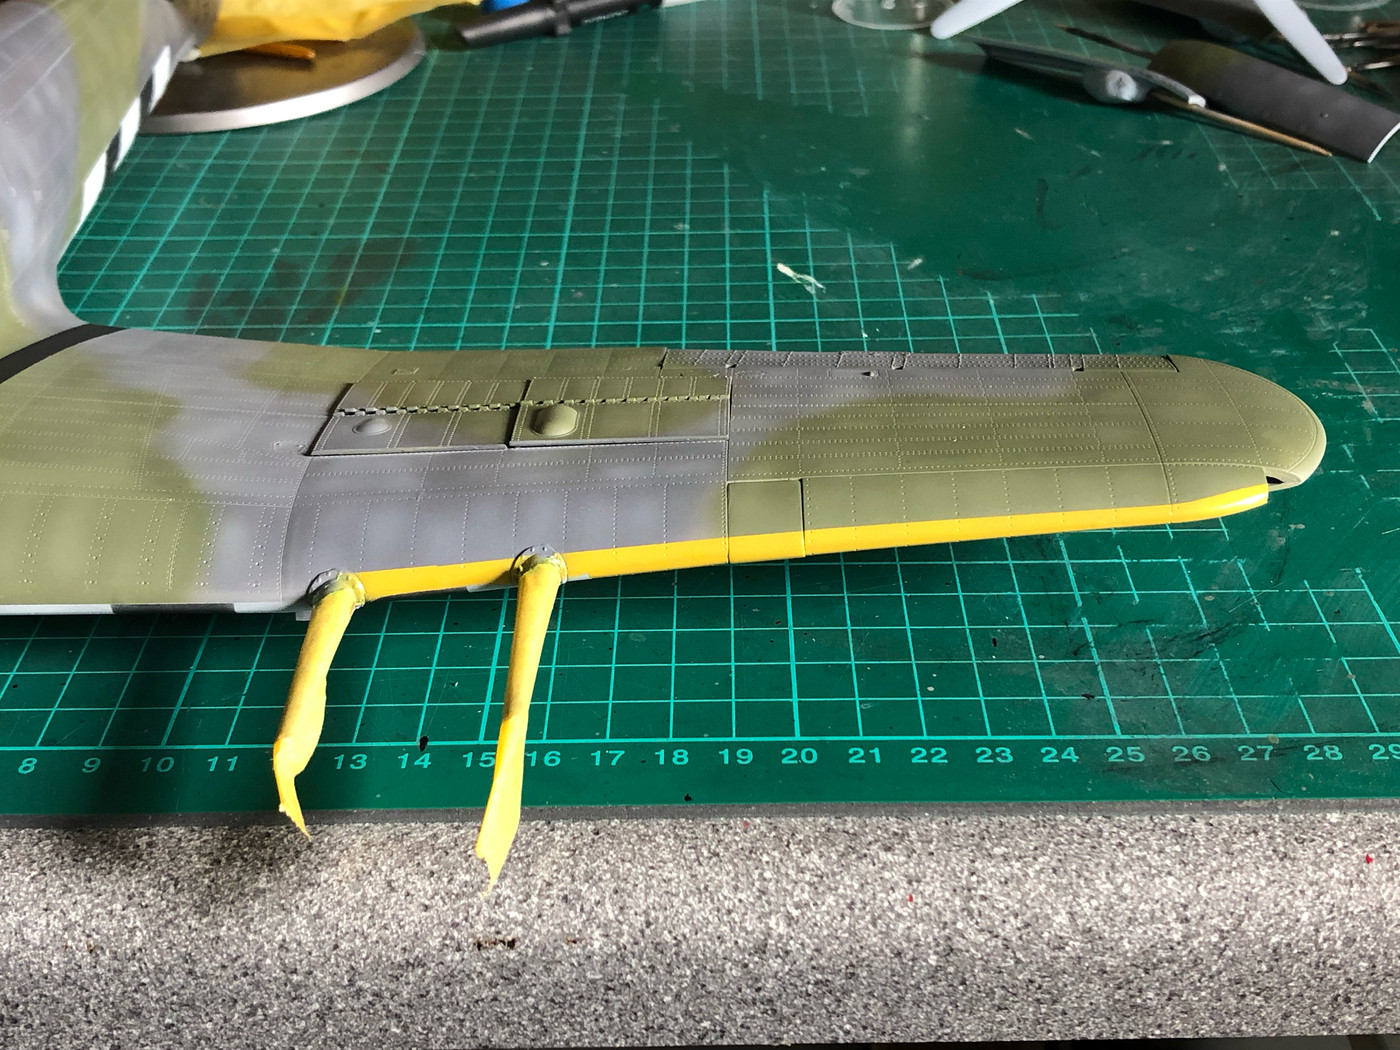

Now do i use the masks for the roundels and lettering or decals? decisions decisions.
Re: AIRFIX 1/24 HAWKER TYPHOON
Posted: Sun May 19, 2019 1:09 pm
by hairypotter
After much deliberation i decided to start to decal the big girl.
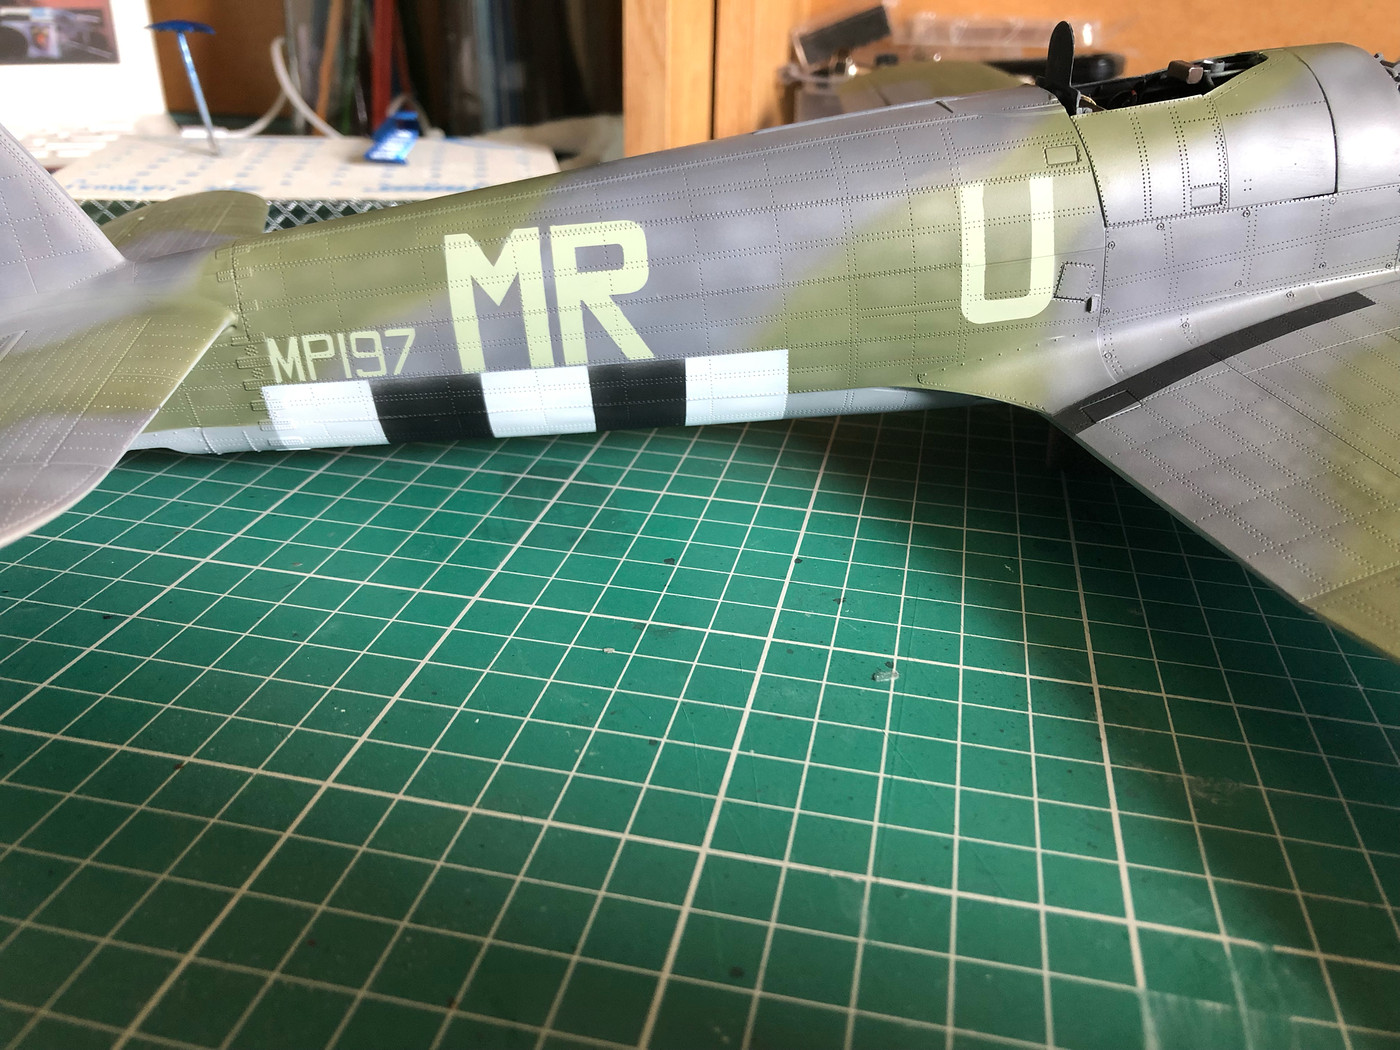
I started with the lettering first,got my trusted Micro Set and Sol ready,put a bit of Set on the plane then applied the decal in place only for it to split into pieces.
So out came the Montex Mask set,after about 2 hours of cursing and swearing we are now ready for painting the letters.


Tamiya XF-21 Sky mixed 50/50 with MLT was sprayed in very light coats so not to flow under the stensils.


The rest of the decals went down using water first.
Micro Sol had no effect on them what so ever,so i used Tamiya X20A in several light coats with great results.


As you have probably noticed i made a bit of a mistake with the roundels on the fuselage(they are too big).
I only realised this when it came to putting the ones on the upper wings.
Anyway onto getting the undercarriage painted and start weathering her.
Re: AIRFIX 1/24 HAWKER TYPHOON
Posted: Sun May 19, 2019 4:57 pm
by Kevthemodeller
All coming along very nicely, lovely cockpit detail