Build thread #2 - just in case the Colonial Viper gets more hiccups.
This is the Moebius kit #915 of the re-imagined Battlestar Galactica for the rebooted TV Series circa 2004. Personally I preferred the original series from the 1970's but the ships in the reboot definitely benefited from the advances in CGI at the time.
The series background
Battlestar Galactica (BS-75) was one of the Jupiter class Battlestars that formed the backbone of the Colonial feet in the war against the Cylons. Built in the early days of the first Cylon war she was a part of the 75th Battlestar Group. At the start of the rebooted TV series she was the last of the Jupiter class and was in orbit above her home planet, Caprica, being turned into a living museum. Then the Cylons launched a sneak attack devastating both the Colonial feet and the 12 colony worlds leaving only the Galactica and one other Battlestar - the much newer and bigger Mercury class Battlestar Pegasus.
The kit
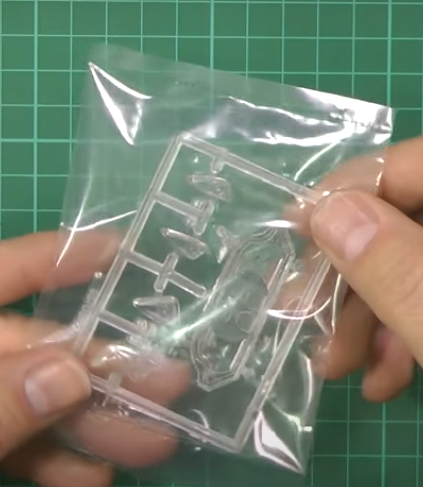
Moebius kit #915 is the re-imagined Battlestar Galactica from the 2004 series. There are two others in the range- the original Battlestar Galactica from the 1970's (kit #942) and the Pegasus from the 2004 series (kit #931). There are some 60 parts in the box plus decals. (This being me this is also the part where we find that the kit advertised as being unopened actually had been and the transparent parts and decals were missing. I have e-mailed Moebius to see if they had have spares. Decals I can get from another firm in higher quality but the transparent bits are crucial to the build.)
Unlike the original version and the Pegasus kits the flight decks on this one have decals for the landing bays that hang out from the side of the ship.
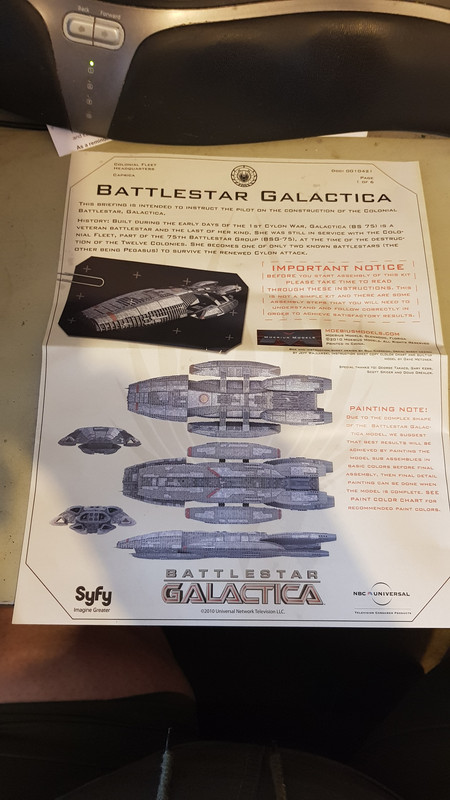
The 6 page instruction colour booklet contains both assembly instruction and colour photo's of the actual assemblies. Its not an overly complex build - I suspect most of the work will be in the painting. Again the instructions give colour call outs and advice - the colours are given in the Testors range. They also give hints on how to paint - the one shown in the instructions is finished in a steel colour but they suggest you can also use a gunship grey as the base coat and then highlight the panels with various shades of lighter grey. Finishing with a coat of matt clear coat if using acrylics. Both schemes they recommend a dark panel wash before applying the clear coat.
There are some photo-etch and resin detailing kits available for this version of the Galactica. I might look at some of them as the build progresses.
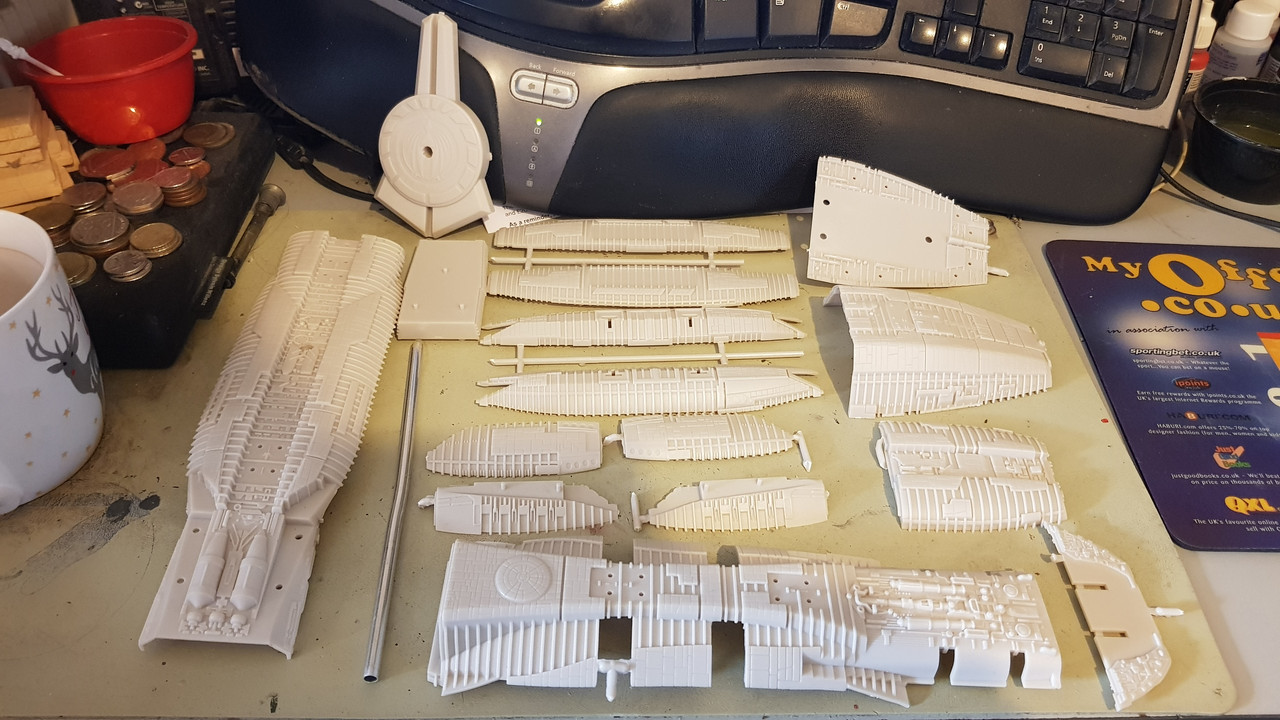
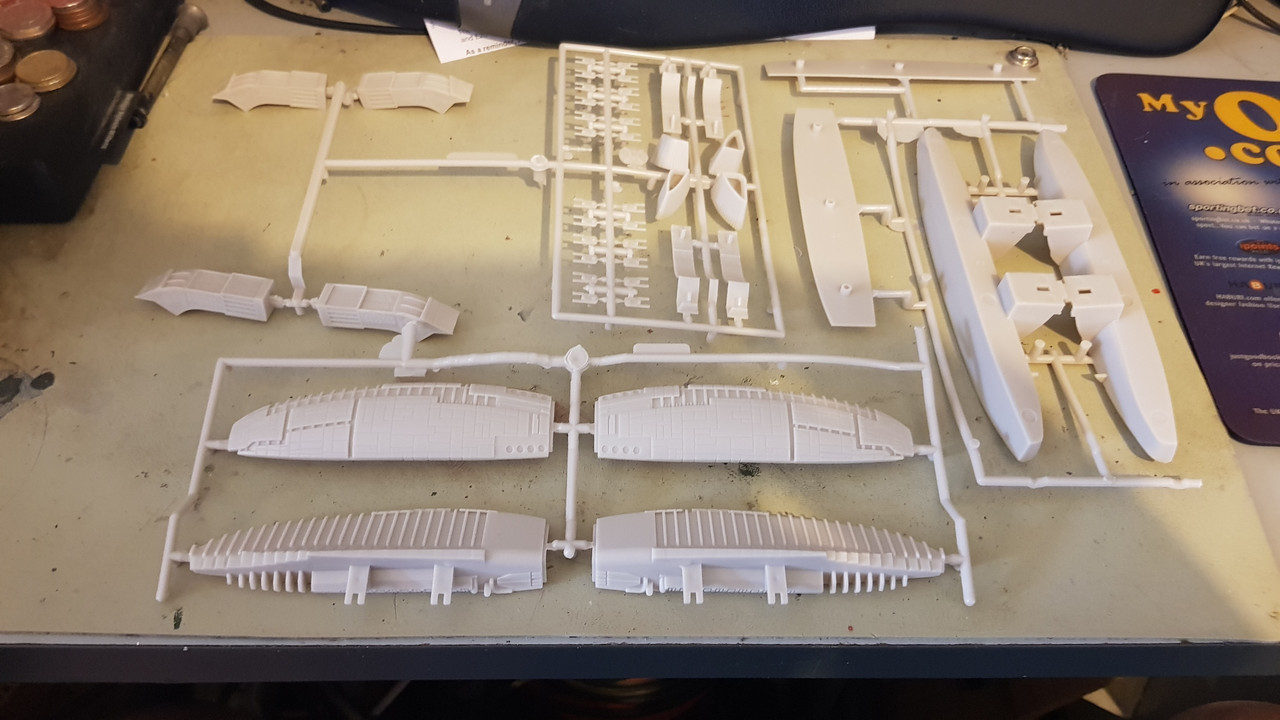
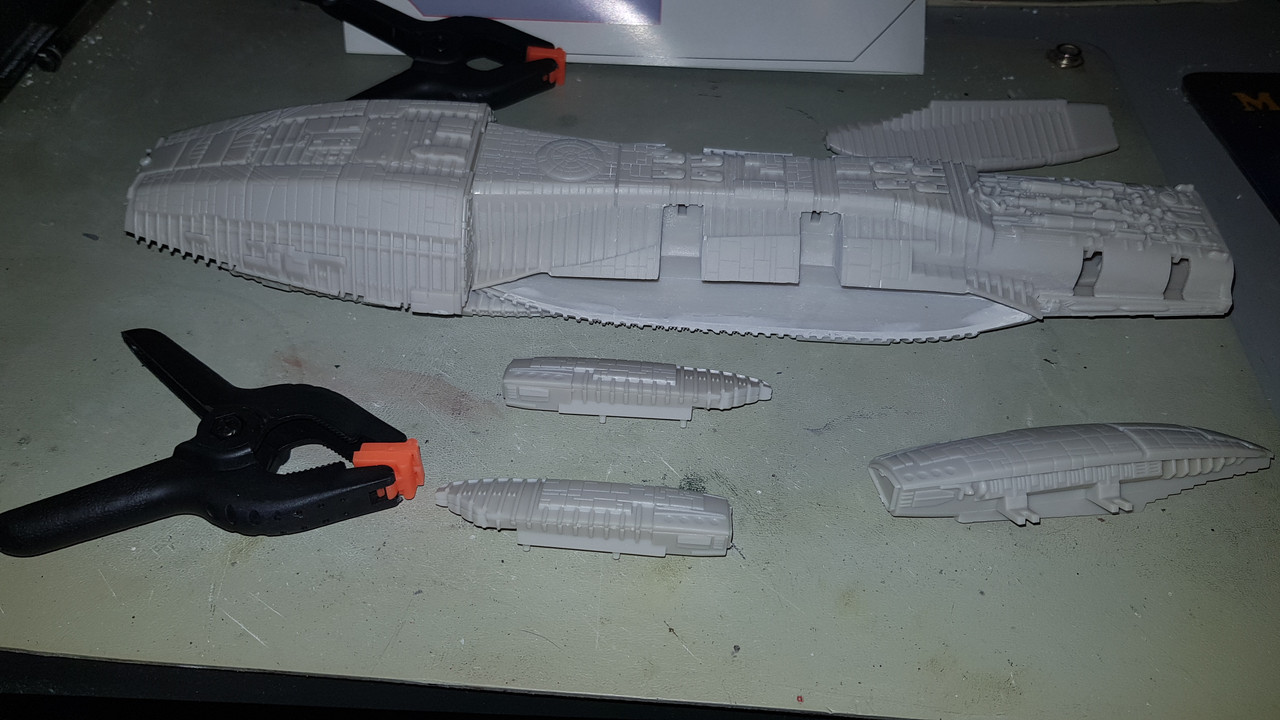
So - the unboxing. As you can see - all the major parts have actually been removed from the sprue bags and and sprues themselves... So much for the "unopened" part!! Luckily for me Moebius have had the part numbers moulded onto the inner surfaces of the parts rather than on the sprues proper so I can still get the right part in the right place :!
And the instruction booklet
(if you are interested - this is what the unboxing should have looked like:
Re: The "New" Battlestar Galactica
Posted: Tue Jun 30, 2020 10:32 pm
by RangerNeil
Step one of the build - assembling the main hull.
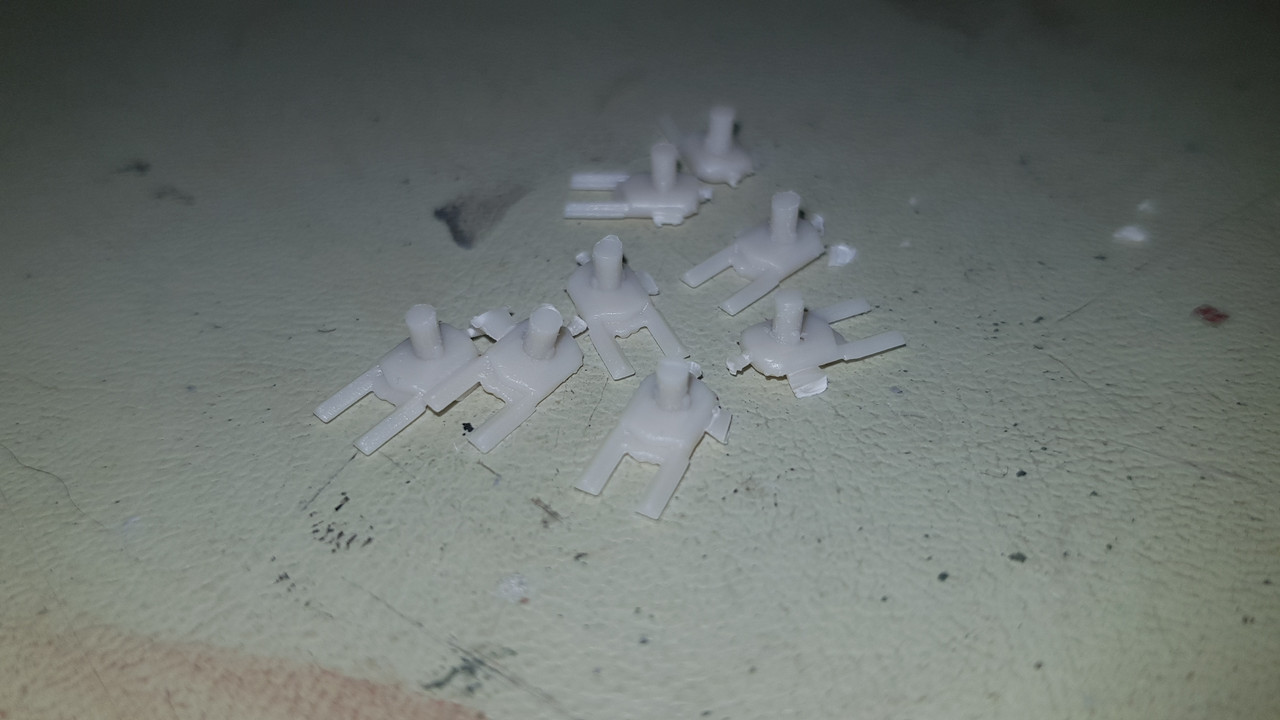
First observation is the plastic is - unusual. Very hard and almost brittle. Very tough to cut but when you start rubbing down the sprue nubs once you get past the hard outer surfaces the inside is very soft. I found cleaning up the rail gun turrets it only needed a couple of wipes with a sanding stick and the surface was smooth to the thumbnail!!
Overall thus far the fit is very good. There are some visible gaps - currently - where the inner hull pieces fit but I am not sure if they get blocked by the hanger outriggers. If they aren't then these gaps will be filled.
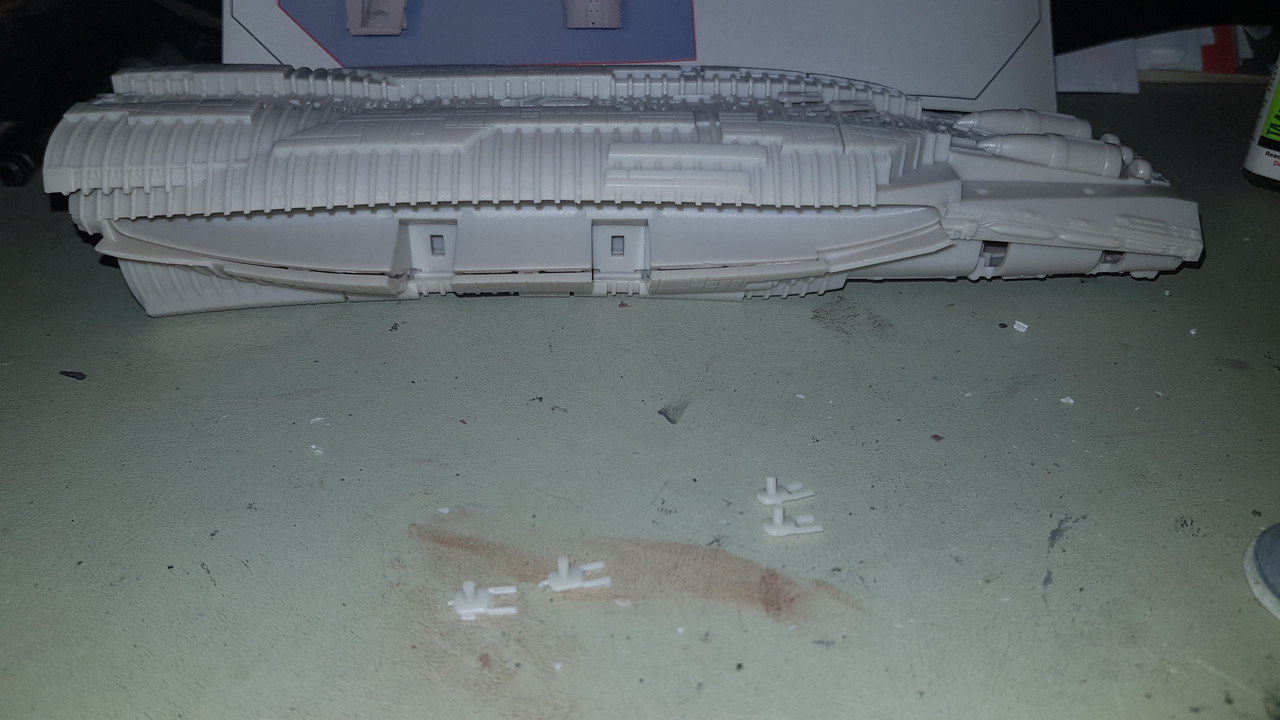
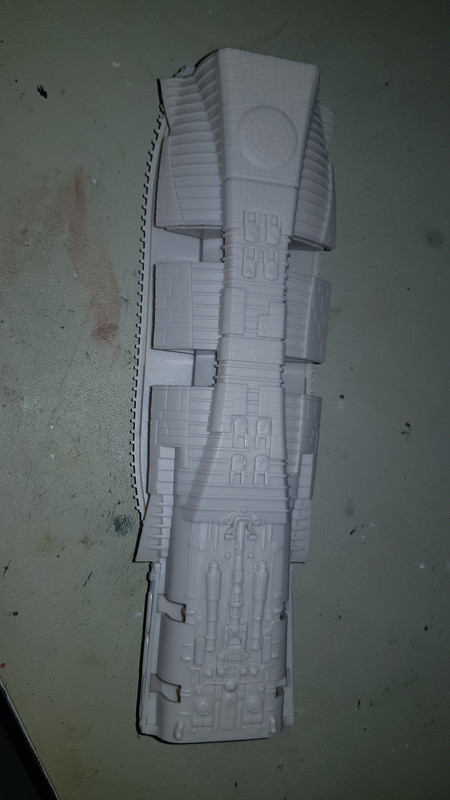
Main hull - upside down - with rail funs, 4 in place, 4 to be cleaned up and fitted.
8 rail guns for the upper hull.
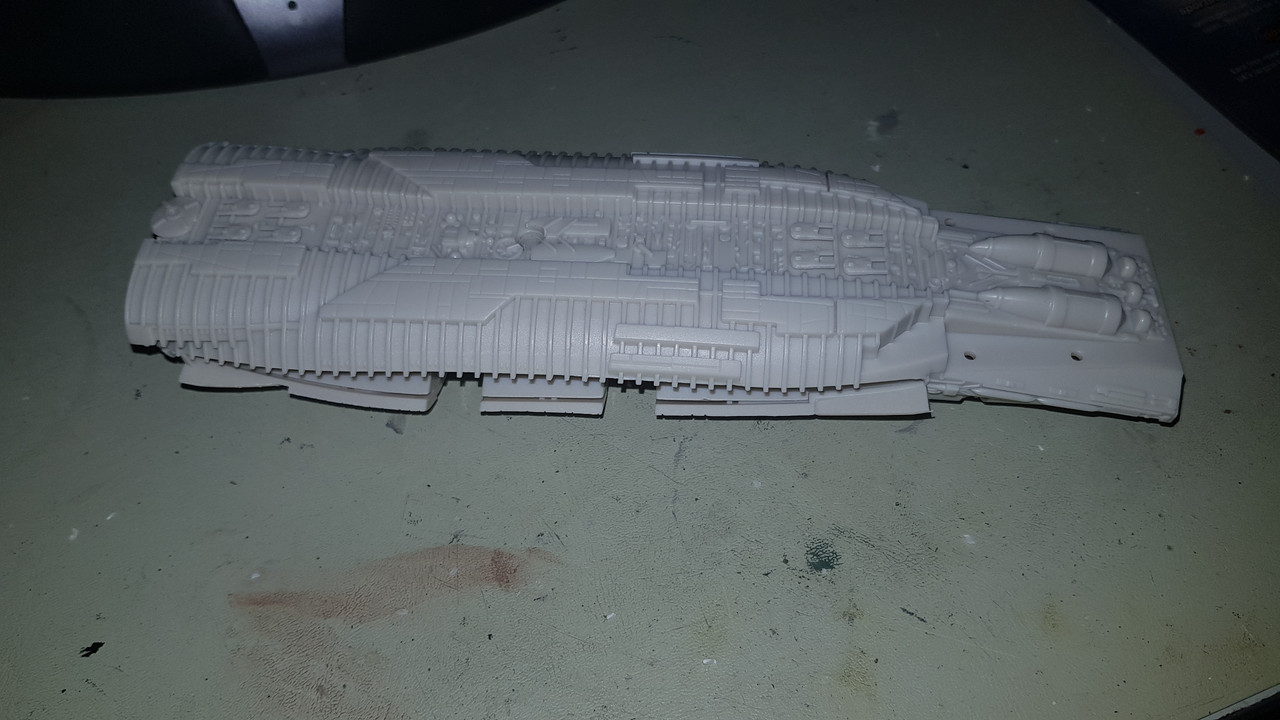
Upper hull complete.
Lower hull complete.
This is as far as I can go on this step as the rear end piece for the engines is on the missing transparency sprue.
Re: The "New" Battlestar Galactica
Posted: Wed Jul 01, 2020 10:17 pm
by RangerNeil
Step two - the complete hull and engine packs.
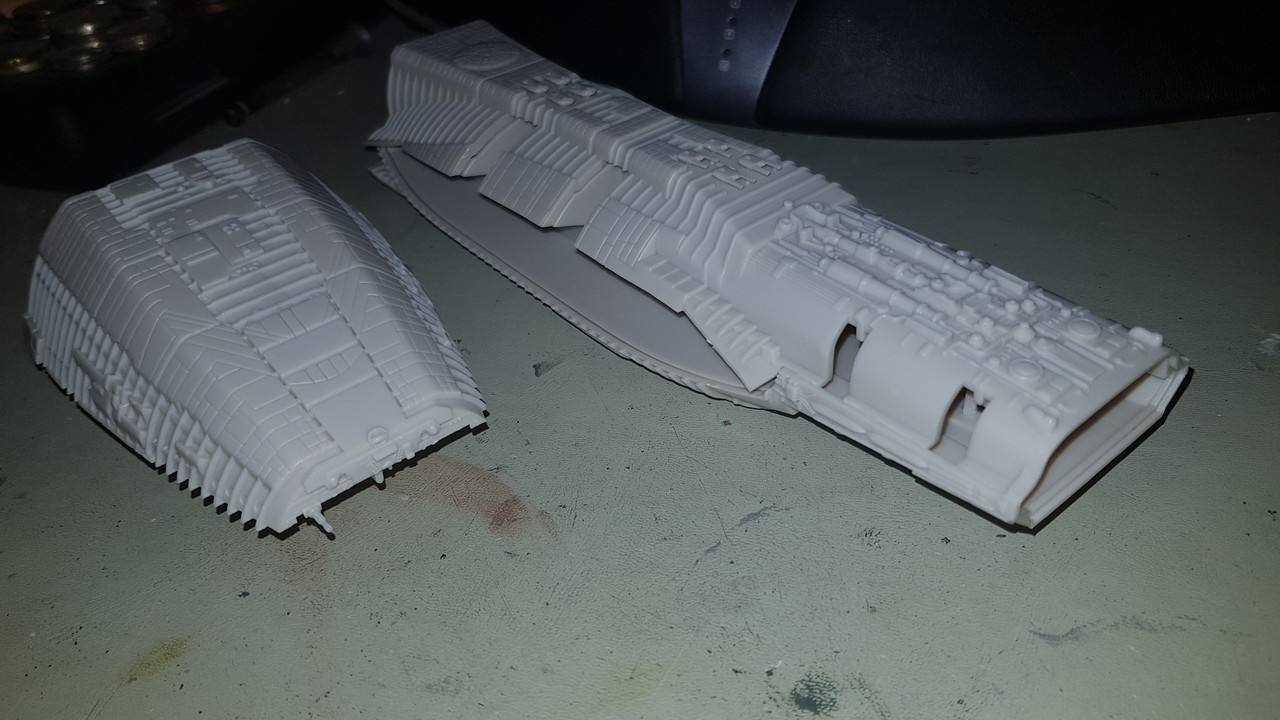
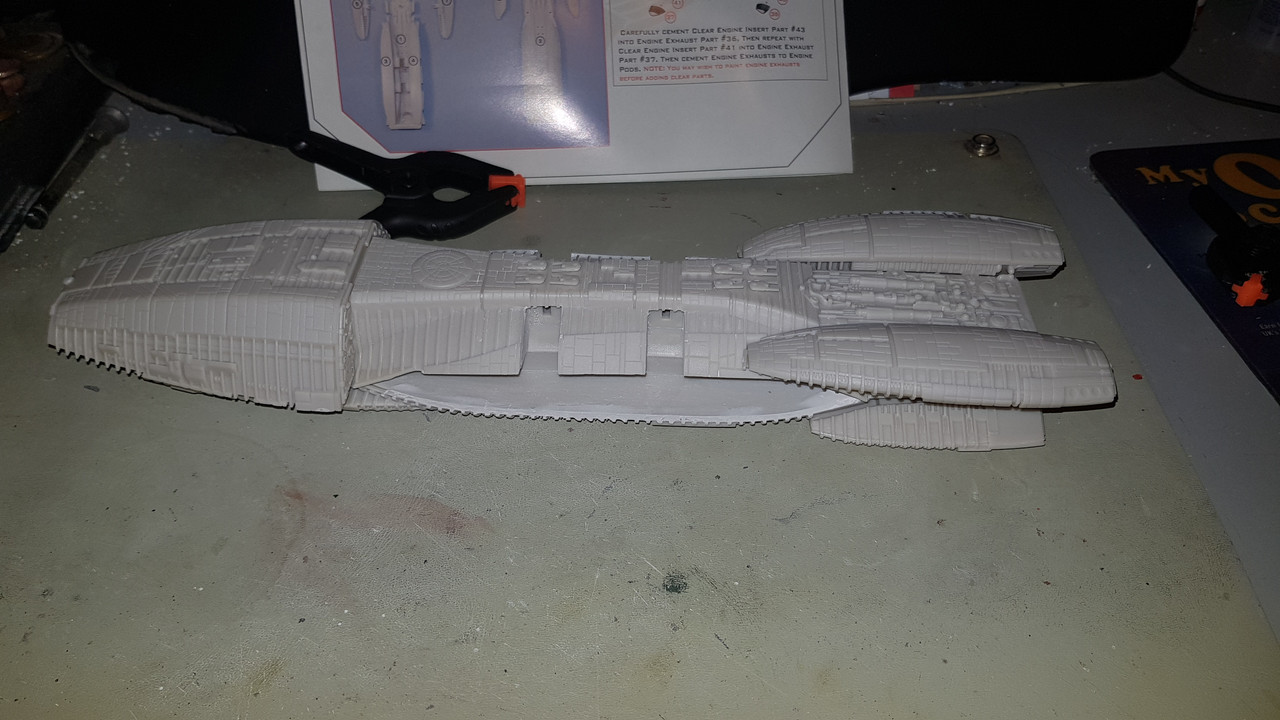
The nose section is assembled and added to the main body giving the Battlestar its insect-like appearance.
The four engine packs are completed and ready to be added. The kits instructions suggest painting both the main hull and these assemblies before adding them to the main hull. Next up will be the hanger decks - and there we run into the issue of the missing decals as this kit has decals for the landing decks inside the hangers that will be inaccessible once the upper and lower flight deck sections are joined...
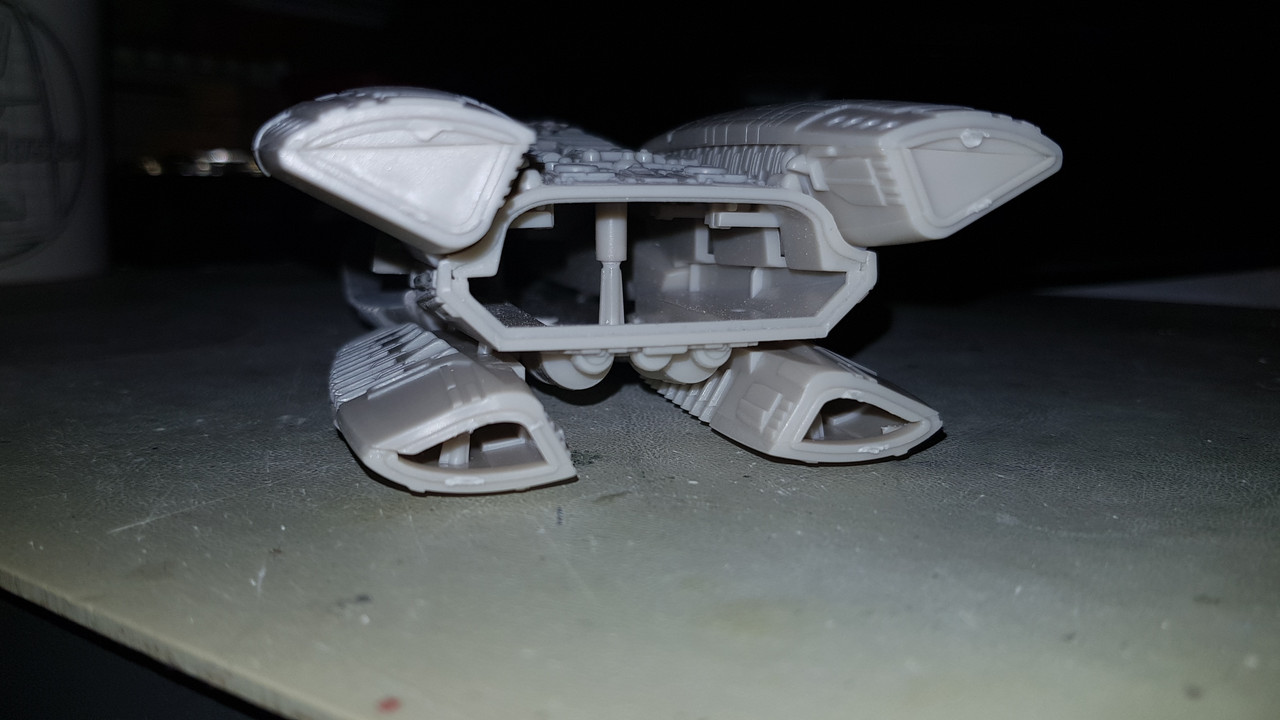
And this is the other sticking point - there should be 5 transparency pieces that go into these openings. Still waiting to hear from Moebius as to availability of the spares.
Re: The "New" Battlestar Galactica
Posted: Thu Jul 02, 2020 12:55 am
by digger303
Re: The "New" Battlestar Galactica
Posted: Fri Jul 03, 2020 12:00 am
by RangerNeil
Step 3 - the hanger decks.
The main hull is as complete as I can get it - likewise the 4 engine pods. The top of the hull and the pods have a coat of primer - and then I ran out!! So - new can of Tamiya surface primer on order from eModels together with some Tamiya paints as they were the best match to the recommended Testors.
This meant I got on with the hanger decks - which are also now as far as I can get as I need the primer AND the decals. Thus:
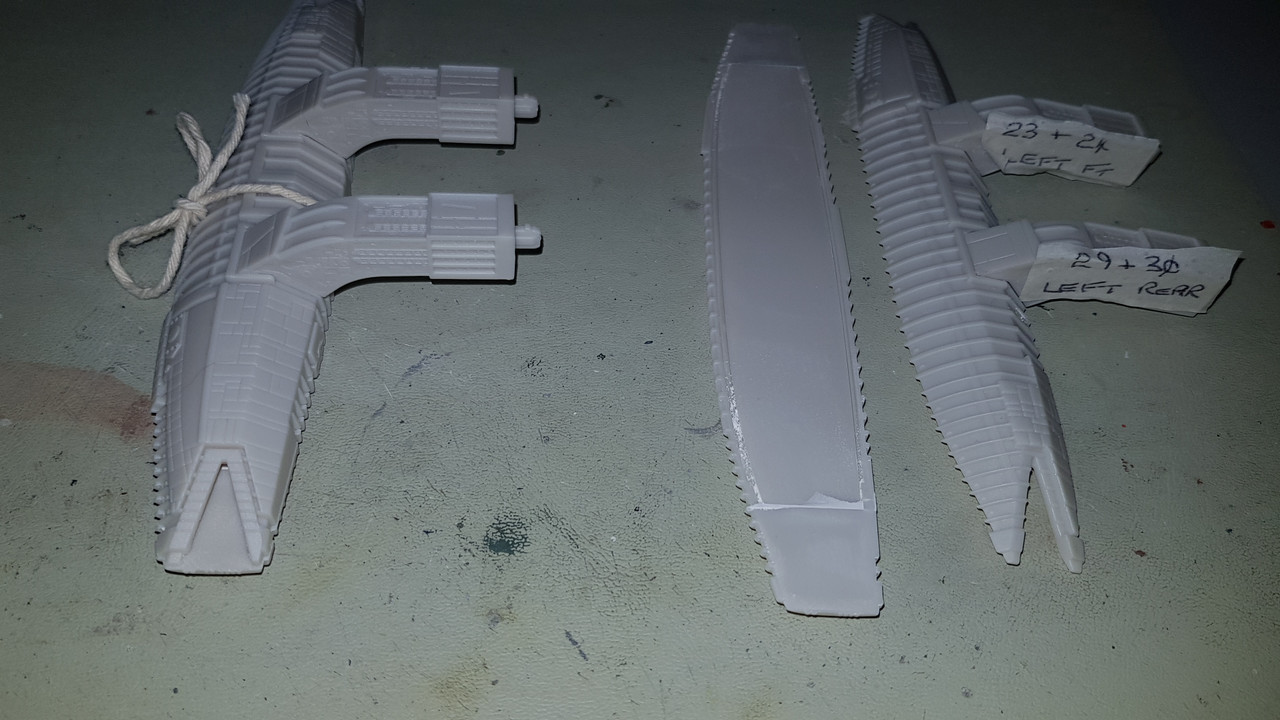
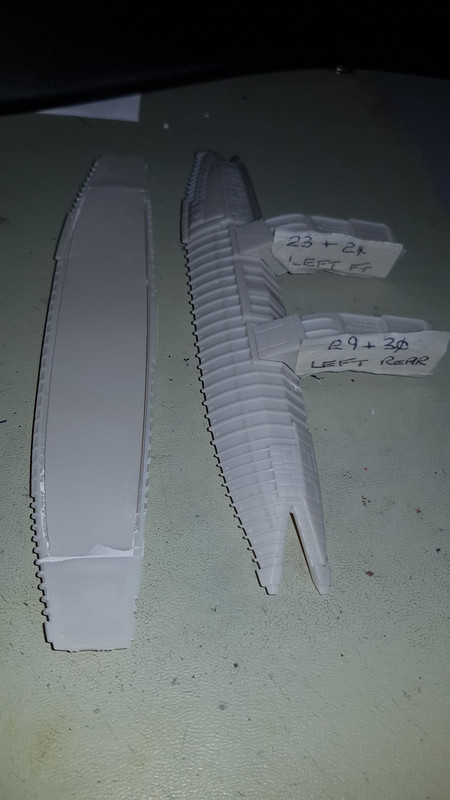
The one on the left is tied together with string so I do not mix the lower halve up. They cannot be joined until they are painted and the landing strip decals applied. The masking tape labels are because the support struts are both handed left and right as well as fore and aft so cannot be mixed up,
The righthand hanger deck split. The caps to either side of the flat lower half are the location grooves for the upper section.
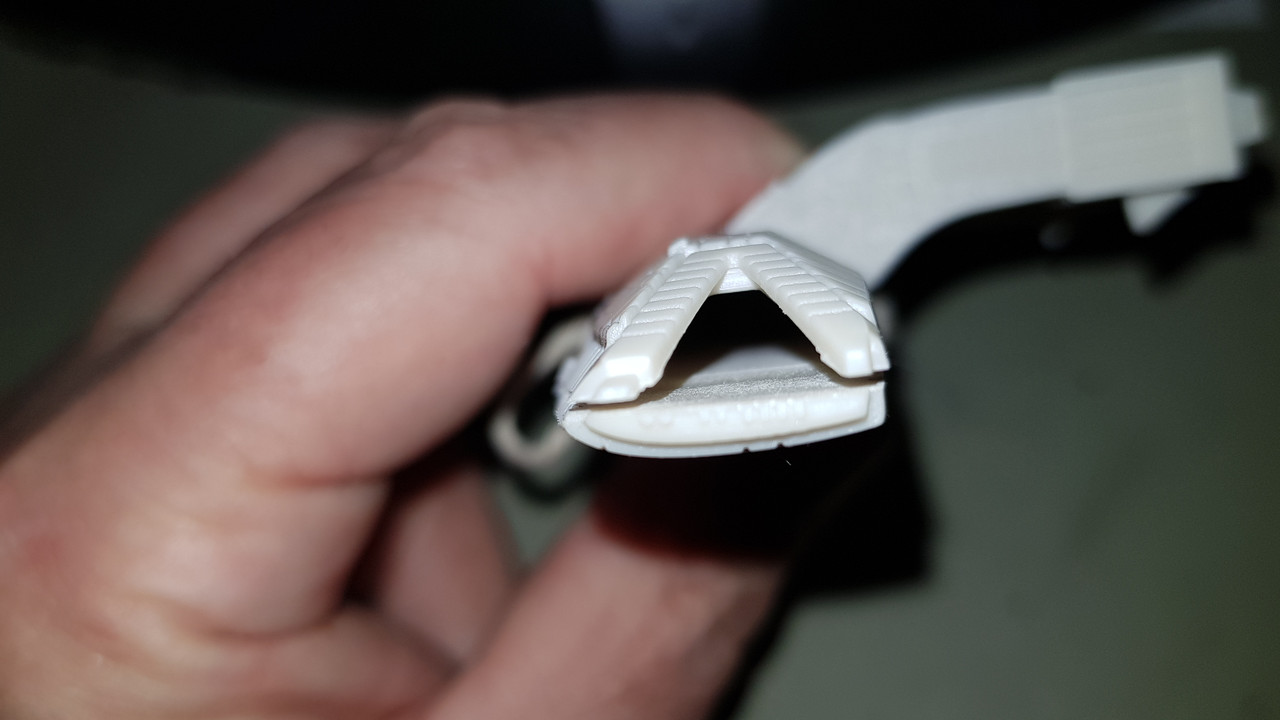
The view down a hanger deck - would have looked good illuminated I think!
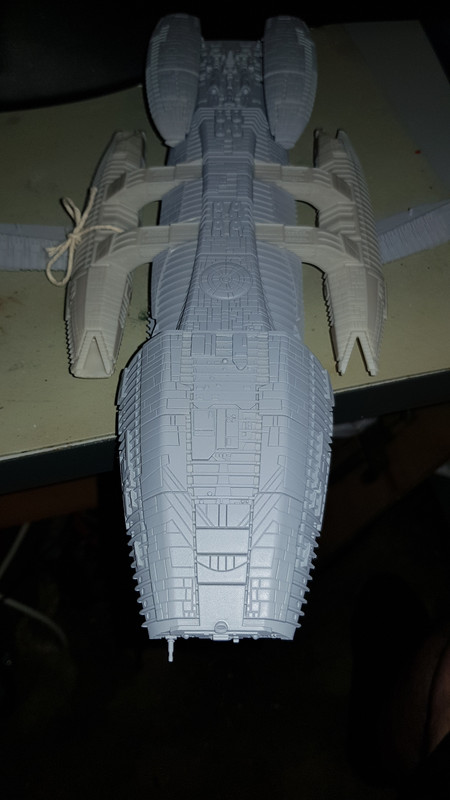
Hanger decks placed in position - paint is needed before they can be joined to the main body.
When the paint arrives in a couple of days and the decal set I can make a bit more process - priming the hanger decks inside and out and painting the inside then assembling the engine pods onto the main body together with the hanger decks but until I hear from Moebius about the replacement transparent part the stern cannot be done. I'm assuming that the US lock-down is still causing problems out there?
Push comes to shove I have some thick opaque plasticard I can trace around the outline of the stern and cut a blank to fit then dig up some photos from the series on the web and try to replicate that stern panel as best I can. The exhausts for the 4 engine pods I tried today and to be honest - unless back-lit you cannot see much through the apertures so these are far less of a problems
Re: The "New" Battlestar Galactica
Posted: Fri Jul 03, 2020 2:49 am
by aur0ra145
Nice progress so far!
Re: The "New" Battlestar Galactica
Posted: Fri Jul 03, 2020 6:12 am
by digger303
going well and a great subject, I watched every episode of BSG.
Re: The "New" Battlestar Galactica
Posted: Fri Jul 03, 2020 6:08 pm
by RangerNeil
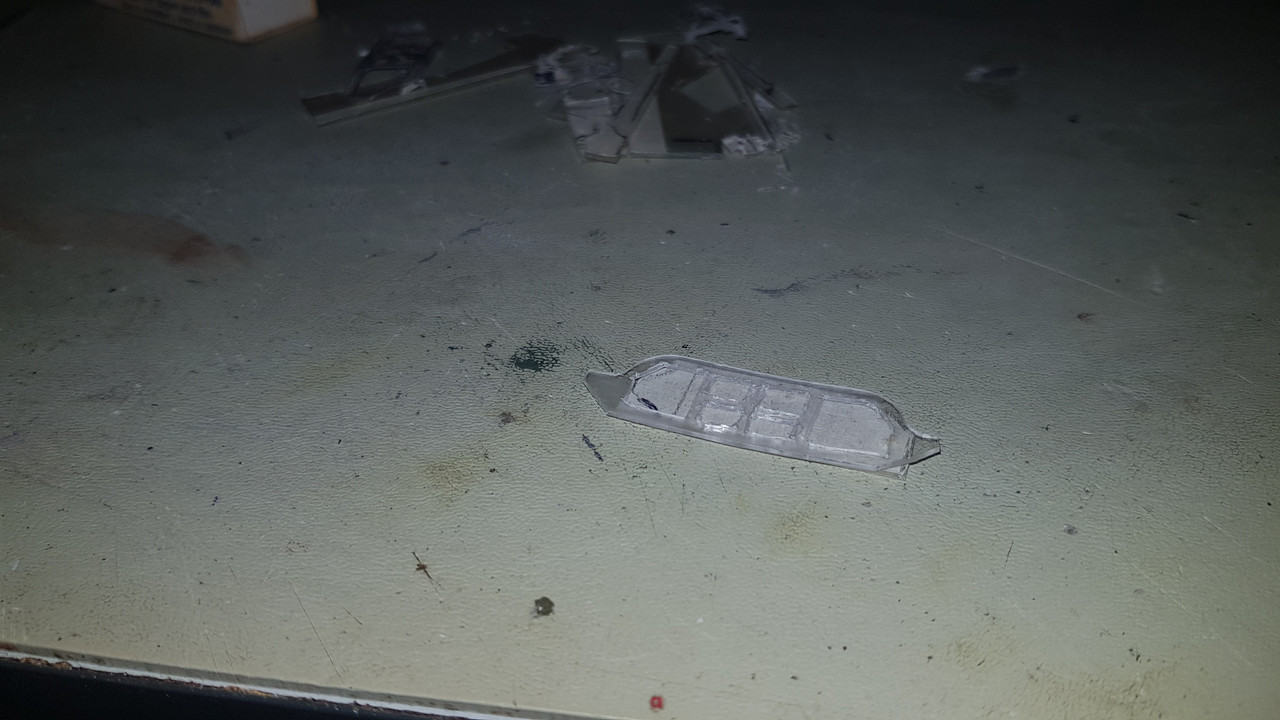
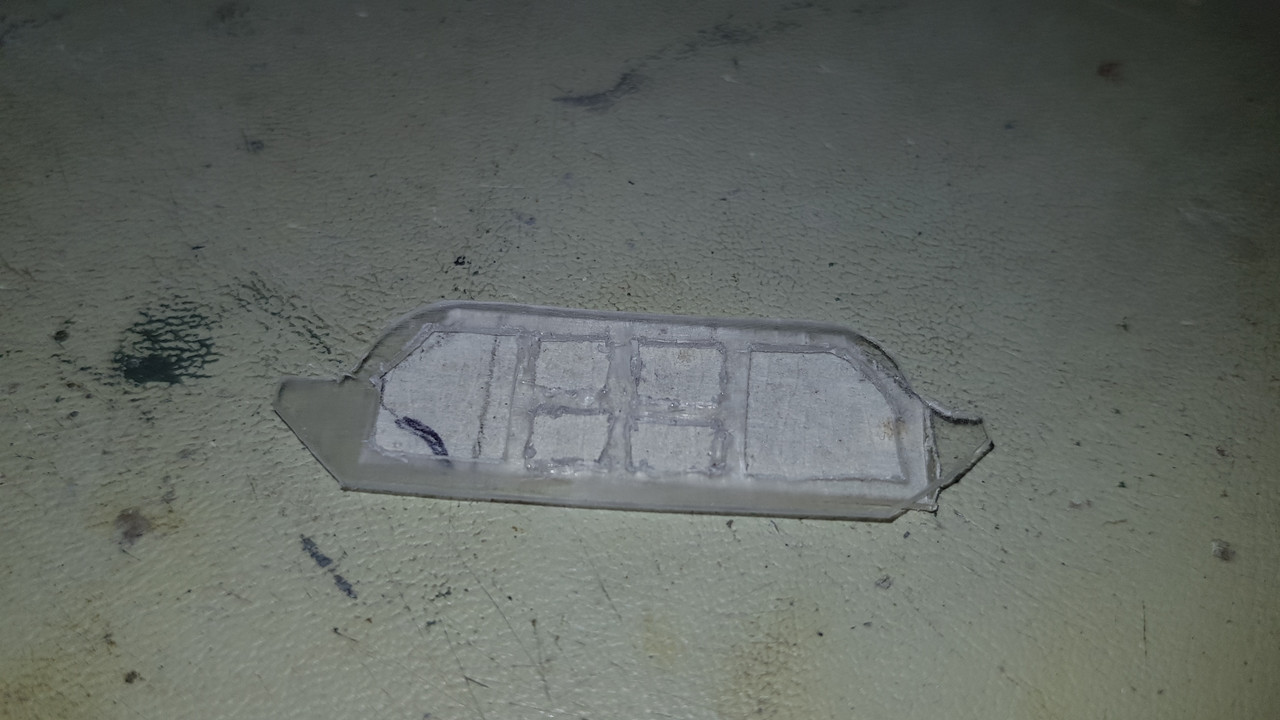
Had a bit of spare time today - the OH was in hospital being checked up for the tumour removal and Stoma operations so I thought I'd have a crack at fabricating a rear plate for the Galactica's hull. First thing to do was find out what the hell it should look like. I had a look though an unboxing video on YouTube and got a screen grab of the transparency - but that was not a lot of use...
So I hit the Google and looked for a stern view of the new series Galactica and found this:
Cue 4 or 5 hours work cutting and shaping the plate to fit the rear of the main hull. then marking out the apertures seen in that stern view which I think are the FTL engines. Got it cut out and took the tape off only to find the centre line was maybe 1mm off to one side.
Consolation is no one is likely to pay much attention once the dark grey hits it (although I will know so I might have another go if there is no word from Moebius). I also cut out the blanking plate to go behind the apertures and it fits quite well - little bit of finishing to do if I actually use it. It was an enjoyable - if frustrating - exercise though, recapturing lost skills.
Re: The "New" Battlestar Galactica
Posted: Sat Jul 04, 2020 10:05 pm
by RangerNeil
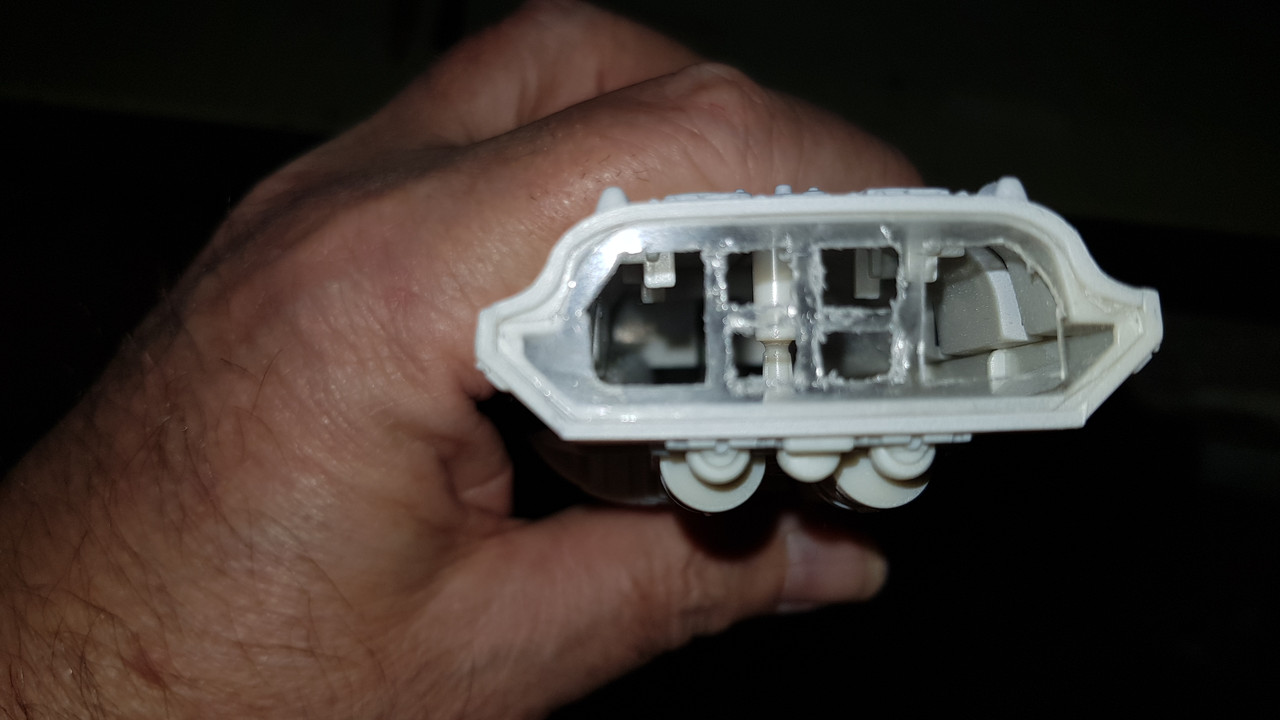
Heard back from Customer Service at Moebius tonight - they have a decal set they are posting to me but not transparent sprue spares. So I will be going ahead to with the one I made. Tomorrow I might have a go at making another one that's got the ports centralised instead of off to one side by about a millimetre.
Re: The "New" Battlestar Galactica
Posted: Sun Jul 05, 2020 12:21 am
by digger303
Very frustrating to spend so much time on a single part then have to redo. It is noticeable as you well know. Is that a honey comb pattern with the ftl. Actually that part is one that a 3 d printer could do pretty well.
Re: The "New" Battlestar Galactica
Posted: Sun Jul 05, 2020 12:53 am
by RangerNeil
digger303 wrote: Sun Jul 05, 2020 12:21 am
Very frustrating to spend so much time on a single part then have to redo. It is noticeable as you well know. Is that a honey comb pattern with the ftl. Actually that part is one that a 3 d printer could do pretty well.
The pattern on the screen shot seems to to be a large port either side on the outside with 4 equally shaped (square-ish) grouped centrally between them. On my first attempt those 4 look offset to the left by a mill8metre or less.
And yes a3D printer would be perfect - but if I even mentioned it the wife would by-pass the divorce lawyers and rolling pin going straight for the kitchen knives!!!
Re: The "New" Battlestar Galactica
Posted: Mon Jul 06, 2020 5:53 pm
by RangerNeil
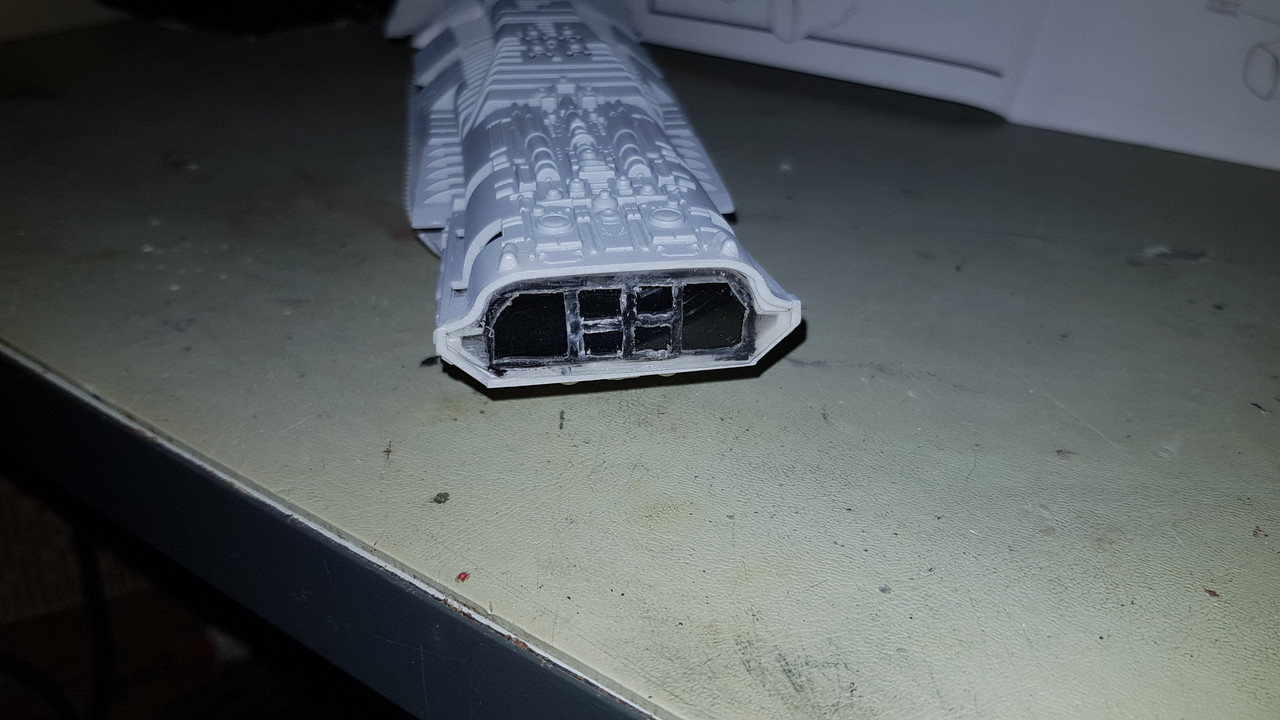
So - drew up another unit then on a whim laid the existing one over it and all the holes lined up.... Seems to be an optical delusion at work... I went ahead and fitted the plate I'd made - doesn't look so bad I think.
Got a little bit of filing to do and then its ready for the new primer that's supposed to be arriving from eModels via UPS "before the end of day".
digger303 wrote: Sun Jul 05, 2020 12:21 am
Very frustrating to spend so much time on a single part then have to redo. It is noticeable as you well know. Is that a honey comb pattern with the ftl. Actually that part is one that a 3 d printer could do pretty well.
The pattern on the screen shot seems to to be a large port either side on the outside with 4 equally shaped (square-ish) grouped centrally between them. On my first attempt those 4 look offset to the left by a mill8metre or less.
And yes a3D printer would be perfect - but if I even mentioned it the wife would by-pass the divorce lawyers and rolling pin going straight for the kitchen knives!!!
If you hear the sharp click of a hammer being pulled back ...duck and weave and head for the door
From a episode of "2 and 1/2 men"..
Re: The "New" Battlestar Galactica
Posted: Wed Jul 08, 2020 10:30 pm
by RangerNeil
Progress!!!
The main hull is painted, lower engines attached and the hanger outriggers completed and painted. I still need to fix the upper engines and hanger decks into place but first - embarrassingly - I need to get a pot of Tamiya's gunship Grey. I sprayed the hull with the AS27 version but having spent hours painting in section I found a couple of patches where the spray didn't reach so they need to be brushed in before the remaining components can be attached.
I also need to find a way of doing the lettering on the base neatly - I tried by brush, it looked awful. Tried using a biro type pen - looks awful so next thing is to paint over the letters in gold - again - and maybe try a fine point fibre pen.
Nearly done though.
Re: The "New" Battlestar Galactica
Posted: Thu Jul 09, 2020 11:04 pm
by RangerNeil
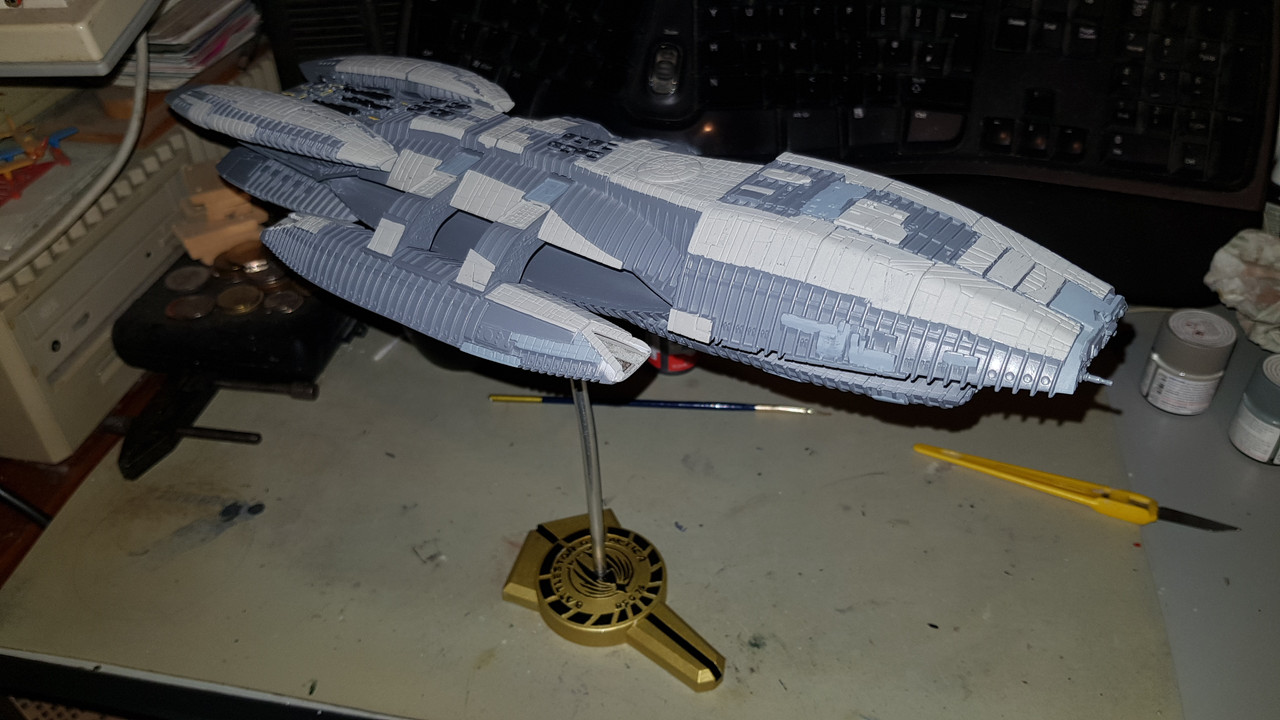
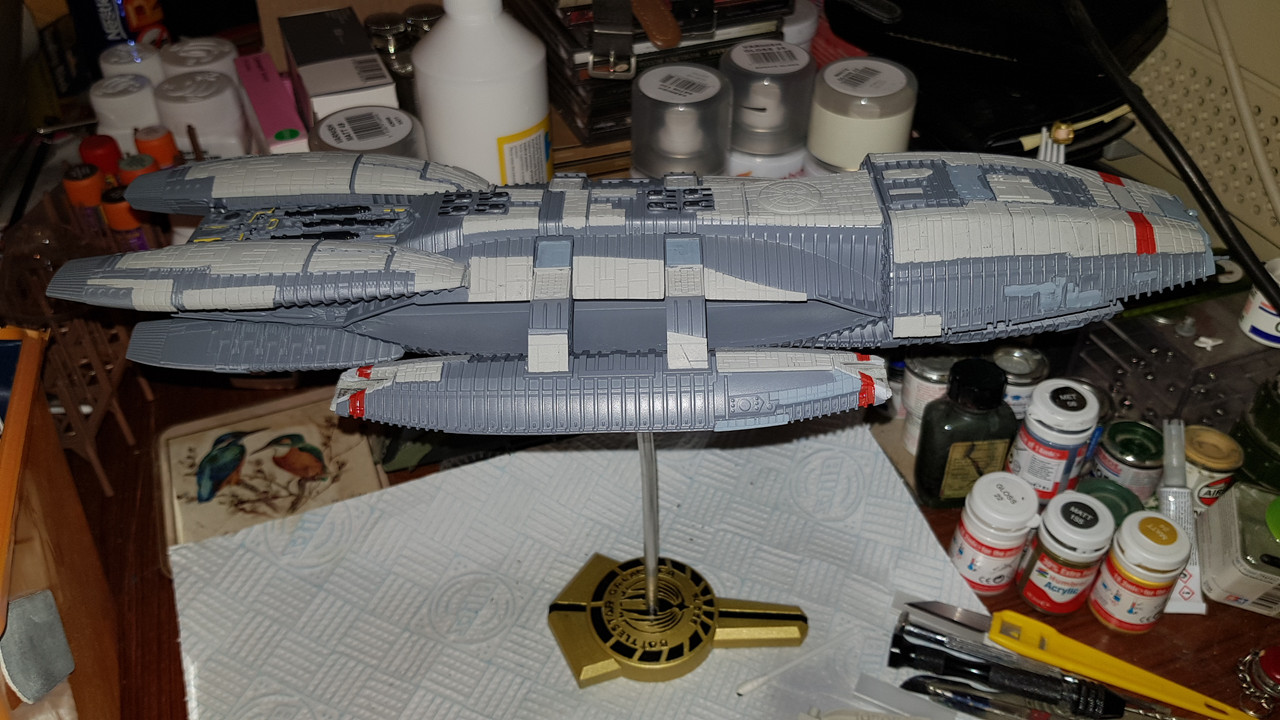
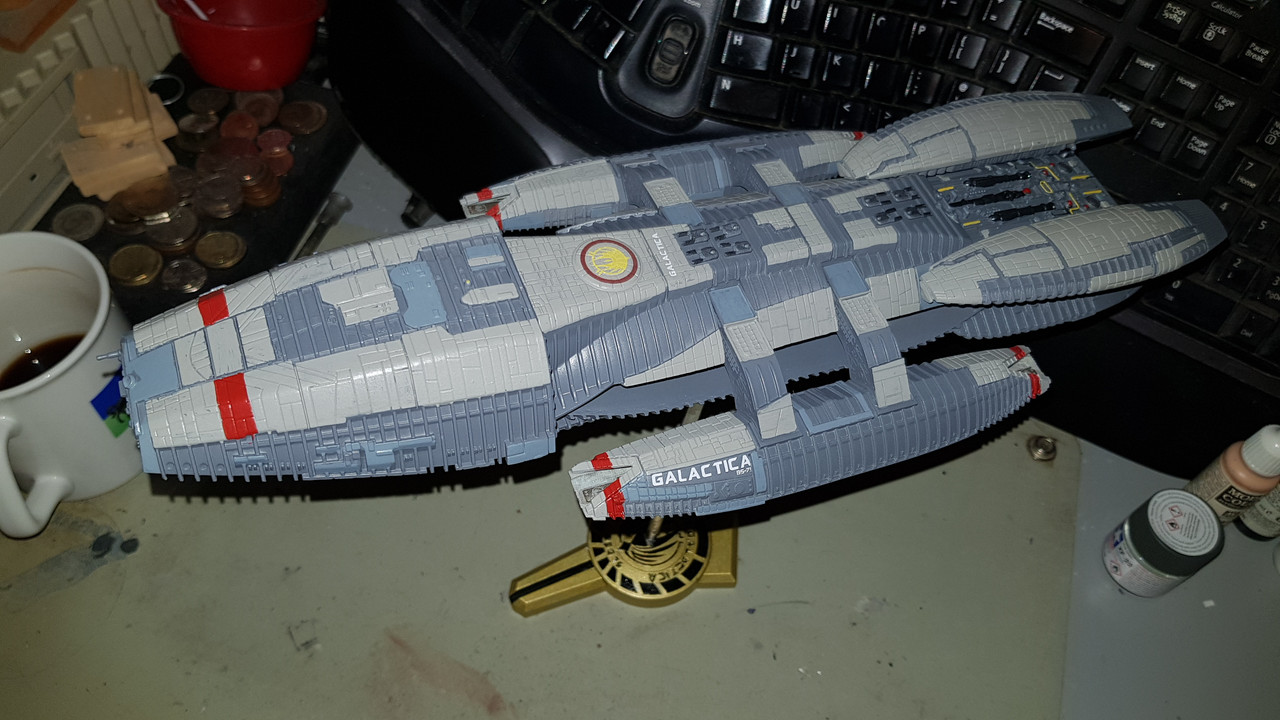
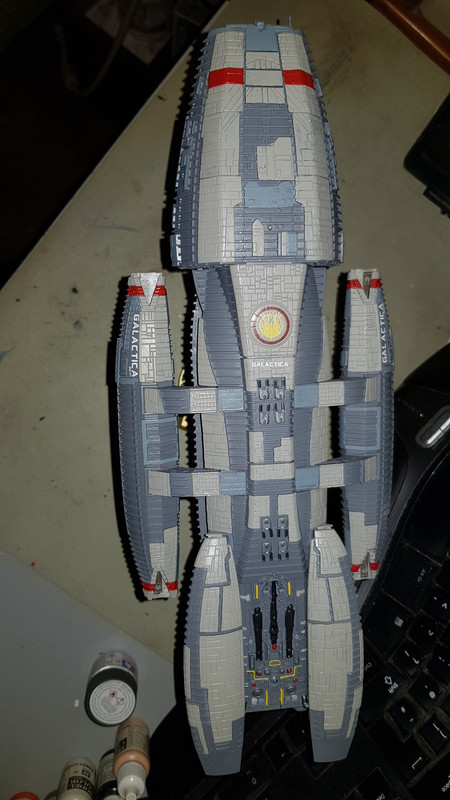
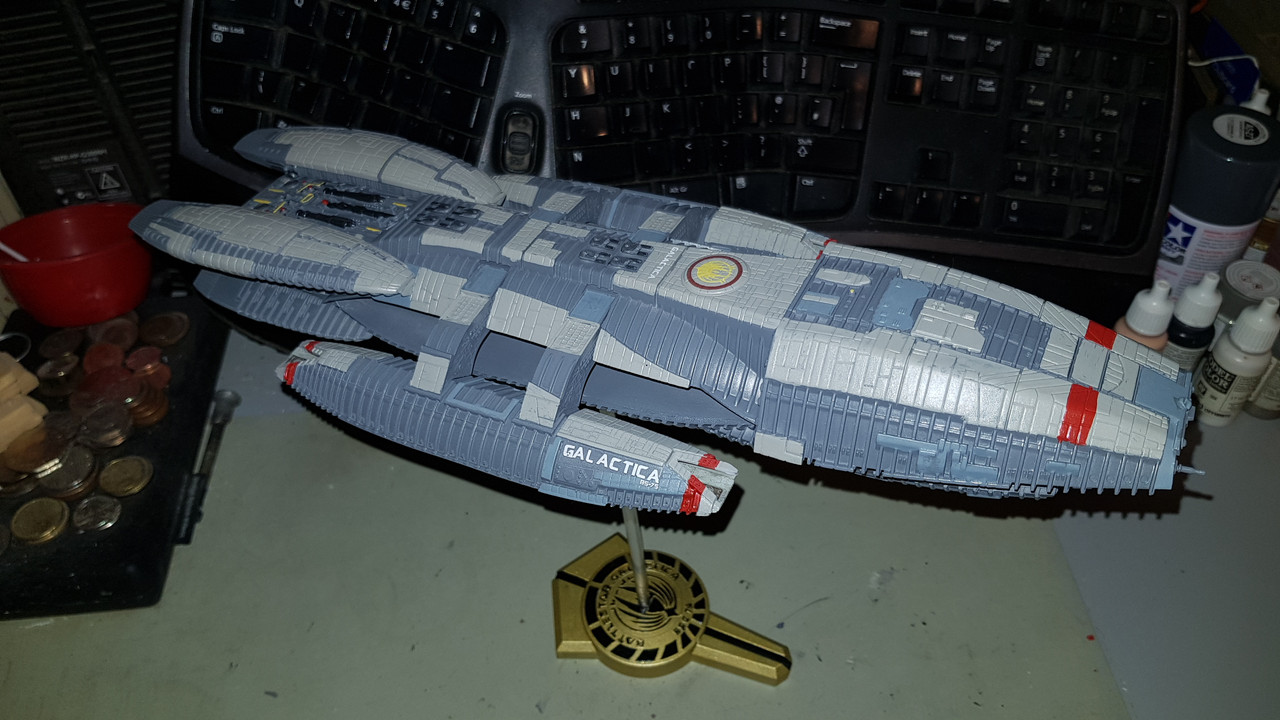
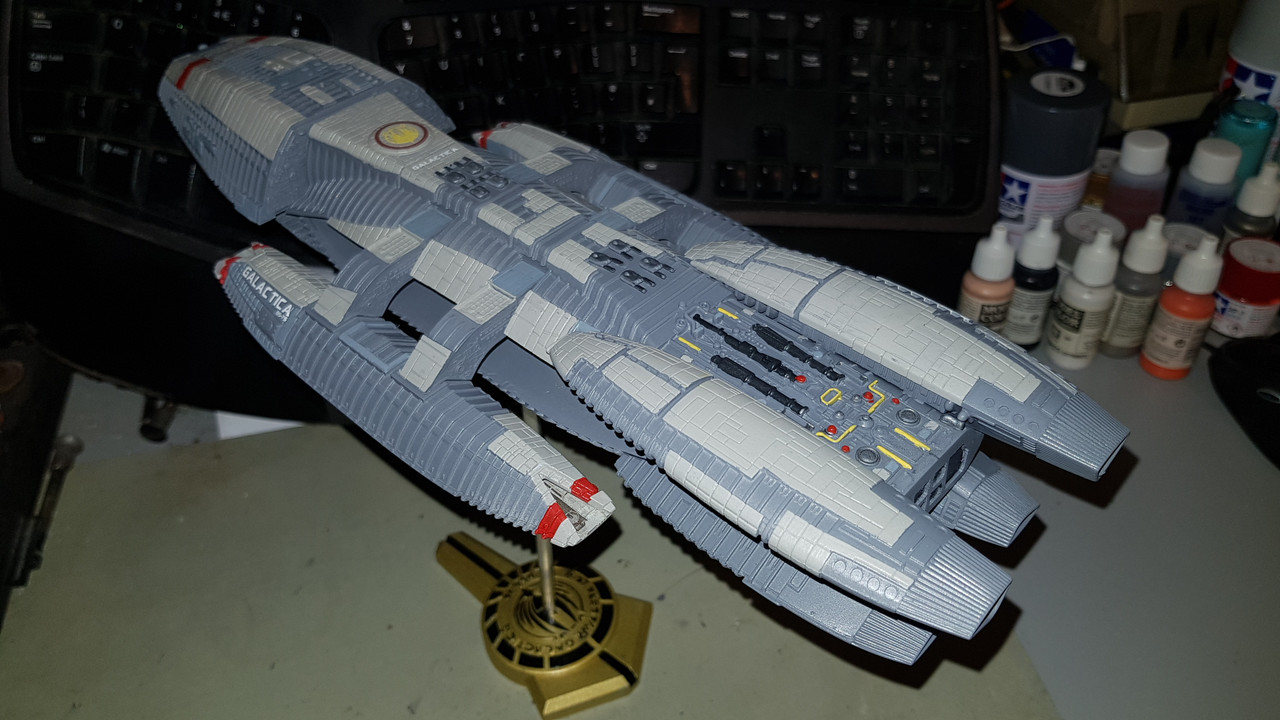
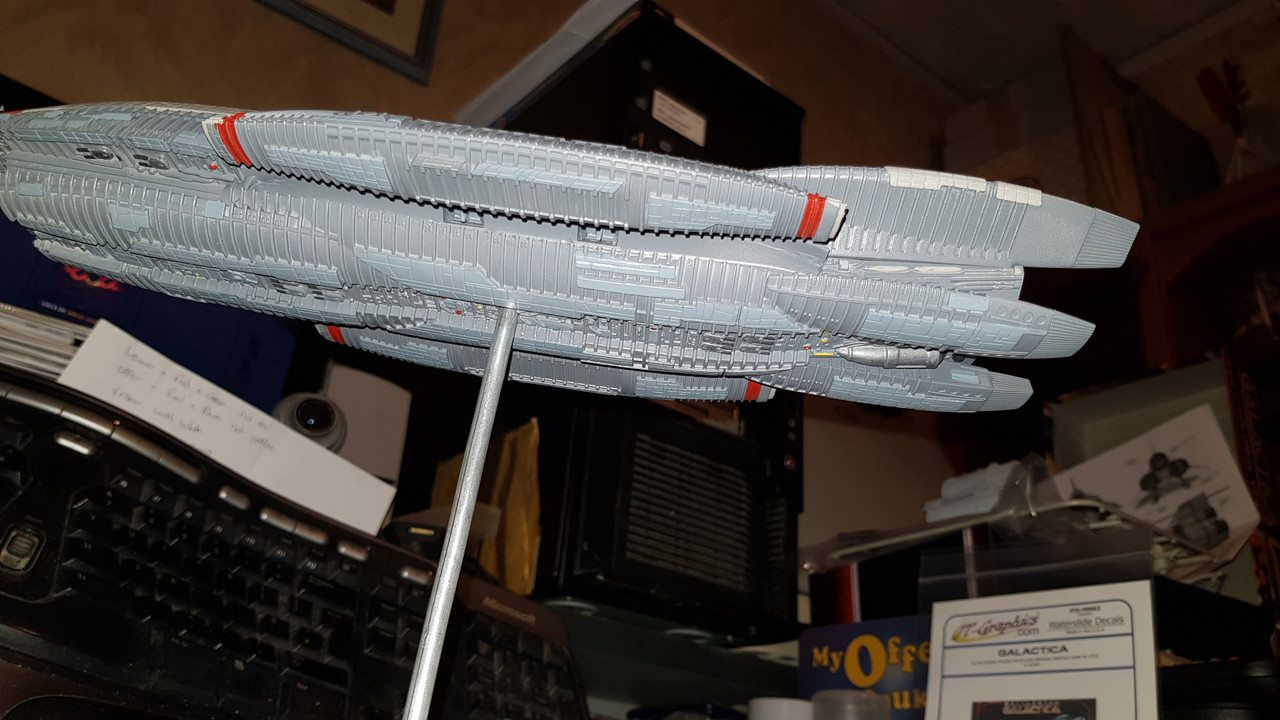
Spent the day finalising the painting of the new Galactica today. Got the decals on and the whole ship has been sprayed with a coat of satin finish.
Tempted to call it done - but I am thinking that a panel wash would really set it off - never done that before so I am open to any suggestions as to - for a beginner - what is best to use and how???
Here's the photos thus far:
Re: The "New" Battlestar Galactica
Posted: Fri Jul 10, 2020 12:12 am
by BigWall
It's looking great! Much lighter than I imagined it would be when you started building.
Doing panel lines is really pretty easy. You can use pre made washes like those from Tamiya etc. I've found that I like using oil paints for washes better than enamels. I think it's easier to clean up any areas where you don't want wash. Just mix whatever you use to a consistency that flows easily and leaves the amount of paint you want left behind. It's easier to add another wash to darken it than it is to clean up too much paint. My rule is that any lines for something that could open get black or dark brown washes and all other lines get a wash that is slightly darker than the base paint color.
Re: The "New" Battlestar Galactica
Posted: Fri Jul 10, 2020 1:36 am
by digger303
yes beautiful work and yes the next level would be to give it a wash of some kind. Not sure what that would be on a space ship, but I'm sure someone who has done it could help very soon.
Re: The "New" Battlestar Galactica
Posted: Sat Jul 11, 2020 2:09 am
by BigWall
I guess I just assumed you meant panel lines. If you meant applying filters over the panels, it's fairly straight forward as well. Check out IPMS Toronto Barbakan on youTube. They did some demonstrations on their Millennium Falcon build as well as on some armor models.
Re: The "New" Battlestar Galactica
Posted: Sat Jul 11, 2020 2:23 pm
by RangerNeil
Pretty much yeah - just wanted to bring the lines out in the light- and mid grey sections. The dark grey is, I think, too smooth.
Ordered a bottle of Vallejo panel wash - we'll see how it goes on one of the Kamov's..