Page 1 of 1
Build #1 - Armstrong-Whitworth Whitley
Posted: Thu Jan 26, 2023 6:15 pm
by RangerNeil
As there was a tie in the "what to build" poll this is the first of the two. The Airfix 1/72 A/W Whitley.
First - the type history:
The Armstrong Whitworth type A.W.38 Whitley was a British medium bomber aircraft of the 1930s. It was one of three twin-engined, front line medium bomber types that were in service with the Royal Air Force (RAF) at the outbreak of the Second World War.
Alongside the Vickers Wellington and the Handley Page Hampden, the Whitley was developed during the mid-1930s according to Air Ministry Specification B.3/34, which it was subsequently selected to meet. In 1937, the Whitley formally entered into RAF squadron service; it was the first of the three medium bombers to be introduced.
Designed by John Lloyd, the Type 38 first flew on the 17th March 1936, entered squadron service in 1937 and remained in service until the end of the war in 1945. Until it was replaced by the 4 engined "heavies" in 1942 the Whitley was one of the RAF's primary bombers together with the Hampden and Wellington. As well as Bomber Command the Whitley served with Coastal Command as well as trainer, glider tug and transport roles.
A total of 1,814 Whitleys were buit ranging from the Mk1 to the Mk VII. Carrying a crew of 5 and a bomb load of up to 7,000 Kg (the biggest bomb that could be carried was 2,000 Kg) in a central bomb bay plus wing cells. Top speed was 230 mph at a height of 16,400 feet, max ceiling was 26,000 feet. Powered by 2 x RR Merlins all version except the Mk VII were capable of maintaining height on one engine. The MK VII was only used by Coastal Command and carried a 6th crewman plus ASV radar.
No intact examples of the Whitely survive to this day. The Midland Air Museum in the UK has a dispay created from fragments of many aircraft.
The kit:
This is the Airfix 1/72 scale 2015 release of the Whitley Mk V.

Inside the box all the sprues are in one bag with the transparencies inside their own bag.
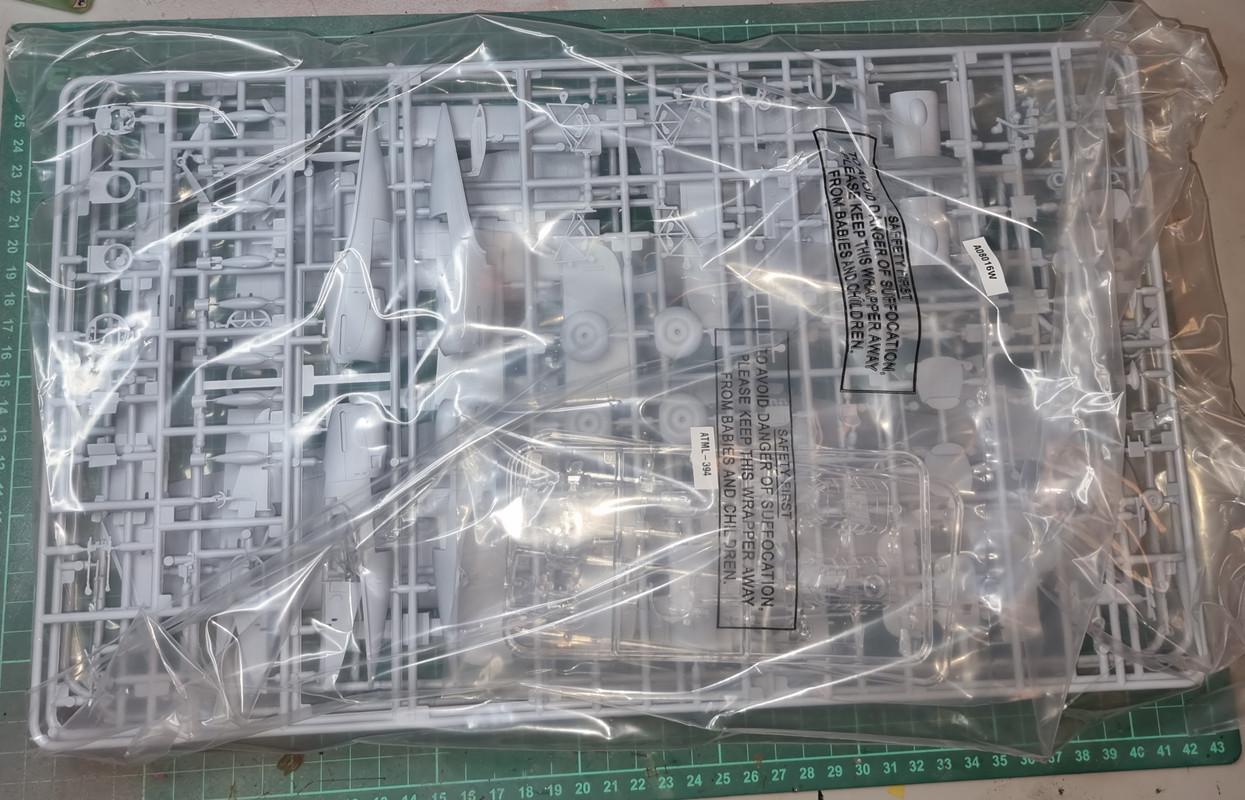
Unusually - in my experience of Airfix kits - the sprues have letters assigned, A to D are grey plastic, sprue E1 and E2 are transparent.
Sprue A
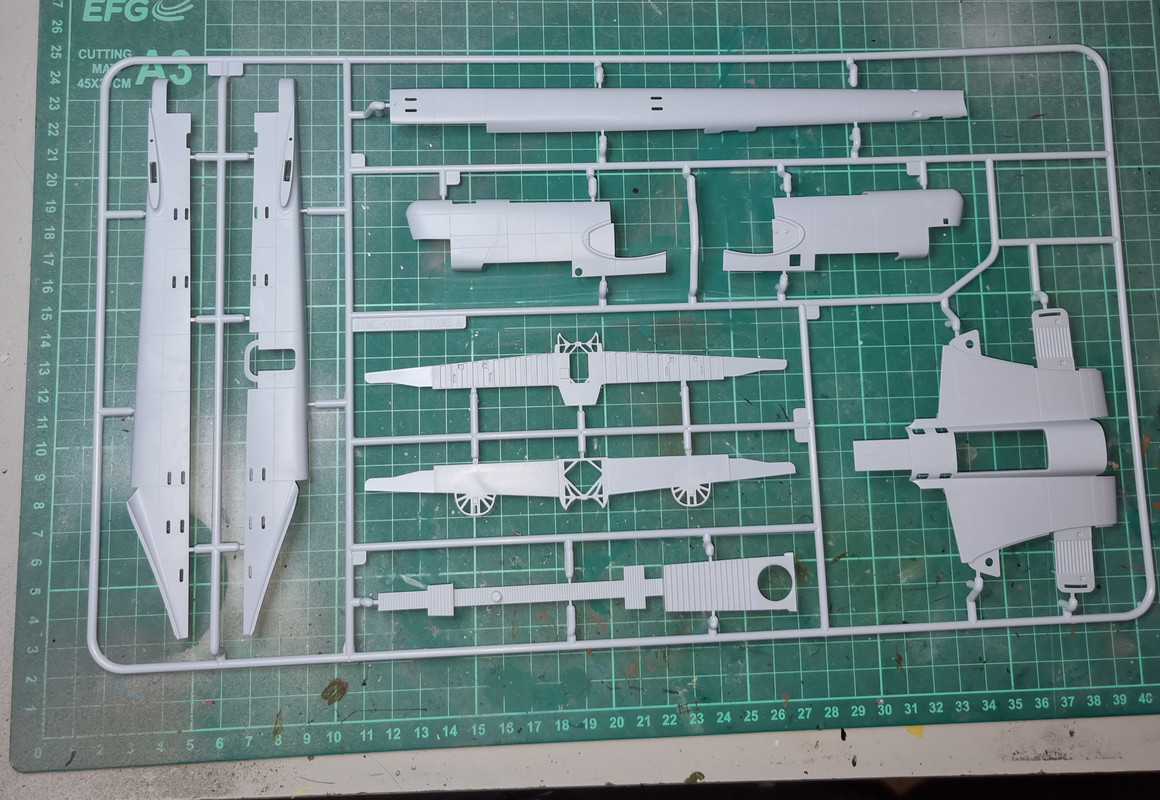 Sprue B
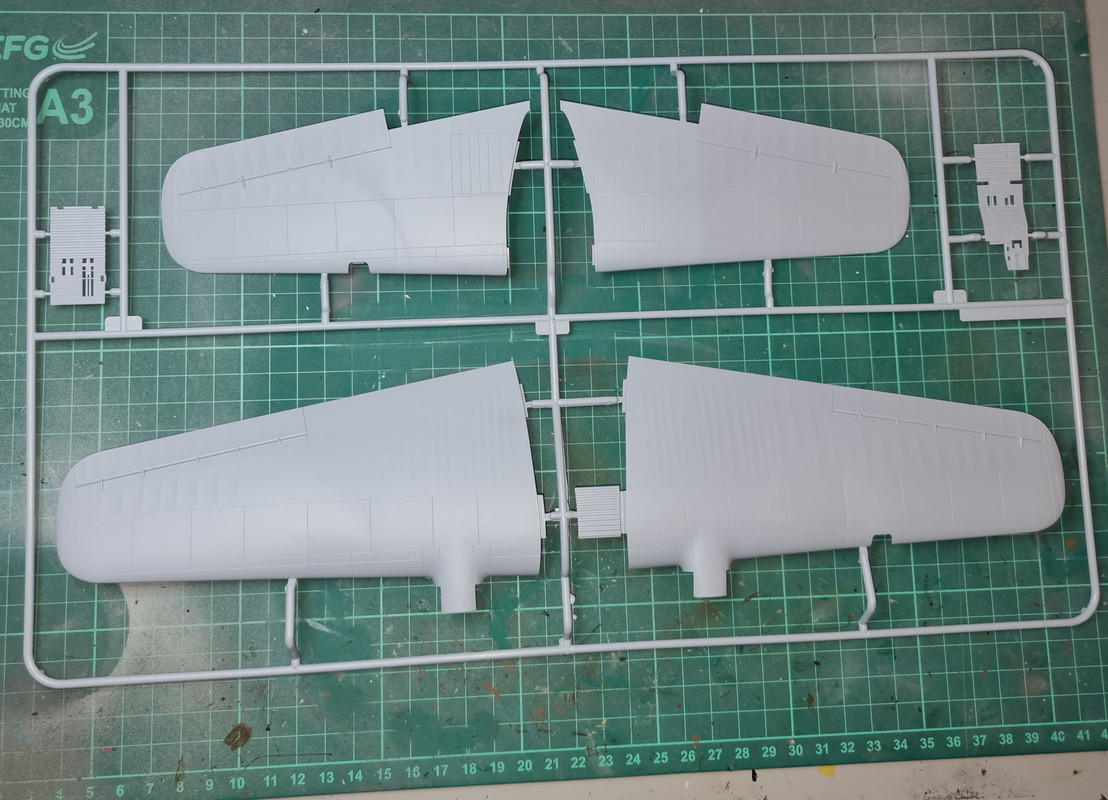 Sprue C
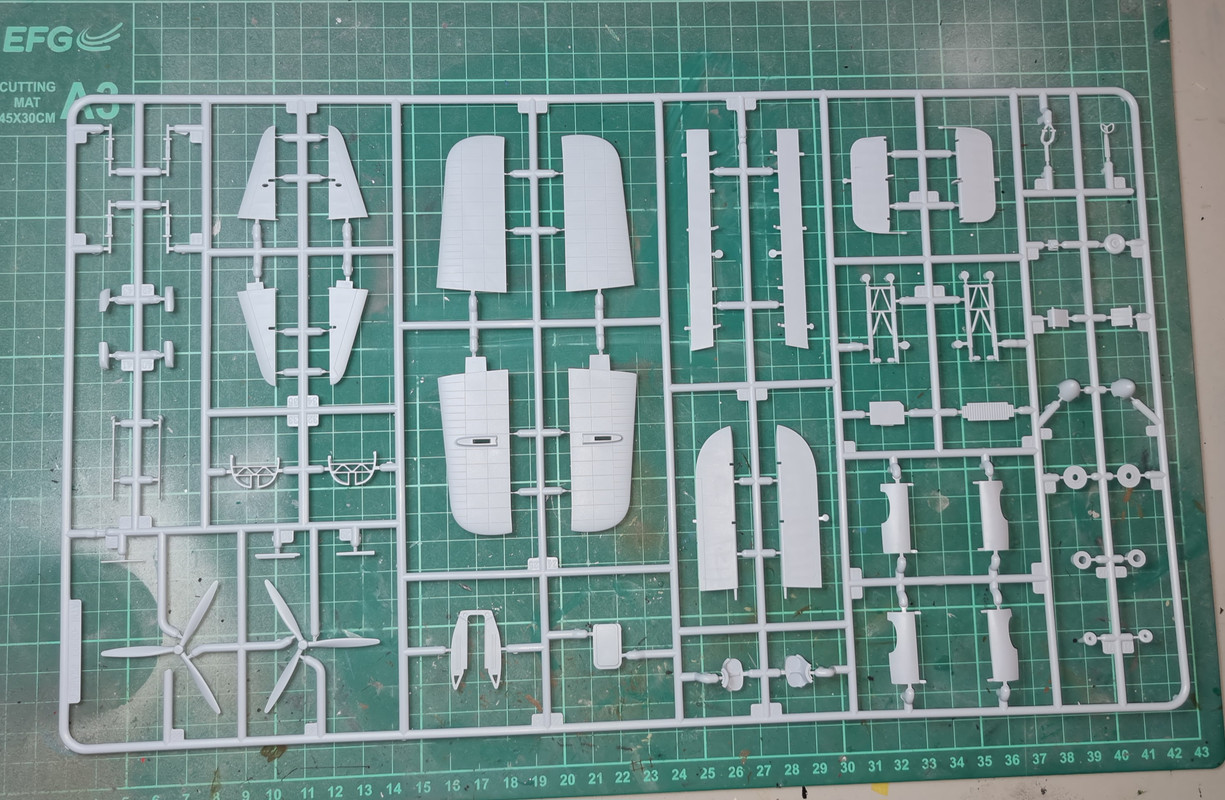 Sprue D
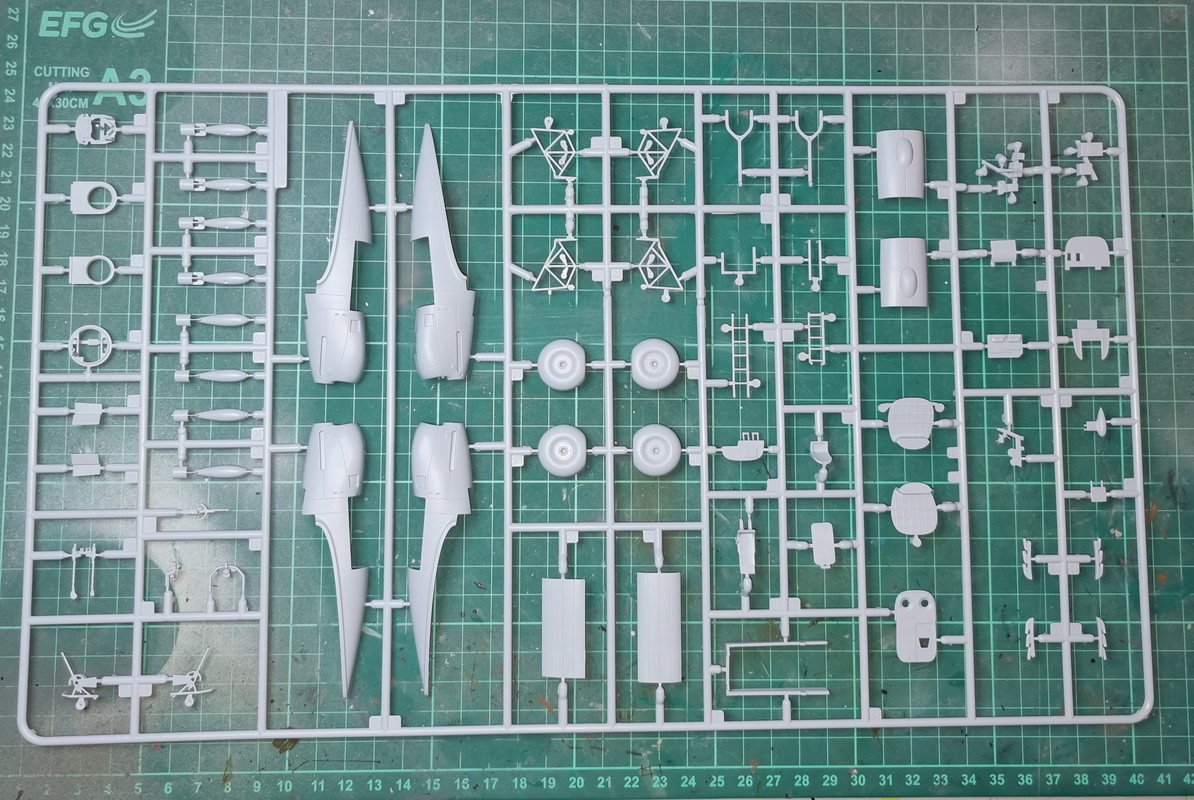 Sprue E
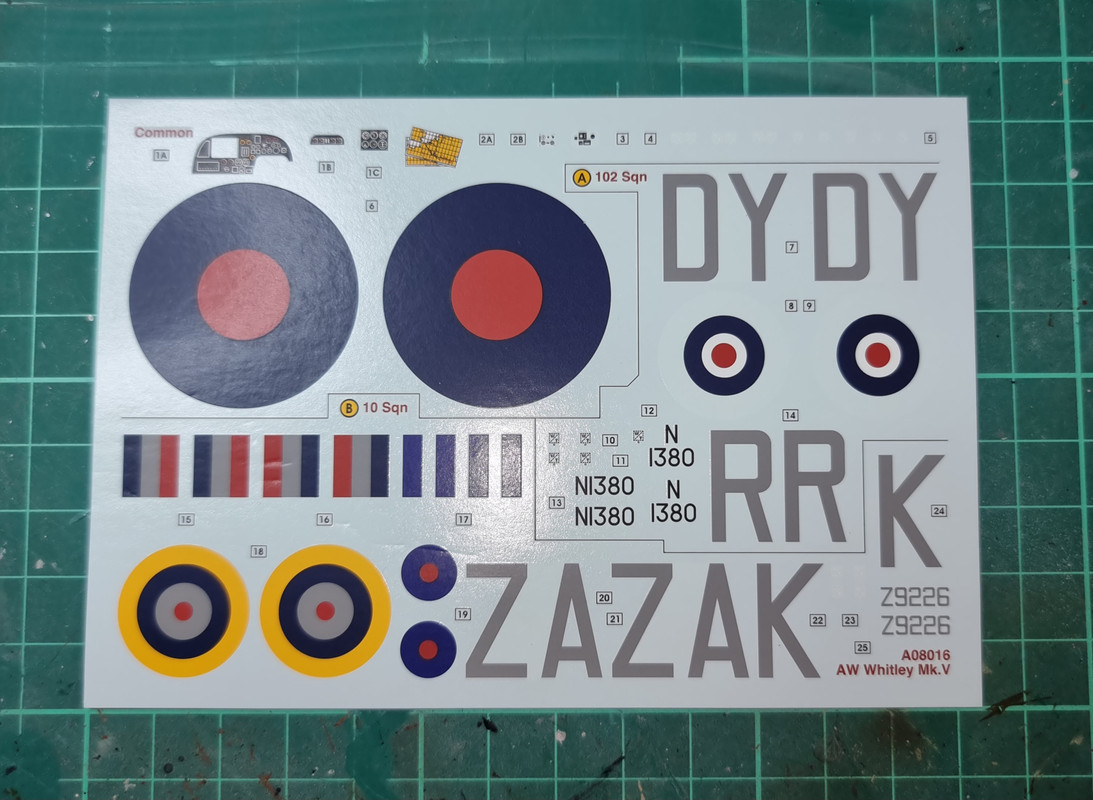
 Decals
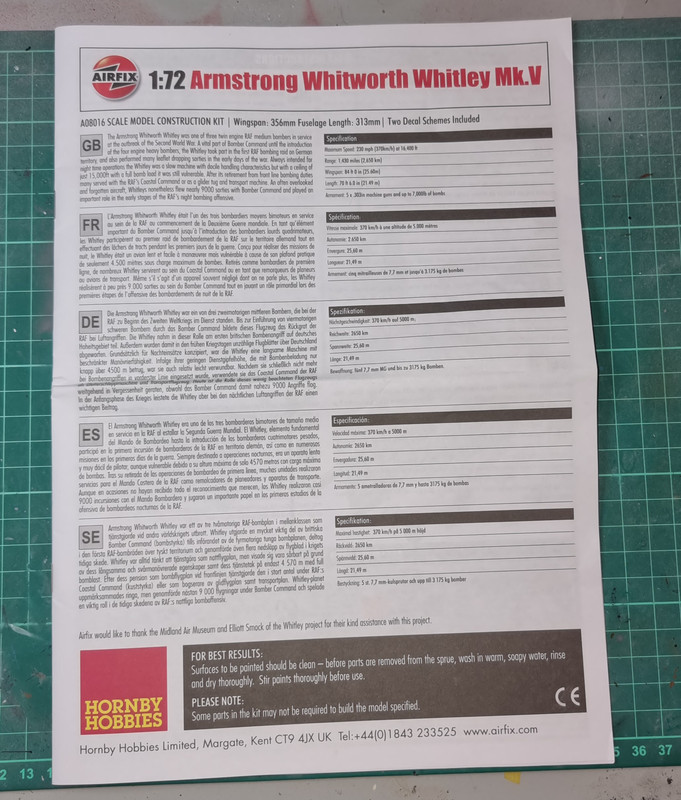
 Instruction sheet
And now the fun begins - the build!!!

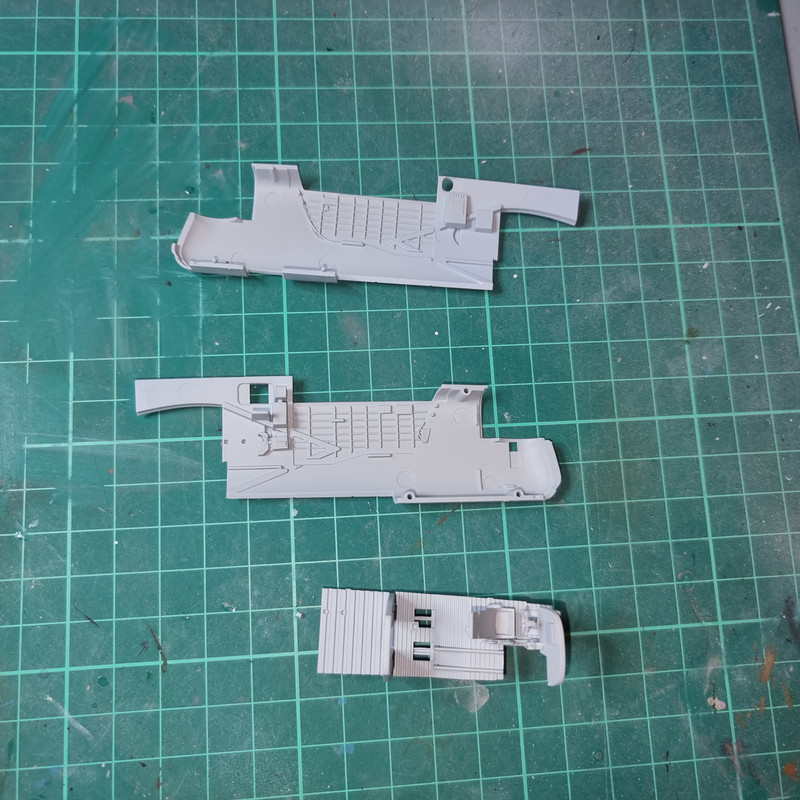
First steps in the instruction manual are the cockpit. Here is the basic cockppit beginnings now waiting for the primer to dry. Comprises the floor, upper and lower bulkheads, pilot seat, control yoke, instrument panel and engine throttles.
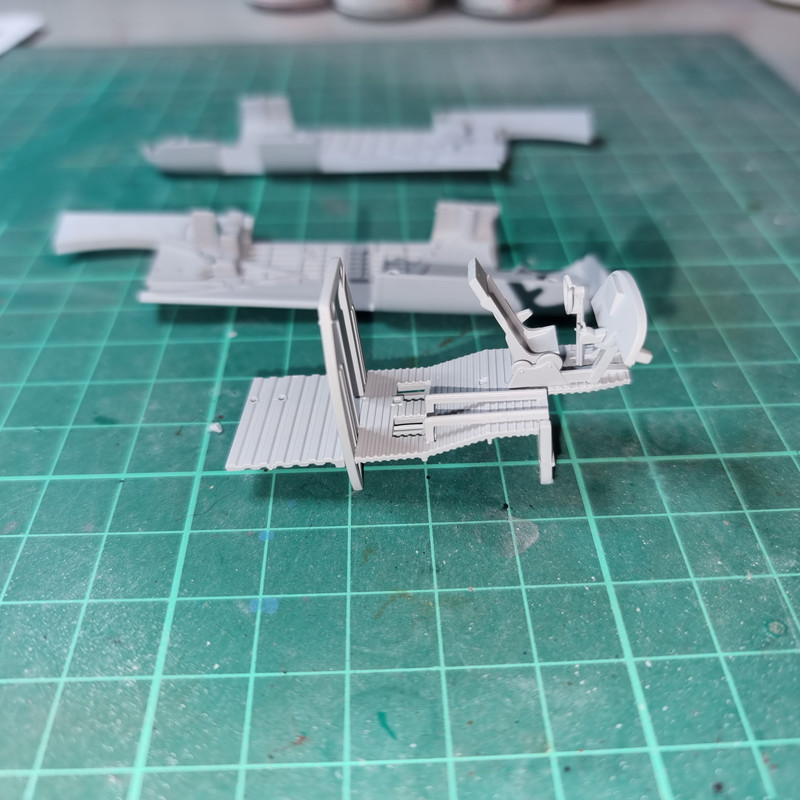
In addition the two nose sections of the fuselage have equipment added and have also been given a coat of primer.
Re: Build #1 - Armstrong-Whitworth Whitley
Posted: Thu Jan 26, 2023 7:26 pm
by ForeverPlasticKits
A great Airfix new kit, have fun building it!


Re: Build #1 - Armstrong-Whitworth Whitley
Posted: Fri Jan 27, 2023 9:45 pm
by RangerNeil
Cracking on today - the cockpit/front fuselage is now complete. It went together quite well (which I admit amazed me). The only issue - and it is a minor one - is the instructions tell you to fit the cockpit to the L/H fuselage half. Then a couple of steps down the line they tell you to put a pair of decals onto boxes on the side wall of the fuselage half - which are now obstructed by the pilot seat and control column... It can be done - I did it - but it is a right royal PITA!!
My own fault though for not reading far enough ahead and spotting this.
Whilst on the topic of decals - the instrument panel ones are three pieces - one major one and 2 smaller. One of the smaller ones sits on a raised panel within the main one which has a blank section. I cut the blank section out of the main with a sharp knife so it sat down without issue. The smaller ones went on quite well, no issues
If anyone else is going to build this kit I'd recommend putting the two sidewall decals on BEFORE fittingvthe interior section.
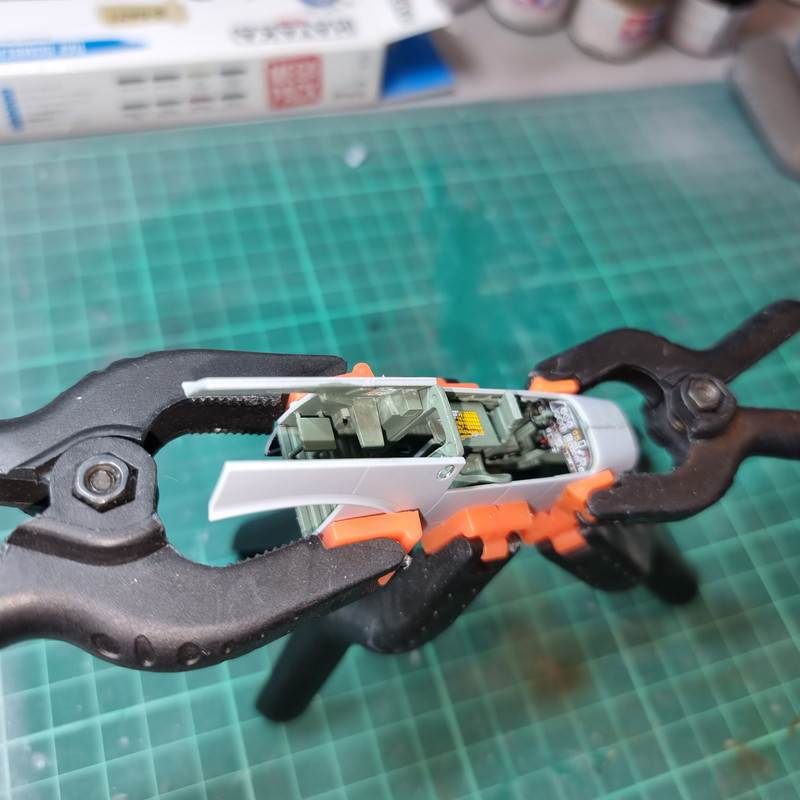
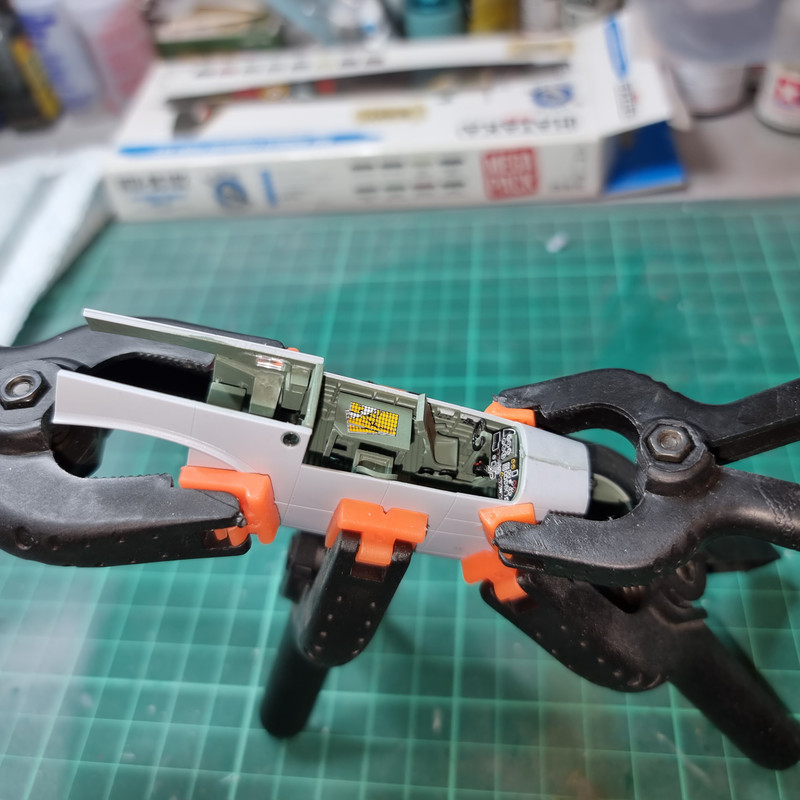
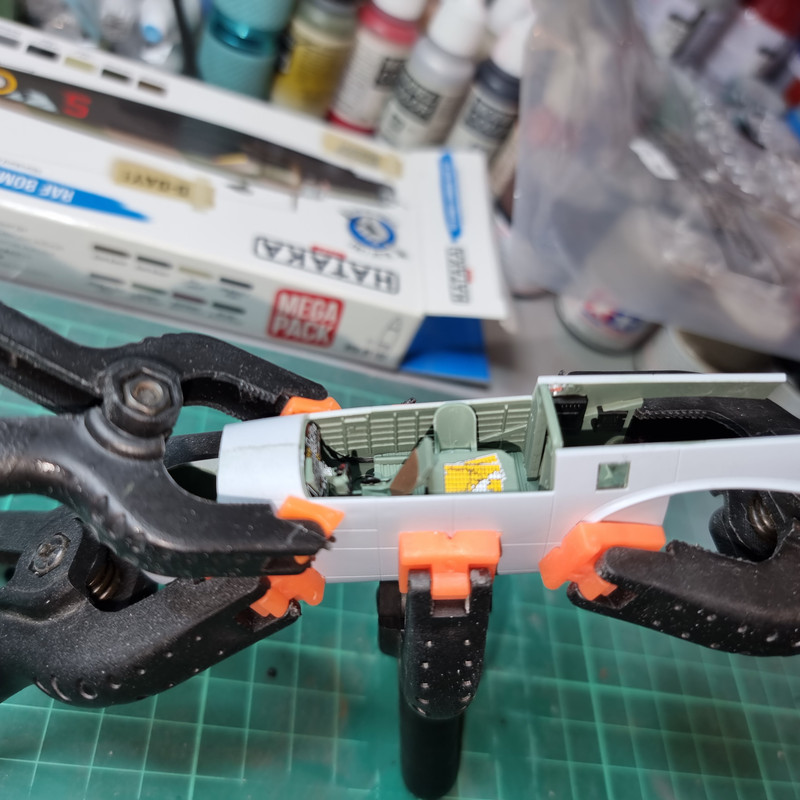
Next phase in the instructions is the rear fuselage - simple enough but an absolute bitch to get lined up.... Thank gawd for masking tape because the clamps just made everything fly apart!!
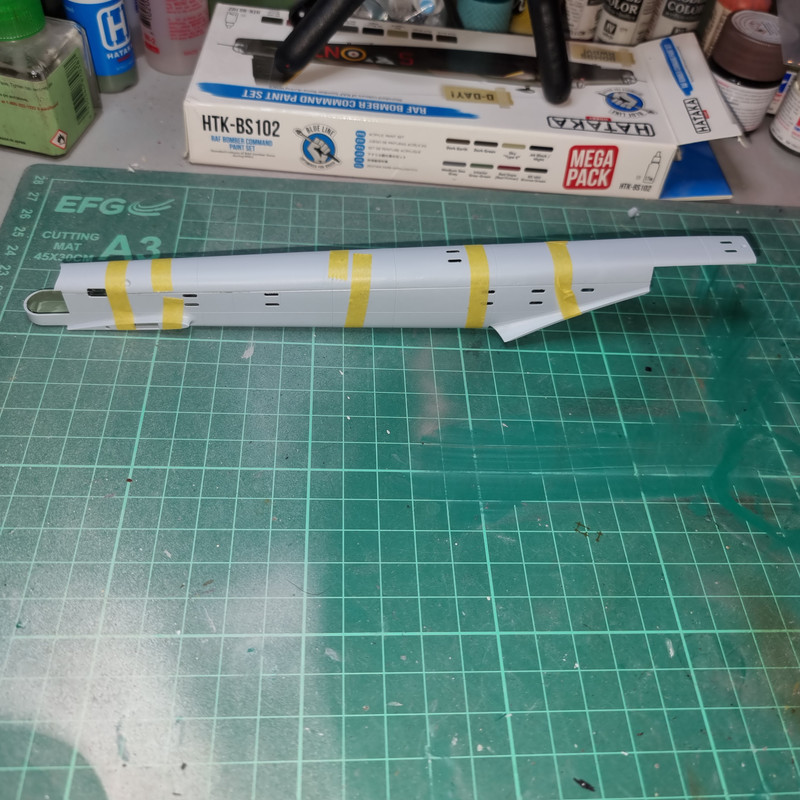
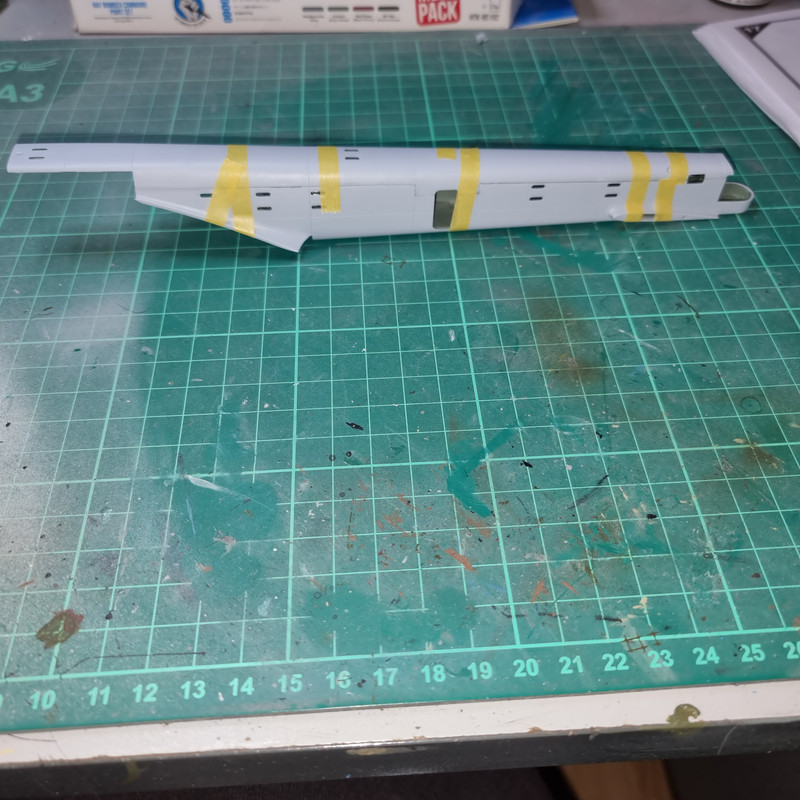
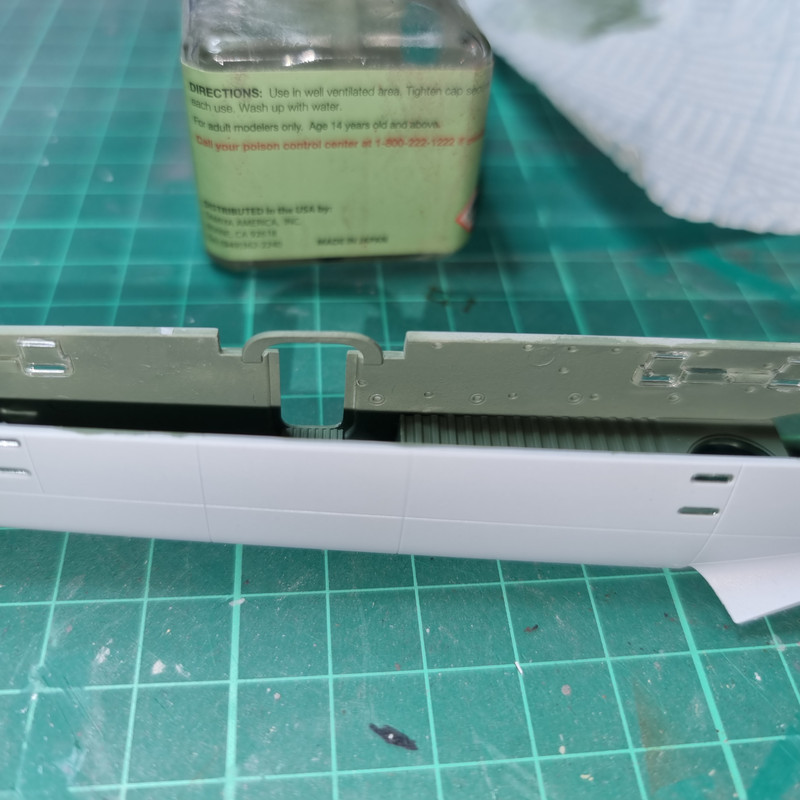
For some odd reason the rear fuselage sides and roof have lots of blanked off holes! I can only assume they are for the Coastal.Command version.
Re: Build #1 - Armstrong-Whitworth Whitley
Posted: Sat Jan 28, 2023 8:29 am
by Stokesy44
Looks like a cracking kit from Airfix. Speedy build so far

Cockpit is looking nice, very cool they gave the nav a map. Nice touch
Re: Build #1 - Armstrong-Whitworth Whitley
Posted: Sat Jan 28, 2023 12:18 pm
by RangerNeil
Stokesy44 wrote: Sat Jan 28, 2023 8:29 am
Looks like a cracking kit from Airfix. Speedy build so far
Cockpit is looking nice, very cool they gave the nav a map. Nice touch
There are a few options in the build - this was the first. You could either have a parachute stowage rack in that location or the navigators table. I opted for the table as it looks better. The navigators seat sits on floor rails and can be placed either beside the pilot facing forwards or in a slid back and rotated towards the table position.
Re: Build #1 - Armstrong-Whitworth Whitley
Posted: Sat Jan 28, 2023 6:32 pm
by RangerNeil
Spent a few hours today working on the Whitley - I am honestly amazed at how fast this is going together!! Being Airfix I was expecting loads of fit issues - thus far they haven't materialised!!
Today was wing day! First job was adding yet more glazing sections - you can see the nifty way Airfix chose to add such small windows.
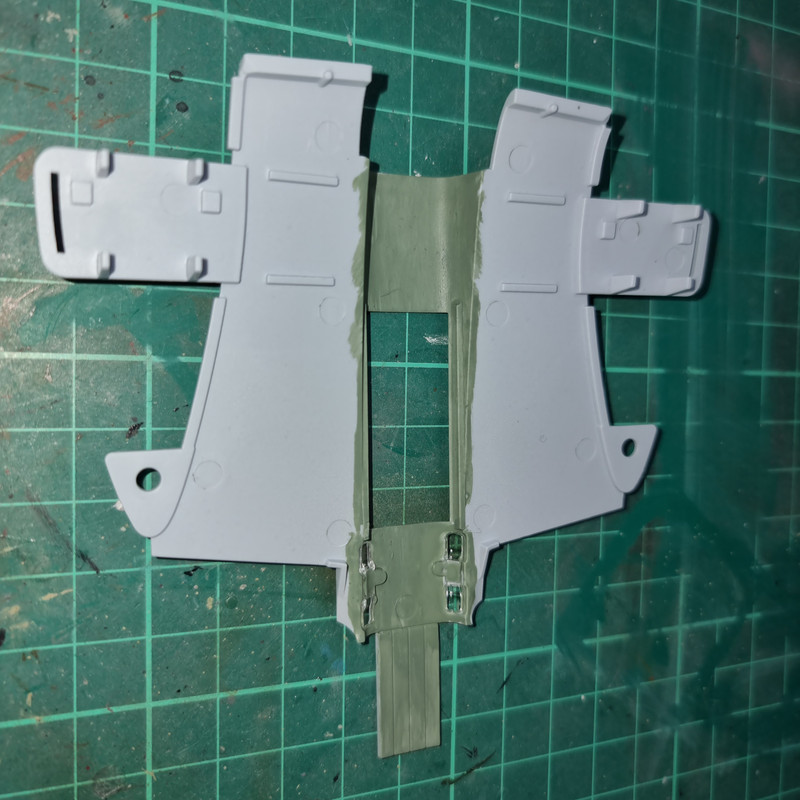
Then I realised after fitting the wing spars to the lower centre section I'd mis-read the paint code for the spars - I'd done them satin black and they should have been aluminium. So that was corrected
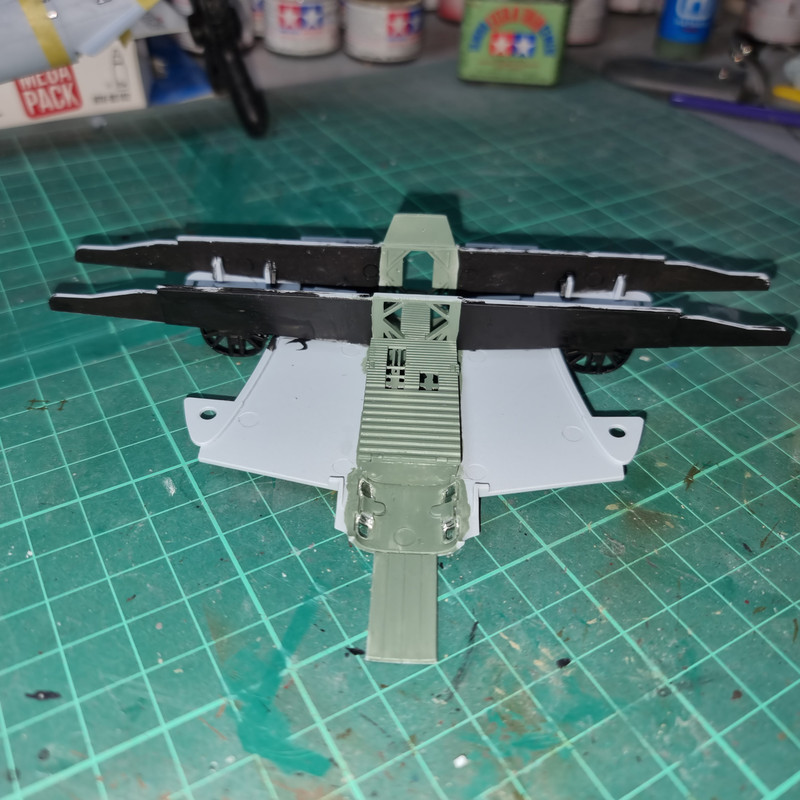
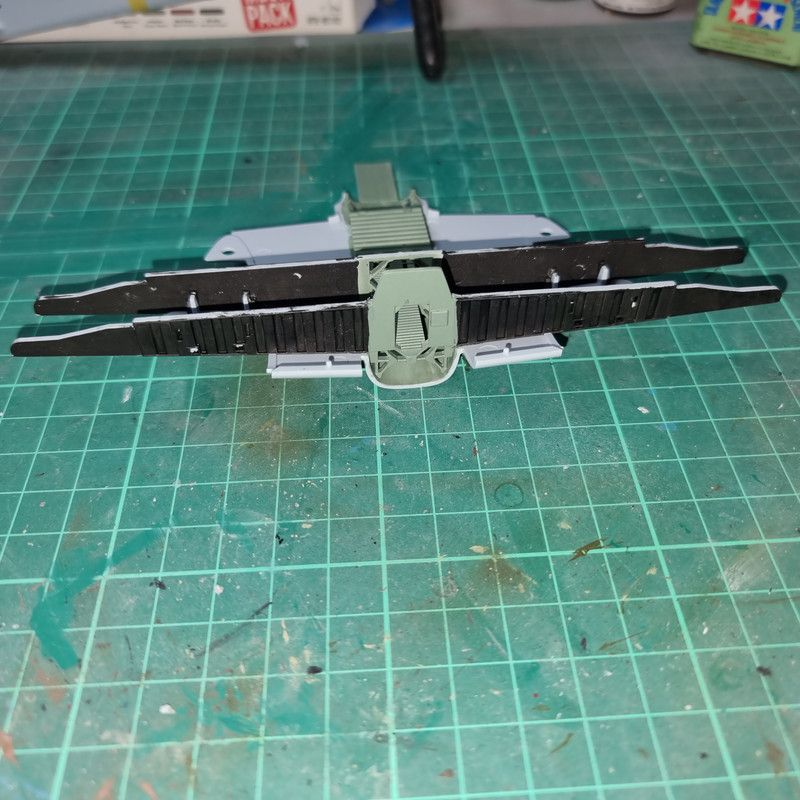
The part that should be satin black - one of the bomb bays!
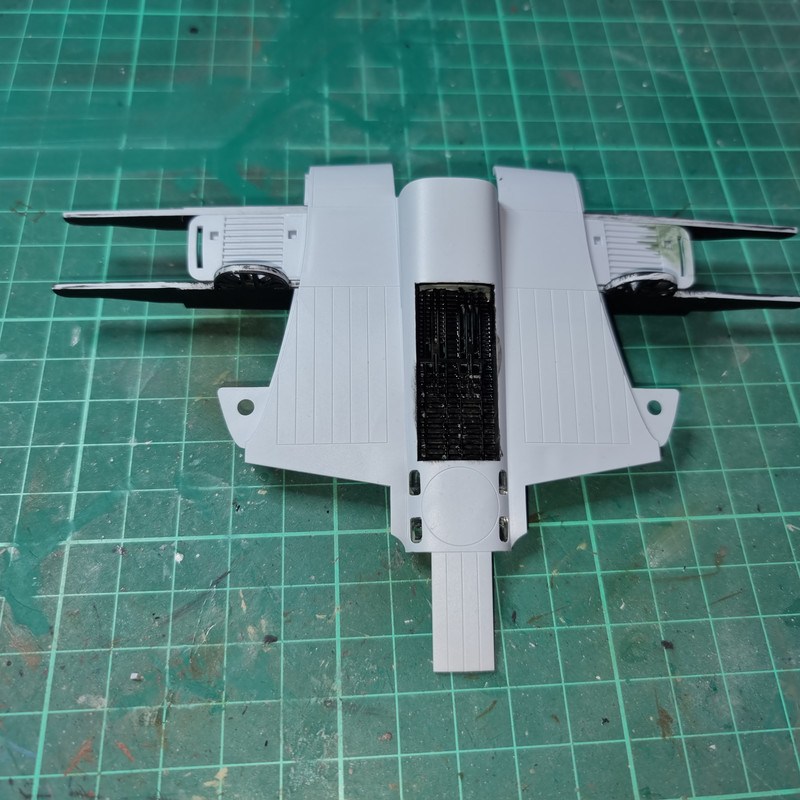
Once that little cock-up was sorted the upper and lower wings were added to the assembly. Again the way the wing halve were joined was quite impressive - and easy. The spars attached to the lower centre section fit into locators in the lower wing halves and the joint with the lower centre section was achieved with precise tabs.
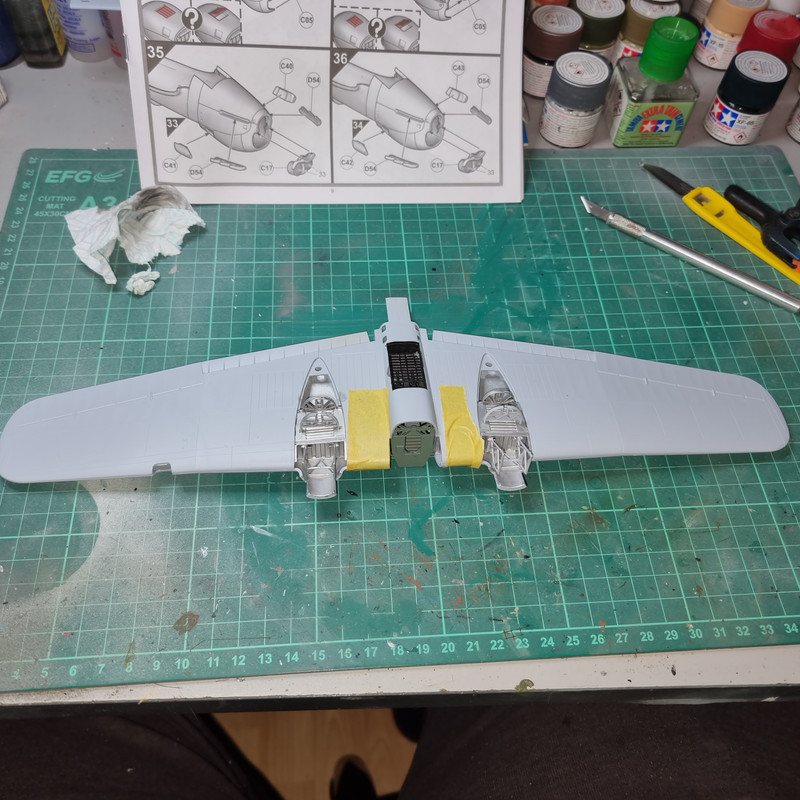
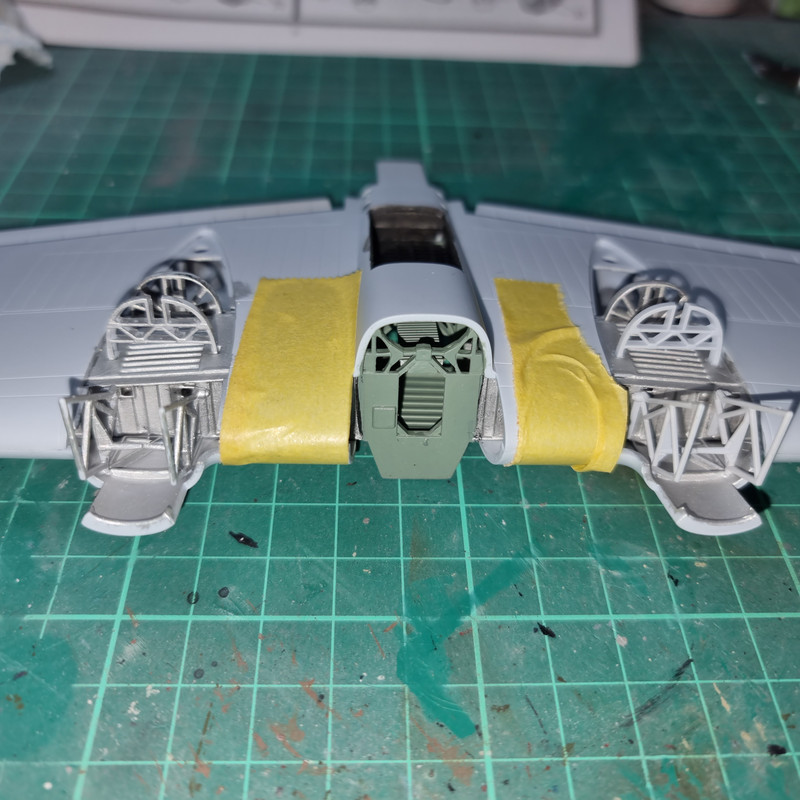
Last job of the day was the engine nacelles/undercarriage bays. First time the kit fought me. The two halves of the nacelles fit together nicely - until the little bulkheads that mark the front of the undercarriage bays were added to the mix. They are a VERY tight fit.
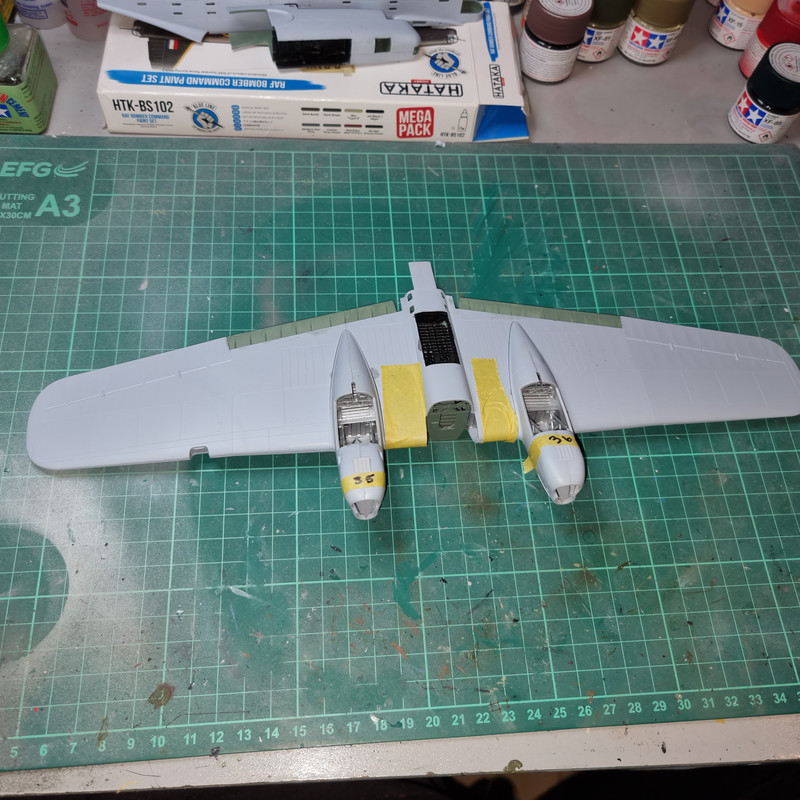
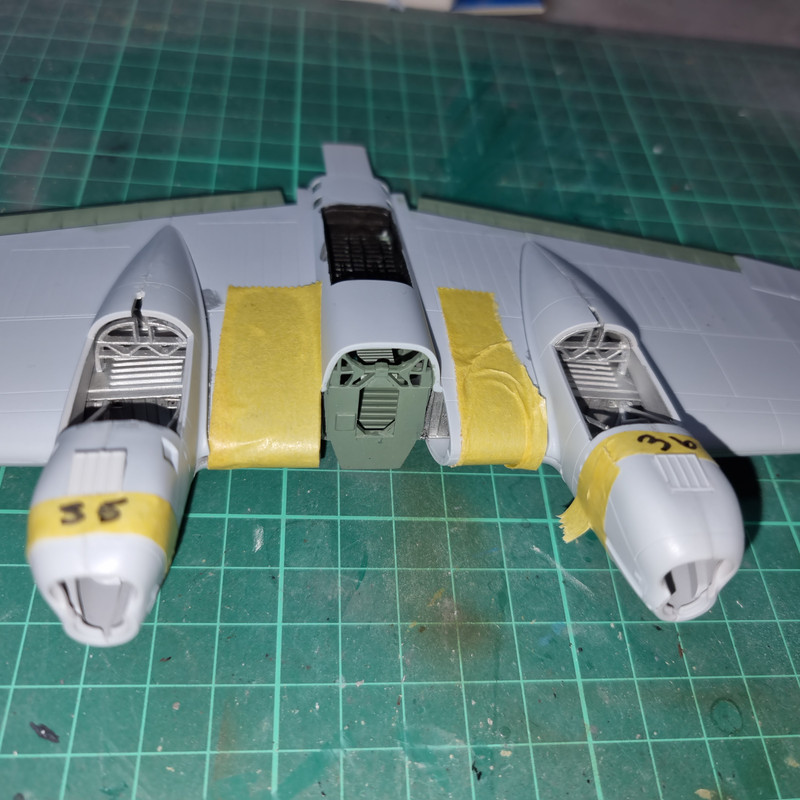
Once the nacelles were assembled and trying I had a try at dry fitting the 3 major assemblies. They seem to go together quite well but the proof will be when they are actually assembled. I think there will be some minor filling to do at this point.
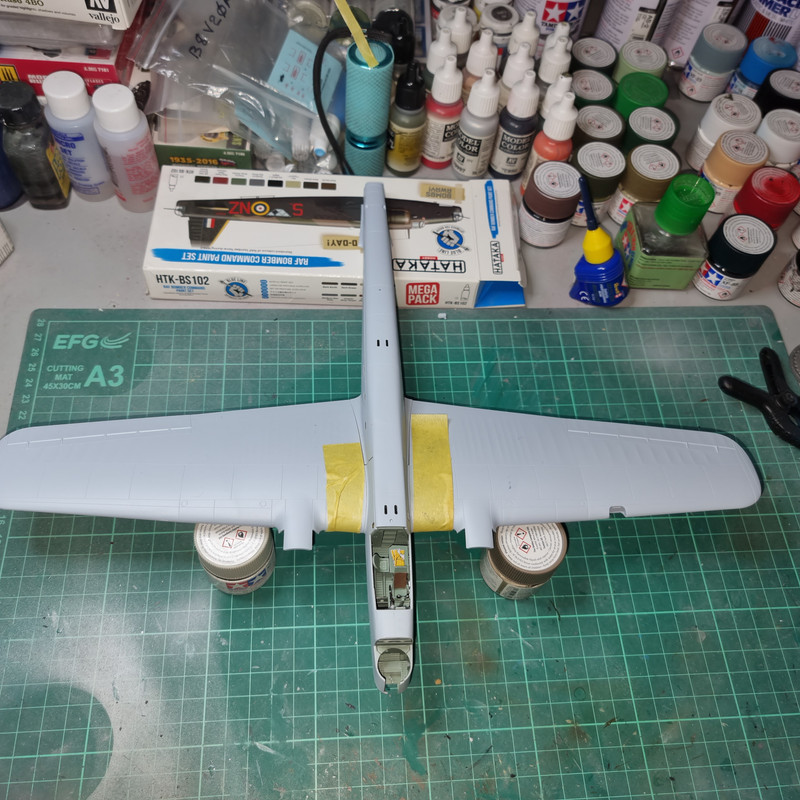
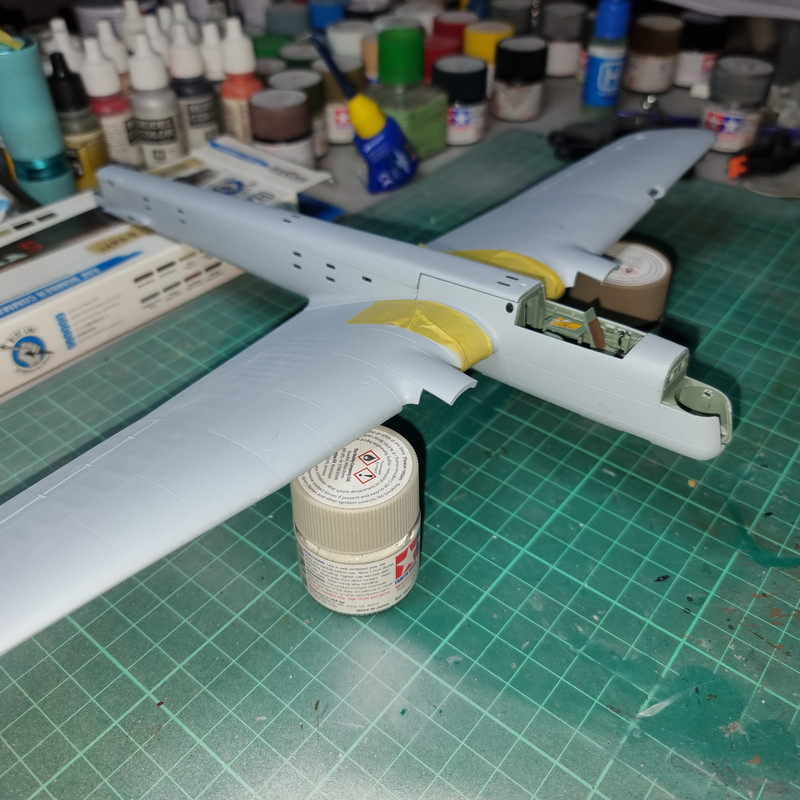
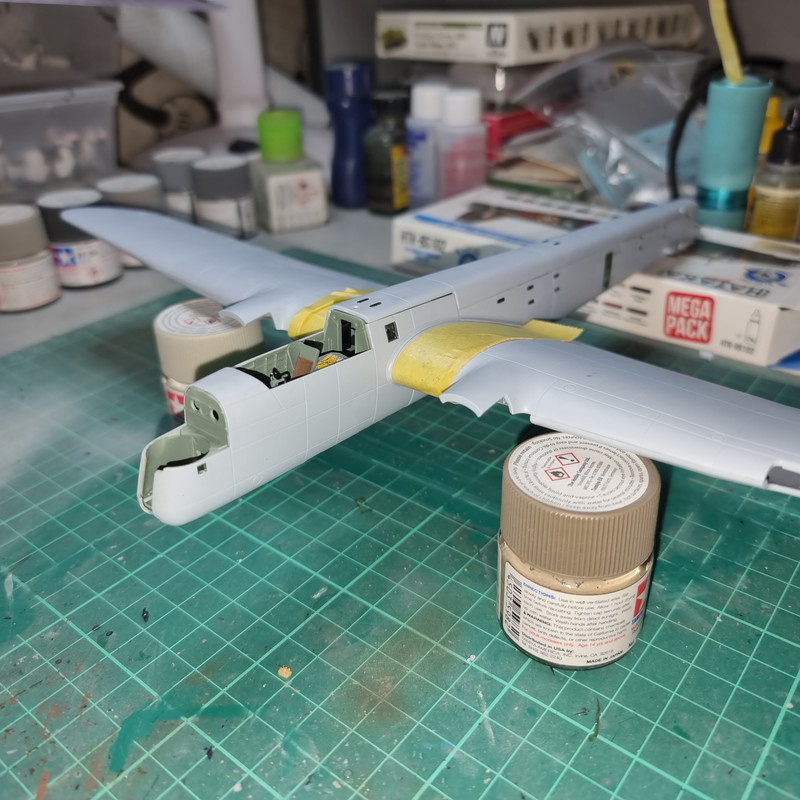
I have to say if this kit, released in 2015, is typical of the new Airfix range then they've managed to shed most of the problems that used to beset their kits. This one looks like its going to be finished a lot earlier than expected (hopefully I haven't just totally jinxed the rest of the build!!

)
Re: Build #1 - Armstrong-Whitworth Whitley
Posted: Sun Jan 29, 2023 9:25 pm
by RangerNeil
Bit more time spent today....
The engine nacelles are attached to the wings
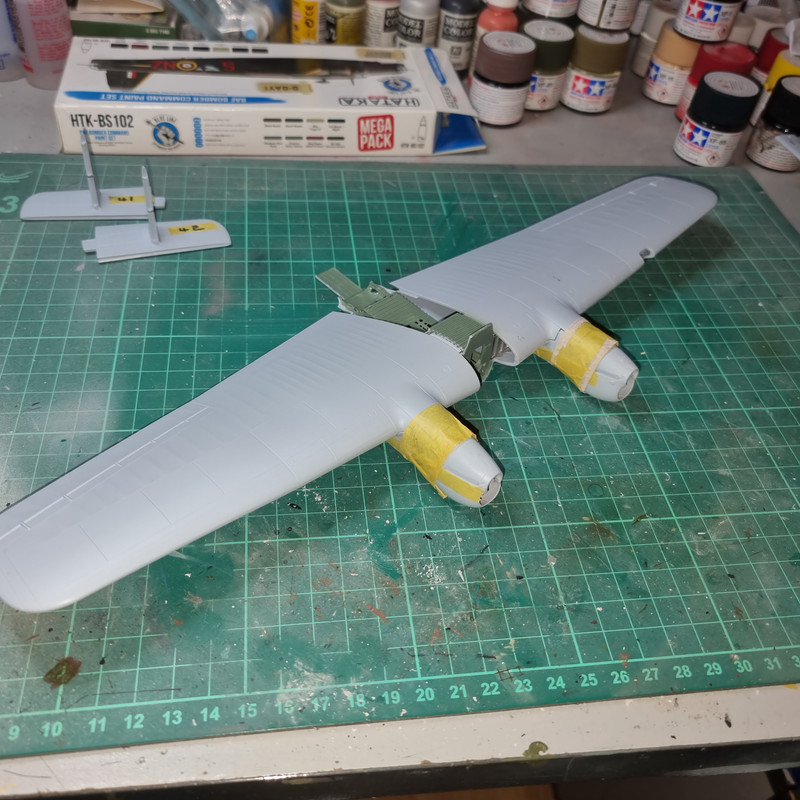
- and the curse of aincient Airfix has reared its ugly head!!
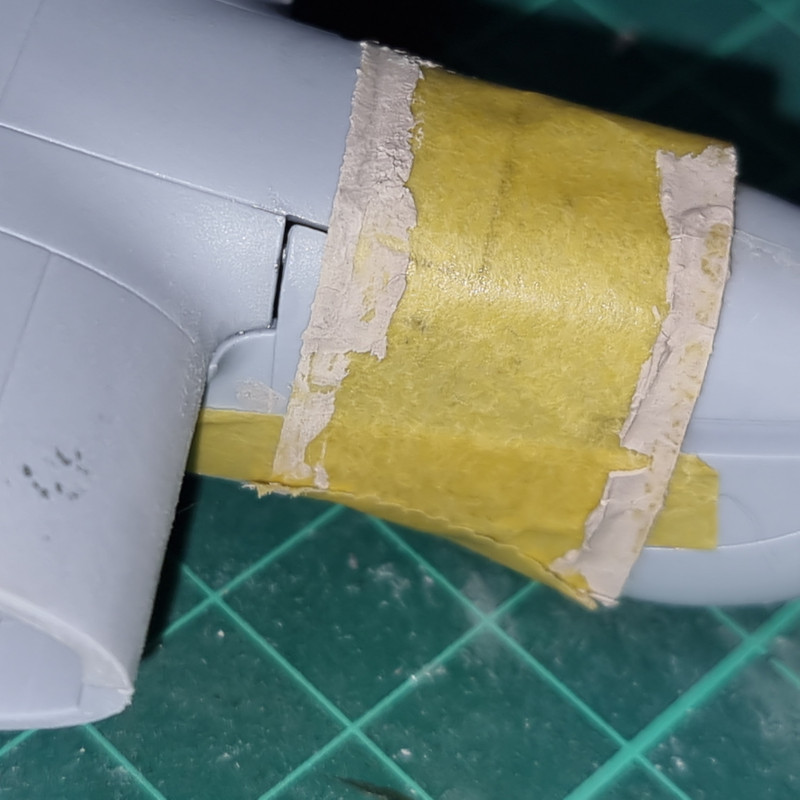
As can be clearly seen there are massive (relatively speaking
) gaps where the upper part of the nacelle thats attached to the wing don't meet the body of the nacelle. One side is better than the other but both are going to need some work with filler and sanding sticks!!
Whilst the wing was put aside to set fully some of the other sub-assemblies were tackled. The tail planes and vertical stabilisers were assembled as were the main landing wheels, propellers, bomb load, fore and aft turrets. I'm not sure yet whether I will use the bombs as the bomb bay doors are supplied moulded in the closed position and will need to be cut into 4's to be displayed open.
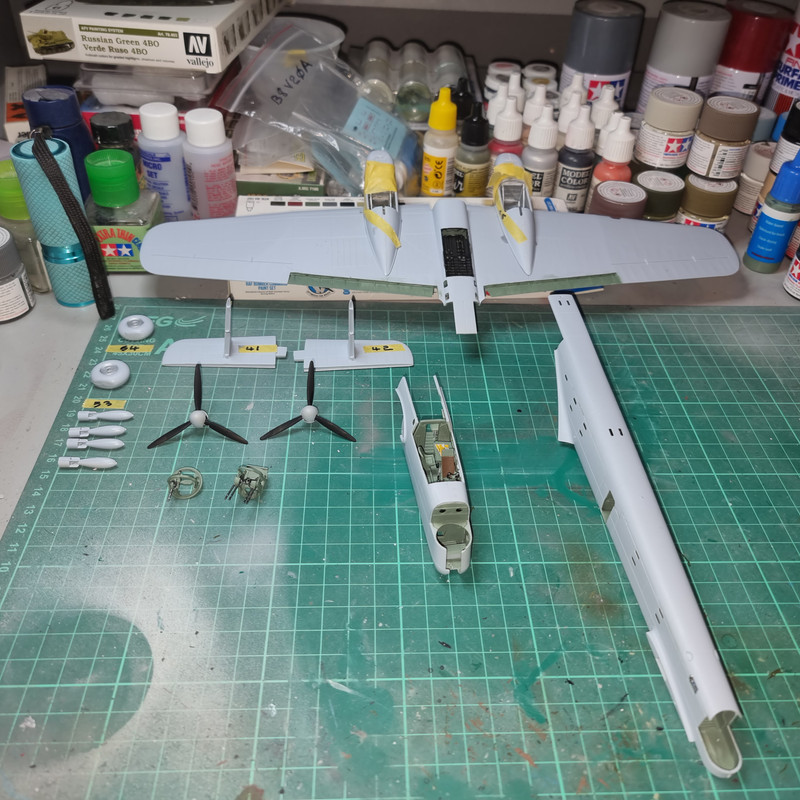
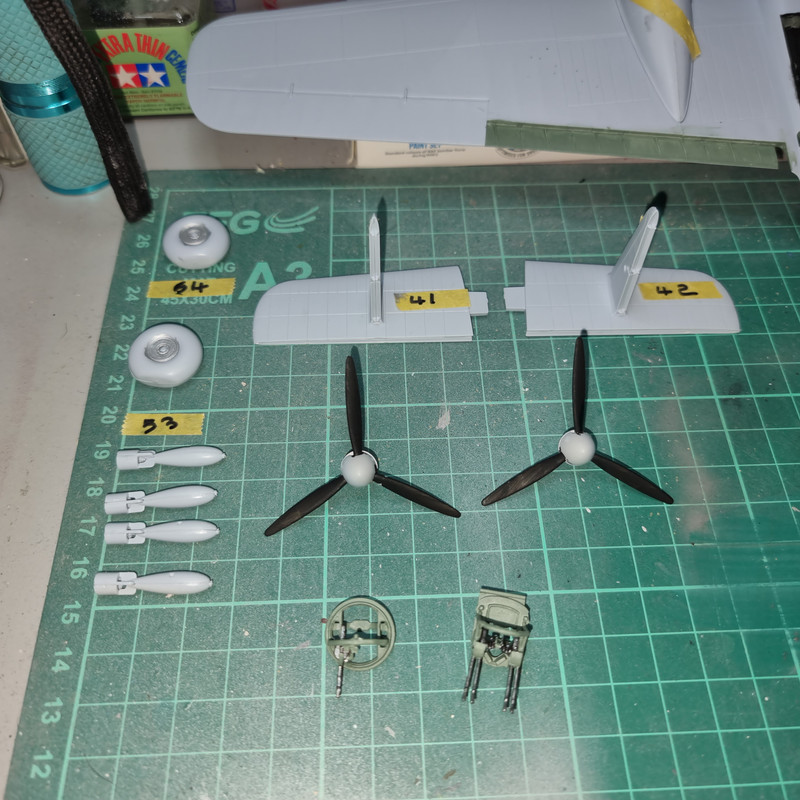
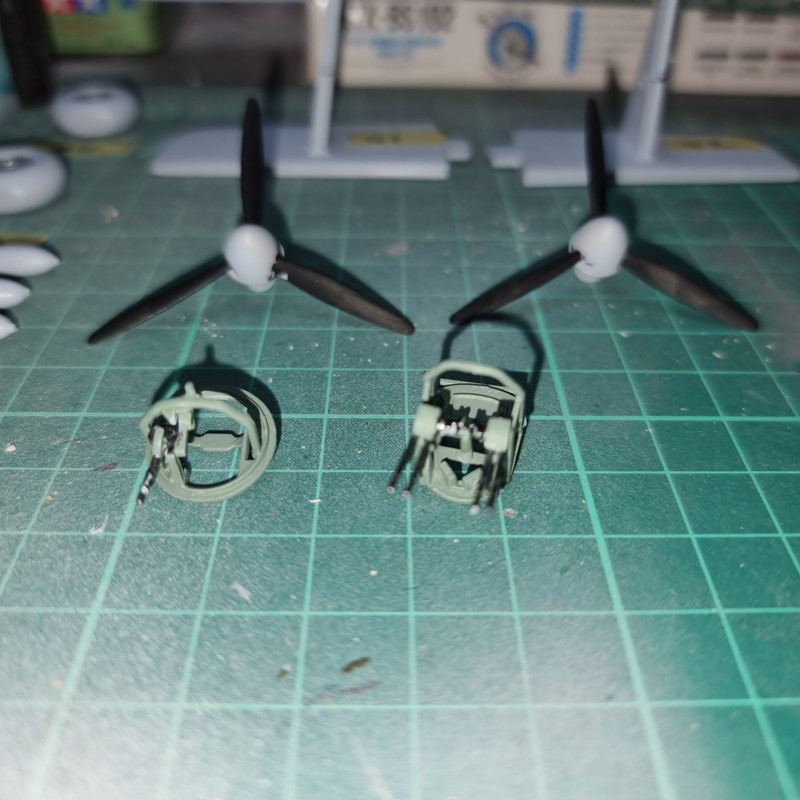
Looking at what comprised a Whitleys defensive armament - what looks like quad belt fed brownings in the tail turret and a drum fed single Vickers K in the nose engenders a whole new degree of respect for the crews who flew these machines on raids into occupied europe.
Re: Build #1 - Armstrong-Whitworth Whitley
Posted: Mon Jan 30, 2023 7:14 pm
by RangerNeil
Did most of the filling and sanding on the wings/nacelles today. Just needs finishing off and polishing but I thought, as I am having to do this, it might be a wise move to join the fuselage sections on to the centre section - just in case more filling and sanding might be needed.
It is.....
I need to determine from photos what is and isn't panel line joins vs areas that actually need filling. The most annoying part though is where the rear fuselage butts up against the front section behind the cockpit - the two sections are marginally different profiles. How much so remains to be seen once the adhesive has fully set.
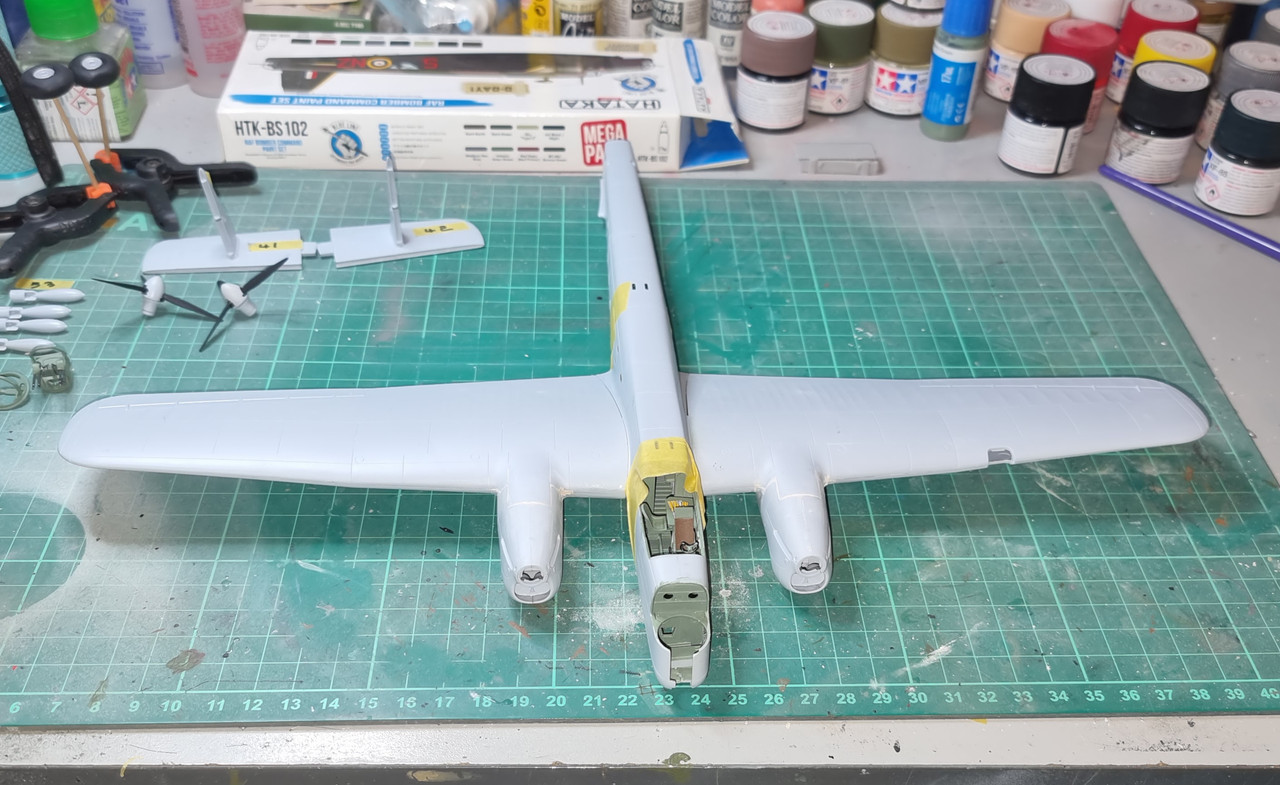
Tail planes and fore/aft turrets are dry fit to see how they line up.
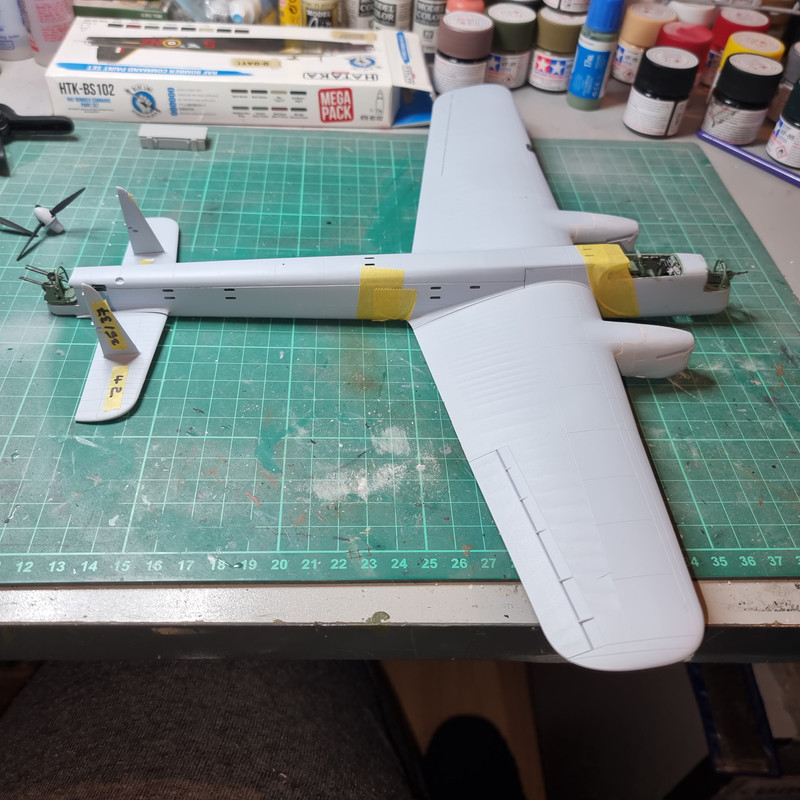
So tomorrow will be a case of finishing any filling and sanding - then its trying to work out how to mask off the loads of tiny windows in the fuselage.......
Re: Build #1 - Armstrong-Whitworth Whitley
Posted: Tue Jan 31, 2023 8:30 pm
by RangerNeil
And the fight begins......
Despite the promising start we are back into the realms of filling and sanding in prodigious quantities sonoften associated with Airfix. Where something joins something else there was a gap - the photos below show just how much.......
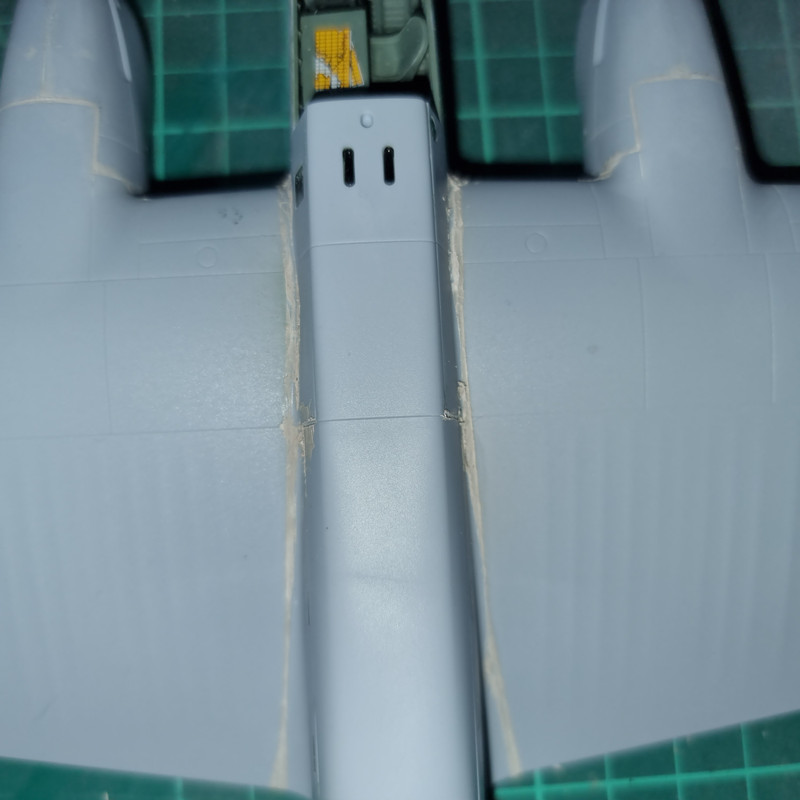
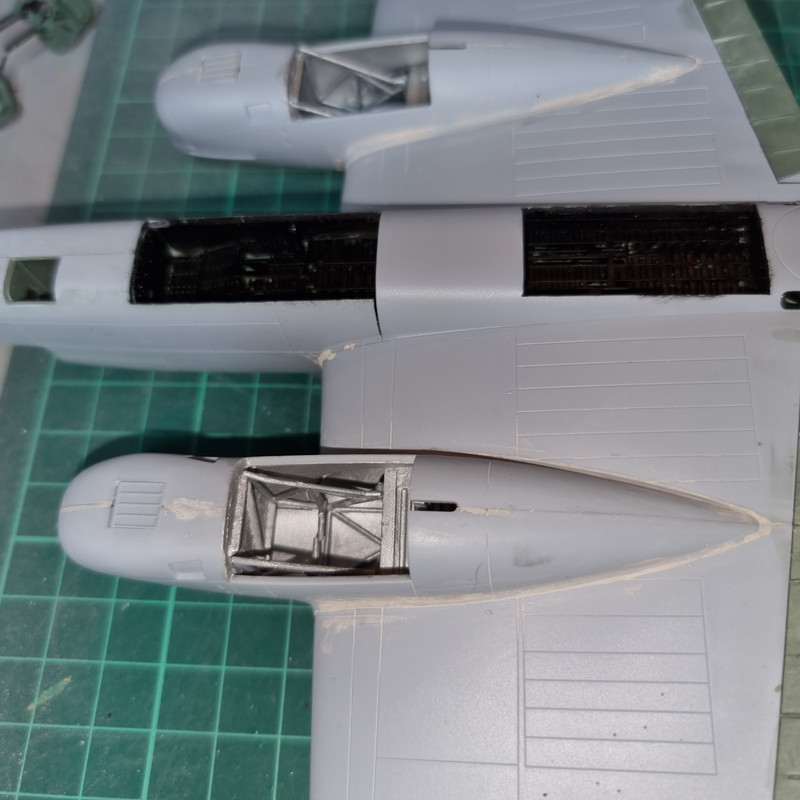
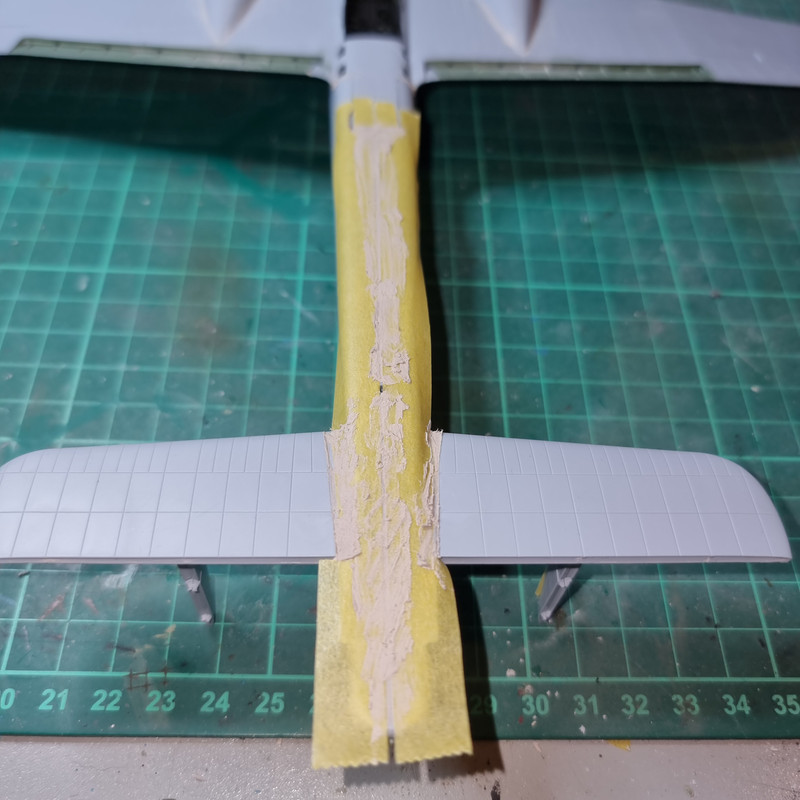
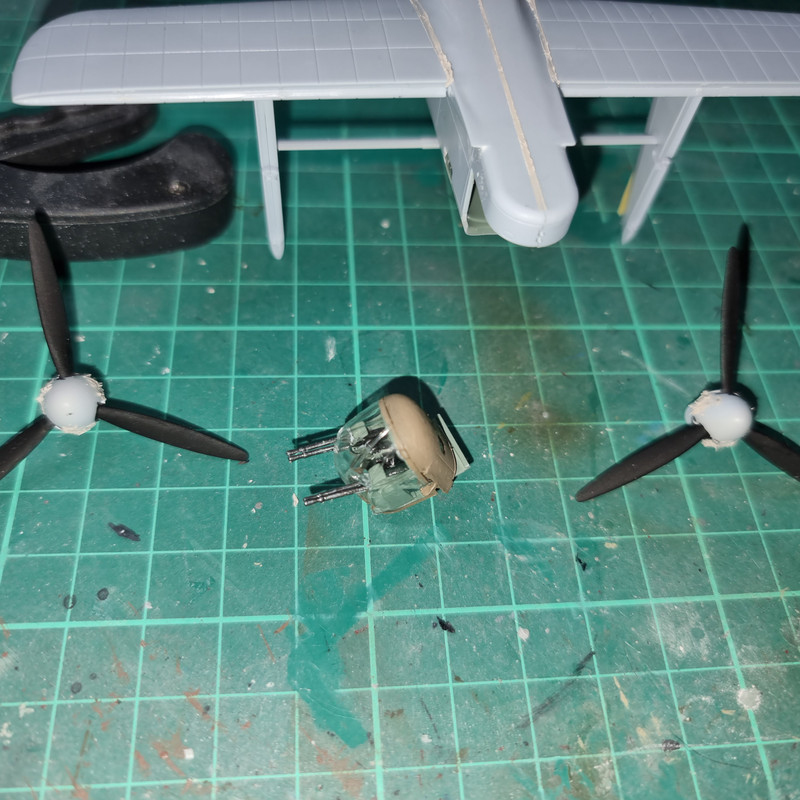
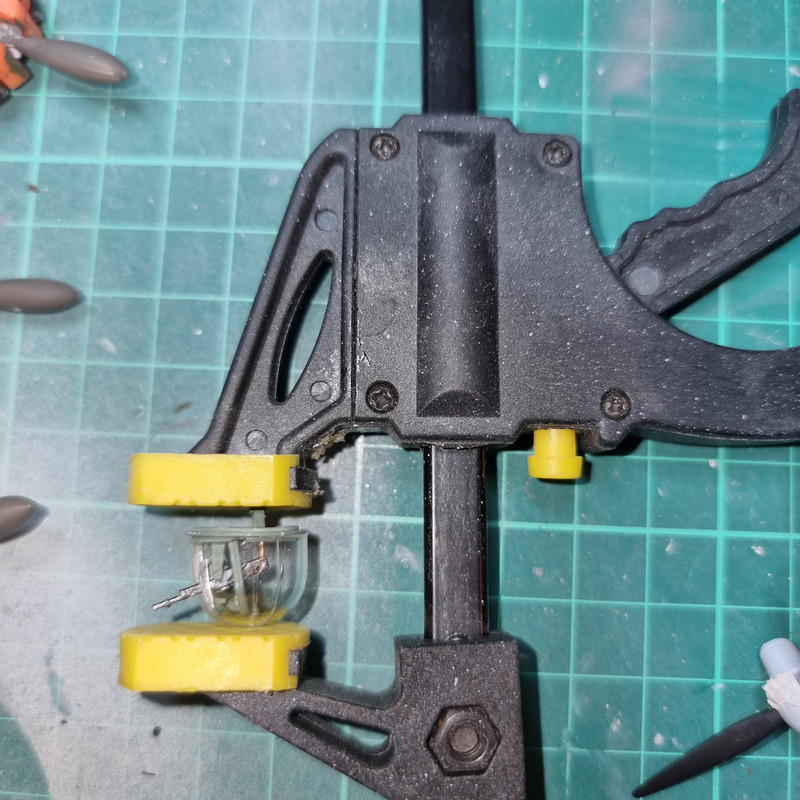
Moving on - whilst the filler is drying overnight - the turret glazing is on both front and rear turrets - front turret was another fight - its a one piece moulding that needed to be slipped over the gun . And the slit in the moulding needed to be drastically opened out. The slit as it came was a flattened ovoid that had to be opened by half a mm at the widest point and turned into a rectangular one. Cue use of a sharp blade......
The rear turret was a two-part moulding, front section still needed spreading to clear the guns and then wiggling - gently - back into place. The rear part has the turret doors with port holes in that had to be painted by hand as masking the tiny portholes would have been nigh on impossible....
Re: Build #1 - Armstrong-Whitworth Whitley
Posted: Tue Jan 31, 2023 9:50 pm
by ForeverPlasticKits
Wonderful result even if this Airfix kit needs some putty it looks nice!
Re: Build #1 - Armstrong-Whitworth Whitley
Posted: Wed Feb 01, 2023 1:12 am
by cor
Foundations are coming along nicely. Its going to be impressive with some paint on it.
Re: Build #1 - Armstrong-Whitworth Whitley
Posted: Wed Feb 01, 2023 6:17 am
by digger303
Re: Build #1 - Armstrong-Whitworth Whitley
Posted: Wed Feb 01, 2023 10:29 am
by RangerNeil
Whats REALLY annoying mate is where I expected issues - like the cockpit/nose assembly - it went together like a dream. Even the turrets went together well. But where its a simple matter of fit - like the engine nacelles into the wings - there were massive gaps where they sat against the wings and where the nacelles mated to the upper surface. It ain't rocket science to make sure these actually fit. If Tamiya can do it so can Airfix!!
That 1960's release of the Fairey Battle went together better than this 2015 release.
Re: Build #1 - Armstrong-Whitworth Whitley
Posted: Wed Feb 01, 2023 11:37 am
by Garion77
RangerNeil wrote: Tue Jan 31, 2023 8:30 pm
And the fight begins......
Despite the promising start we are back into the realms of filling and sanding in prodigious quantities sonoften associated with Airfix. Where something joins something else there was a gap - the photos below show just how much.......
Moving on - whilst the filler is drying overnight - the turret glazing is on both front and rear turrets - front turret was another fight - its a one piece moulding that needed to be slipped over the gun . And the slit in the moulding needed to be drastically opened out. The slit as it came was a flattened ovoid that had to be opened by half a mm at the widest point and turned into a rectangular one. Cue use of a sharp blade......
The rear turret was a two-part moulding, front section still needed spreading to clear the guns and then wiggling - gently - back into place. The rear part has the turret doors with port holes in that had to be painted by hand as masking the tiny portholes would have been nigh on impossible....
As I'm also building an airfix kit at the moment, a most recent one being the Gloster Javelin... I feel you ! As I said to my friend digger... airfix needs a fix !
Nice work despite all the problems you've encountered !
Re: Build #1 - Armstrong-Whitworth Whitley
Posted: Wed Feb 01, 2023 4:51 pm
by Tomcat64
That's really come together quickly but just when you think Airfix has upped their game to modern standards they decide it's time to pop off for a pint and just chuck the rest into a box and have done - really disappointing variations on the quality.
Keep at it though mate as you're properly knocking that into shape despite all it's throwing at you & it's a great looking heavy as far as I'm concerned.
Re: Build #1 - Armstrong-Whitworth Whitley
Posted: Wed Feb 01, 2023 7:16 pm
by RangerNeil
Thanks for the kind words folks - really much appreciated.
Well - 5 hours of work with sanding and polishing sticks and it was as good as its going to get.
Next job was finding a way of masking all those tiny slit windows. Masking tape would have been a nightmare and I REALLY didn't want to risk those popping out inside when tape was pressed down. So I used Maskol and said a fervent prayer. (And yes, I did forget the patches of filler around the door - its done now).
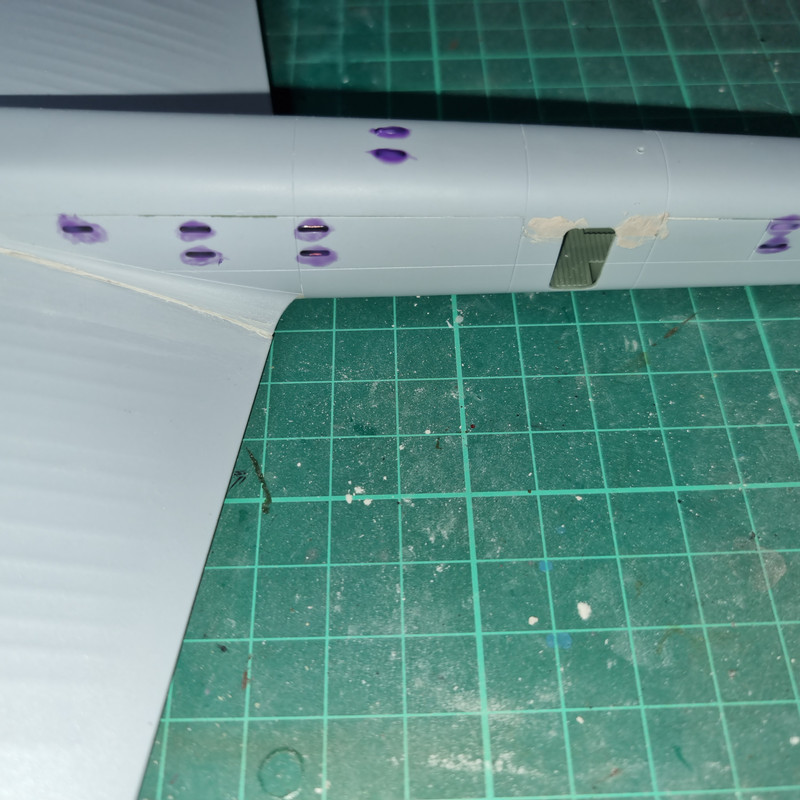
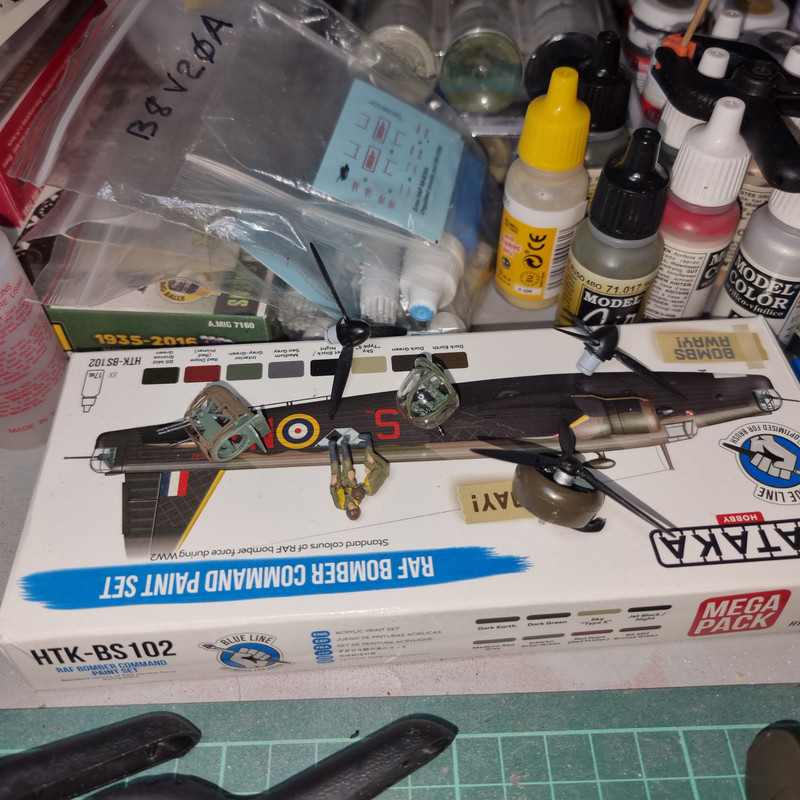
I thought the underside would be a good test as it only has 2 windows so the fuselage was duly masked up and given a coat of Hataka "Jet Black" from their Bomber Command set.
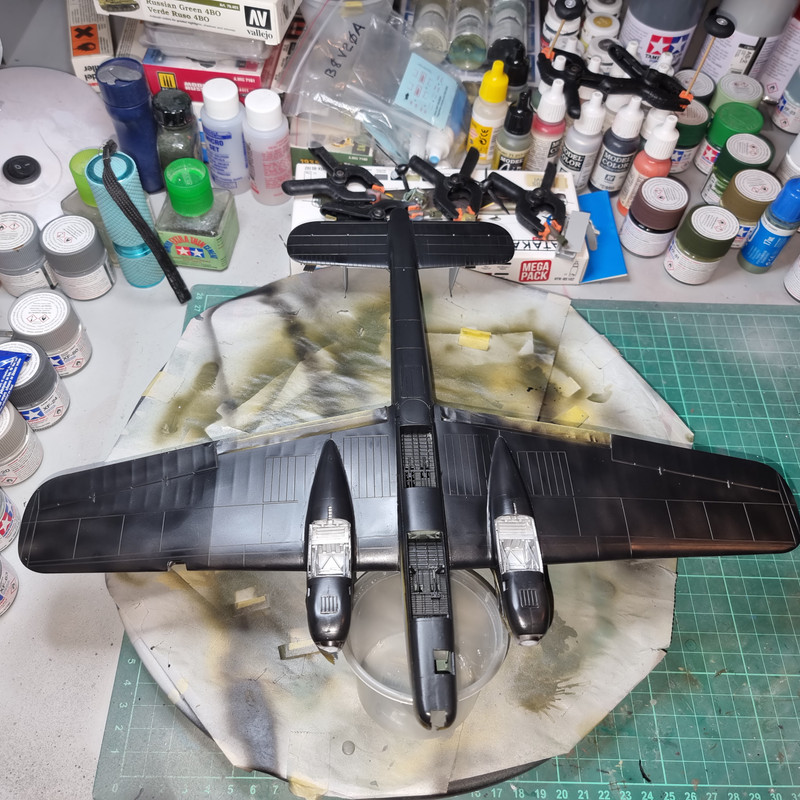
It seems a bit patchy to me so tomorrow it gets another coat. Then I can take the masking tape off and try removing the Maskol, see what I get.
Bomb load got a 2nd coat of green and the prop spinners a coat of Jet Black.
It seems the finishing line may actually be getting closer.
Re: Build #1 - Armstrong-Whitworth Whitley
Posted: Wed Feb 01, 2023 8:25 pm
by DBMiller
The cockpit and interior look damn fine!
Re: Build #1 - Armstrong-Whitworth Whitley
Posted: Thu Feb 02, 2023 9:05 pm
by RangerNeil
Re: Build #1 - Armstrong-Whitworth Whitley
Posted: Fri Feb 03, 2023 12:07 am
by digger303
Re: Build #1 - Armstrong-Whitworth Whitley
Posted: Fri Feb 03, 2023 8:07 am
by Stokesy44
Great to see the kit make it to painting. Really good work on the seams to bring the kit into the 21st century!
Re: Build #1 - Armstrong-Whitworth Whitley
Posted: Fri Feb 03, 2023 9:10 am
by Quax
you've done a terrific job with the filler and knocking it back into shape, these things always come alive once paint goes on

Paul
Re: Build #1 - Armstrong-Whitworth Whitley
Posted: Fri Feb 03, 2023 2:17 pm
by RangerNeil
Oh crap!!!! Started peeling the Maskol off the second set of lower windows - and the pva has popped!!

I've tried running TET around the one still more or less in place to see if it will hold enough to let the remains of the maskol come off. Annoyingly its almost impossible to get anything behind it to push it back into place.
Re: Build #1 - Armstrong-Whitworth Whitley
Posted: Fri Feb 03, 2023 2:34 pm
by digger303
RangerNeil wrote: Fri Feb 03, 2023 2:17 pm
Oh crap!!!! Started peeling the Maskol off the second set of lower windows - and the pva has popped!!
I've tried running TET around the one still more or less in place to see if it will hold enough to let the remains of the maskol come off. Annoyingly its almost impossible to get anything behind it to push it back into place.
Damnation to say the least.
Re: Build #1 - Armstrong-Whitworth Whitley
Posted: Fri Feb 03, 2023 6:49 pm
by RangerNeil
digger303 wrote: Fri Feb 03, 2023 2:34 pm
RangerNeil wrote: Fri Feb 03, 2023 2:17 pm
Oh crap!!!! Started peeling the Maskol off the second set of lower windows - and the pva has popped!!
I've tried running TET around the one still more or less in place to see if it will hold enough to let the remains of the maskol come off. Annoyingly its almost impossible to get anything behind it to push it back into place.
Damnation to say the least.
To say that's an understatement would be an understatement!!
I'm leaving it another night as the black still feels "tacky" to the touch so that gives the TET more time to set.
The only alternative I can see if the TET won't hold is for the peice to come out completely and then for me to trrim the individual pieces to fit then push them in, one at a time, from the outside. Really hope it doesn't come to that!!!
Re: Build #1 - Armstrong-Whitworth Whitley
Posted: Sat Feb 04, 2023 12:21 am
by digger303
RangerNeil wrote: Fri Feb 03, 2023 6:49 pm
digger303 wrote: Fri Feb 03, 2023 2:34 pm
RangerNeil wrote: Fri Feb 03, 2023 2:17 pm
Oh crap!!!! Started peeling the Maskol off the second set of lower windows - and the pva has popped!!
I've tried running TET around the one still more or less in place to see if it will hold enough to let the remains of the maskol come off. Annoyingly its almost impossible to get anything behind it to push it back into place.
Damnation to say the least.
To say that's an understatement would be an understatement!!
I'm leaving it another night as the black still feels "tacky" to the touch so that gives the TET more time to set.
The only alternative I can see if the TET won't hold is for the peice to come out completely and then for me to trrim the individual pieces to fit then push them in, one at a time, from the outside. Really hope it doesn't come to that!!!
I know it's shutting the gate after the horse has bolted, but I have read that guys building this type of craft add retaining brackets to the inside before closing up.
The alternative choice if your fix doesn't work is to make windows out of glue ( I think ).

Re: Build #1 - Armstrong-Whitworth Whitley
Posted: Sat Feb 04, 2023 8:26 pm
by RangerNeil
Progression - and regression.....
Progress is the base coat of Dark Earth is on - not that it looks very dark!!!
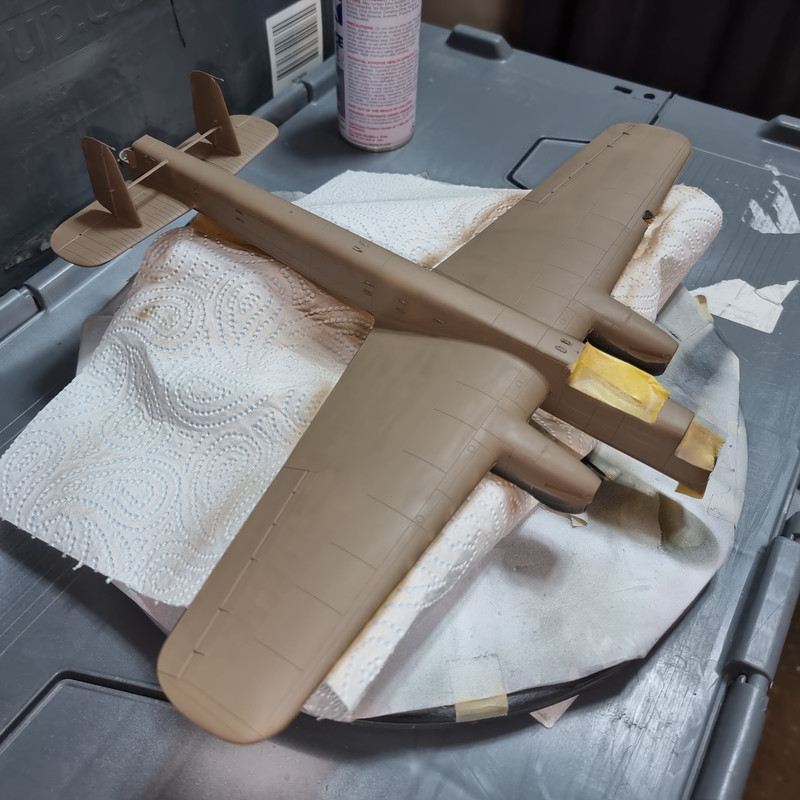
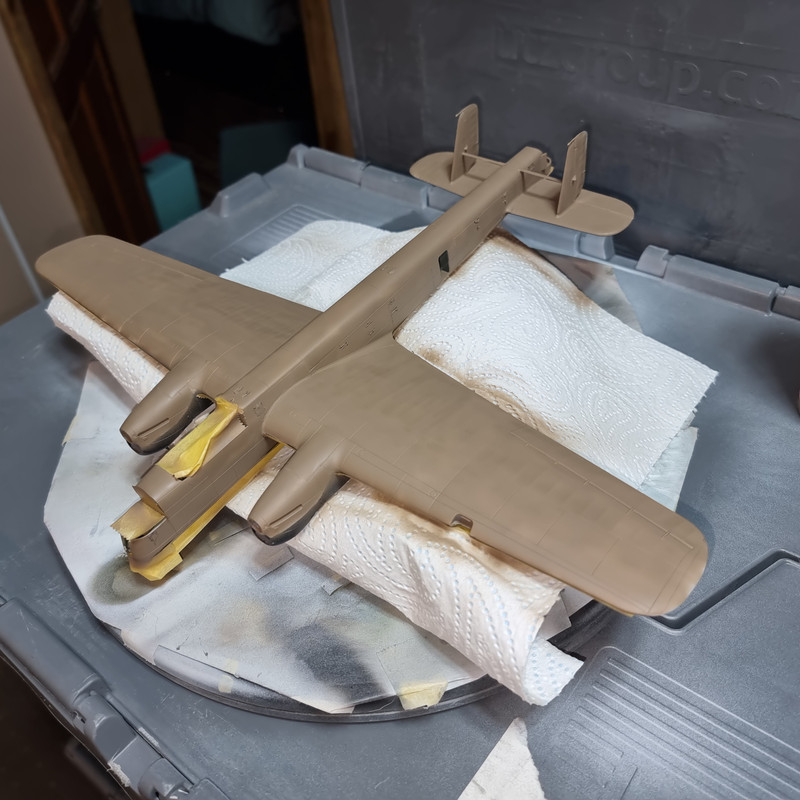
And various sub- assemblies are ready once the Dark Green and silk topcoat are on.
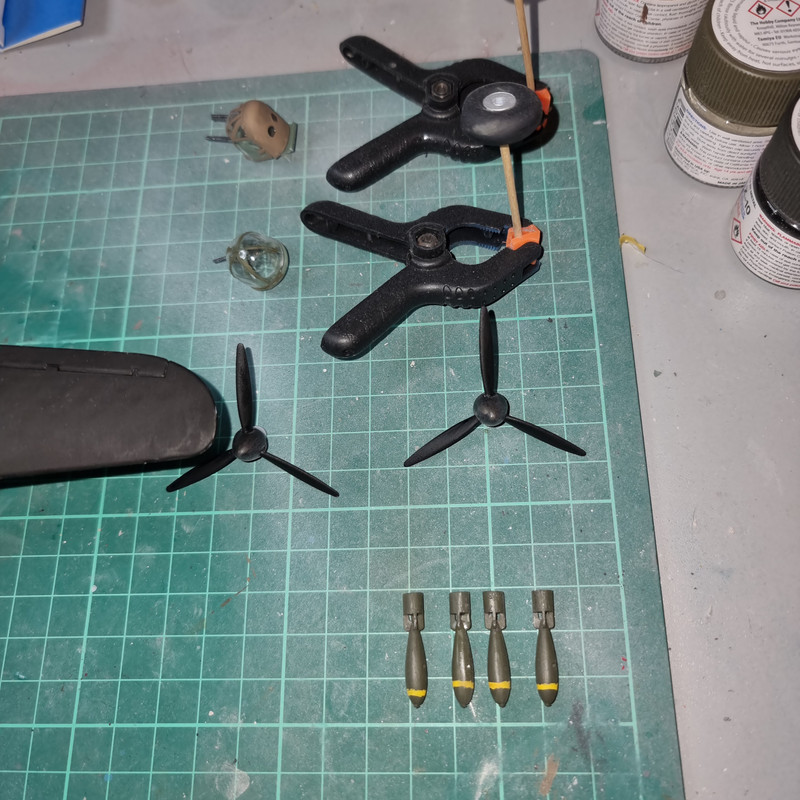
Regression is the twin lower windows on one side fell out and the location is now inaccesible.
So - current plan is to trim the two little windows down to remove the locating lips that should go inside the fuselage and push them in from the outside with a touch of TET or CA.
And somehow the two turrets have got a little overspray on them somehow - no idea how - but they needed a touch of polish anyway so no big deal....
Re: Build #1 - Armstrong-Whitworth Whitley
Posted: Sat Feb 04, 2023 11:48 pm
by digger303
Re: Build #1 - Armstrong-Whitworth Whitley
Posted: Sun Feb 05, 2023 6:24 pm
by BigWall
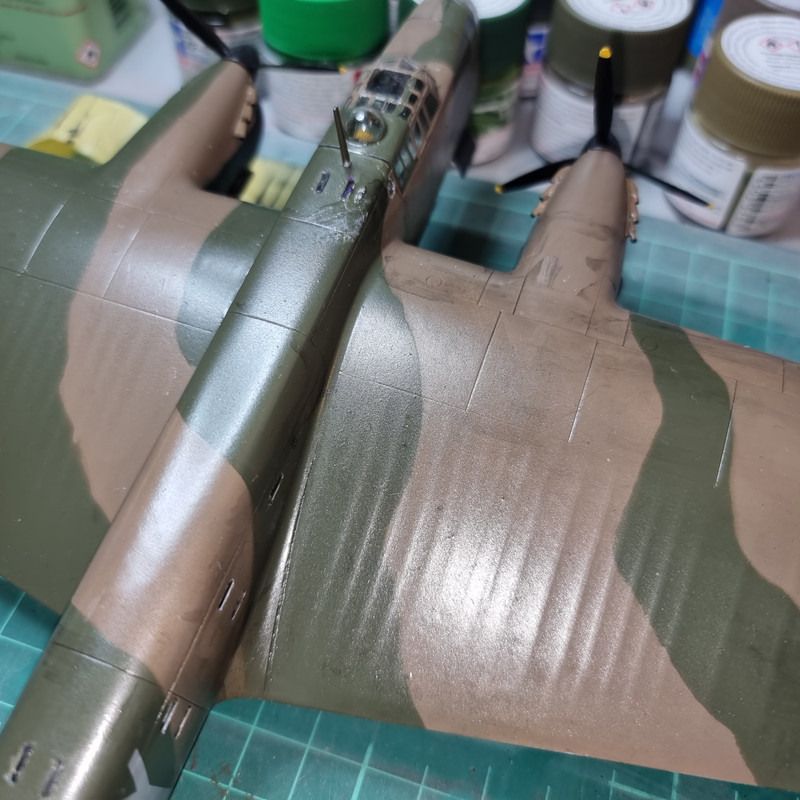
Nice progress! I looking forward to seeing all the paint go down. Am I seeing what looks like tin canning molded in? I think that's what it's called when the skin is wrinkled by stress. It is really apparent on the plane on display at The Air Force Academy.
Re: Build #1 - Armstrong-Whitworth Whitley
Posted: Sun Feb 05, 2023 8:16 pm
by RangerNeil
Green overlay went on today. The immutable laws of Murphy said the 18mm masking tape promptly ran out so I used panzer putty to create the shapes. I have to say I do not think it was that successful. I need to go over the edging in places again with a hairy stick I think......
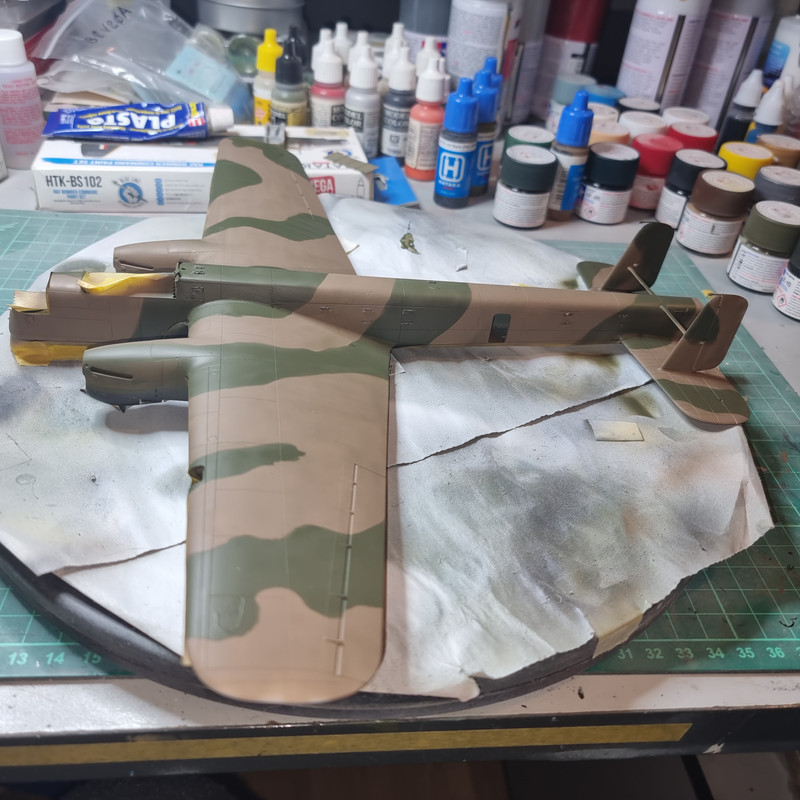
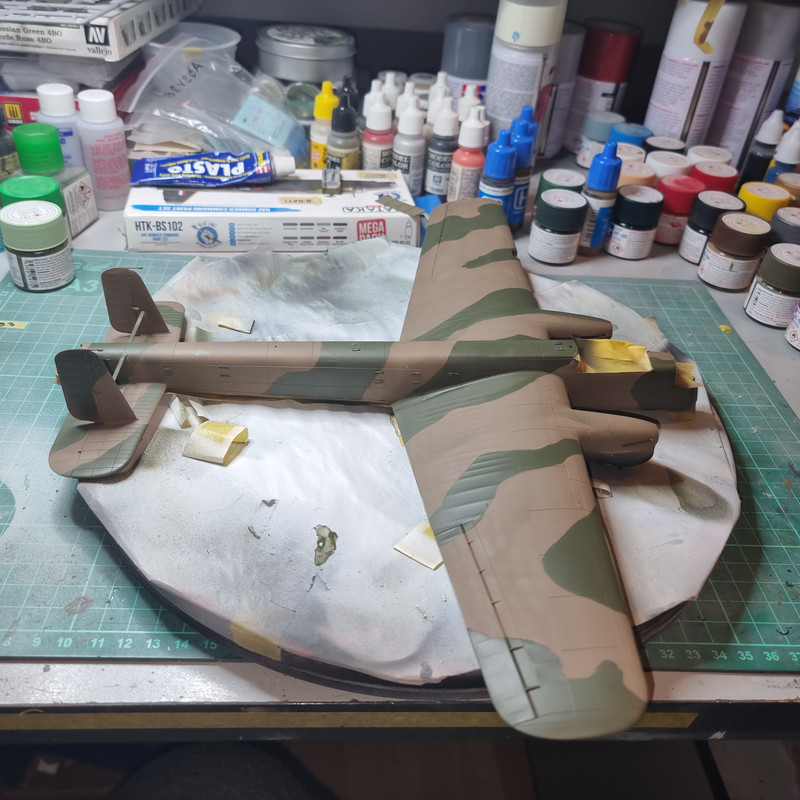
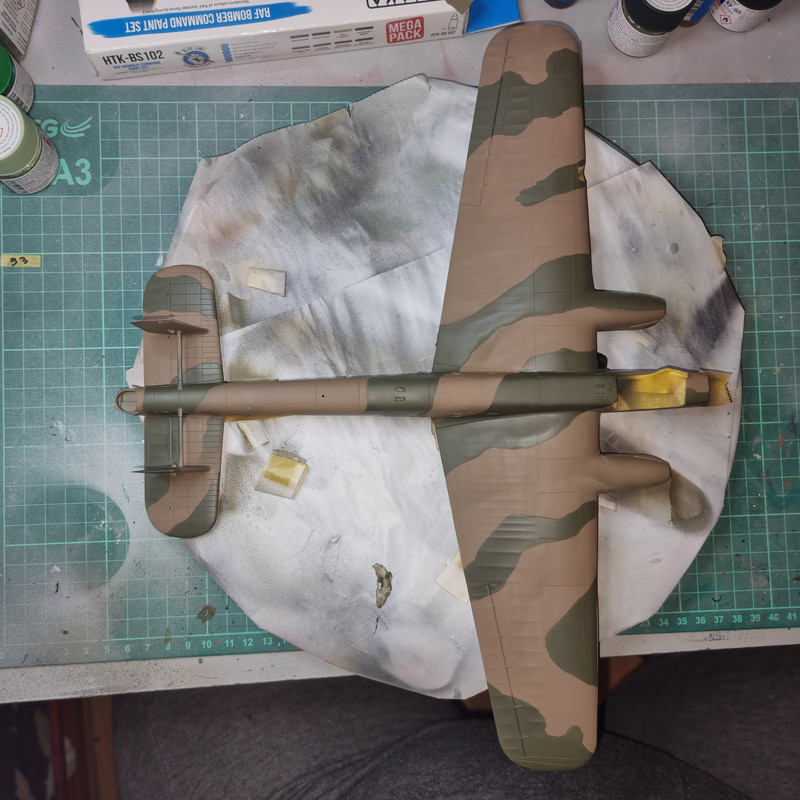
As regards "tin canning" - I think what you are seeing is a combination of poor lighting and modulation in the paint coverage. I cannot honestly say this kit has it moulded in.....
A word about the Hataka Blue Line paints:
They are said to be suitable for brush or airbrush. Certainly for the air brush they work extremely well. Using the hairy stick it takes a minimum of 3 coats to lose the streaky effect and go solid. Using the airbrush, though, they are VERY prone to damage. The Dark Earth had 36 hours to dry and the photo below shows what happens after I touched it pushing the panzer putty into shape.....
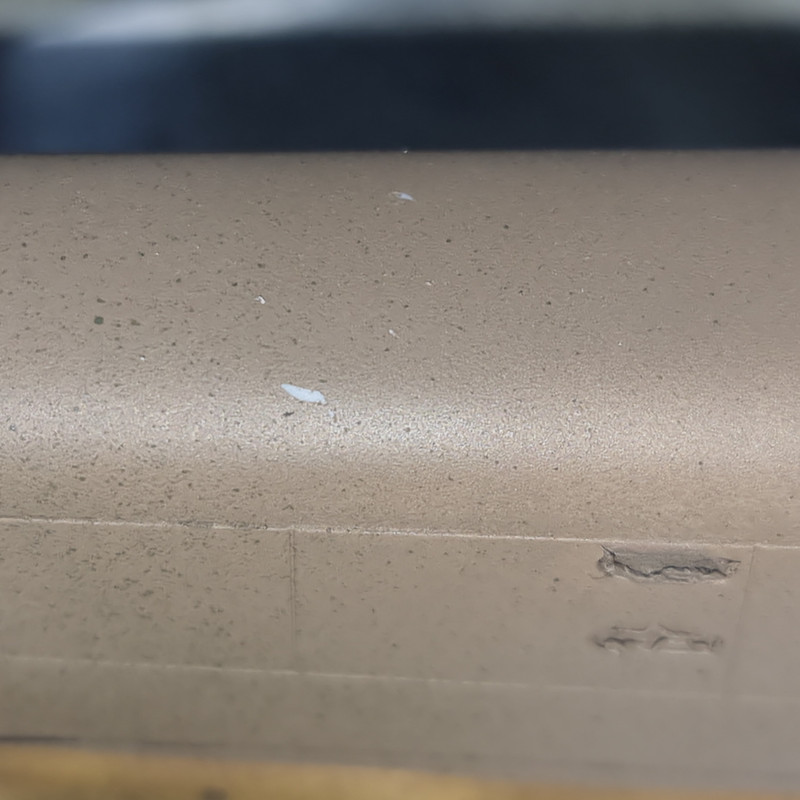
I am wondering if it would be good to apply a clear topcoat, matt or silk, before applying the overlay in future. Anyone got any thoughts on doing this??
Re: Build #1 - Armstrong-Whitworth Whitley
Posted: Mon Feb 06, 2023 8:10 am
by Stokesy44
The camo looks good, nice and smooth.
A matt coat will help, a gloss like aqua gloss might be better and then a matt coat after decals. Aqua gloss is very hard once dry so it should do the trick.
Re: Build #1 - Armstrong-Whitworth Whitley
Posted: Tue Feb 07, 2023 11:34 pm
by RangerNeil
This one continues to put up.a fight!!
The forward part of the fuselage is a clear moulding as there are 3 stacked windows either site AND it hold the front turret in. The instruction say remove material from the inside of this part so its a "snug fit" - if I took any more off the "beak" that holds the front turret in would have vanished.
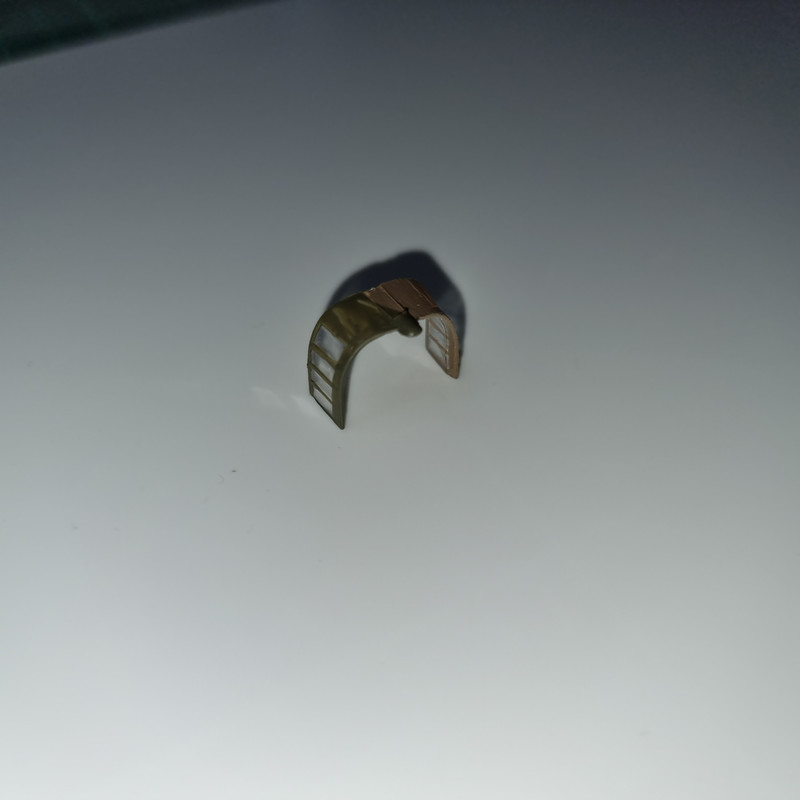
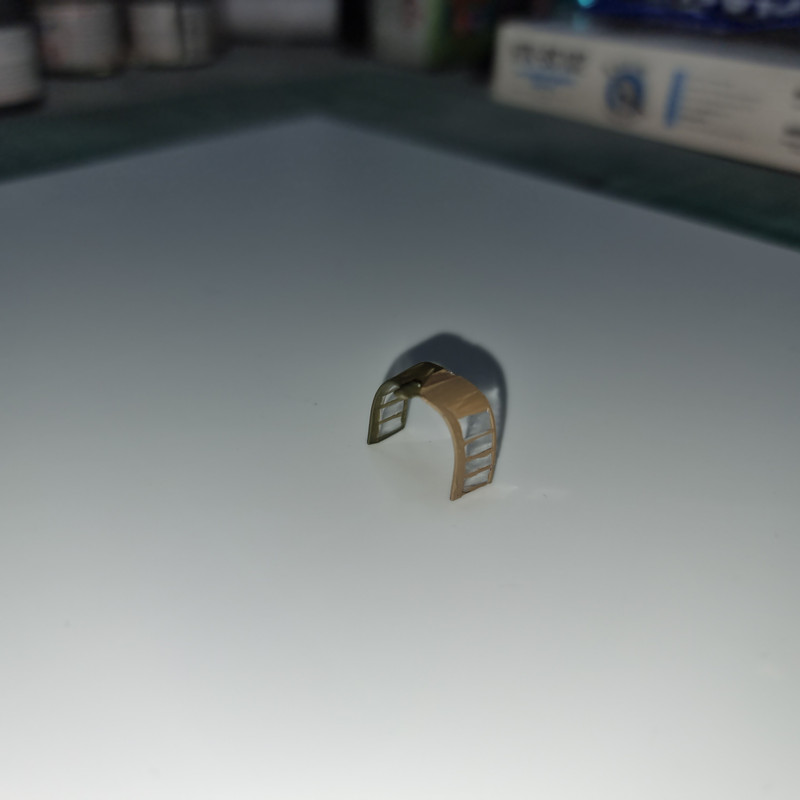
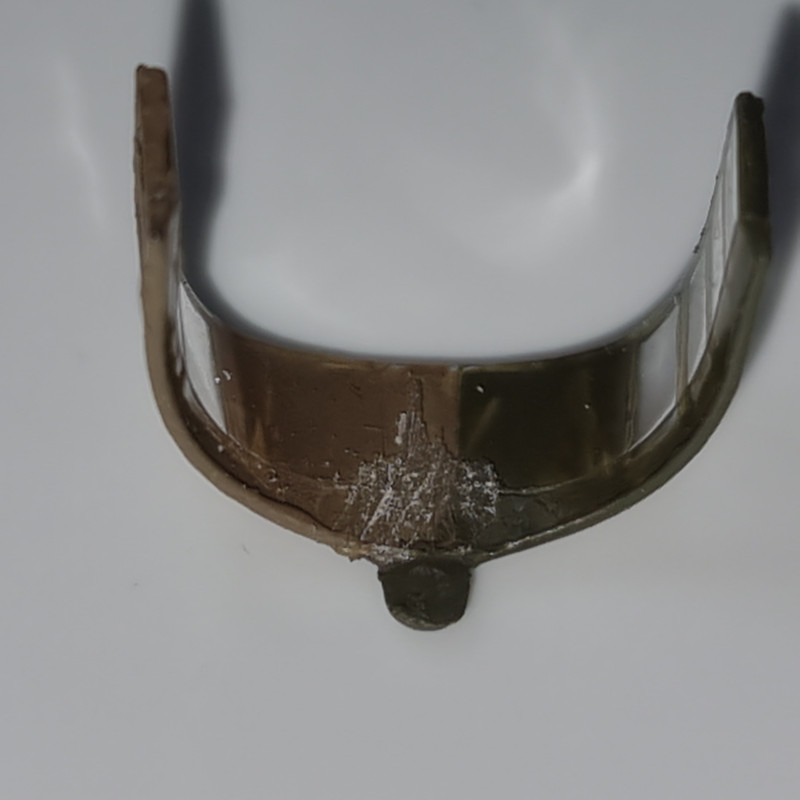
Even at this point the part isn't the greatest fit:
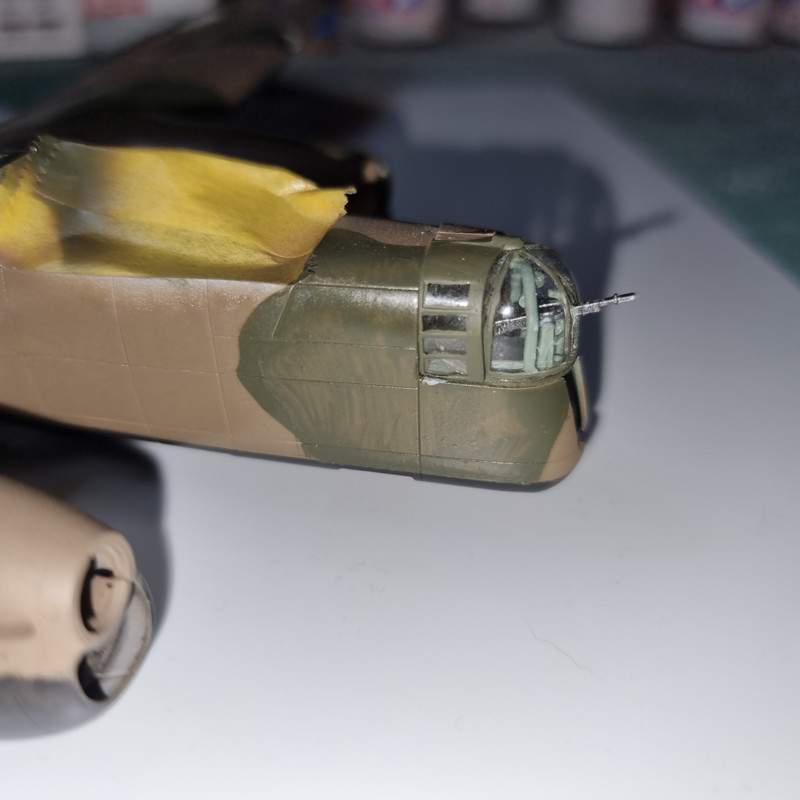
So - its been pulled down as tight as possible and secured wwith tape over night - we'll see how it looks tomorrow. The cockpit canopy also wasn't the greatest fit but I think that can definitely be improved with a bit of work. If I were ever to build this one again I think I would fit these parts before painting and find a way of masking them and the turrets.
Re: Build #1 - Armstrong-Whitworth Whitley
Posted: Wed Feb 08, 2023 3:45 pm
by RangerNeil
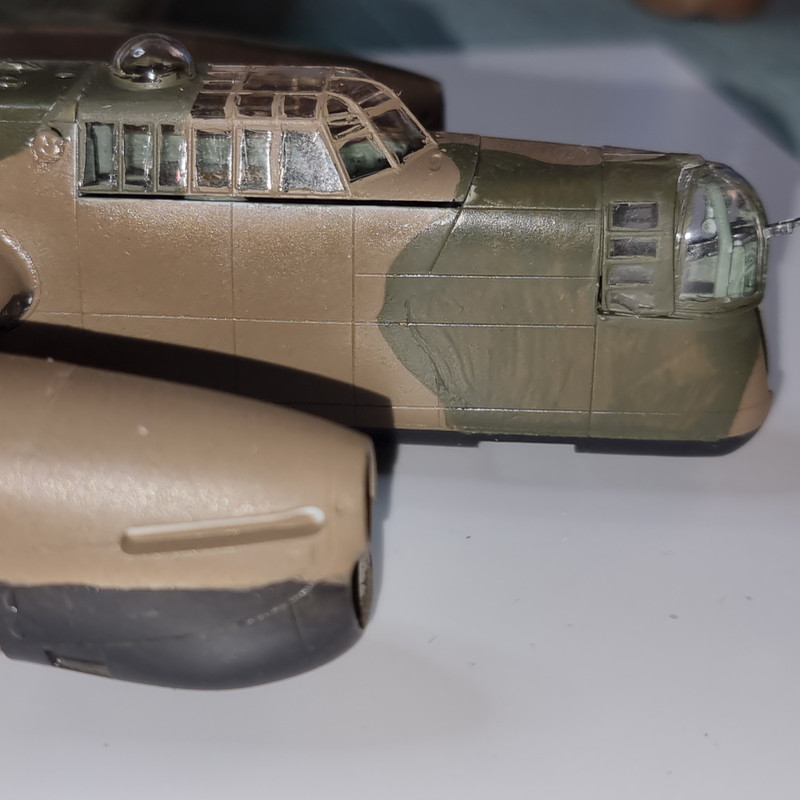
The perfect fitting canopy......
Re: Build #1 - Armstrong-Whitworth Whitley
Posted: Fri Feb 10, 2023 8:27 pm
by RangerNeil
Did some work on the cockpit tonight - it now fits better than before - BUT - its still a fraction narrower than the Fuselage opening!! Absolutely poor quality contol!!!
I then spent over an hour trying to mask the cockpit windows with tape - and gave up in frustration. So I've applied Maskol and am letting it set overnight.
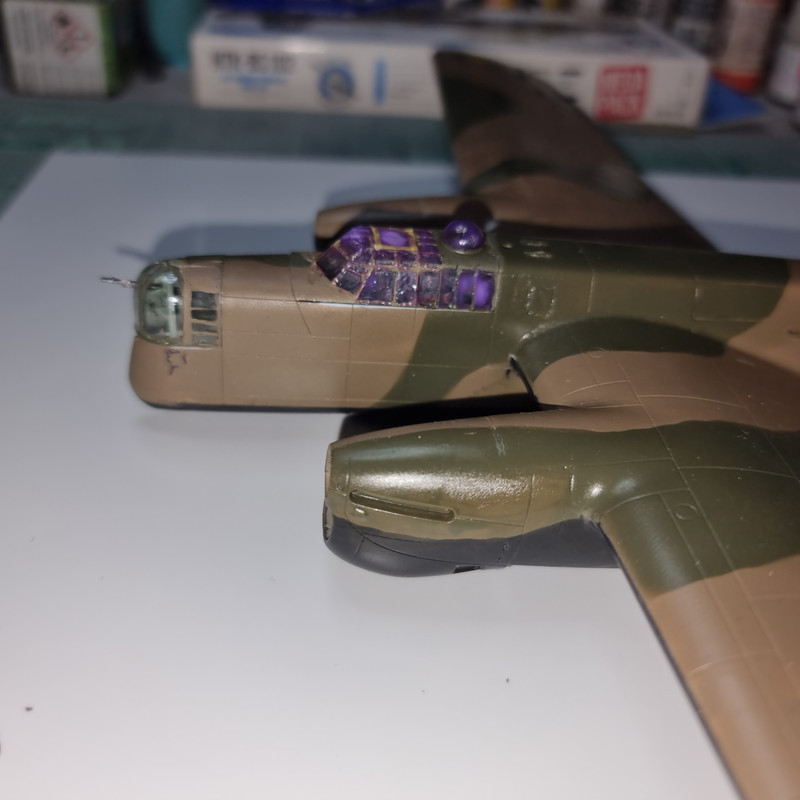
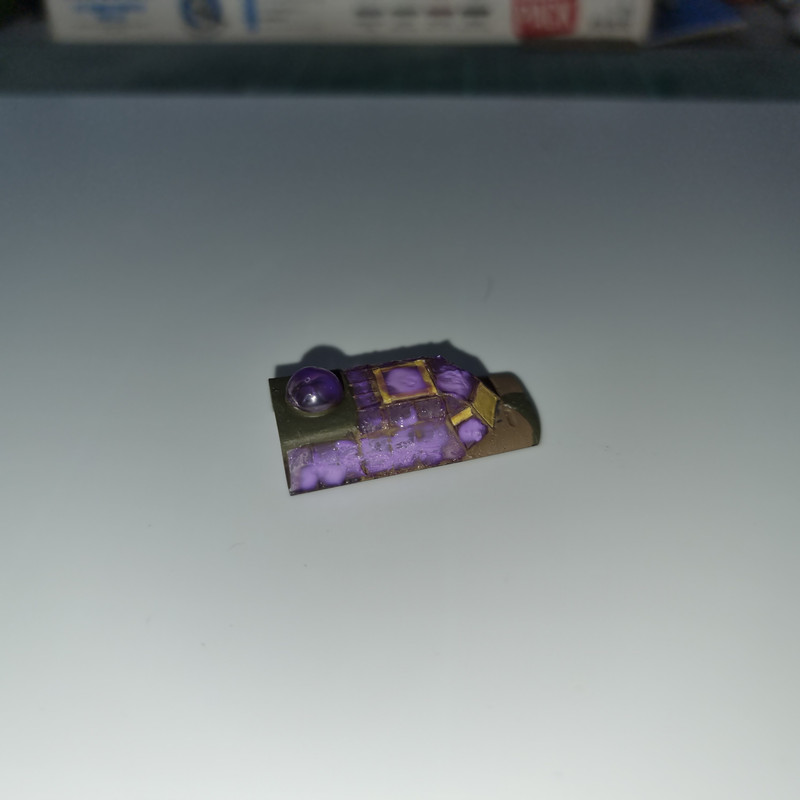
Absolutely frustrating to be this close to the finish and find the fight increasing!!!
Re: Build #1 - Armstrong-Whitworth Whitley
Posted: Sun Feb 12, 2023 12:17 am
by digger303
Well it is old Airfix, but I do feel your frustration. It isn't as bad as having the canopy larger than the outside surface of the fuselage by a good margin.
I shy away from the old kits mostly because it kills my mojo and I don't have enough skills or time to fix short comings.
At this point I thought I'd better check Scalemates and actually check how old this kit is.... 2015 new tooled. So I have to retract that earlier statement sorry Neil I thought it was one of those vintage series. So now I'm thinking 2015 jez I thought the newer tooled stuff was good, not so it seems or one at least has to check the reviews carefully. Not having a go Neil just thinking ahead if I decide to buy any Airfix and I am partial to their Walrus.
There is absolutely no excuse for sloppy work on Airfix's part producing new molds in this day and age for the price they charge I expect a certain level of basic quality control. It seems modern management doesn't think it's necessary and I think it's what I pay for. Sorry for the rant Neil I don't want to high jack your thread....back to normal programming now
Re: Build #1 - Armstrong-Whitworth Whitley
Posted: Sun Feb 12, 2023 10:58 am
by RangerNeil
digger303 wrote: Sun Feb 12, 2023 12:17 am
Well it is old Airfix, but I do feel your frustration. It isn't as bad as having the canopy larger than the outside surface of the fuselage by a good margin.
I shy away from the old kits mostly because it kills my mojo and I don't have enough skills or time to fix short comings.
At this point I thought I'd better check Scalemates and actually check how old this kit is.... 2015 new tooled. So I have to retract that earlier statement sorry Neil I thought it was one of those vintage series. So now I'm thinking 2015 jez I thought the newer tooled stuff was good, not so it seems or one at least has to check the reviews carefully. Not having a go Neil just thinking ahead if I decide to buy any Airfix and I am partial to their Walrus.
There is absolutely no excuse for sloppy work on Airfix's part producing new molds in this day and age for the price they charge I expect a certain level of basic quality control. It seems modern management doesn't think it's necessary and I think it's what I pay for. Sorry for the rant Neil I don't want to high jack your thread....back to normal programming now
No probs mate - you've just said whats been going through my mind.
I'm wondering if the QC issues are why they are returning production to the UK from China....
Re: Build #1 - Armstrong-Whitworth Whitley
Posted: Sun Feb 12, 2023 11:07 pm
by digger303
RangerNeil wrote: Sun Feb 12, 2023 10:58 am
digger303 wrote: Sun Feb 12, 2023 12:17 am
Well it is old Airfix, but I do feel your frustration. It isn't as bad as having the canopy larger than the outside surface of the fuselage by a good margin.
I shy away from the old kits mostly because it kills my mojo and I don't have enough skills or time to fix short comings.
At this point I thought I'd better check Scalemates and actually check how old this kit is.... 2015 new tooled. So I have to retract that earlier statement sorry Neil I thought it was one of those vintage series. So now I'm thinking 2015 jez I thought the newer tooled stuff was good, not so it seems or one at least has to check the reviews carefully. Not having a go Neil just thinking ahead if I decide to buy any Airfix and I am partial to their Walrus.
There is absolutely no excuse for sloppy work on Airfix's part producing new molds in this day and age for the price they charge I expect a certain level of basic quality control. It seems modern management doesn't think it's necessary and I think it's what I pay for. Sorry for the rant Neil I don't want to high jack your thread....back to normal programming now
No probs mate - you've just said whats been going through my mind.
I'm wondering if the QC issues are why they are returning production to the UK from China....
Good luck trying to find out the answer to that question. They duck interviews as one of the podcasts has been trying to get them on for a age and no luck as yet.
Re: Build #1 - Armstrong-Whitworth Whitley
Posted: Thu Mar 09, 2023 11:13 pm
by RangerNeil
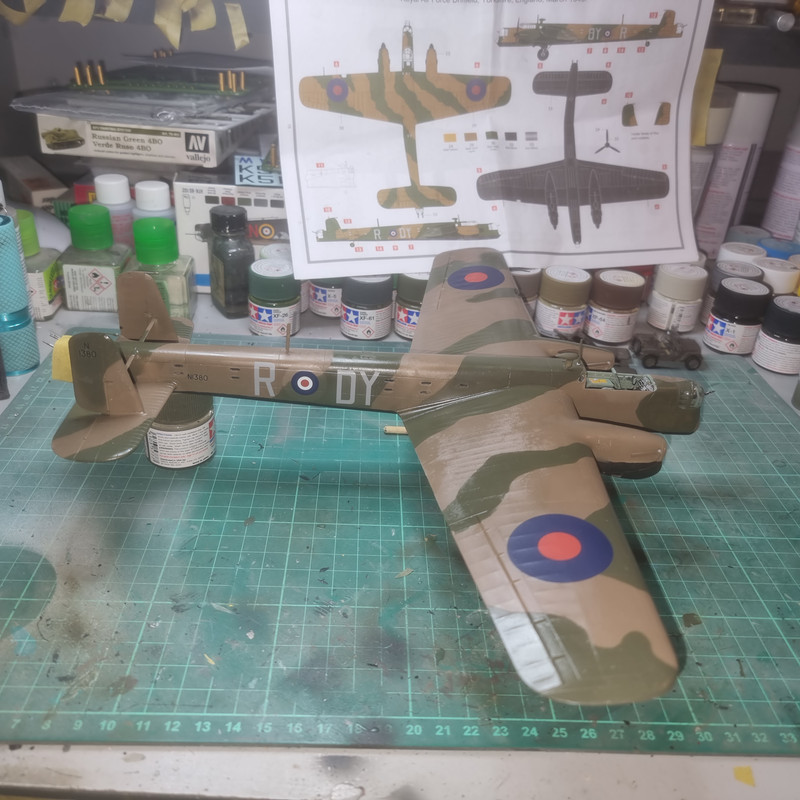
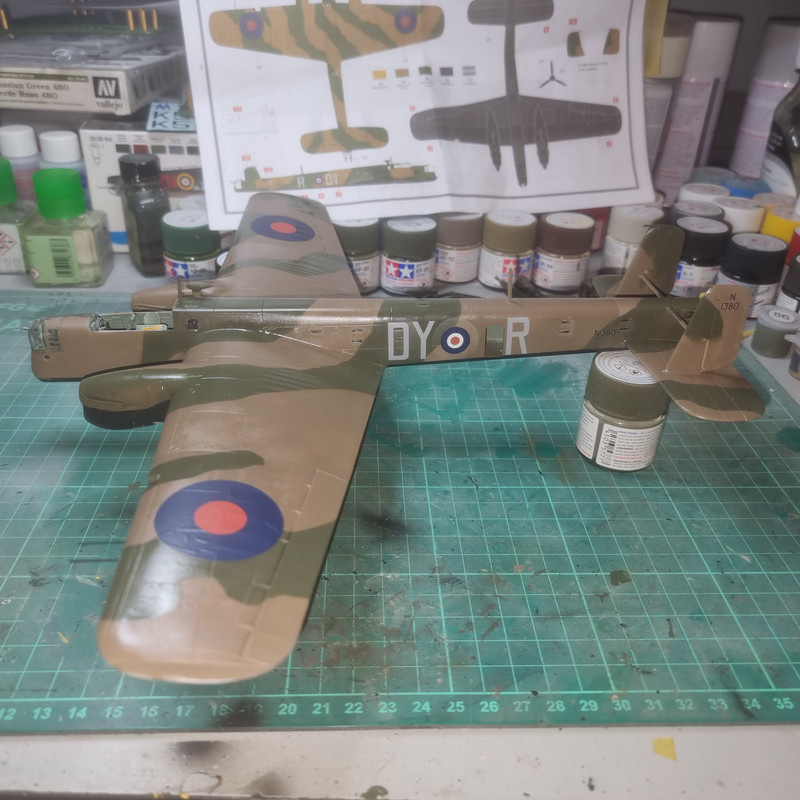
Well, got the Whitley mojo back at last so all the decals are on. Letting them dry overnight then going in with the Microsol(Red bottle) to get them to settle into the panel lines.
Once thats done its satin varnsh timeand then I can finish the build - bomb bays, flaps, undercarriage etc.
Re: Build #1 - Armstrong-Whitworth Whitley
Posted: Thu Mar 09, 2023 11:30 pm
by digger303
digger303 wrote: Sun Feb 12, 2023 11:07 pm
RangerNeil wrote: Sun Feb 12, 2023 10:58 am
digger303 wrote: Sun Feb 12, 2023 12:17 am
Well it is old Airfix, but I do feel your frustration. It isn't as bad as having the canopy larger than the outside surface of the fuselage by a good margin.
I shy away from the old kits mostly because it kills my mojo and I don't have enough skills or time to fix short comings.
At this point I thought I'd better check Scalemates and actually check how old this kit is.... 2015 new tooled. So I have to retract that earlier statement sorry Neil I thought it was one of those vintage series. So now I'm thinking 2015 jez I thought the newer tooled stuff was good, not so it seems or one at least has to check the reviews carefully. Not having a go Neil just thinking ahead if I decide to buy any Airfix and I am partial to their Walrus.
There is absolutely no excuse for sloppy work on Airfix's part producing new molds in this day and age for the price they charge I expect a certain level of basic quality control. It seems modern management doesn't think it's necessary and I think it's what I pay for. Sorry for the rant Neil I don't want to high jack your thread....back to normal programming now
No probs mate - you've just said whats been going through my mind.
I'm wondering if the QC issues are why they are returning production to the UK from China....
Good luck trying to find out the answer to that question. They duck interviews as one of the podcasts has been trying to get them on for a age and no luck as yet.
EDIT........Airfix must have changed there stance a little because they gave complete tour and podcast interview to the UK podcast....Just Making Conversation.
Re: Build #1 - Armstrong-Whitworth Whitley
Posted: Thu Mar 09, 2023 11:31 pm
by digger303
Re: Build #1 - Armstrong-Whitworth Whitley
Posted: Sat Mar 11, 2023 12:03 am
by RangerNeil
Thus far the mojo continues to survive
Today the undercarriage went on together with the bay doors and the front access hatch. Tomorrow I get to look at the rear, main, access door and the bomb bays. Airfix provide the bomb bay doors moulded in the closed position so if I want to display them open I need to slice each one into the 4 seperate doors. Not sure if I want to risk this.....
The decals are quite thick and I'm having issues getting them to conform to the sunken panel lines. I'm using MicroSol (the red bottle,) and it just seems to be lifting decal, not softening it......
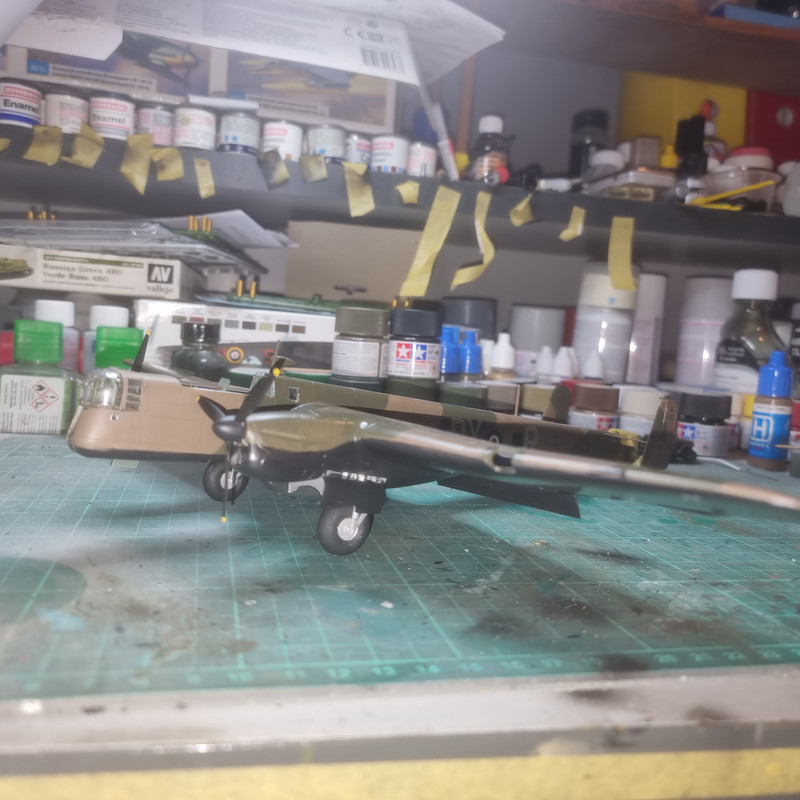
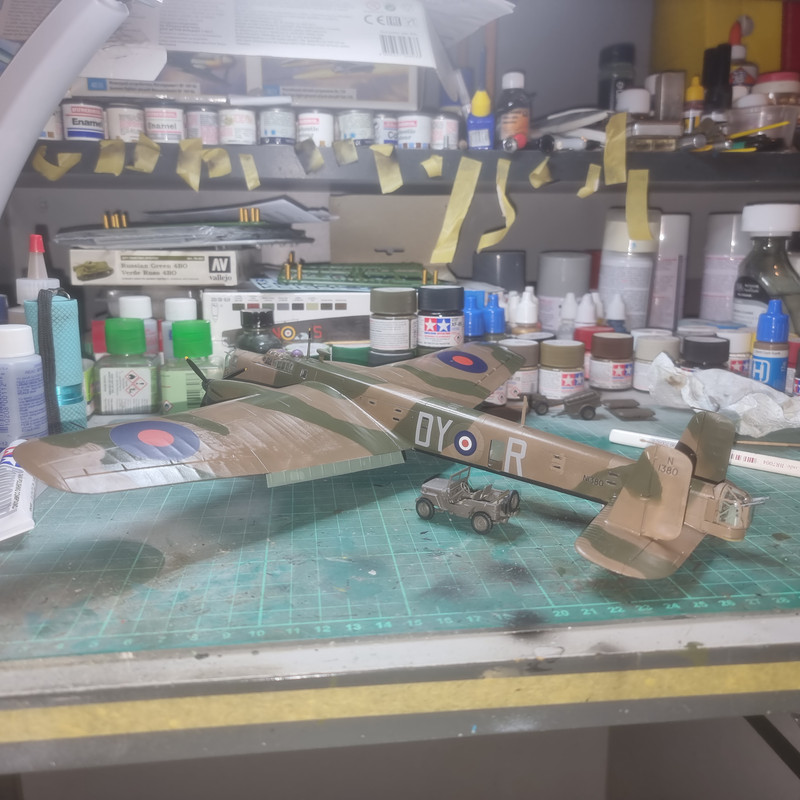
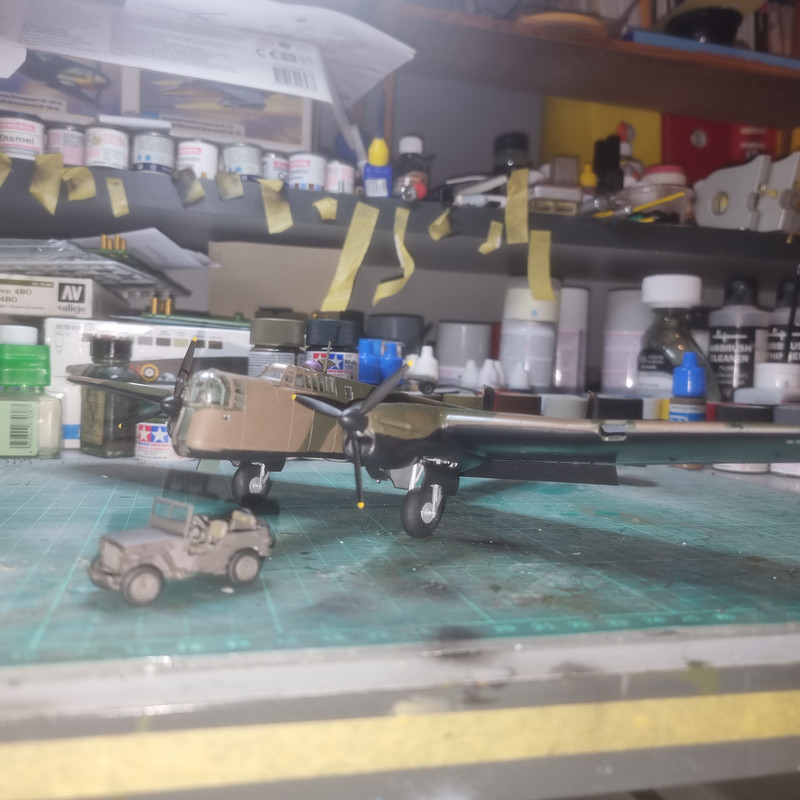
The end, at last, is in sight
Hopefully the light at the end of the tunnel isn't the express train going the other way.....
Re: Build #1 - Armstrong-Whitworth Whitley
Posted: Sat Mar 11, 2023 5:16 am
by digger303
Re: Build #1 - Armstrong-Whitworth Whitley
Posted: Sun Mar 12, 2023 12:53 am
by RangerNeil
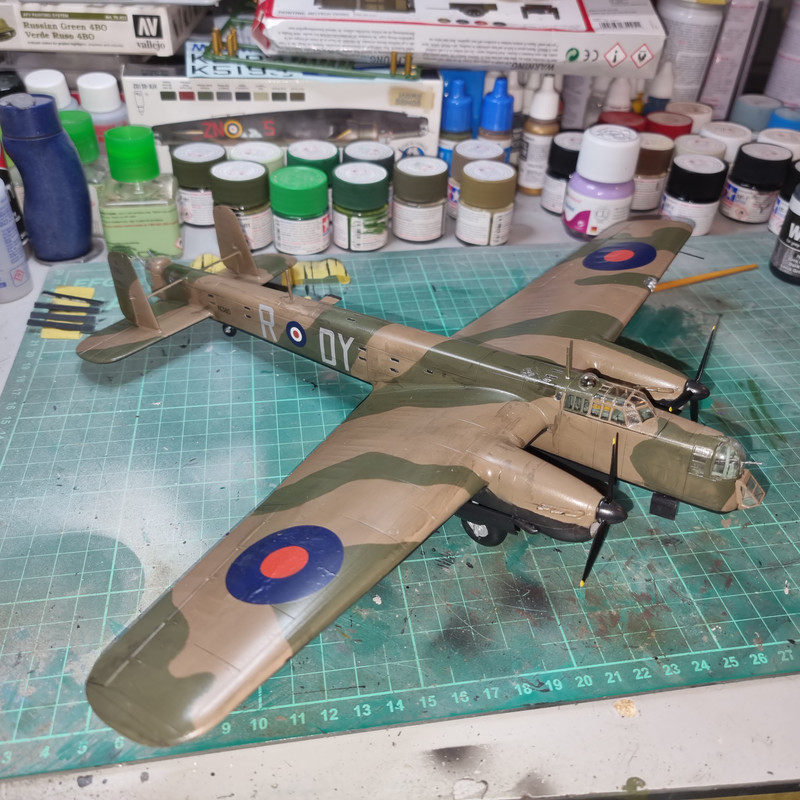
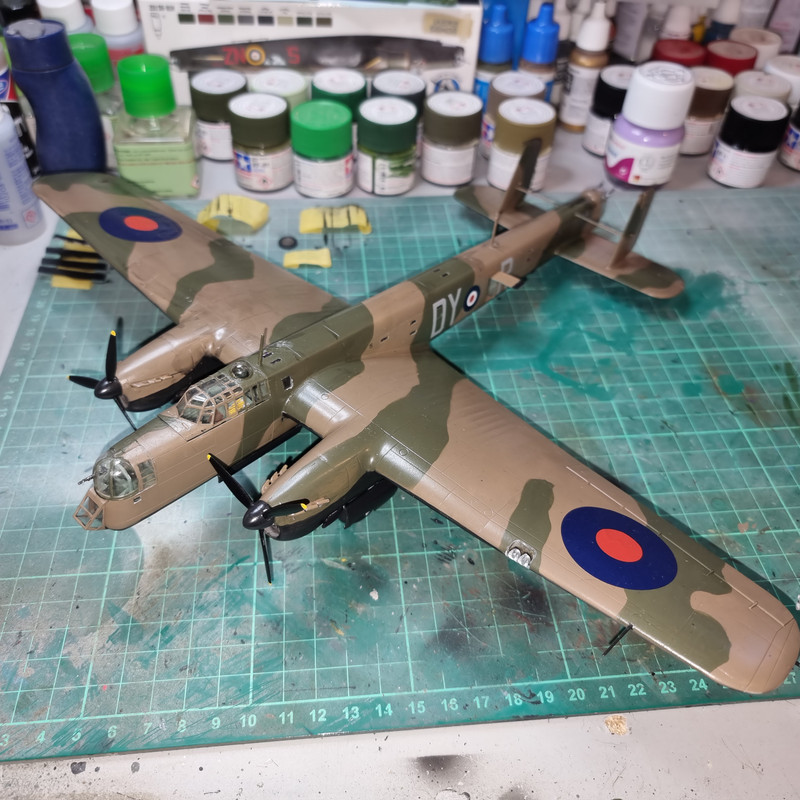
Satin coat applied to the top and sides, Maskol removed from all the windows except the lowest 4 behind the wing roots (what a PITA that was....), rear entrance door fitted and canopy/nose glazing dry fitted.
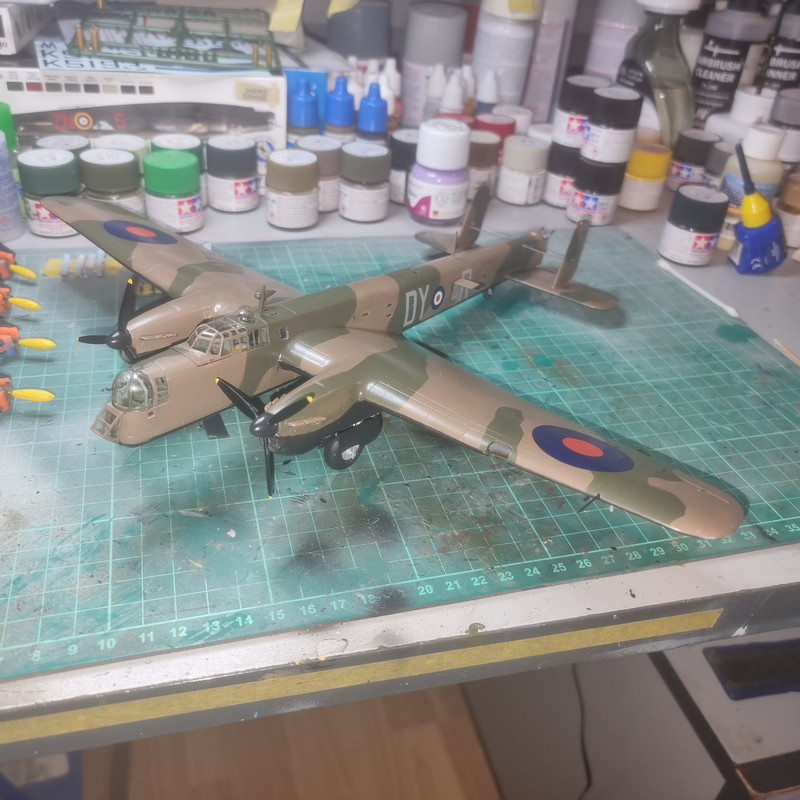
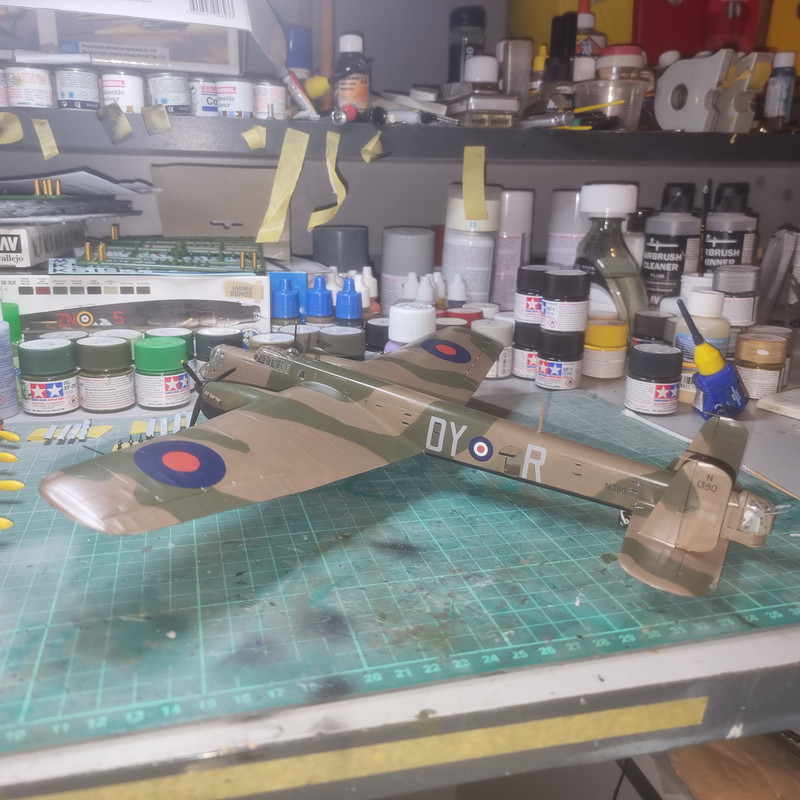
Plan is letting the satin coat dry overnight - this Vallejo Acrylic takes forever to harden off, hence why I prefer the Humbrol enamel finish as that only needs half hour before it can safely handled then tomorrow it can be flipped over and the satin coat applied to the underside after the bomb bays are completed.
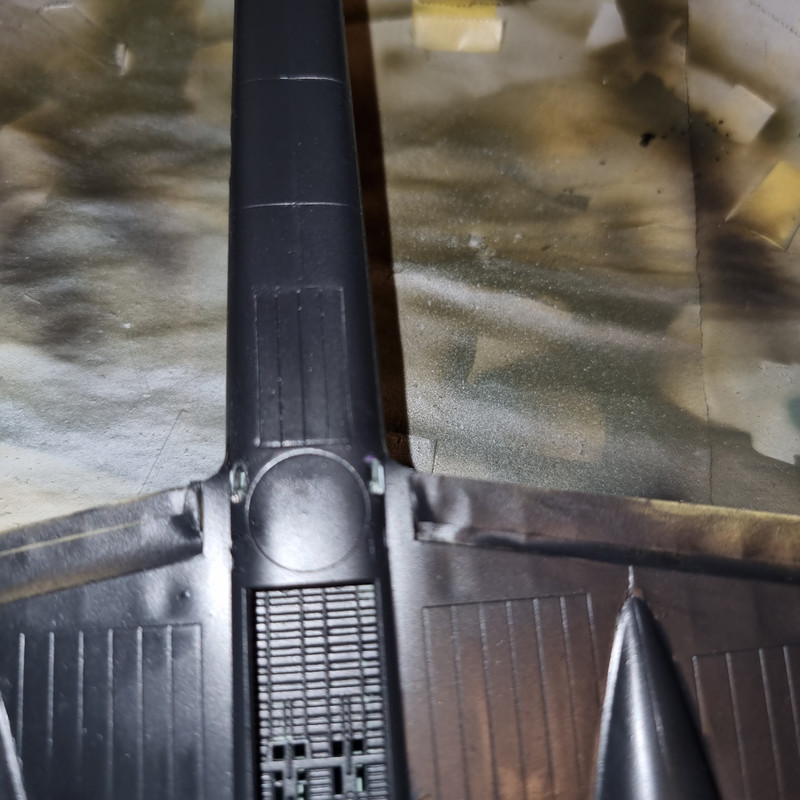
Before they can be done the rather nasty ejector marks on the inside of the doors
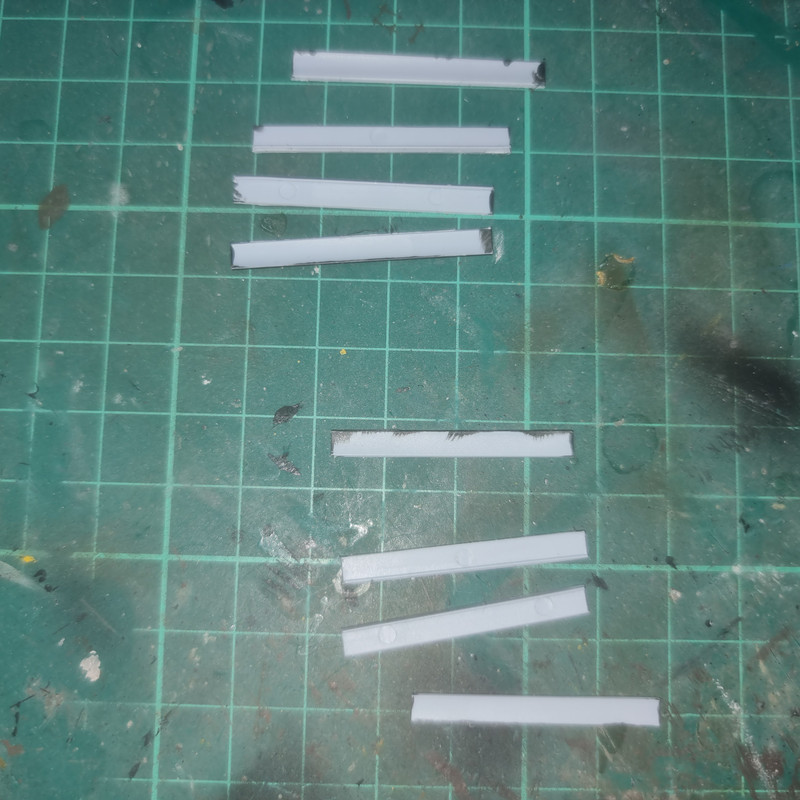
need rubbing down (they were filled with putty this afternoon). The doorswere also a nightmare to seperate properly along the guidelines.....
Its not looking too bad right now - the end is definitely in sight!
Re: Build #1 - Armstrong-Whitworth Whitley
Posted: Sun Mar 12, 2023 11:50 pm
by RangerNeil
Didn't get much modelling time today - hit a pothole Weds night at 30mph and blew the N/S/F tyre. Been phoning around trying to get the best price for a replacement, found one yesterday (still over £100!) so today I went to swap the blown tyre for the spare - damn thing fought me so much it took6 hours to get the car elevated, old wheel off, space saver spare fitted, car dropped, - and space saver pumped back up from 40 to 60 psi. What a nightmare!!
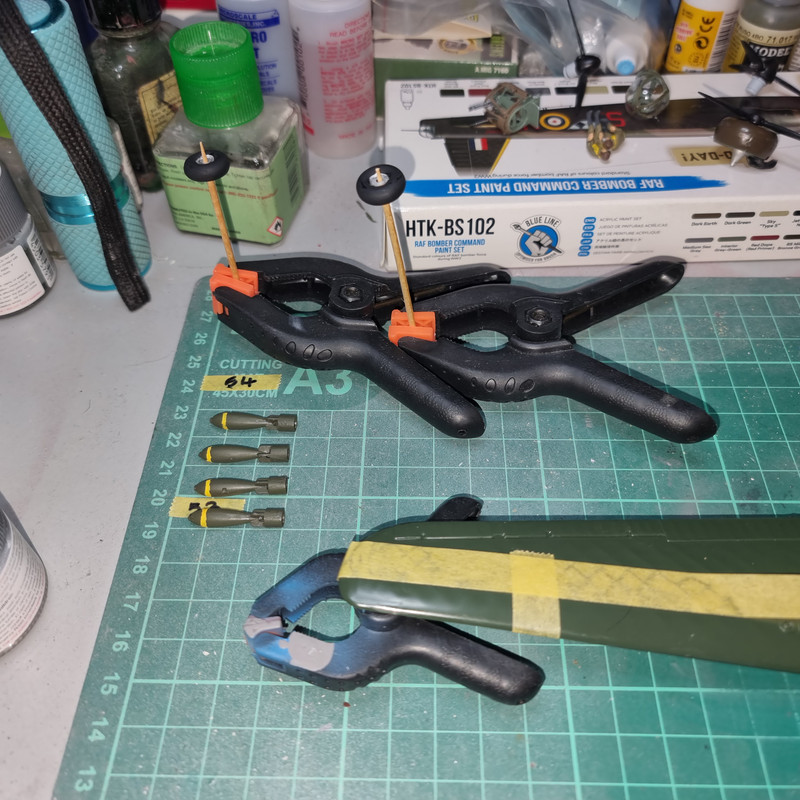
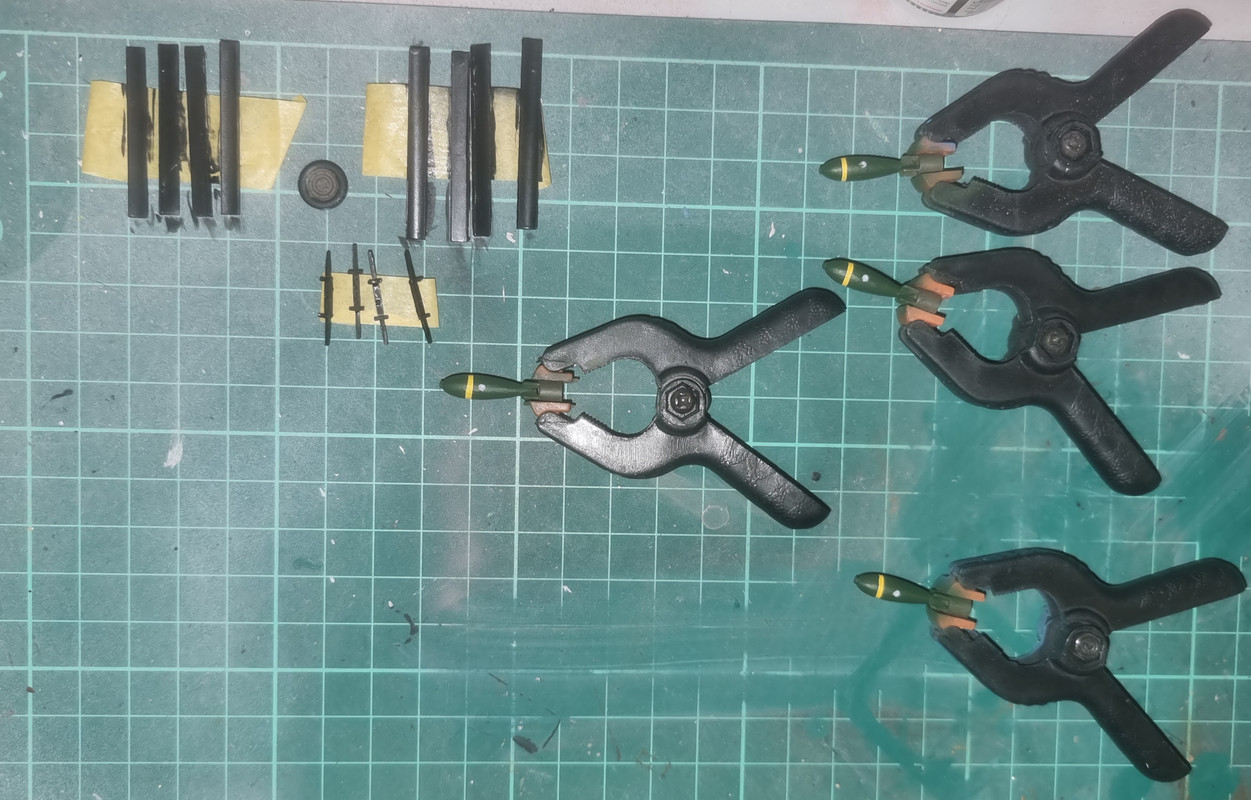
Anyways - the ejector marks on the inner faces of the bomb bay doors are now filled, sanded and painted. The bomb carriers are off the sprue and painted. And I didn't like the look of the 4 bombs - I tried painting the yellow line freehand and as I looked yesterday I thought " what a mess" so I've redone them. All 4 had the bodies painted yellow last night and today I wrapped a strip of 1mm masking tape around each, broke out the airbrush and recoated the bodies in dark green, peeling off the tape when dry. They look 100% better.
Re: Build #1 - Armstrong-Whitworth Whitley
Posted: Mon Mar 13, 2023 4:32 am
by digger303
Re: Build #1 - Armstrong-Whitworth Whitley
Posted: Mon Mar 13, 2023 7:49 am
by Stokesy44
Fine looking camo and decal work.
Re: Build #1 - Armstrong-Whitworth Whitley
Posted: Mon Mar 13, 2023 11:26 pm
by BigWall
Your lines came out nice and crisp!
I hate it when what should be a simple job turns into an entirely too complicated issue!
Re: Build #1 - Armstrong-Whitworth Whitley
Posted: Tue Mar 14, 2023 12:28 pm
by RangerNeil
Yeah - the handling is totally different, esp. cornering..... And when you go to refit the real wheel you then have to jack the car up higher to get the wheel on the hub....
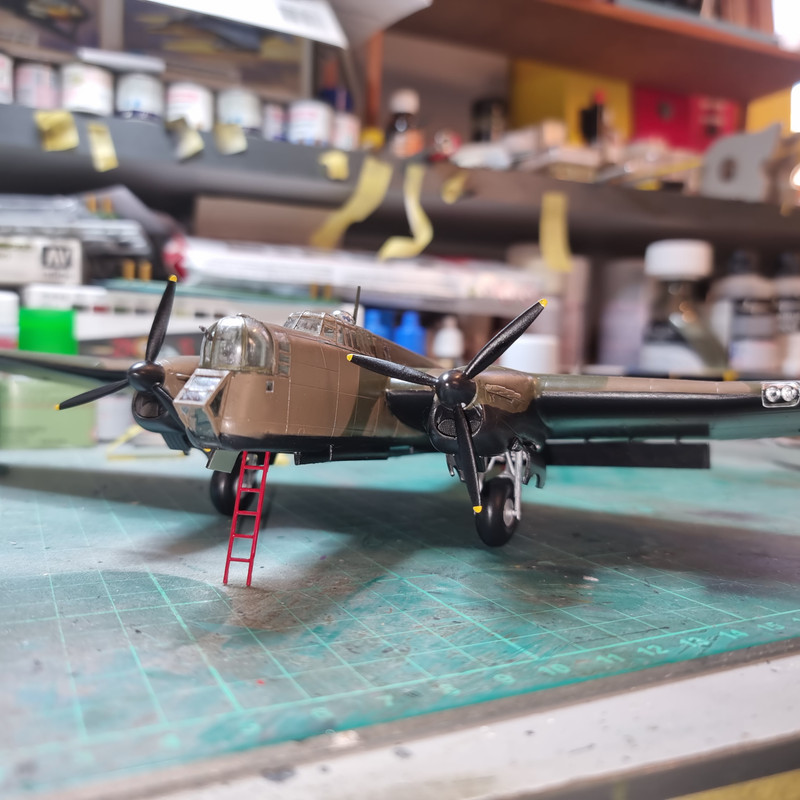
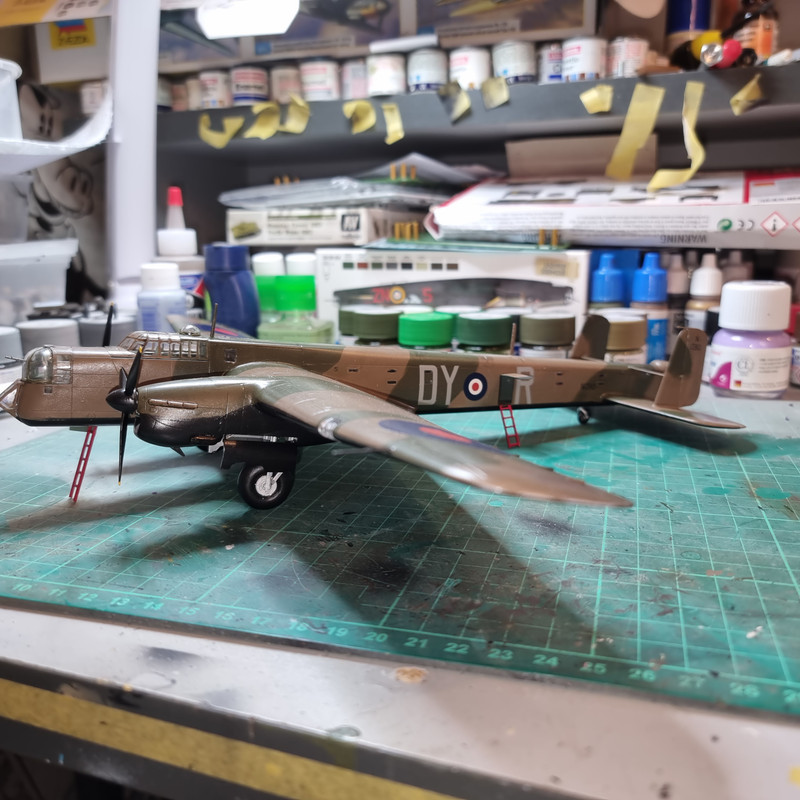
Anyways - back to the Whitley - just off to fit the bomb carriers to the bombs and then those to the bomb bays, bomb bay doors to the underside and the final coat of satin to the underside. That will just leave the glazing and access ladders to fit and its job done.
Re: Build #1 - Armstrong-Whitworth Whitley
Posted: Tue Mar 14, 2023 5:42 pm
by RangerNeil
Re: Build #1 - Armstrong-Whitworth Whitley
Posted: Tue Mar 14, 2023 11:45 pm
by digger303