Page 1 of 1
Progress Build of the Phoenix Airplane from The Flight of the Phoenix Movie (1965)
Posted: Fri Sep 27, 2024 8:18 pm
by Phillip1
Fellow Modelers,
The very entertaining American survival film The Flight of the Phoenix, made in 1965, is a fictional story of a small group of oil rig workers whose Fairchild C-82A Packet twin engine cargo plane gets caught in a sand storm and has to make an emergency crash landing deep in the Sahara desert. One of the passengers, brilliant aircraft designer Heinrich Dorfmann, tells the other survivors a new, smaller single engine plane can be built from the wreckage and fly them to safety. Although dubious, the others know there is no hope of outside rescue and understand this longshot option is preferable to slowly dying in the desert. The movie deals mainly with the challenges of building the new airplane (nicknamed “Phoenix”), the personality conflicts between the survivors and the lack of water. This movie has been one of my favorites for many years, although I admit the premise of building a new airplane under the given circumstances was not possible. However, I will admit the director did a credible job of making the impossible believable. The acting in the movie is also first rate, with outstanding performances from Hardy Kruger, Richard Attenborough and James Stewart. Surprisingly the movie was a box office failure, although it received two Academy Award and two Golden Globe nominations. Over the decades it has gained a strong following and favorable viewer rating.
For decades I wanted to add a “Phoenix” airplane model to my collection but no model manufacturer has ever offered this kit in any medium (i.e., plastic/resin/vac-form, etc.). It always seemed that the easiest plan to acquire one was to do what they did in the movie-start with heavily modifying a Fairchild C-82A Packet and scratch-build all the other required parts. I was never motivated to do this, but recently found a 2012 build thread on Brittmodeller.com by Mike N where he did this exact conversion. I was immediately inspired by his efforts and decided to do the same thing myself. A plastic model of the Fairchild C-82A Packet is not available, but the Fairchild C-119C/G Boxcar (a very similar, improved and more powerful version of the C-82A) has been available from Testors/Italeri in 1/72 scale and Aurora in 1/77 scale for many years. I used the Testors/Italeri kit as my starting point. Note for the 1965 movie two “Phoenix” airplanes were built, a flying version (named Tallmantz Phoenix P-1) and one non-flying (static) version. My build is the non-flying version, which is seen in almost every single exterior scene of the movie. Let’s get started…
Images 001-005a: Here are model box photos and instructions of the kit I purchased on e-bay. The quality of the parts is okay but not great. The last image is the actual C-82A Packet used in the flying sequences of the movie’s opening. Even in this photo it can be seen how similar the C-82A and C-119 are.
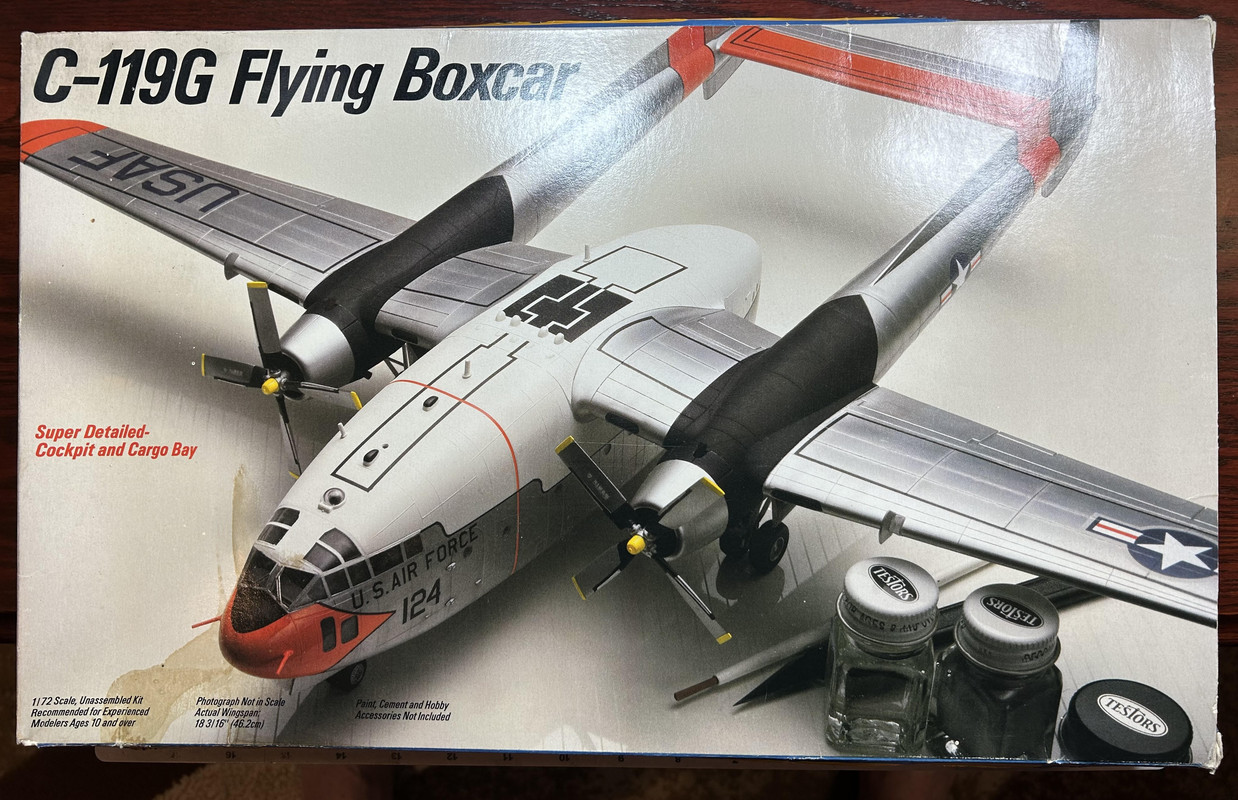
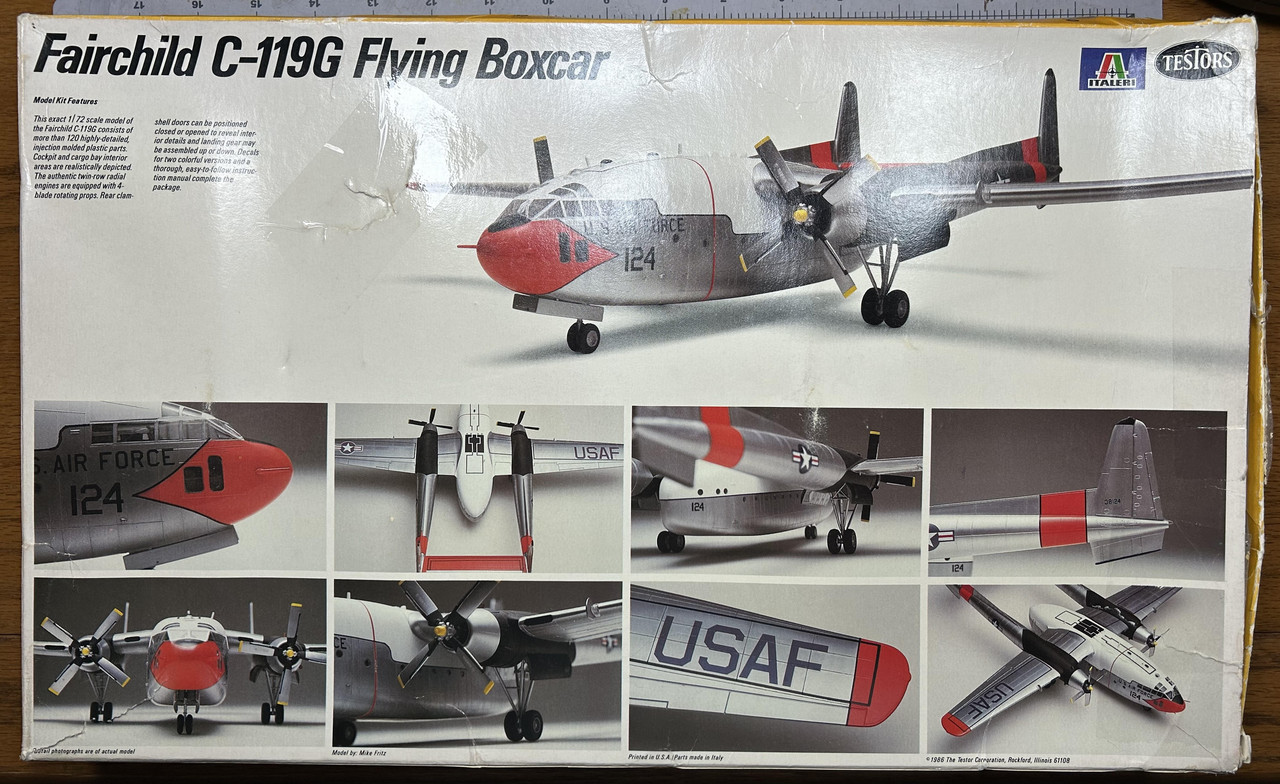
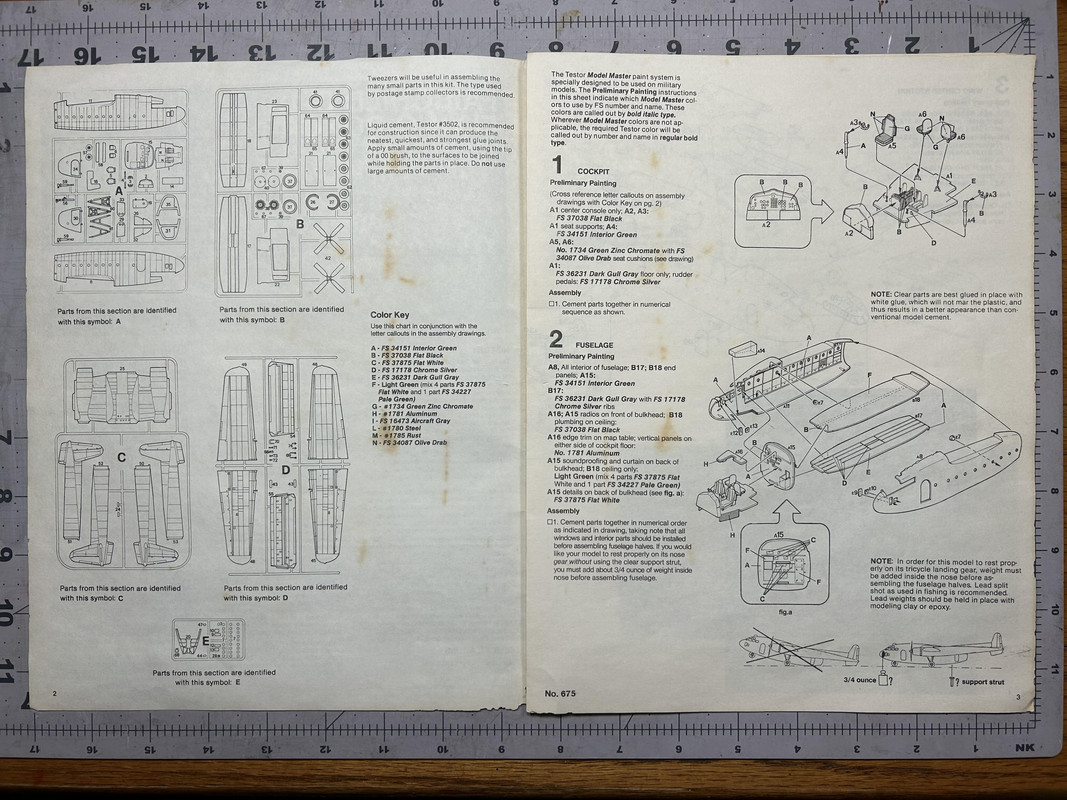
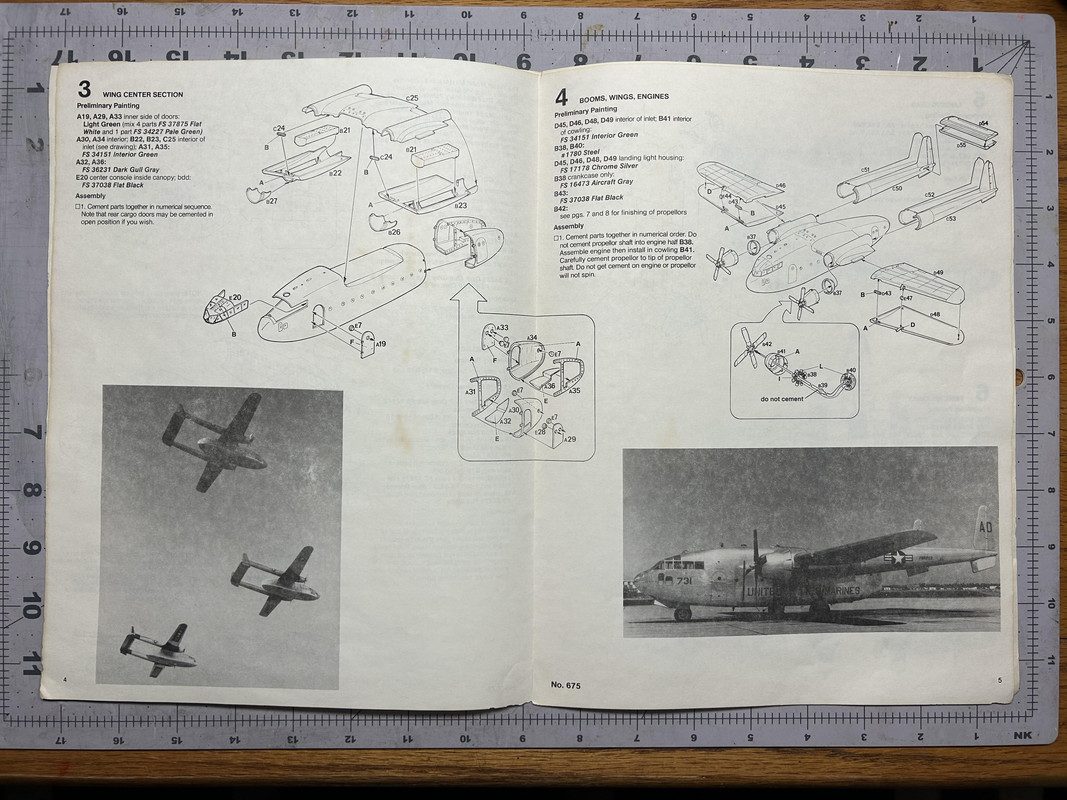
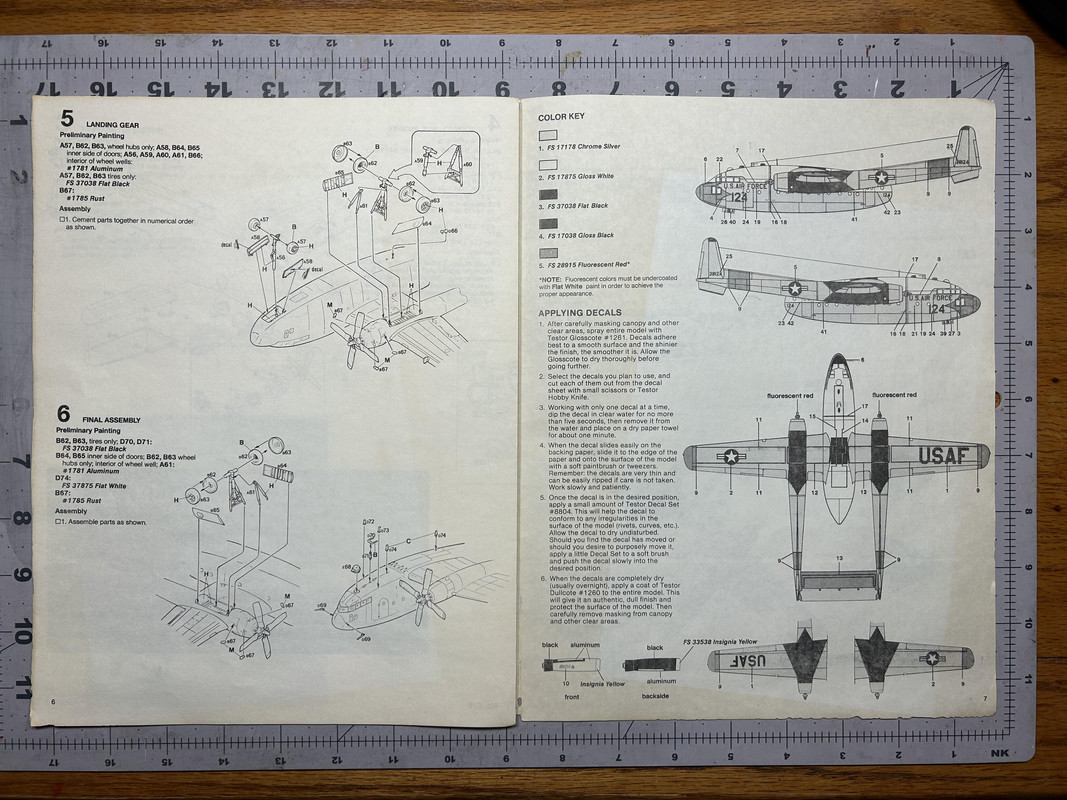
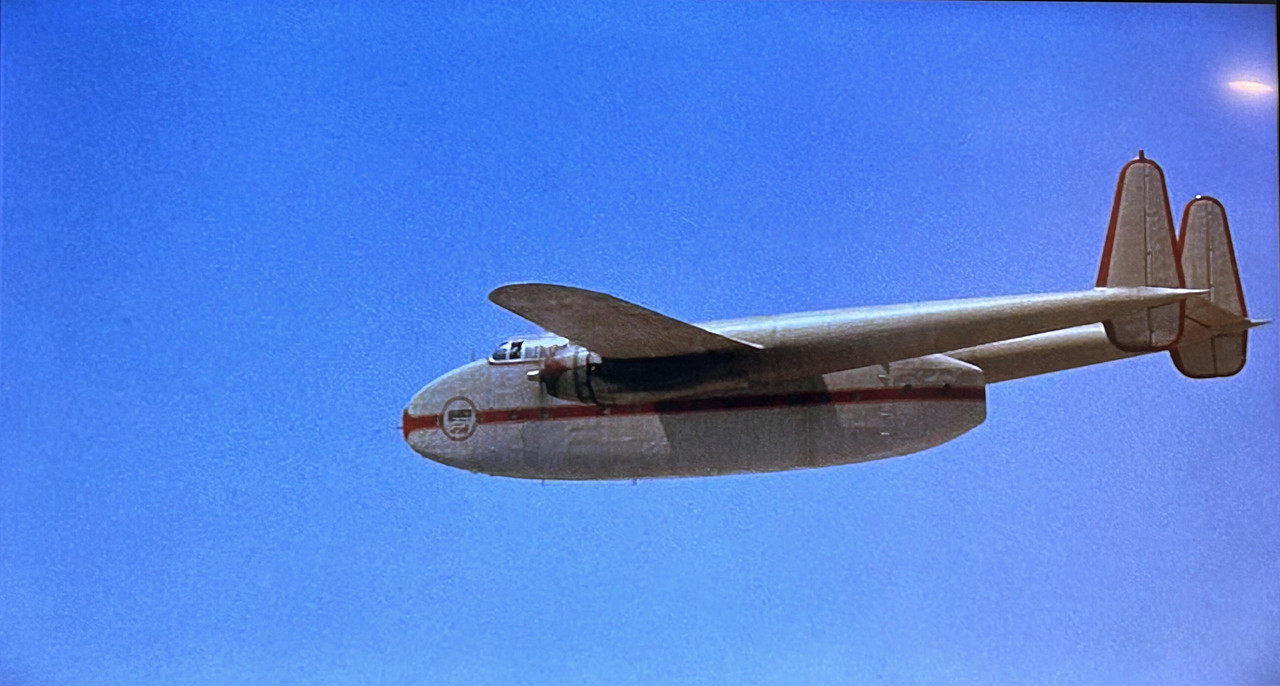
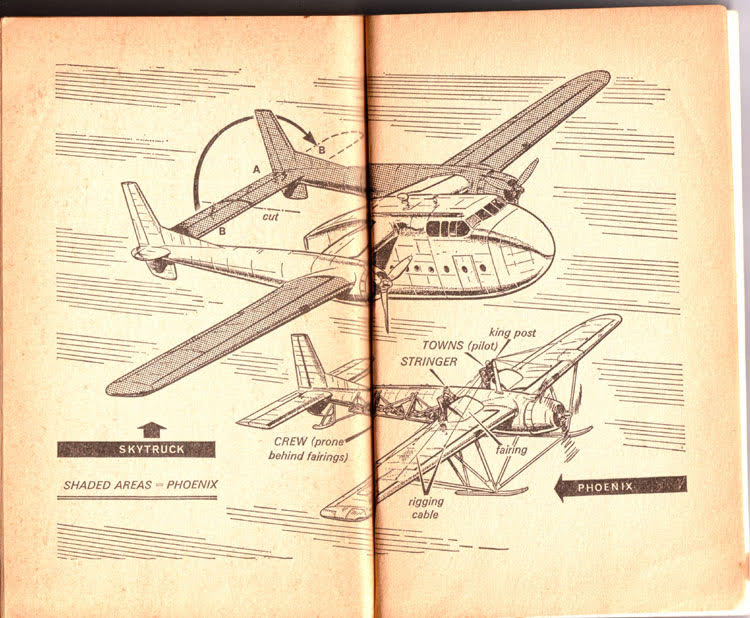
Image 005b: Here is a line drawing from "The Flight of the Phoenix" novel by Elleston Trevor published in 1964 showing a simplified overview of what is required to convert the skytruck to the reborn Phoenix. Actually, it is a pretty cool visual.
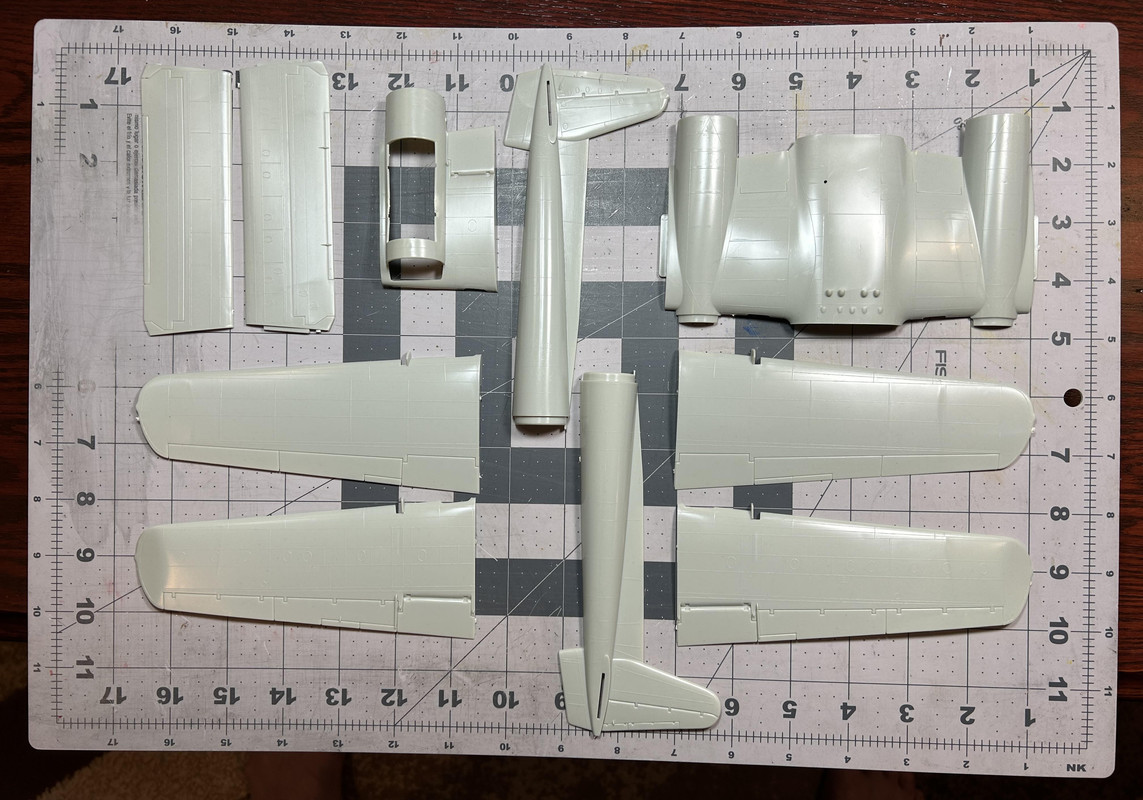
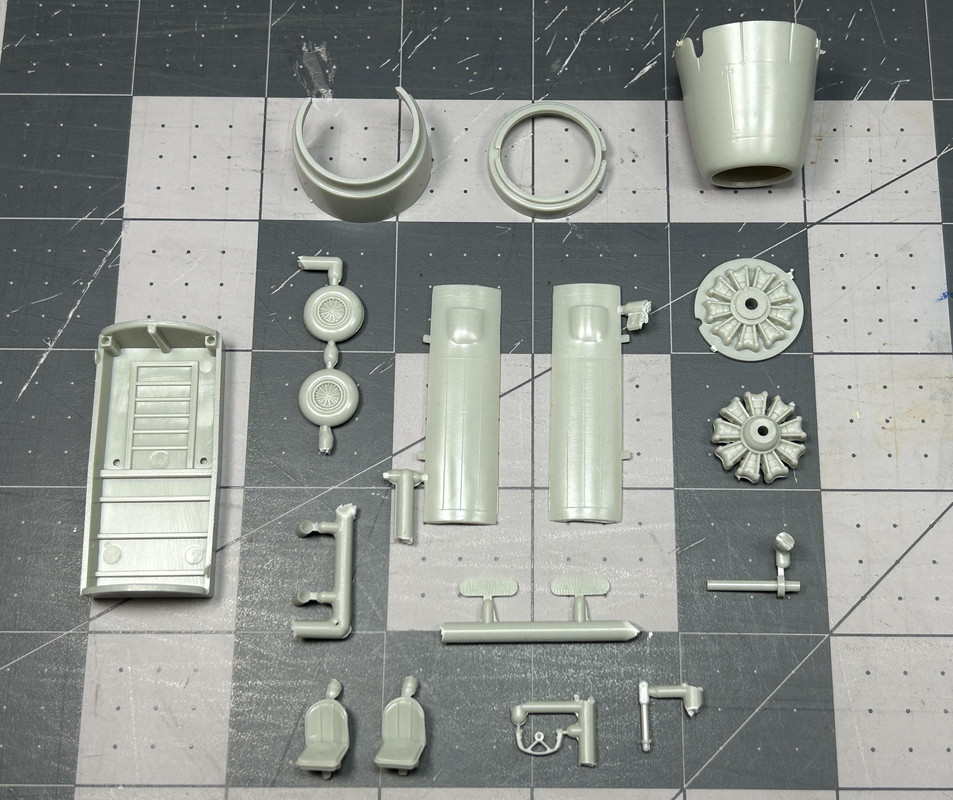
Images 006-007: These photos show the basic parts used to create the Phoenix and have been separated from the rest of the C-119 kit. This project will require some major modifications and scratch-building with the ONLY reference being the movie itself.
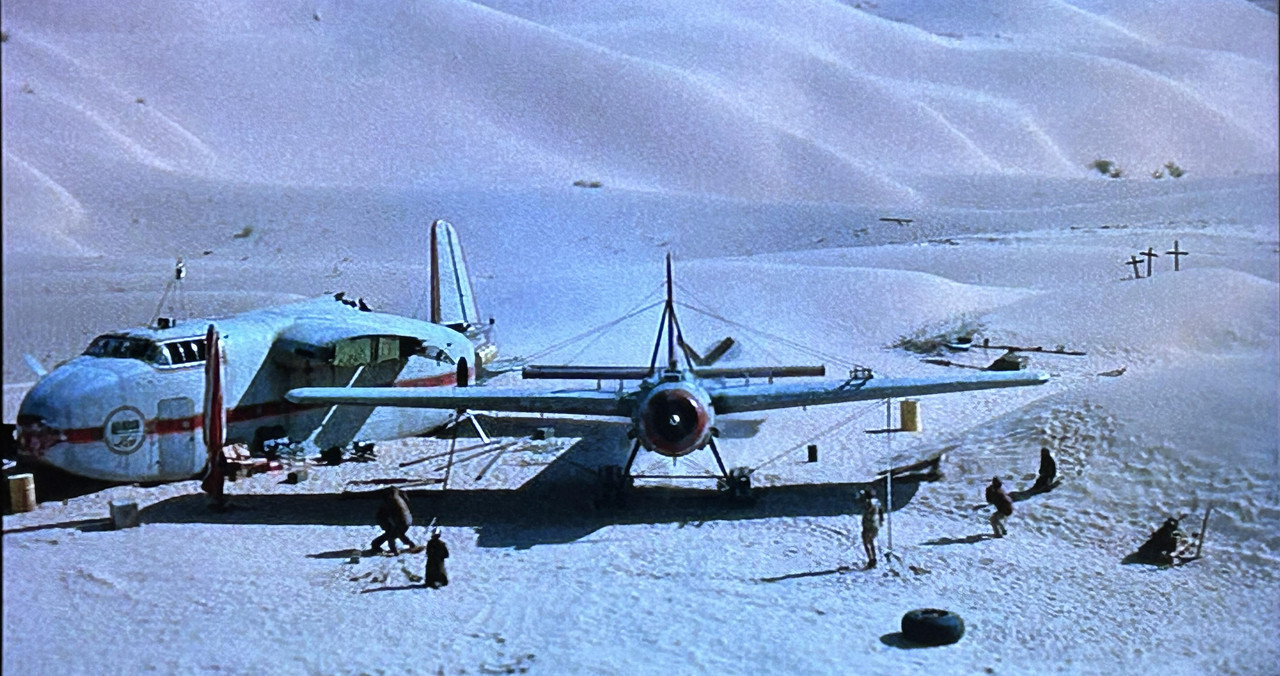
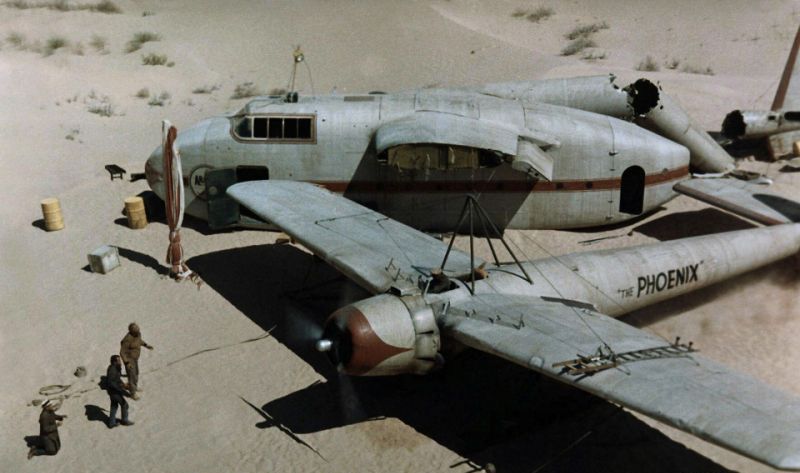
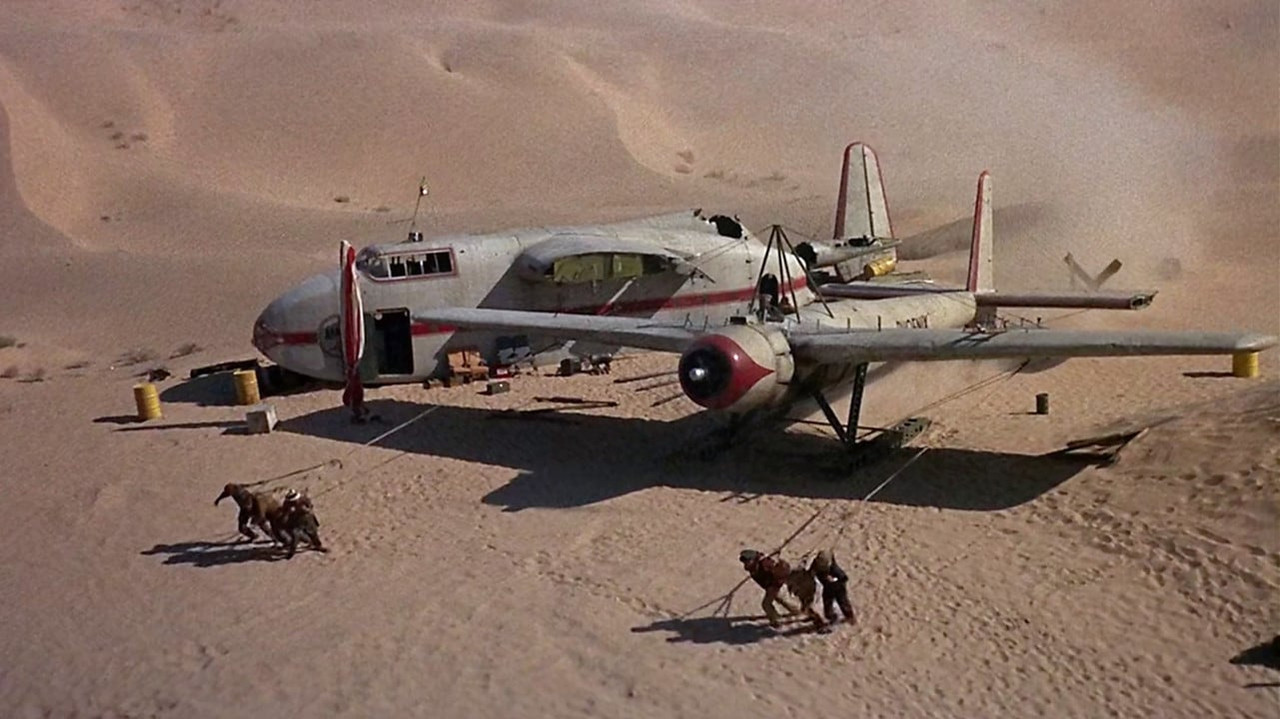
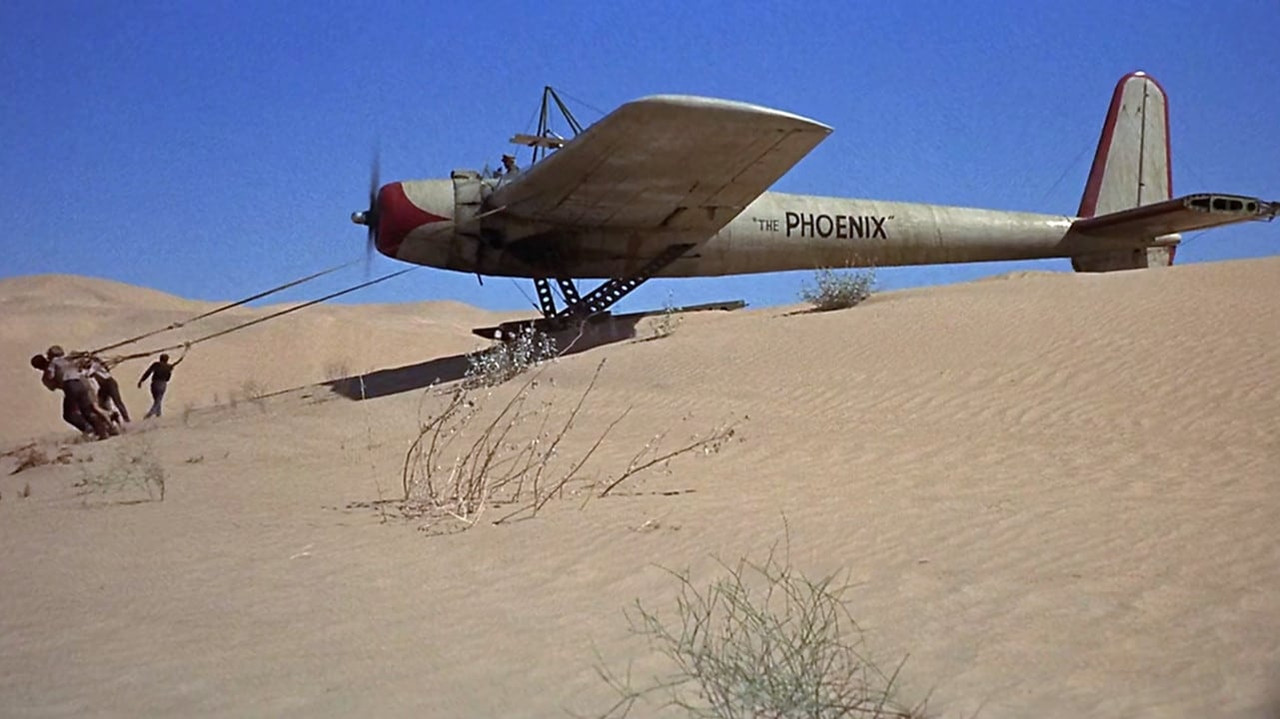
Images 007a-007e: Here are some of the best images of what the completed movie “Phoenix” looked like.
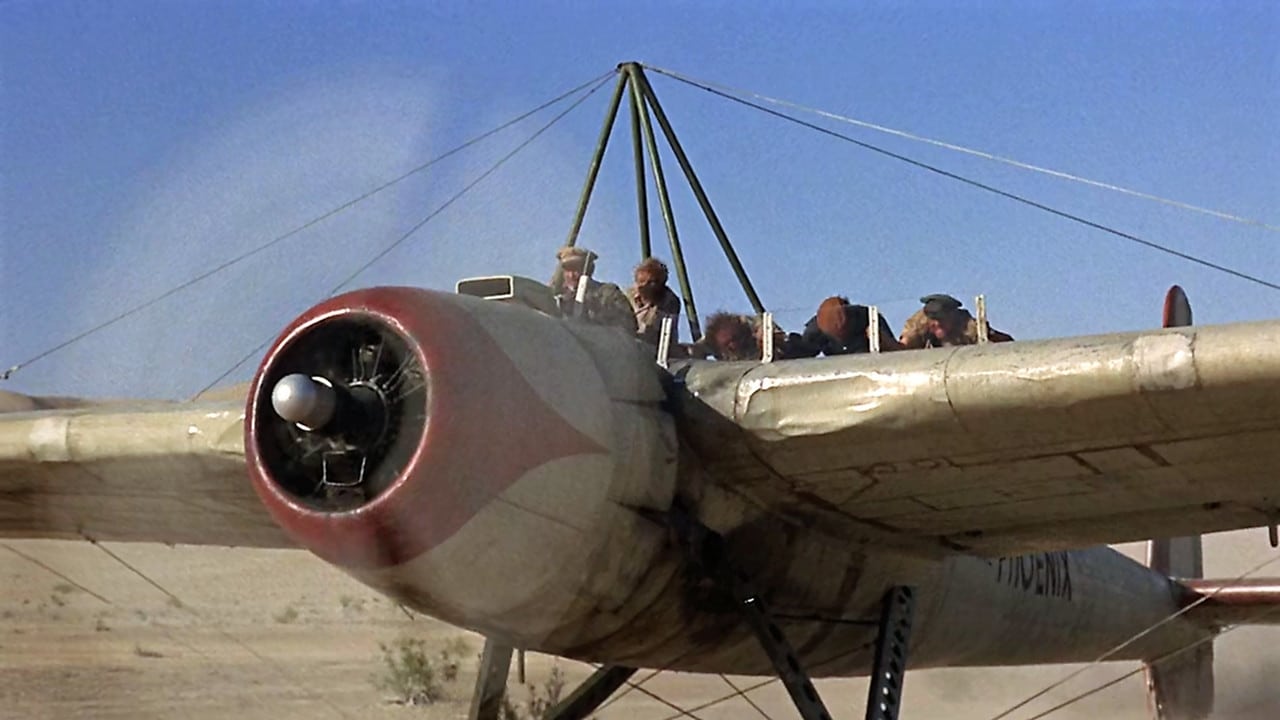
Until next time…
Phillip1
Re: Progress Build of the Phoenix AirpCoollane from The Flight of the Phoenix Movie (1965)
Posted: Sat Sep 28, 2024 2:51 am
by digger303
Re: Progress Build of the Phoenix Airplane from The Flight of the Phoenix Movie (1965)
Posted: Sat Sep 28, 2024 4:55 pm
by Phillip1
digger303-Thanks!
Phillip1
Re: Progress Build of the Phoenix Airplane from The Flight of the Phoenix Movie (1965)
Posted: Sat Sep 28, 2024 9:05 pm
by RangerNeil
A fascinating project!! One of my favourite films too.
Re: Progress Build of the Phoenix Airplane from The Flight of the Phoenix Movie (1965)
Posted: Sat Sep 28, 2024 9:25 pm
by Twokidsnosleep
This is a cool project


Re: Progress Build of the Phoenix Airplane from The Flight of the Phoenix Movie (1965)
Posted: Sun Sep 29, 2024 5:25 pm
by Phillip1
RangerNeil/Twokidsnosleep-Welcome aboard!
Phillip1
Re: Progress Build of the Phoenix Airplane from The Flight of the Phoenix Movie (1965)
Posted: Sun Oct 06, 2024 9:10 pm
by Phillip1
Fellow Modelers-Construction and the first modifications begin…
Figure 008: I decided to start assembling the wings first, since they required very little modification. In this photo the left wing is taped together as it comes out of the box, but on the right wing the radiator opening has been filled, the landing light has been filled and the seam line has been sanded out.
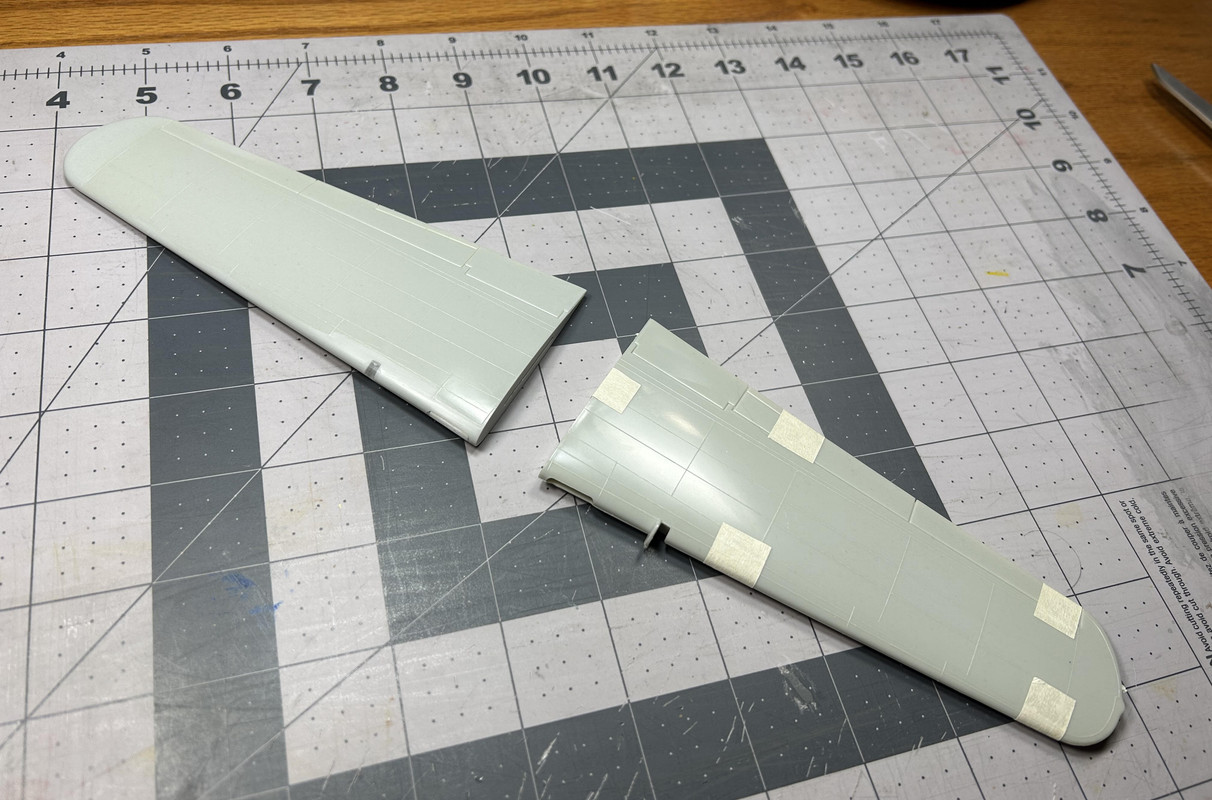
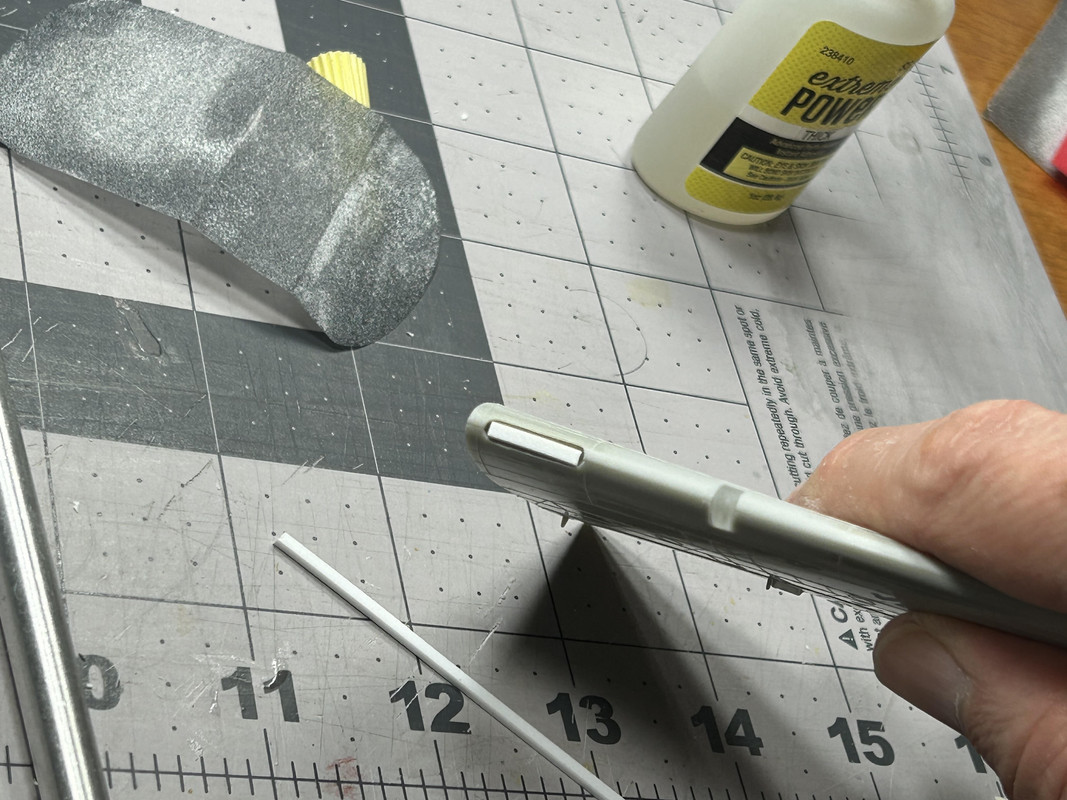
Figure 009: This close up view shows a small piece of styrene was cut to fit in the left wing radiator opening to make filling it easier.
Figures 010 and 011: The top and bottom of the right wing are shown after sanding away all of the raised panel lines. The kit’s raised panel lines are nice, but on the fuselage almost all of them will be lost due to the required modifications. Therefore, the panel lines on all parts will be removed to maintain a uniform look.
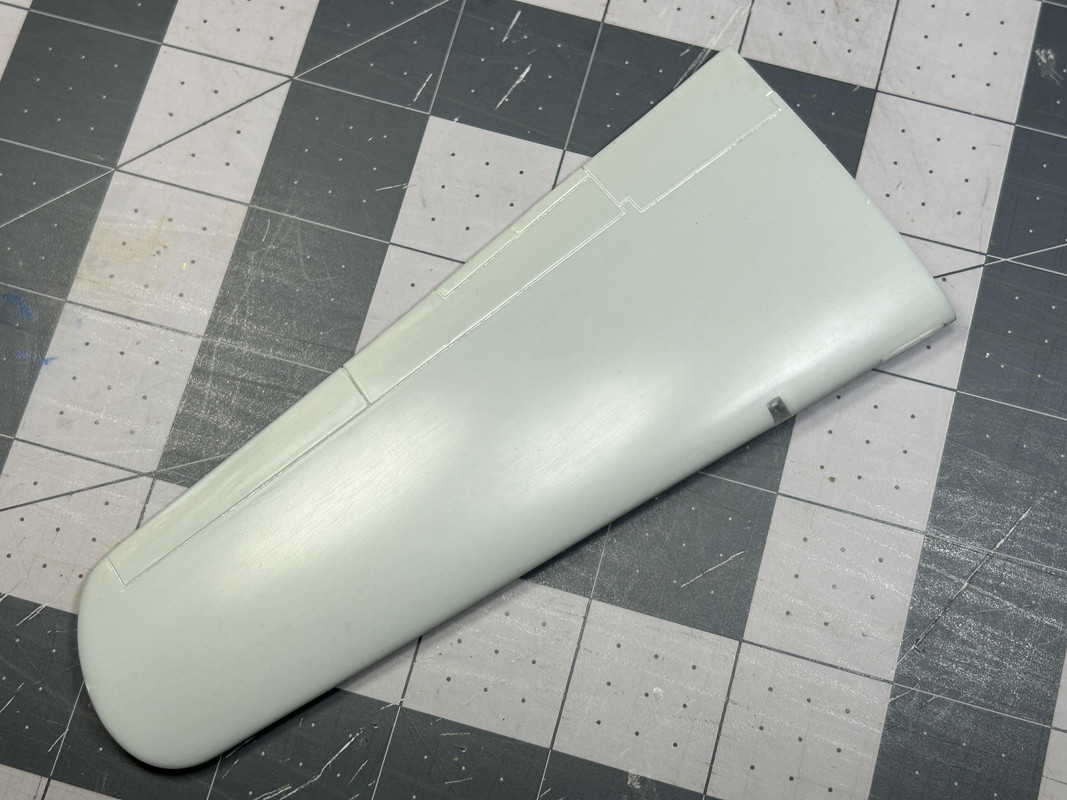
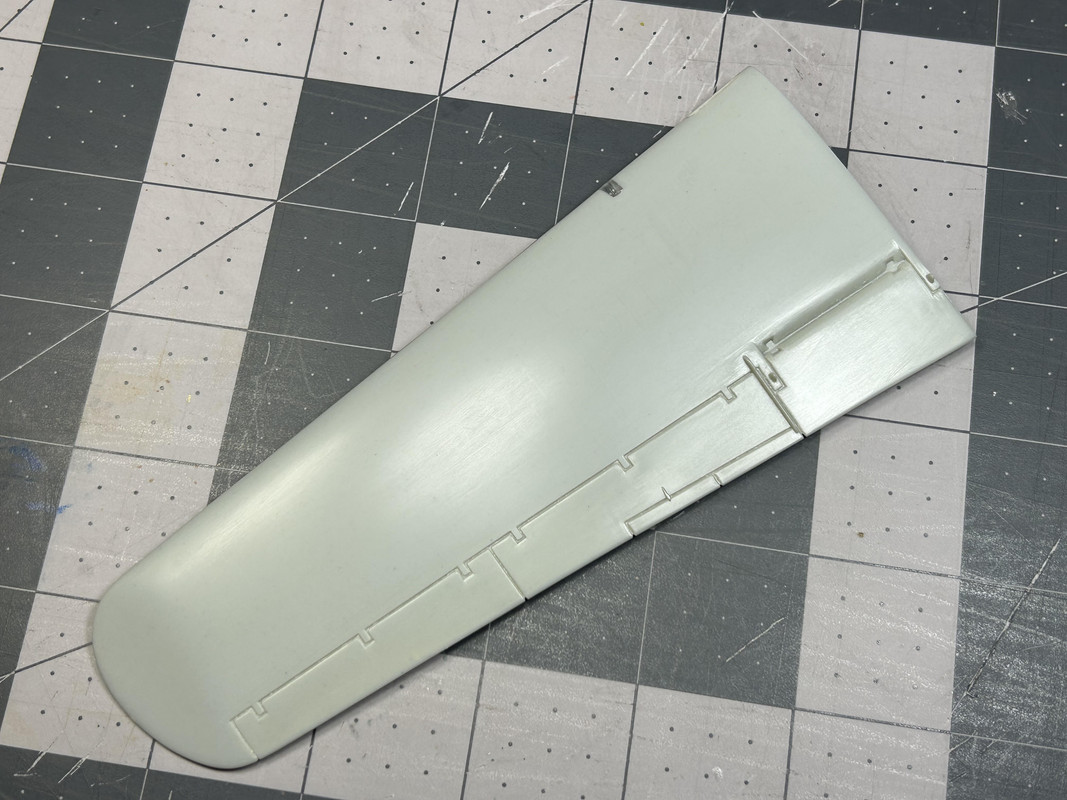
Figure 012: The rear fuselage (boom) was worked on next. This photo shows what it looks like out of the box.
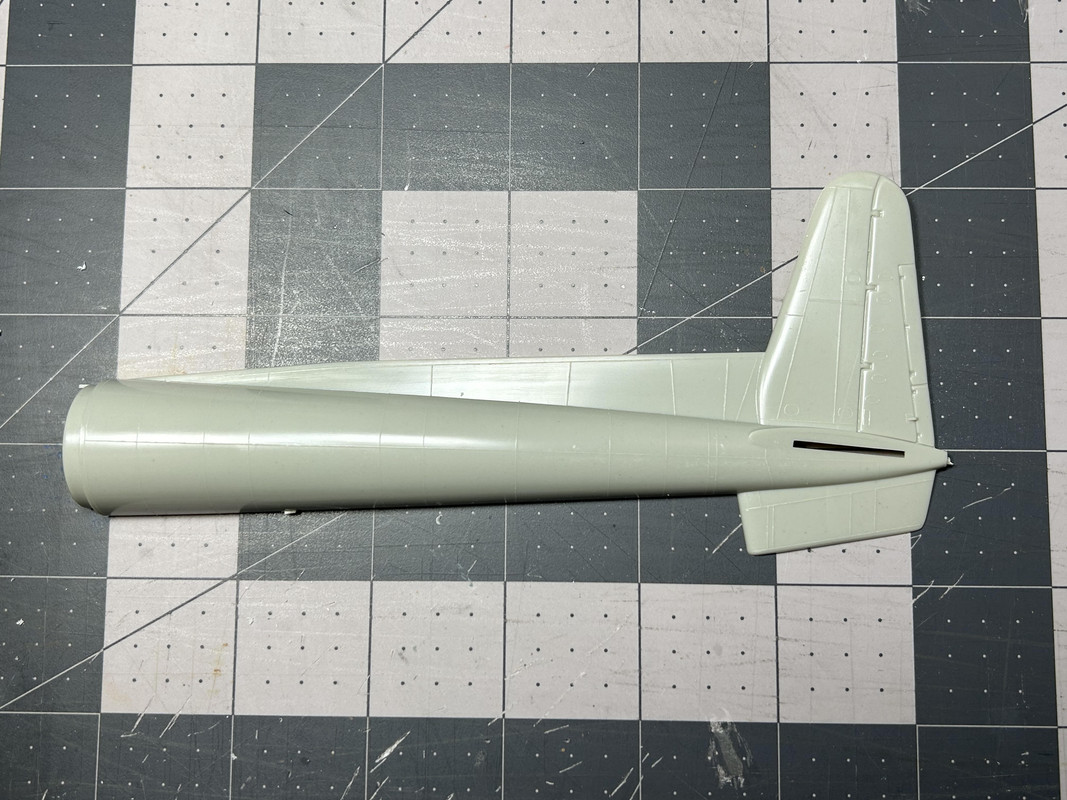
Figure 013: First, the long dorsal fin (strake) that connects to the vertical stabilizer was removed. Note a little lip was left to be sanded away after the two halves were together.
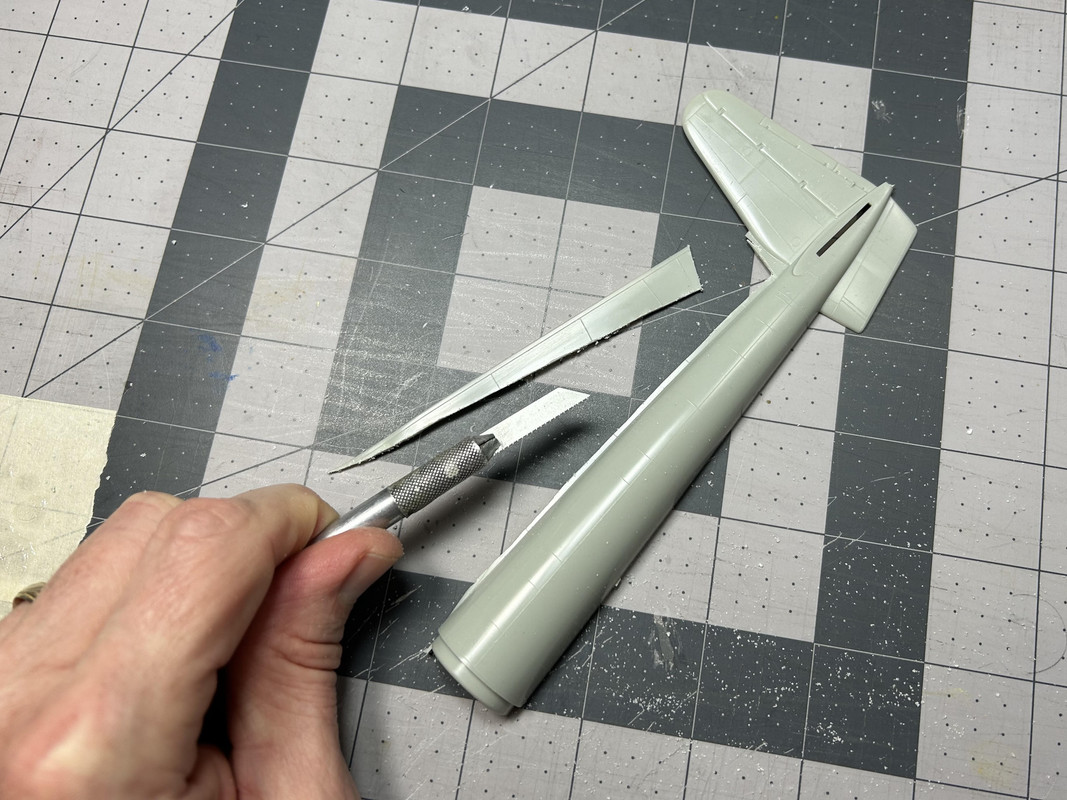
Figures 014 and 015: The fit of the boom halves revealed a large gap at the base of the vertical stabilizer. Sanding away part thickness on the inside helped reduce the gap.
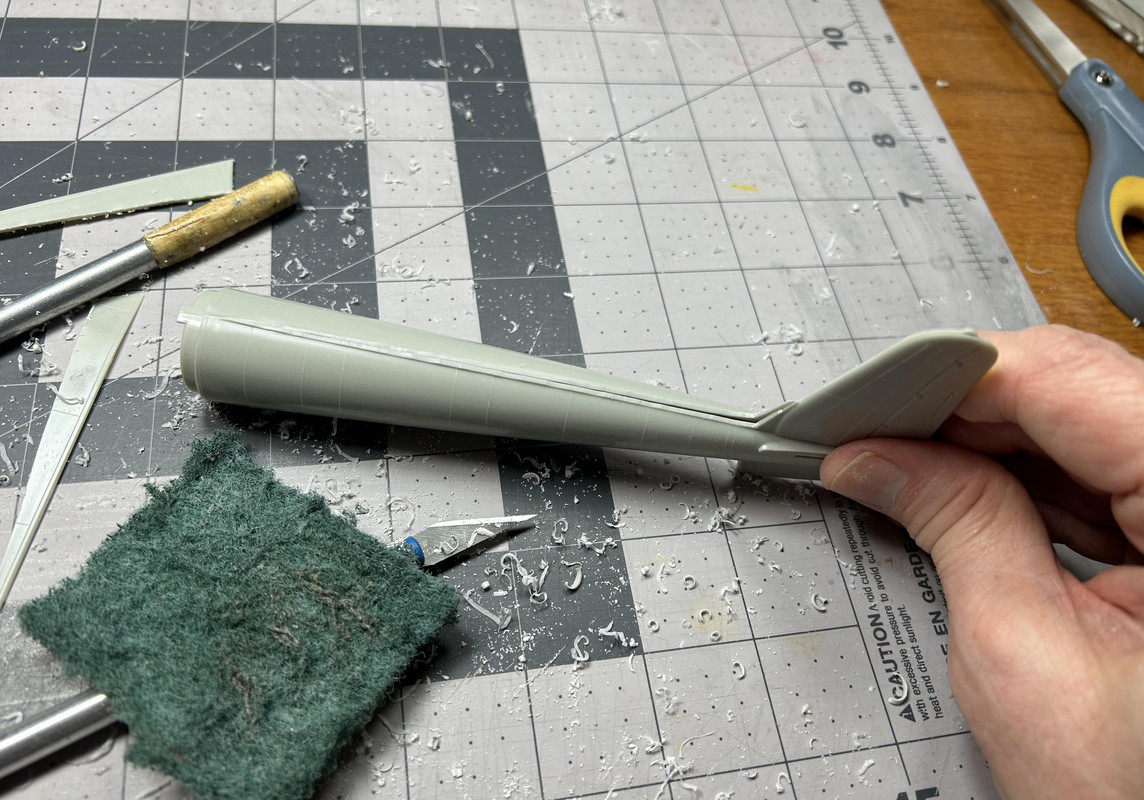
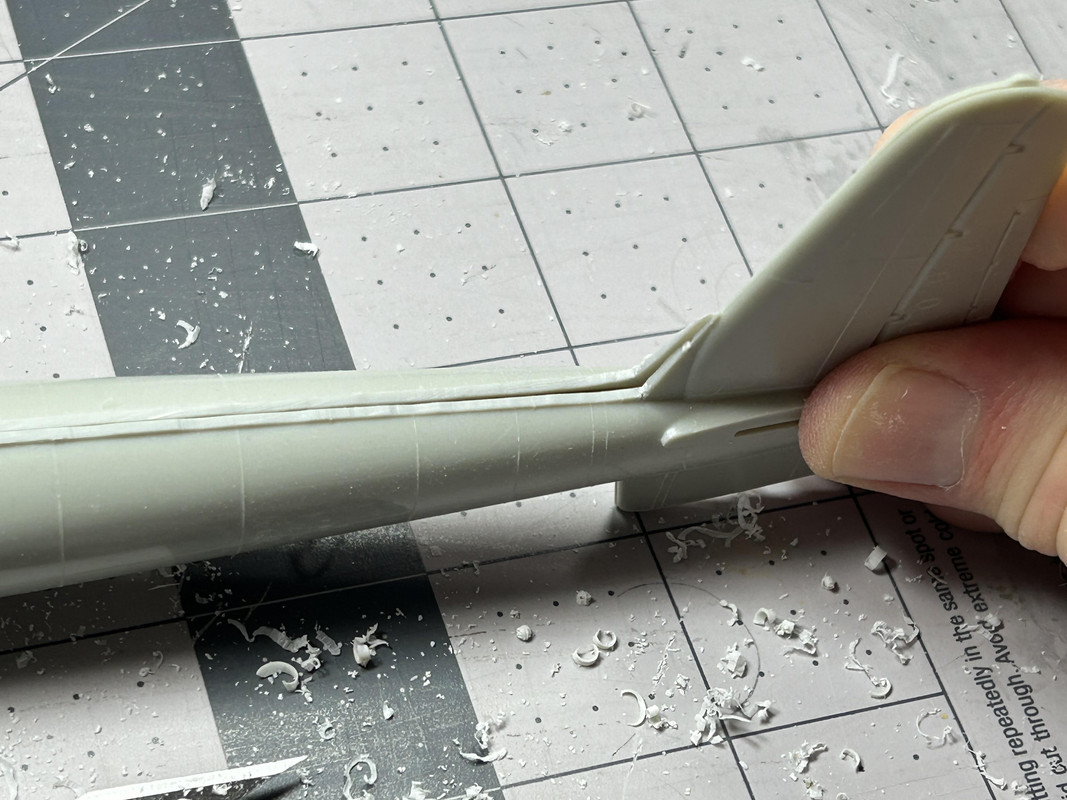
Figure 016: This image shows the seam line being slowly sanded away. Note both of the boom halves used were the ones that had the extended shoulder horizontal stabilizer mating points (kit parts C50 and C52). Using these parts meant there were no matching locator pins and holes, so careful alignment was done before any glued was applied.
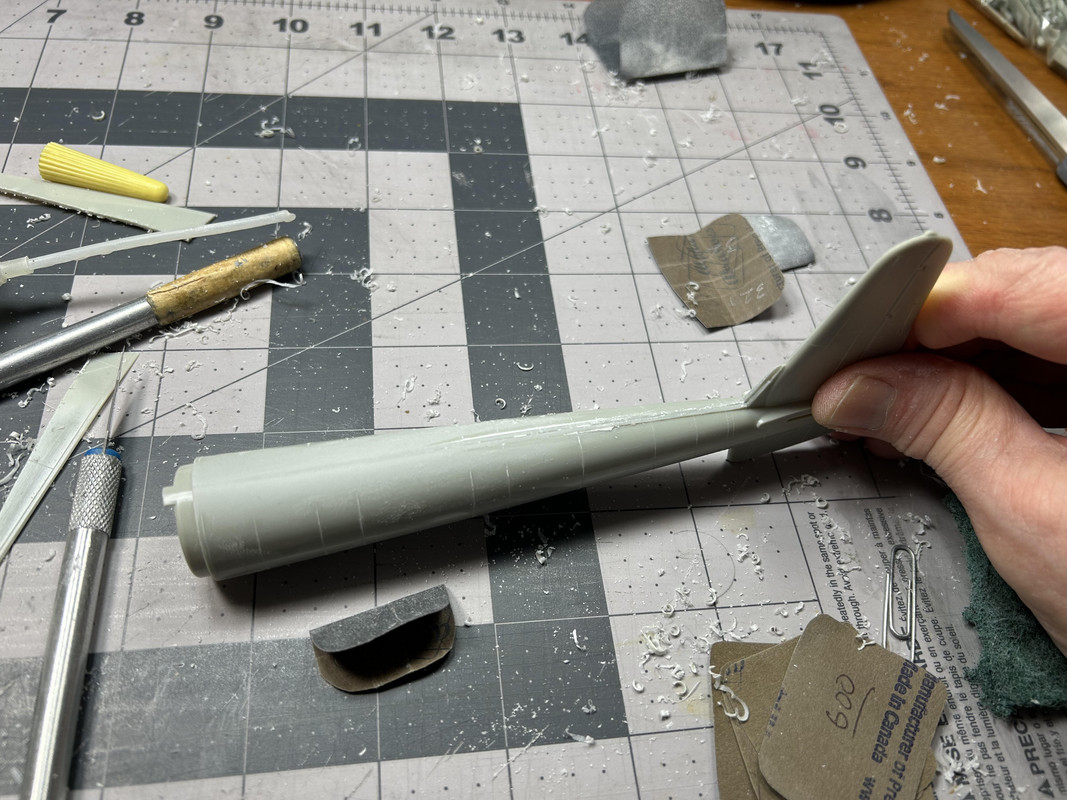
Figure 017: The seam line has been completely removed.
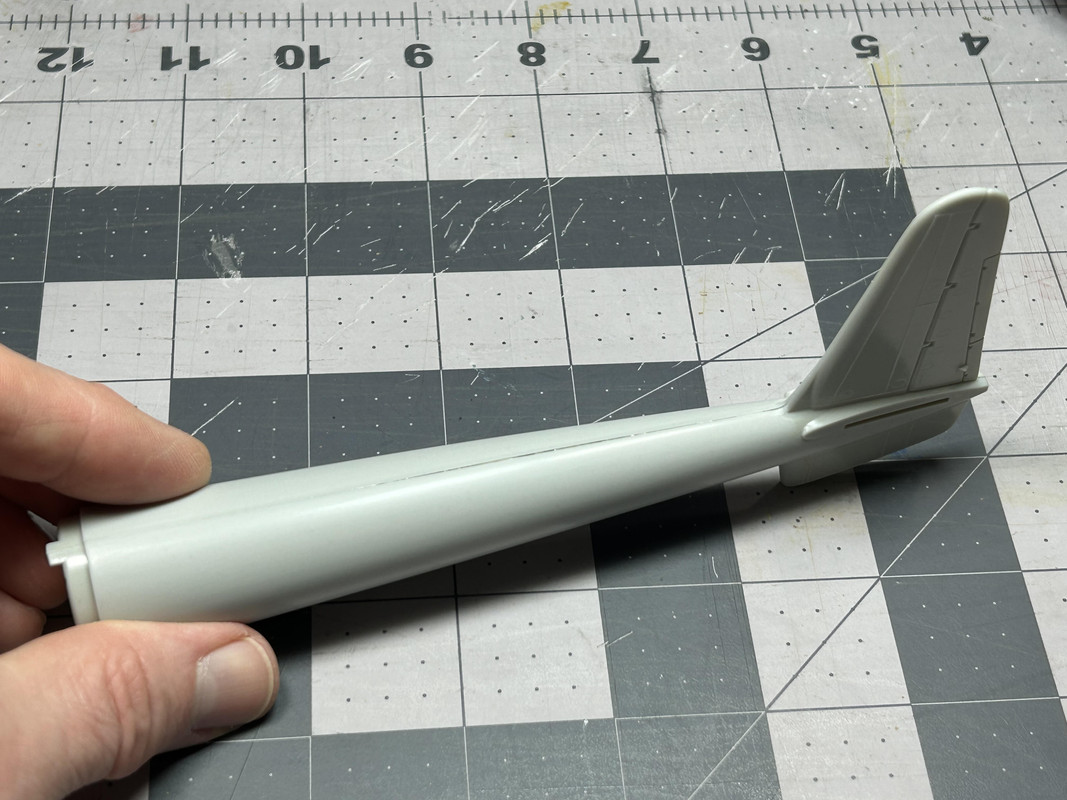
Figure 018: Here is a side view of the rear fuselage. Note the raised panel lines still need to be removed.
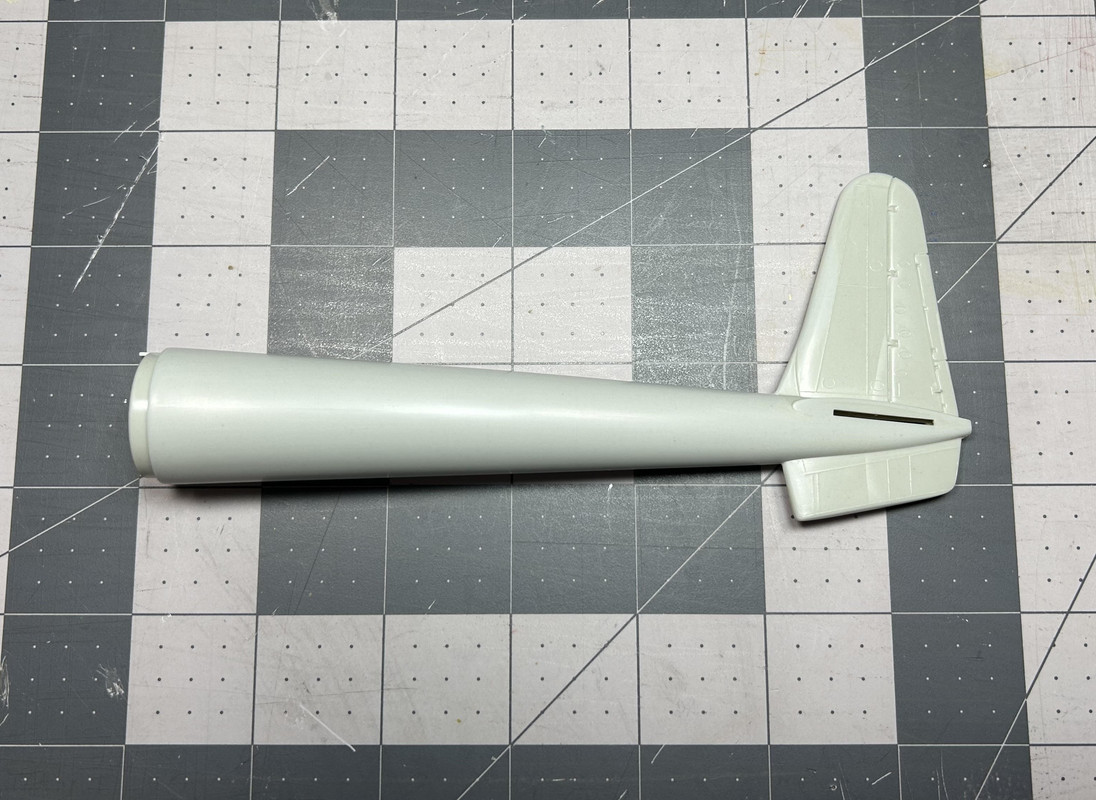
Figure 019: The horizontal stabilizers were worked on next. Here are the upper and lower parts out of the box.
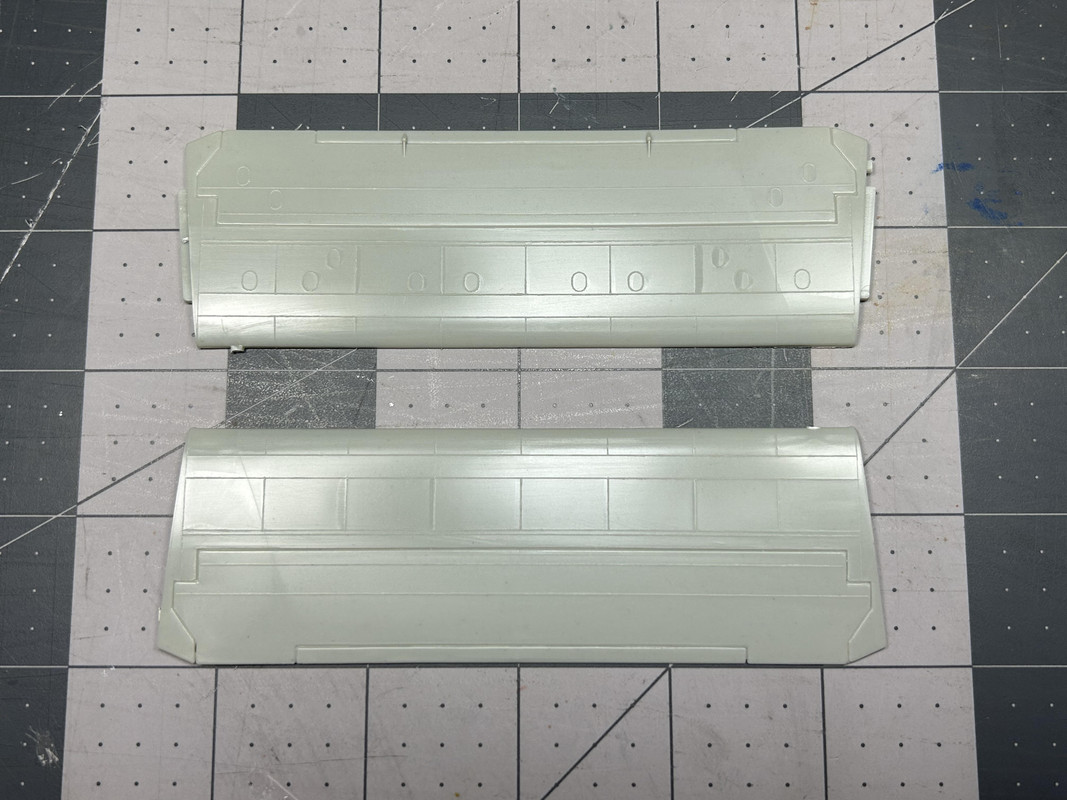
Figure 020: Just like in the movie, the centerline was marked off and the parts cut in half.
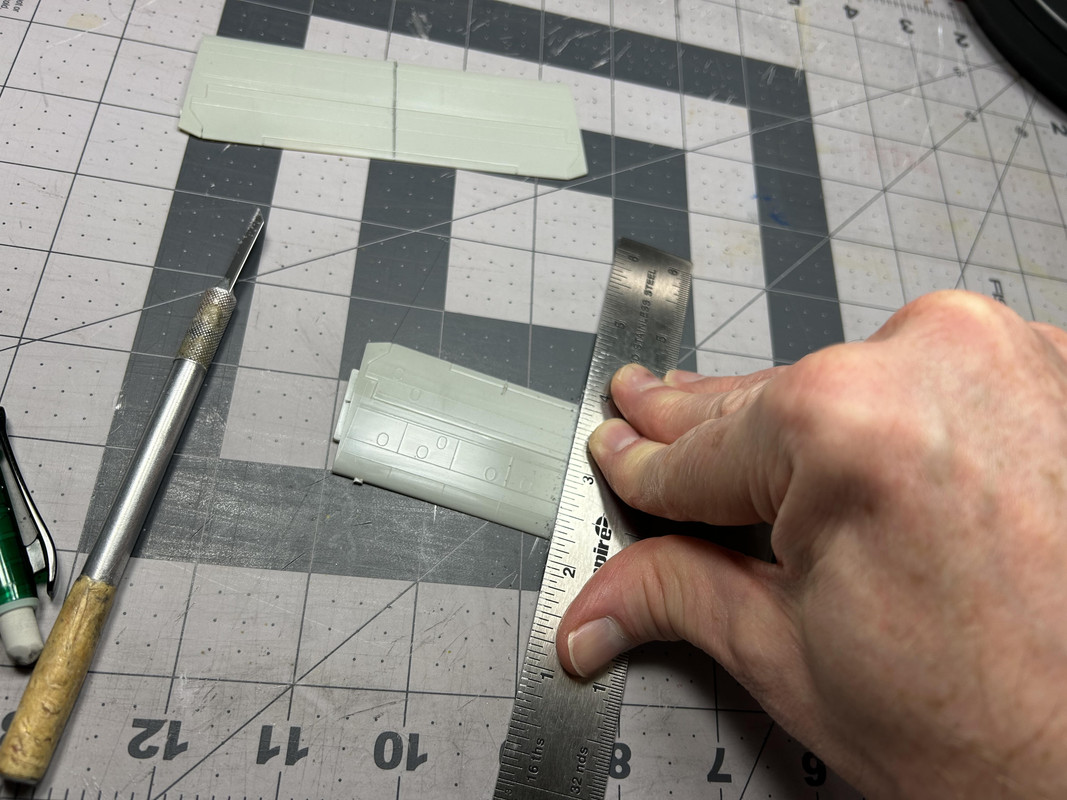
Figure 021: The horizontal stabilizers are shown after assembly and removing the seam lines/raised panel lines. Additional work to seal the open outside edges will be done later.
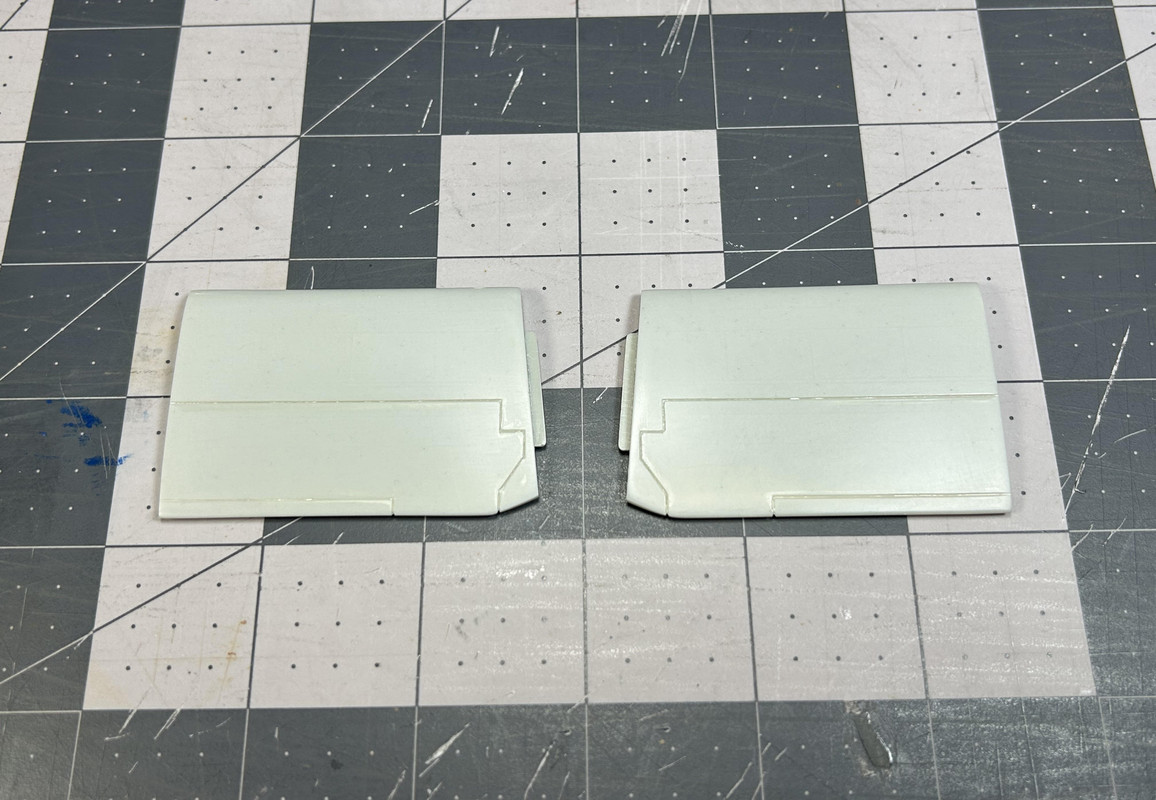
Figure 022: Work now moves to the challenge of converting the upper-front engine boom into the upper-front fuselage. The kit part is shown before any cutting is done.
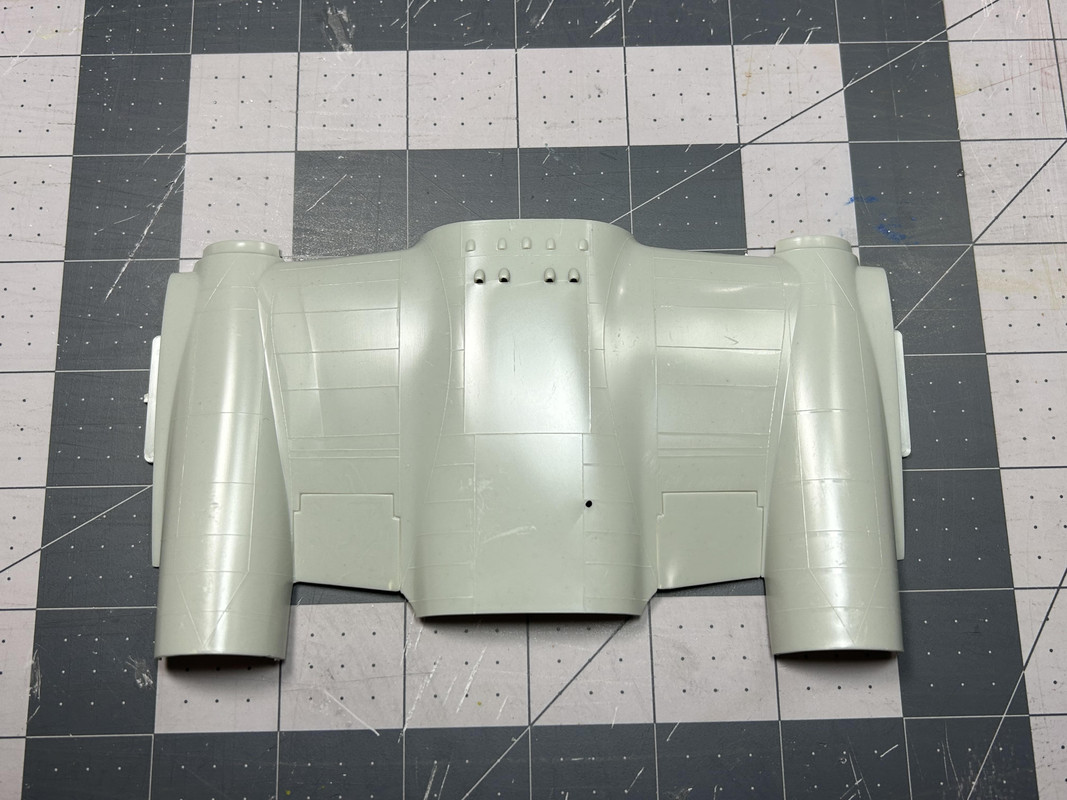
Figure 023: First, the centerline of the left side upper-front engine was marked off. The kit’s raised panel lines made this easy to do.
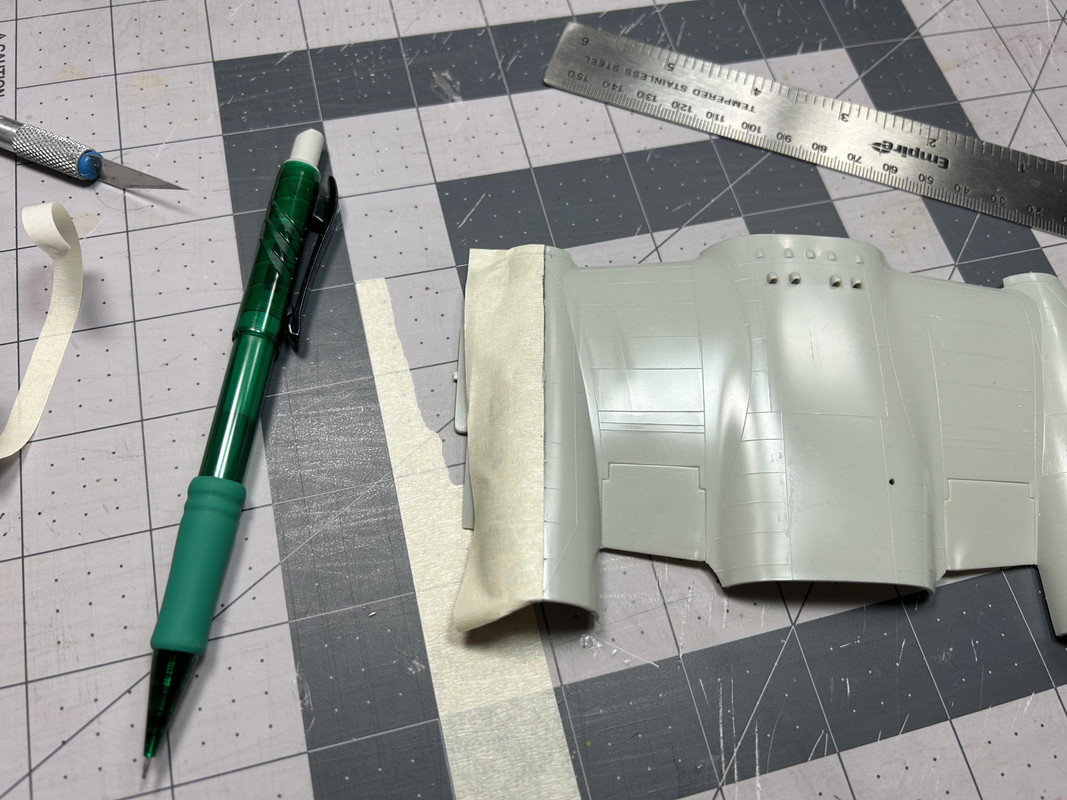
Figure 024: The left side upper-front section was then cut away.
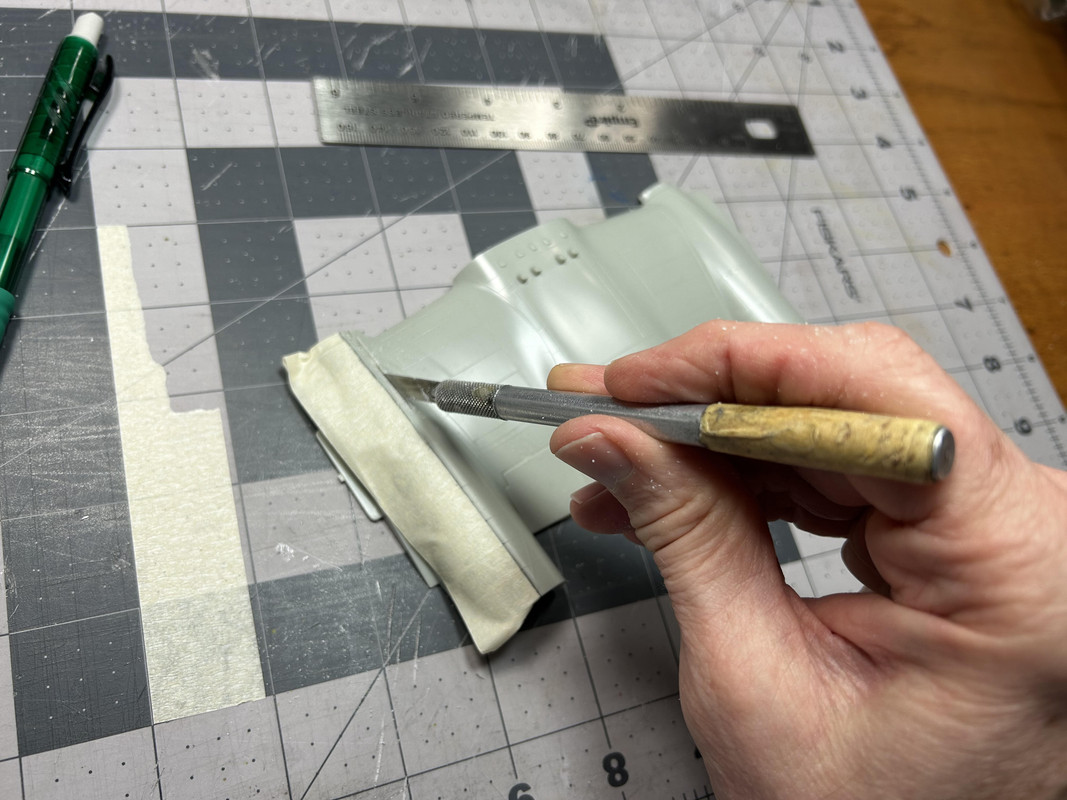
Figure 025: On my cut I left about a 1/8” lip past the centerline. I did this so I could carefully sand away the excess and the part would have a clean, straight edge.
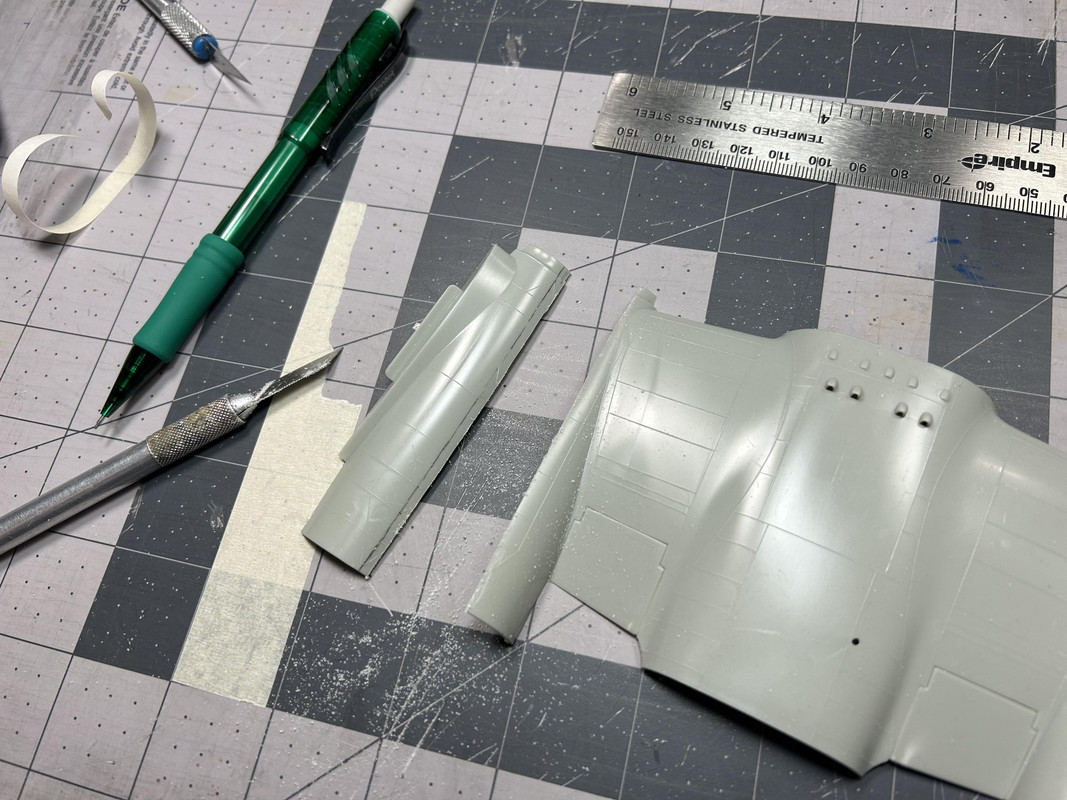
Figure 026: Now the exact same work was done to the right side upper-front engine. Shown in this photo are the left and right parts side-by-side after final sanding. This modification made the left and right wing connections symmetrical (and much easier to build). In the movie the wing connections to the engine boom were not symmetrical due to a more pronounced dihedral on the inboard connection. However, I believe the movie production crew (in their efforts to make the Phoenix look like a credible and competently built airplane) did several things to cover up or camouflage any stark asymmetry between the left and right wing connections. Interestingly enough, in the 2004
Flight of the Phoenix movie remake (which is a bad and disappointing movie) the production crew went out of their way to over-accent the mis-matched asymmetry of the left and right wing, making the airplane look kind of goofy. Just my two cents worth anyway…
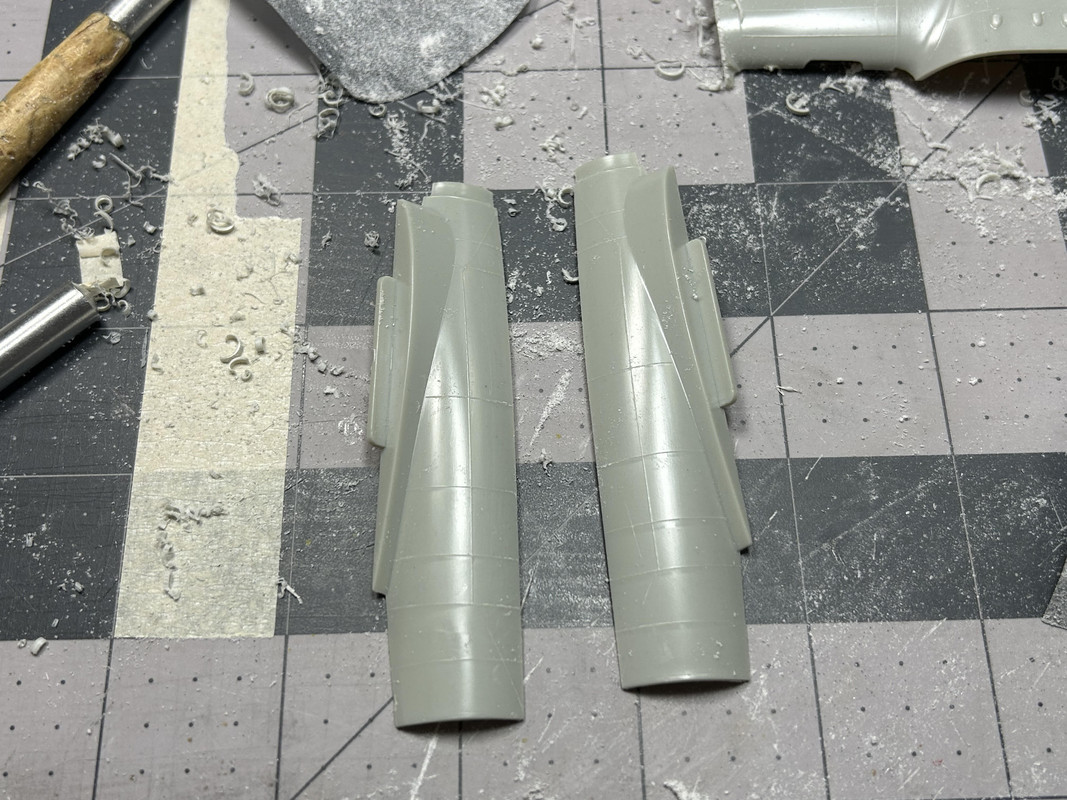
Figure 027: Before the left and right upper-front fuselage parts were glued together I taped them to the rear boom assembly to match up the radius at the mating point.
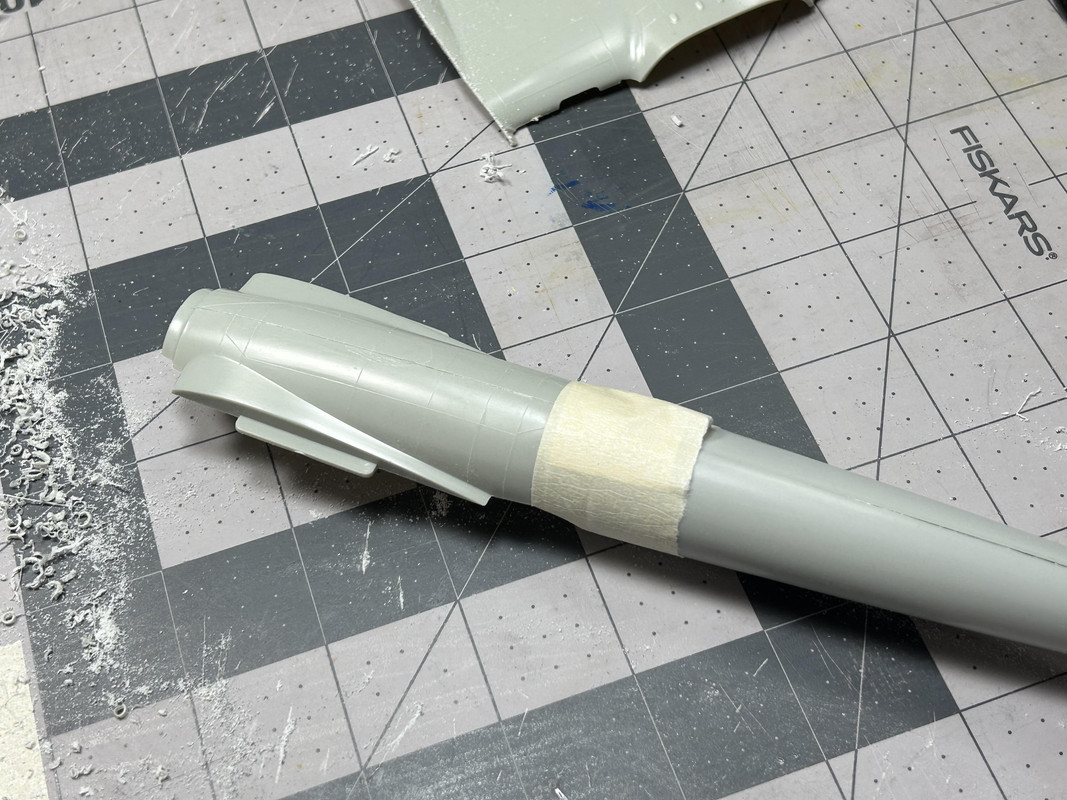
Figure 028: The left and right upper-front fuselage parts are shown after being glued together.
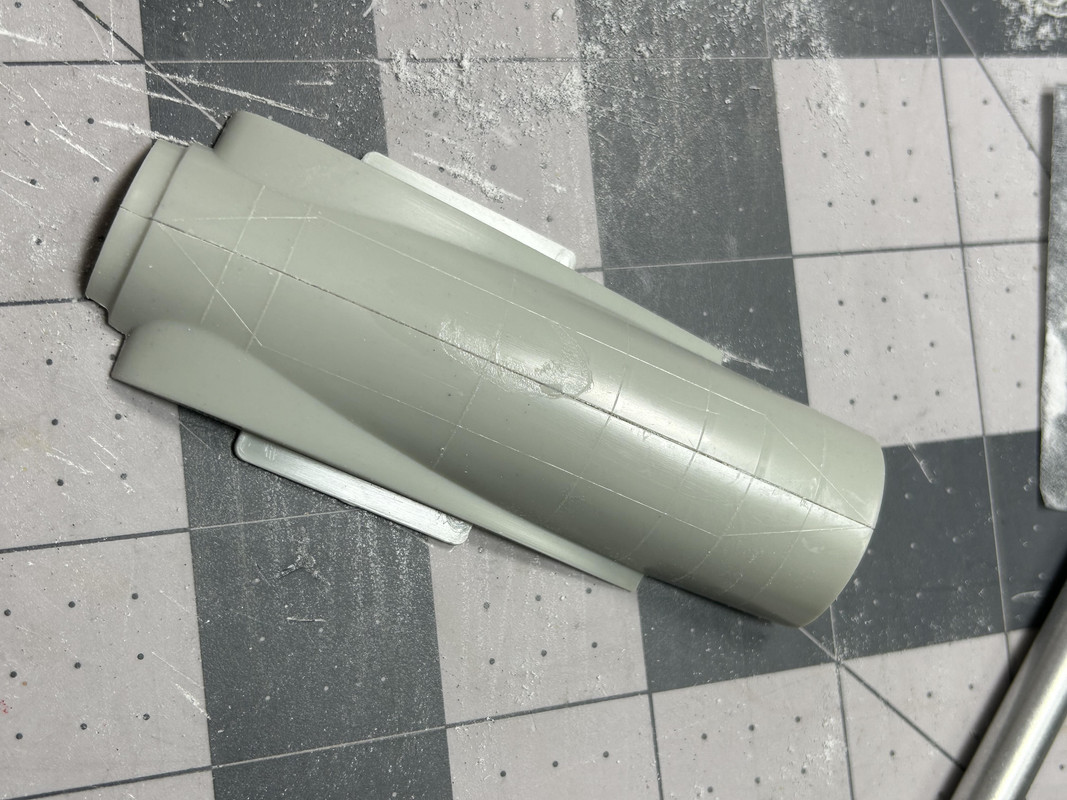
Figure 029: Here are the parts after the seam line was been sanded away.
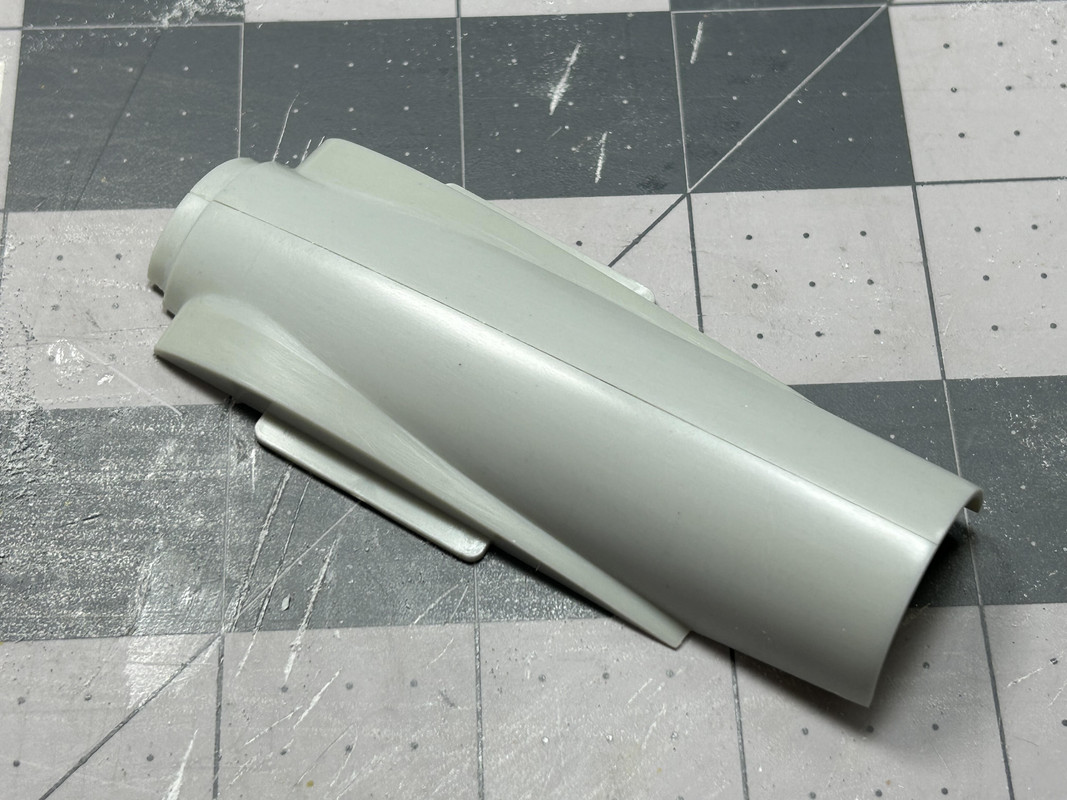
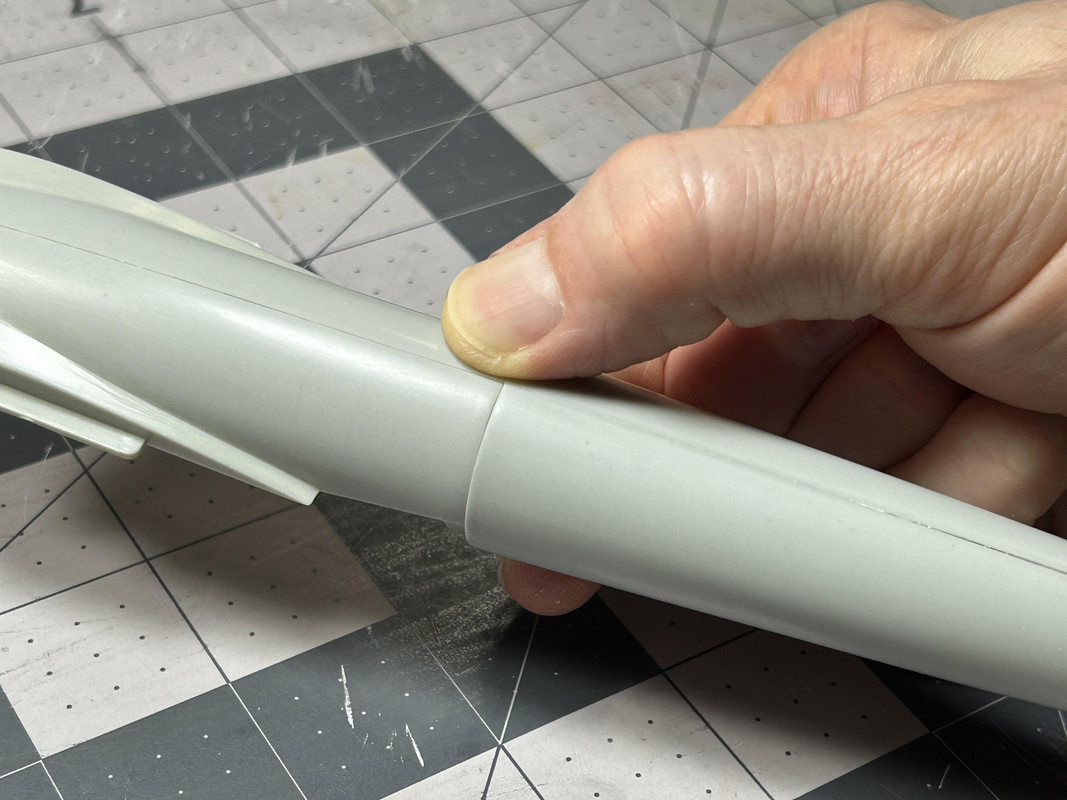
Figure 030: This photo shows a test fitting (one of very many) to confirm a good connection between the rear boom and upper-front fuselage. A good connection is critical here as these two sub-assemblies will eventually be mated into a single part.
Until next time...
Phillip1
Re: Progress Build of the Phoenix Airplane from The Flight of the Phoenix Movie (1965)
Posted: Mon Oct 07, 2024 12:39 am
by digger303
Re: Progress Build of the Phoenix Airplane from The Flight of the Phoenix Movie (1965)
Posted: Sun Oct 13, 2024 1:48 am
by Phillip1
Fellow Modelers-Construction and modifications to the fuselage continue.
Figures 031 and 032: Work moves to converting the lower-front engine boom into the lower-front fuselage, similar to the earlier work and once again starting by measuring and marking the centerline then cutting the part in half.
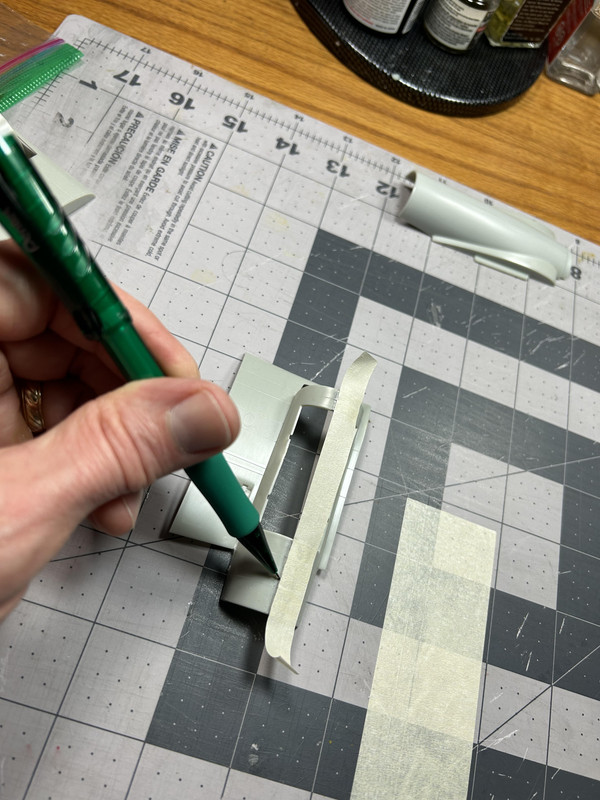
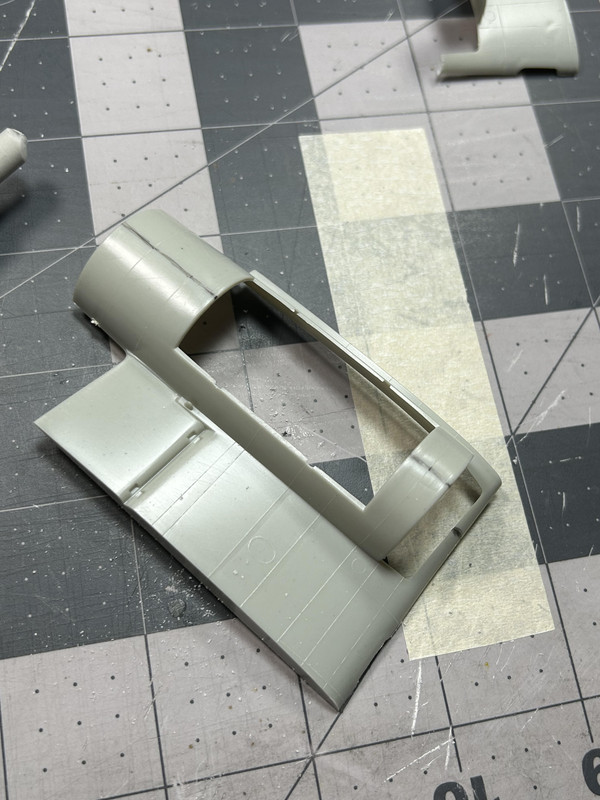
Figure 033: This photo shows the extra lip being sanded away from the centerline
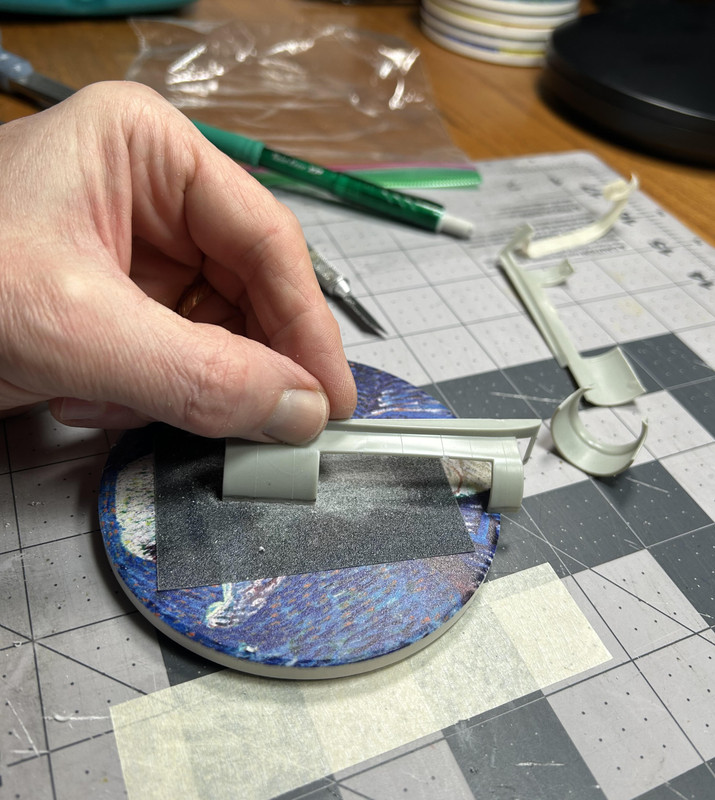
Figure 034: To make these assemblies symmetrical, both the left and right mirror image parts are used (i.e., the outside halves of kit parts B22 and B23). The parts in the photo are ready to be glued together.
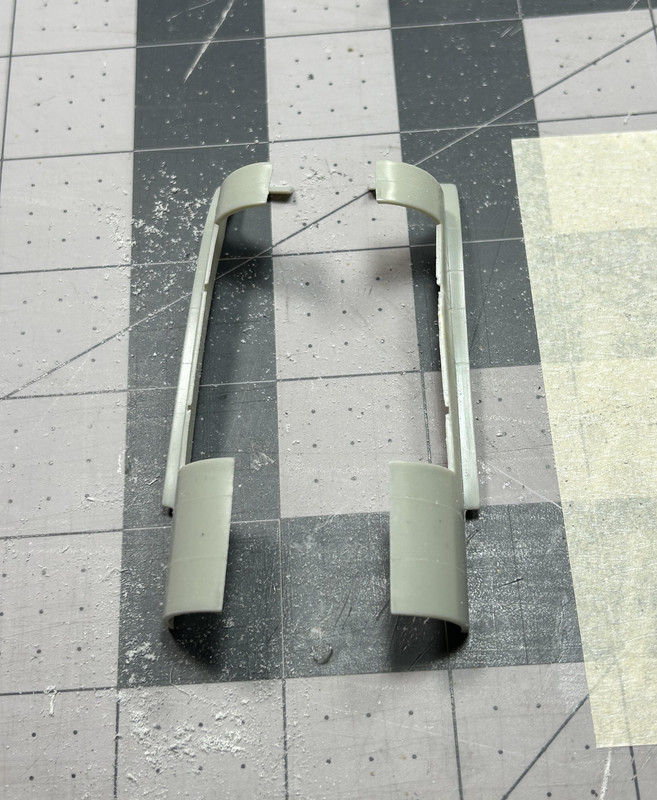
Figure 035: The lower-front fuselage parts were matched to the lower boom assembly (like before with the upper assembly) before adding any glue. In this photo the first drop of superglue has just been added.
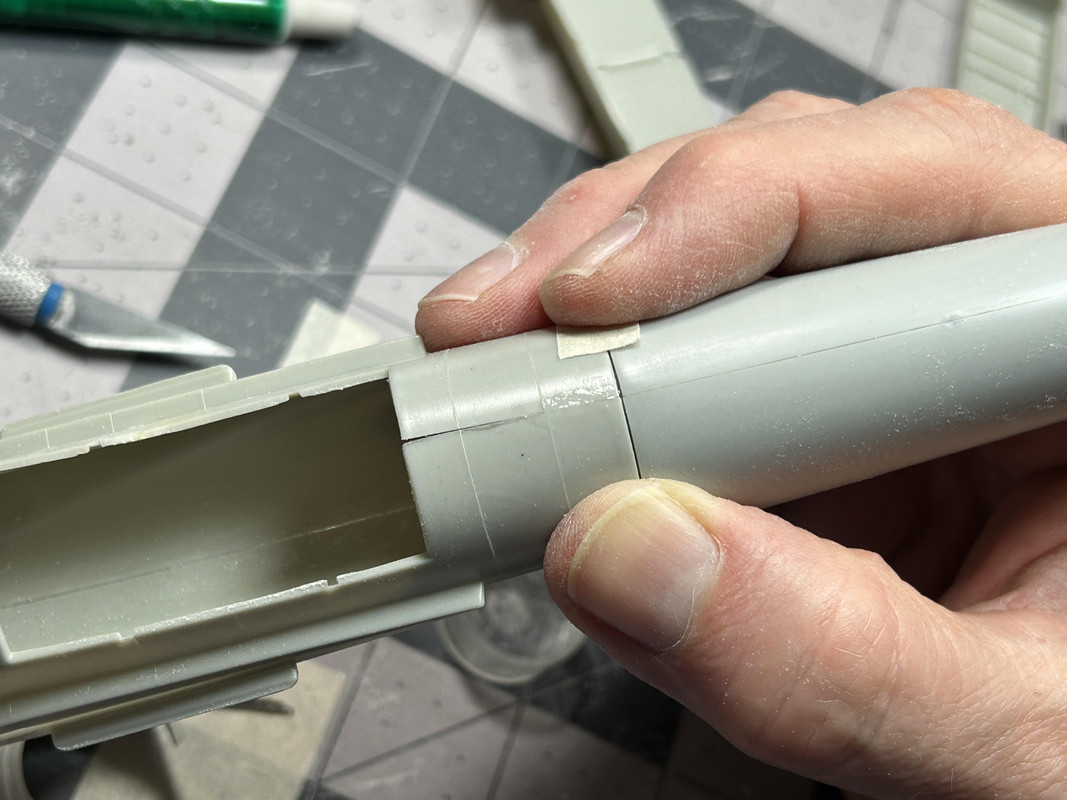
Figure 036: A bead of superglue is added all across the join line of the lower-front fuselage assembly before sanding the seam line away.
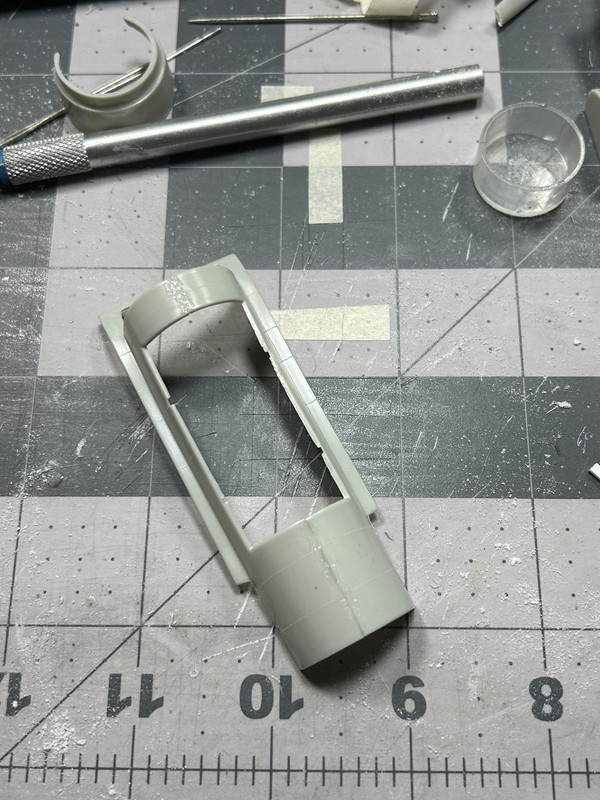
Figure 037: This photo shows the lower and upper front fuselage assemblies being test fitted together.
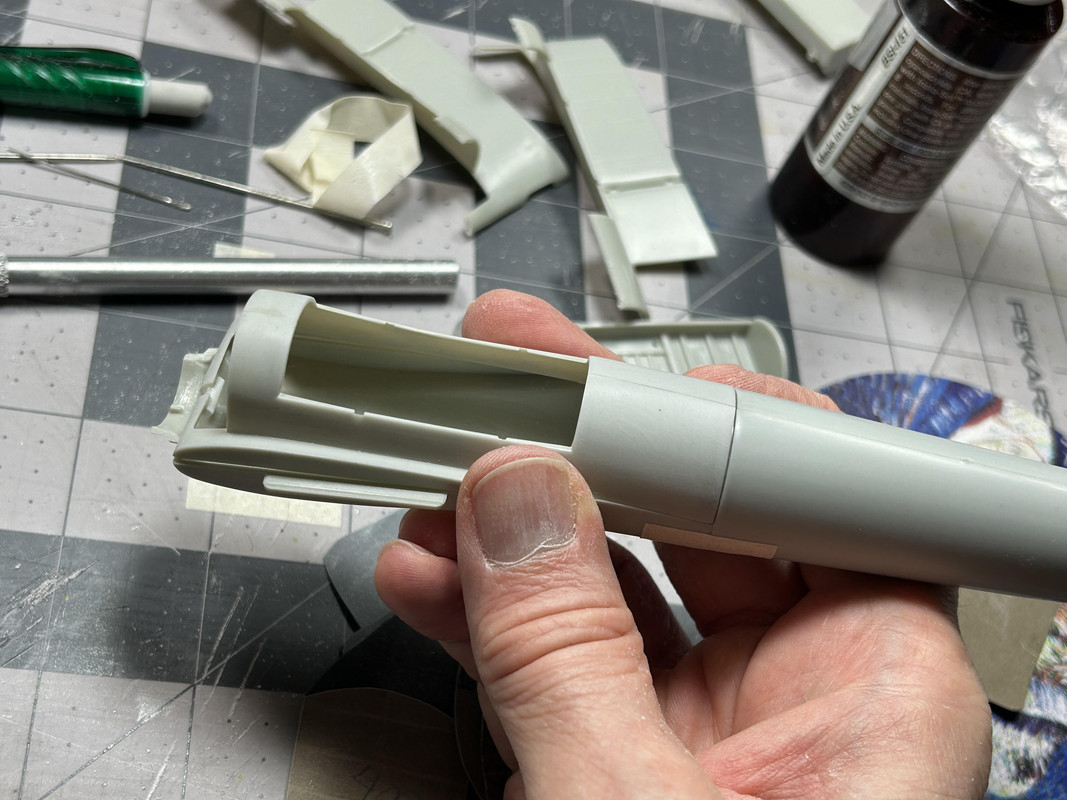
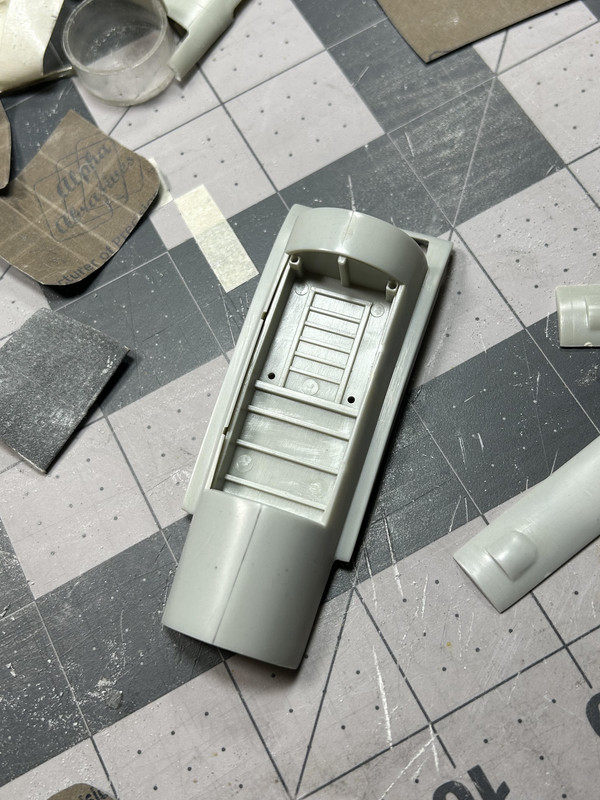
Figure 038: Gluing the landing gear flooring inside of the lower-front fuselage assembly added a lot of rigidity and strength. This is important, as the entire weight of the model will eventually rest on this area.
Figures 039 through 041: The next step was adding the landing gear doors in the closed position. This was actually a hassle to do because the doors were molded to be in the open position and in the closed position the fit was really poor. A large amount of slow-set superglue and tedious sanding was required to achieve an acceptable finish.
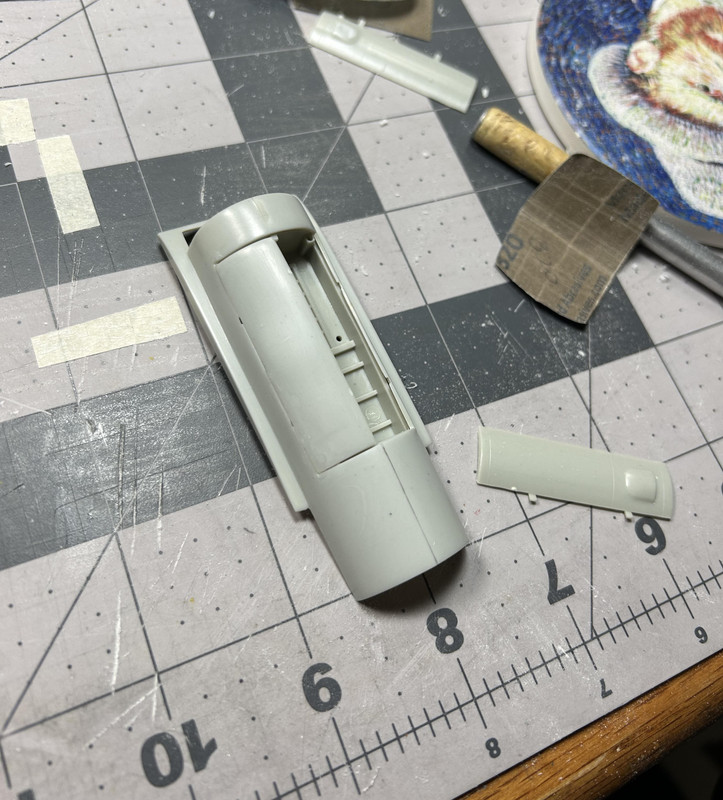
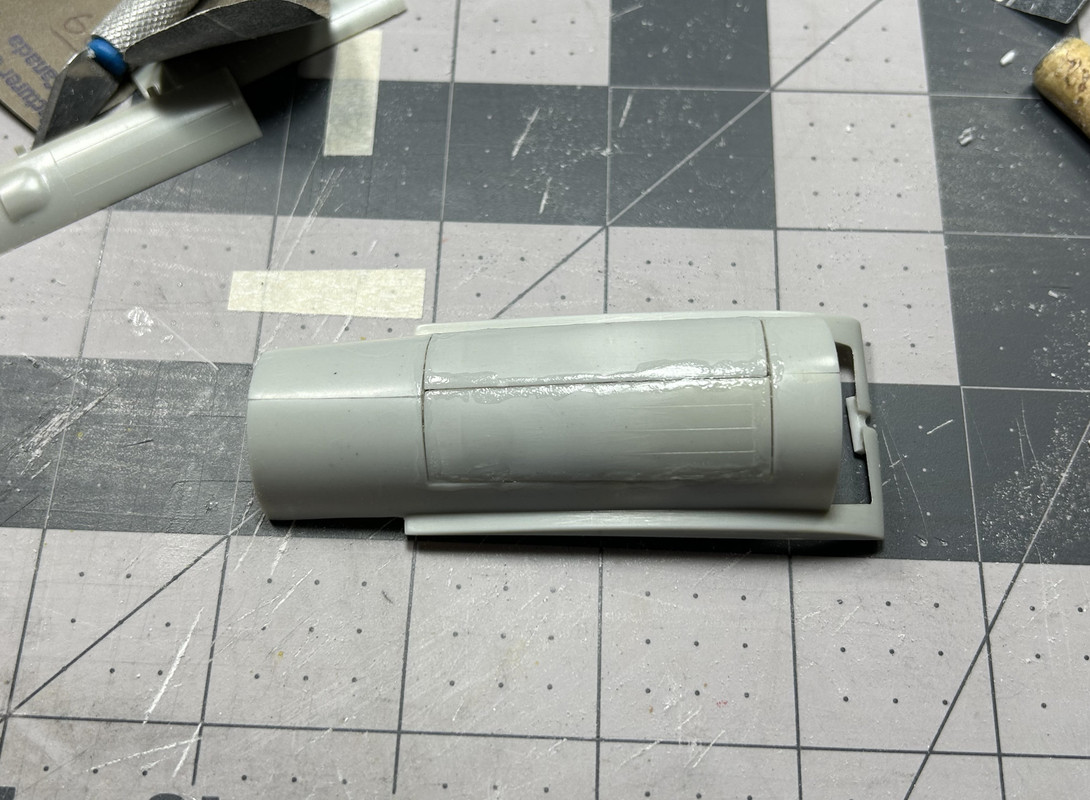
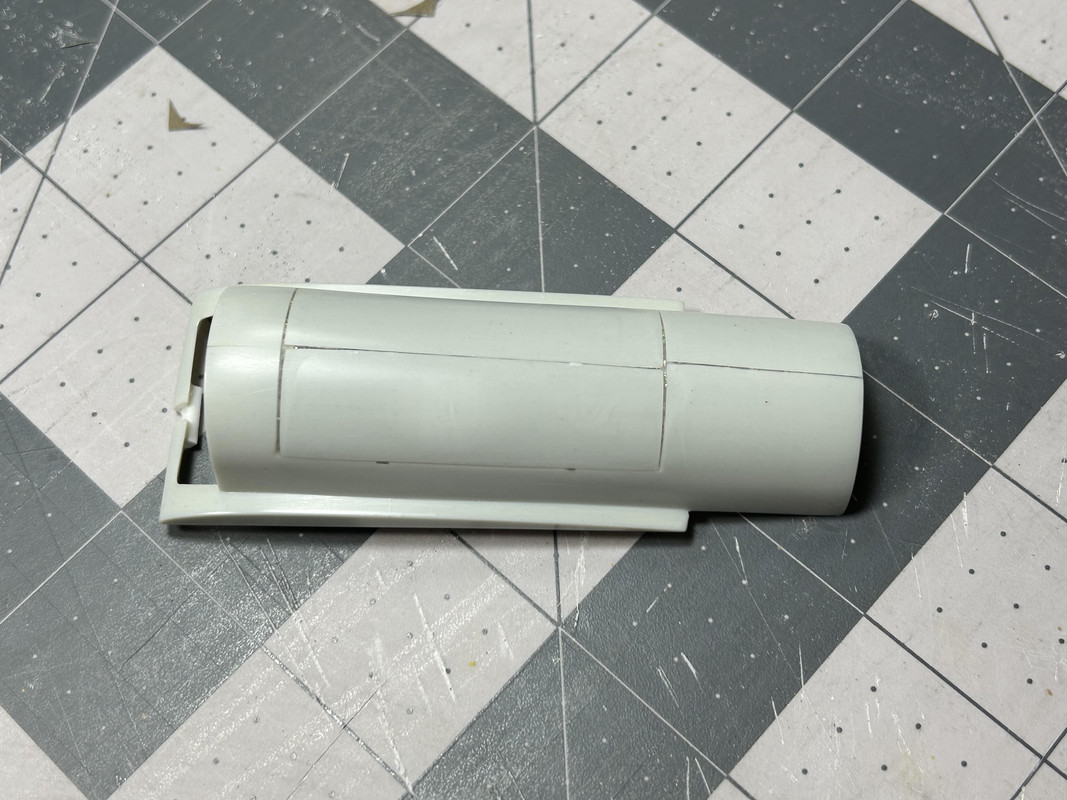
Figures 042 and 043: Two views showing more test fitting. The upper and lower front fuselage halves are ready to be glued together but before that can happen a scratch-built cockpit must be painted and installed.
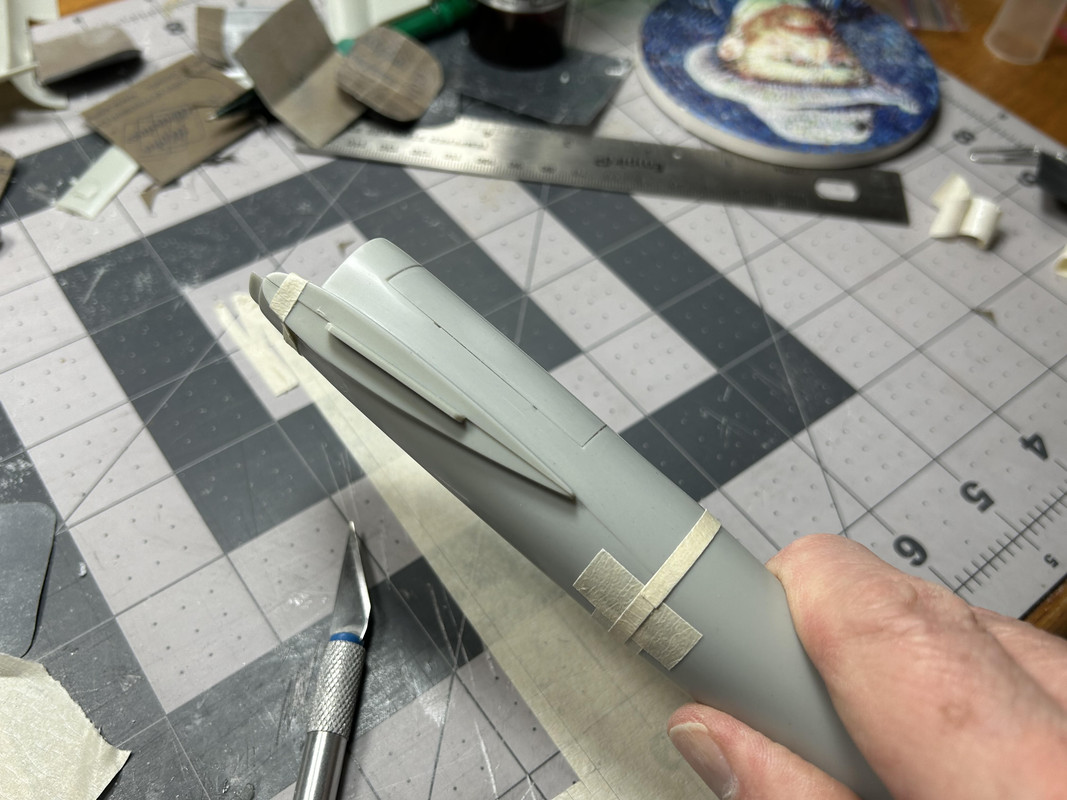
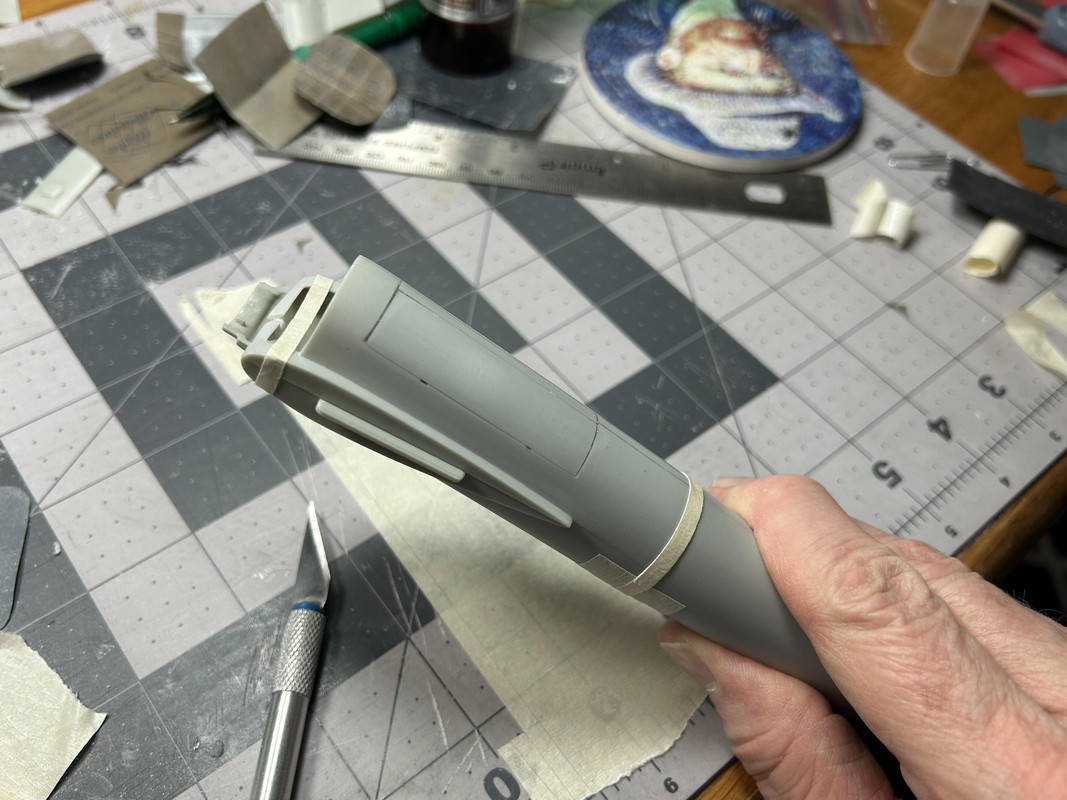
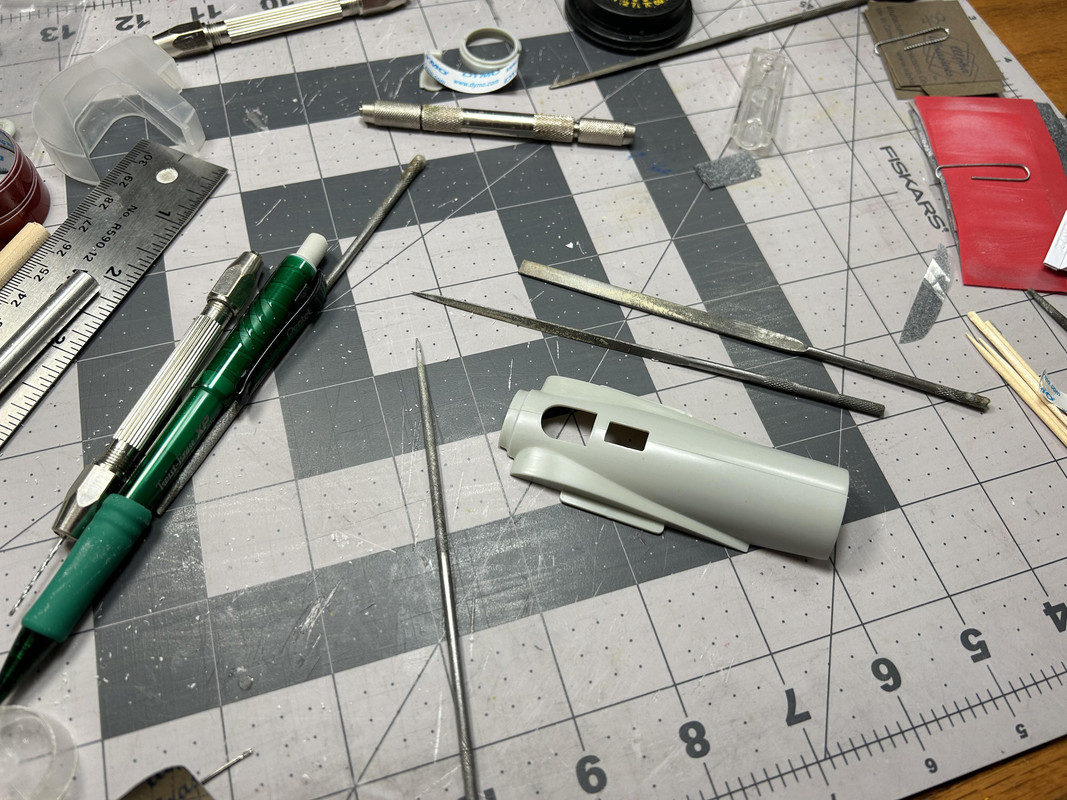
Figures 044 through 047: The next modification was cutting the pilot cockpit opening. The size and location were estimated after viewing movie still photos, then marked off with a pencil. A small drill bit was used to remove plastic in the shape of the opening. Next, an X-acto knife cut away the drilled plastic. Finally, sandpaper and files were used to smooth out and clean the openings.
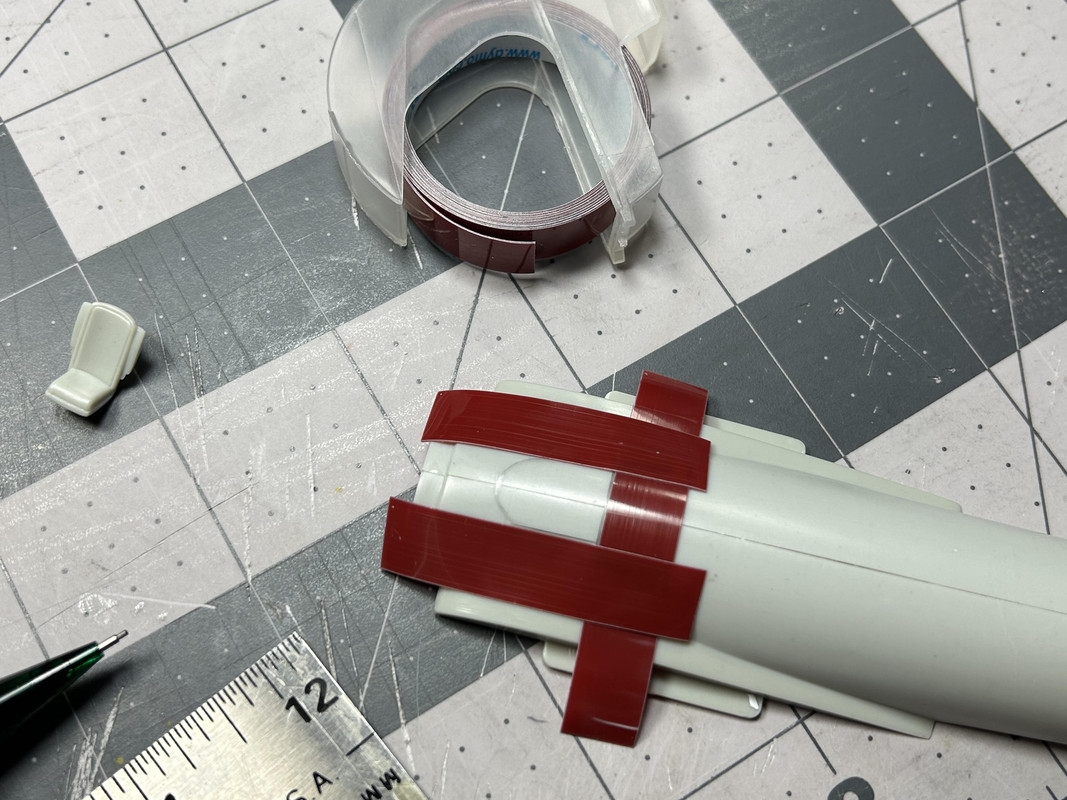
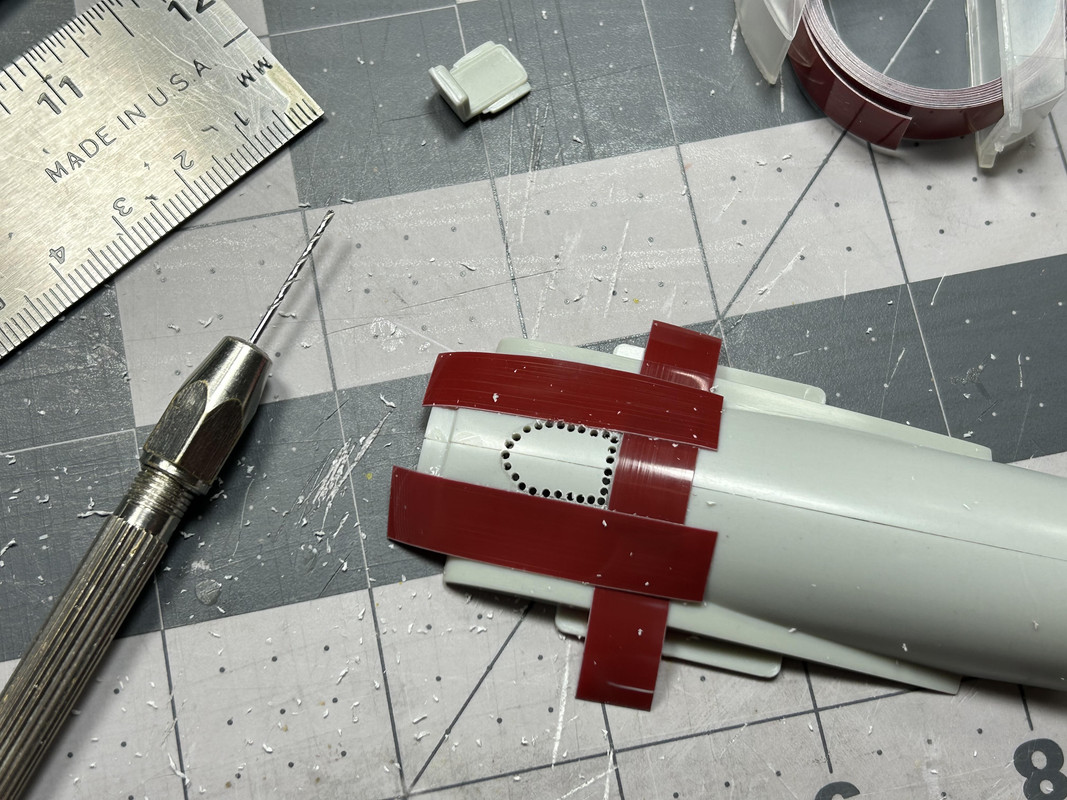
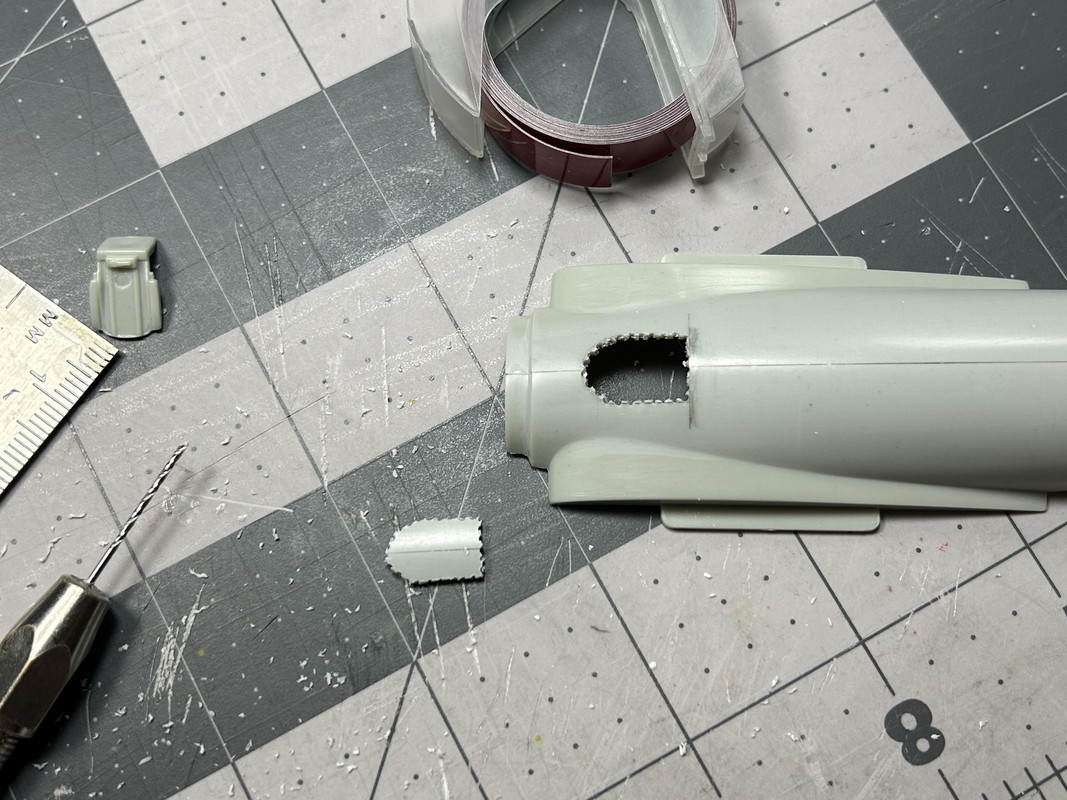
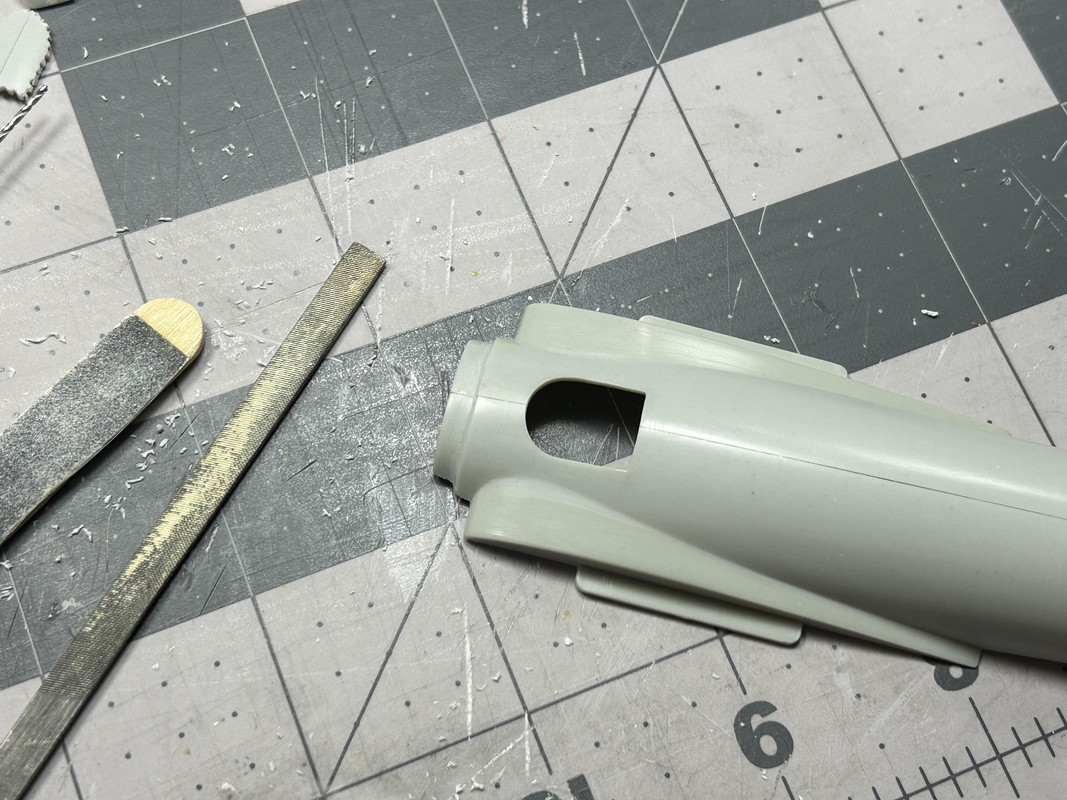
Figures 048 and 049: The same construction steps were used to add the observer opening right behind the main cockpit.
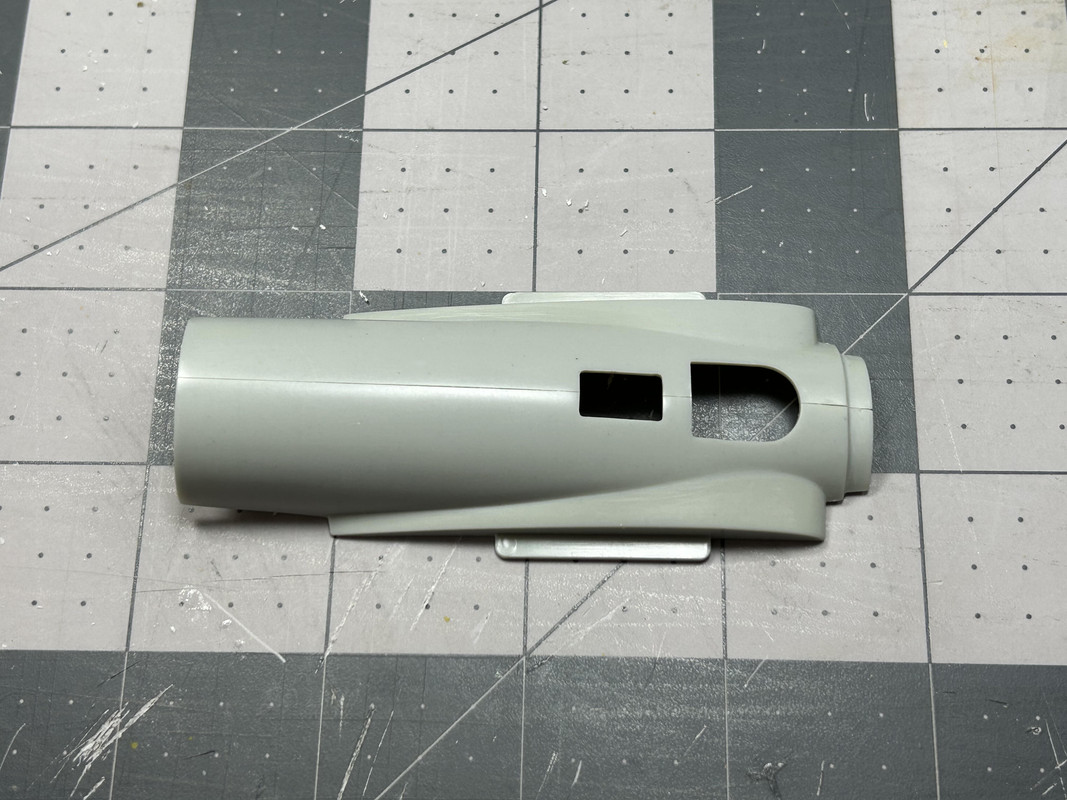
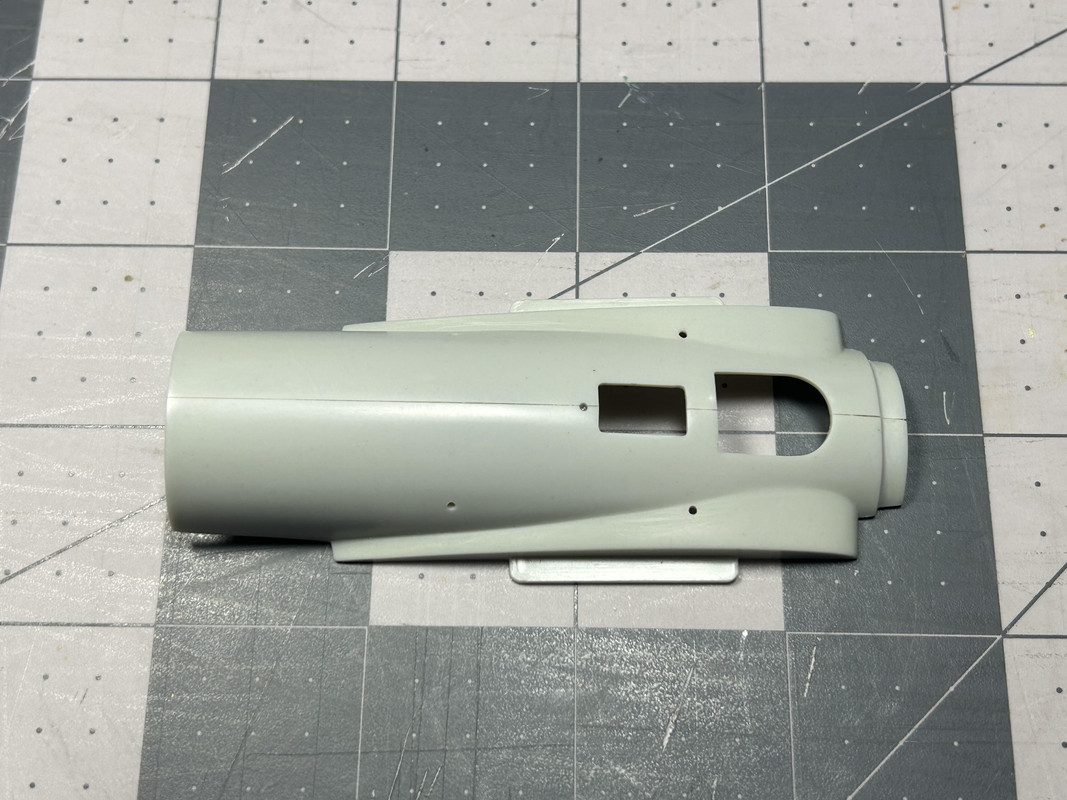
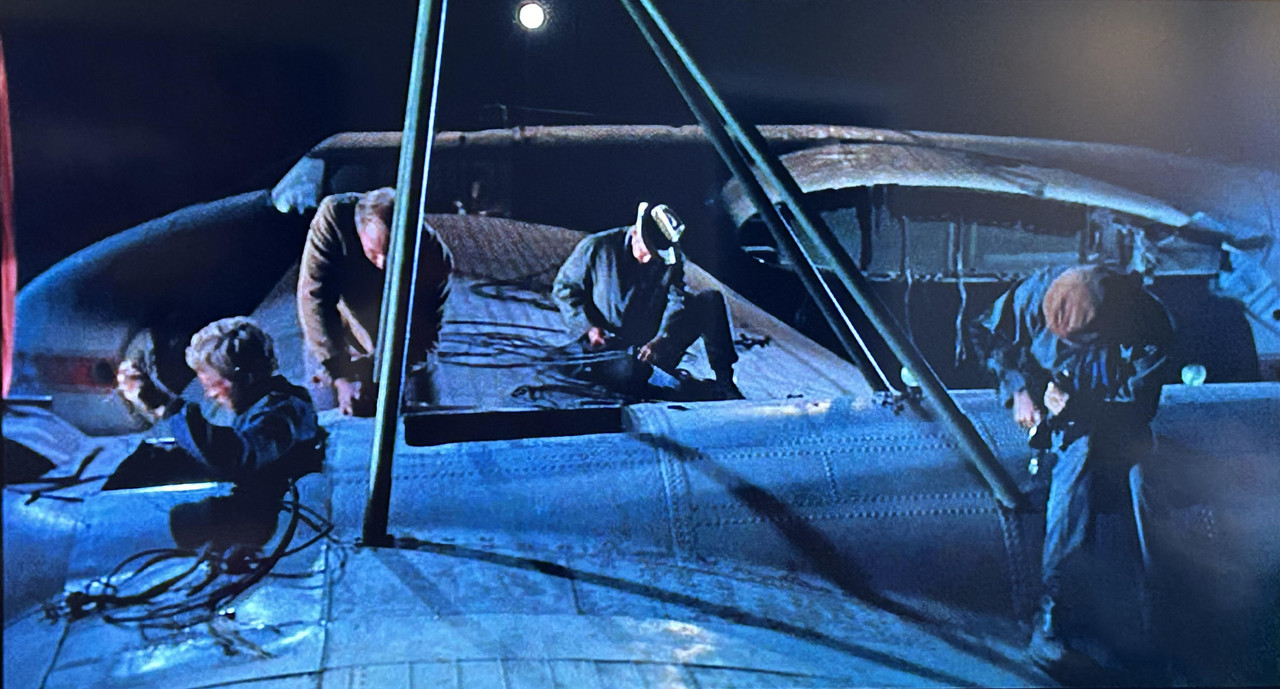
Figures 050 and 050a: The Phoenix was rigged with a lot of guy wires, with several on the upper wings supported by four cabane struts. The second image is a film still that helped me locate and drill holes in the fuselage where the cabane struts will be added later.
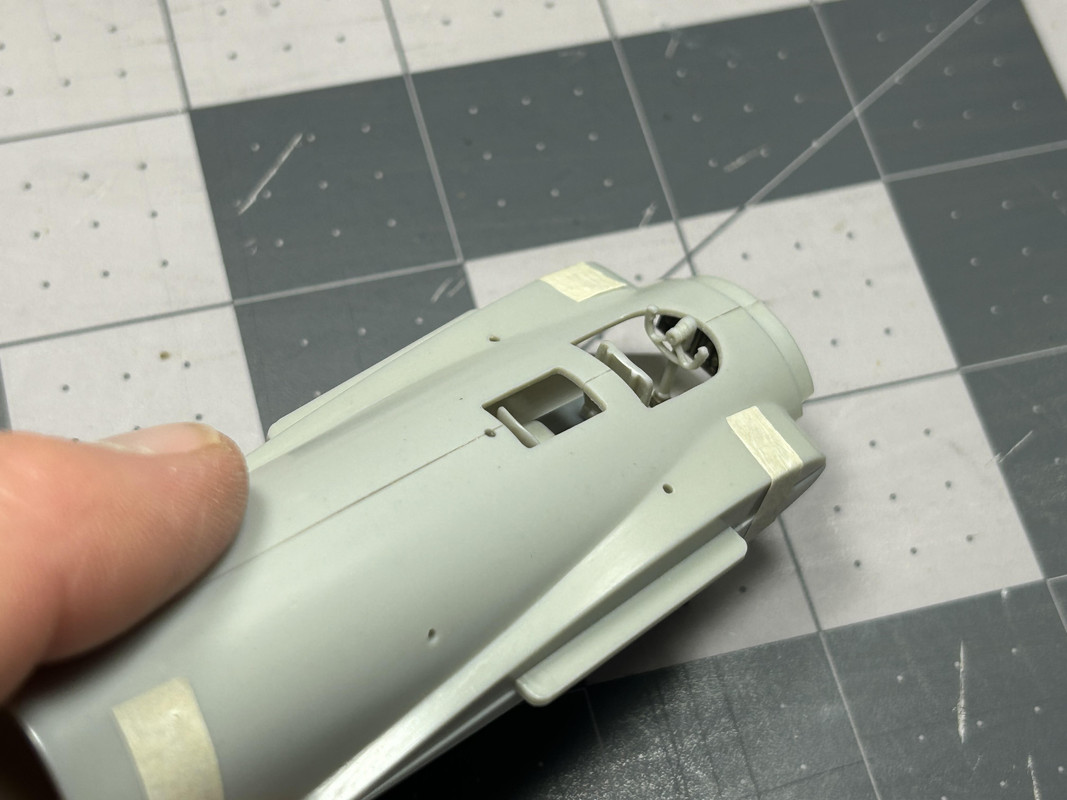
Figures 51 and 052: A bare-bones minimum cockpit was built using two seats, a control column, and steering wheel from the kit parts with the rest coming from my spares box. The detail is minimal, as not much will be seen even though the cockpits are open.
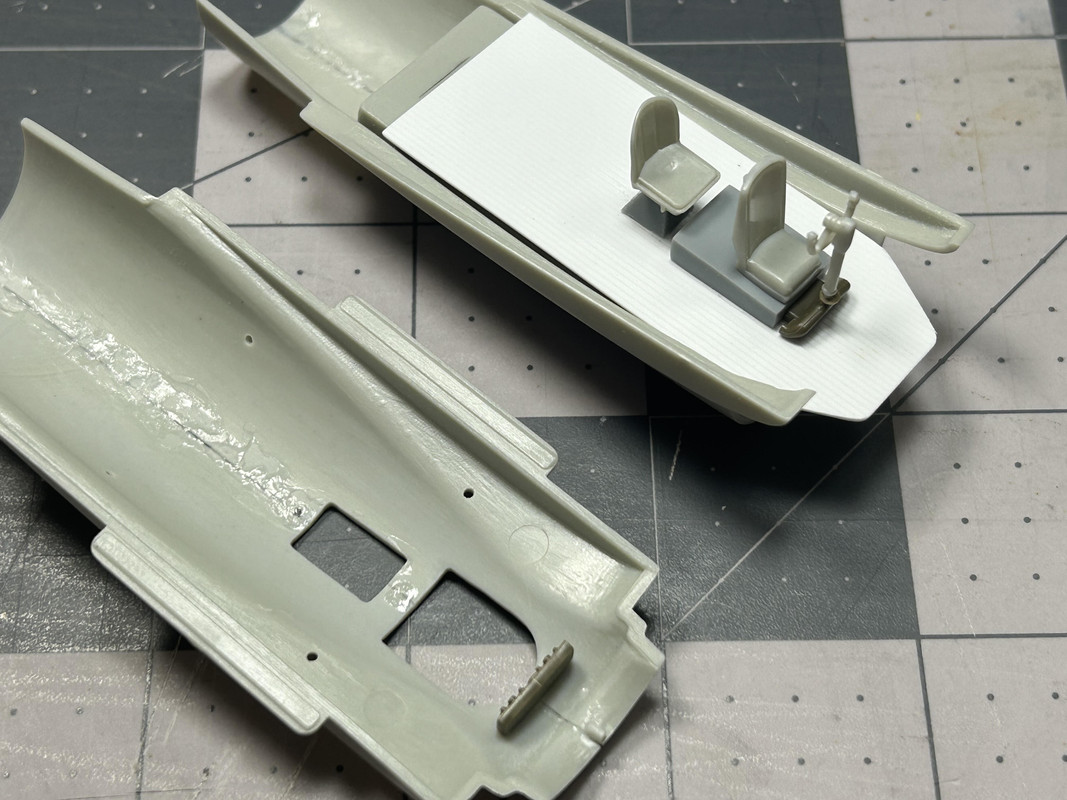
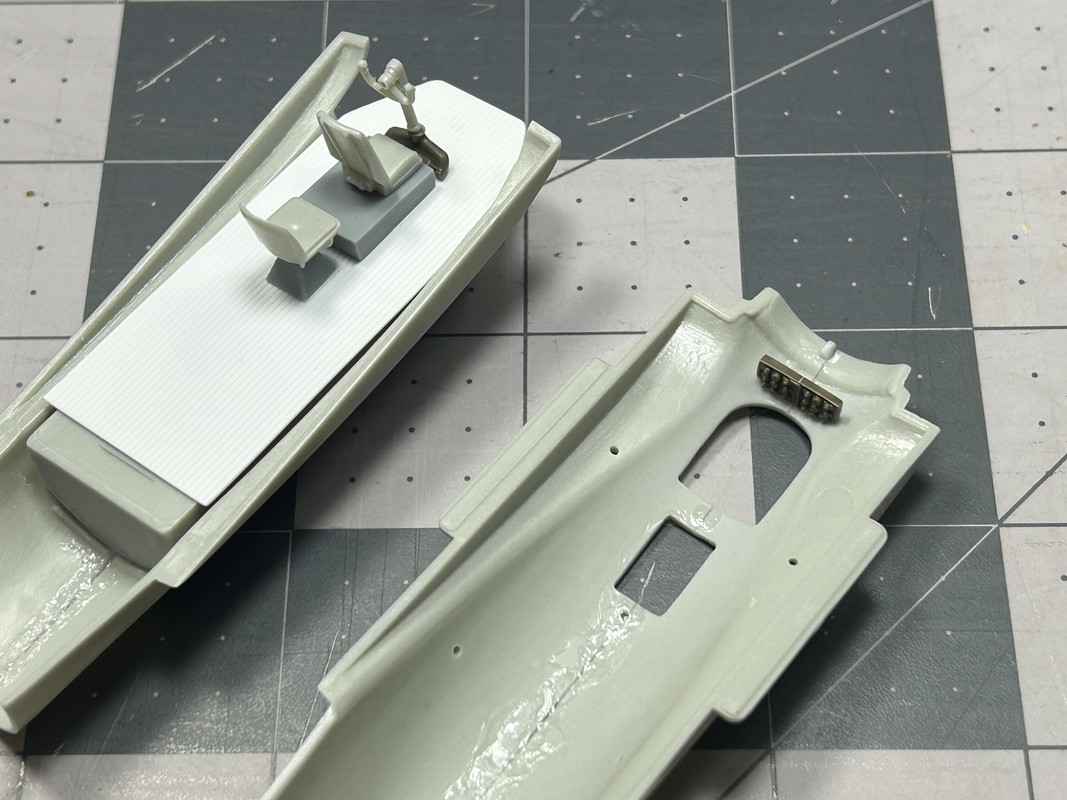
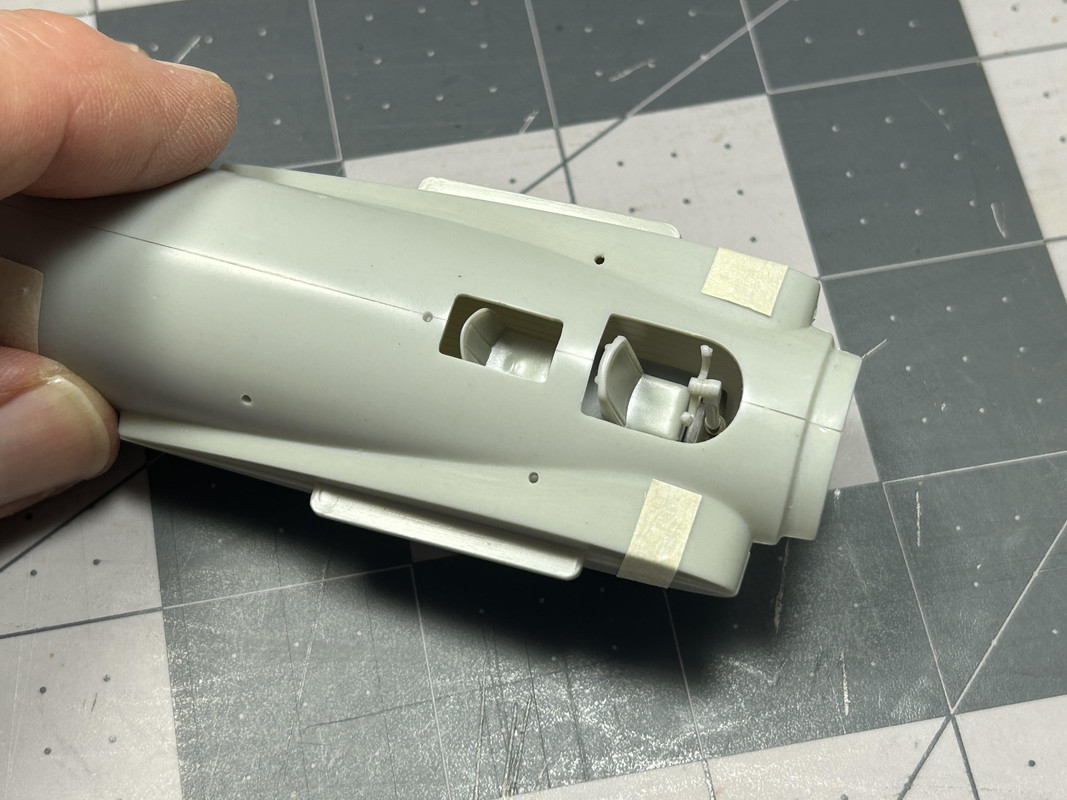
Figures 053 and 054: Here are two views of test fitting to confirm the parts were properly centered and at the correct elevation. I made sure the pilot seat and steering wheel were elevated above the cockpit opening like in the movie.
Figures 055 through 057: In the movie the entire aircraft interior was painted a bright green-probably zinc chromate green. I used Model Master Interior Green (very close to zinc chromate green) on the interior on my Phoenix. Dark gray pastel dust and medium gray dry-brushing was used to vary the color, and bring out the details.
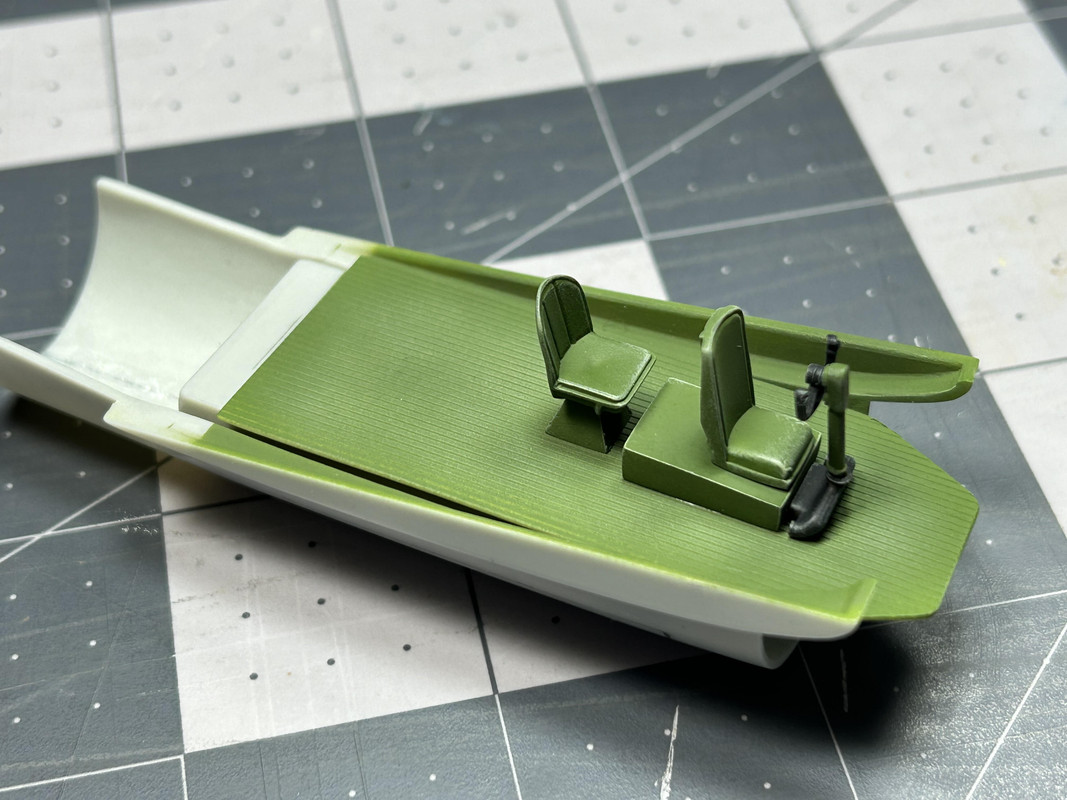
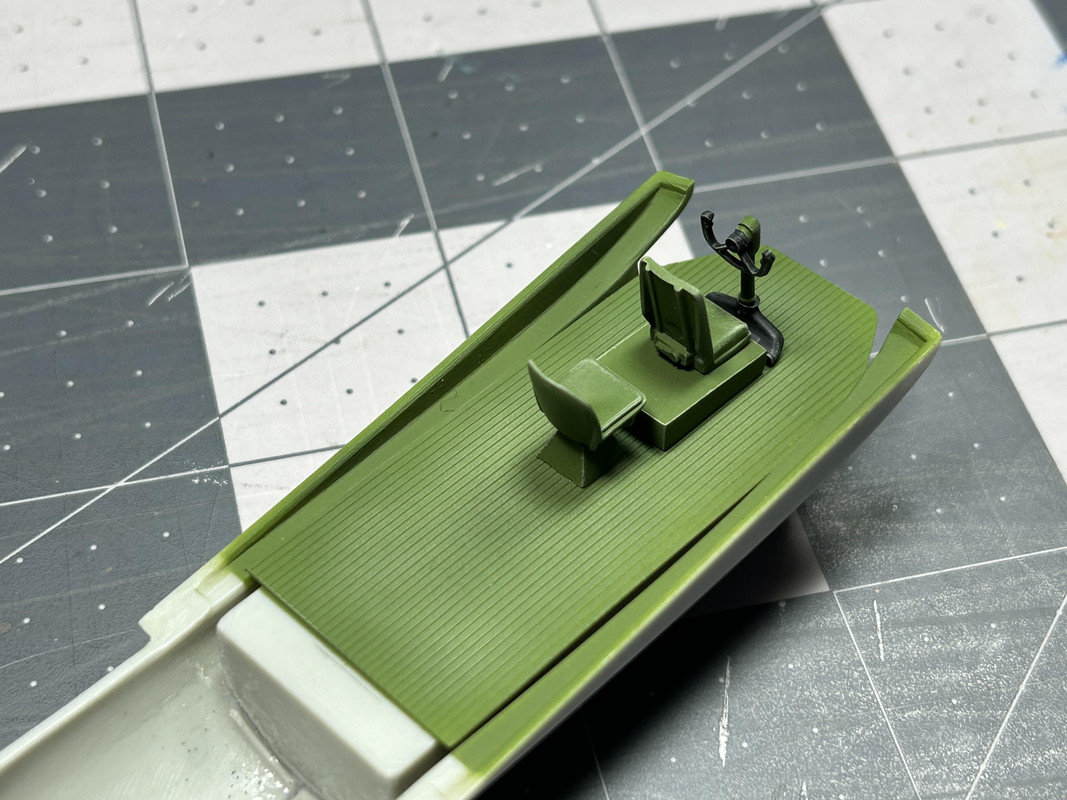
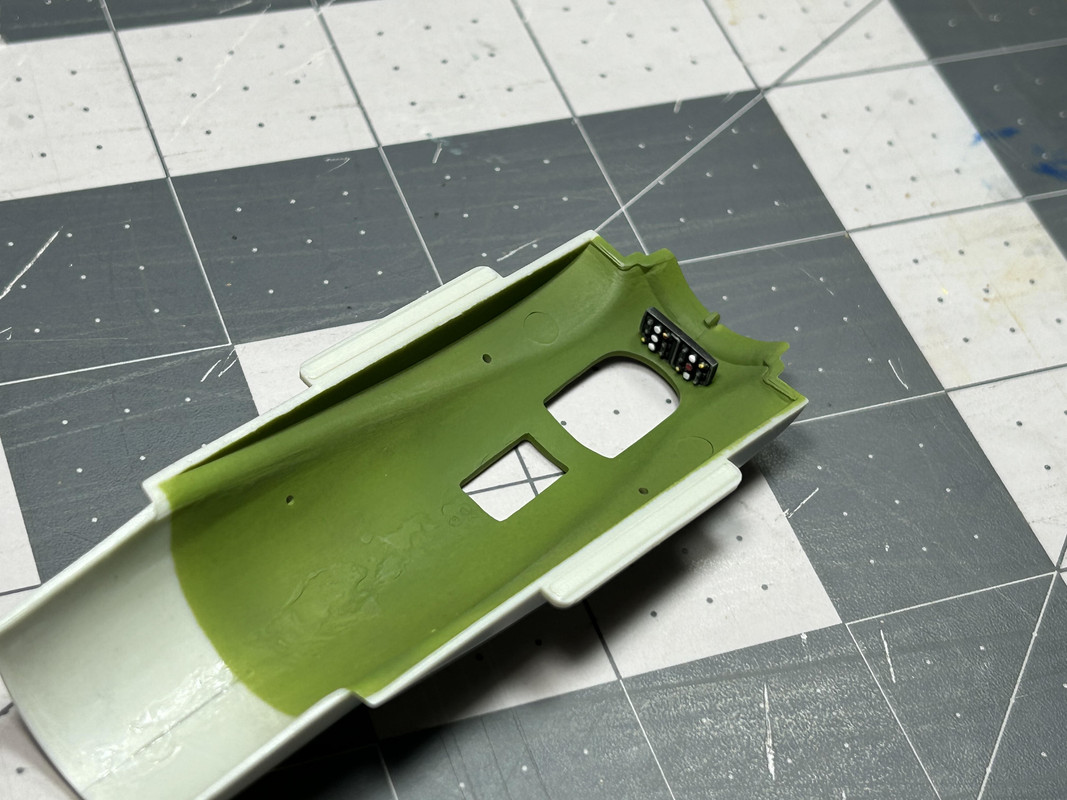
Figure 058: The front and rear fuselage assemblies have been are glued together and the seam line sanded out.
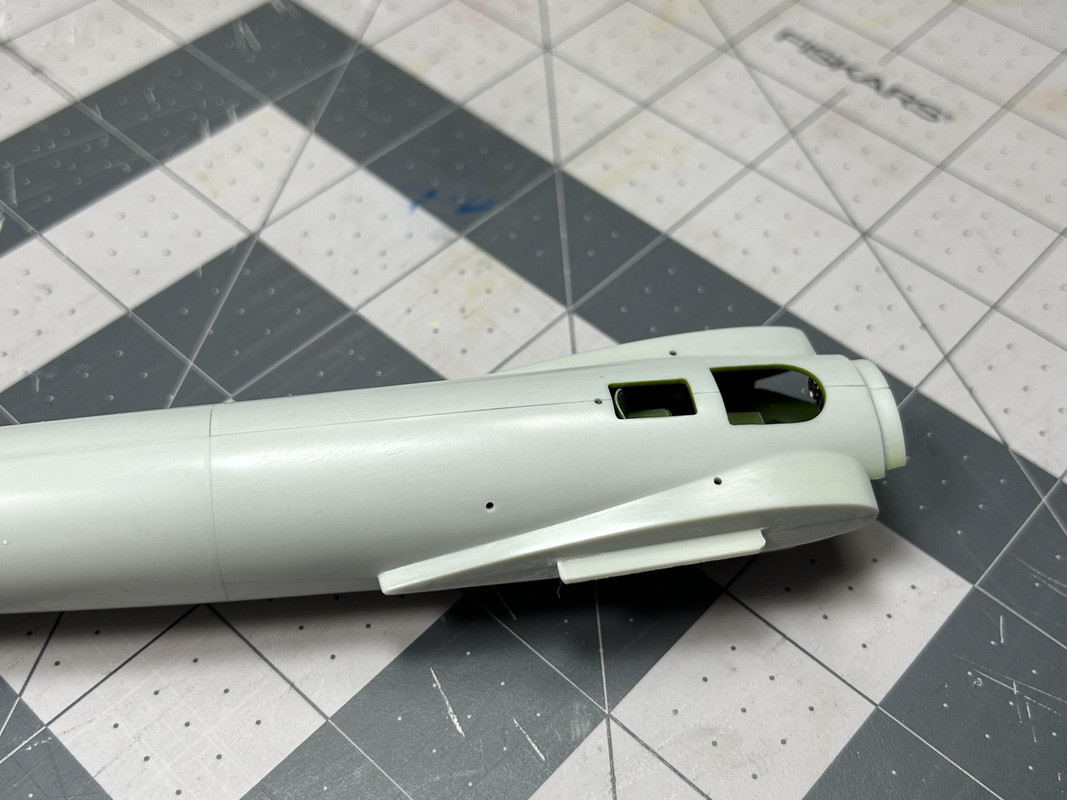
Figure 059: The final two lower fuselage parts required to be cut in half and rejoined as a symmetrical assembly are shown here.
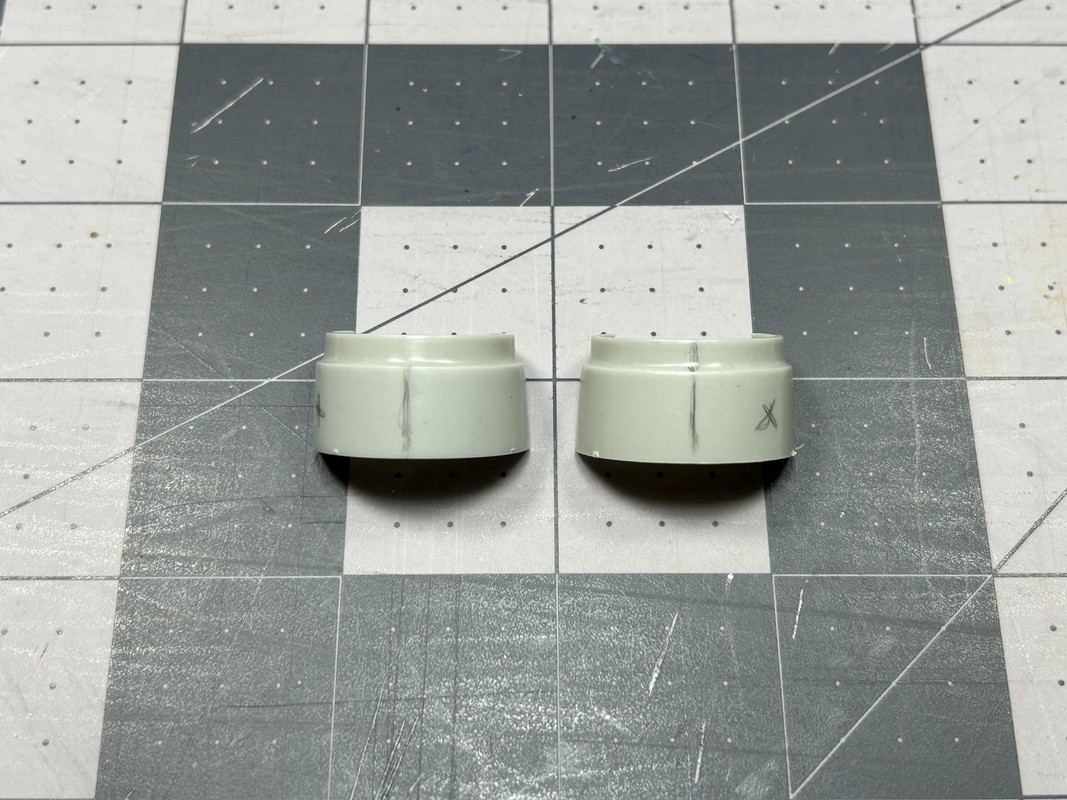
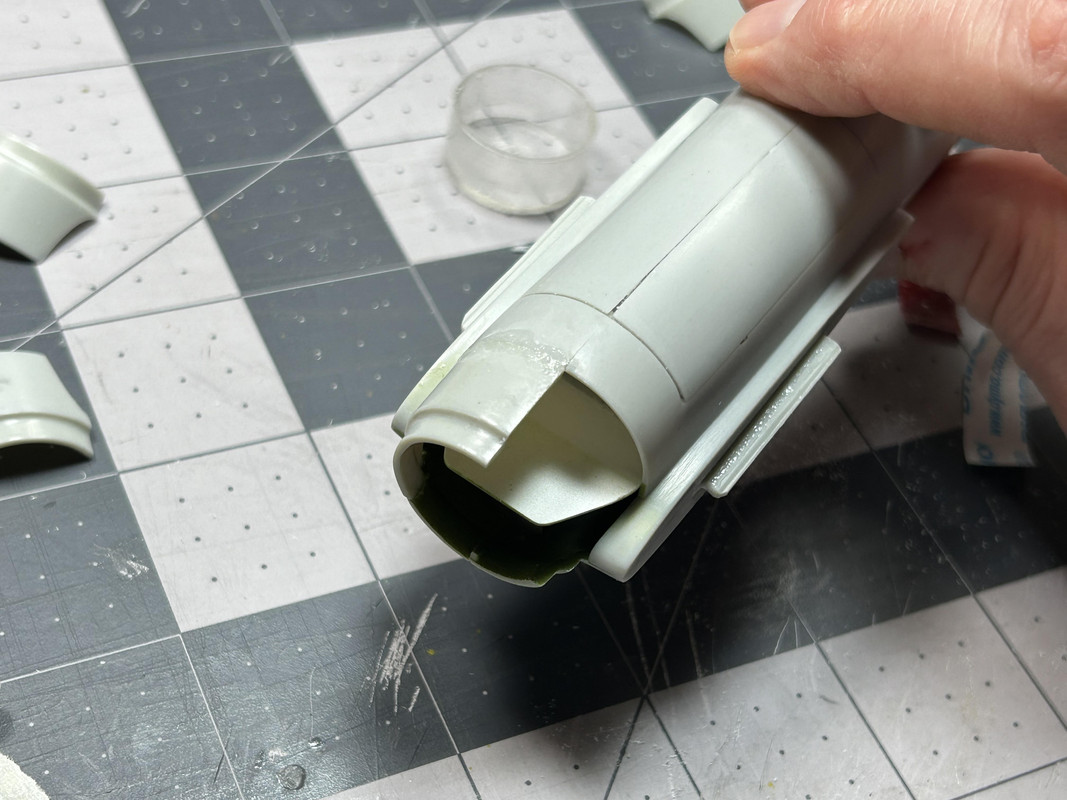
Figure 060: The left side is glued in place. Some forced bending of the part by was required to get a better fit.
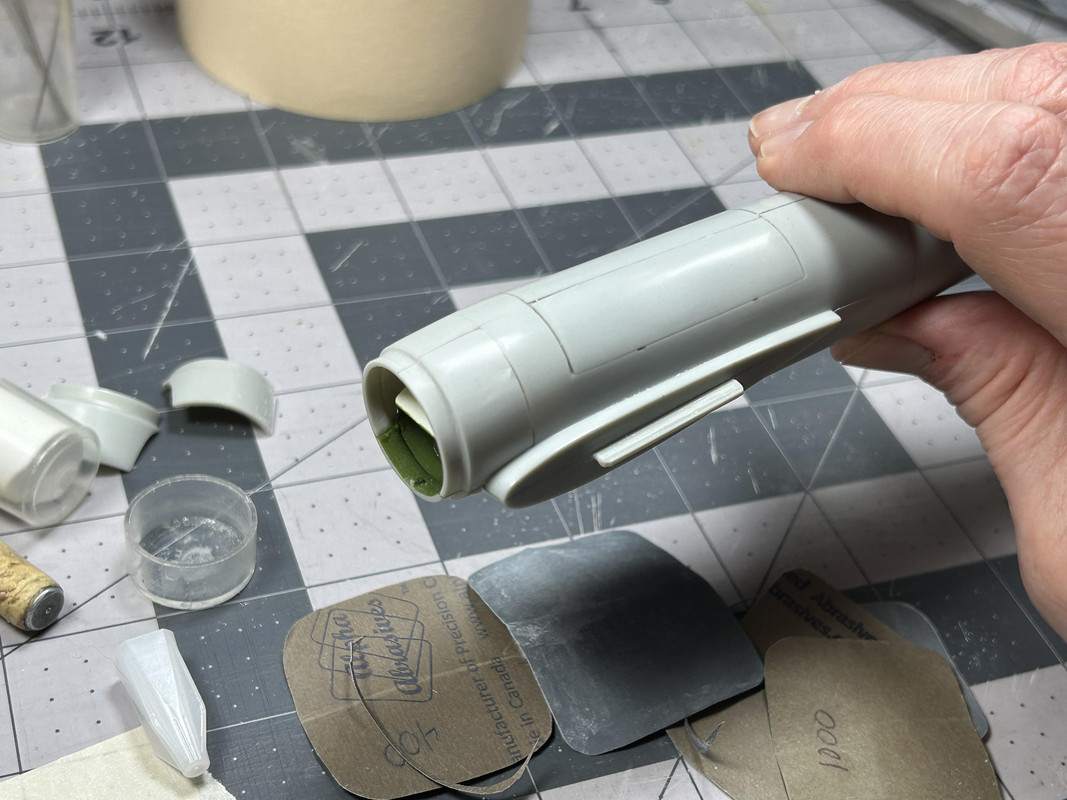
Figures 061 and 062: The two lower fuselage parts are in place and sanded out.
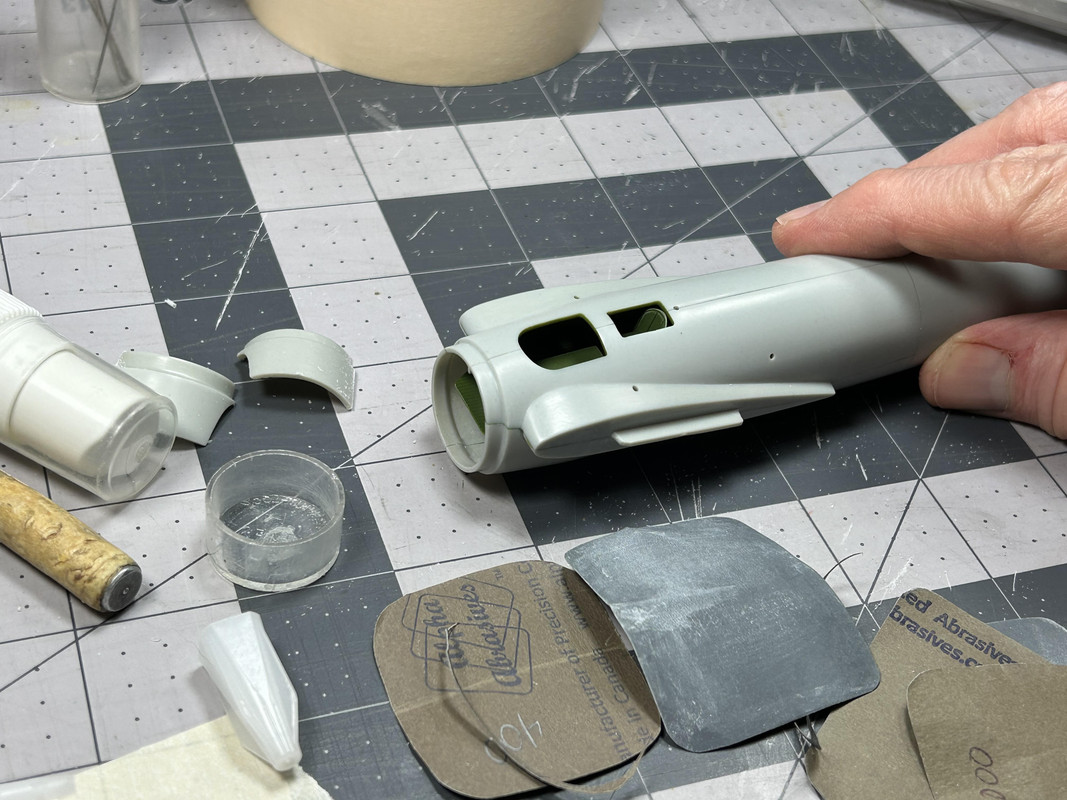
Figures 063 through 064a: The damage to the ventral fin was created by cutting a jagged pattern with an X-acto knife, then crimping the area with small needle nose pliers. The third image is a film still that shows the damaged ventral fin.
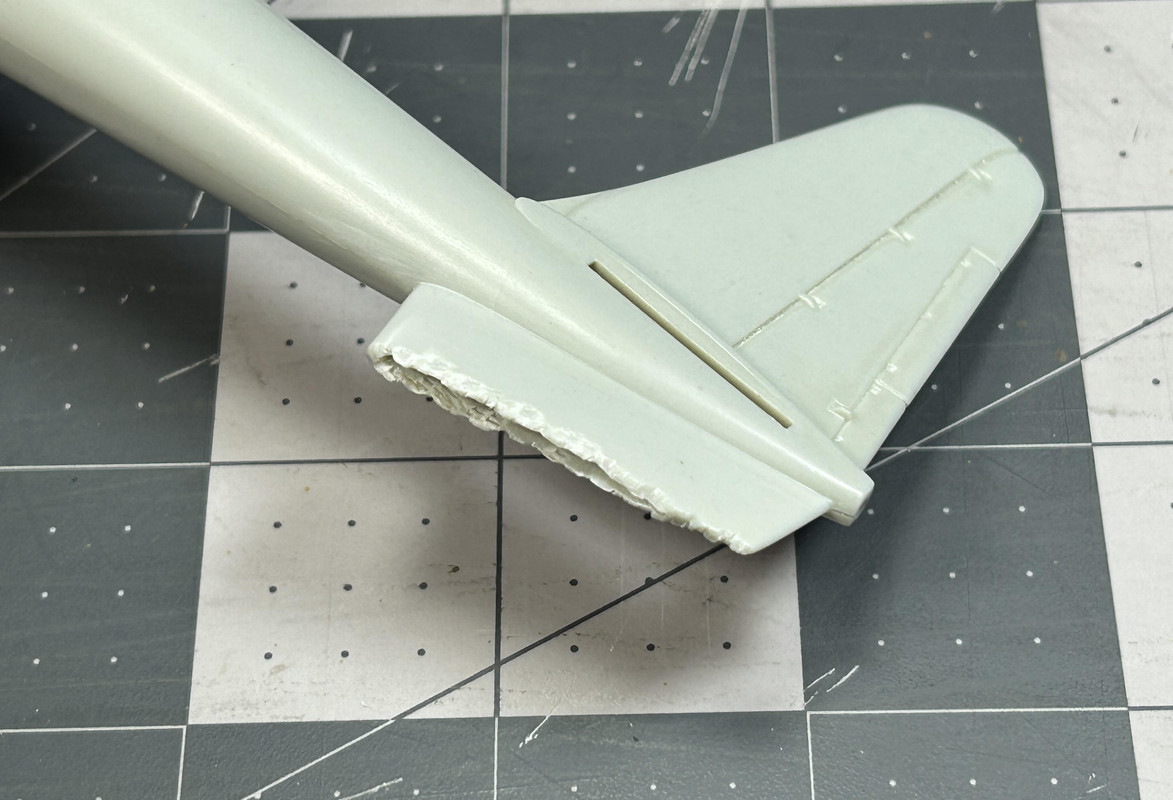
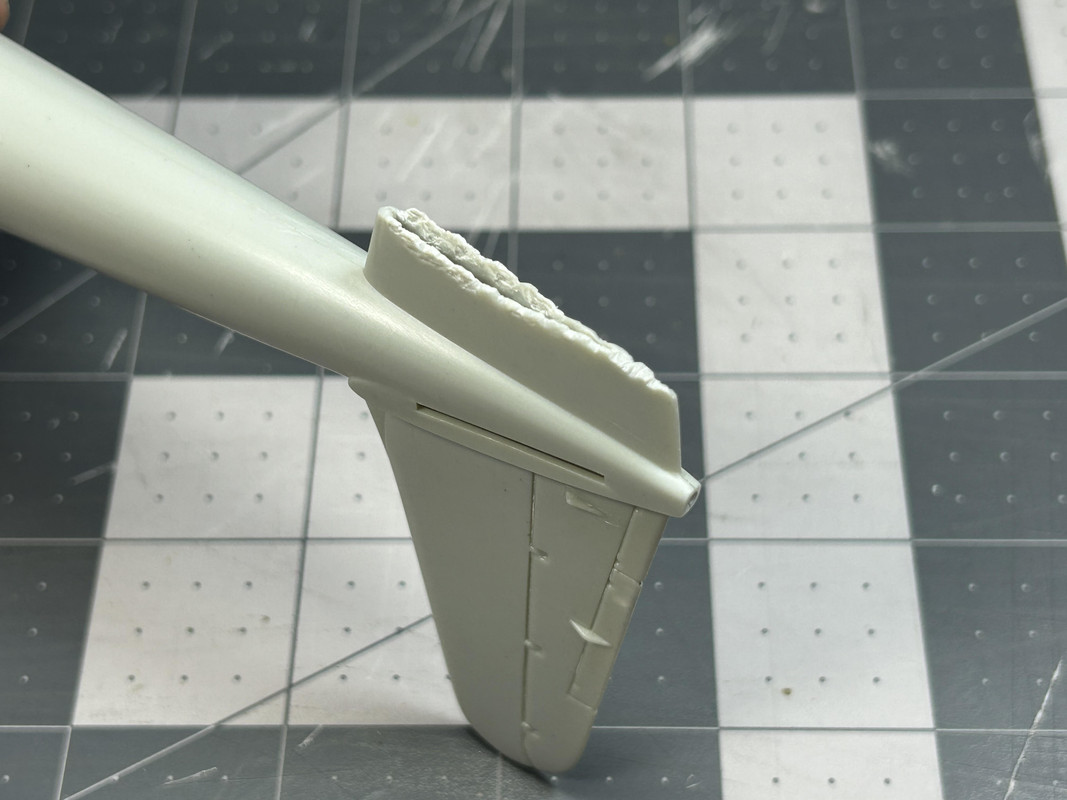
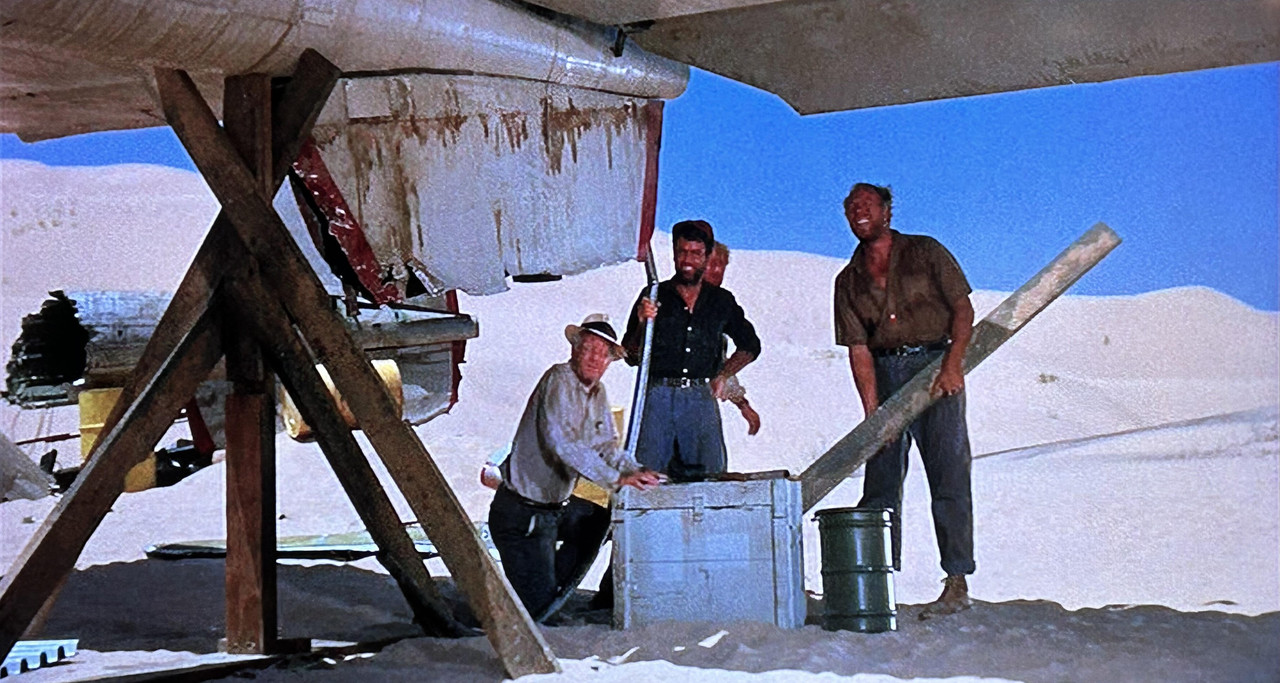
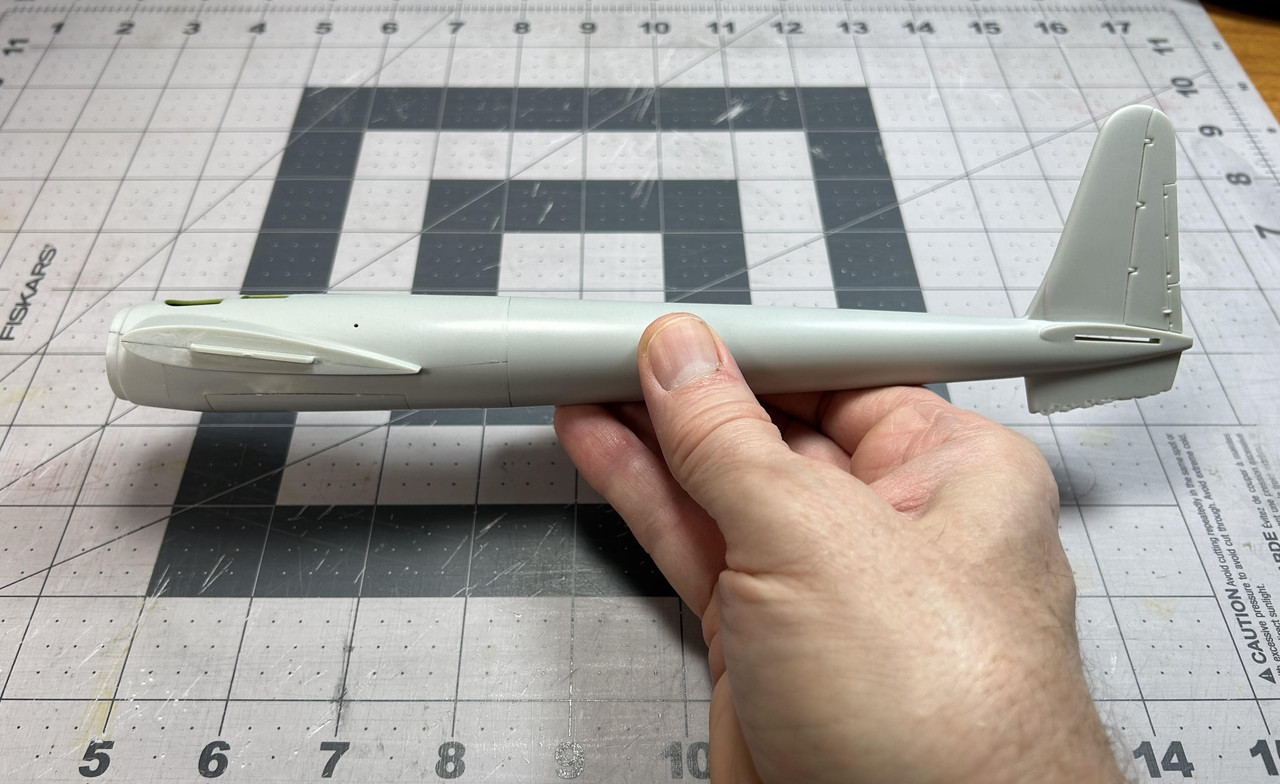
Figure 065: The basic fuselage shape (made up of ten different pieces) is done. Whew! Although this model is 1/72 scale (which is really smaller than I am used to) it is now clear to me this airplane will be a fairly large size when complete and comparable to the size of a 1/32 scale early WW2 fighter (i.e., F4F Wildcat, P-40 Warhawk, etc.)-just a lot skinnier!
Until next time...
Phillip1
Re: Progress Build of the Phoenix Airplane from The Flight of the Phoenix Movie (1965)
Posted: Sun Oct 13, 2024 7:00 am
by digger303
Re: Progress Build of the Phoenix Airplane from The Flight of the Phoenix Movie (1965)
Posted: Sun Oct 13, 2024 10:30 am
by cor
Thats taking shape
Re: Progress Build of the Phoenix Airplane from The Flight of the Phoenix Movie (1965)
Posted: Mon Oct 14, 2024 6:31 am
by Stokesy44
Cracking work. I'll have to watch the film now!
Re: Progress Build of the Phoenix Airplane from The Flight of the Phoenix Movie (1965)
Posted: Tue Oct 15, 2024 1:24 pm
by Phillip1
digger303/cor/Stokesy44-Thanks for the compliments!
Stokesy44-I HIGHLY recommend watching this, especially if you like gritty survivalist movies!
Phillip1
Re: Progress Build of the Phoenix Airplane from The Flight of the Phoenix Movie (1965)
Posted: Tue Oct 15, 2024 10:46 pm
by RangerNeil
Thats some amazing workmanship thus far!!
Re: Progress Build of the Phoenix Airplane from The Flight of the Phoenix Movie (1965)
Posted: Wed Oct 16, 2024 1:55 pm
by Phillip1
RangerNeil-Thank you very much!
Phillip1
Re: Progress Build of the Phoenix Airplane from The Flight of the Phoenix Movie (1965)
Posted: Fri Oct 18, 2024 2:24 pm
by Phillip1
Fellow Modelers-More fuselage details are worked on and several subassemblies are glued together.
Figures 066 through 068: The cowling is very important to the overall look of the Phoenix, so several modifications were done to improve its appearance. First, a saw was used to separate each flap. Next, each flap was carefully bent outward to make them look partially open and thin styrene pieces were used to fill in three recessed notches. Finally, the outside edges of the flaps were sanded down to get them closer to scale thickness. This photo shows a box stock cowling next to the modified one.
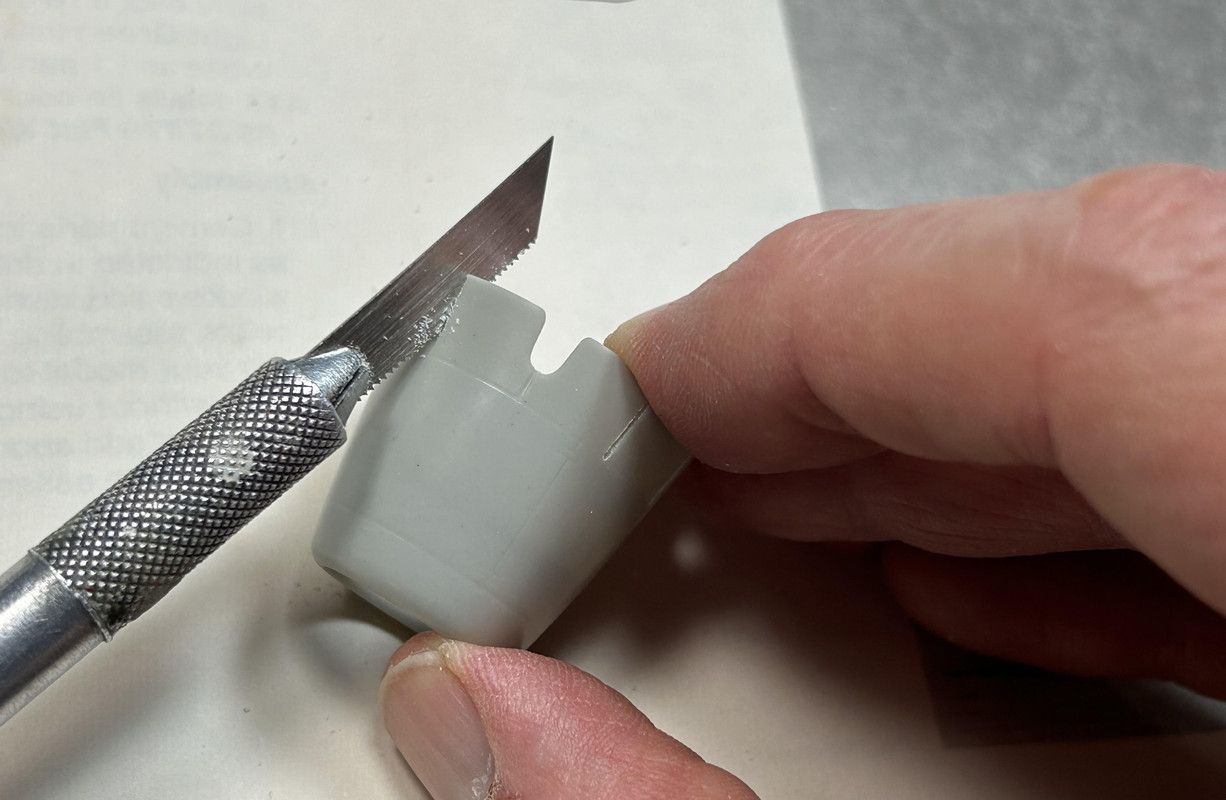
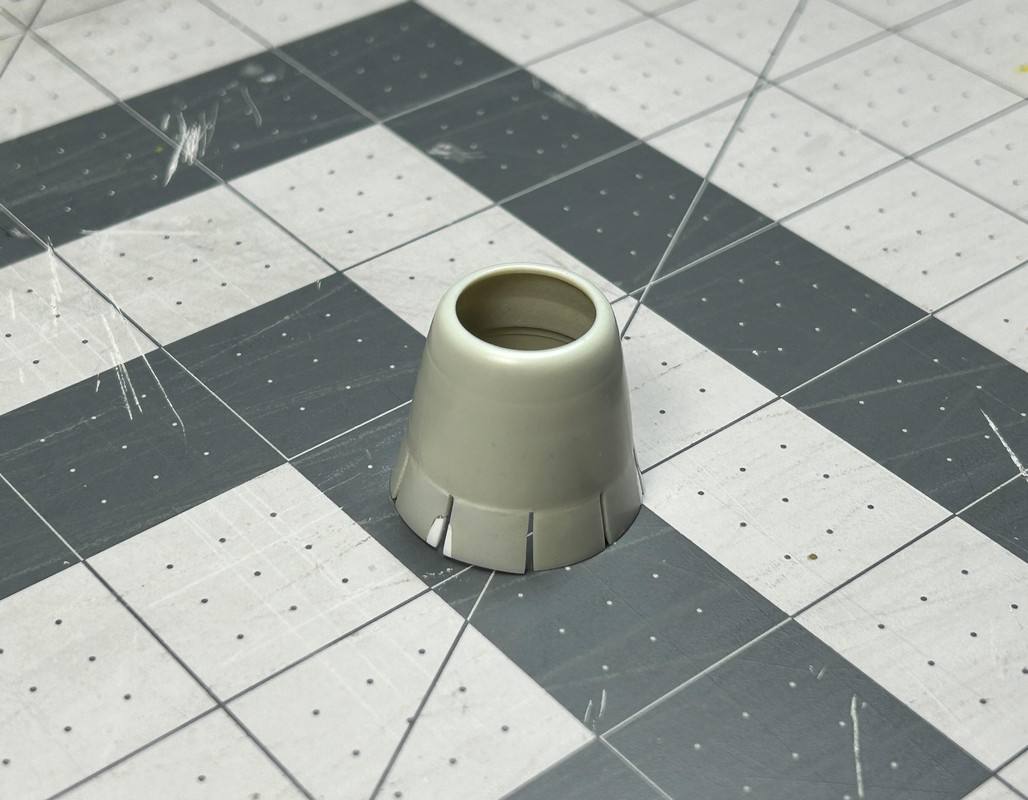
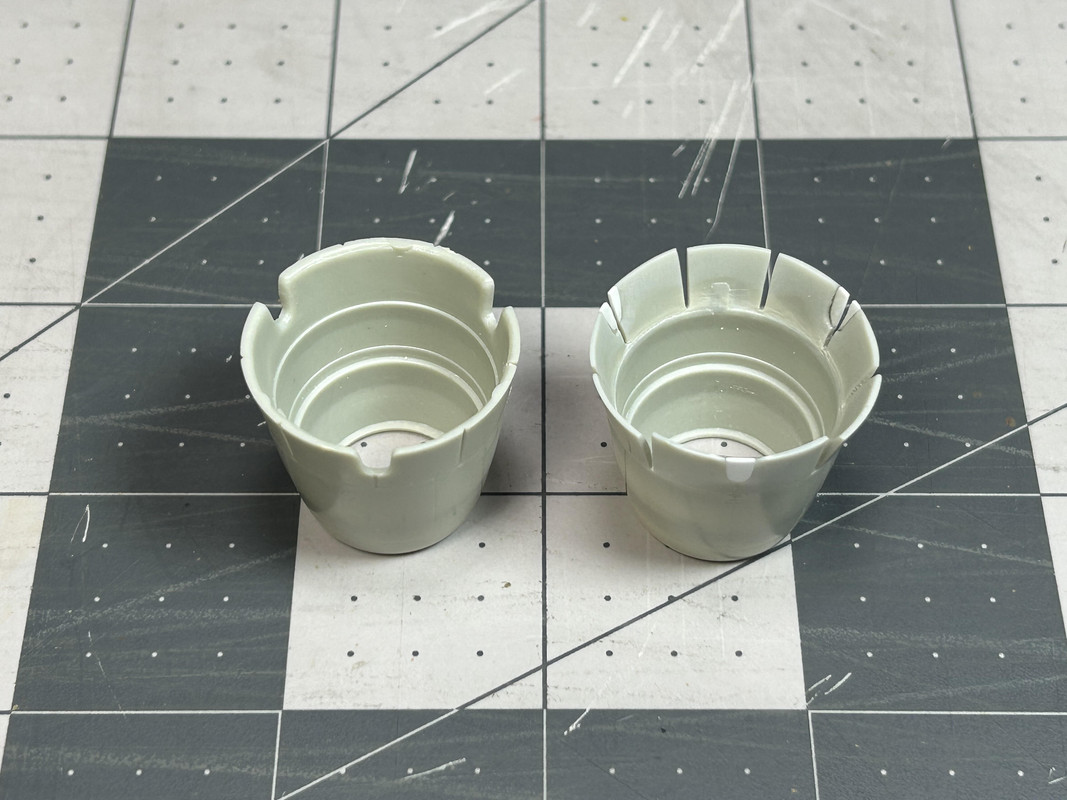
Figures 069 and 070: The modified cowling is test fitted to the fuselage.
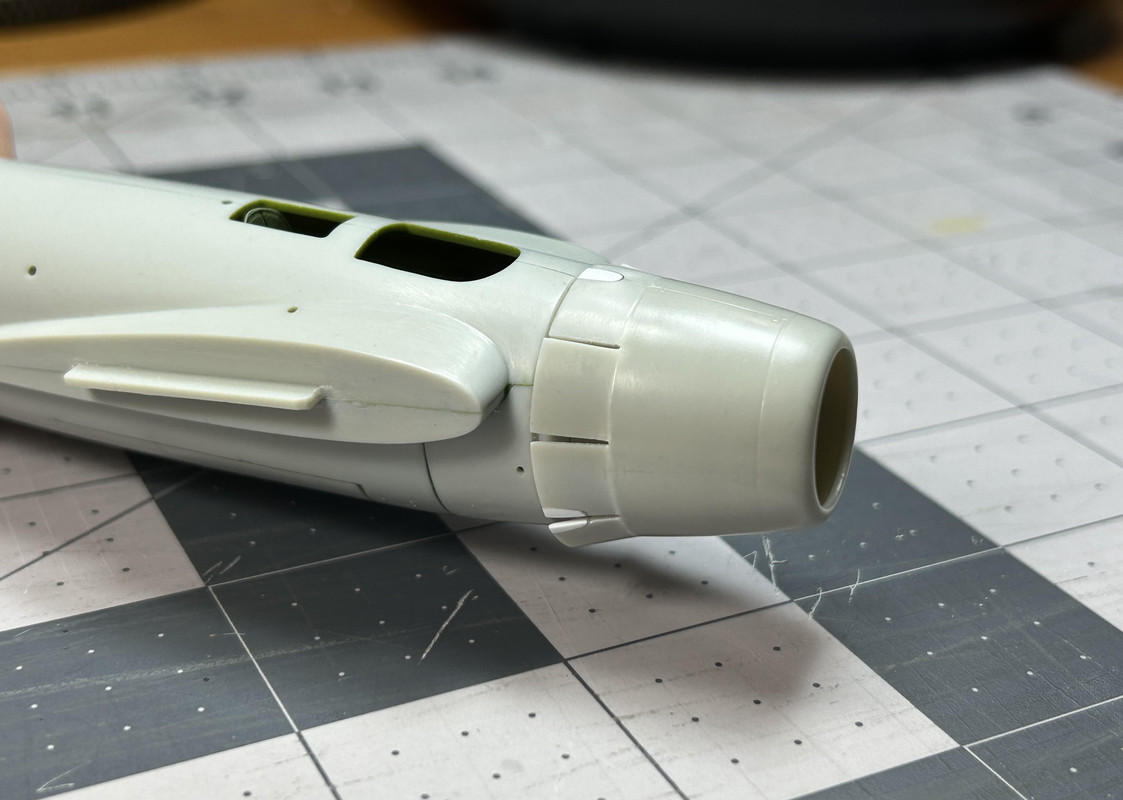
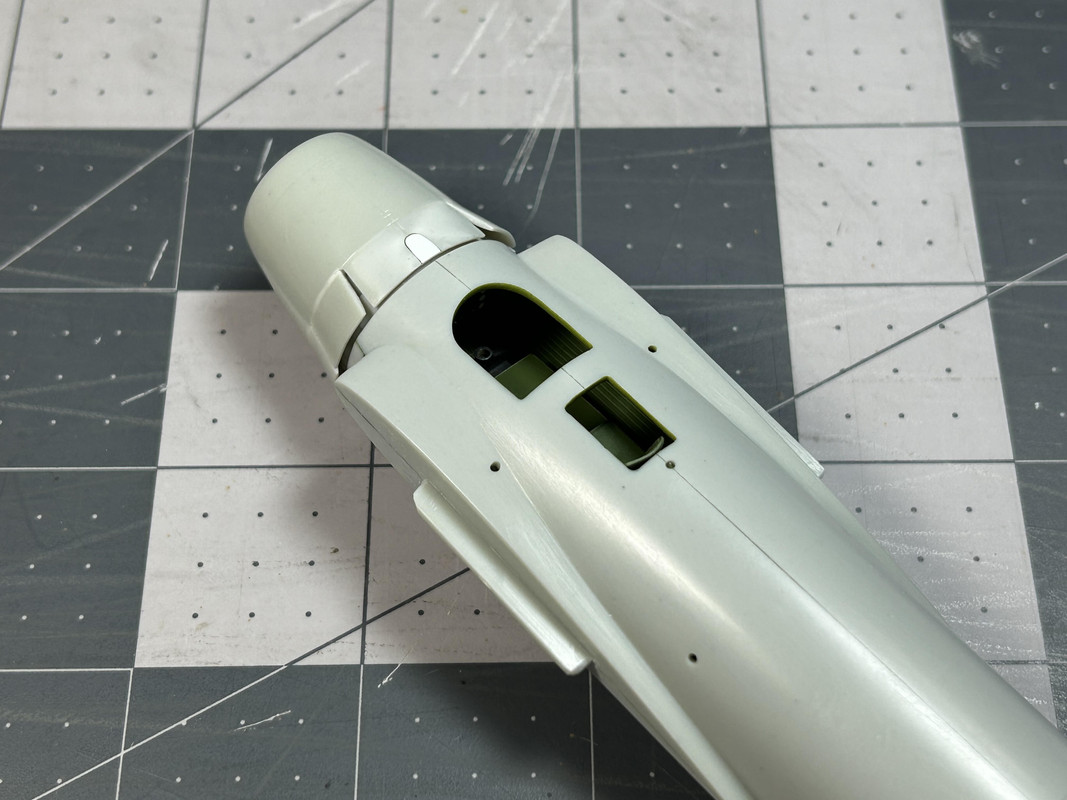
Figure 071: Two slightly oversized, thin styrene pieces were glued to the outside of each stabilizer edge, then sanded down to match the airfoil shape of the part.
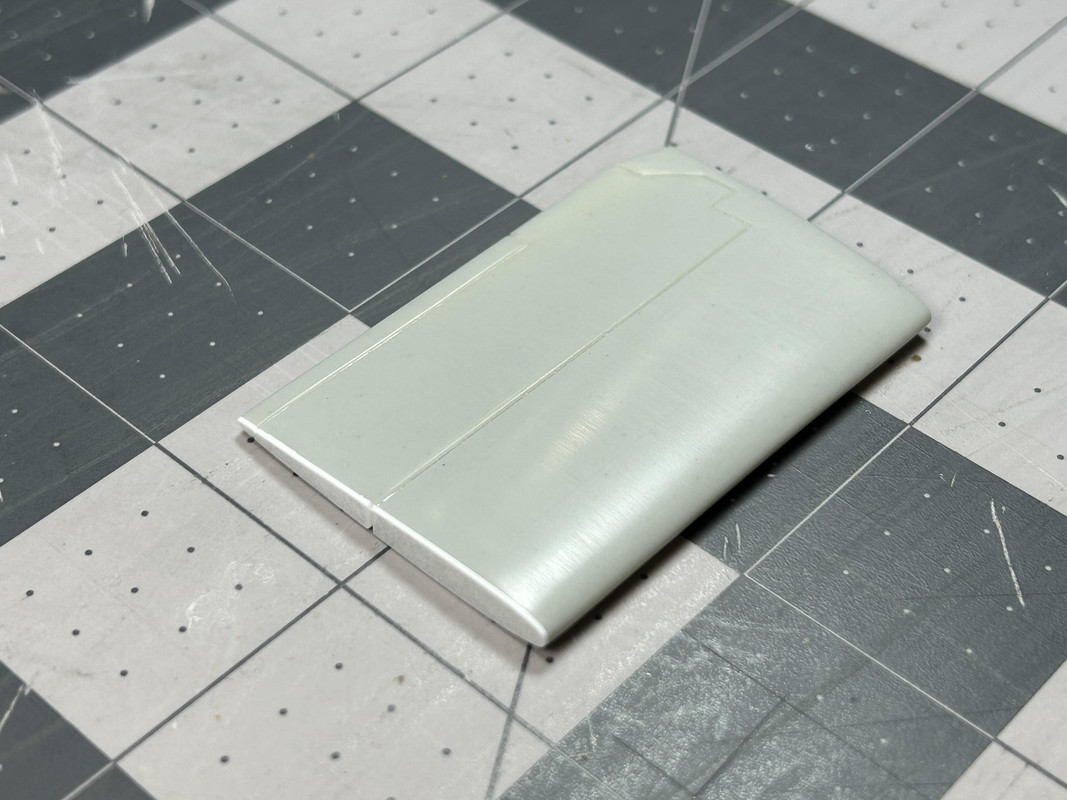
Figure 072: Lightening holes were drilled to represent internal framing although my hole pattern is a little simplified compared to the movie prop.
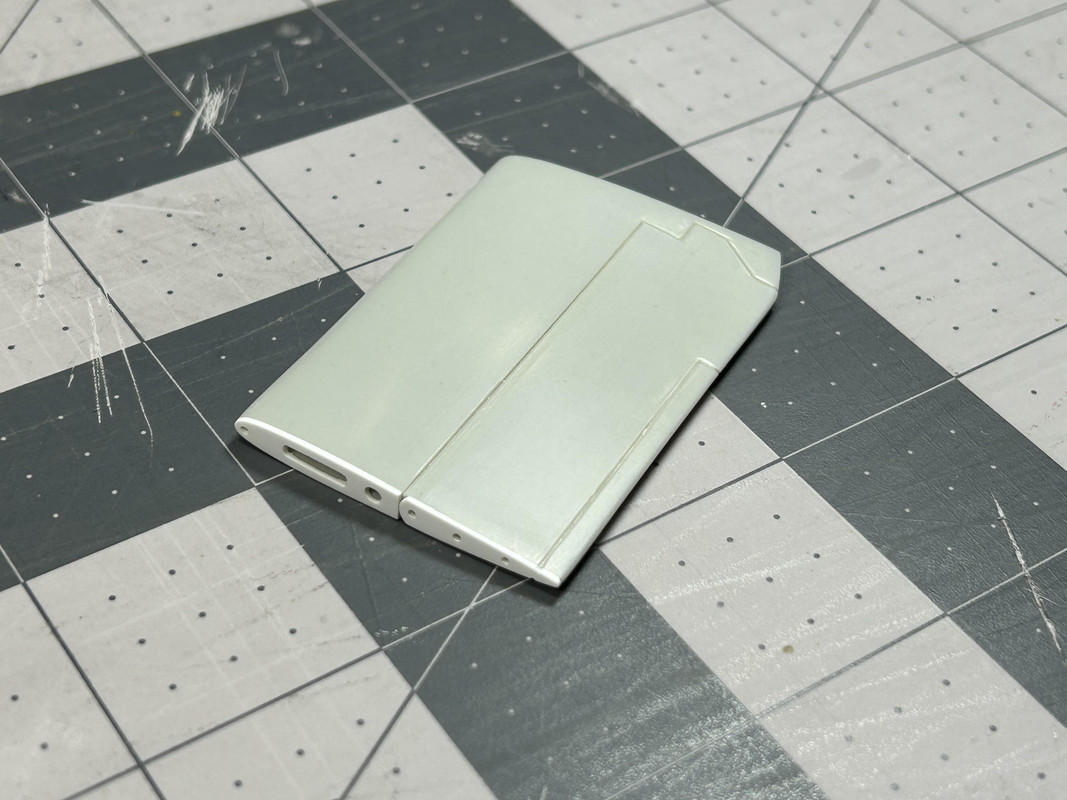
Figure 073: At this point several subassemblies were glued together, starting with the horizontal stabilizers. The fit of the these to the fuselage was very good.
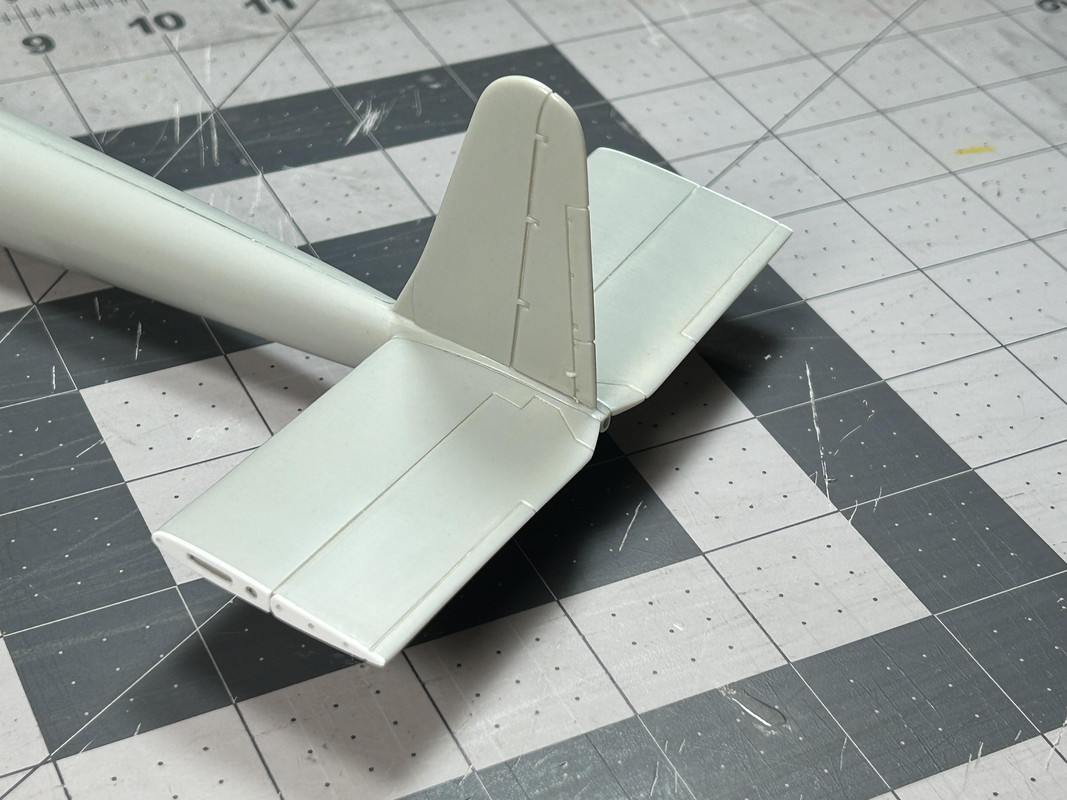
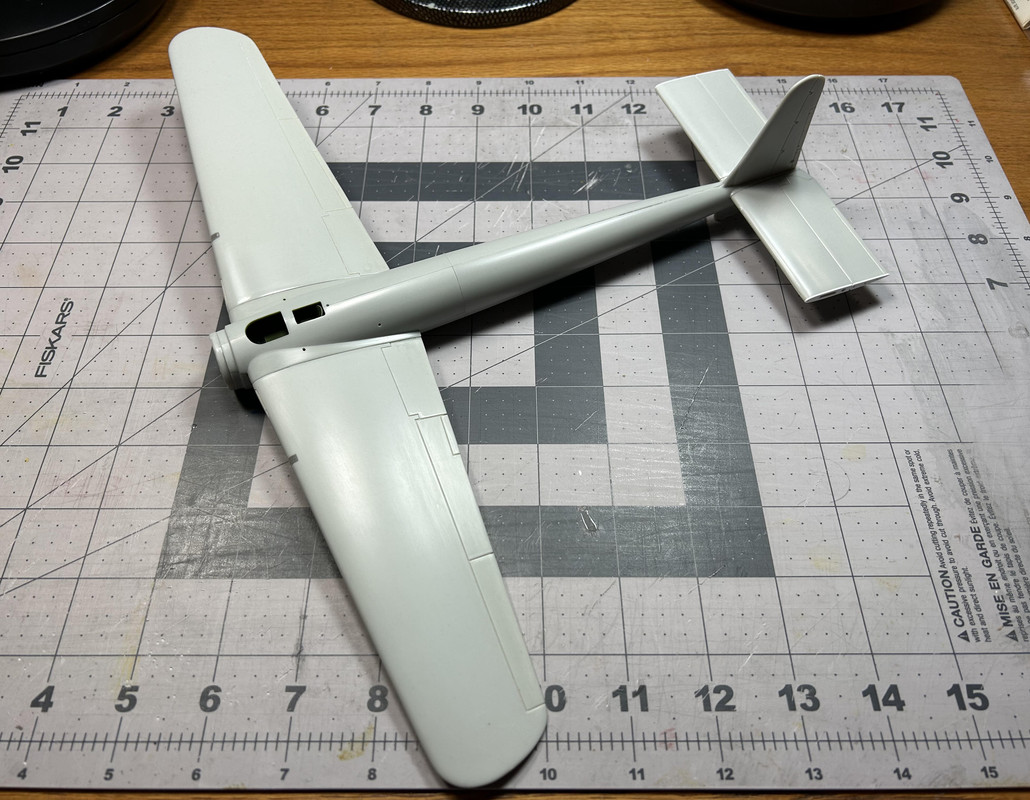
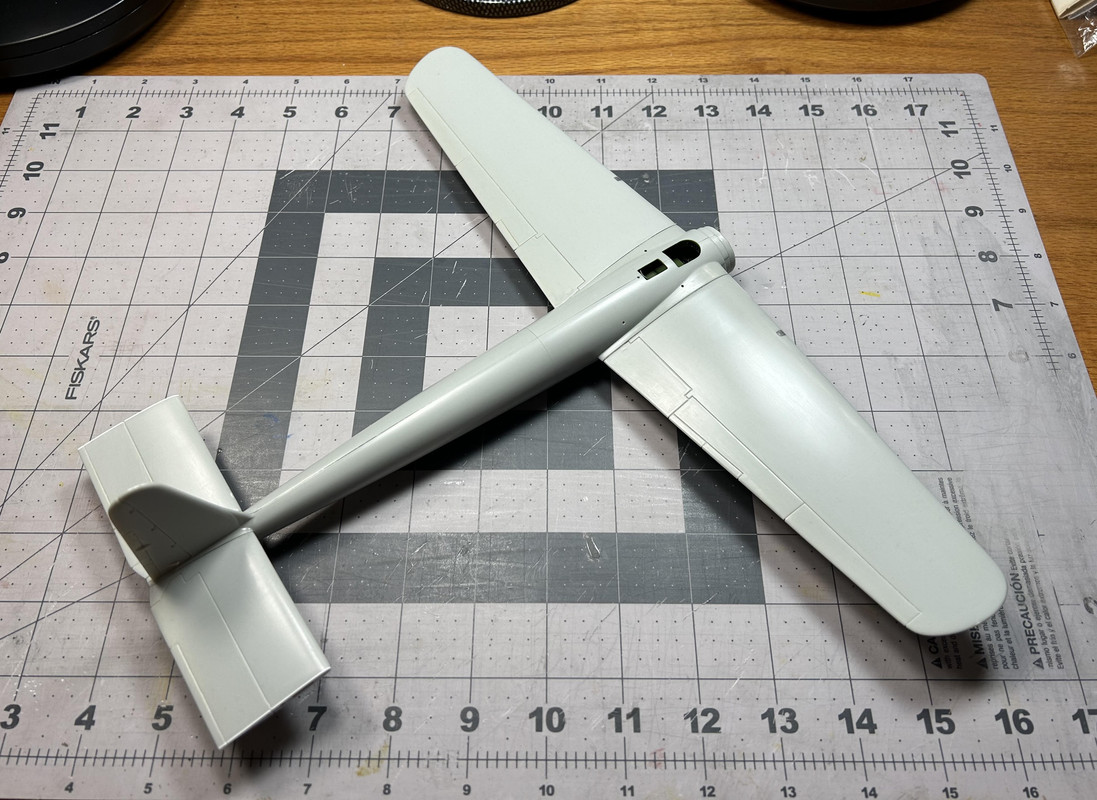
Figures 074 through 076: The wings were added next. I did have to do a little sanding and trimming to get a good flush mating surface against the fuselage, but overall, I was very pleased with the fit. A small amount of 5-Minutes epoxy was used to fill any tiny gaps. Getting to this point in the build reminds me of the scene in the move where the navigator Lew Moran says to the designer Heinrich Dorfmann, “You know, it’s really beginning to look like something.”
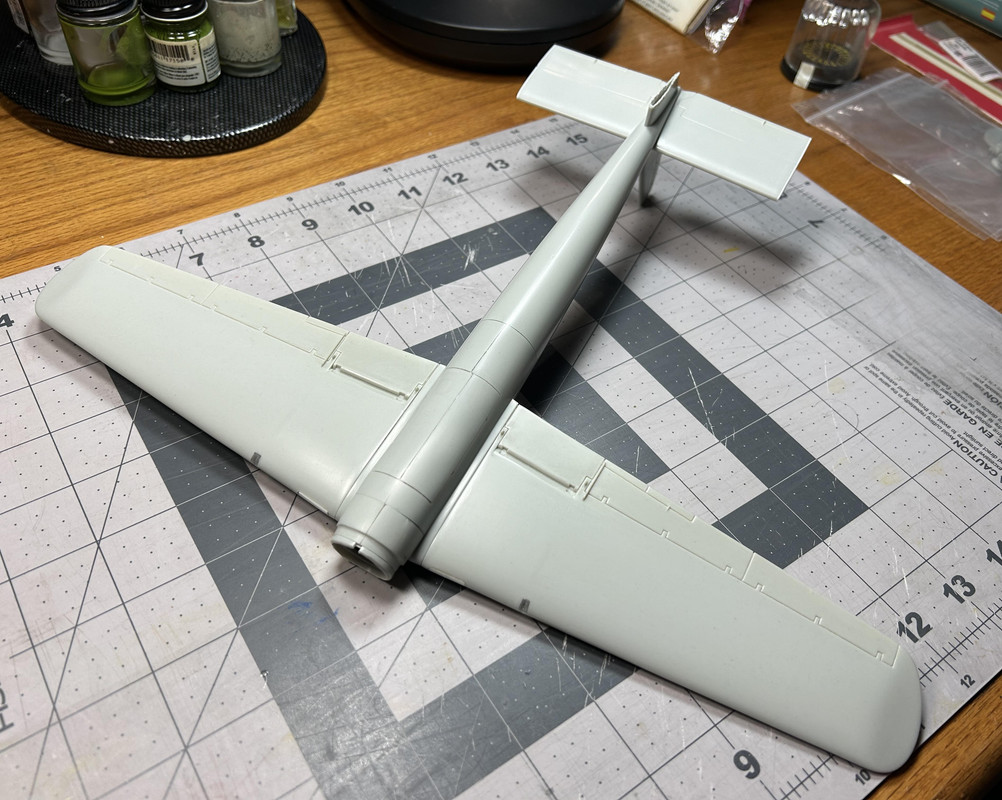
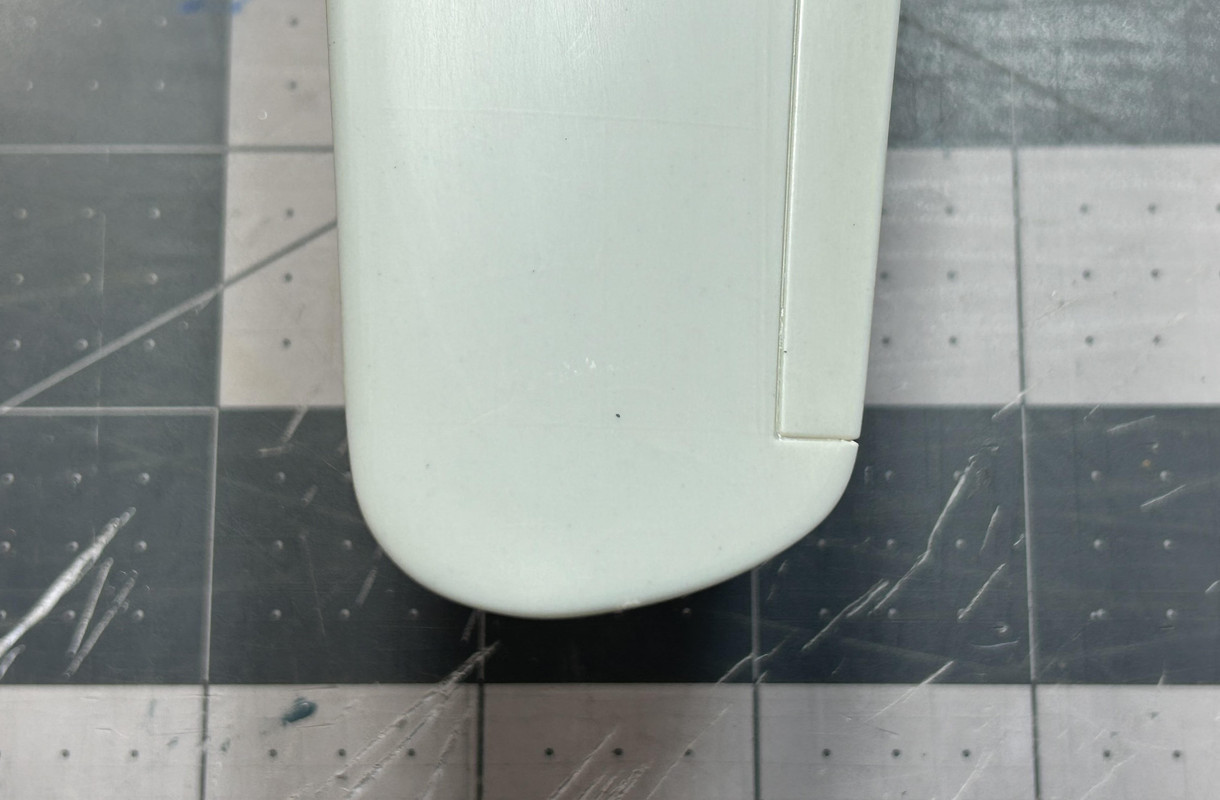
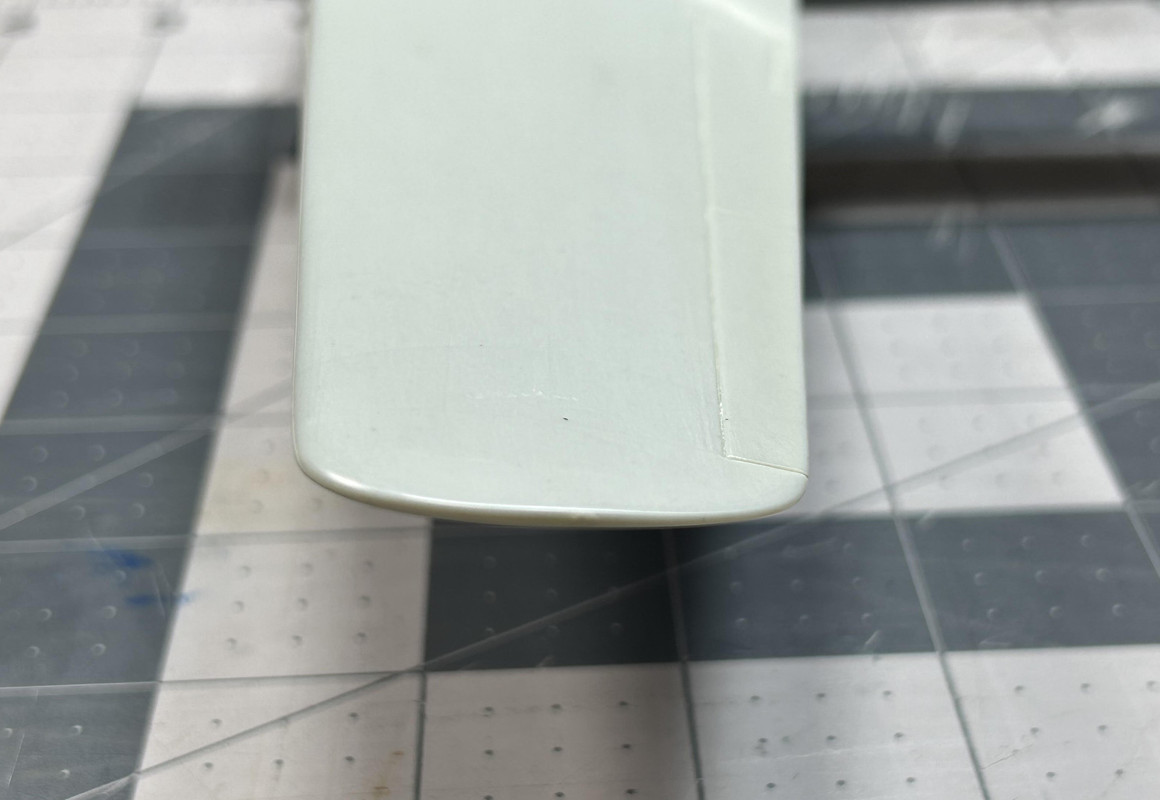
Figures 077 and 078: These two wingtip photos show how an illusion is created that changes the shape of the tip, depending upon what angle it is viewed from. The first photo was taken at a high angle and shows the actual rounded shape of the wingtip, which was the same for all versions of the C-82 and C-119. The second photo was taken at a low angle and gives the impression the tip is squared off and flat. This is noticeable several times in the movie.
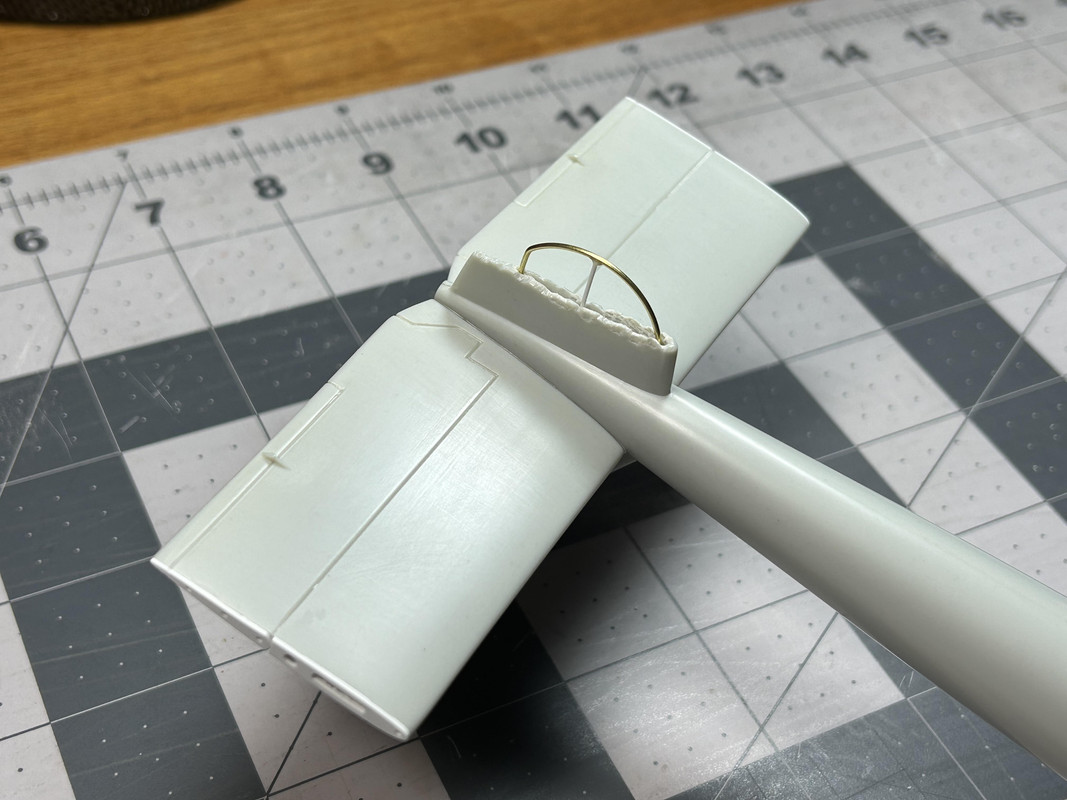
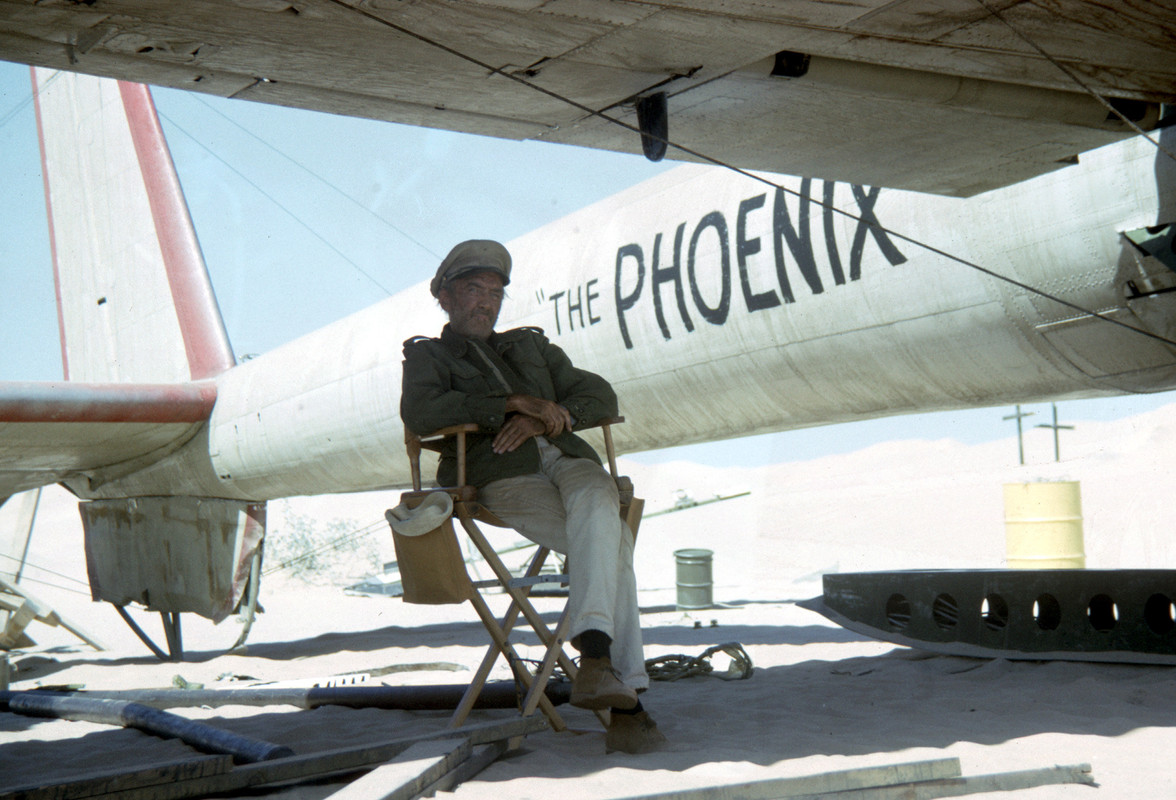
Figures 079 and 079a: Small brass rod was bent to shape to make the tailskid. The first photo shows it being test fitted. The second “behind the scenes” movie photo may be the only image that exists showing what the finished tailskid actually looked like.
Figures 080 through 082: A correct three blade propeller from Quick Boost replaced the kit part. I selected the PBY propeller blades because they were very long, even longer than those used on a B-17.
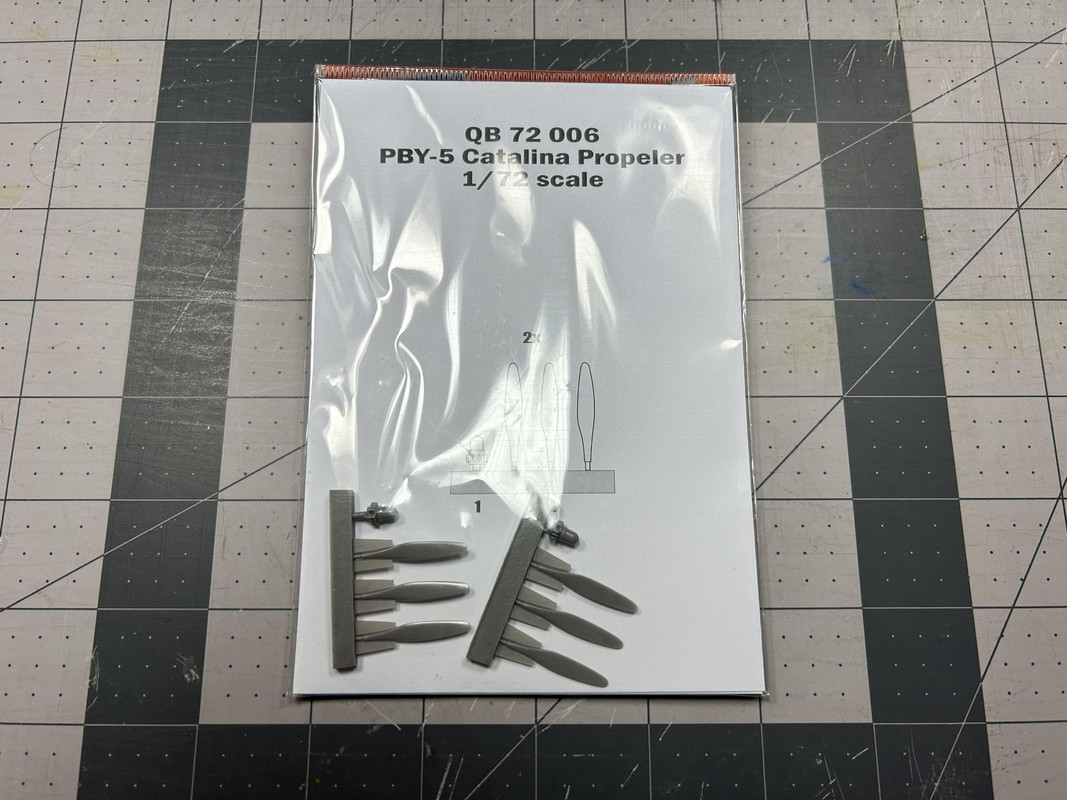
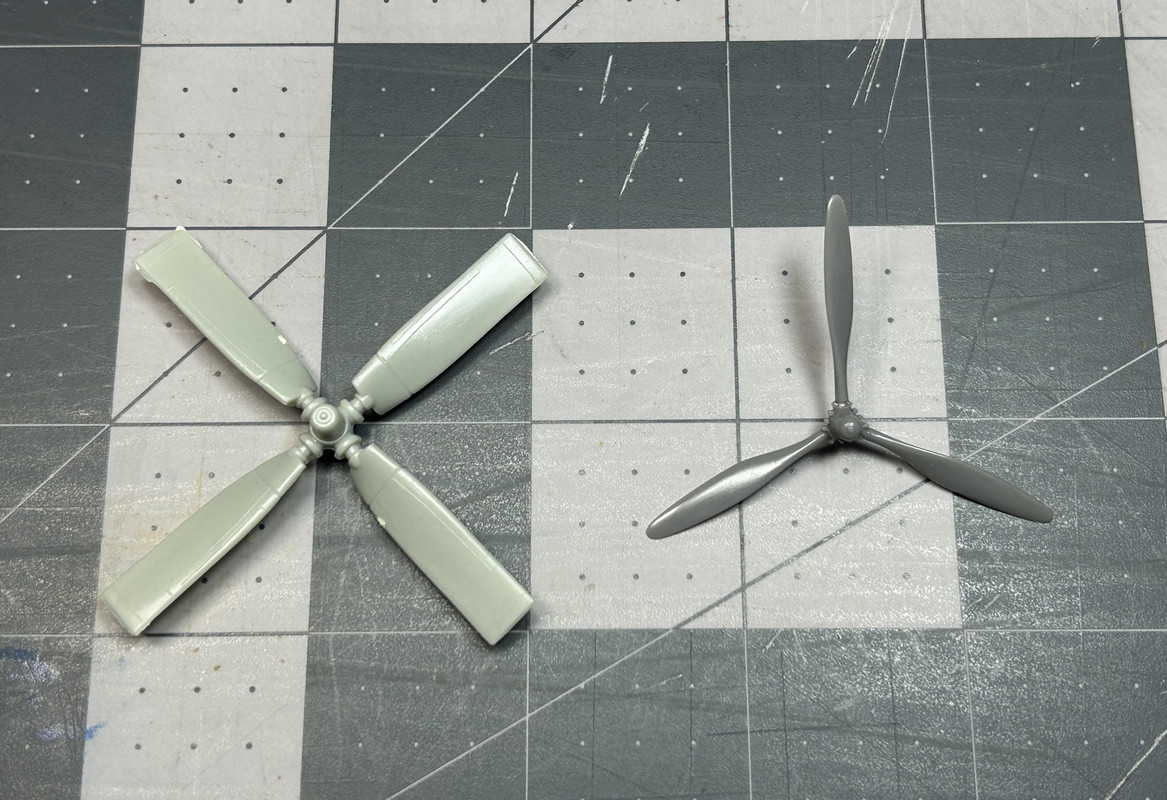
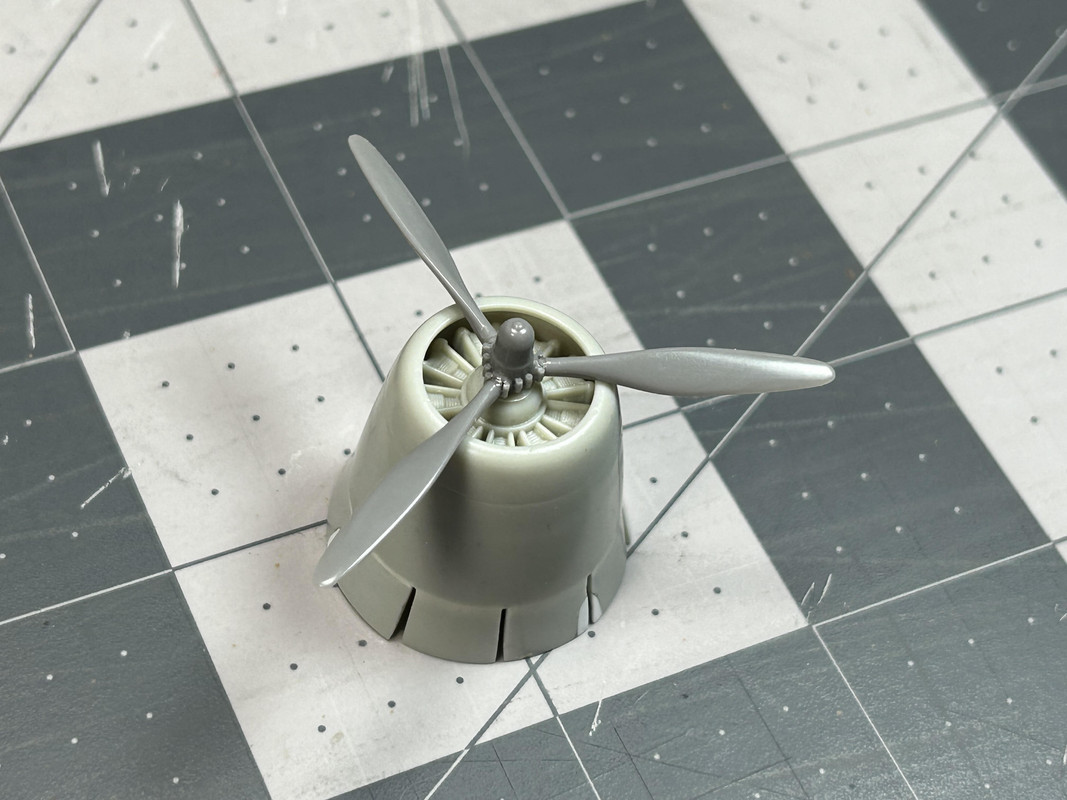
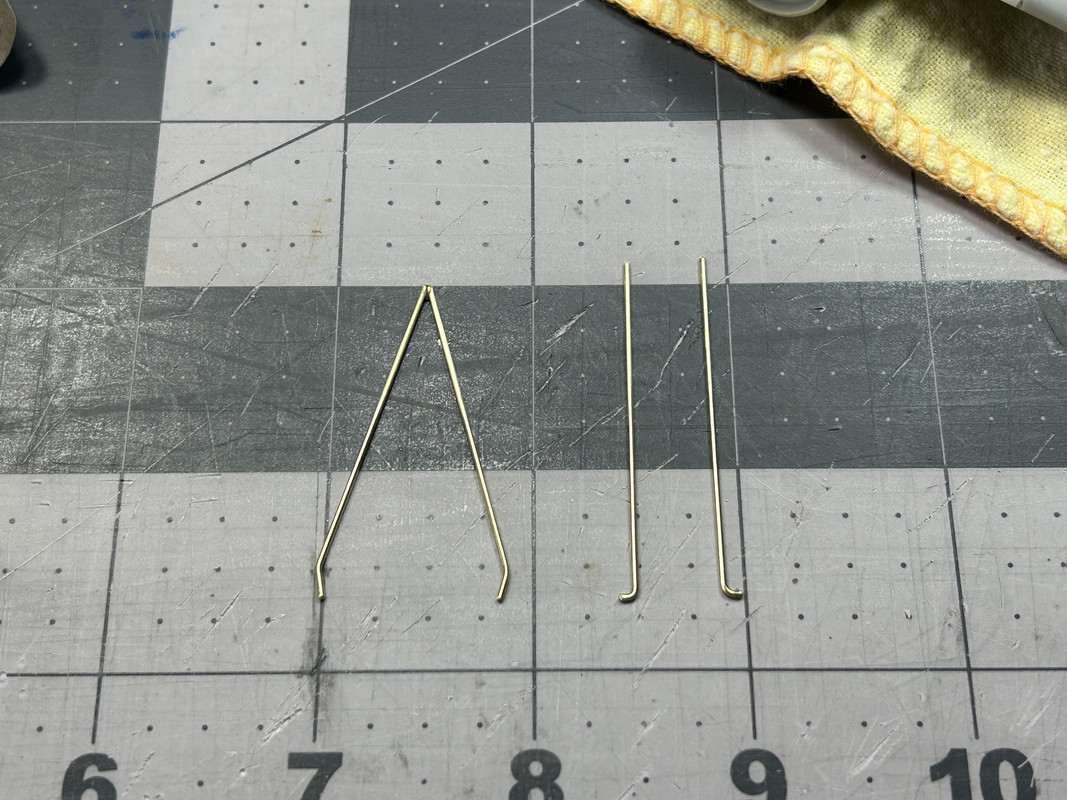
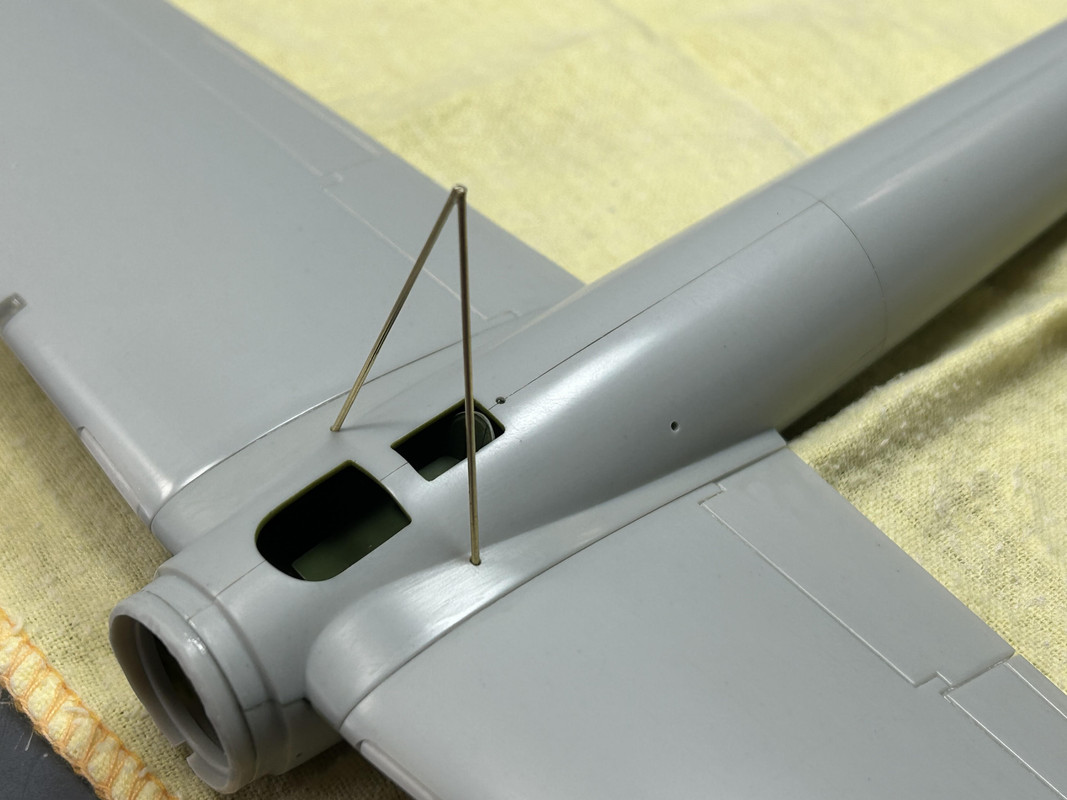
Figures 083 and 084: The Phoenix had multiple guy wires supported by cabane struts. Brass rods were used to represent the struts and the front ones are shown being test fitted.
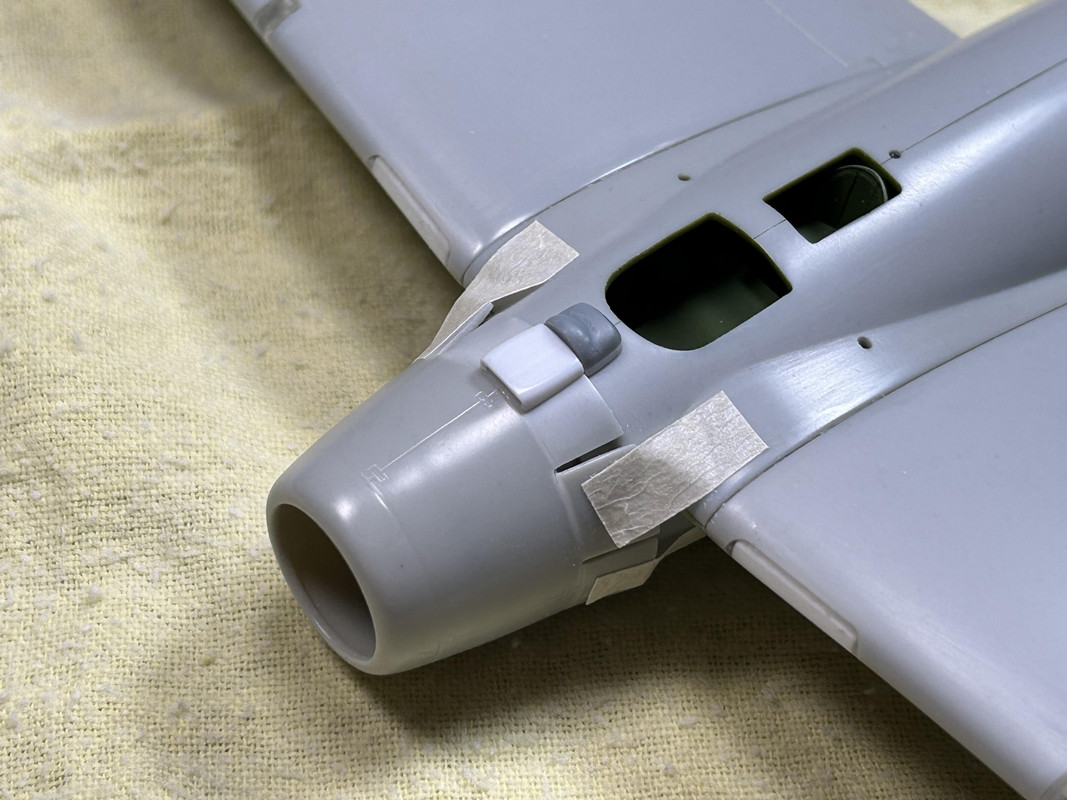
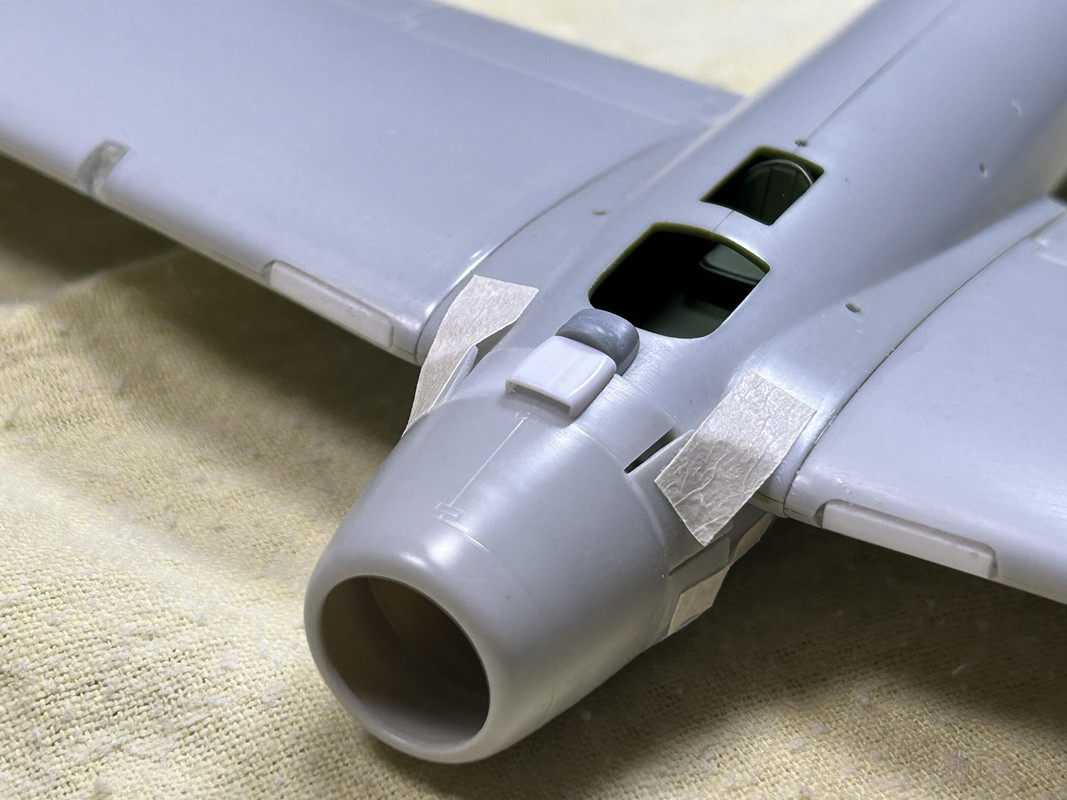
Figures 085 and 086: The scratch-built, two part engine air intake assembly is shown being tested fitted.
Until next time...
Phillip1
Re: Progress Build of the Phoenix Airplane from The Flight of the Phoenix Movie (1965)
Posted: Sat Oct 19, 2024 12:46 am
by digger303
Re: Progress Build of the Phoenix Airplane from The Flight of the Phoenix Movie (1965)
Posted: Sun Oct 20, 2024 7:50 am
by cor
I agree, that some engineering in itself. I will also have to check out the film.
Re: Progress Build of the Phoenix Airplane from The Flight of the Phoenix Movie (1965)
Posted: Sun Oct 20, 2024 4:53 pm
by Phillip1
digger303/cor-Thanks for the compliments!
cor-I HIGHLY recommend this film-you will not be disappointed!
Phillip1
Re: Progress Build of the Phoenix Airplane from The Flight of the Phoenix Movie (1965)
Posted: Mon Oct 28, 2024 12:46 pm
by Phillip1
Fellow Modelers-The scratch-built support legs and skis are worked on.
Figure 087: Creating the support legs and skis was the most challenging scratch-built part of this project. Evergreen styrene 1/8” X 1/4” rectangular tube was used to make all four support legs, and 1/4” X 1/4” square tube was used to make the two skis. These sizes were chosen because I knew they would be strong enough to support the model without flexing, and they looked close to being in scale with what is seen in the film. Lengths for each part were estimated based on reviewing film still photos and comparing the size of the fuselage against the size of the support legs/skis.
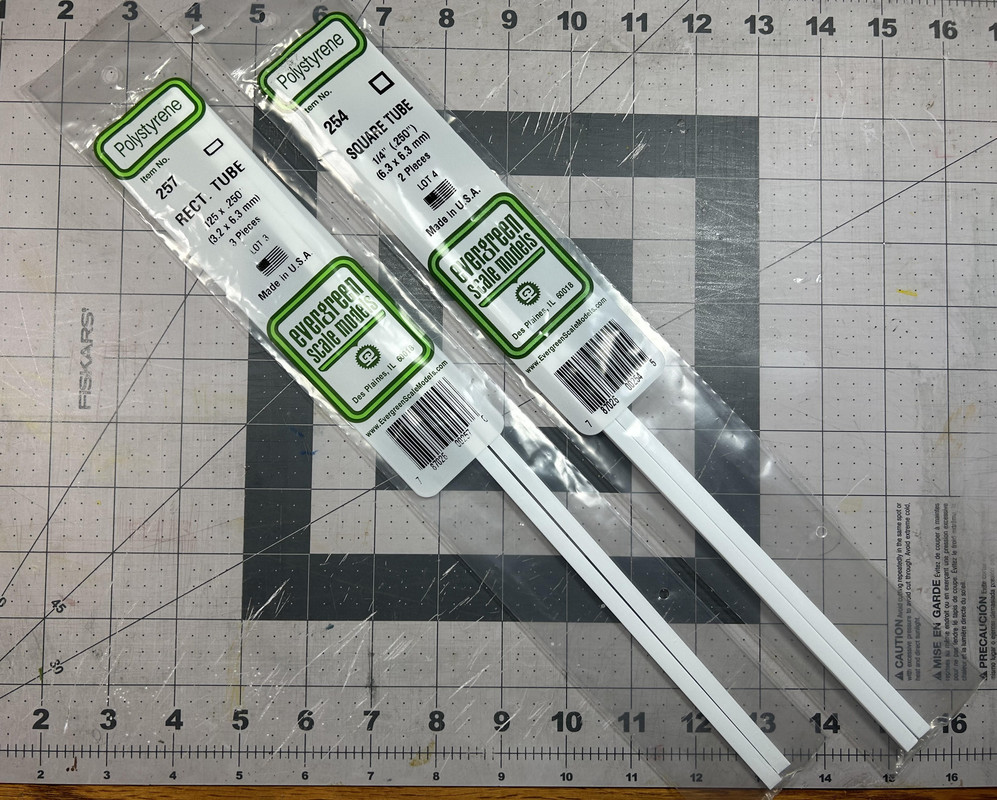
Figure 088: The front legs were worked on first. After the length of about 1-3/16” (30 mm) was cut, the top end was beveled to a radius matching the fuselage under the wing. Next, the size and spacing of the lightening holes was carefully marked then drilled out. A 1/8” size drill bit was used for the final hole size. Precision measuring was critical since centering and evenly spacing the holes went a long way in determining how good the final parts looked. I had to remeasure multiple times on my parts to get them as good as they could be.
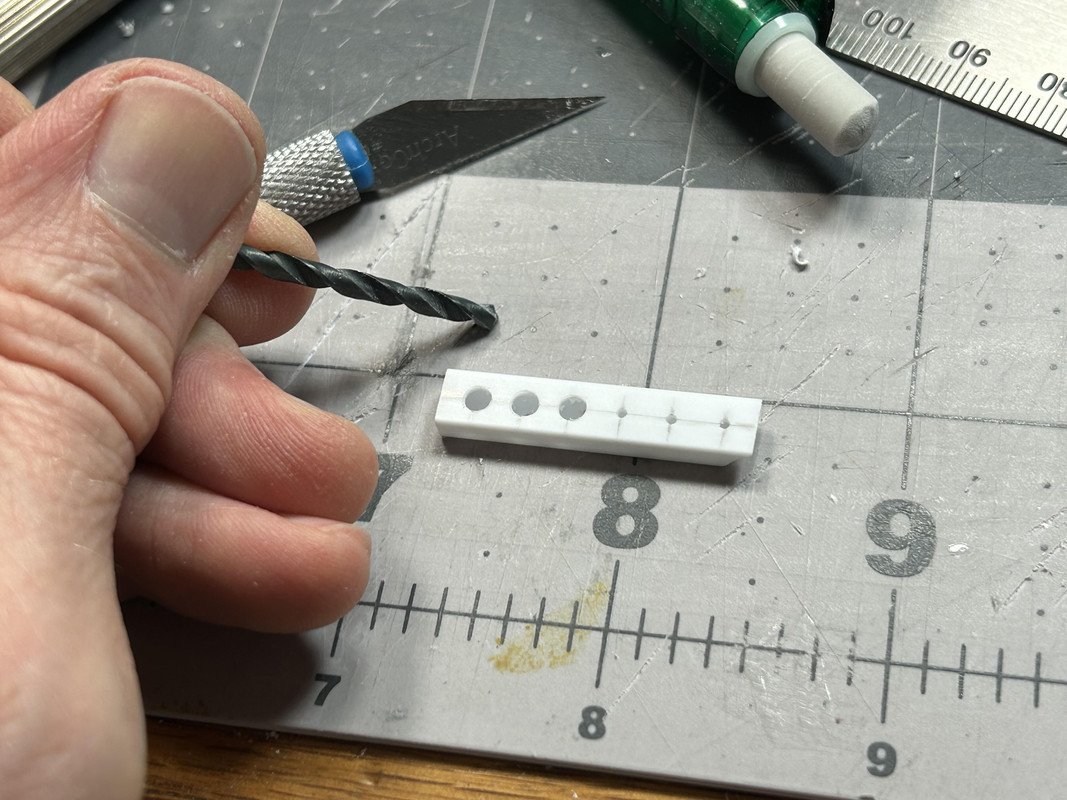
Figure 089: Here is a photo of the finished front support legs.
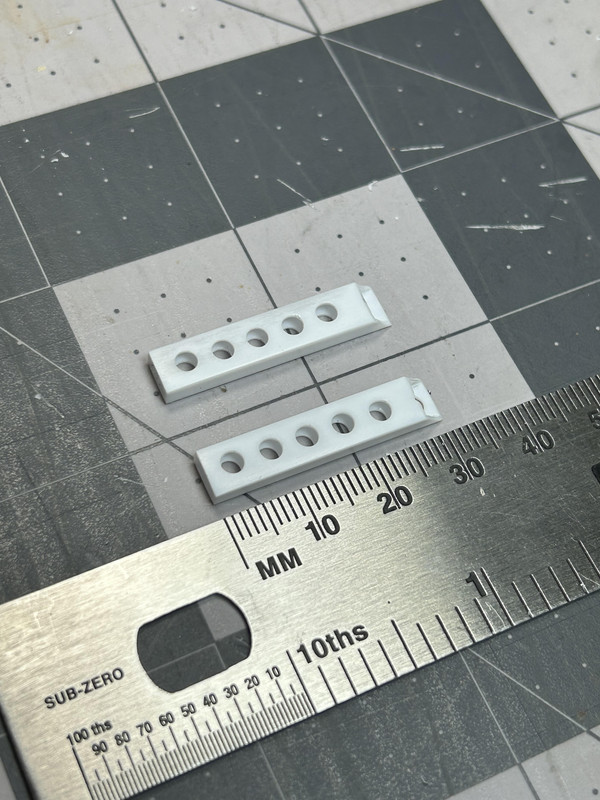
Figure 090: Location marks for the front support legs were made on the lower fuselage with a pencil. For the initial right leg attachment only a tiny drop of slow-set superglue was used so the part could be easily broken off if I missed the desired angle. This photo was taken right before the left leg was attached. Attaching the left leg was much more difficult, as its location had to be the exact mirror opposite of the right leg. Note I had to break off and reattach the left leg several times before I was happy with the alignment.
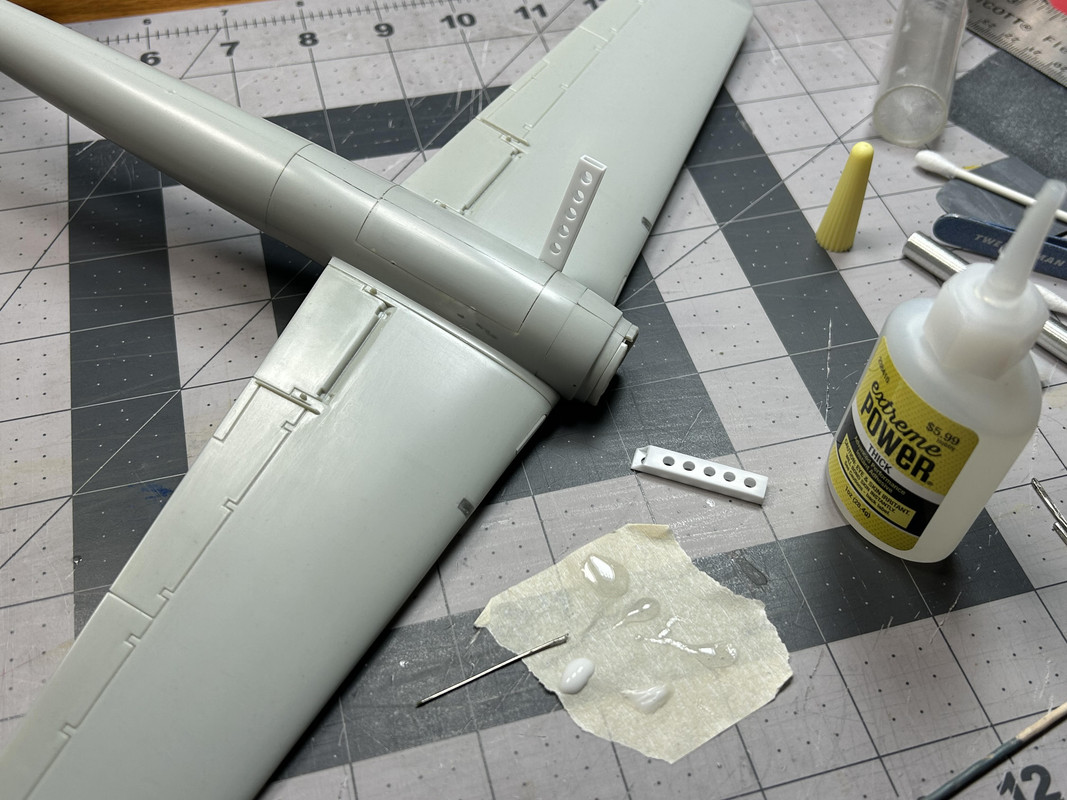
Figure 091: To strengthen the connection between each support leg and fuselage, a small amount of superglue was carefully dropped inside the tubing through the closest lightening hole opening. Next, a bead of 5-Minute Epoxy was placed around the outside of the tubing/fuselage where they joined together.
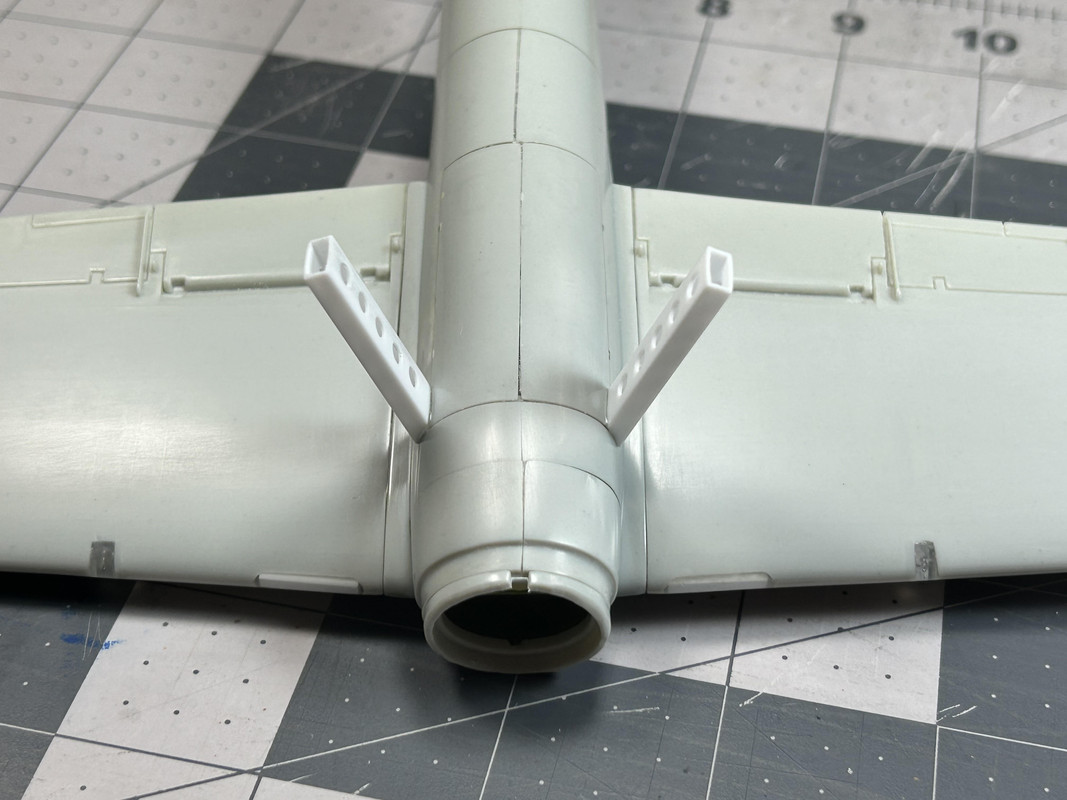
Figure 092: Determining the length of the rear support leg was next, using the established front leg pieces as a helpful guide. And yes, the front legs are supposed to be leaning slightly backwards as shown.
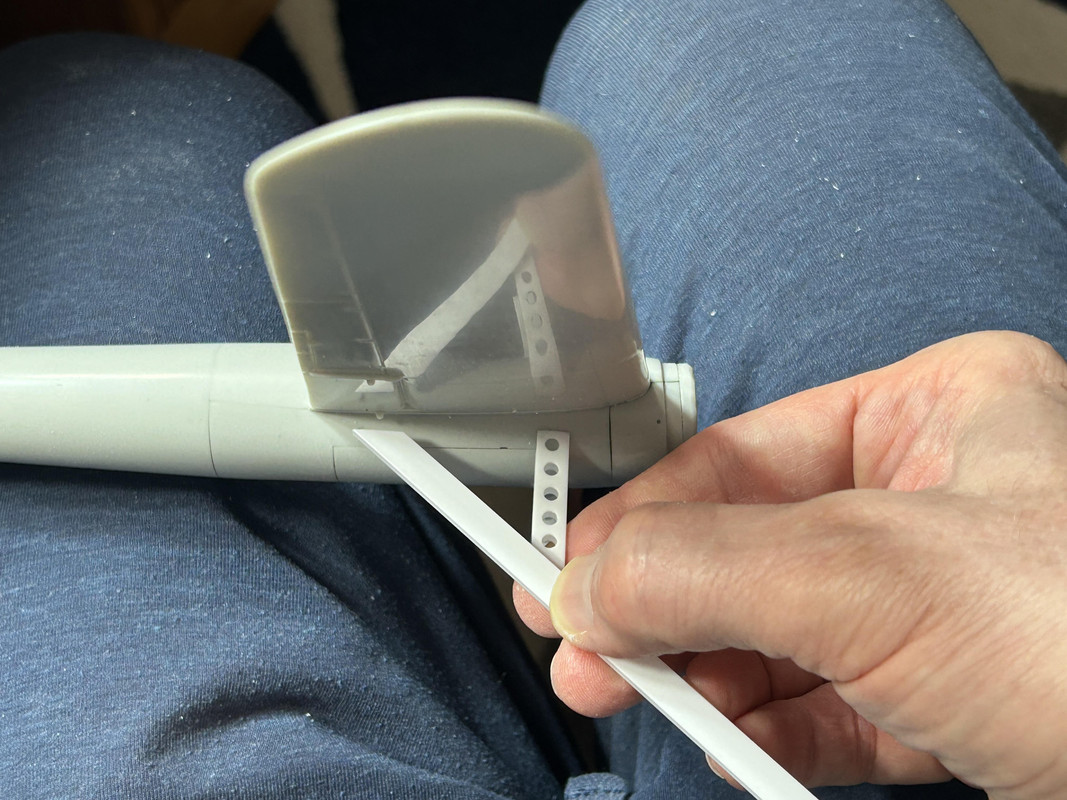
Figure 093: The length of the rear support leg was about 1-9/16” (40 mm). The angle of the bottom end was cut so it would lay flush against the front support leg.
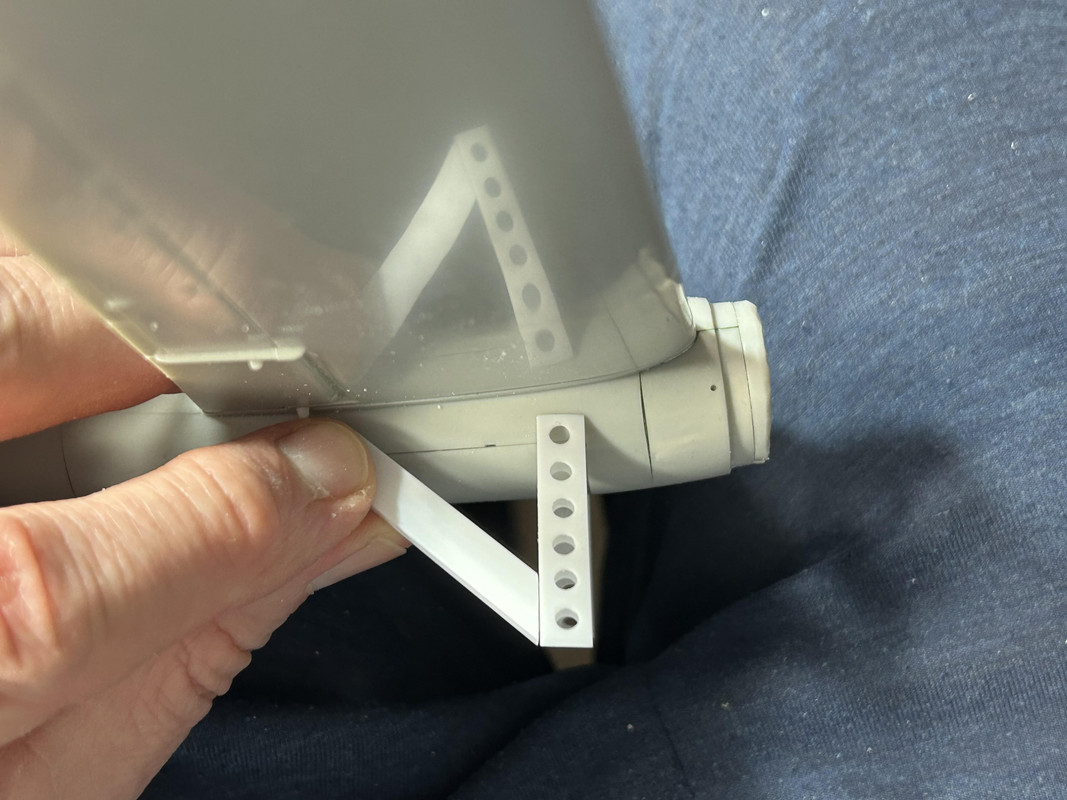
Figure 094: Like before, the top end was given a beveled radius until it matched the fuselage. To achieve this many test fits were required!
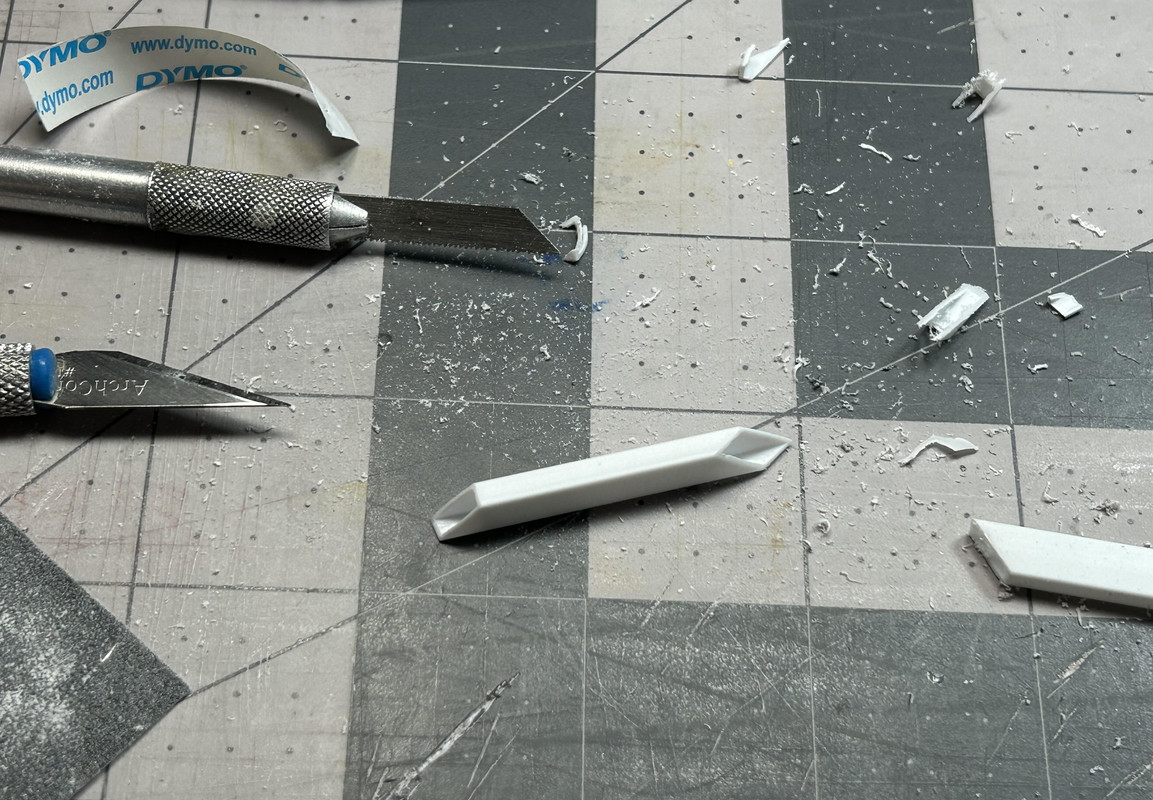
Figure 095: The lightening holes were drilled and the rear support legs were glued in place in the same way as the front support legs. The front support legs already being in position made adding the rear support legs much easier.
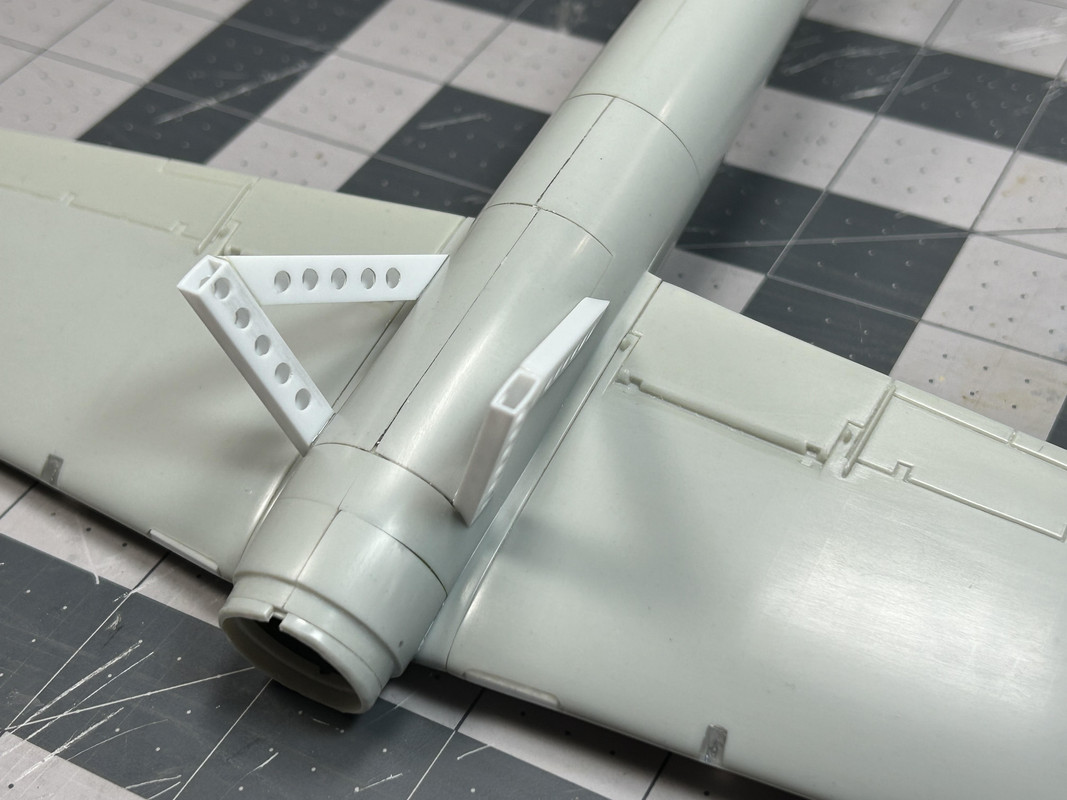
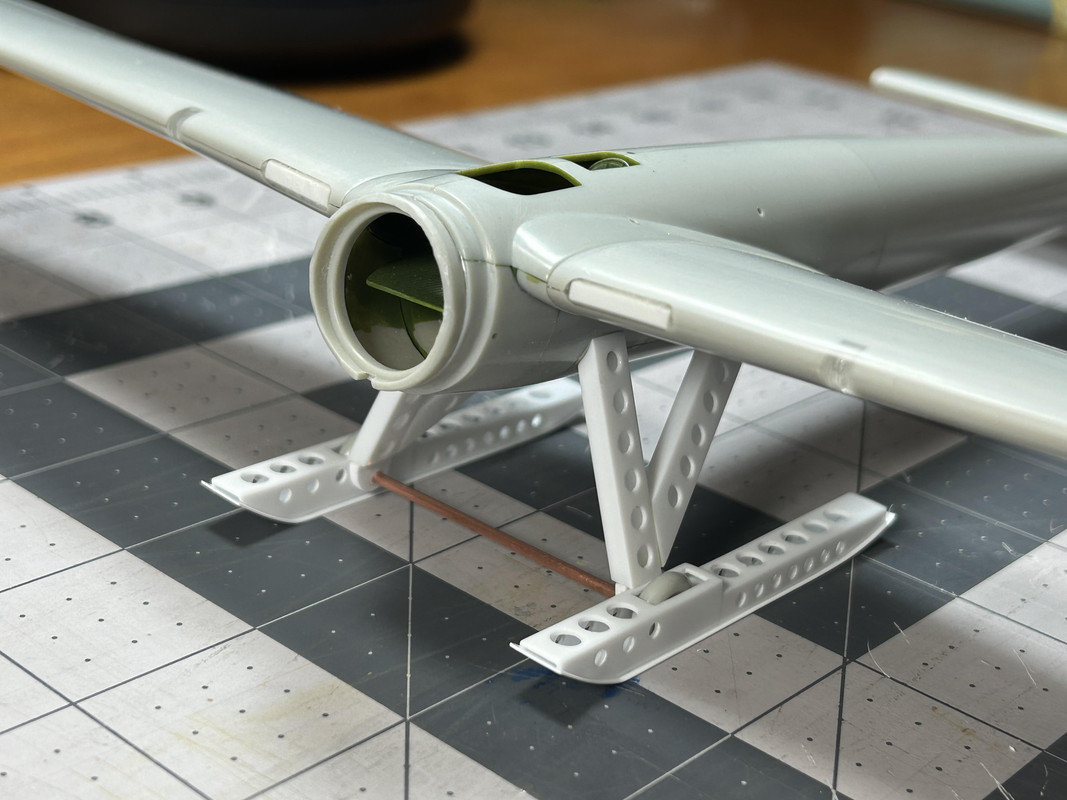
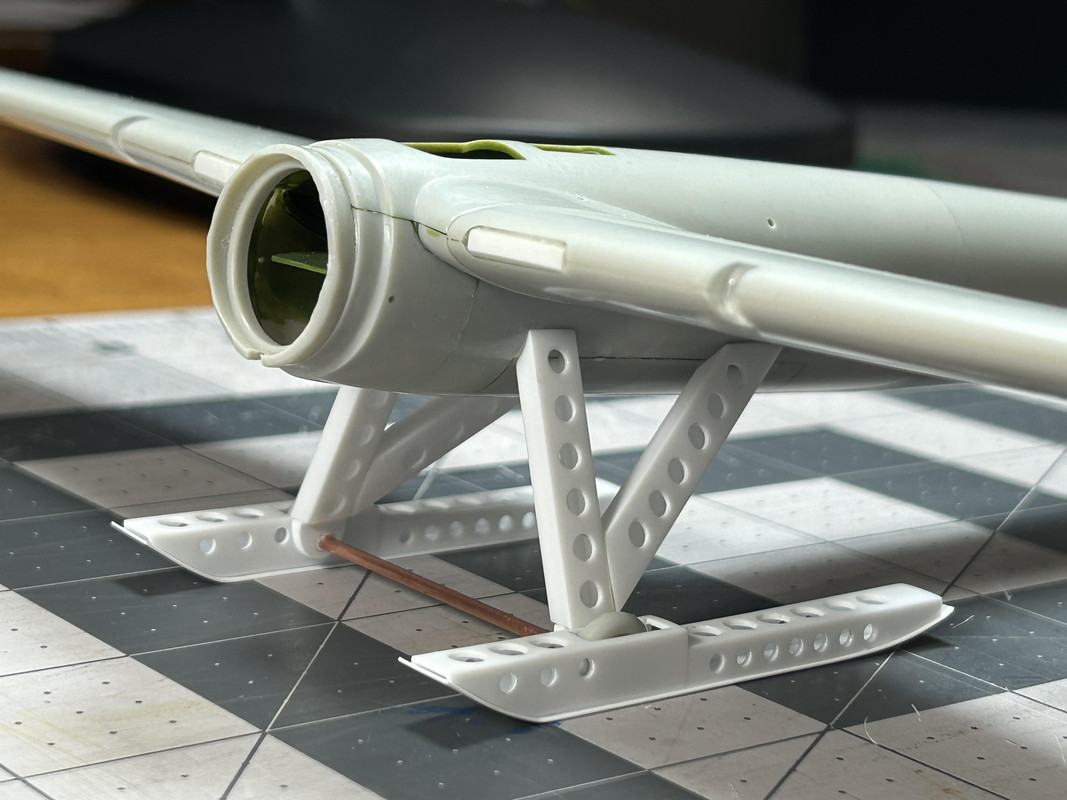
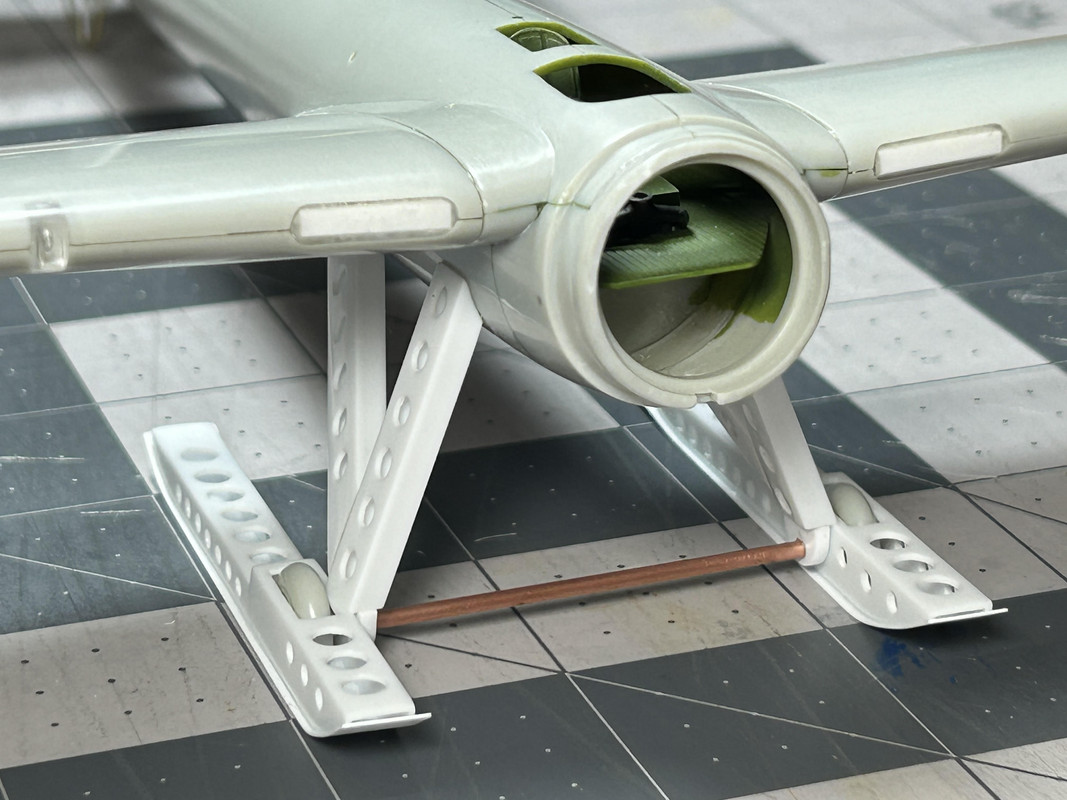
Figures 096 through 099: Here are several images showing the finished support legs.
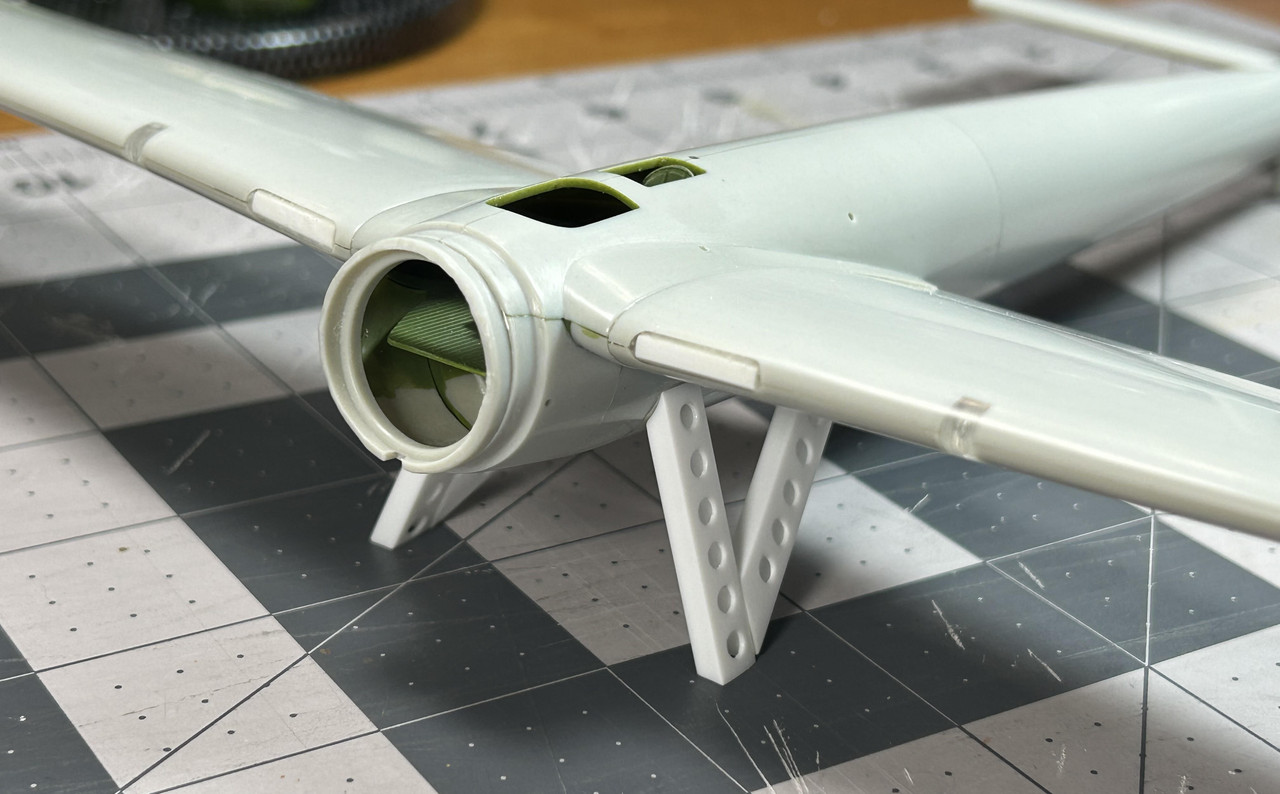
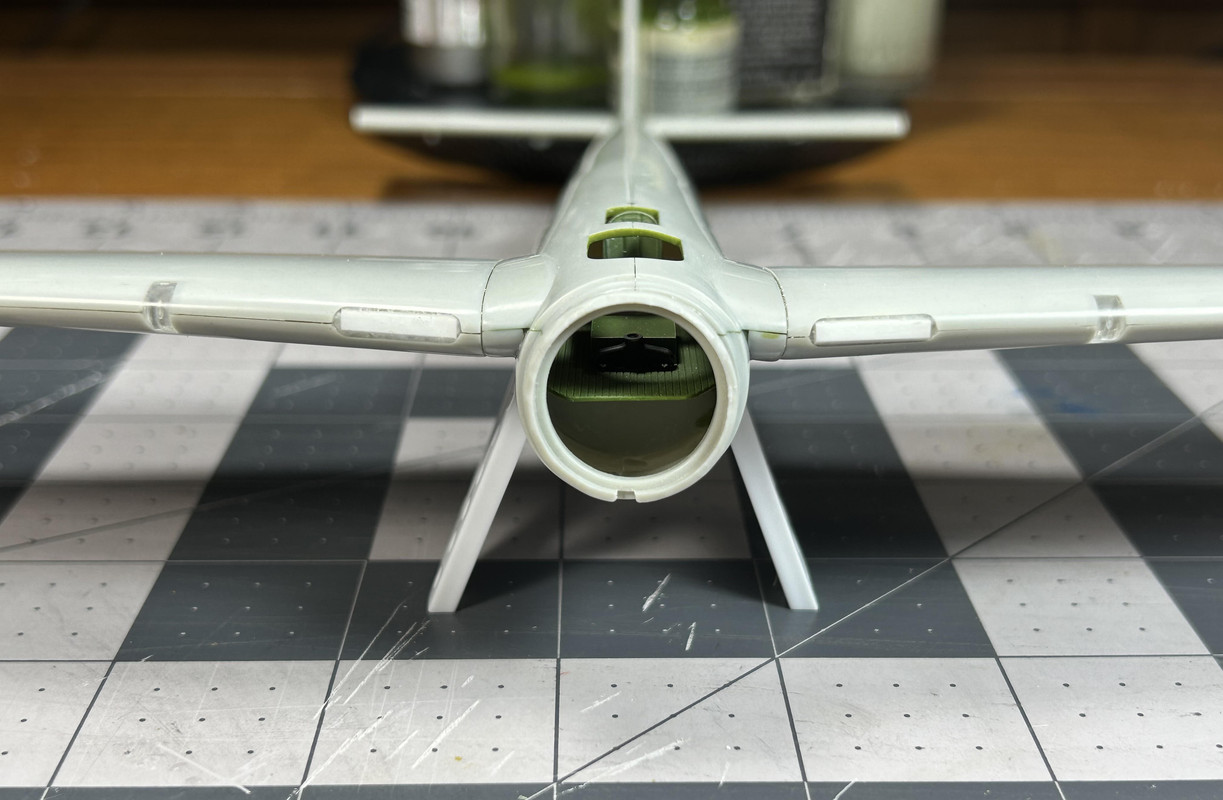
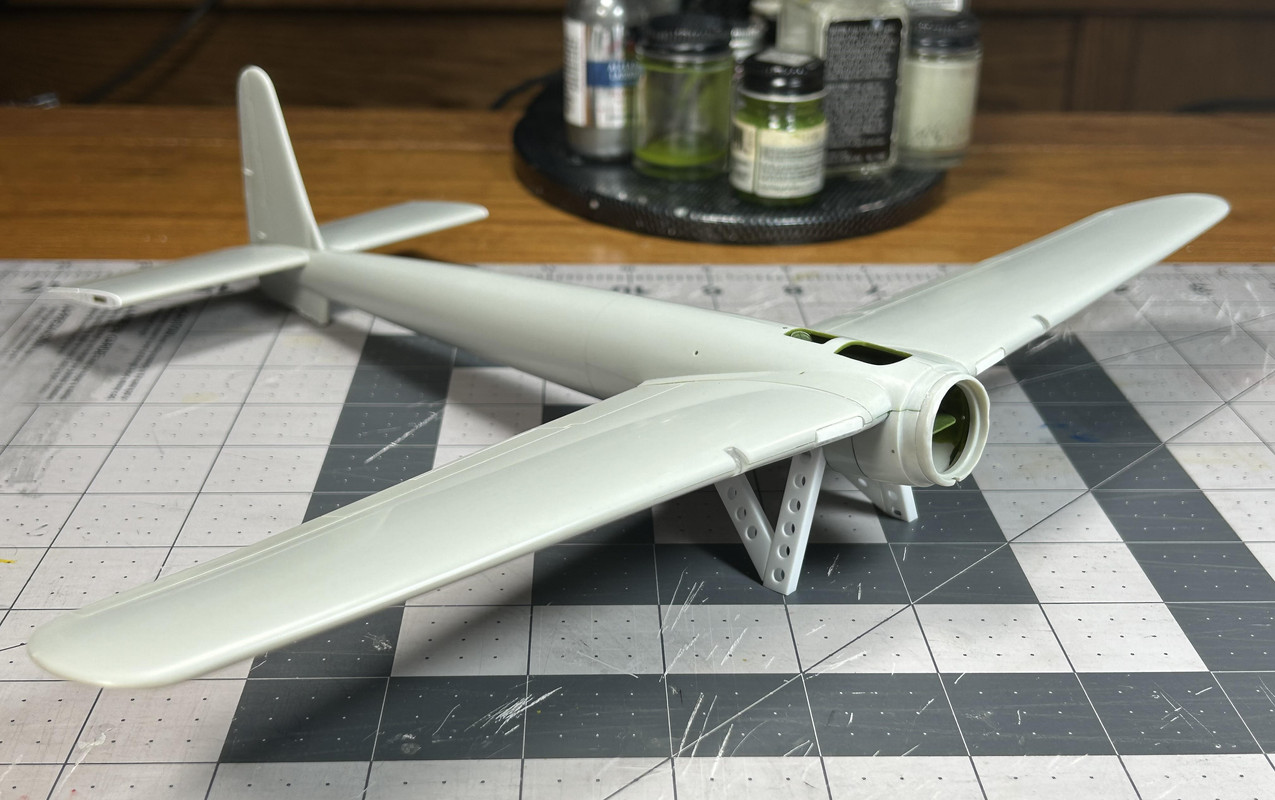
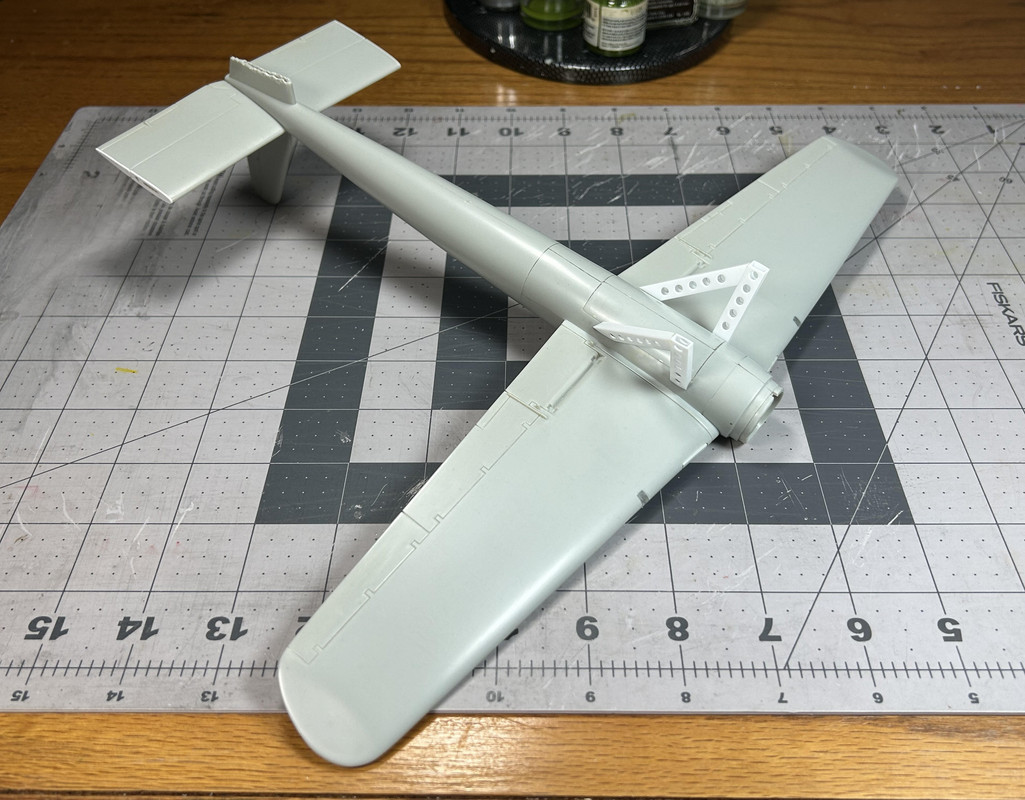
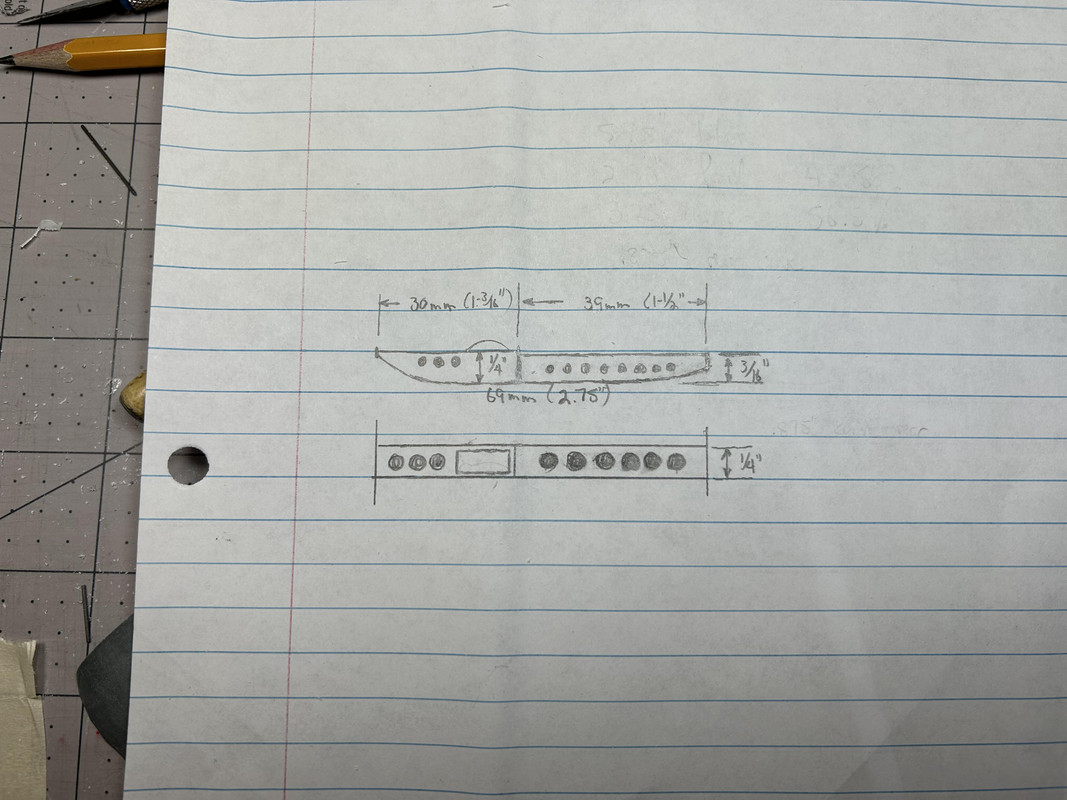
Figure 100: Time to build the skis! Shown is a rough sketch I drew of the skis to be built. This drawing helped me see what it should look like during construction. Each ski was divided into a front and rear section with the overall length being about 2-3/4” (69 mm).
Figures 101 and 102: The front sections were built first-starting with creating a curved front end.
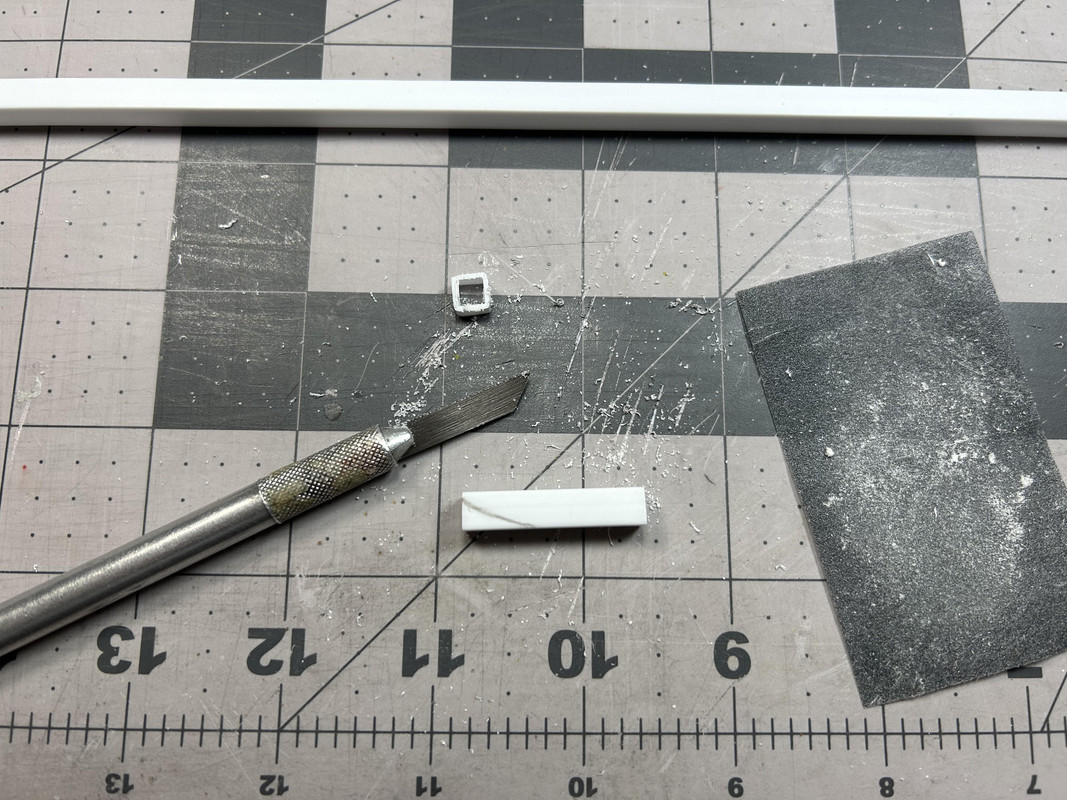
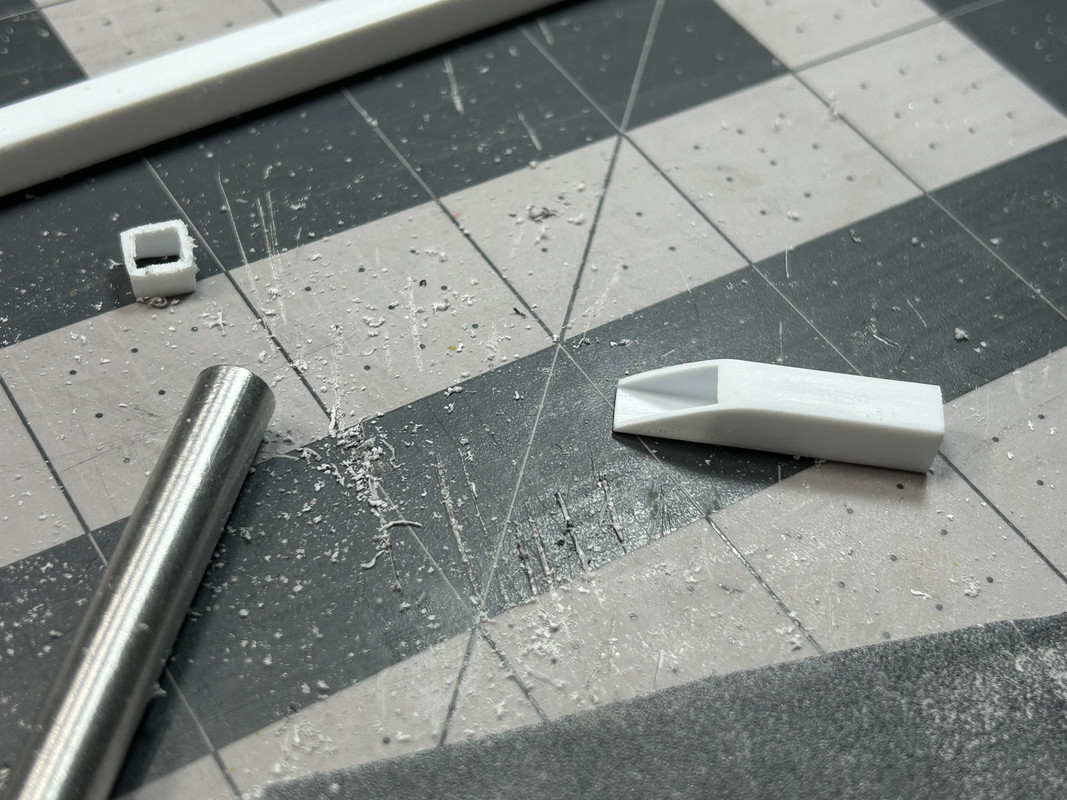
Figures 103 through 106: The rectangular openings for the false wheels were made the same way as the cockpit openings-drilling an outline, cutting the outline away and sanding the inside edges smooth. I believe the reason wheels were included on the non-flying Phoenix was because the flying Phoenix (P-1) had to have them. The flying Phoenix (P-1) was built to only take-off/land on smooth runways and it used wheels (not skis) to do that. Since those wheels were very visible in the flying sequences of the movie, false wheels were added to the static Phoenix to maintain continuity.
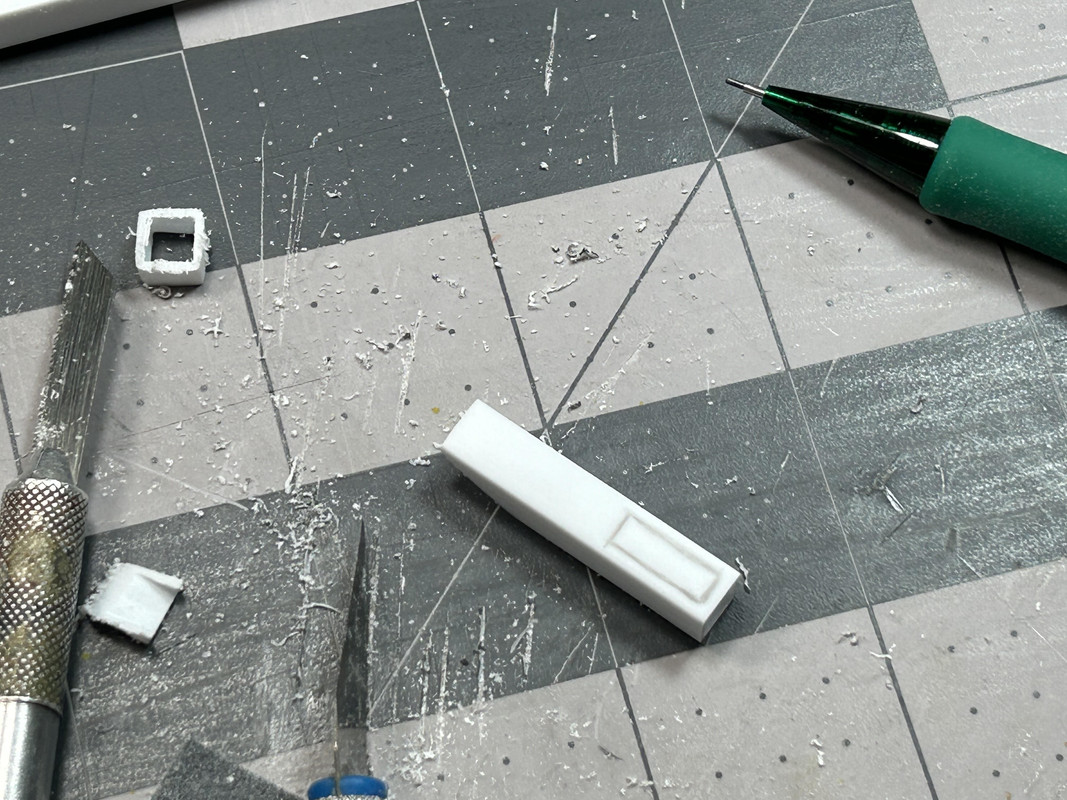
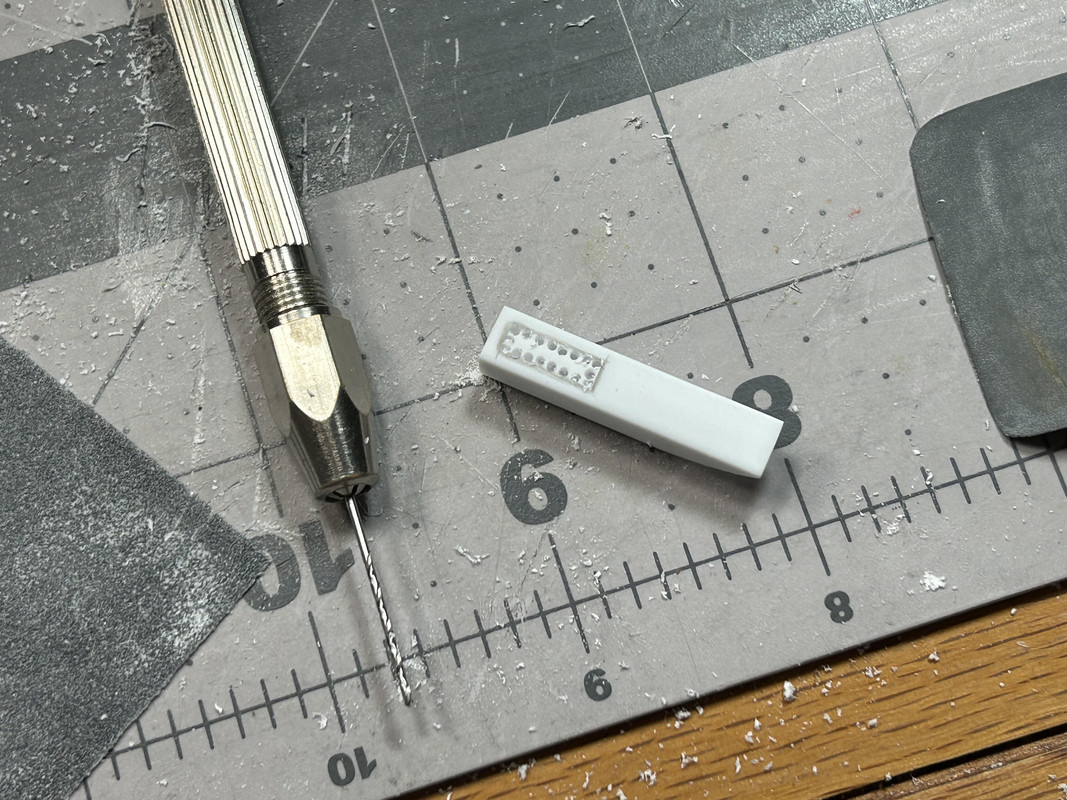
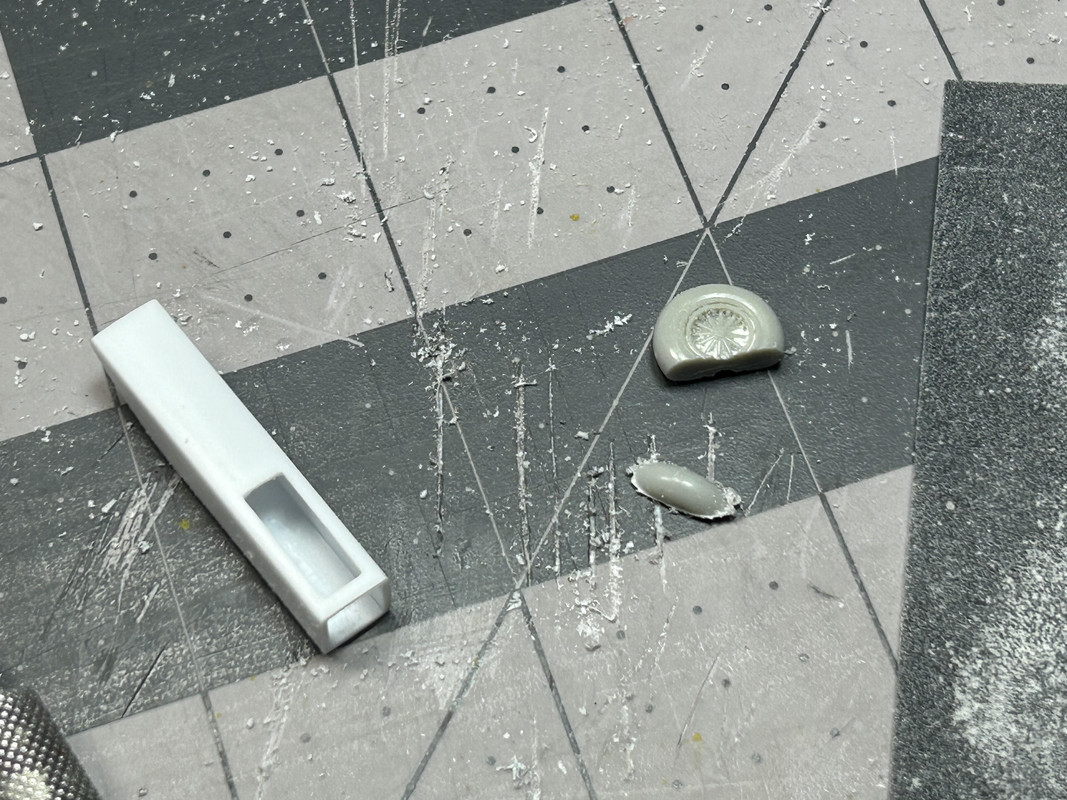
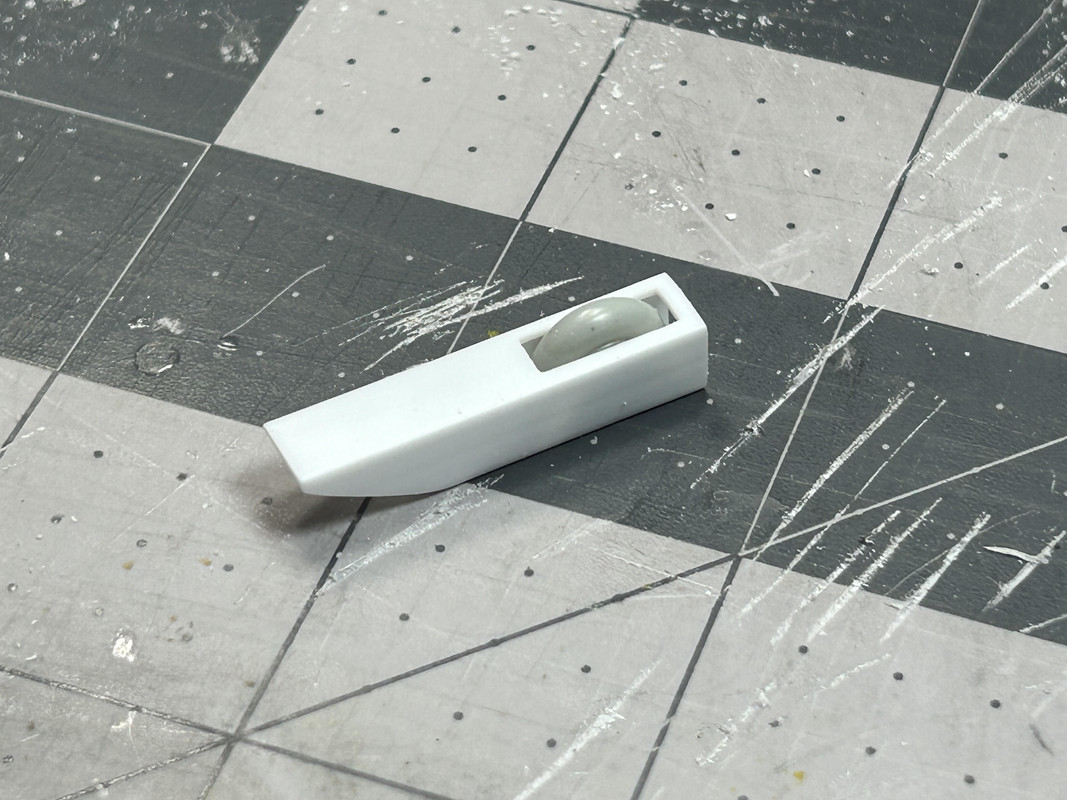
Figures 107 through 110: The steps of marking and drilling the lightening holes are seen in the photos. A 9/64” size drill bit was used for the final top hole size and a 5/64” size drill bit for the final side hole size.
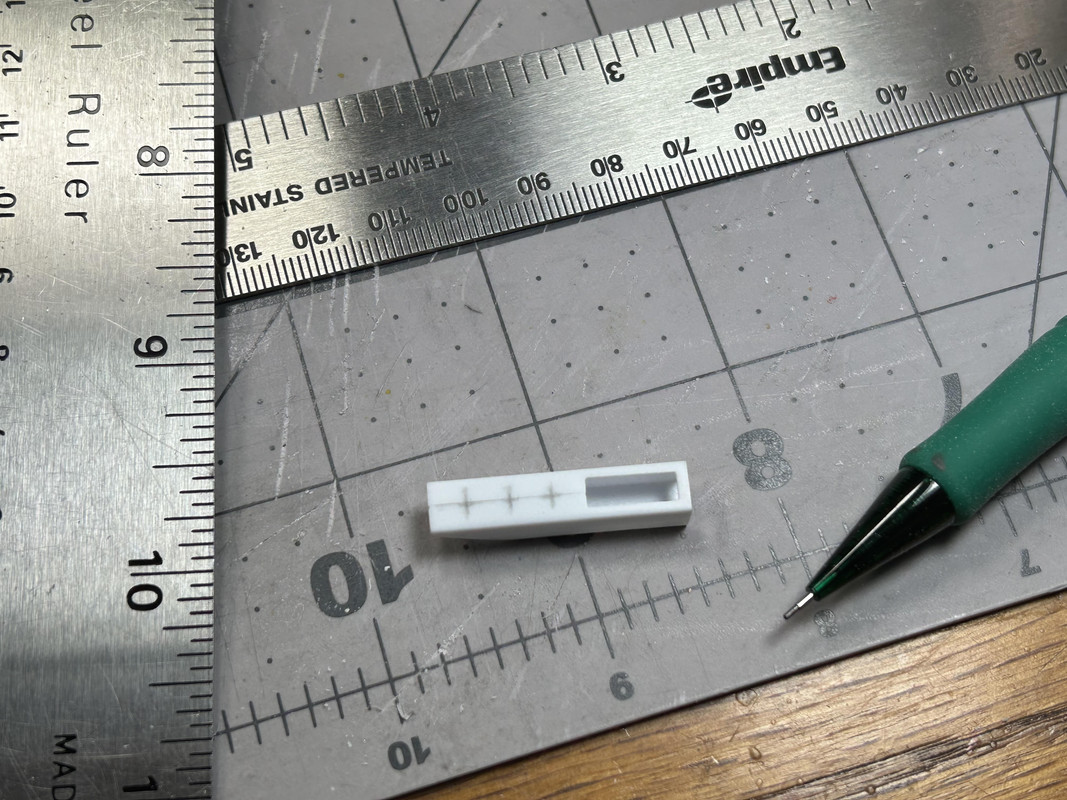
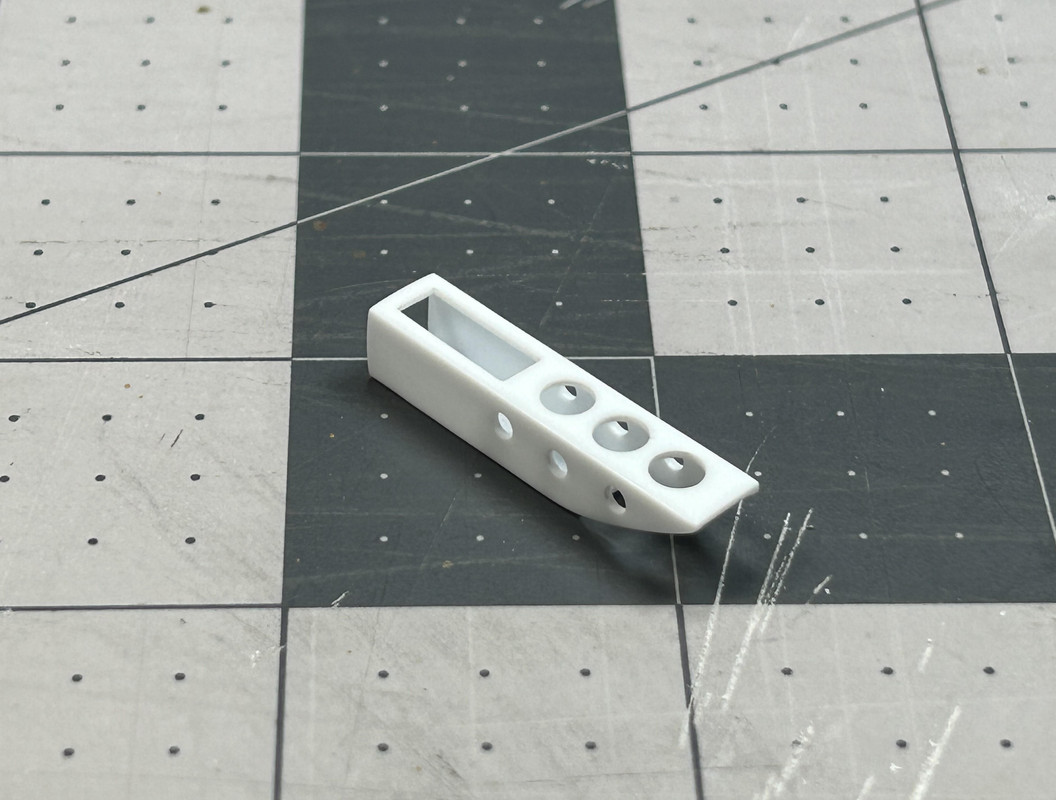
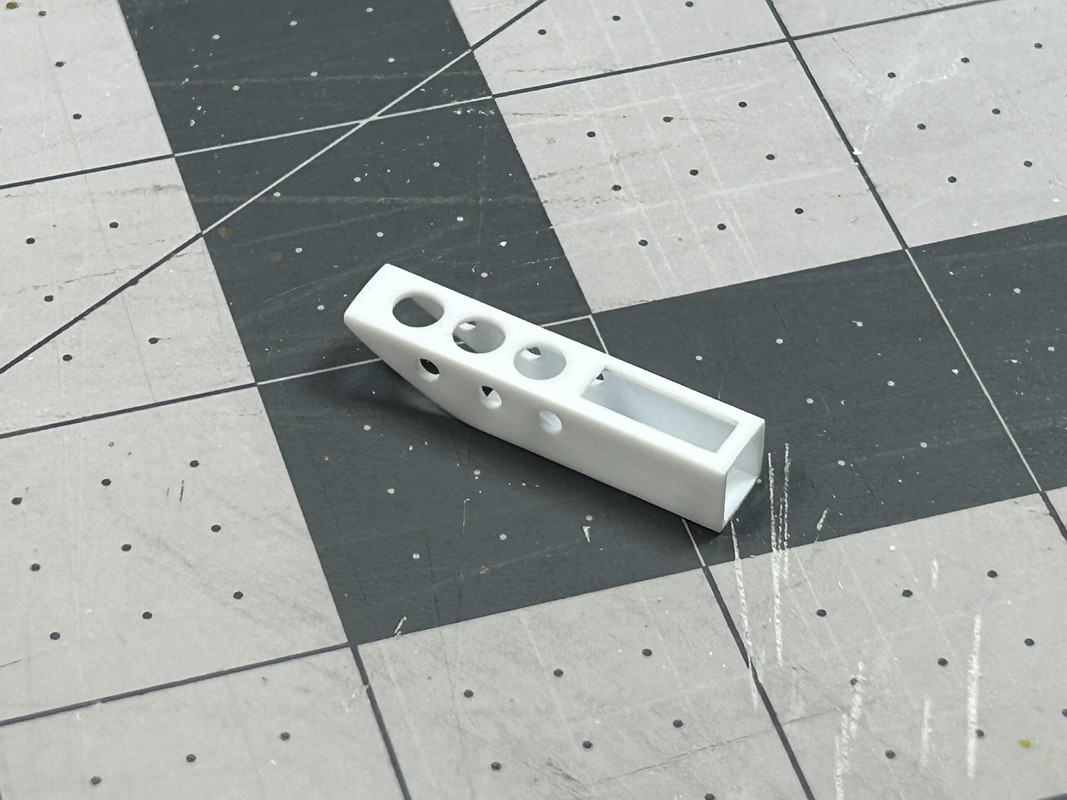
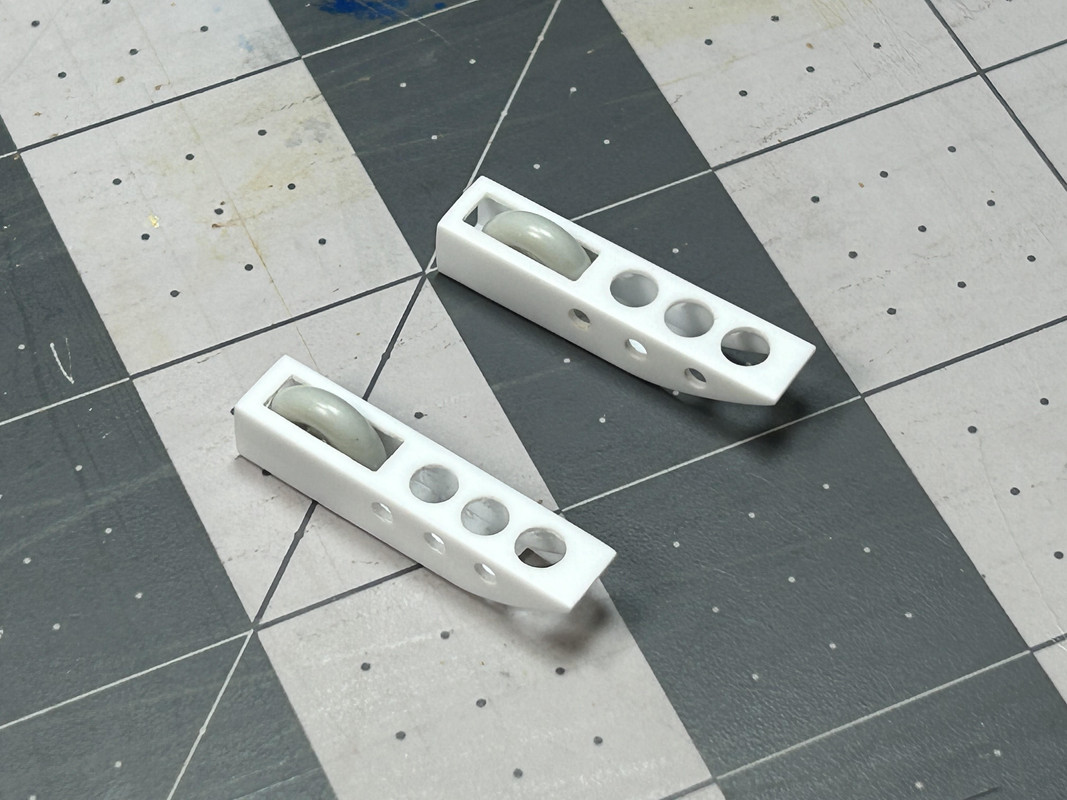
Figure 111: The rear section height needed to be 1/16” less than the front section (3/16” vs 1/4”). After the length was cut, one of the four tubing walls was sanded away which produced the desired height.
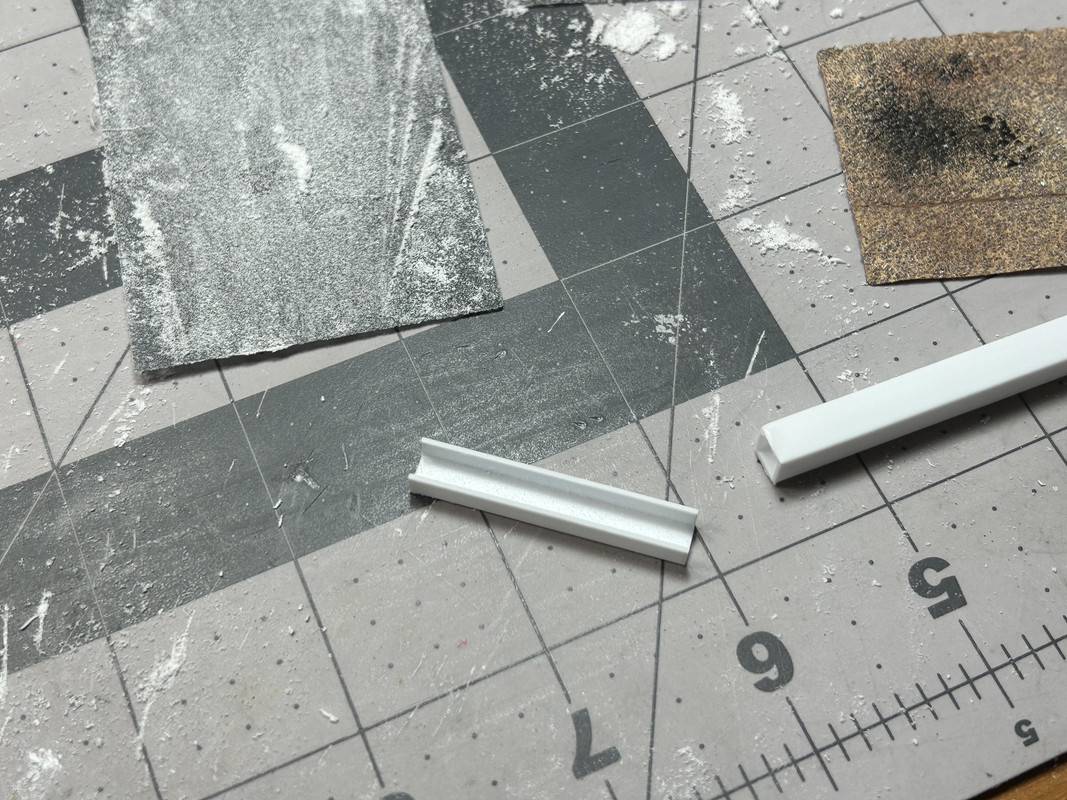
Figure 112: The curved rear end and top lightening holes have been added. Note the sharpened pencil lead used to mark centering and spacing lines.
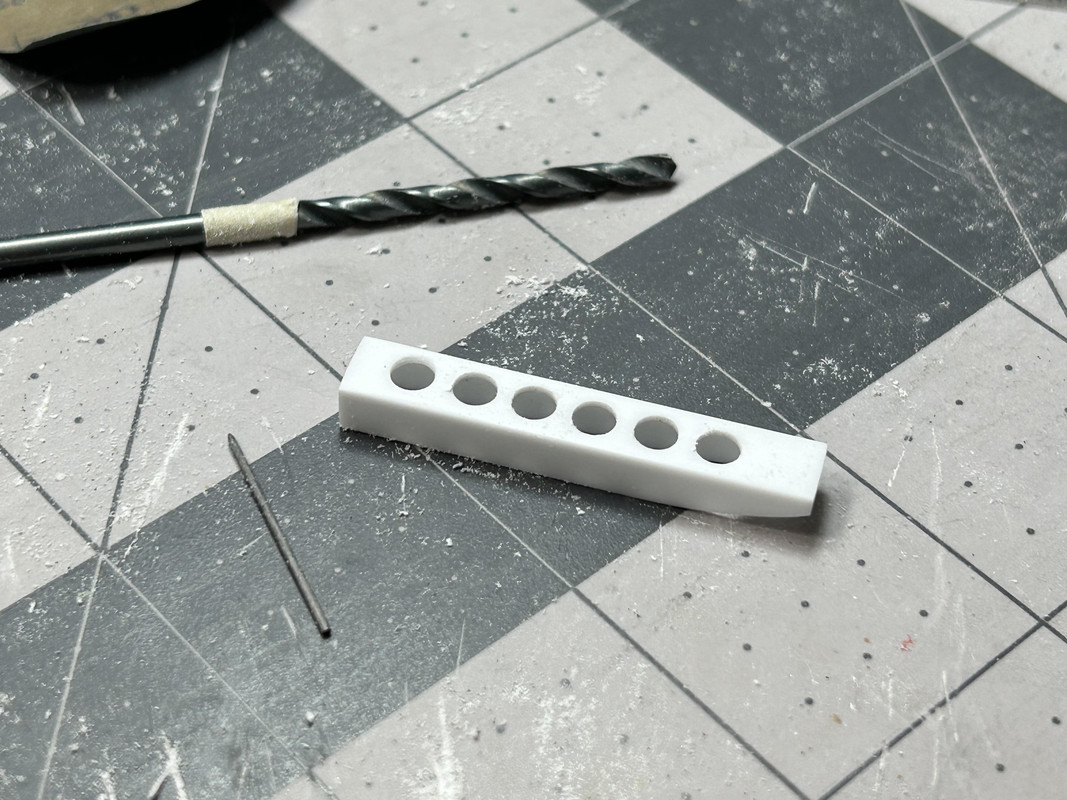
Figures 113 through 115: The same drilling steps were used for all of these parts. First, a very small drill bit was used to make pilot holes. Second, an X-acto knife reamed out the pilot holes. Next, the final size holes were drilled. Finally, a small sandpaper piece, rolled into a funnel shape, was used to clean up each opening.
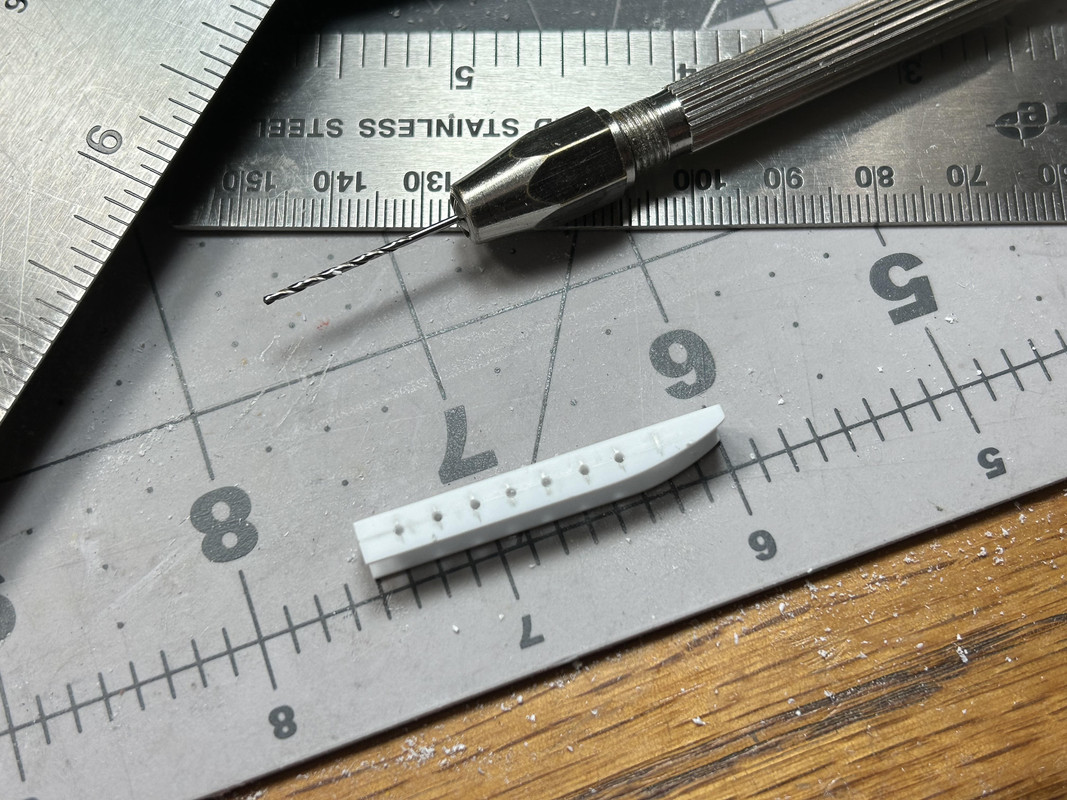
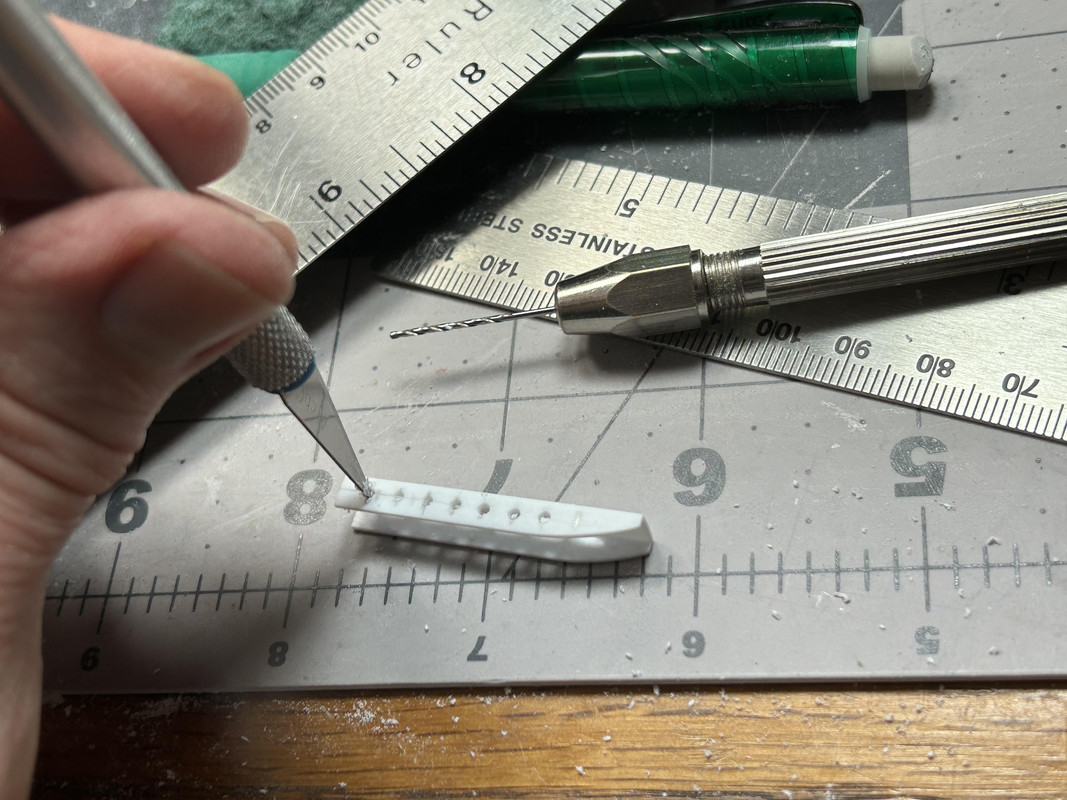
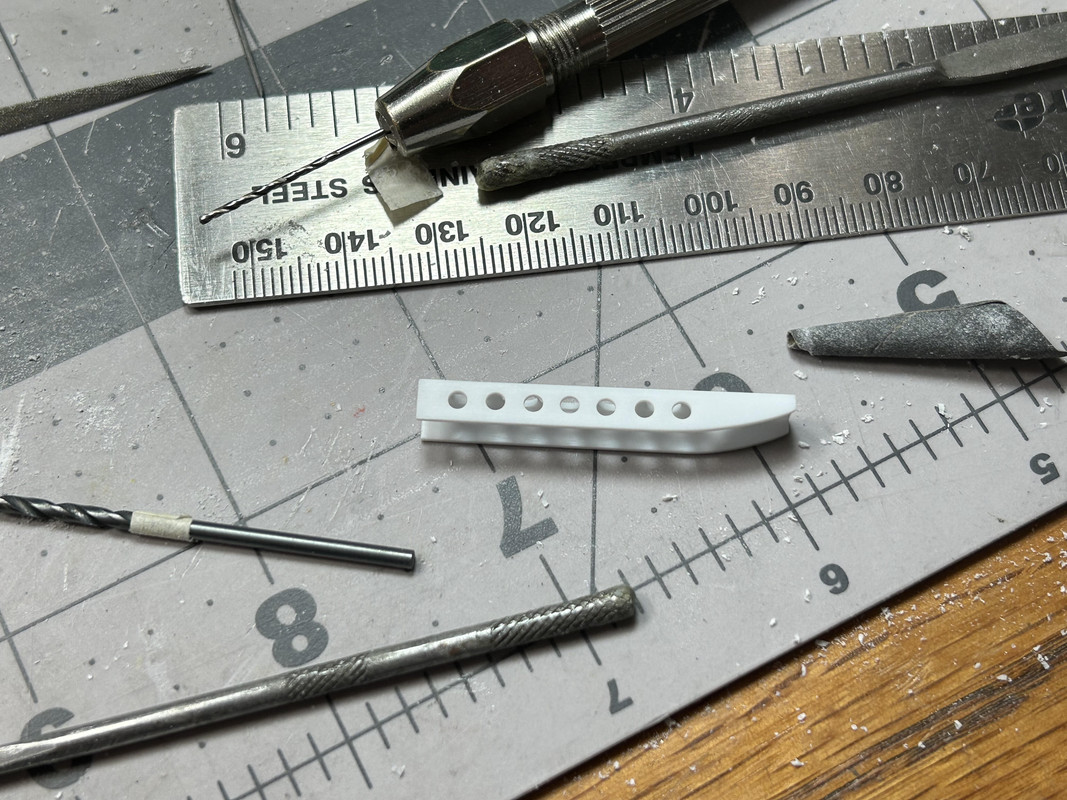
Figure 116: The completed front and rear sections were glued together and the connecting seam lines sanded out.
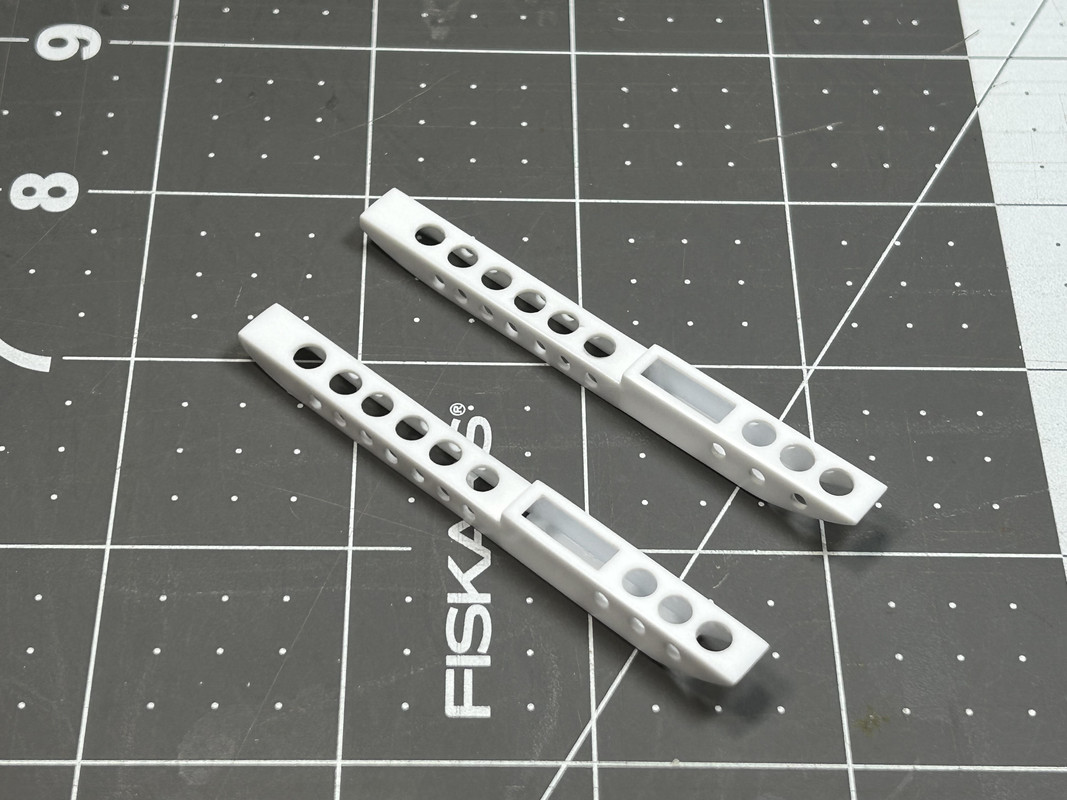
Figures 117 through 119: Very thin Evergreen styrene (.010”) was used for the bottom cover plates and attached using Tamiya Extra Thin Liquid Cement. Due to the ski’s curves, small sections were glued one at a time.
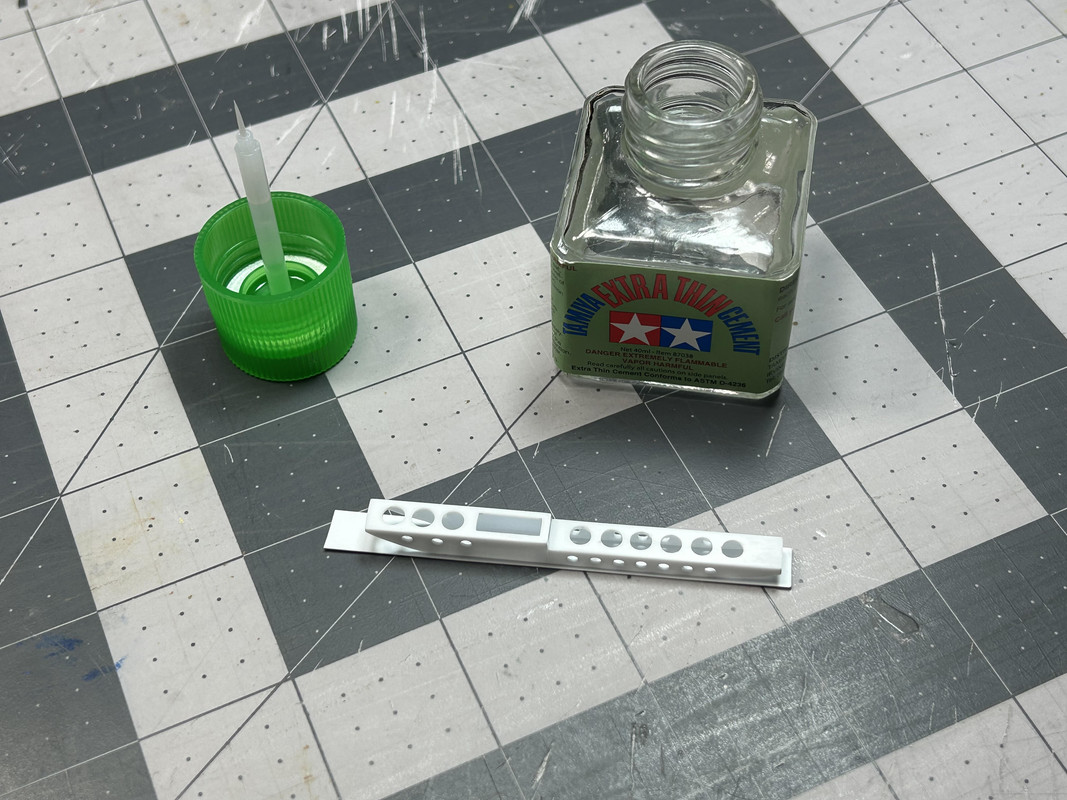
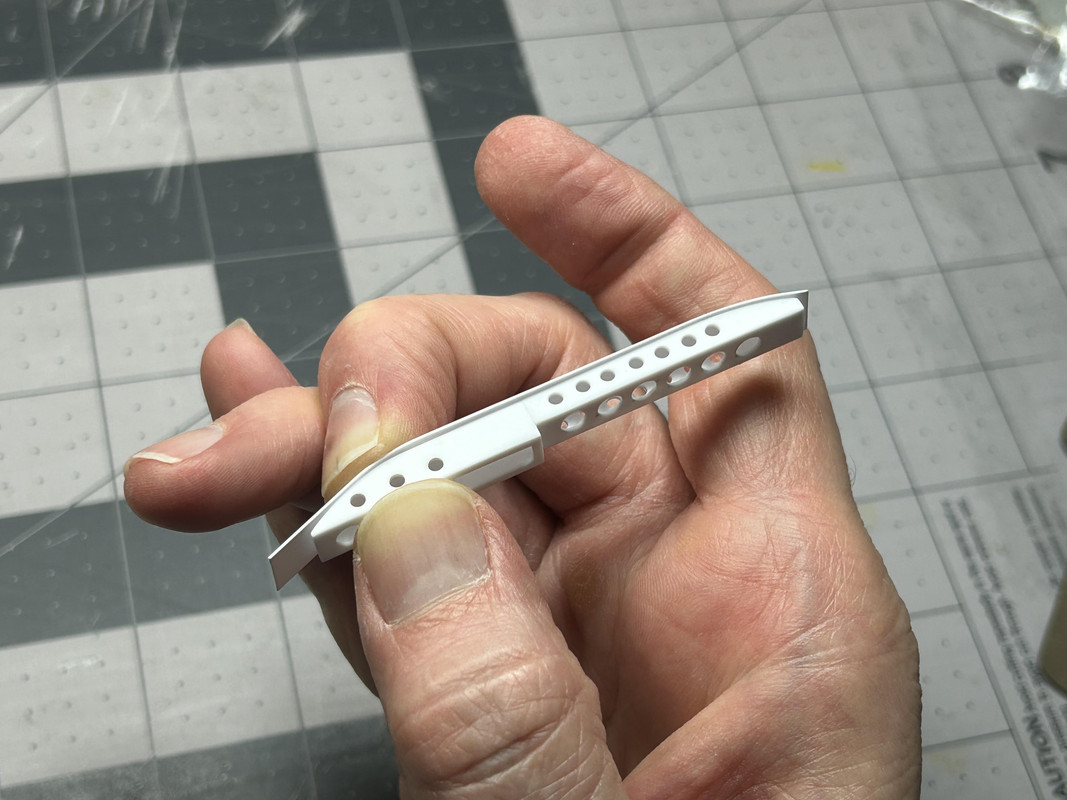
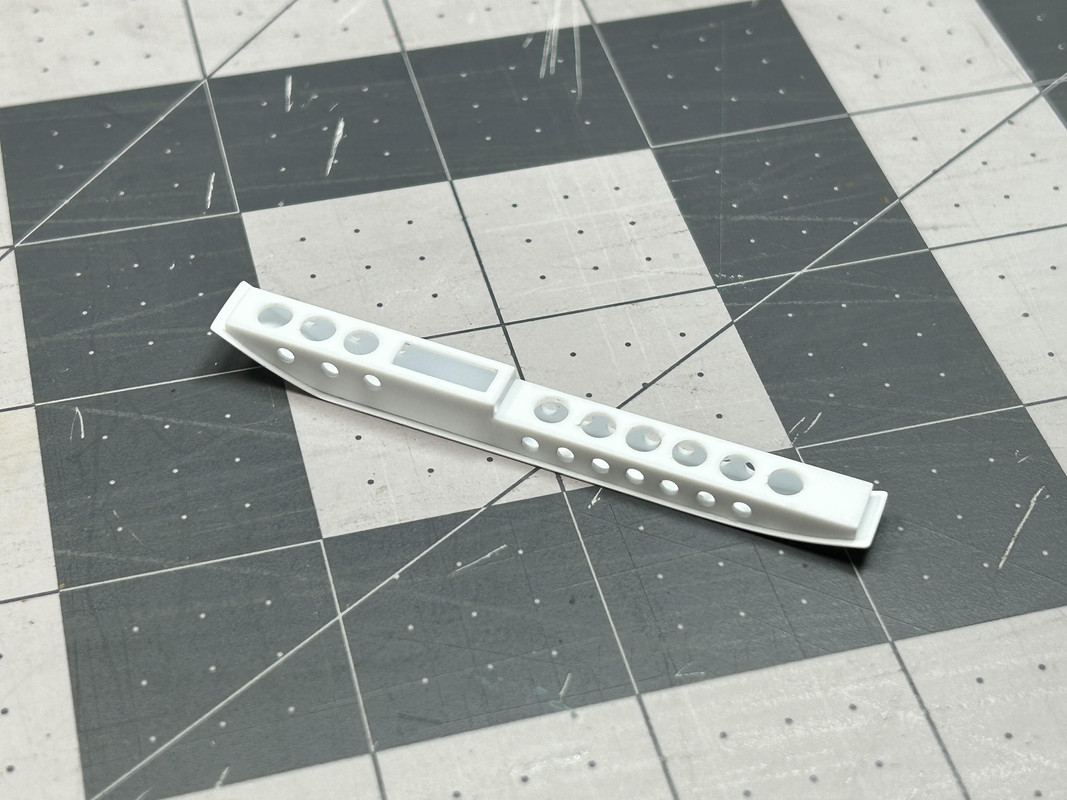
Figure 120: Here are the finished ski assemblies. I am glad to have this part of the project done!
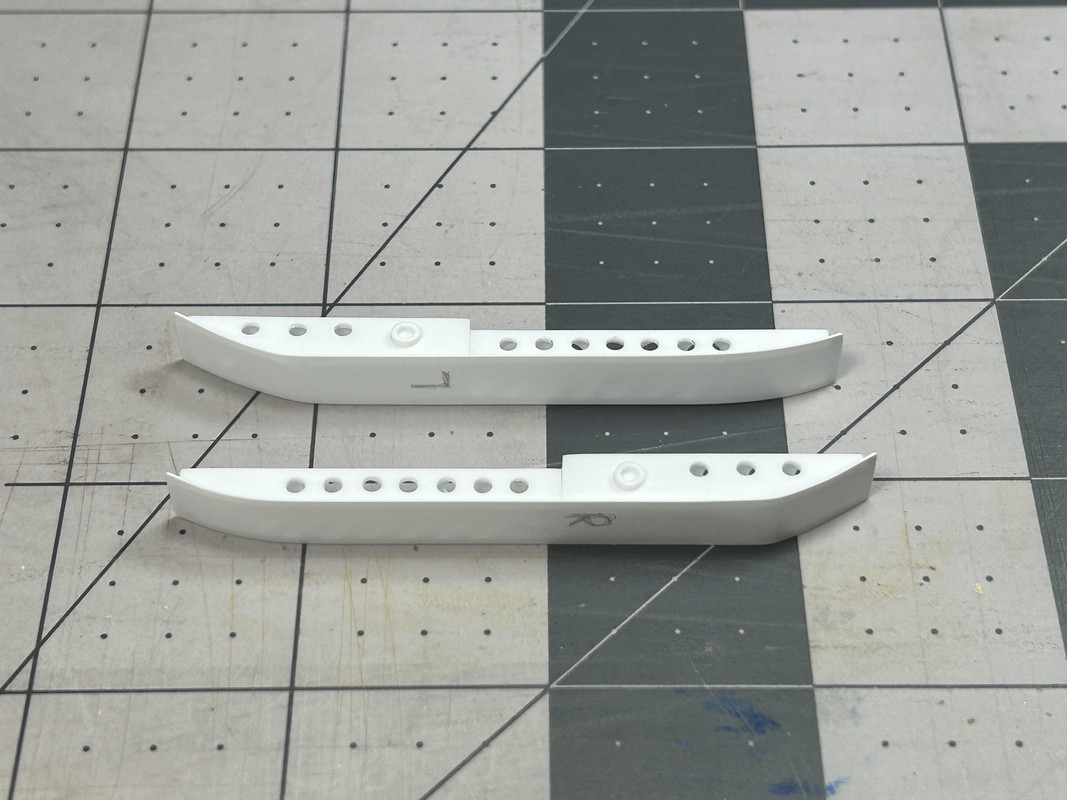
Figures 121 and 122: The movie never shows clear images of how the support legs and skis are joined together, so some creative scratch-building was required. I decided the simplest solution was to custom shape two Evergreen styrene pieces to act as connectors between the support legs and the skis. These photos show the connectors after being glued to the bottom of the front support legs.
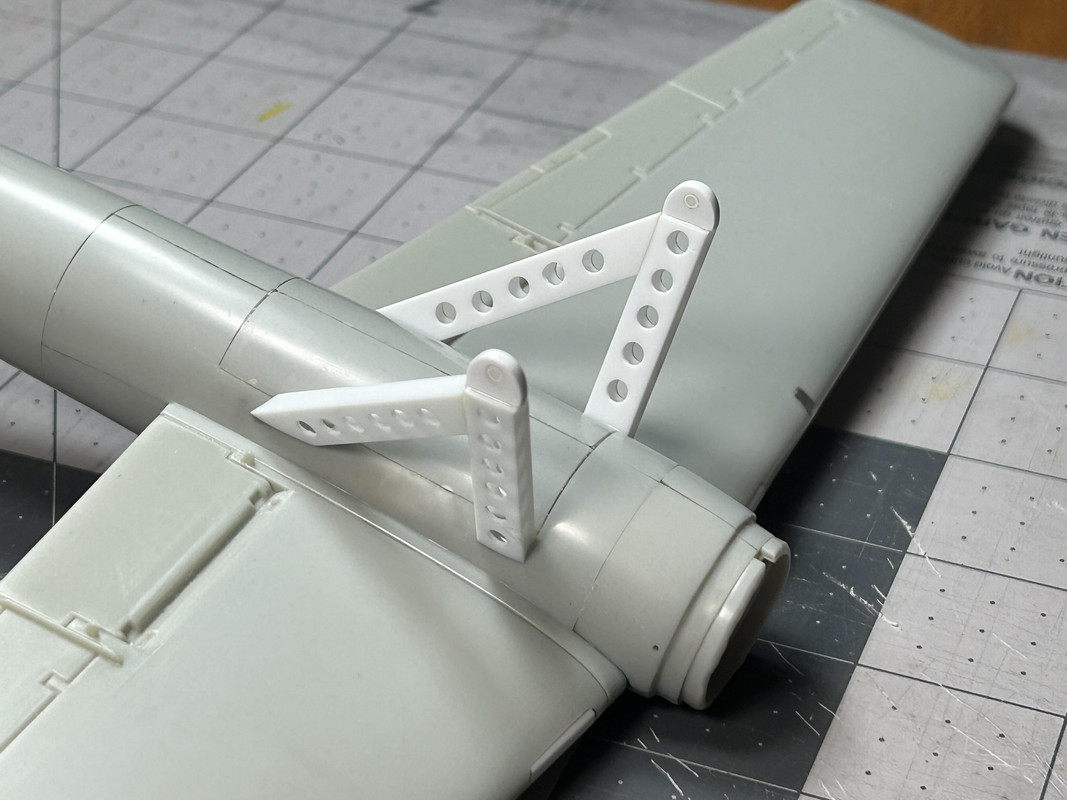
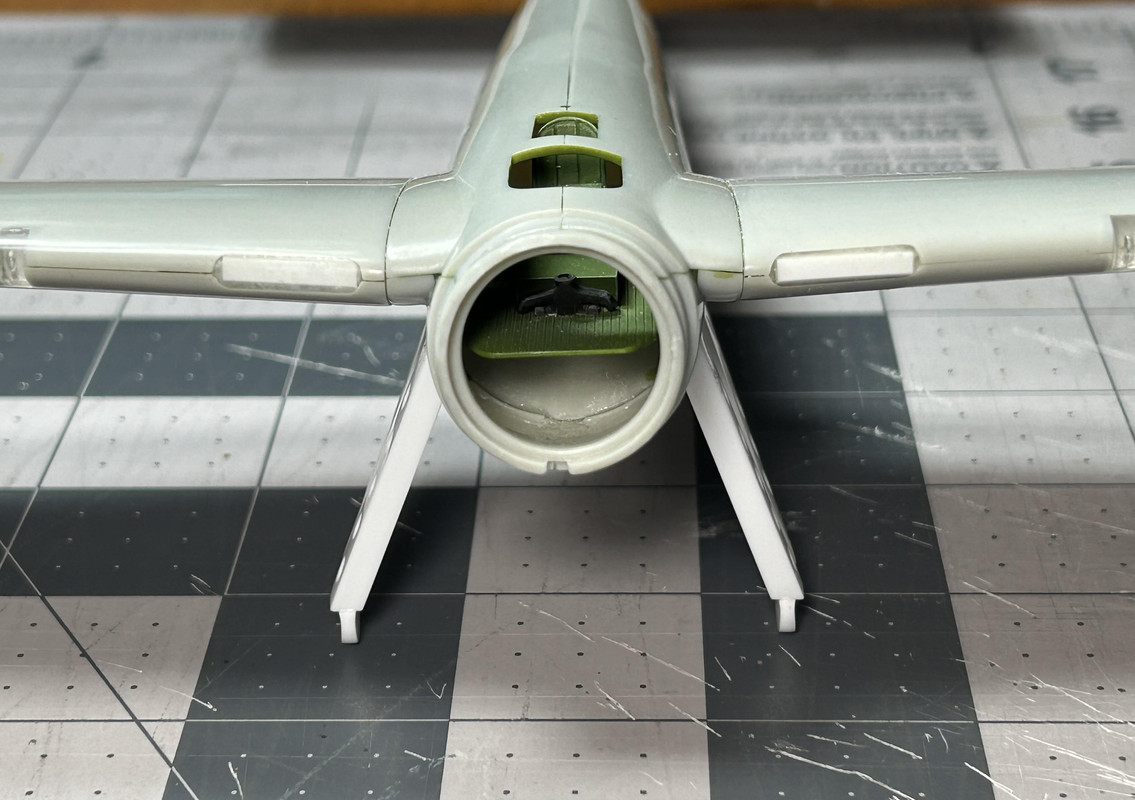
Figure 123: The horizontal bracing rod was made out of 1/16” brass tubing and glued to the inside of the connectors.
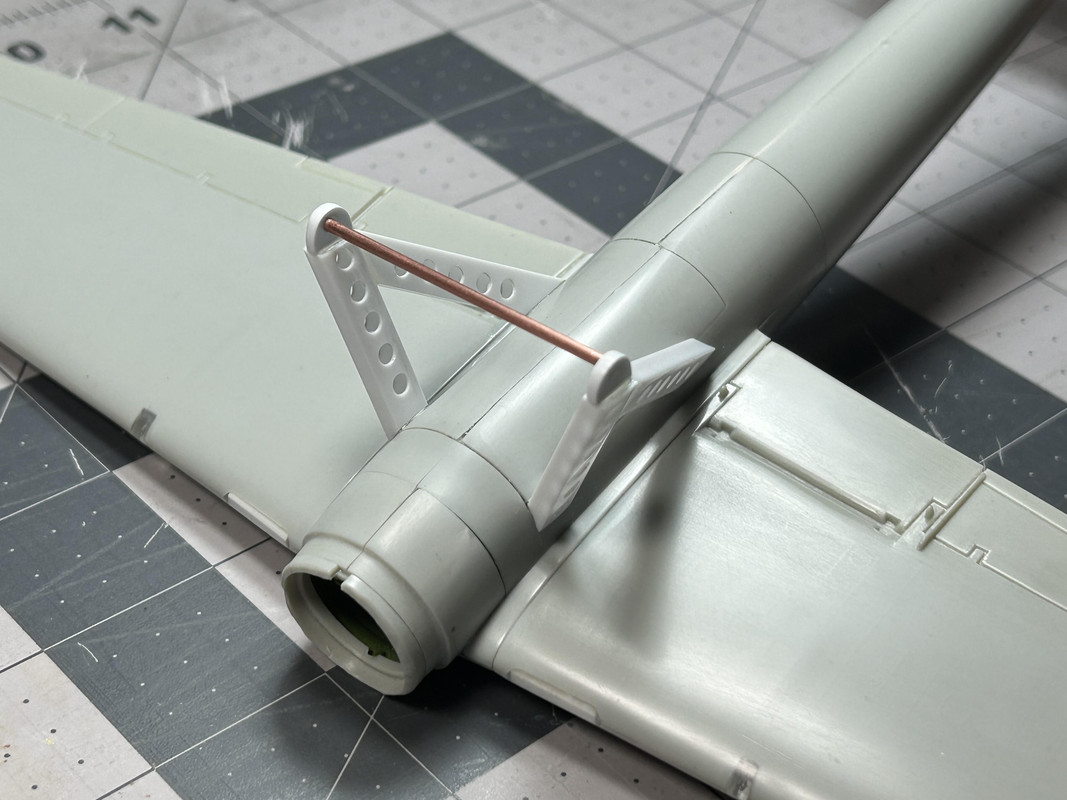
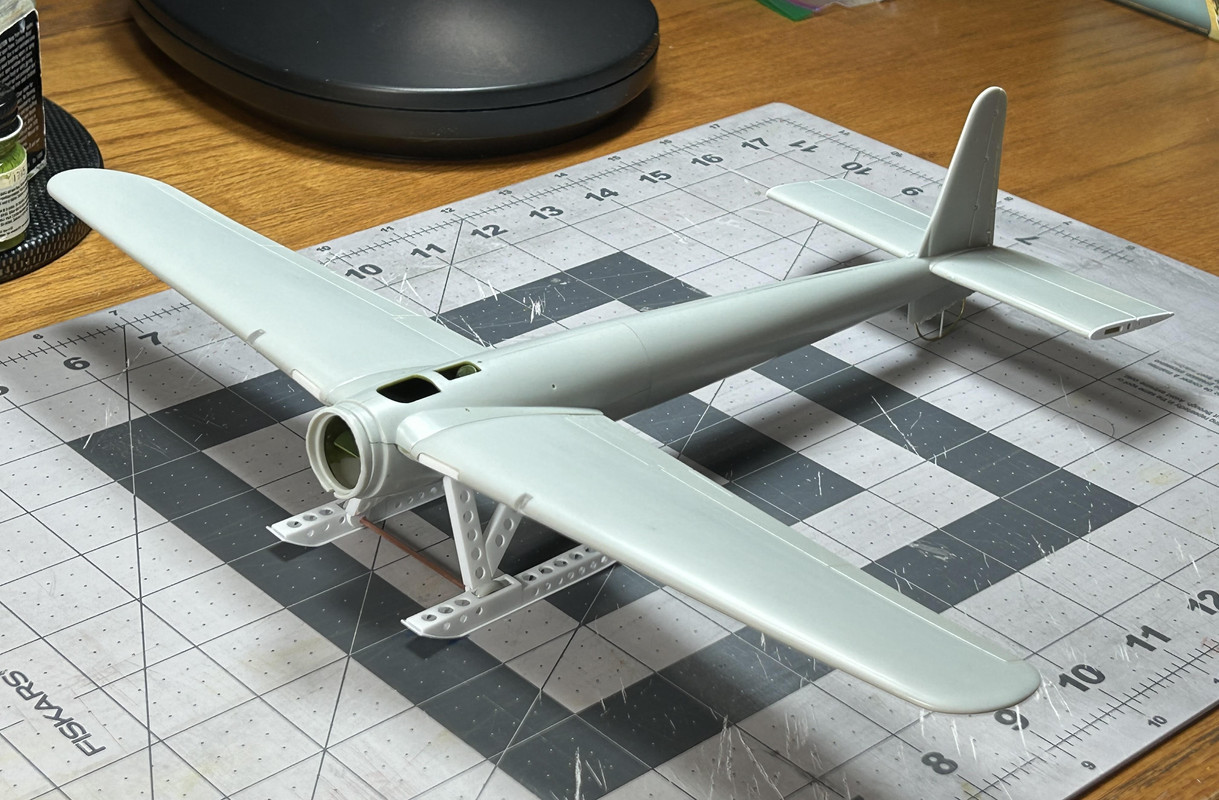
Figures 124 through 127: These photos show the airframe/supports legs mounted on the skis. This is just a test fitting to confirm everything fits. The skis will be permanently attached after all of the parts are painted.
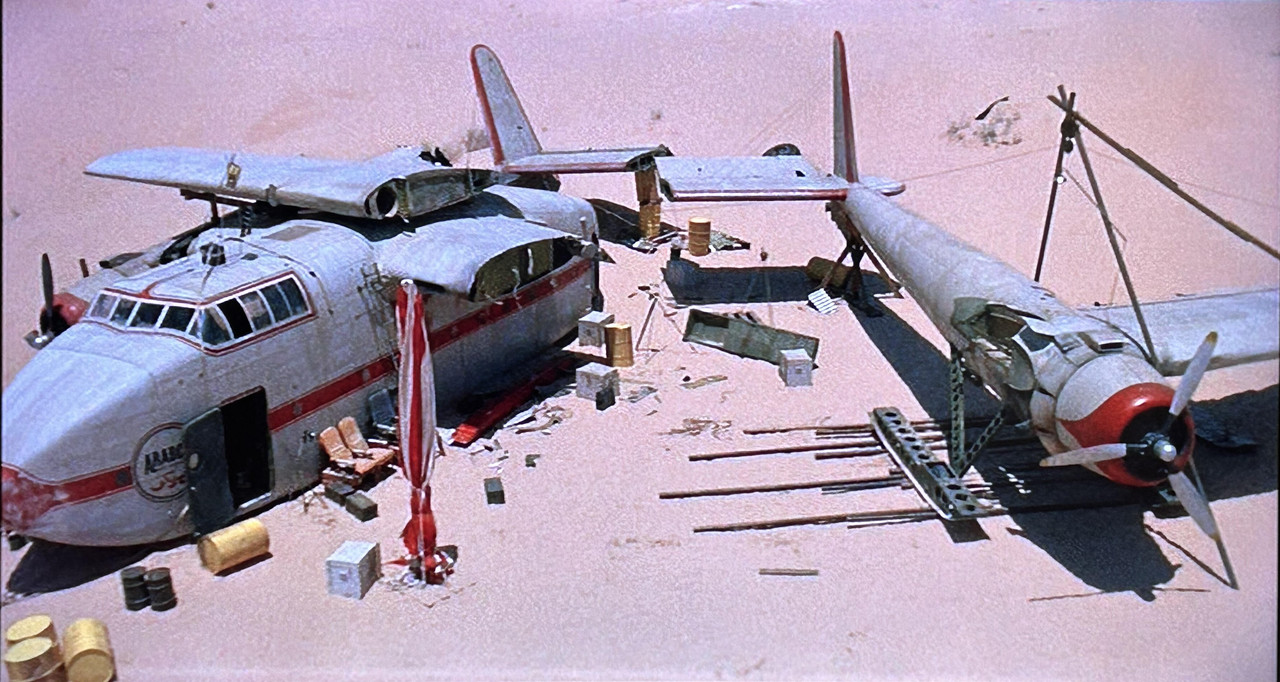
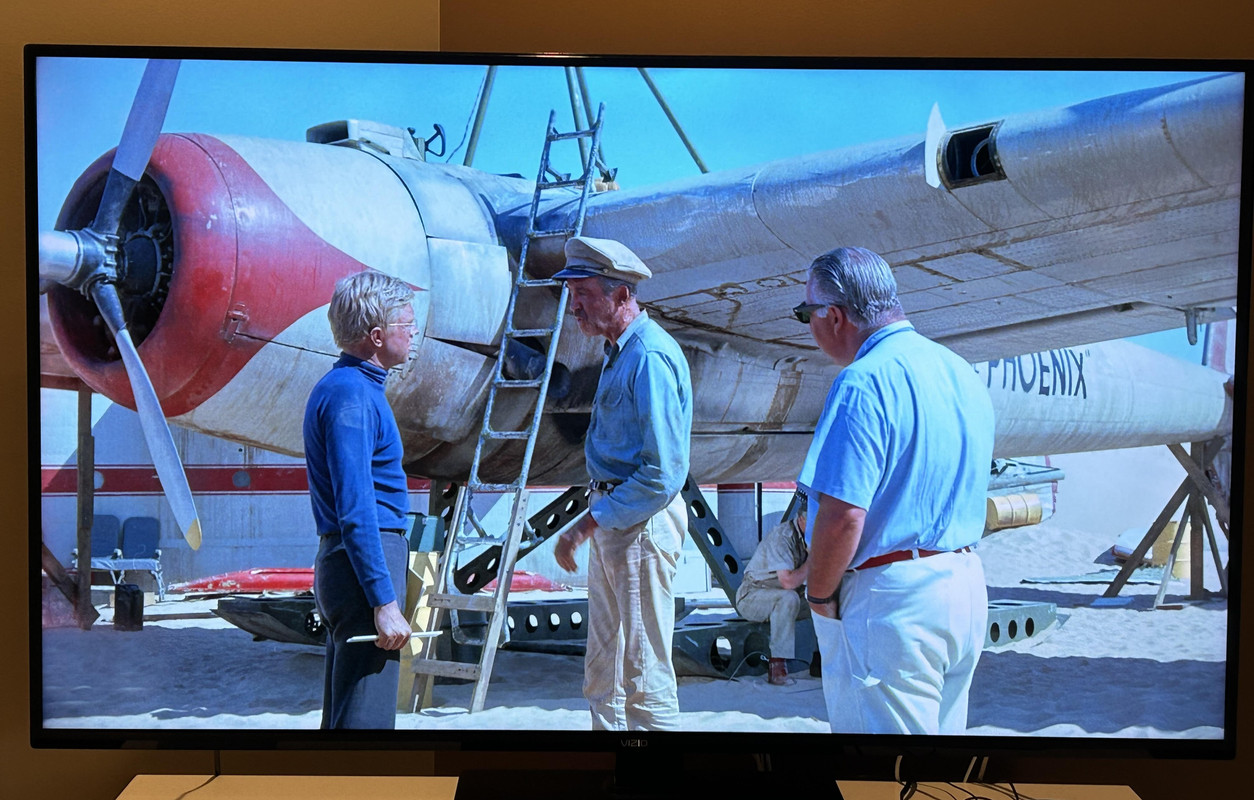
Figures127a and 127b: Here are a couple of cool movie images where you can see the Phoenix’s support legs and skis.
Until next time...
Phillip1
Re: Progress Build of the Phoenix Airplane from The Flight of the Phoenix Movie (1965)
Posted: Mon Oct 28, 2024 6:05 pm
by DRUMS01
Lovely work with nice authenticity to the movie.
Re: Progress Build of the Phoenix Airplane from The Flight of the Phoenix Movie (1965)
Posted: Tue Oct 29, 2024 12:46 pm
by Phillip1
DRUMS01-Thanks! The movie is the only reference there is if you want to build this airplane, but fortunately it is shown in many of the exteriors scenes which removes a good deal of guesswork.
Phillip1
Re: Progress Build of the Phoenix Airplane from The Flight of the Phoenix Movie (1965)
Posted: Wed Nov 06, 2024 1:24 pm
by Phillip1
Fellow Modelers-The painting and weathering adventure begins.
Figure 129: A total of twenty-four holes were drilled into the wings, horizontal/vertical stabilizers and support legs to accommodate the guy wires added later.
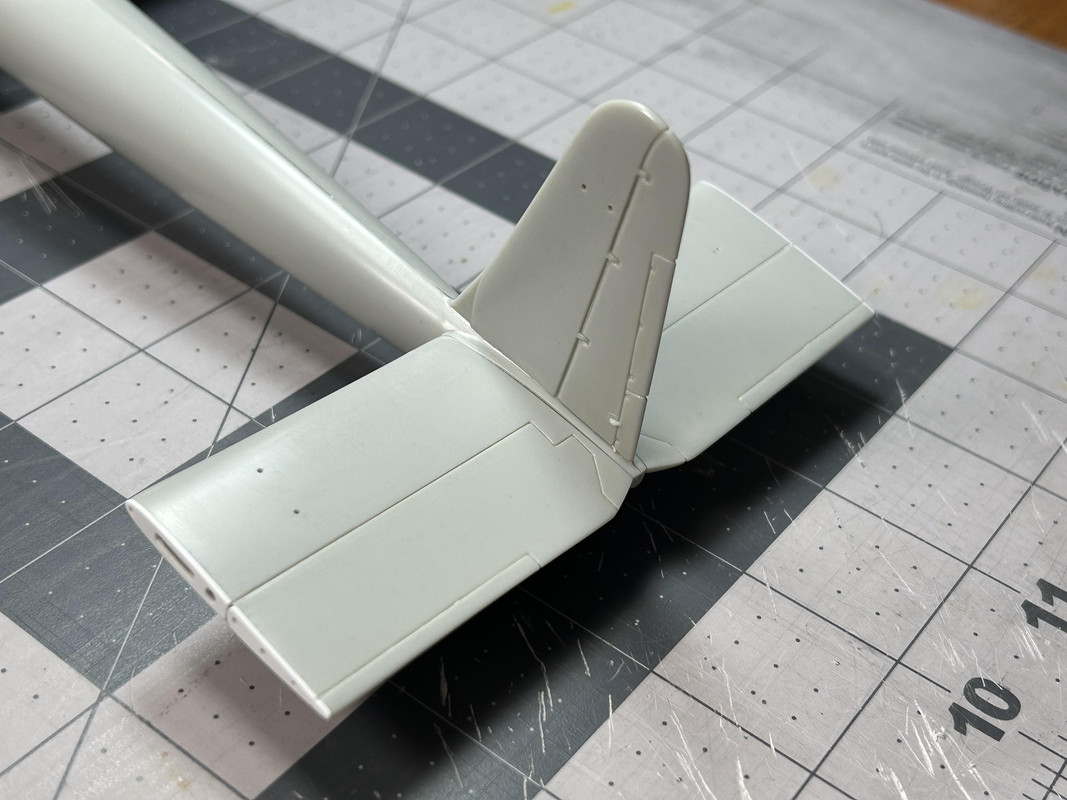
Figure 130: Although I am not building a diorama or including figures, the airplane will to sit on a base with a desert landscape, as I feel this will really compliment the airplane and elevate the project. The size and shape of the basic wooden base is seen here. It will be worked on after the airplane is finished.
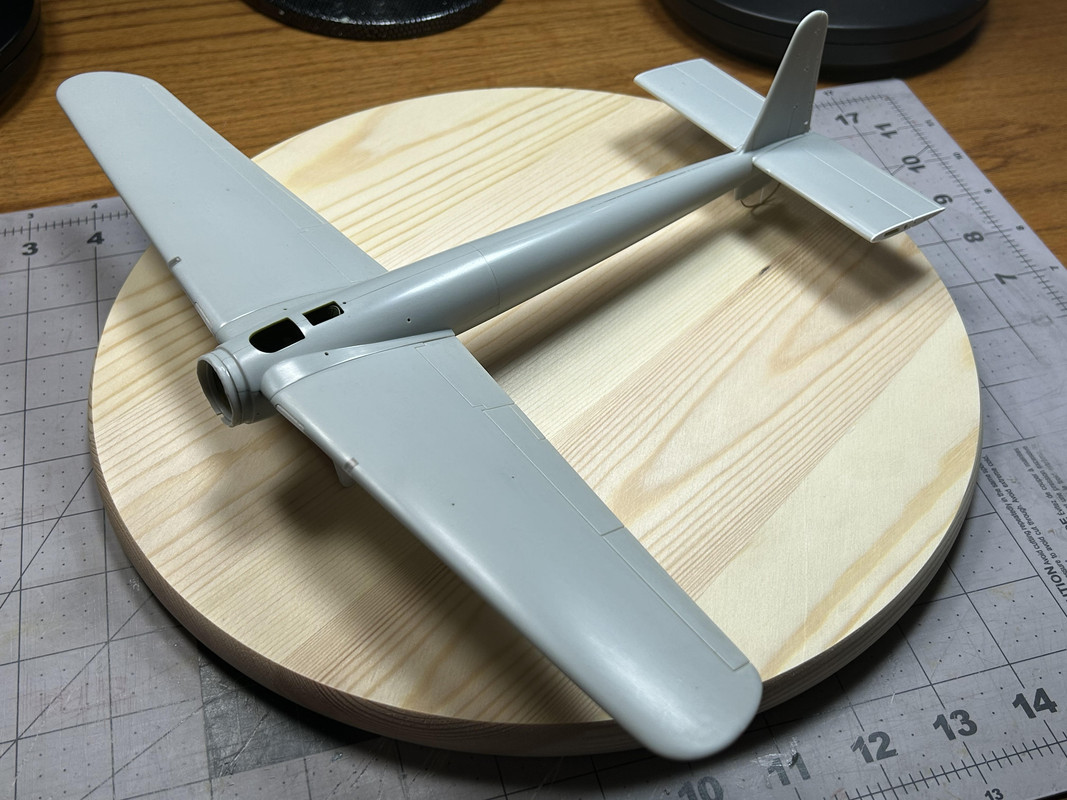
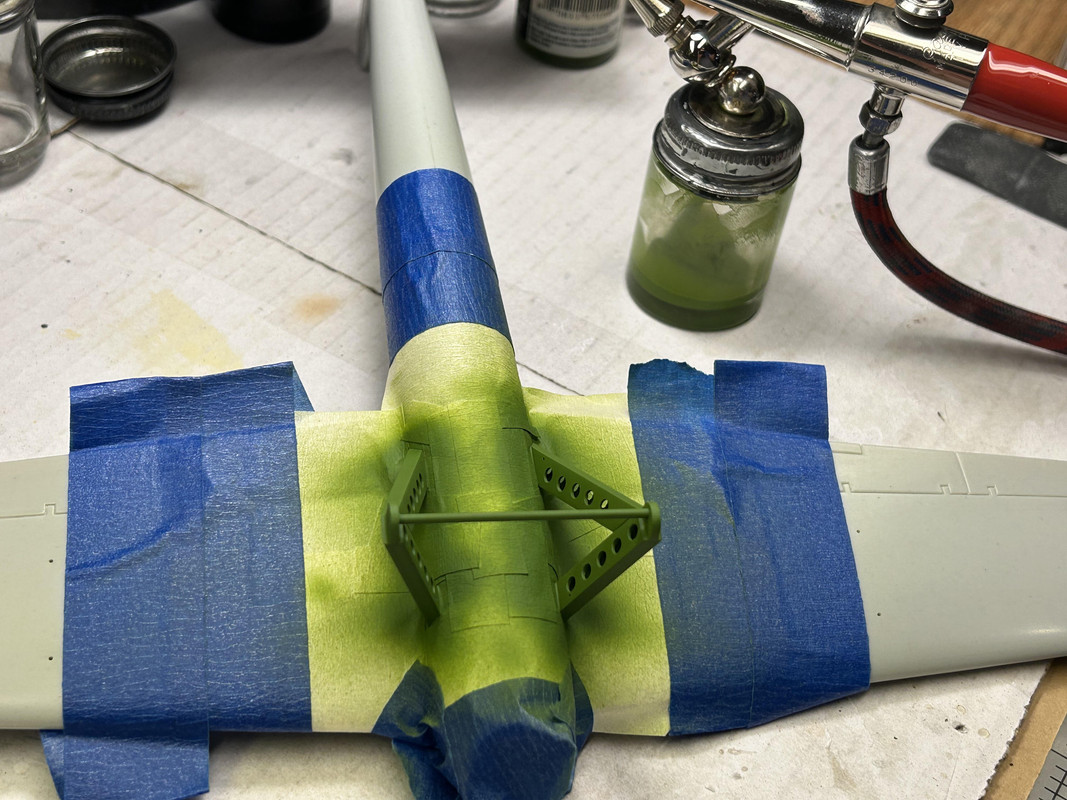
Figure 131: It was decided to paint the support legs before the basic airframe, as I was concerned it would be difficult to apply good paint coverage on the interior of the support leg tubing. It was a tedious application but I was able to get it done.
Figures 132 and 133: The radial engine was worked on next. The only upgrade detail was adding ignition wires to each cylinder. After they were in place the entire assembly was over-sprayed with Testors Dullcote.
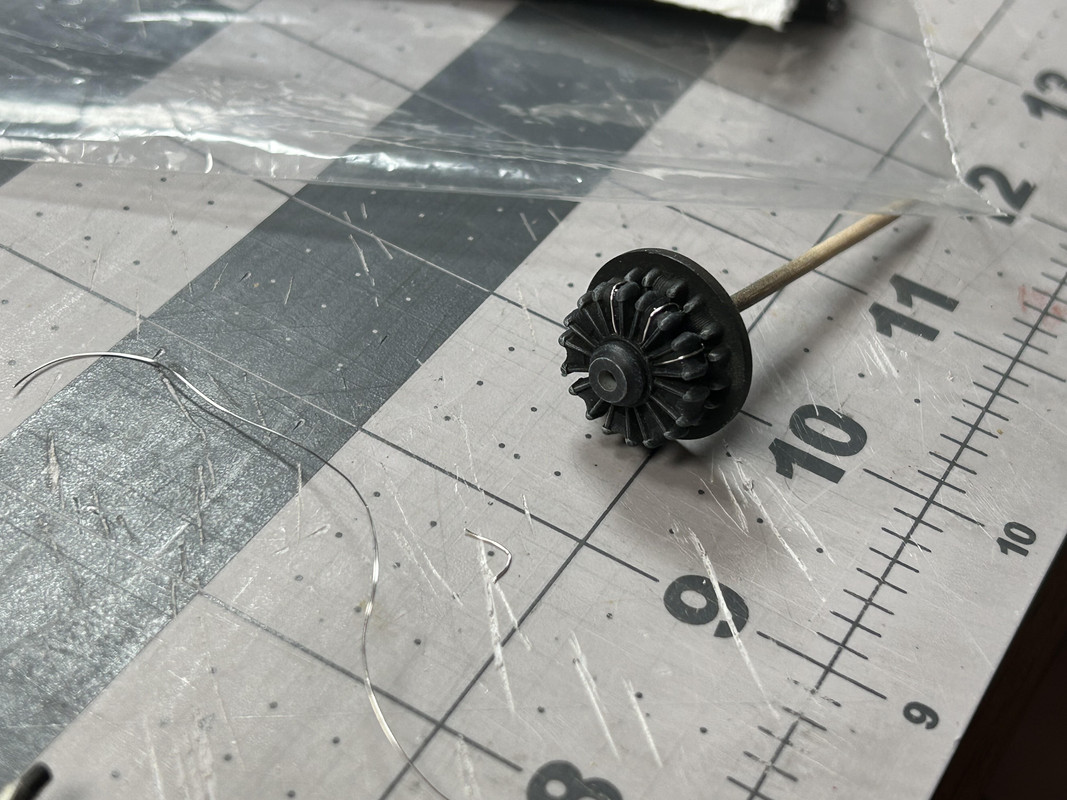
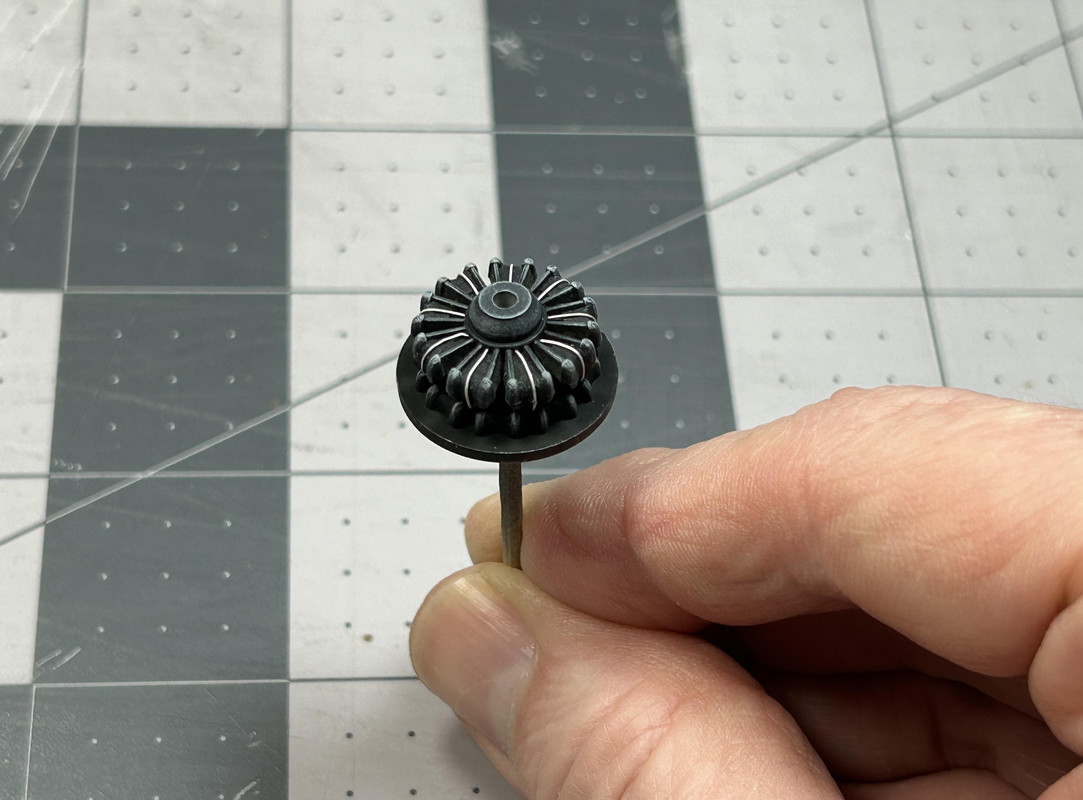
Figure 134: The two skis were painted next. This photo shows the color “straight from the bottle”, which is really bright and green.
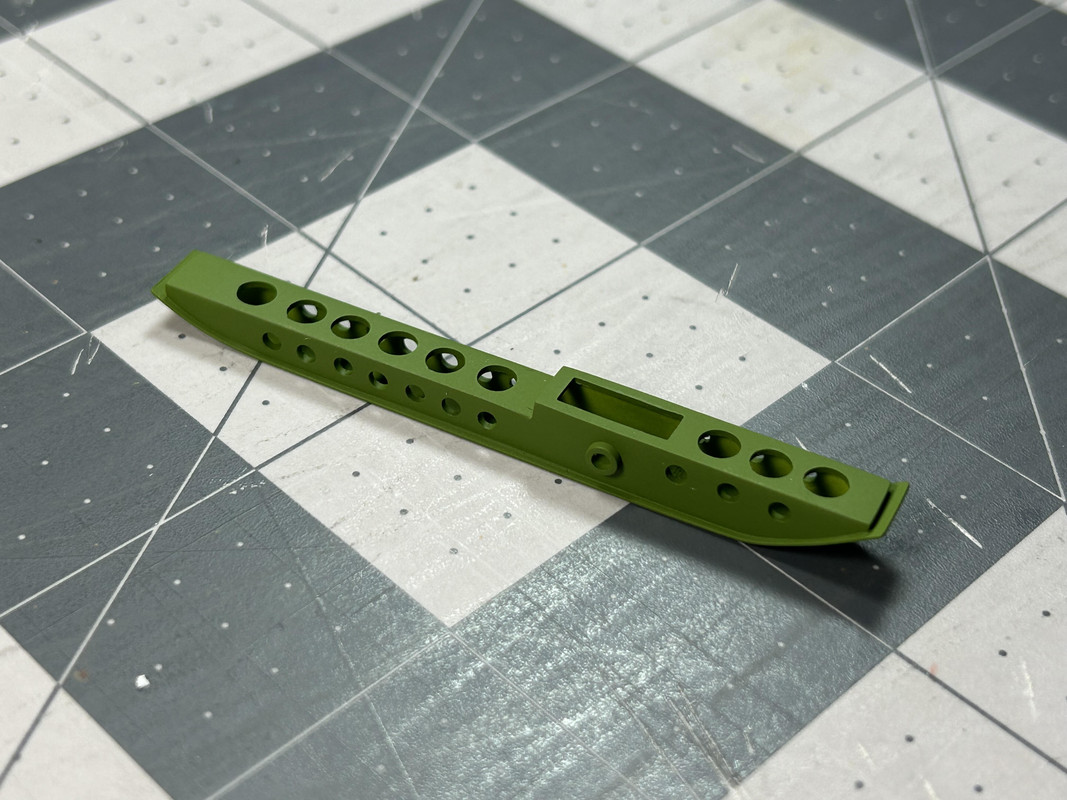
Figure 135: A thick application of dark gray pastel dust has been added with a soft brush to make the finish darker and duller.
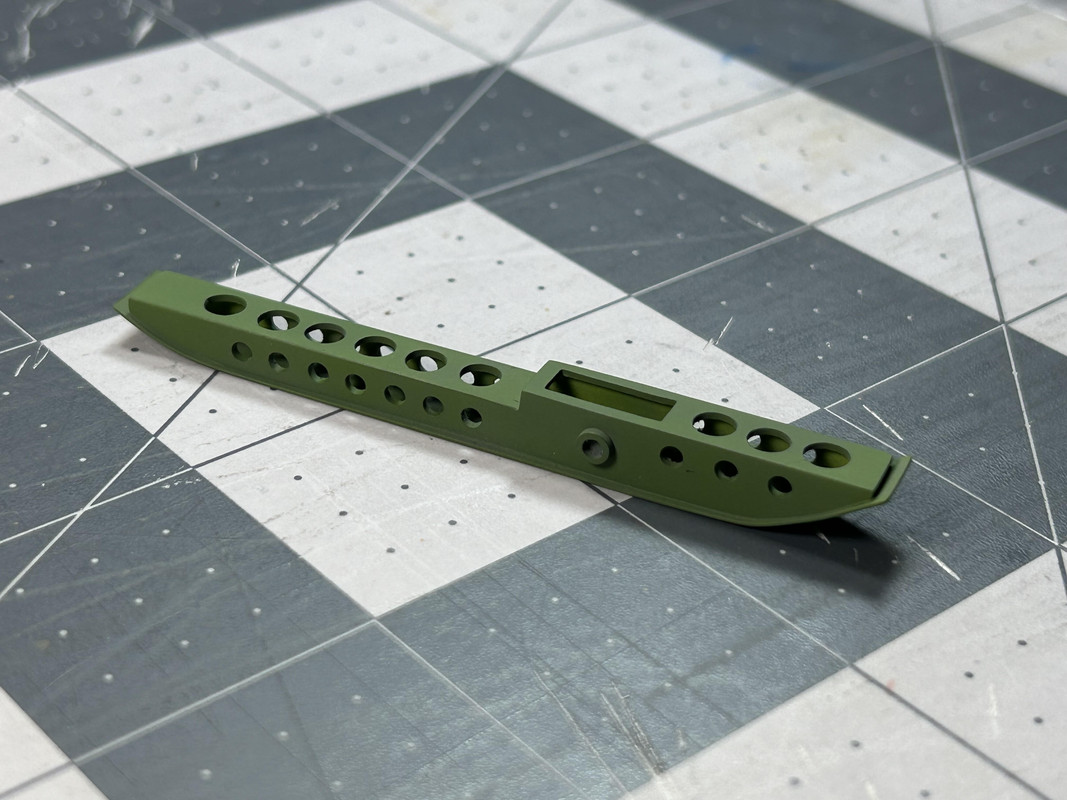
Figure 136: All of the edges have been dry-brushed with Model Master RAF Interior Green. The final weathering will be adding metal paint chipping, done later.
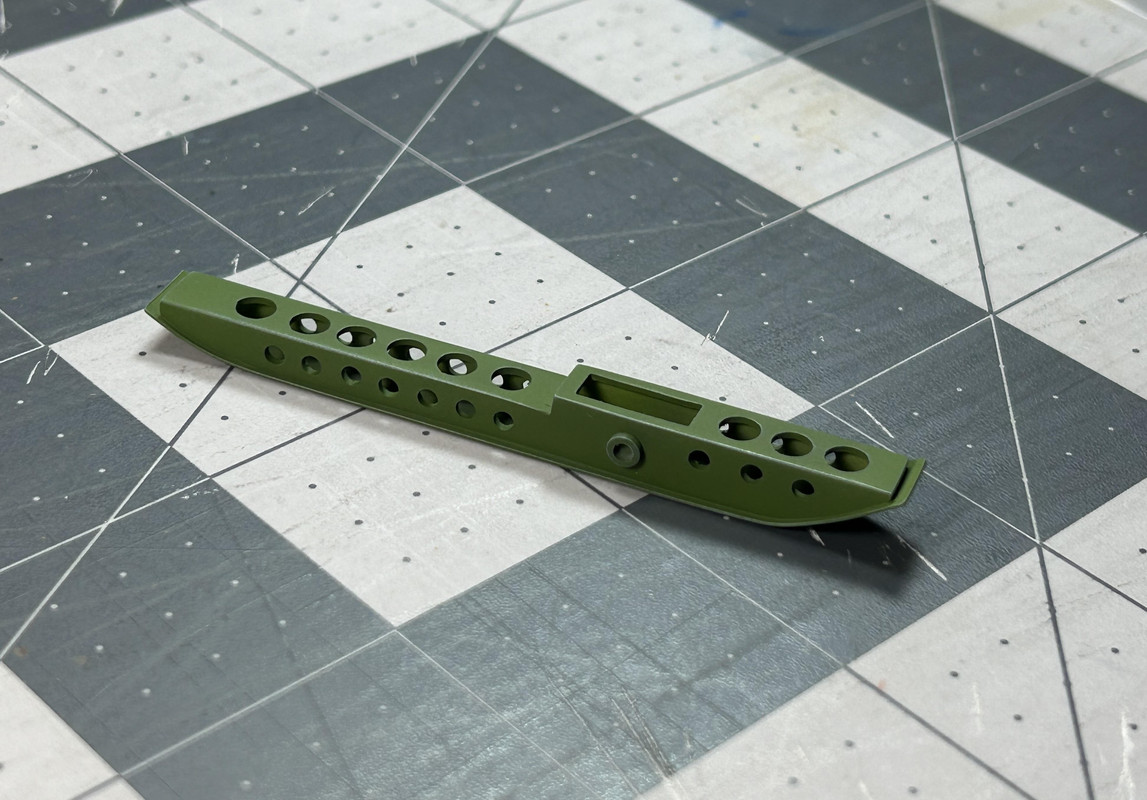
Figure 137: The painted support legs were masked off with what seemed like 100 different pieces of tape before the main assembly was painted.
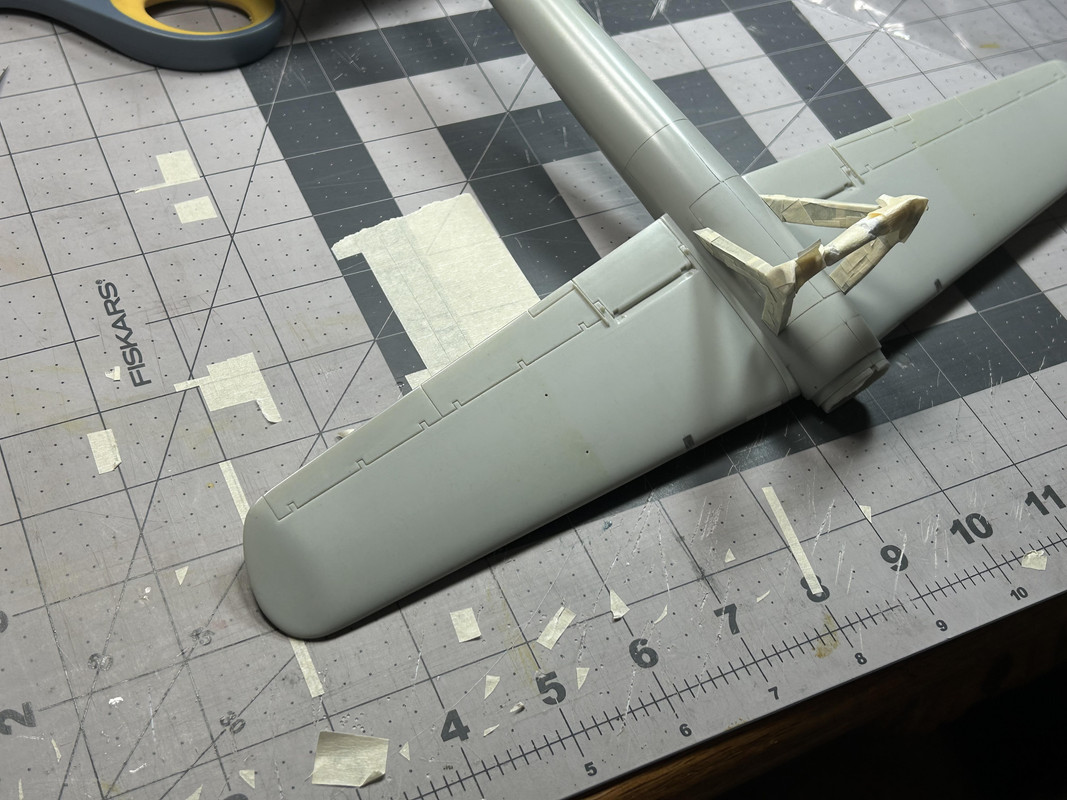
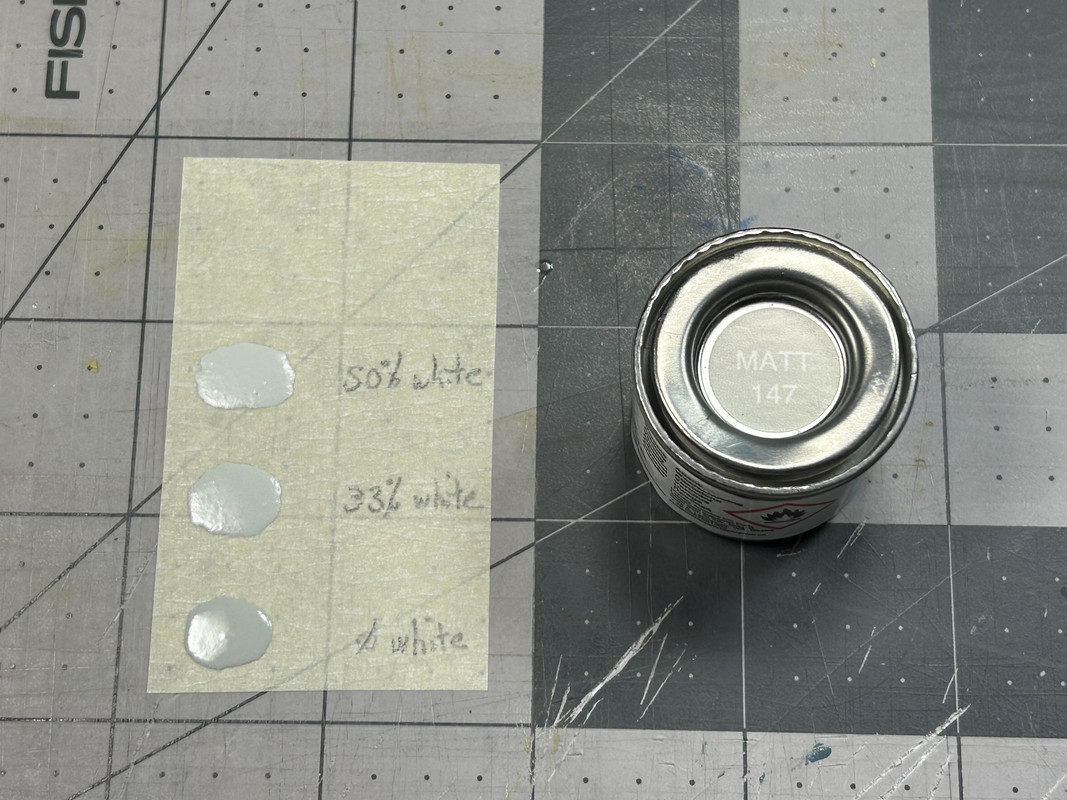
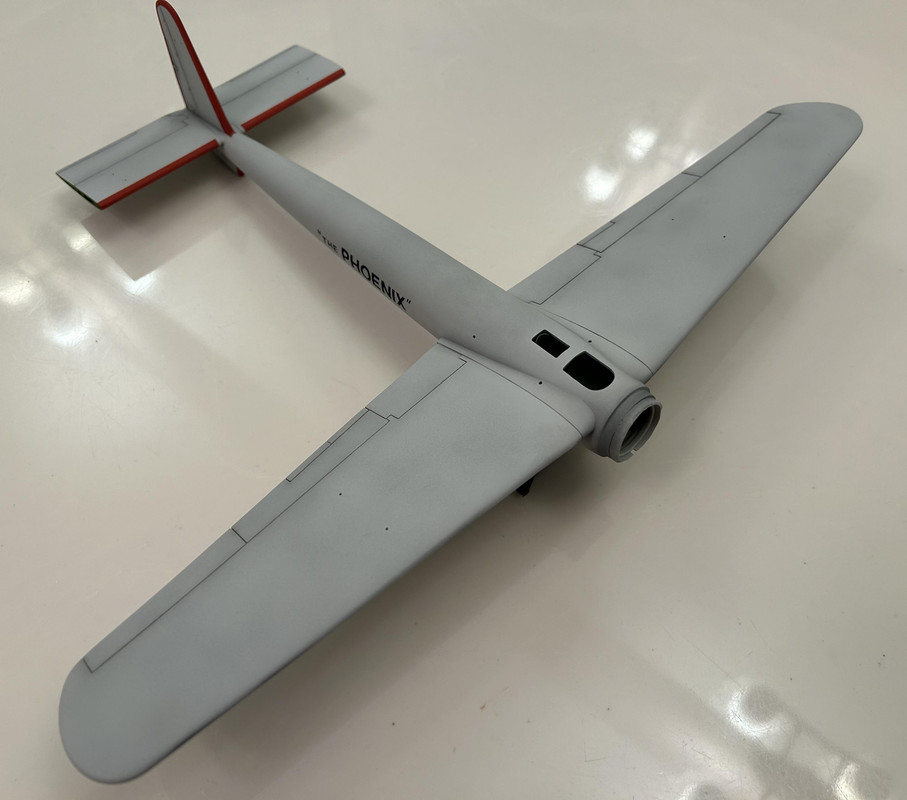
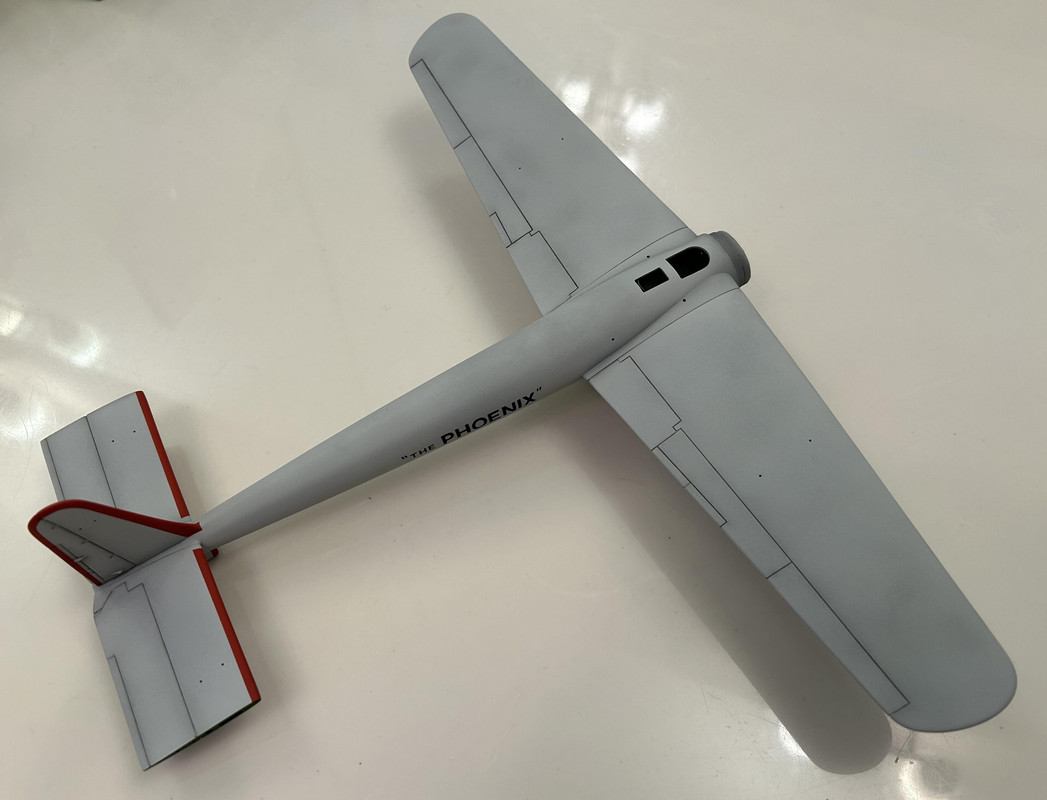
Figure 138: In my opinion the base color of the airplane in the movie was a VERY light gray, with the actual finish having a lot of color variation due to a dirty and grimy build up. The lightest gray I had in my paint stock was Humbrol 147, which is a light gray but not light enough. I compared the base color to a mixture with 33% white added and a second mixture with 50% white added. The mixture with 33% white is what I ended up using.
Figures 139 and 140: Here is the basic airframe after three coats of paint were applied. The look is clean and pristine now, but that will change. Note a very soft cloth was used to gently buff each coat after drying to help keep the paint finish smooth.
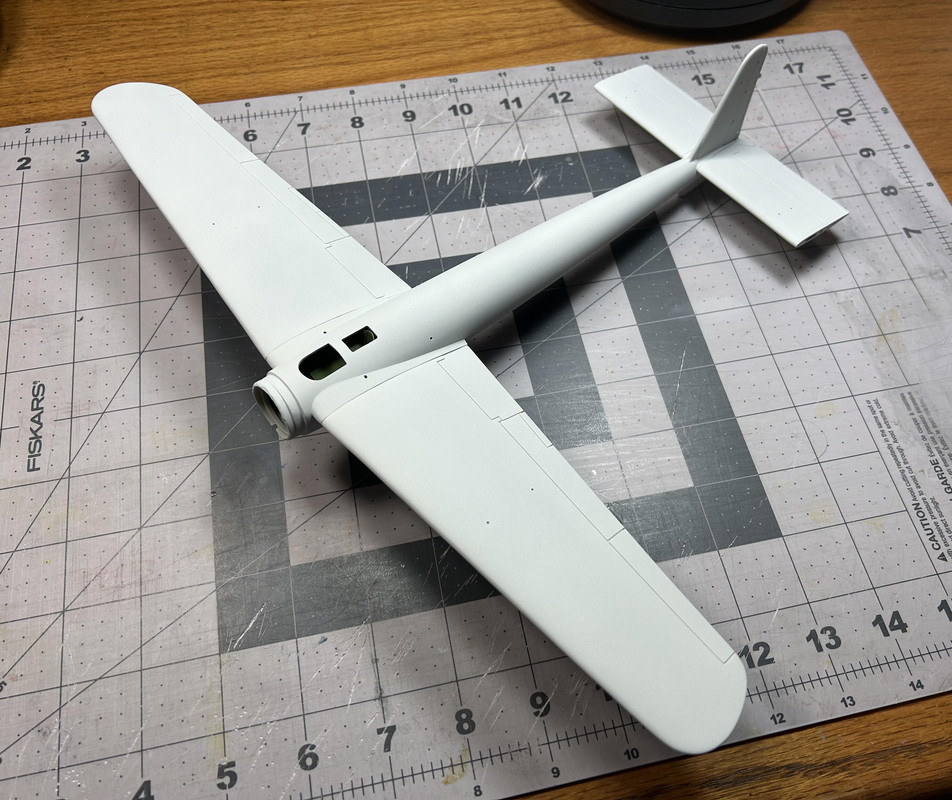
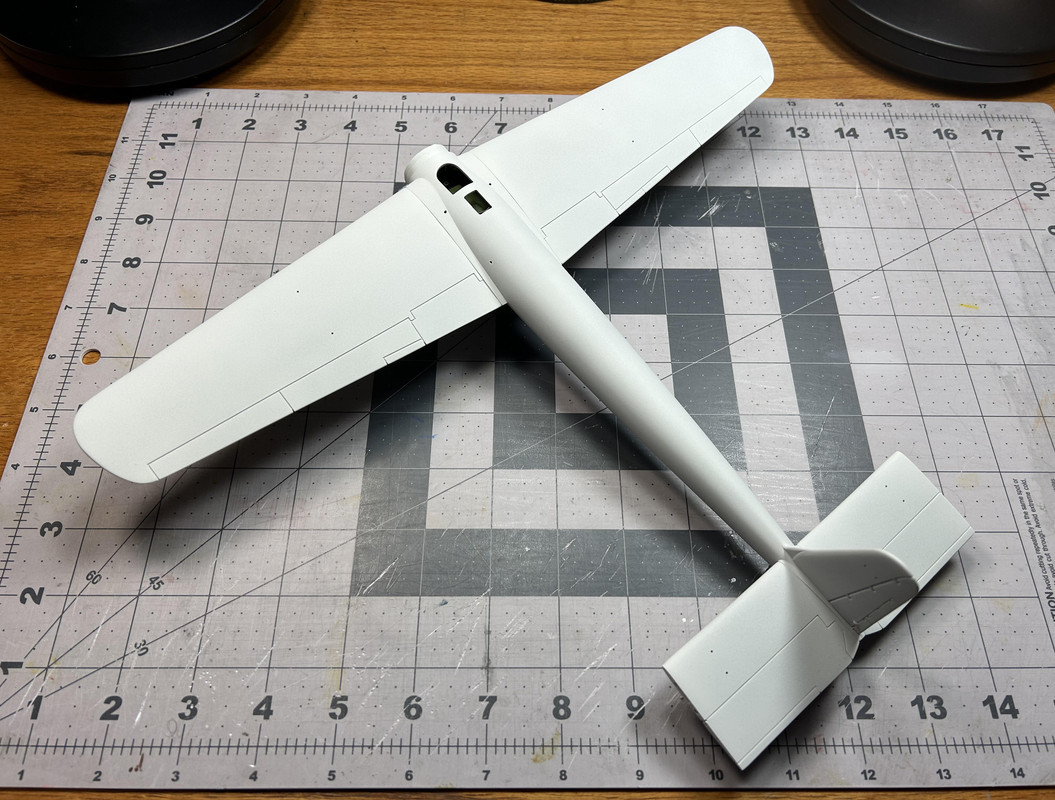
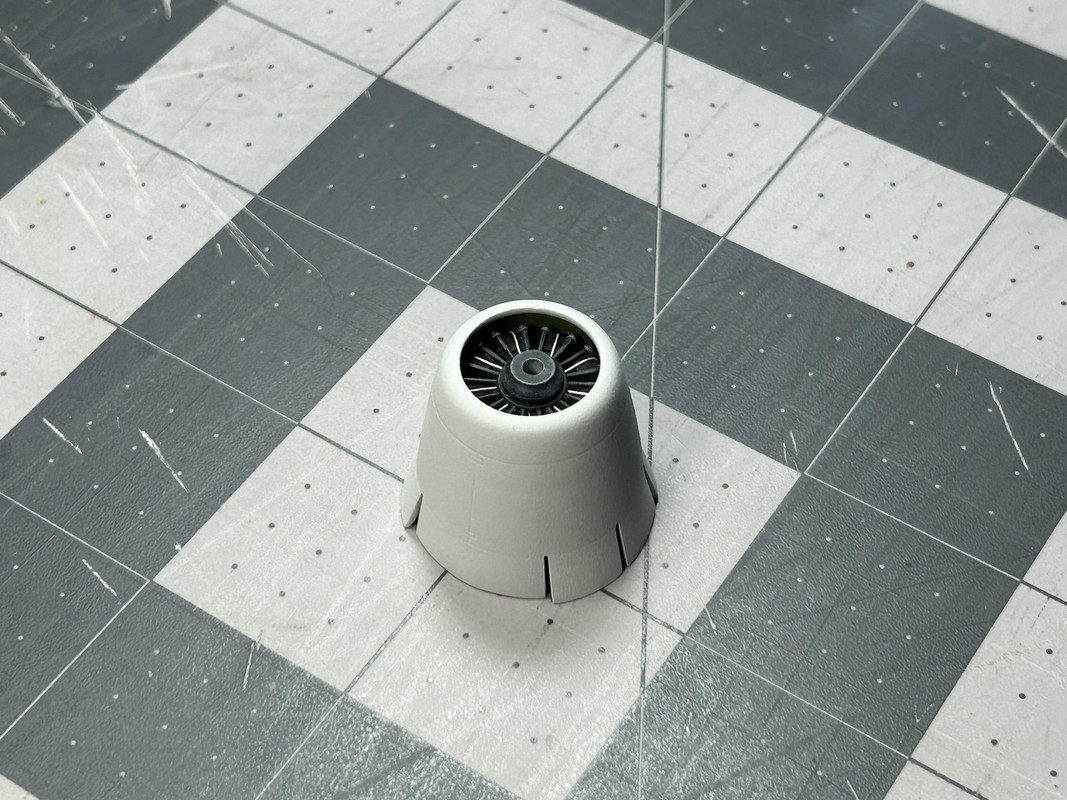
Figure 143: The engine was glued inside the cowling after the cowling was painted.
Figures 144 and 145: The landing gear door lines that were sanded away earlier needed to be added back on. This was accomplished by masking off where the lines needed to be, then using a sharpened pencil lead to carefully draw them back on.
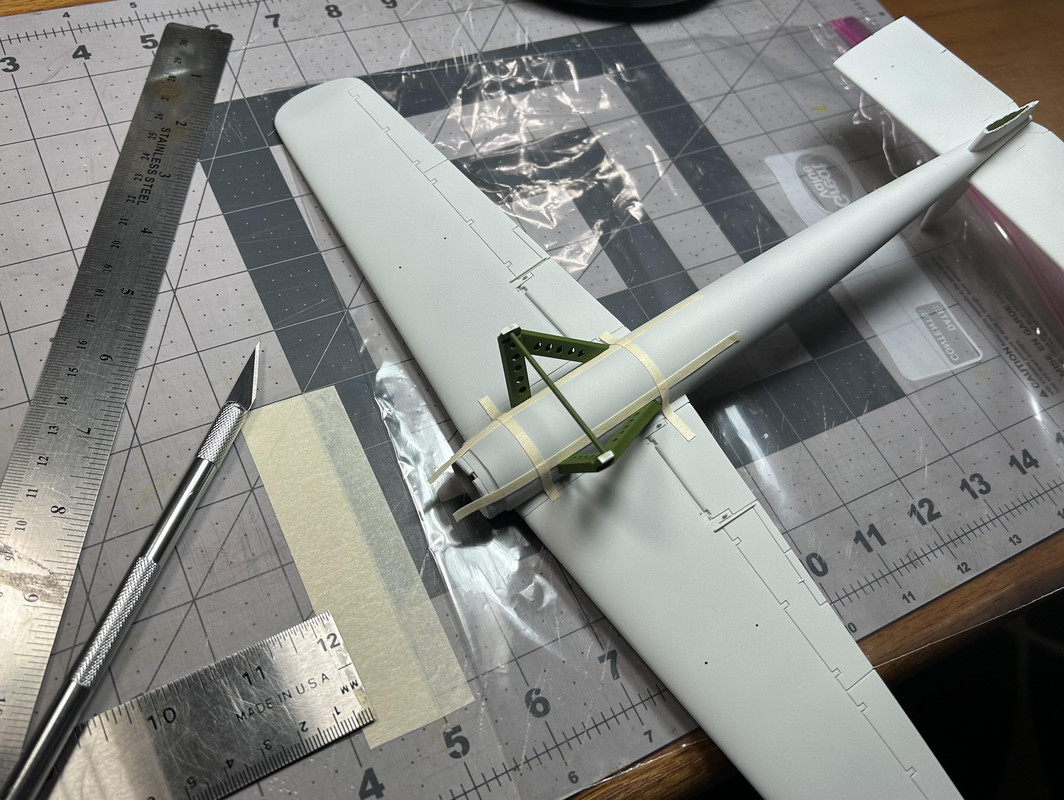
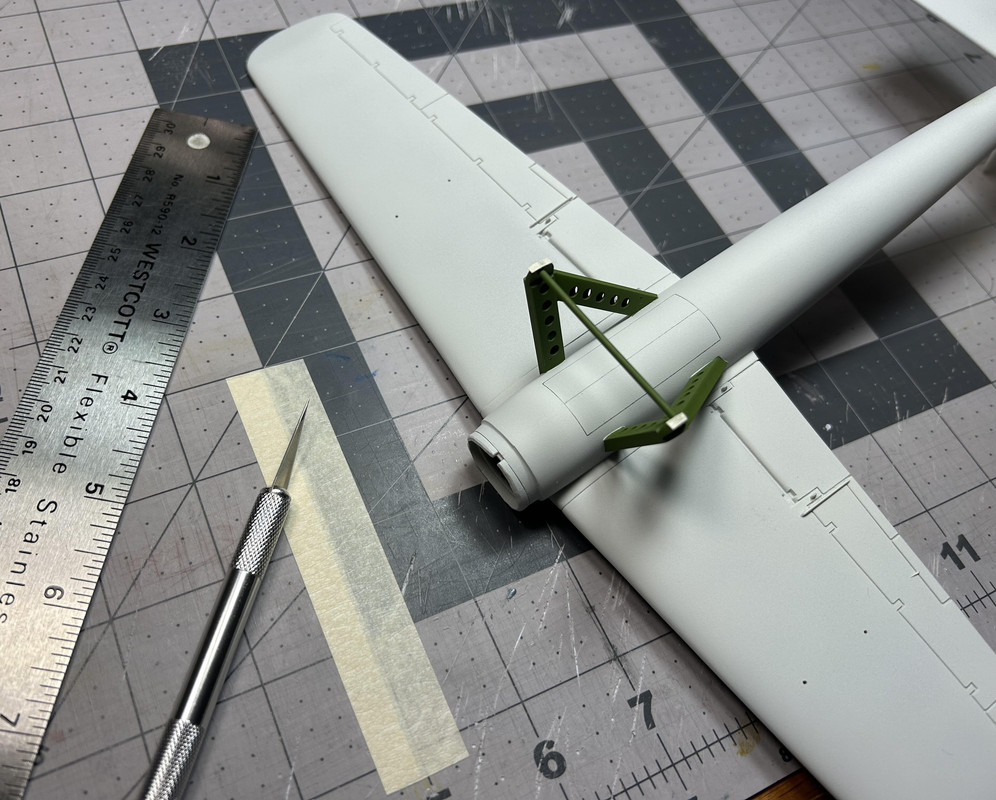
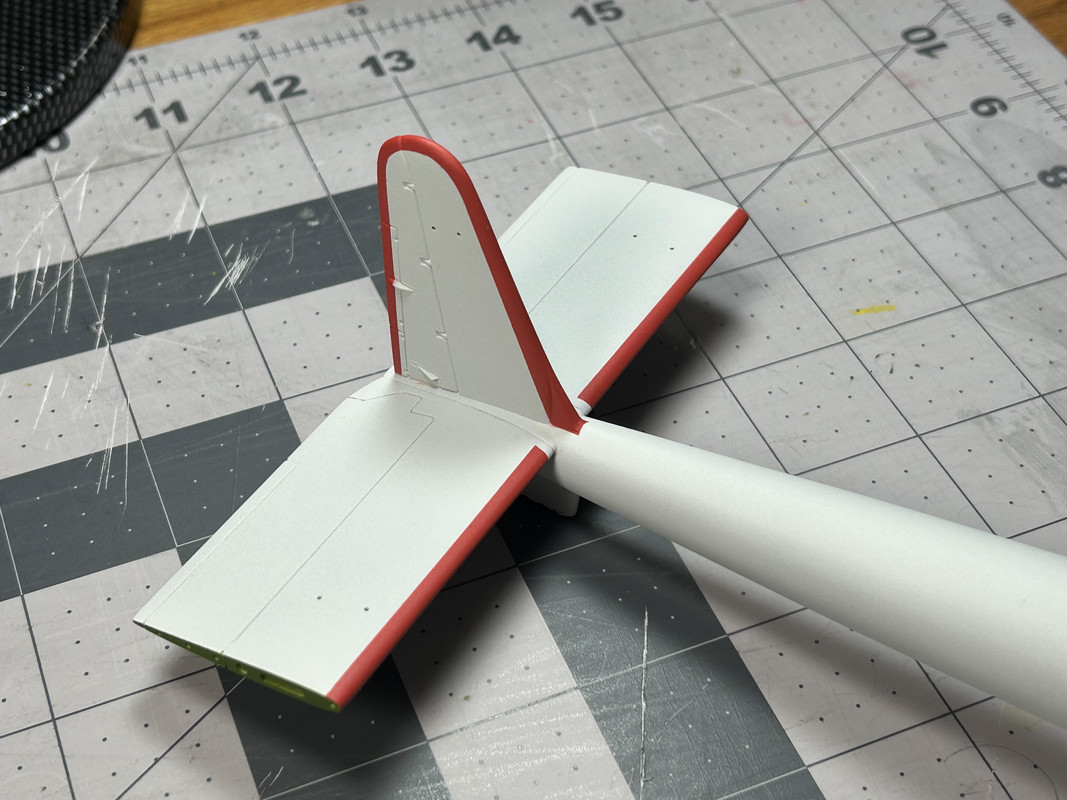
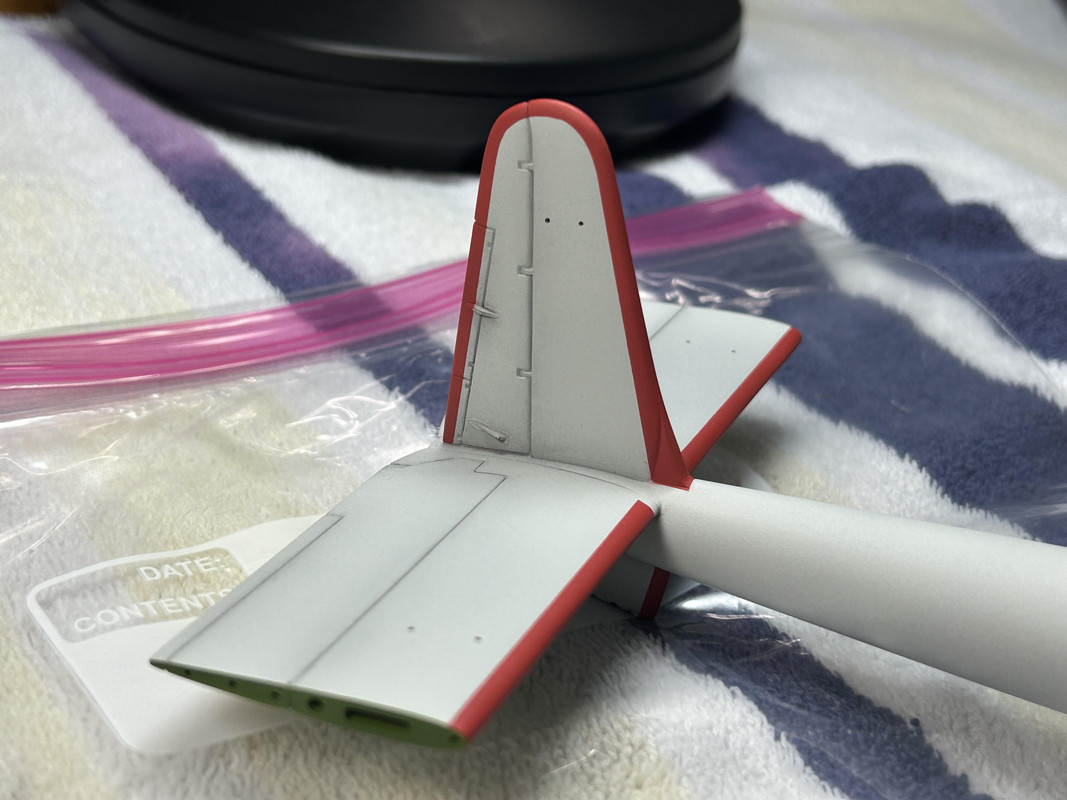
Figure 146: The horizontal and vertical stabilizers were masked off and the trim markings painted. For this color Testors Flat Grapefruit (1196) was used, which is a dull, washed out red.
Figures 147 and 148: Masking and painting the cowling trim marking came next.
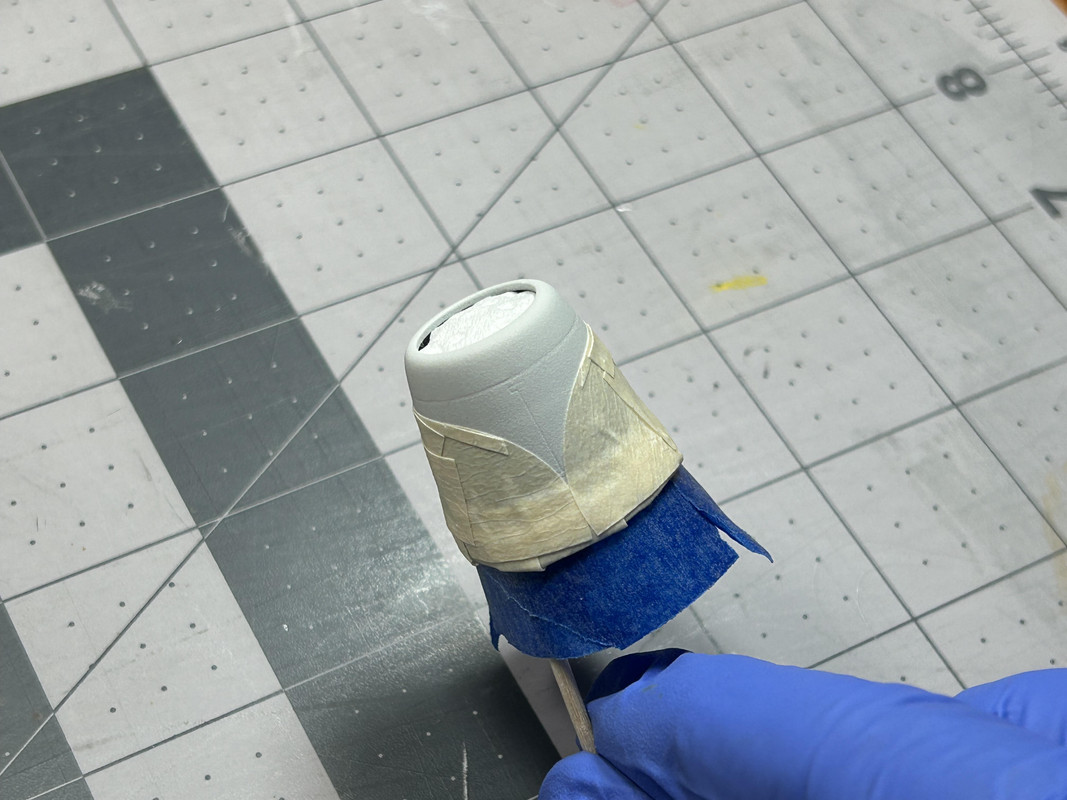
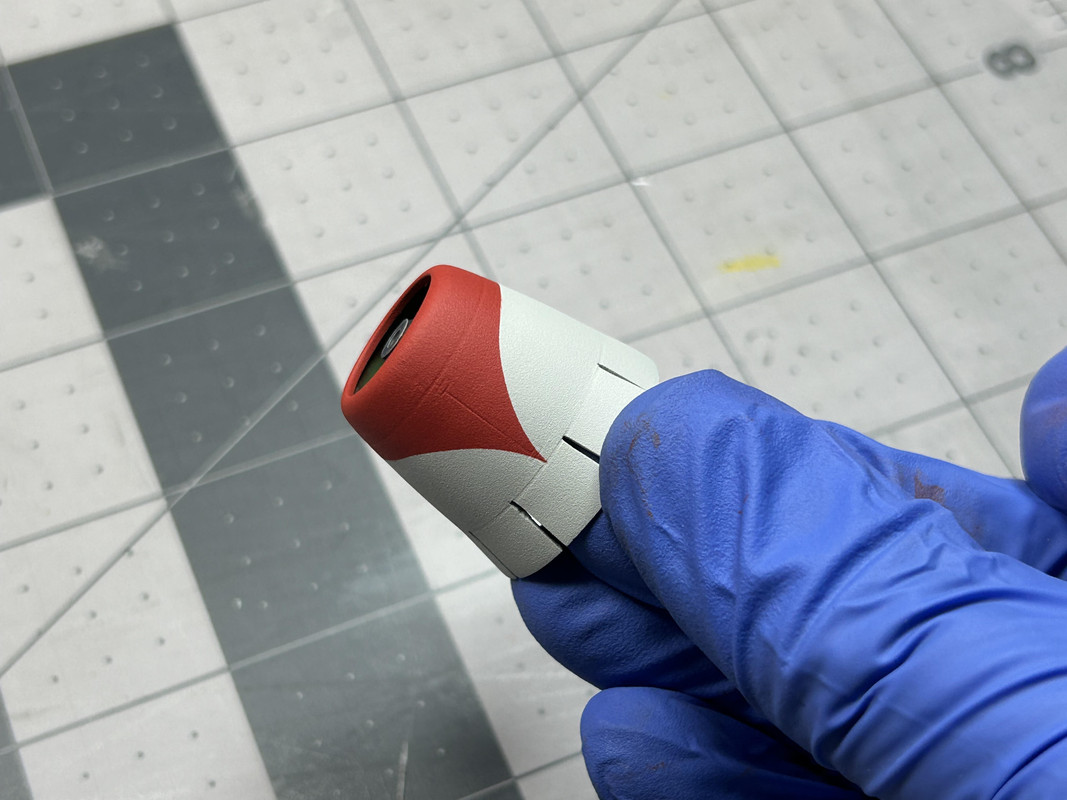
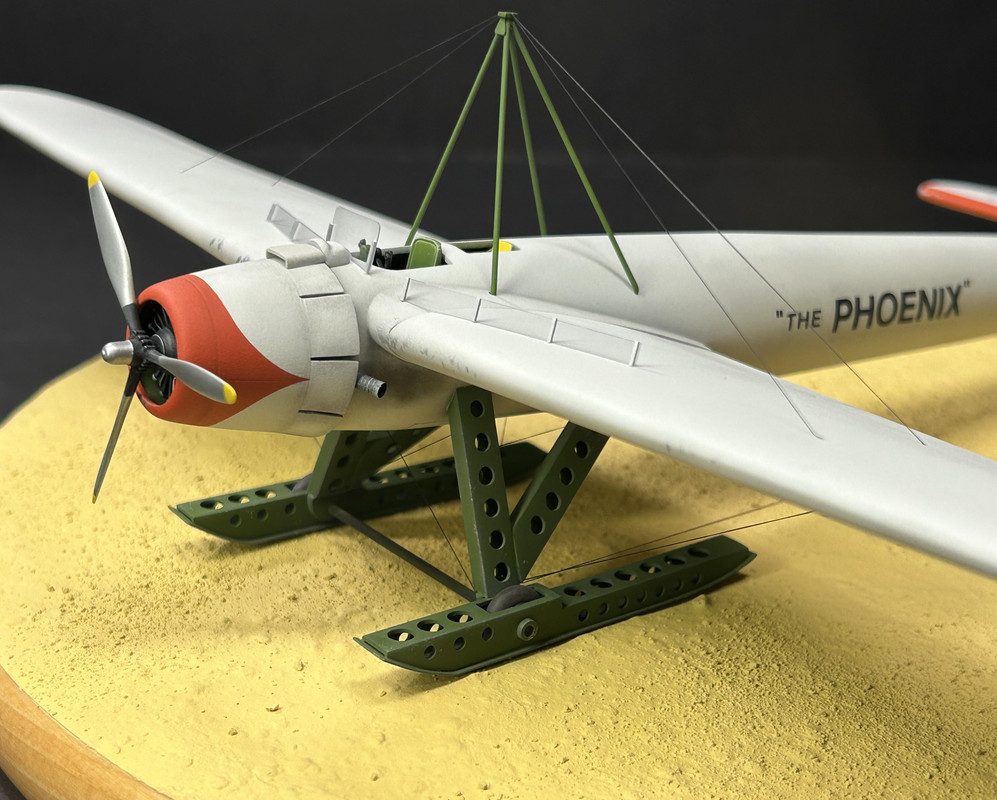
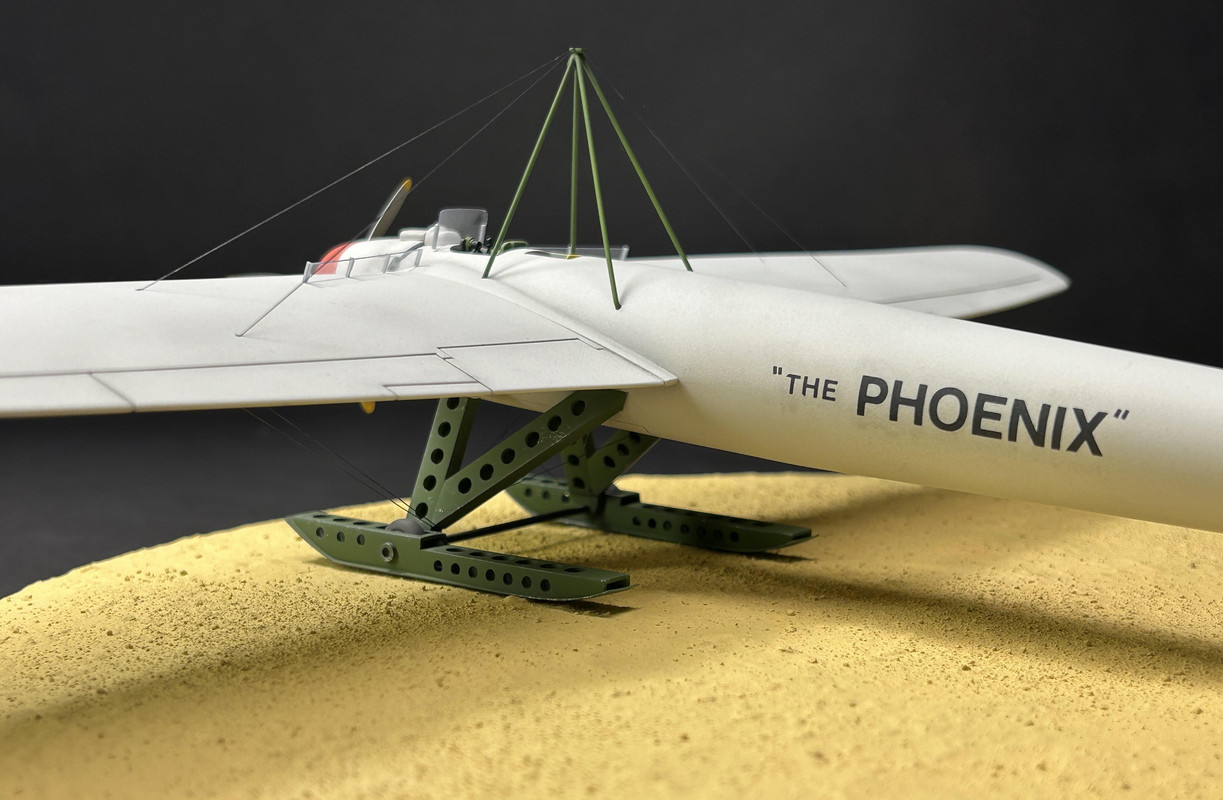
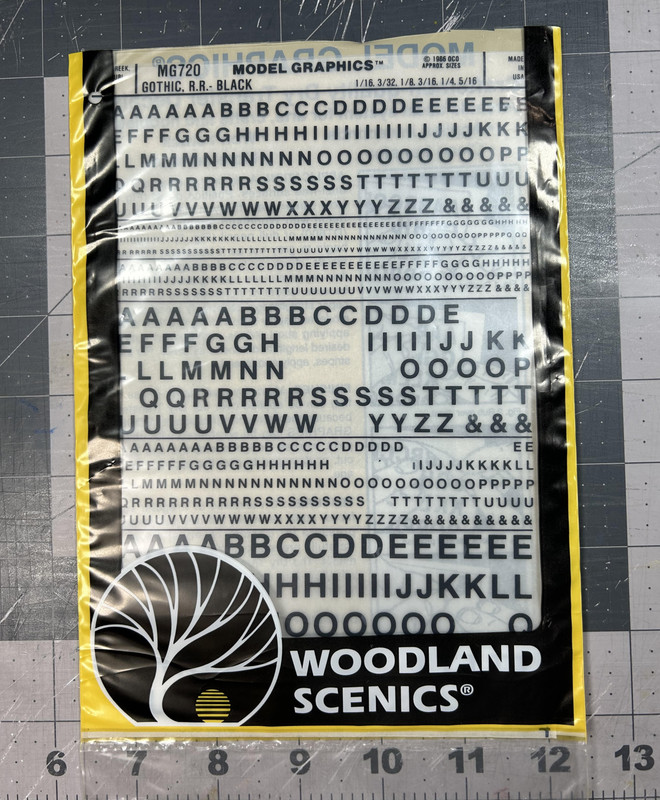
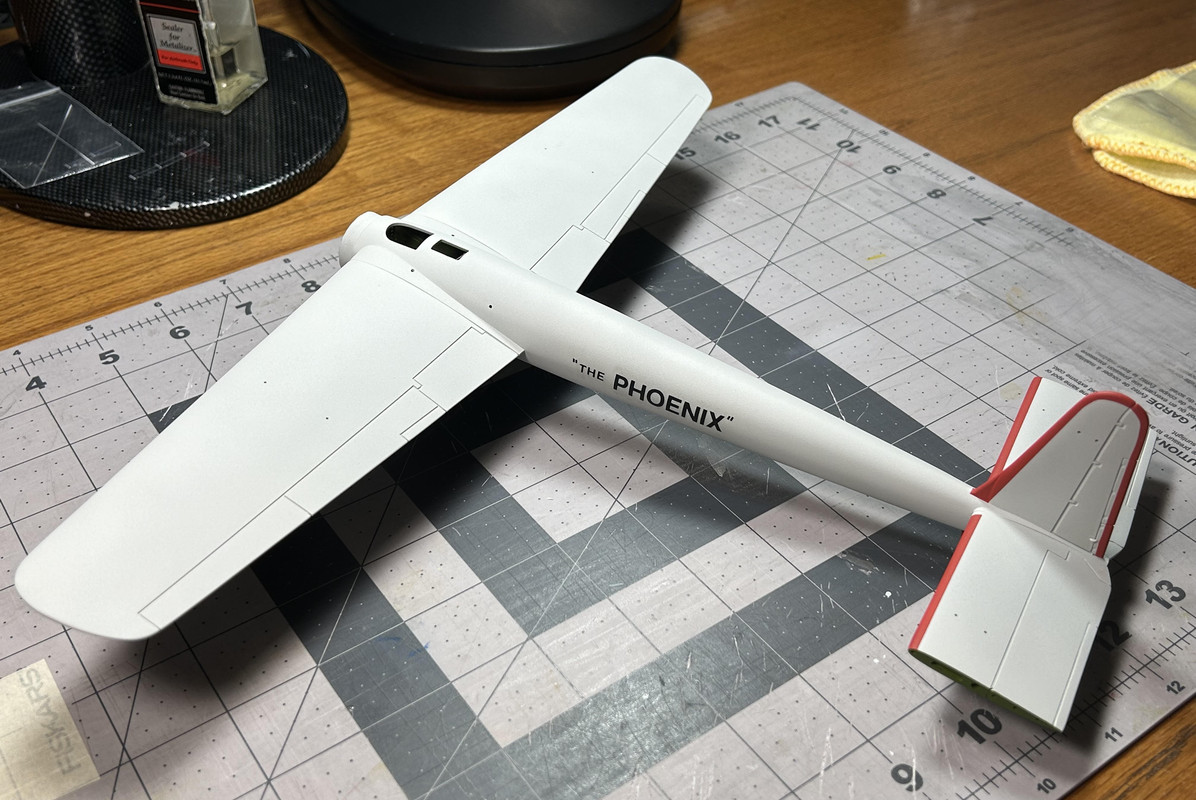
Figure 149: Time to apply the decals! The only ones added were “THE PHOENIX” letters on both sides of the fuselage. For this I used Model Graphics dry transfers (#MG720) that were first burnished down on clear decal film.
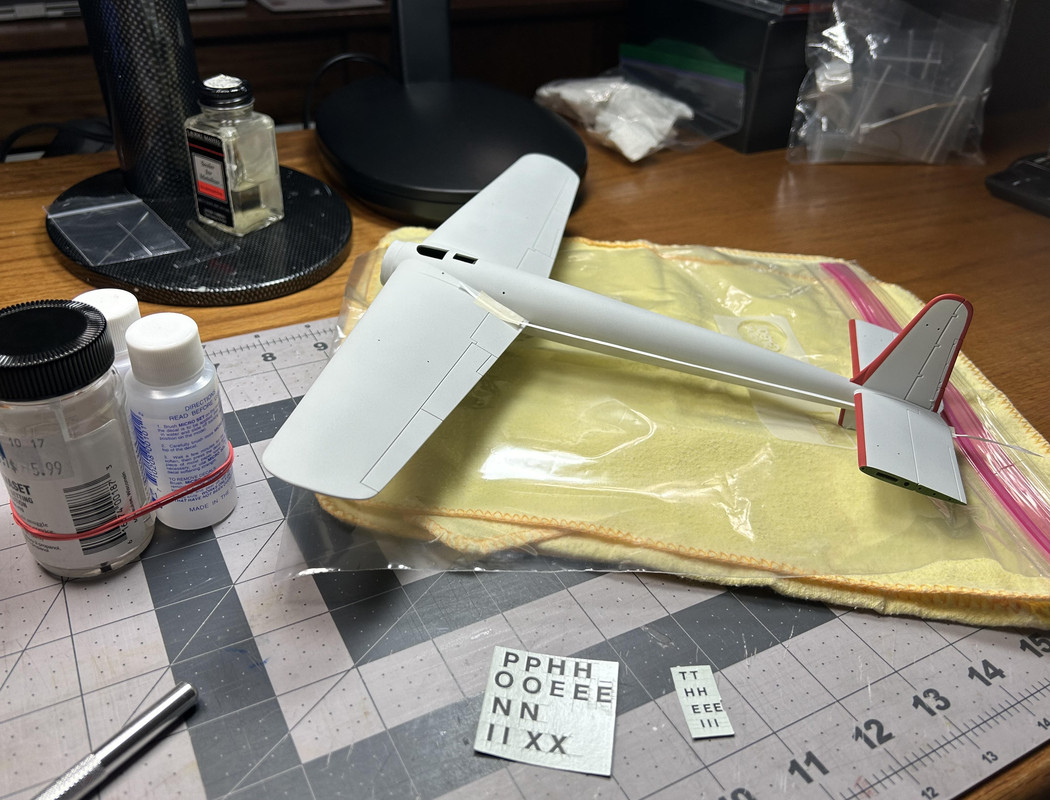
Figures 150 and 151: Before the decals were applied a piece of dental floss was taped across the length of the fuselage in a straight line, which made lining up the decals much easier.
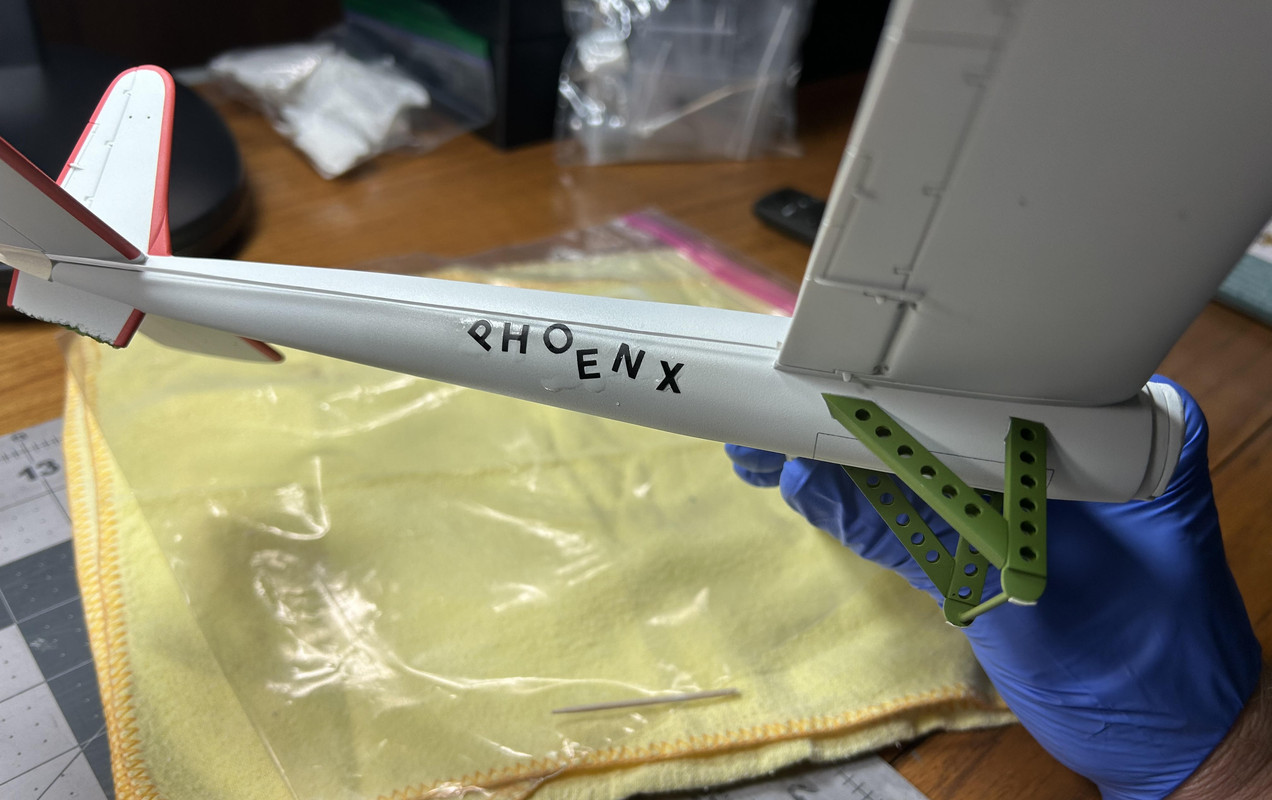
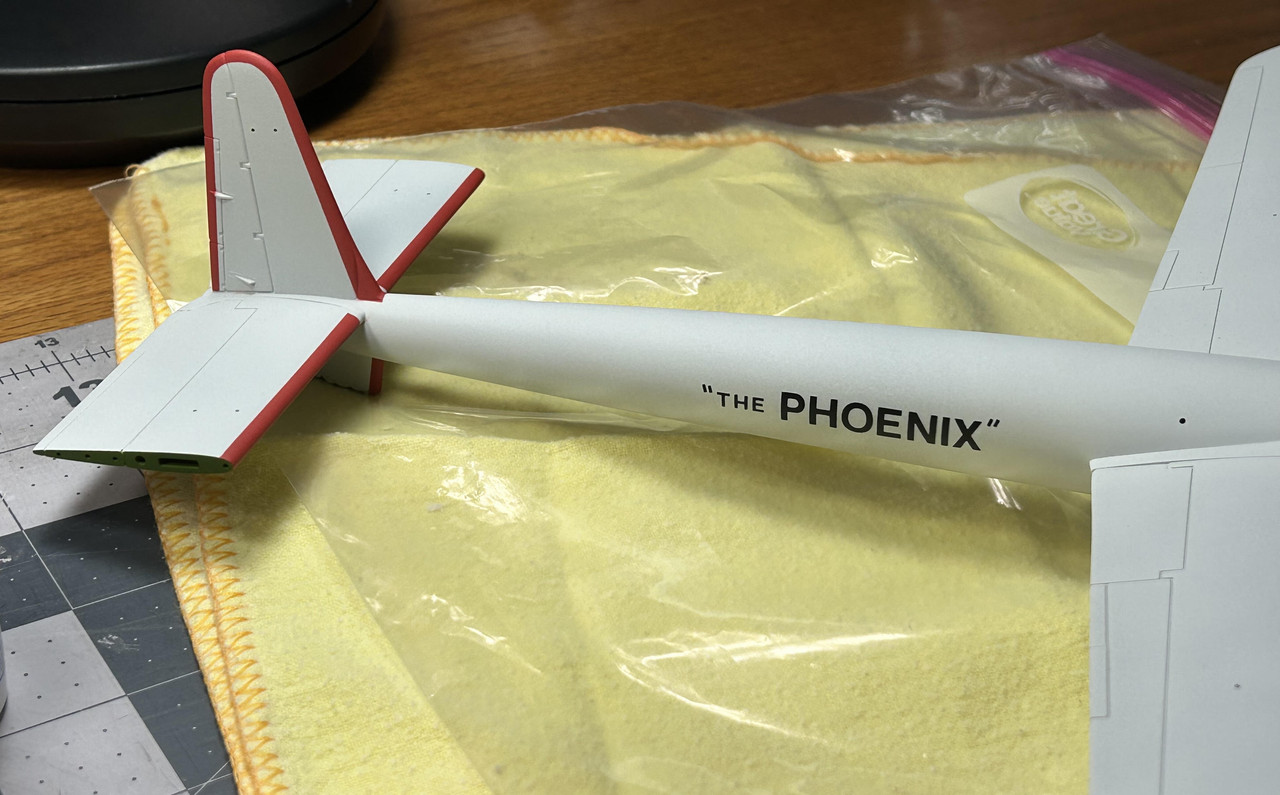
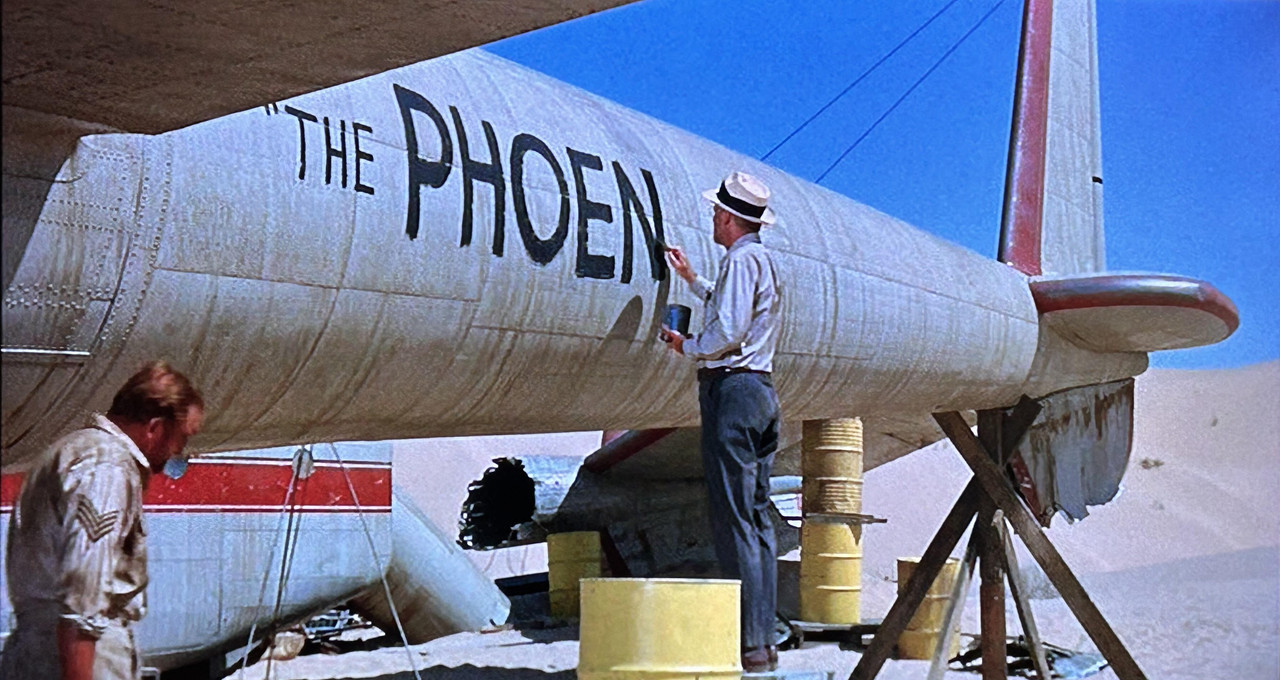
Figures 152 through 153a: These photos show the decals after final application and being over-sprayed with Dullcote. The last image is a movie still showing the Phoenix lettering being applied.
Figures 154 and 155: The next step is weathering. First, dark gray pastel dust was applied in the horizontal/vertical stabilizer recessed lines with a small, pointed brush, then the excess dust was blown away. Next, a soft, thick brush spread and blended the dust to the surrounding areas.
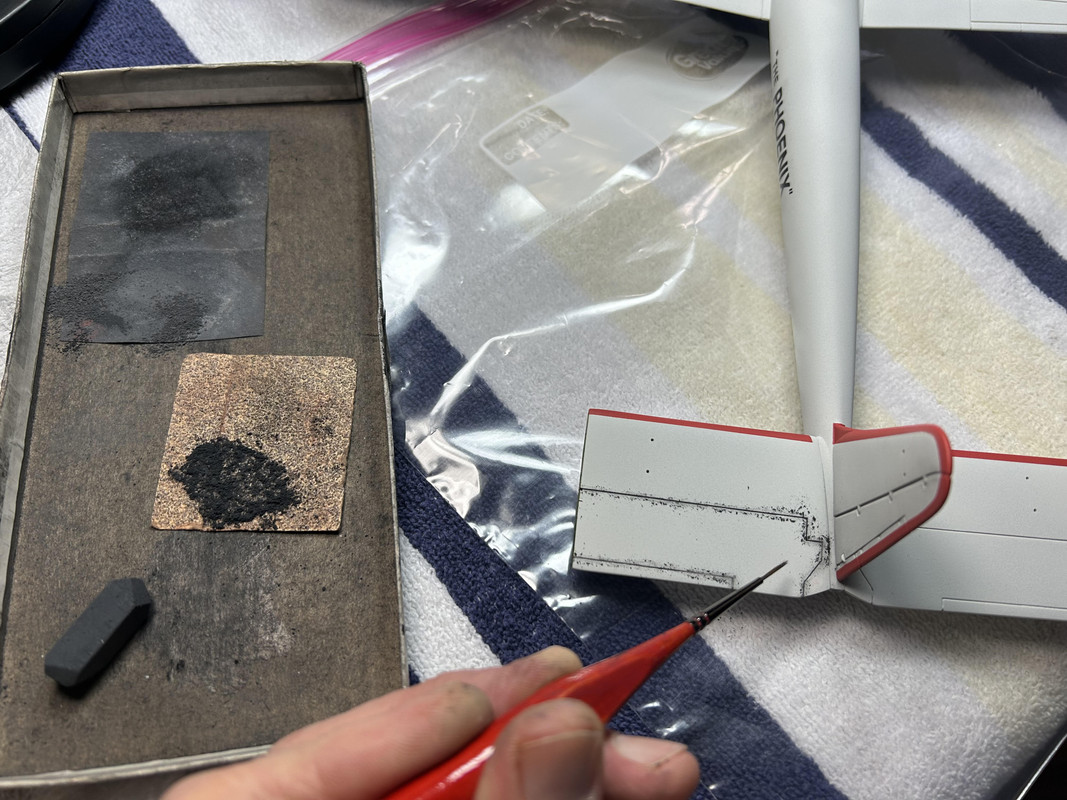
Figures 157 and 158: Next, the same steps were used on the flap and aileron recessed lines.
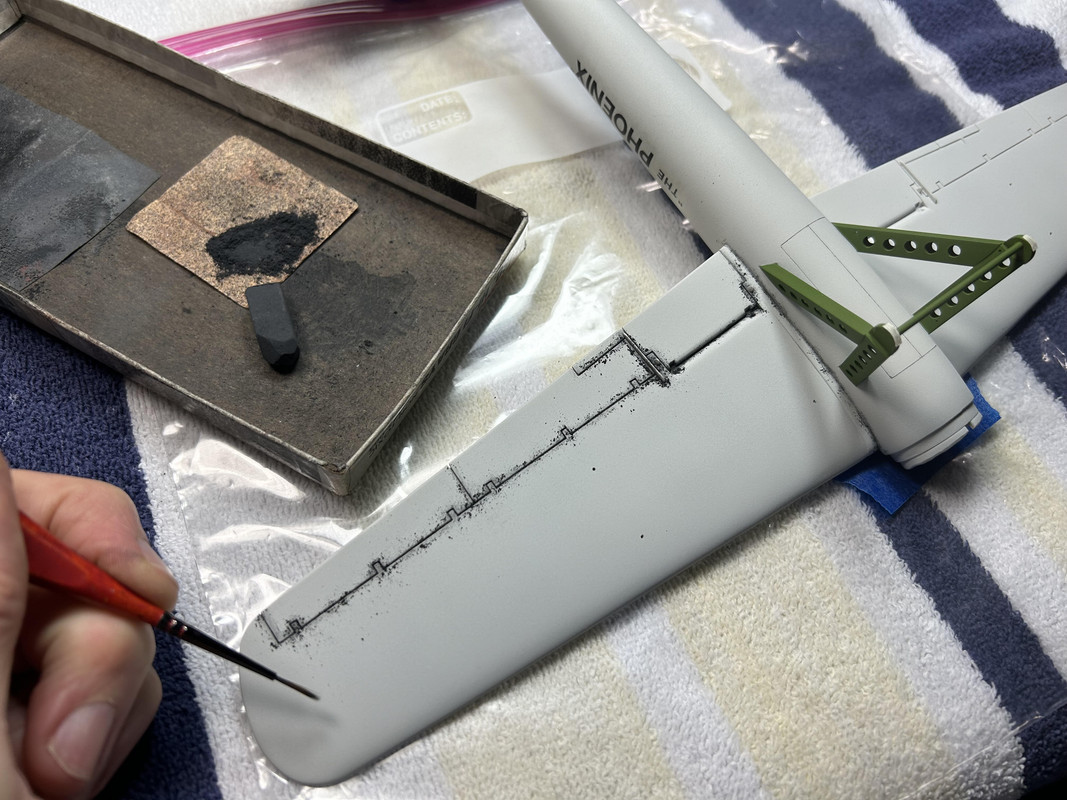
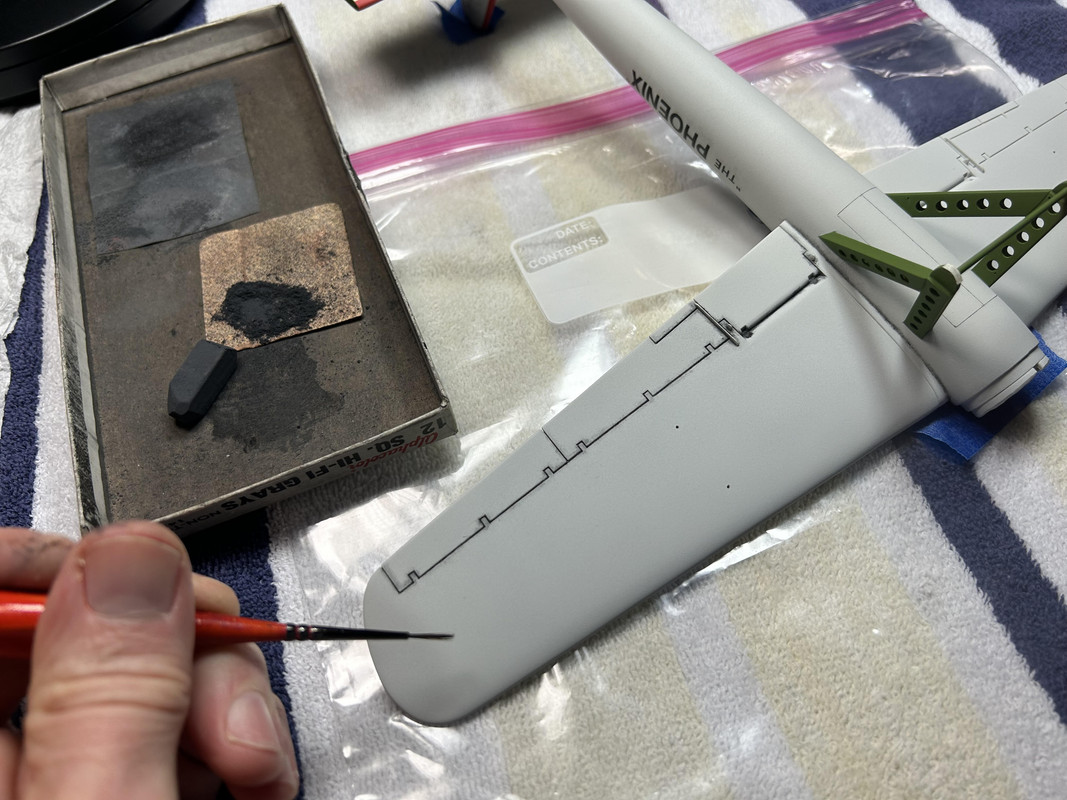
Figures 159 and 160: Finally, medium gray pastel dust was burnished in at random (with the soft, thick brush) over the entire assembly to vary the color and produce a dirty and grimy look.
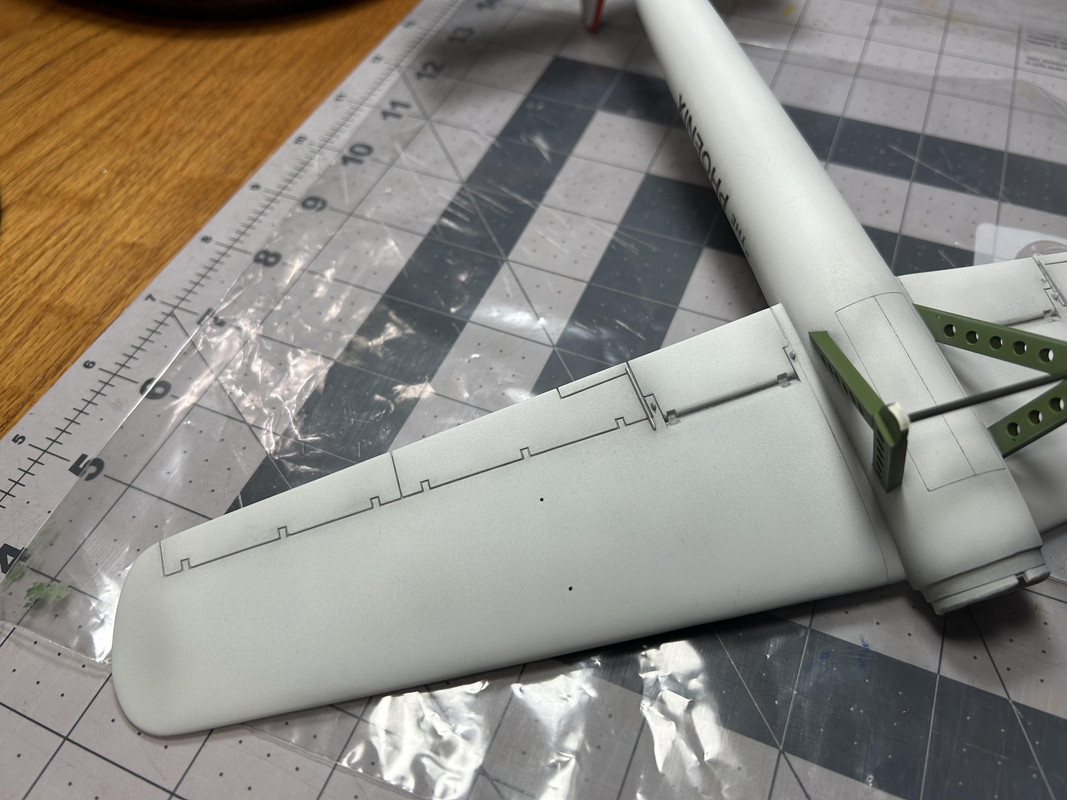
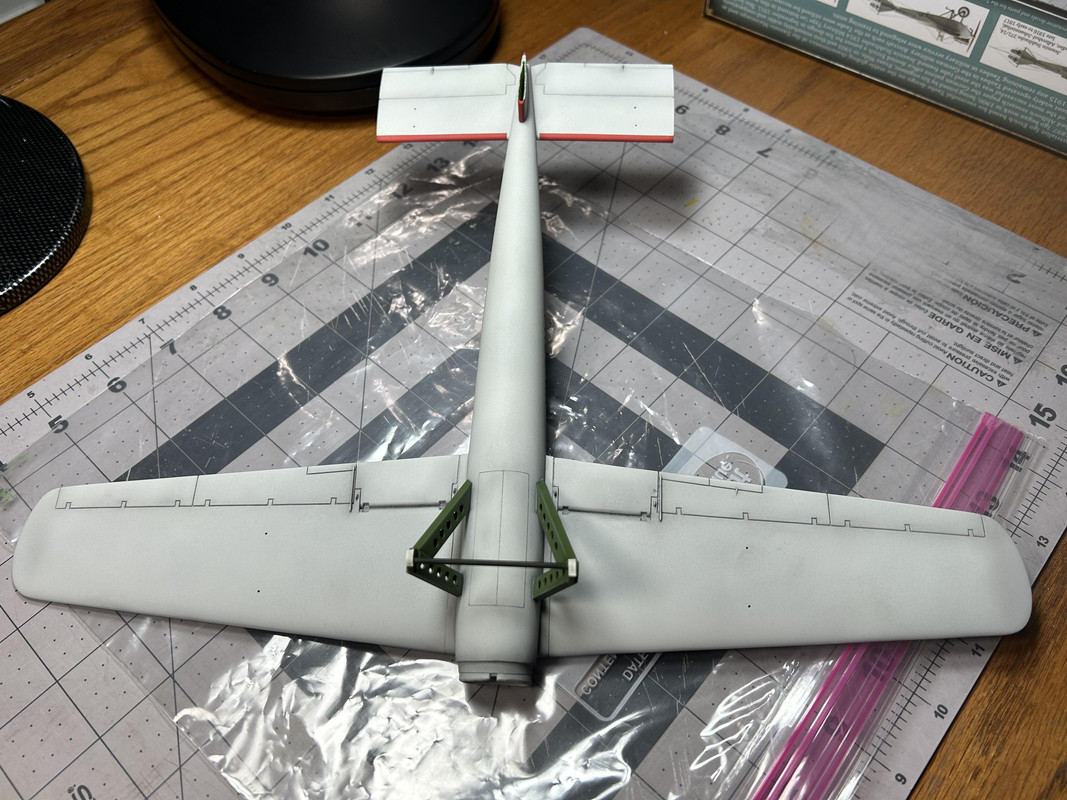
Figures 162 and 163: The bright fluorescent lights used on my workbench kind of washout the weathering effect so these two photos were taken in another room with weaker lights. The overall color shows up too dark but the varied, marbling finish comes across clearer.
Until next time...
Phillip1
Re: Progress Build of the Phoenix Airplane from The Flight of the Phoenix Movie (1965)
Posted: Thu Nov 07, 2024 3:12 am
by digger303
Re: Progress Build of the Phoenix Airplane from The Flight of the Phoenix Movie (1965)
Posted: Thu Nov 07, 2024 6:11 am
by cor
thats some nice work
Re: Progress Build of the Phoenix Airplane from The Flight of the Phoenix Movie (1965)
Posted: Thu Nov 07, 2024 3:24 pm
by Phillip1
digger303/cor-Thanks!
Phillip1
Re: Progress Build of the Phoenix Airplane from The Flight of the Phoenix Movie (1965)
Posted: Sun Nov 10, 2024 4:06 pm
by Phillip1
Fellow Modelers-Additional weathering and sub-assembly work are included in this post.
Figure 164: To represent metal paint chipping, Model Master Aluminum paint and torn pieces of a sponge were used.
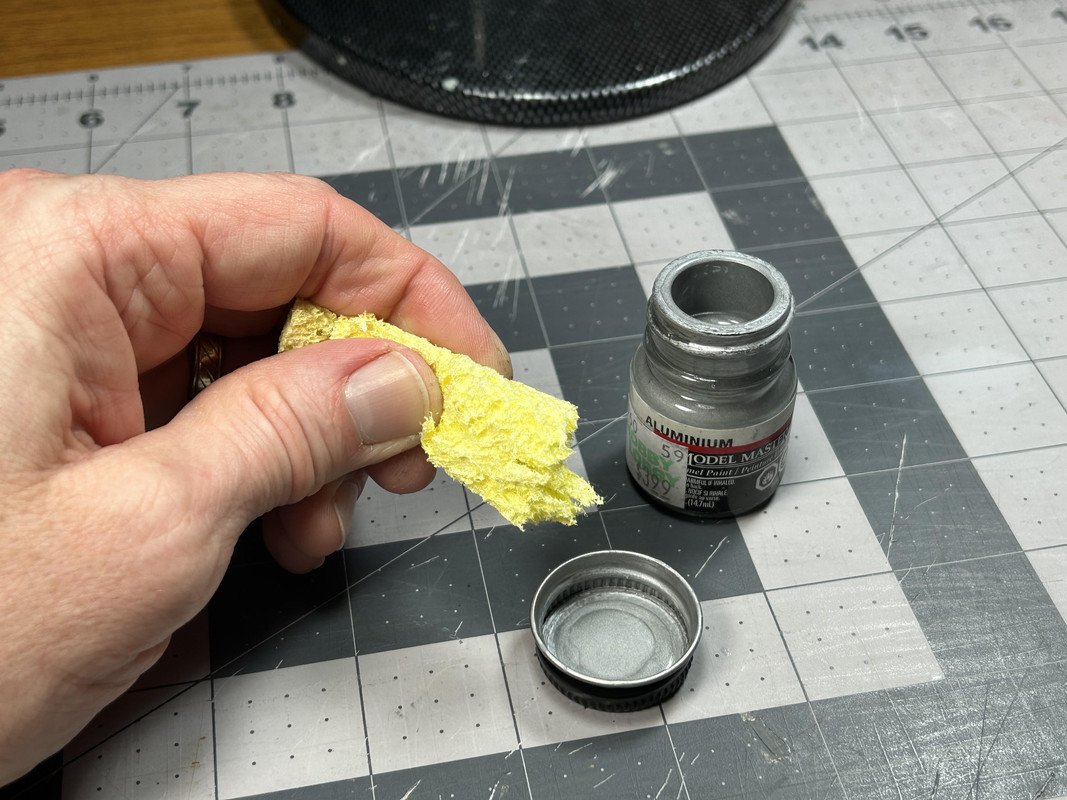
Figure 165: Chipping on the wing leading edges was added around the propeller arc area.
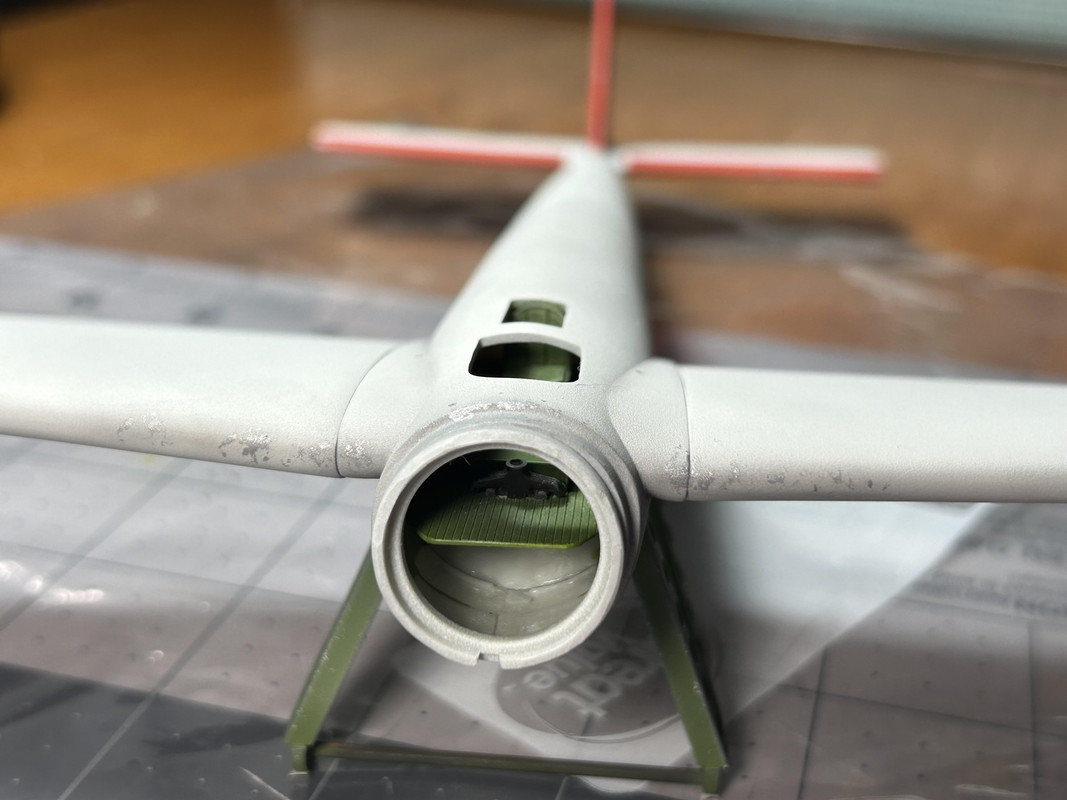
Figure 166: Minor chipping was added to the leading edges of the horizontal and vertical stabilizers.
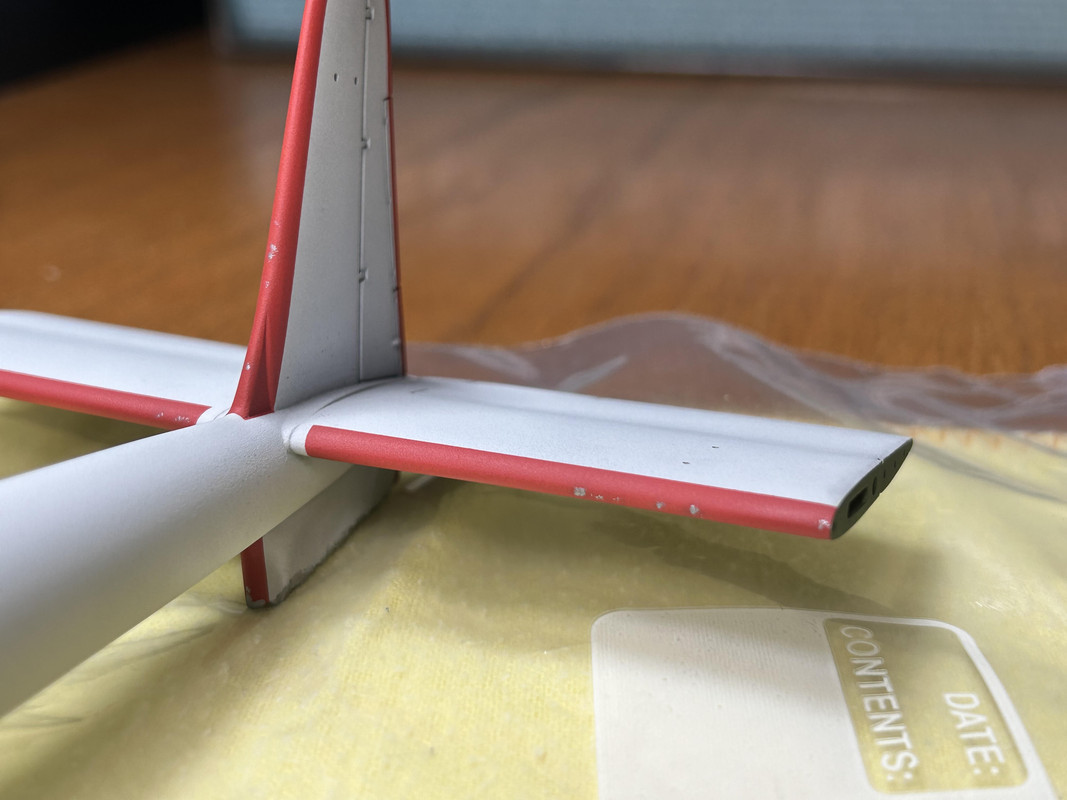
Figure 167: The support legs were also given chipping marks. Note that black pastel dust was burnished in with a Q-tip near the front of the fuselage to represent engine exhaust deposits.
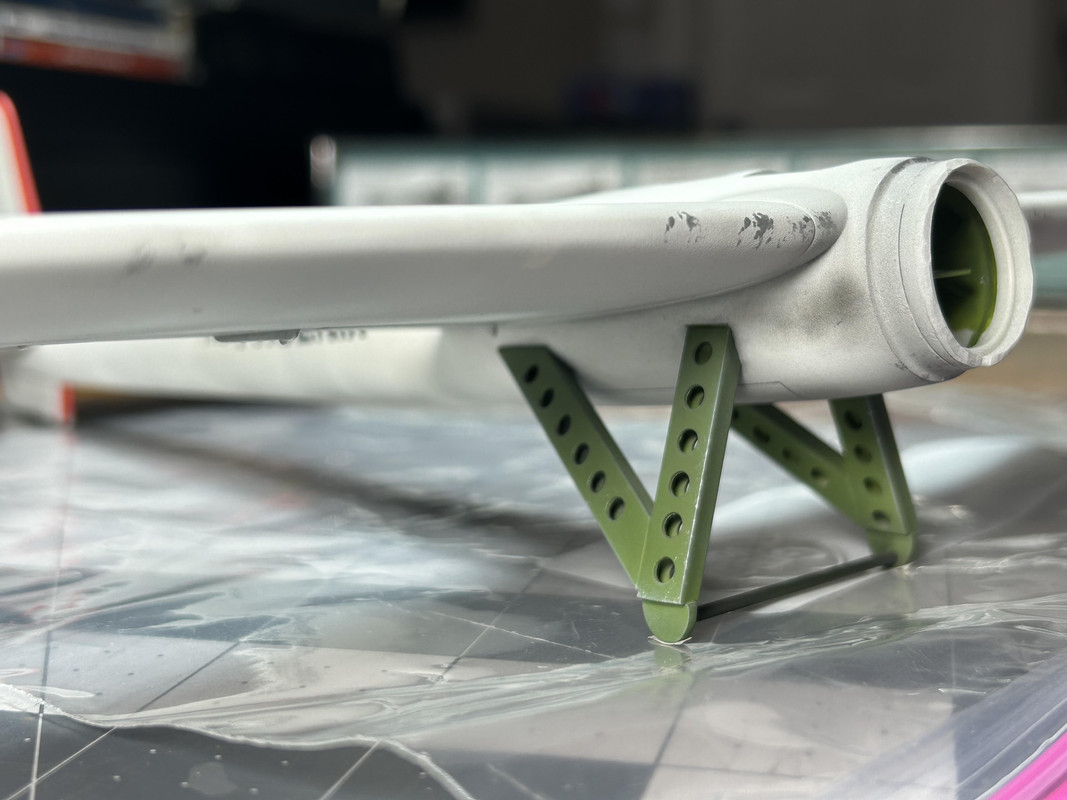
Figure 168: The skis are shown after getting their metal chipping treatment.
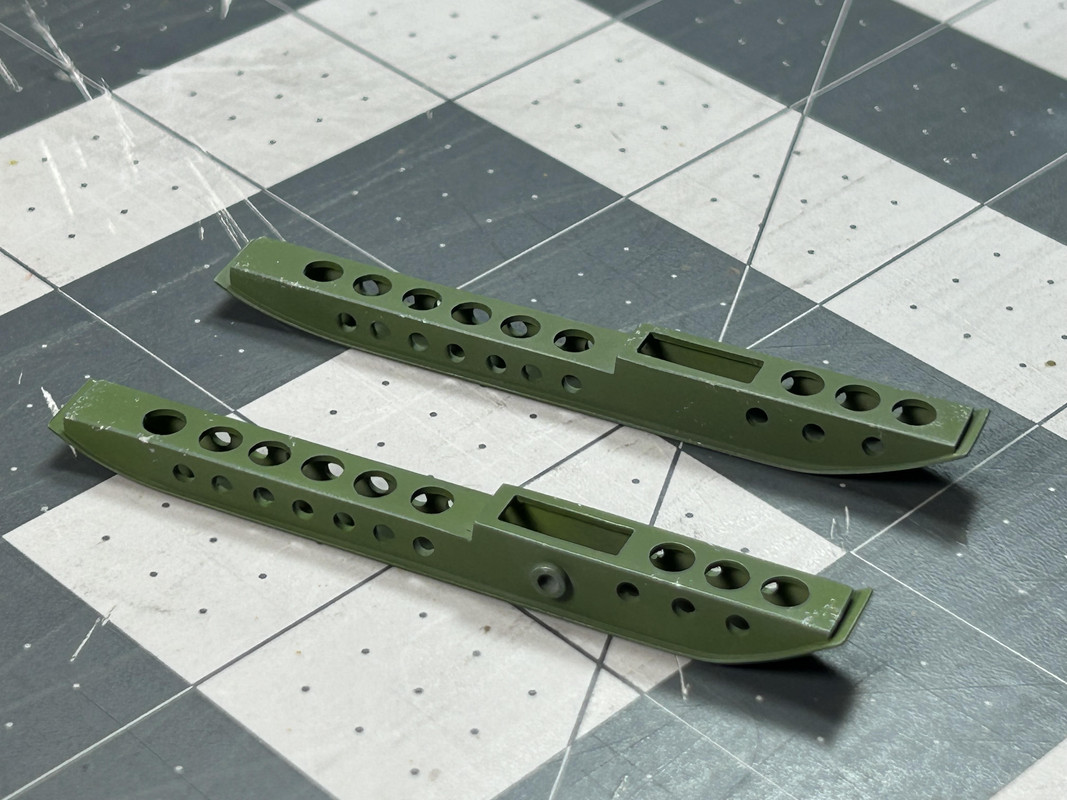
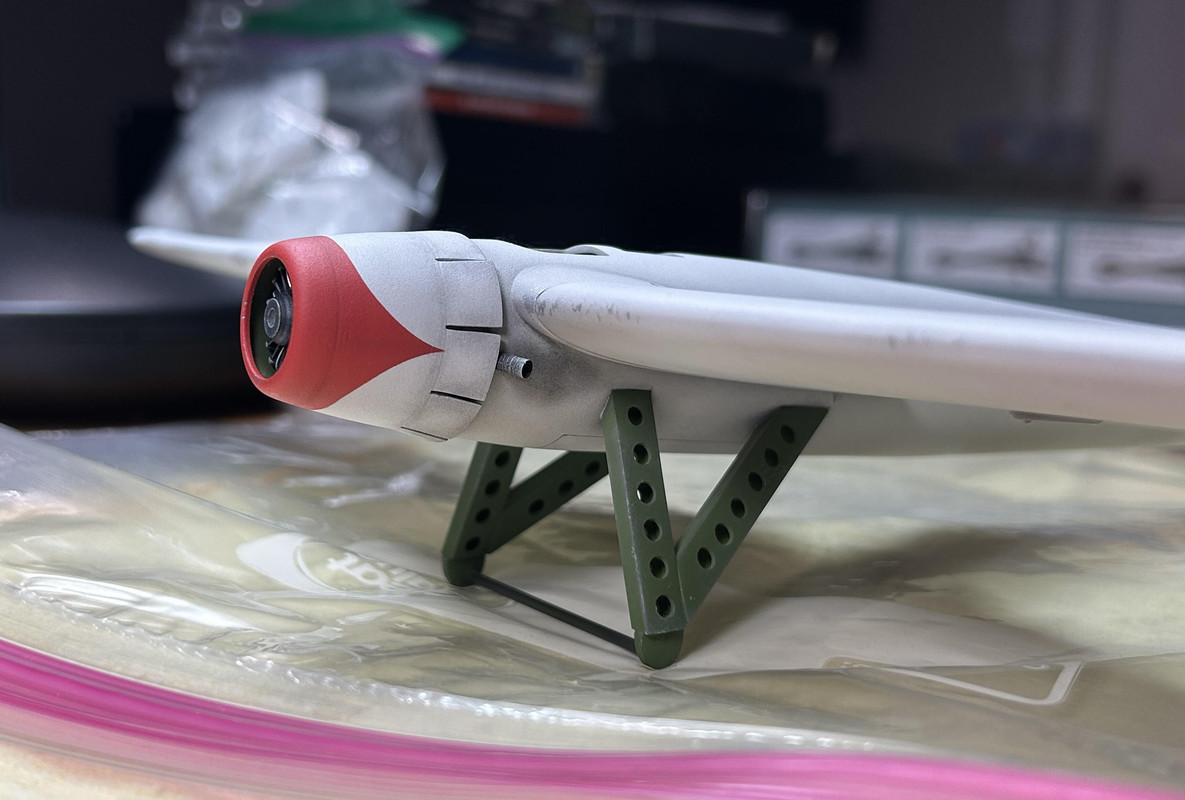
Figure 169: The cowling was given the dark and medium gray pastel dust treatment then permanently glued to the fuselage.
Figures 170 through 171a: The first two photos show the airframe assembly after the skis were permanently glued in place with 5-Minute Epoxy. The last image is a really crisp and sharp movie still of the Phoenix that I just recently found.
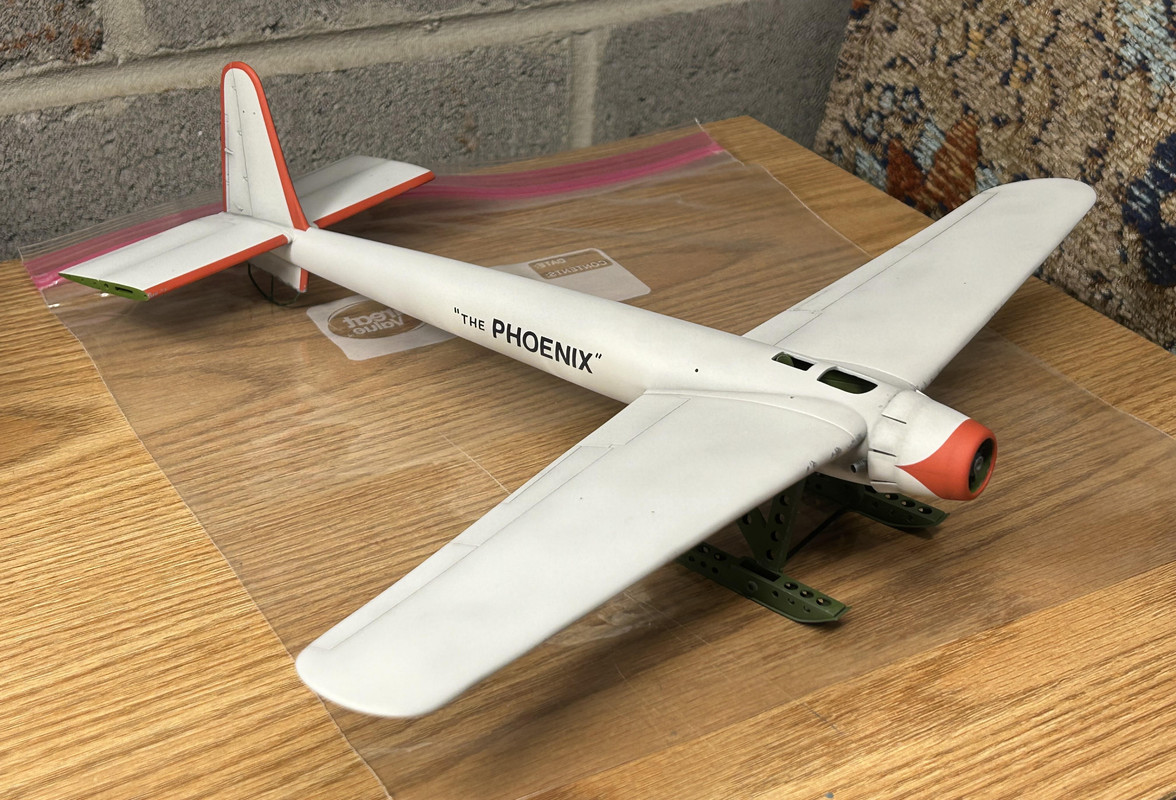
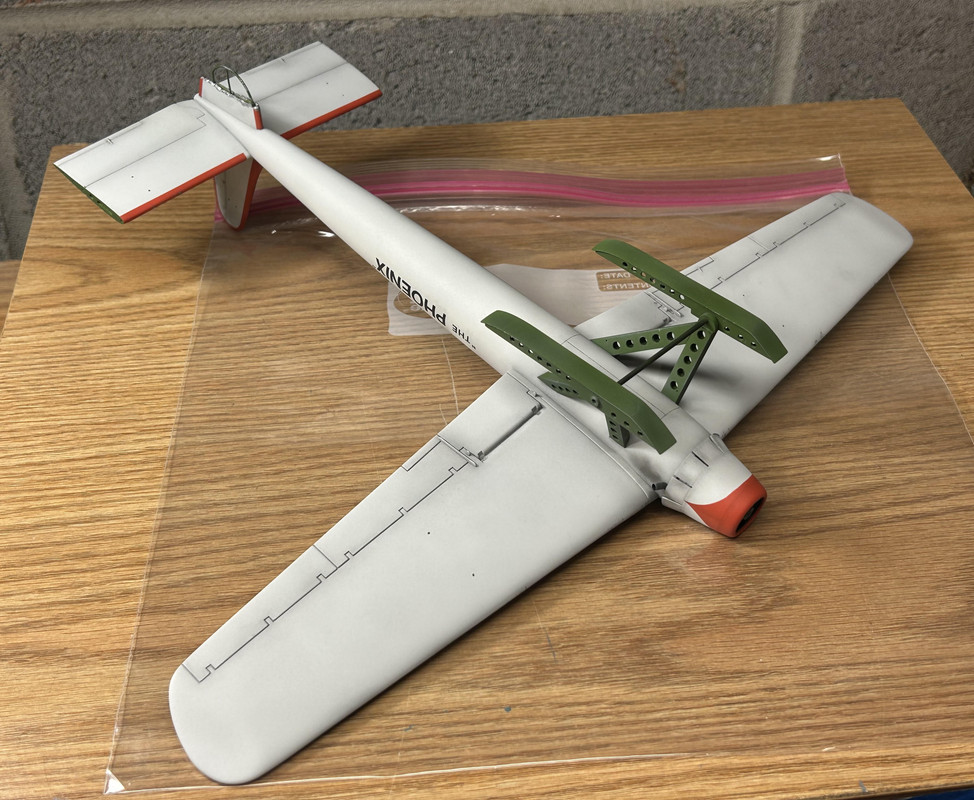
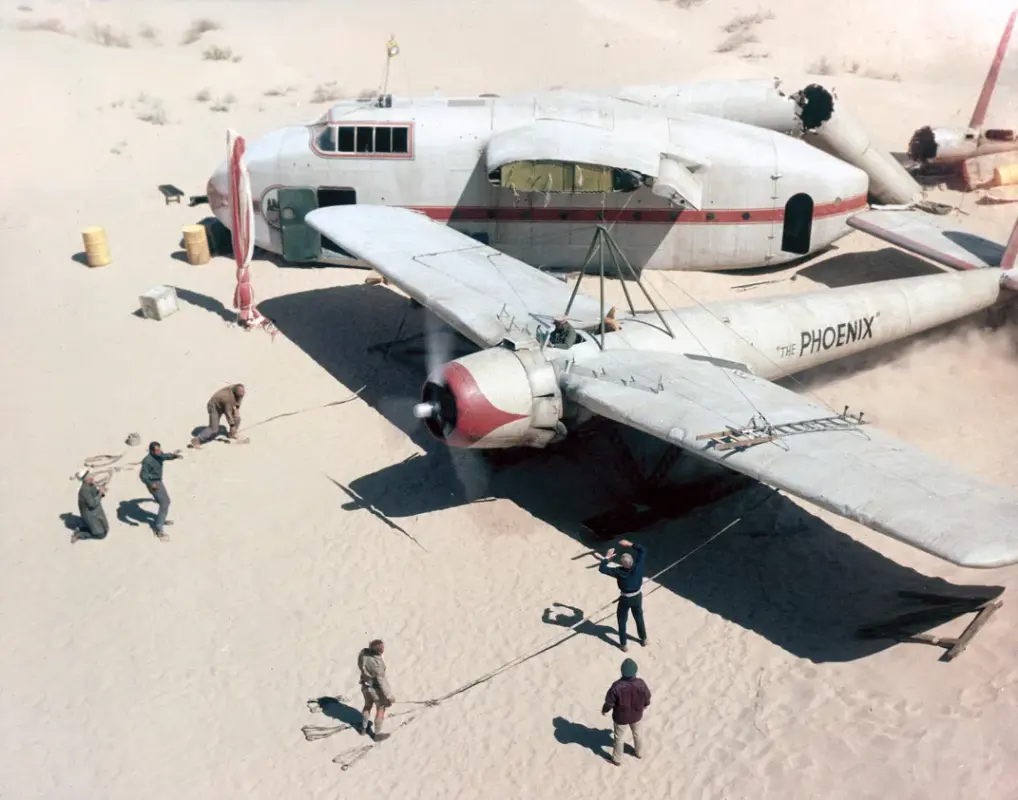
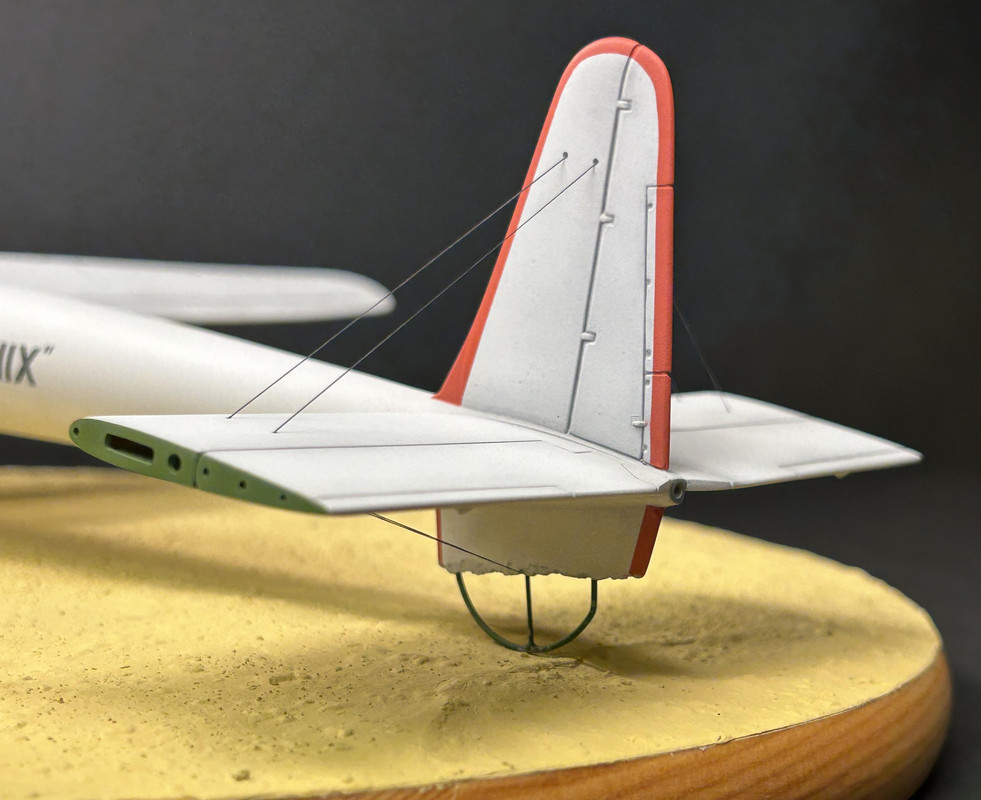
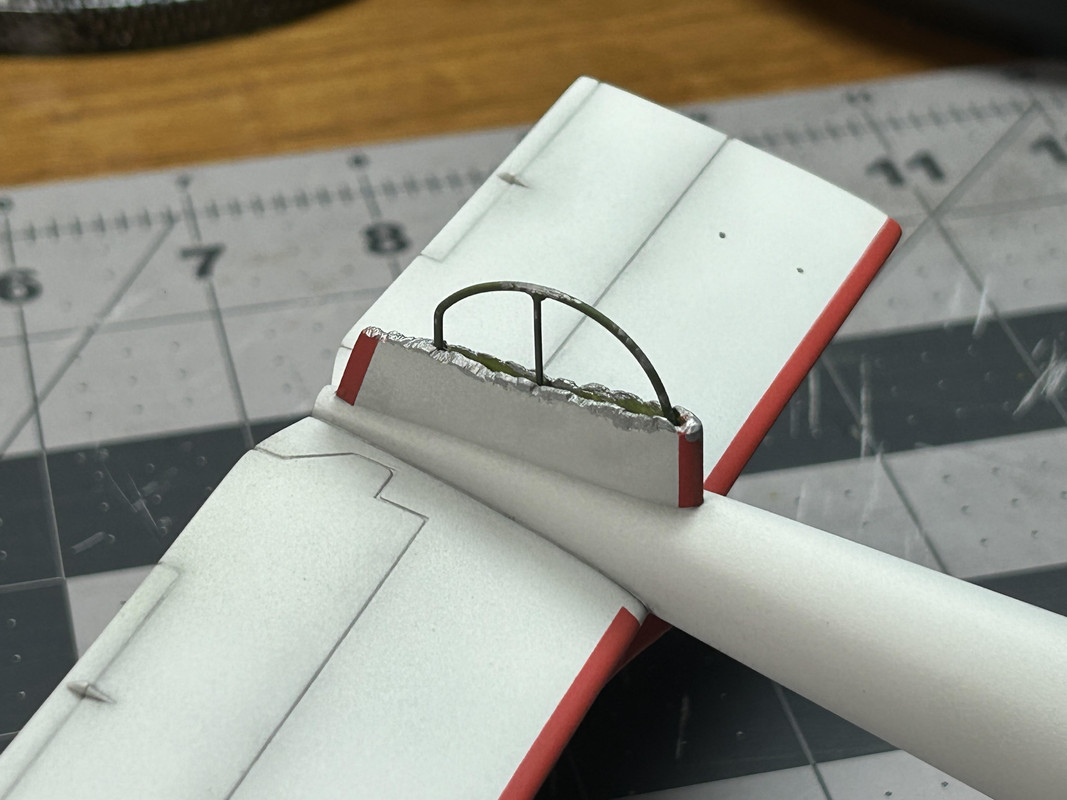
Figure 172: Here is a close up view of the finished tailskid assembly.
Until next time...
Phillip1
Re: Progress Build of the Phoenix Airplane from The Flight of the Phoenix Movie (1965)
Posted: Mon Nov 11, 2024 11:48 am
by digger303
Re: Progress Build of the Phoenix Airplane from The Flight of the Phoenix Movie (1965)
Posted: Tue Nov 12, 2024 2:12 pm
by Phillip1
digger303-In the movie there is a conversation between characters Morand and Dorfmann about the machinery and equipment being carried by the airplane (i.e., welding machines/torches/cables/winches, etc.) and why they were being removed from the oil rig site since "they were in good working order". I think this was put in the script so the audience could understand the airplane was was carrying a lot of the tools and materials required for the rebuild.
Phillip1
Re: Progress Build of the Phoenix Airplane from The Flight of the Phoenix Movie (1965)
Posted: Wed Nov 13, 2024 5:20 am
by digger303
Phillip1 wrote: Tue Nov 12, 2024 2:12 pm
digger303-In the movie there is a conversation between characters Morand and Dorfmann about the machinery and equipment being carried by the airplane (i.e., welding machines/torches/cables/winches, etc.) and why they were being removed from the oil rig site since "they were in good working order". I think this was put in the script so the audience could understand the airplane was was carrying a lot of the tools and materials required for the rebuild.
Phillip1
Ok. It's been a very long time since I watched that movie. I only said that because on any new job I have started there has always been something I've forgotten or didn't think of. Not to mention the amount of food and water for that many people. Hey though it's a movie a story entertain not to be nit picked to death by me.
Regardless of all that you have some great skills to bring it all together nicely.

Re: Progress Build of the Phoenix Airplane from The Flight of the Phoenix Movie (1965)
Posted: Wed Nov 13, 2024 4:22 pm
by Phillip1
digger303-Lack of water was one of the biggest obstacles the survivors faced and the movie focused on it a lot.
Phillip1
Re: Progress Build of the Phoenix Airplane from The Flight of the Phoenix Movie (1965)
Posted: Fri Nov 15, 2024 2:31 pm
by Phillip1
Fellow Modelers-Guy wire rigging, windshield fairing assembly and creating a desert landscape complete the last work in progress post.
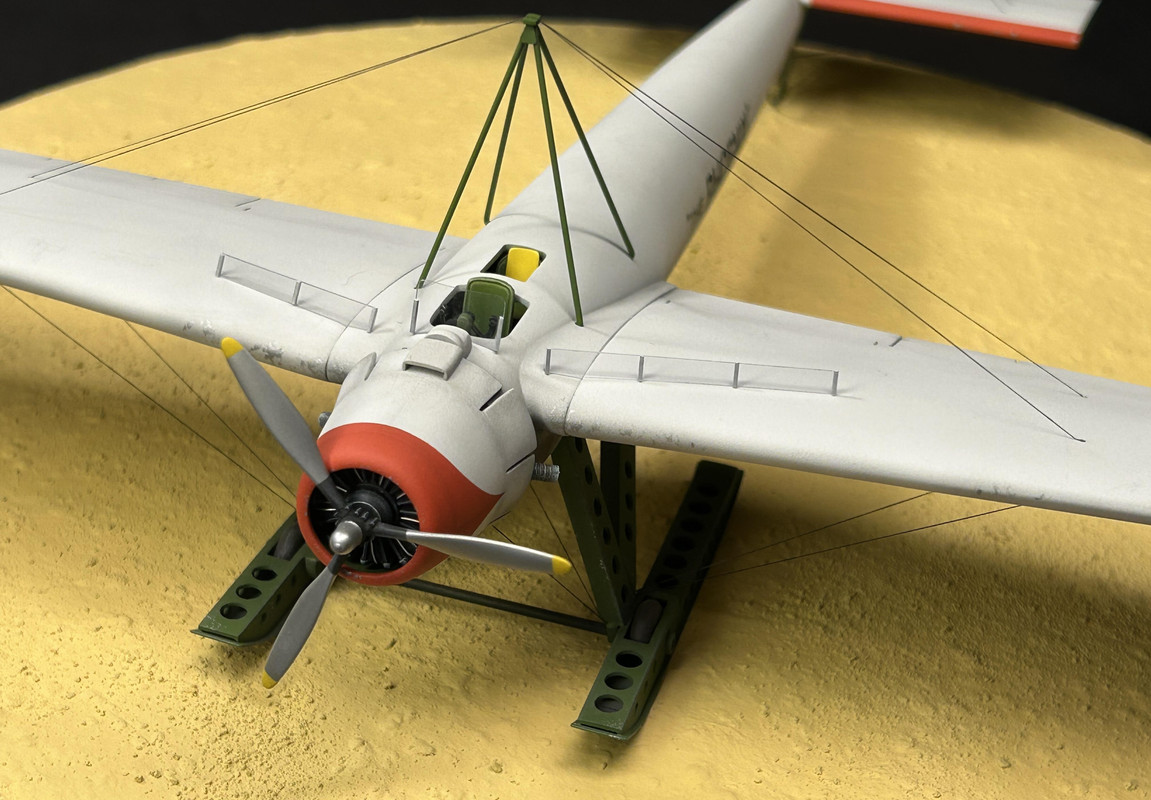
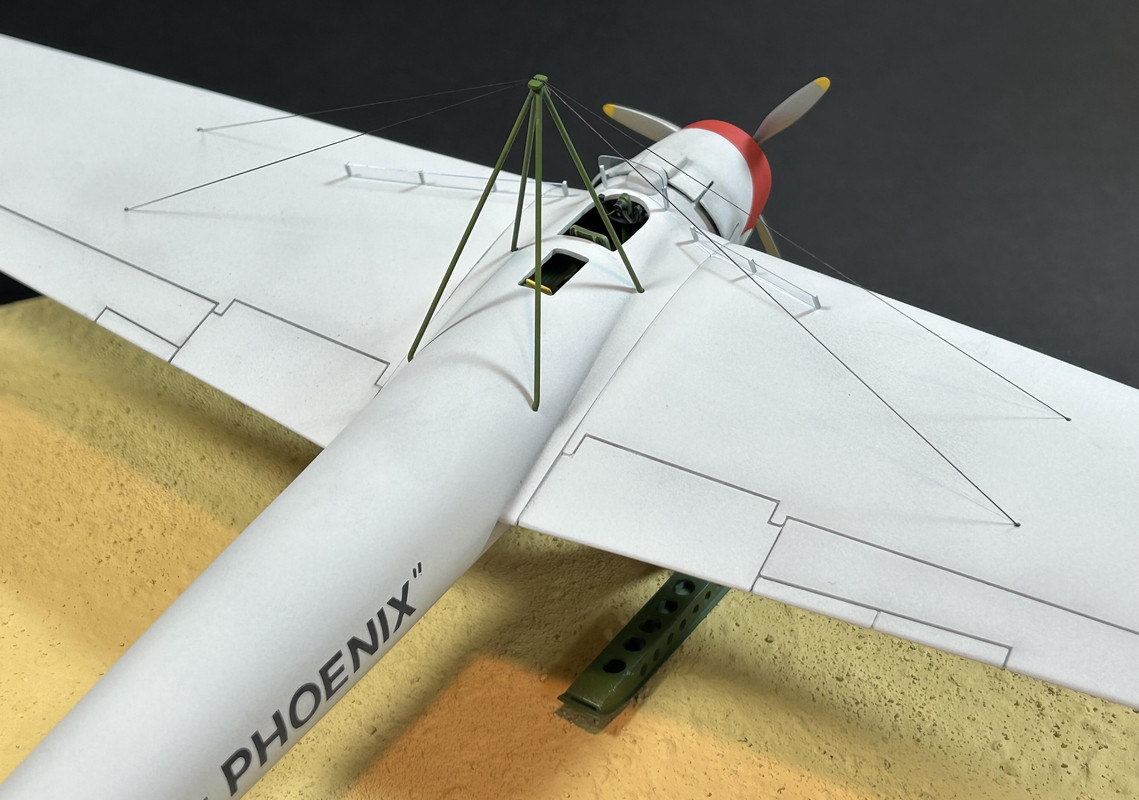
Figures 173 through 176: EZ Line black fine was used to rig all the guy wires. The lower side wires were rigged first, since the cabane struts will have to be in place on the upper side before the wing wires can be installed.
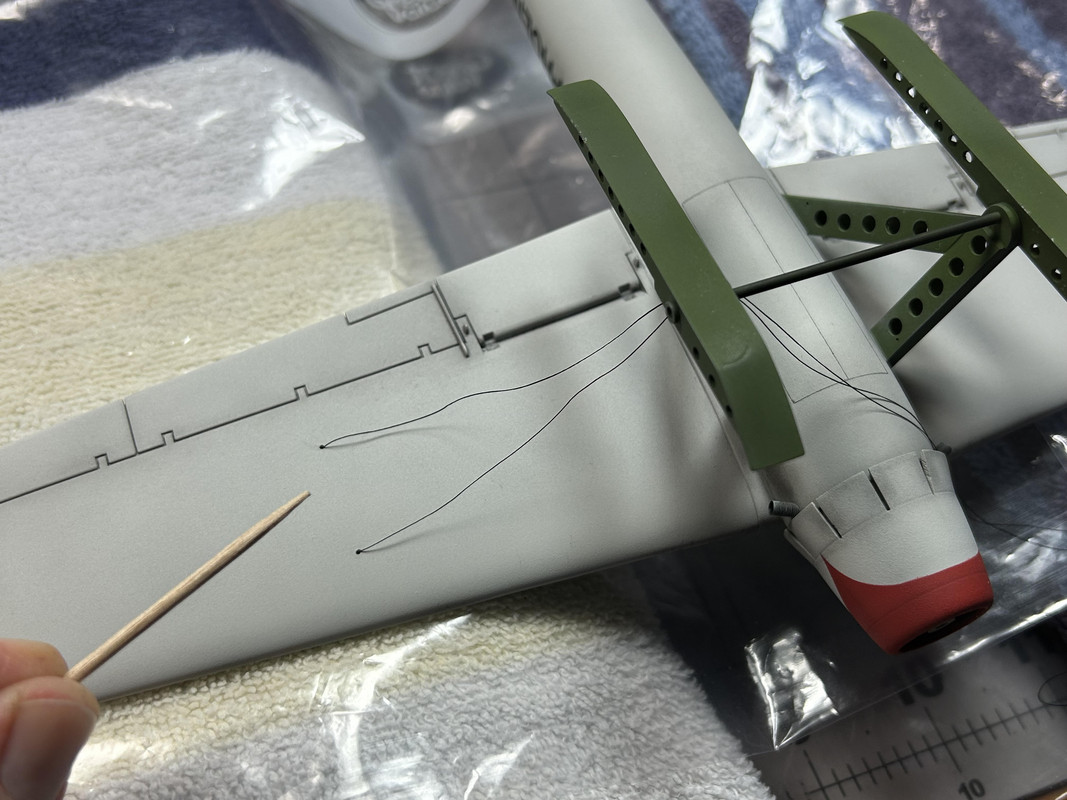
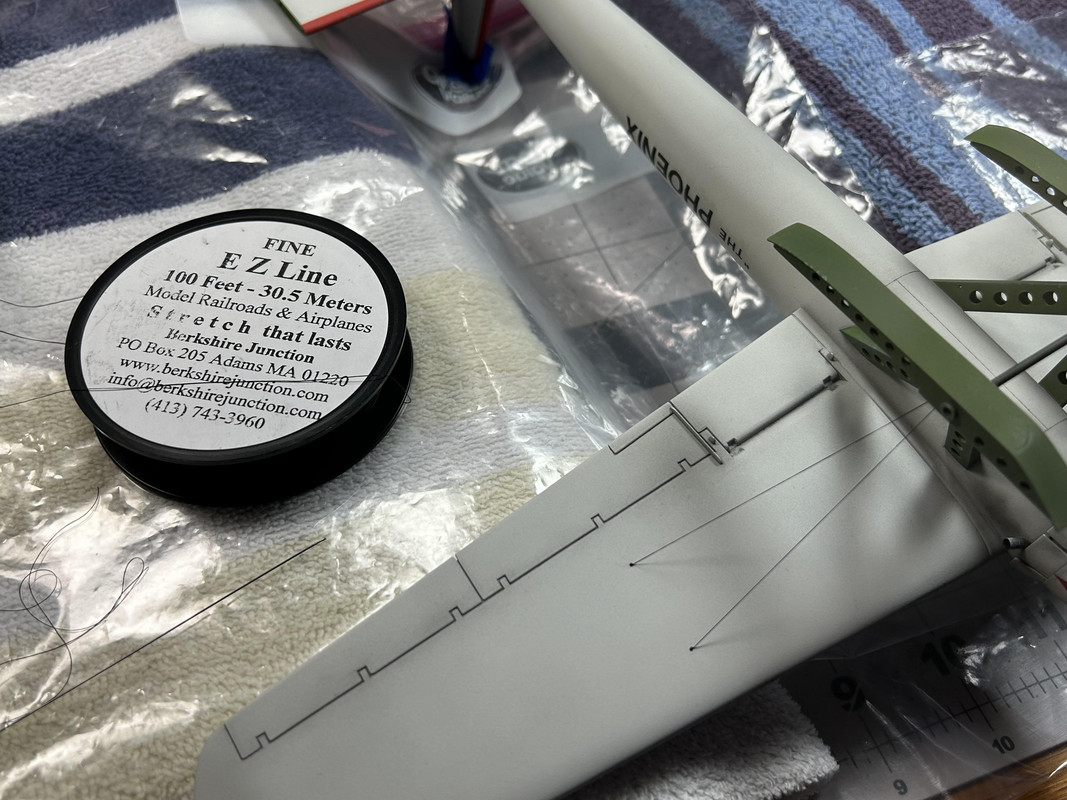
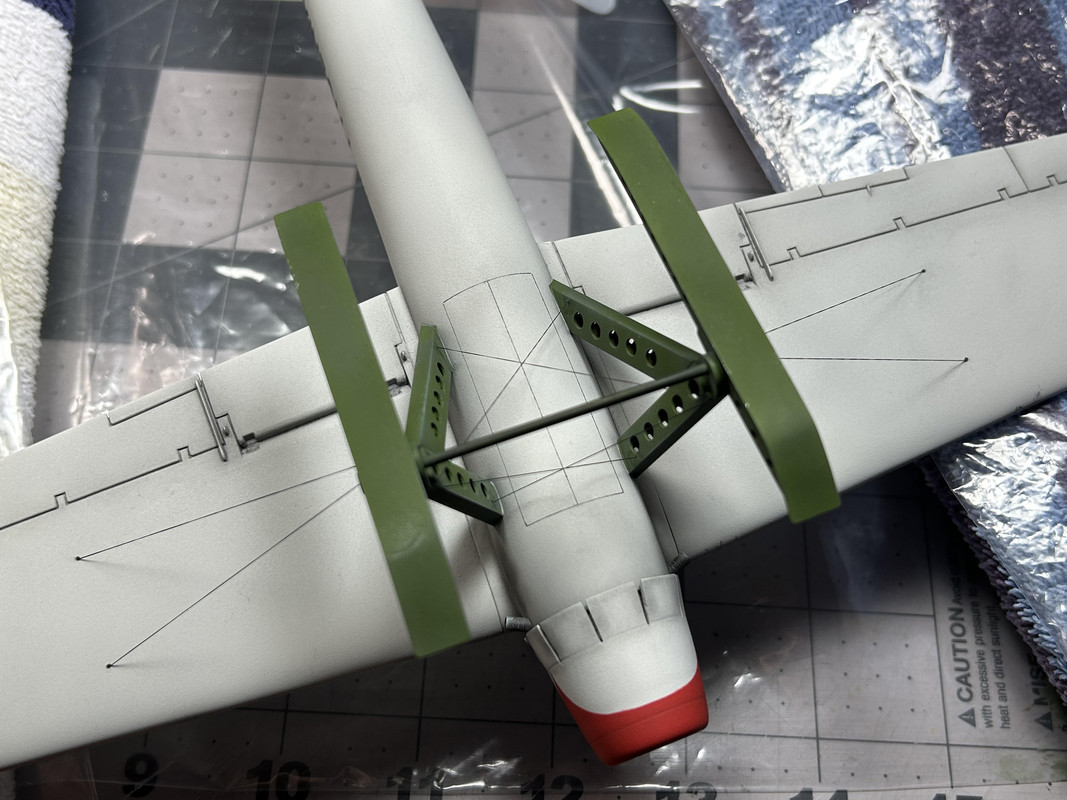
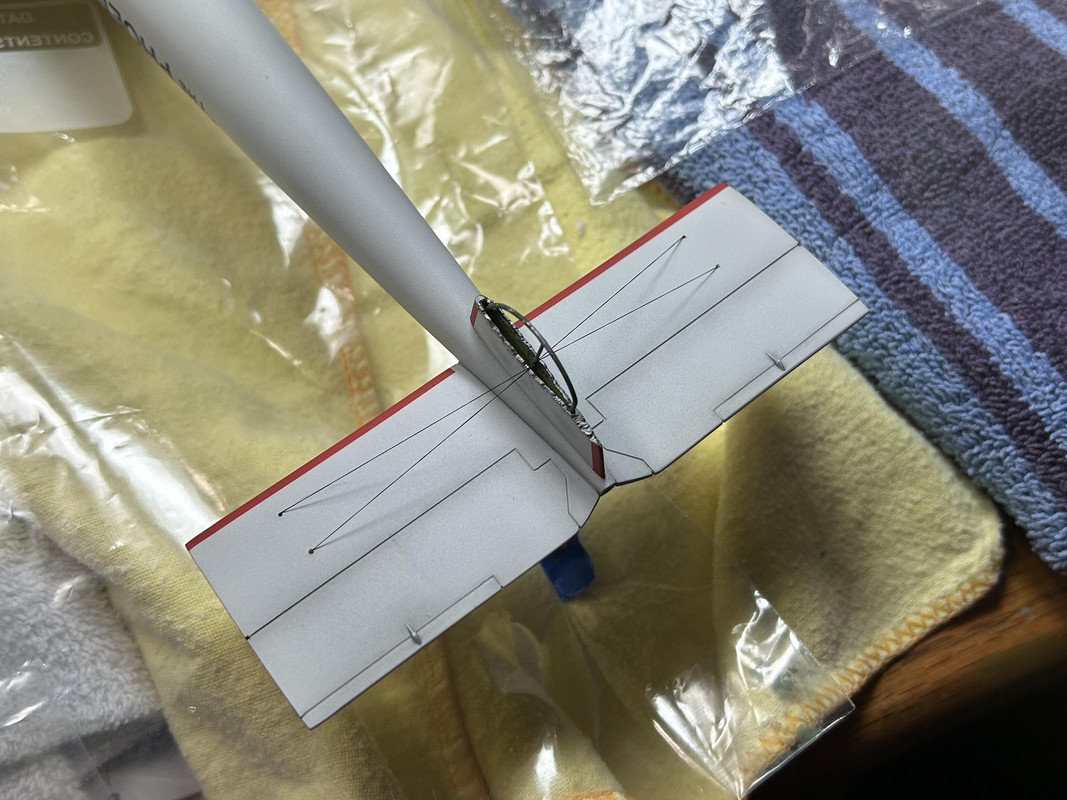
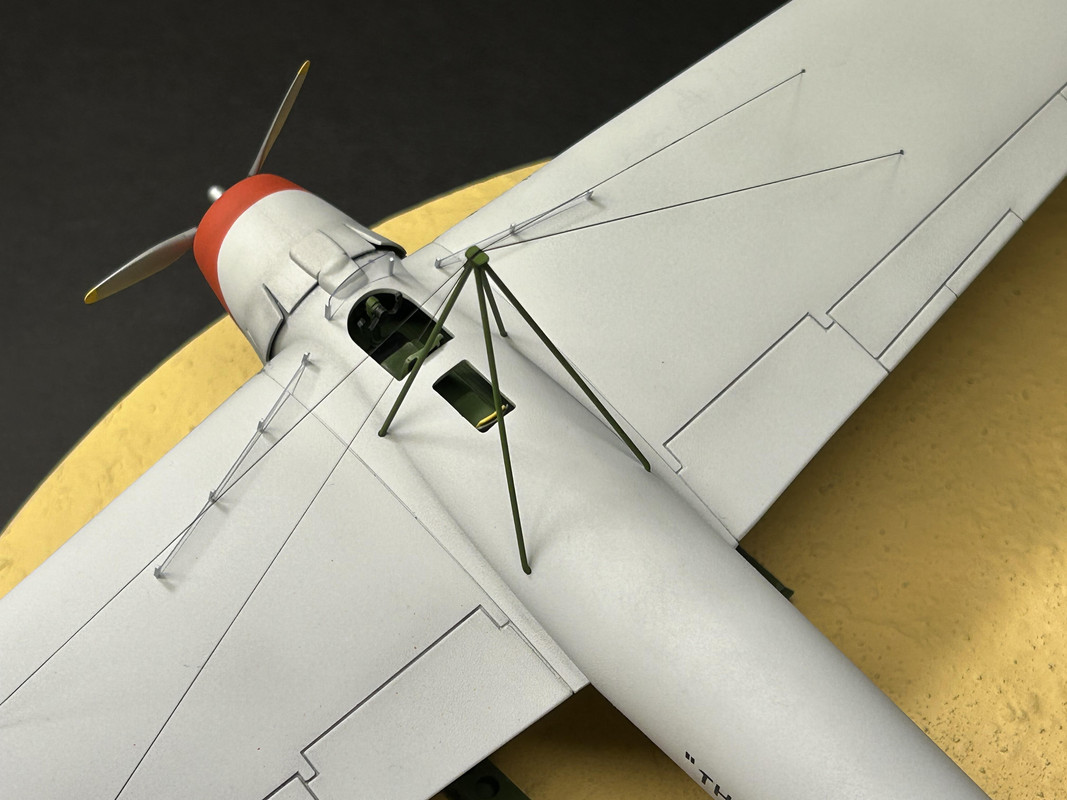
Figures 177 and 178: The pilot seat, control column, engine air intake and cabane struts are shown after being installed.
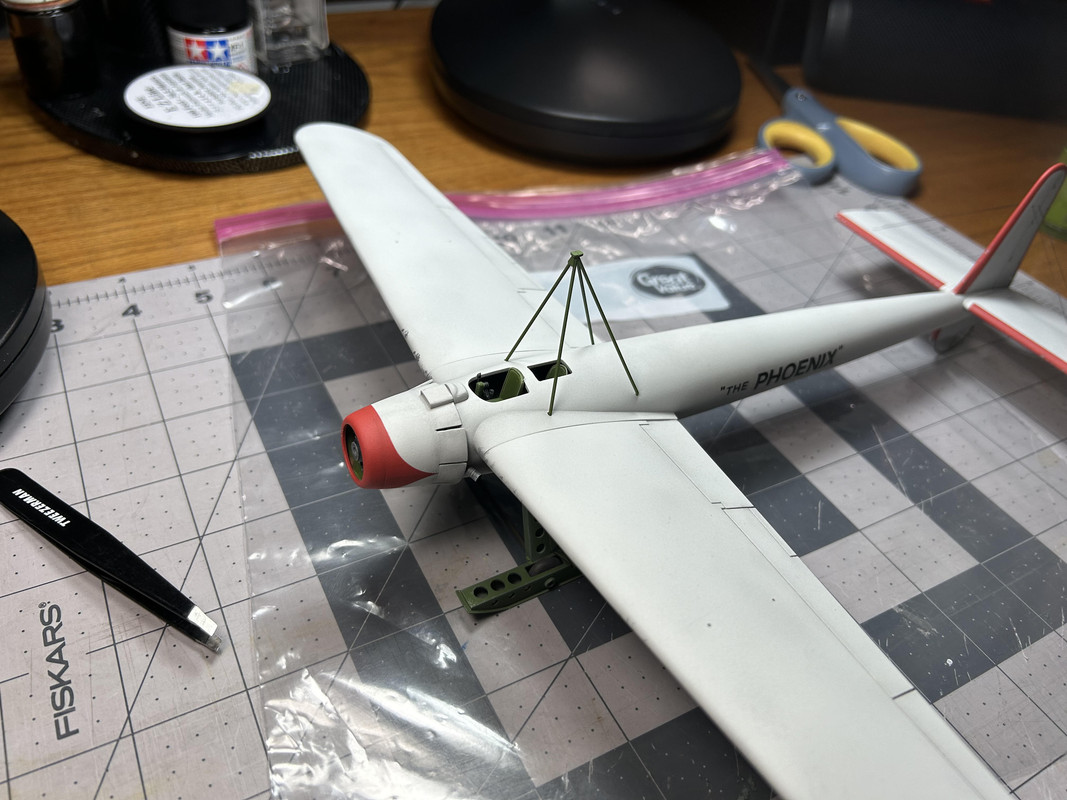
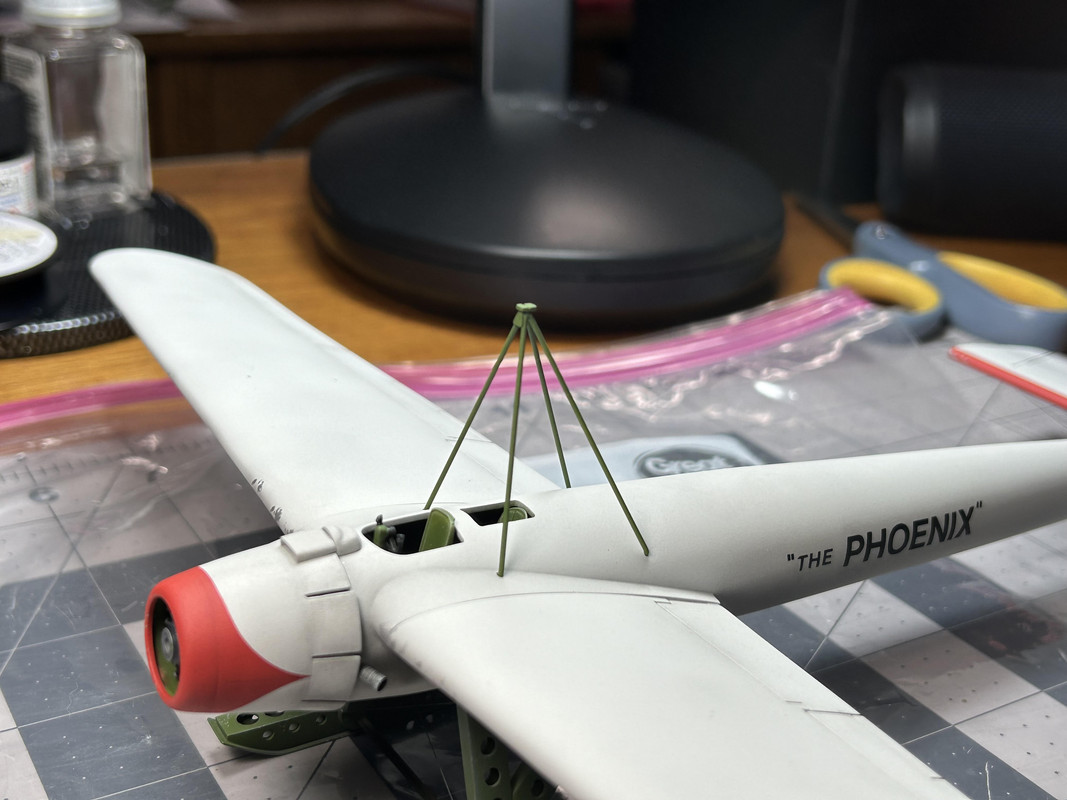
Figures 179 and 180: The upper side guy wires are glued in place.
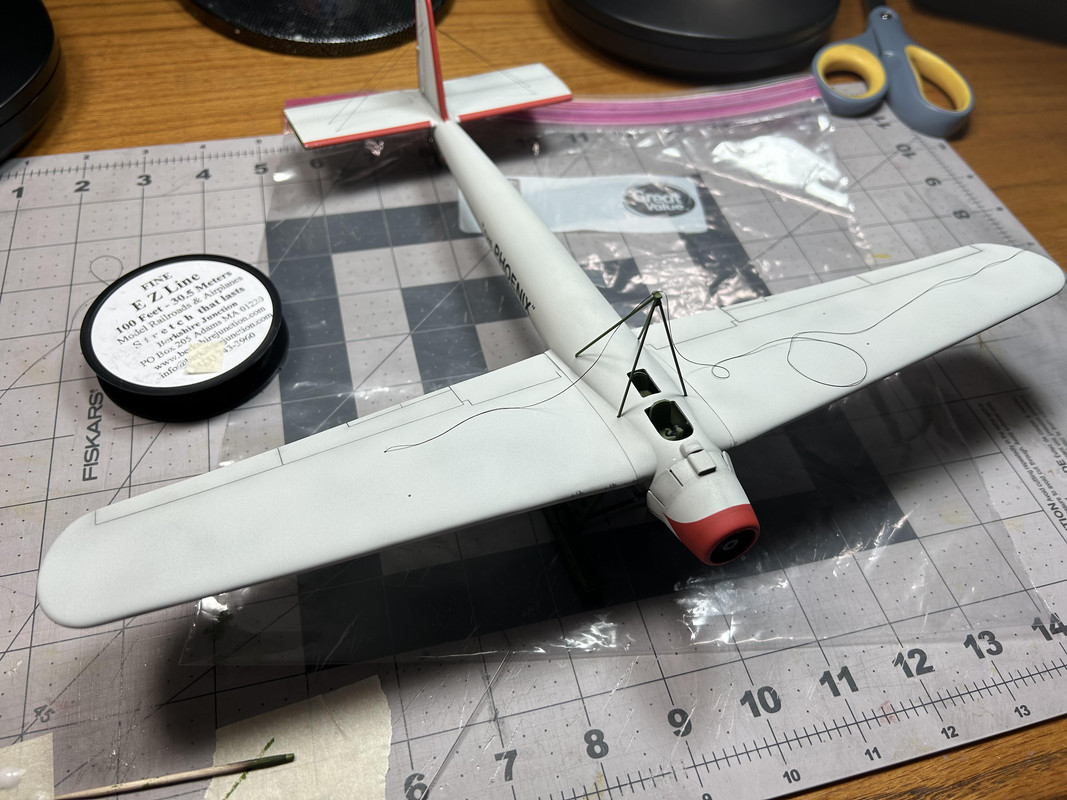
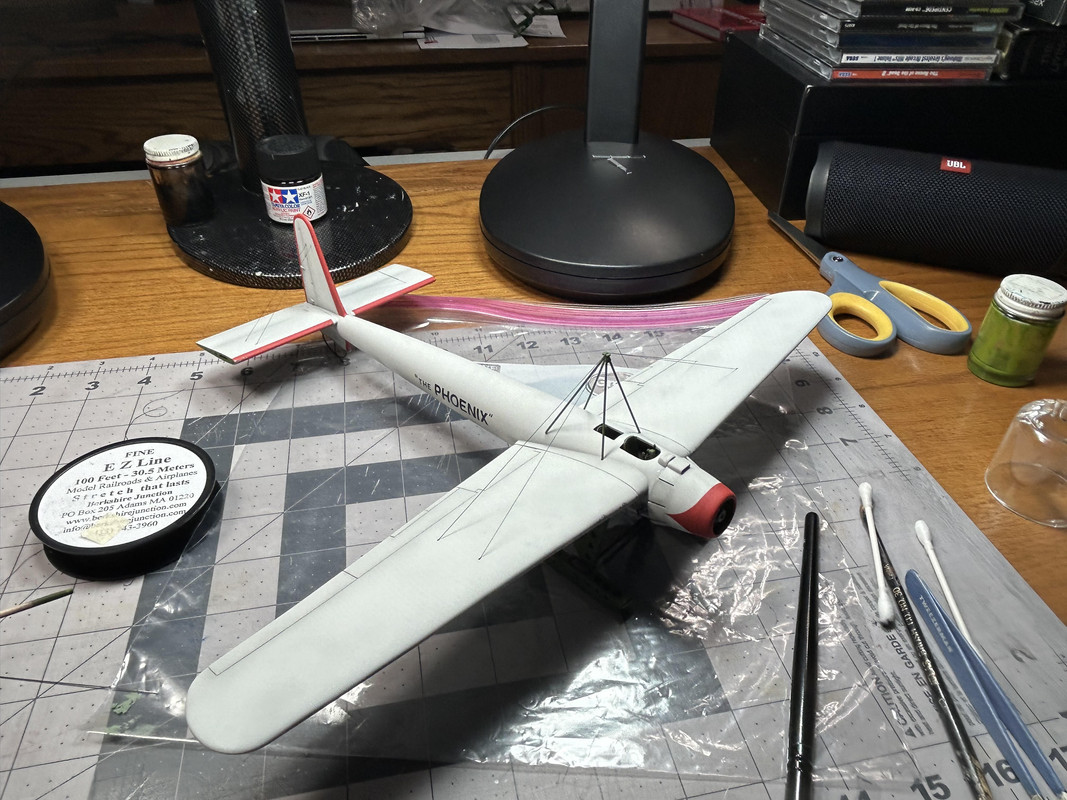
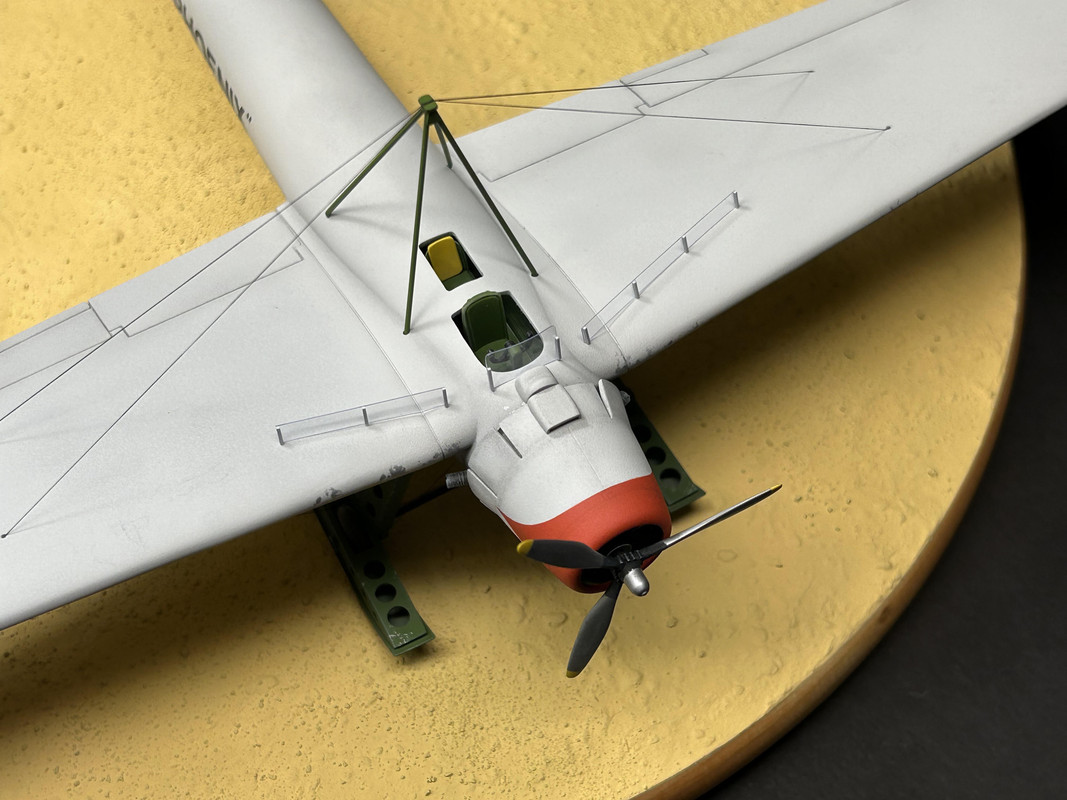
Figure 181: I felt I would not be able to create a one-piece clear wing/fuselage windshield fairing assembly due to the complicated shapes of the fuselage and wings. Therefore, I made three separate assemblies. 007” thick clear film was cut to the required sizes, with the pilot windshield being rolled to give it a slight radius.
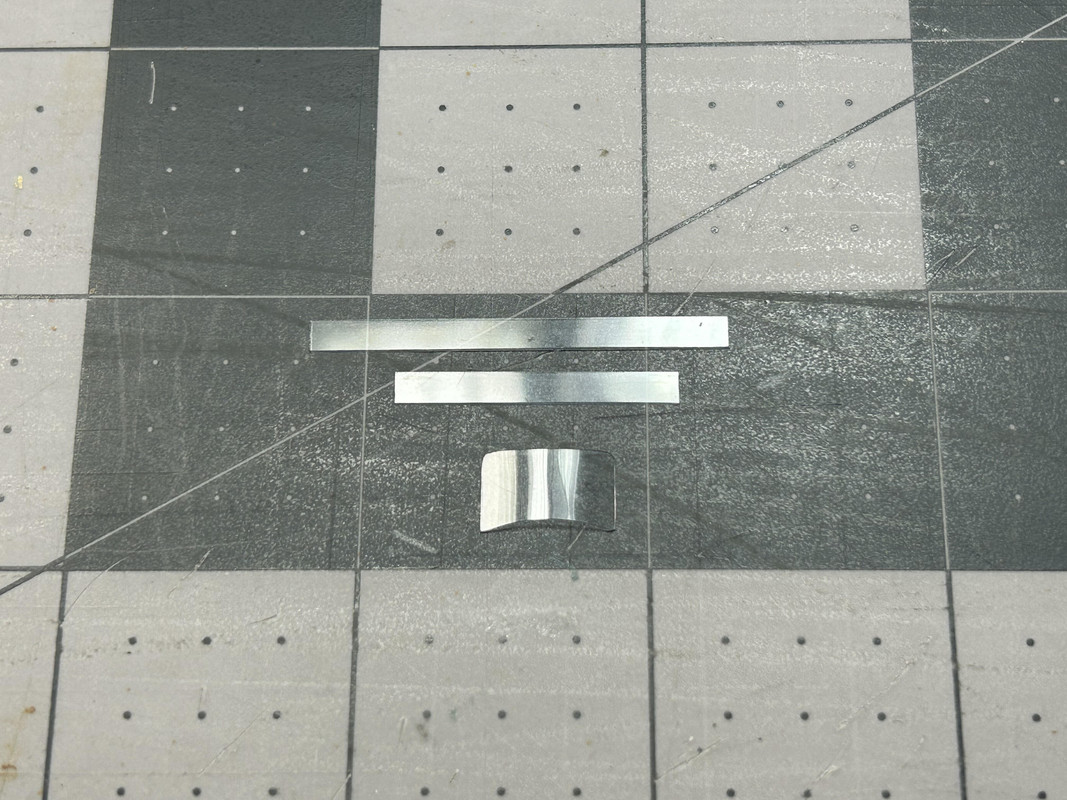
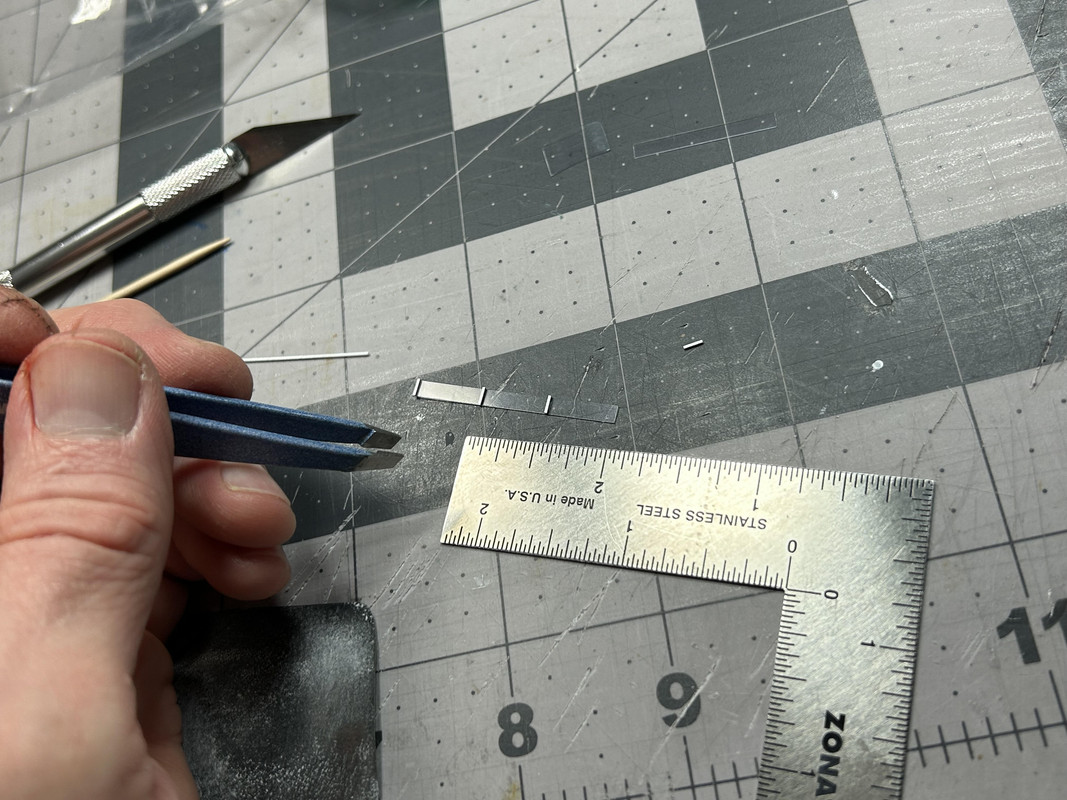
Figures 182 and 182a: Tiny square Evergreen braces were painted aluminum, cut to length and attached to the clear pieces with white glue. White glue was also used to join each windshield fairing assembly to the airframe. The second image is a film still showing a closeup view of the windshield fairing arrangement.
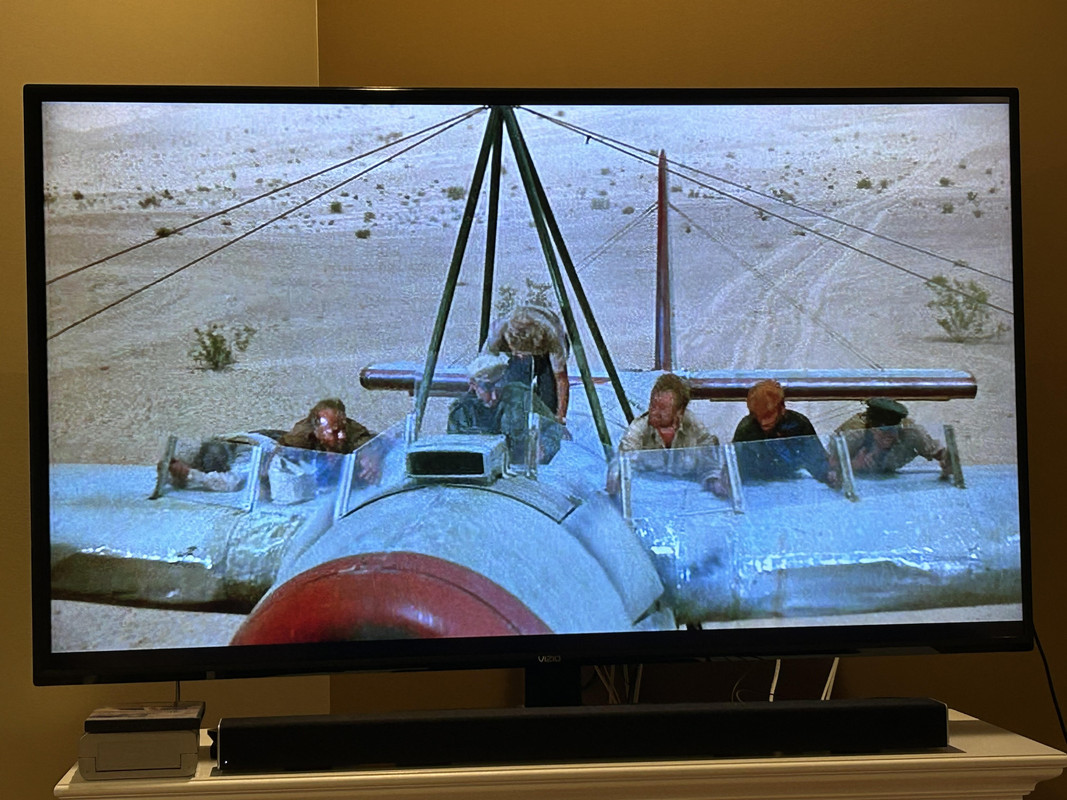
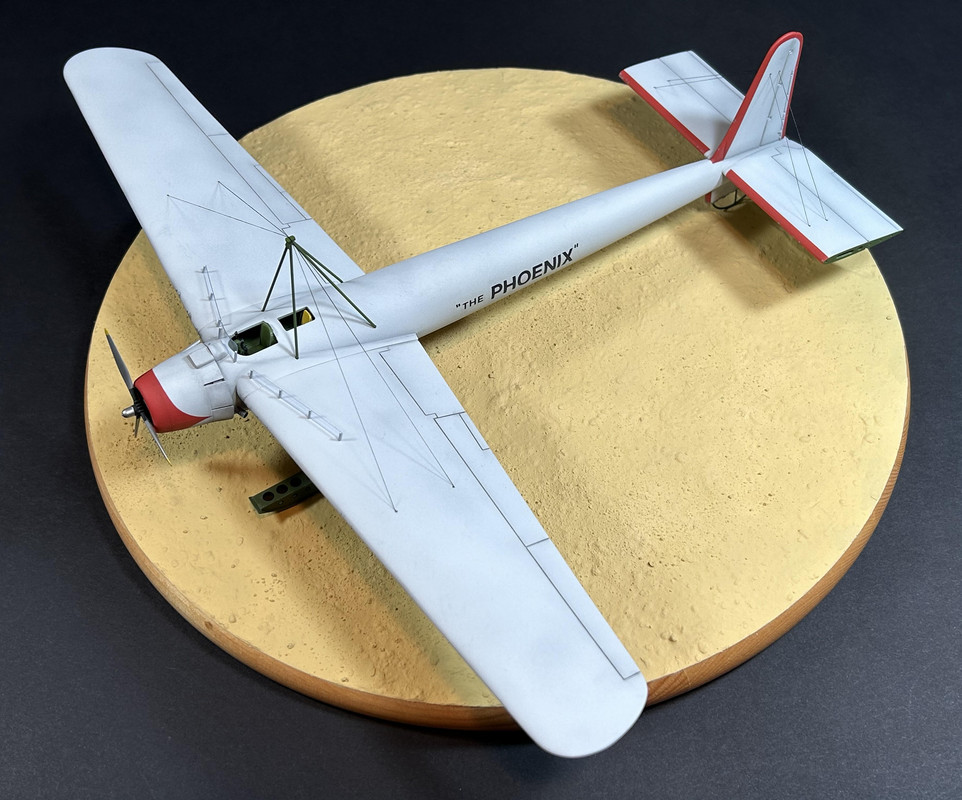
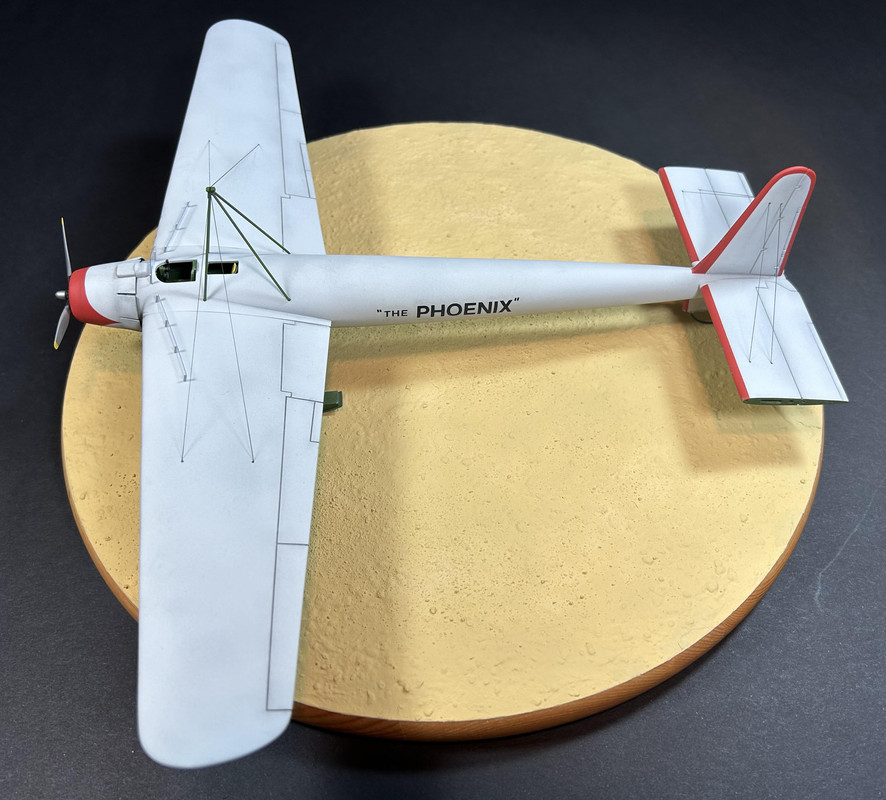
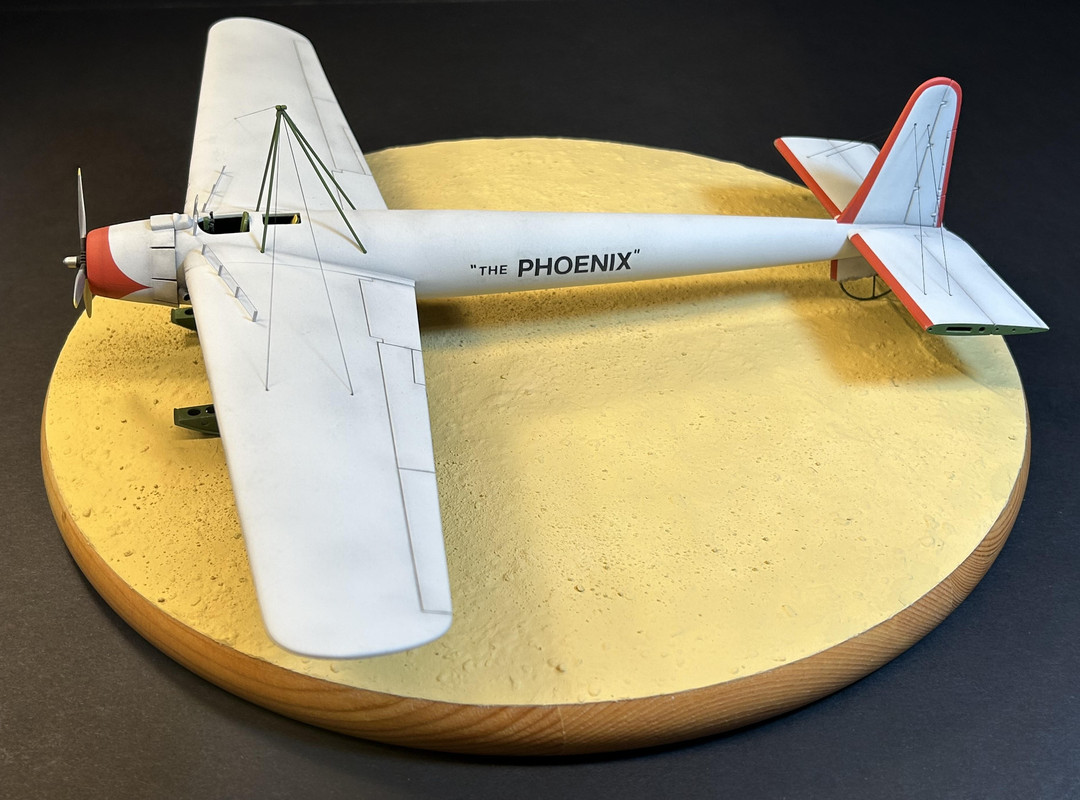
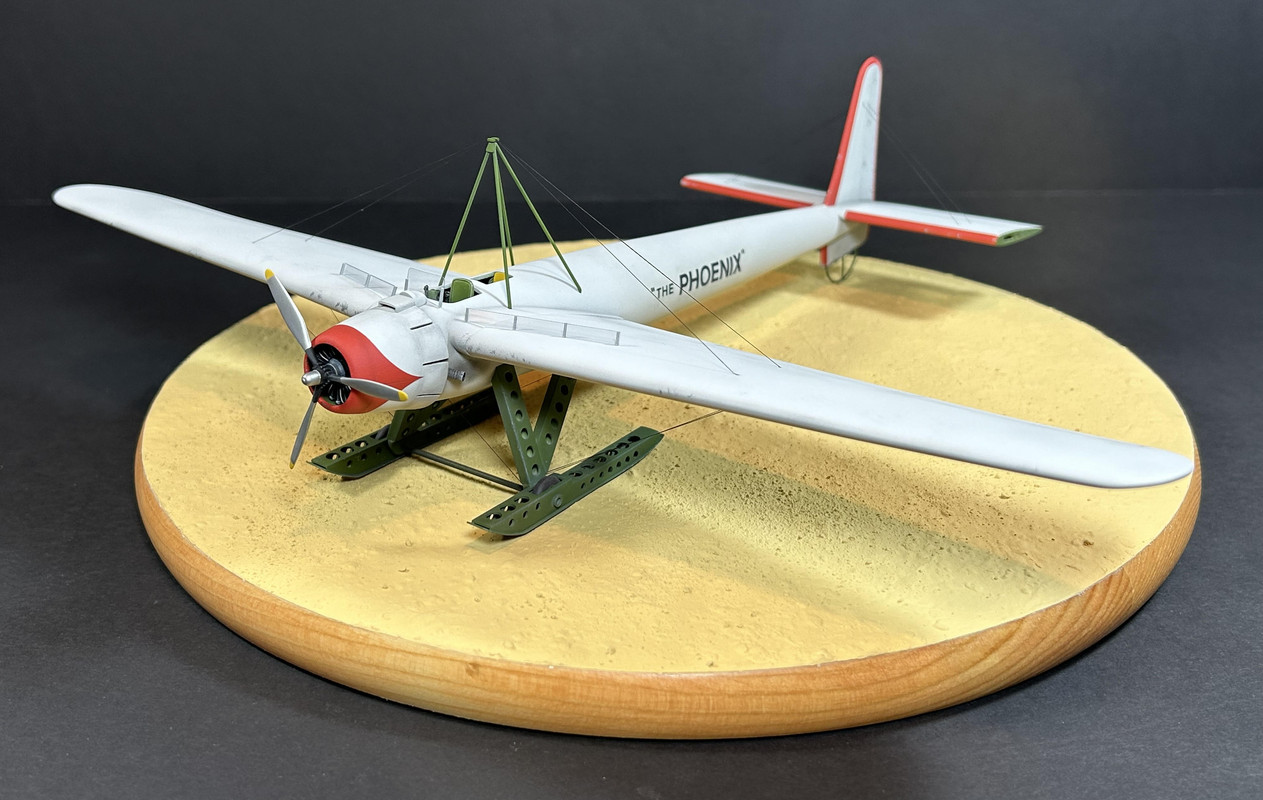
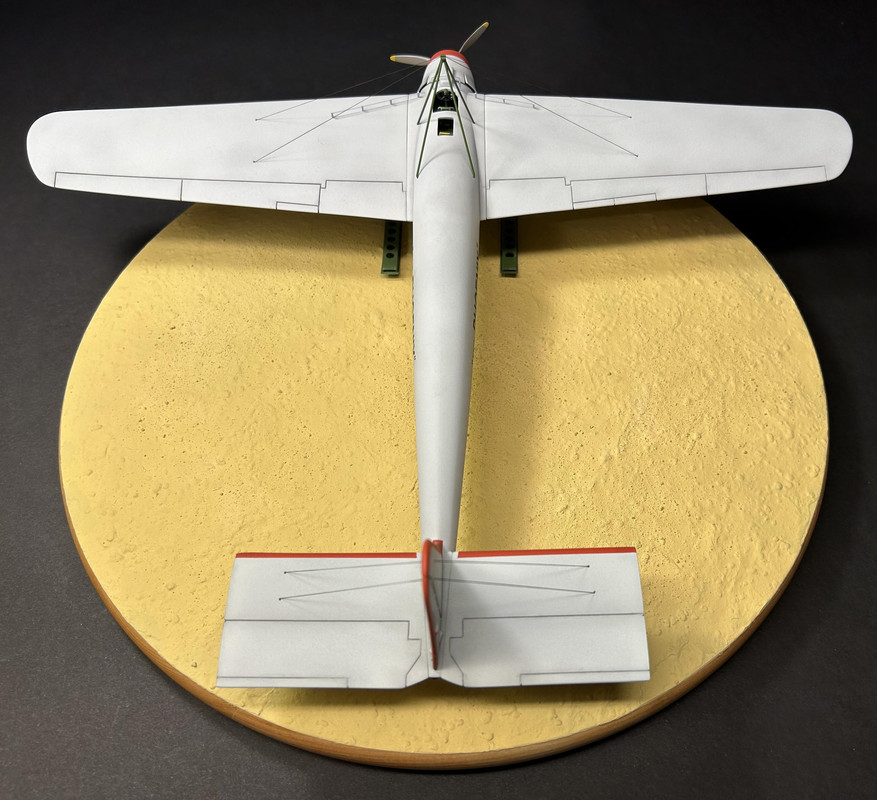
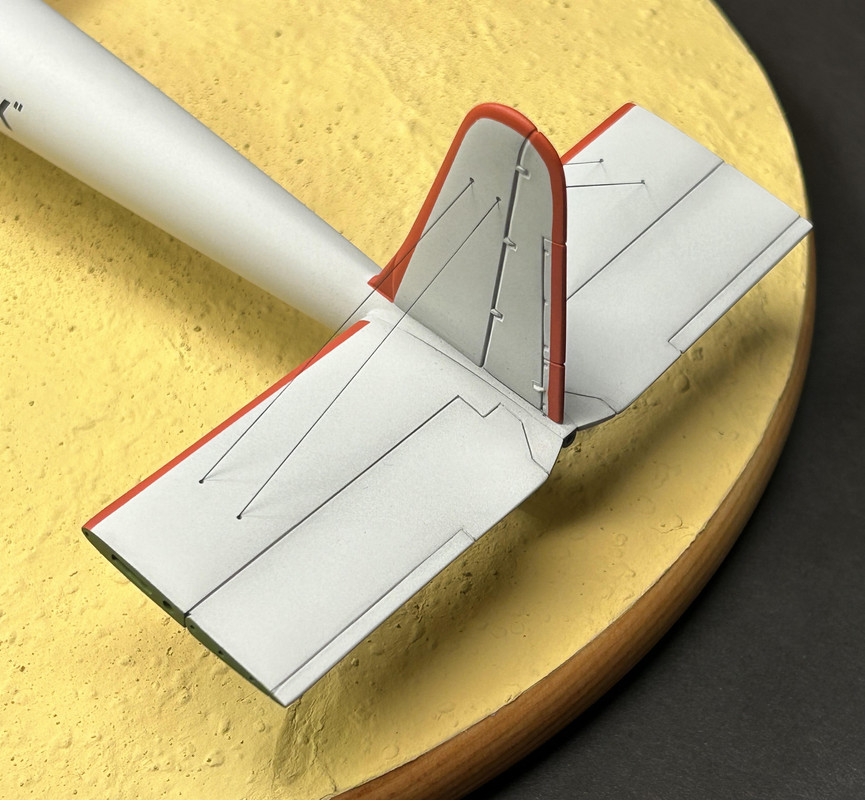
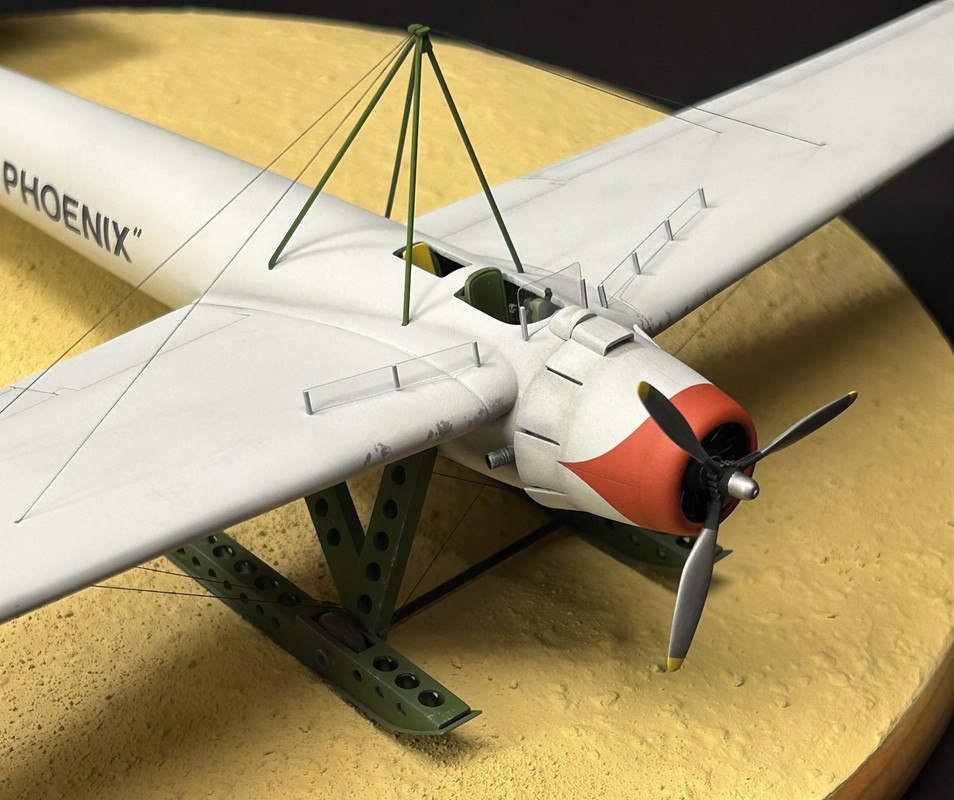
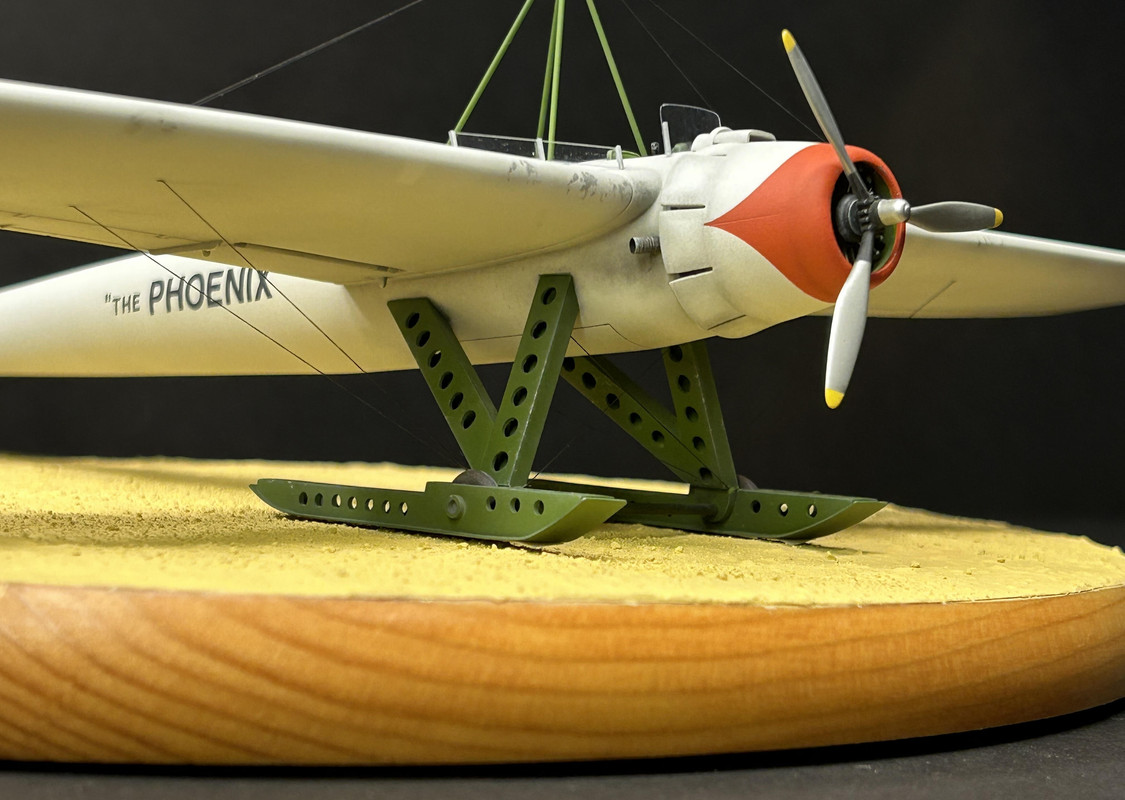
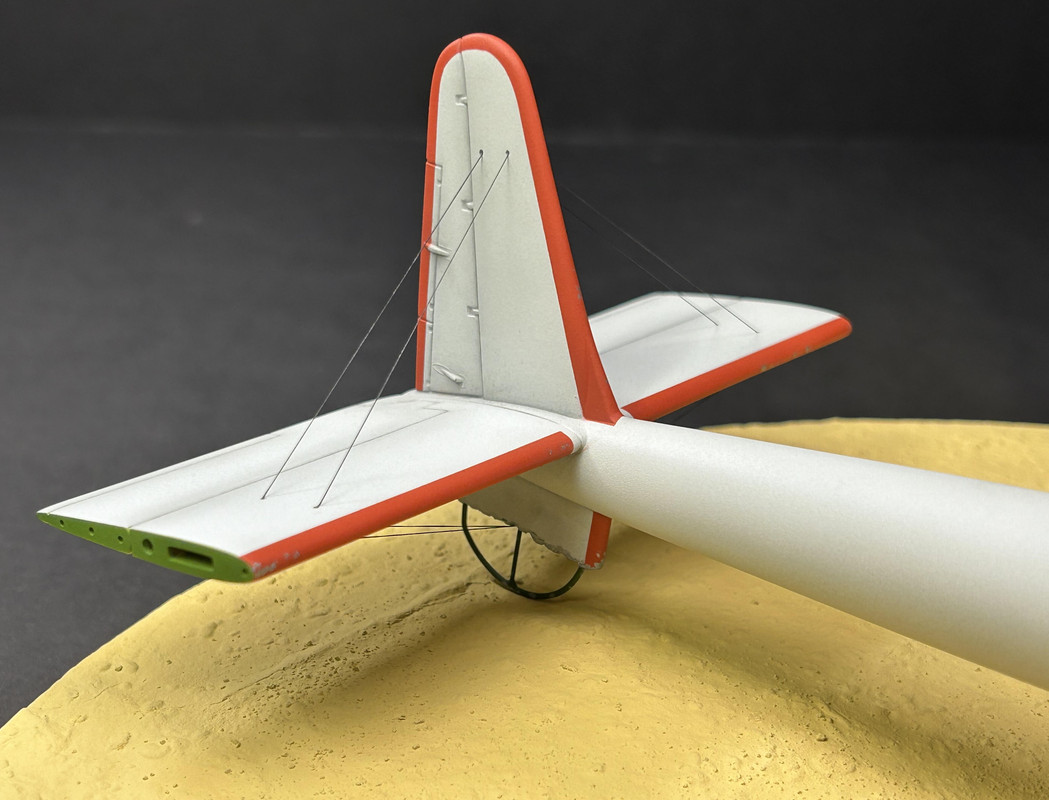
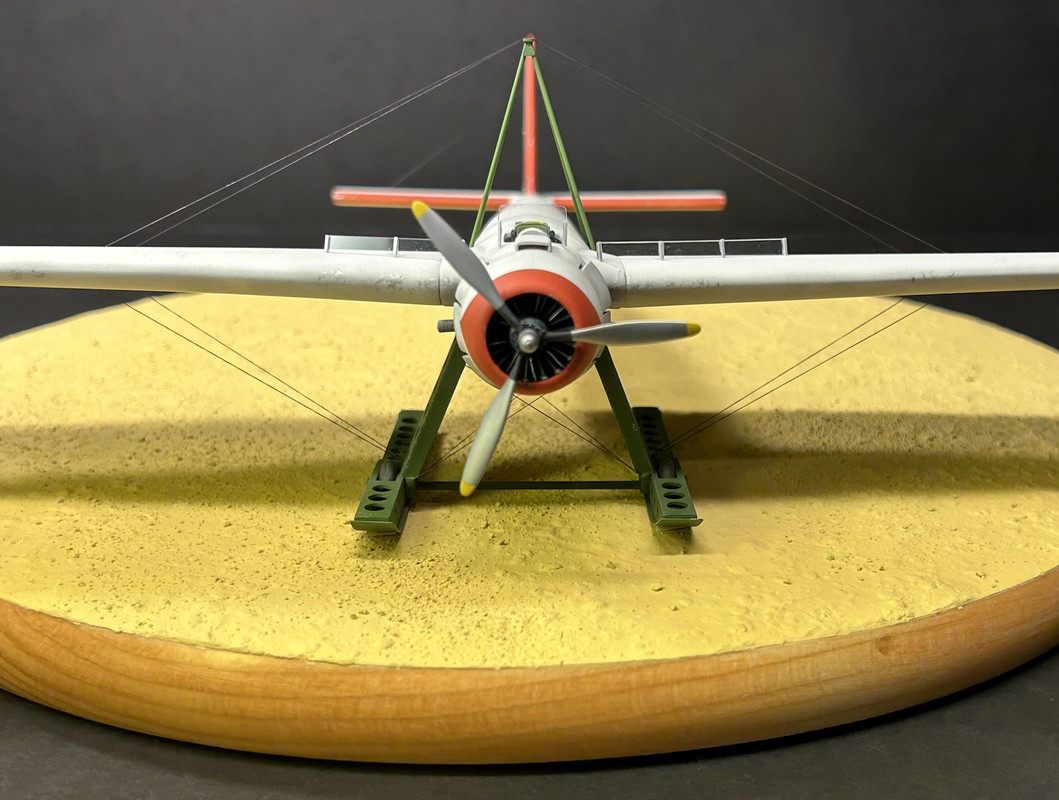
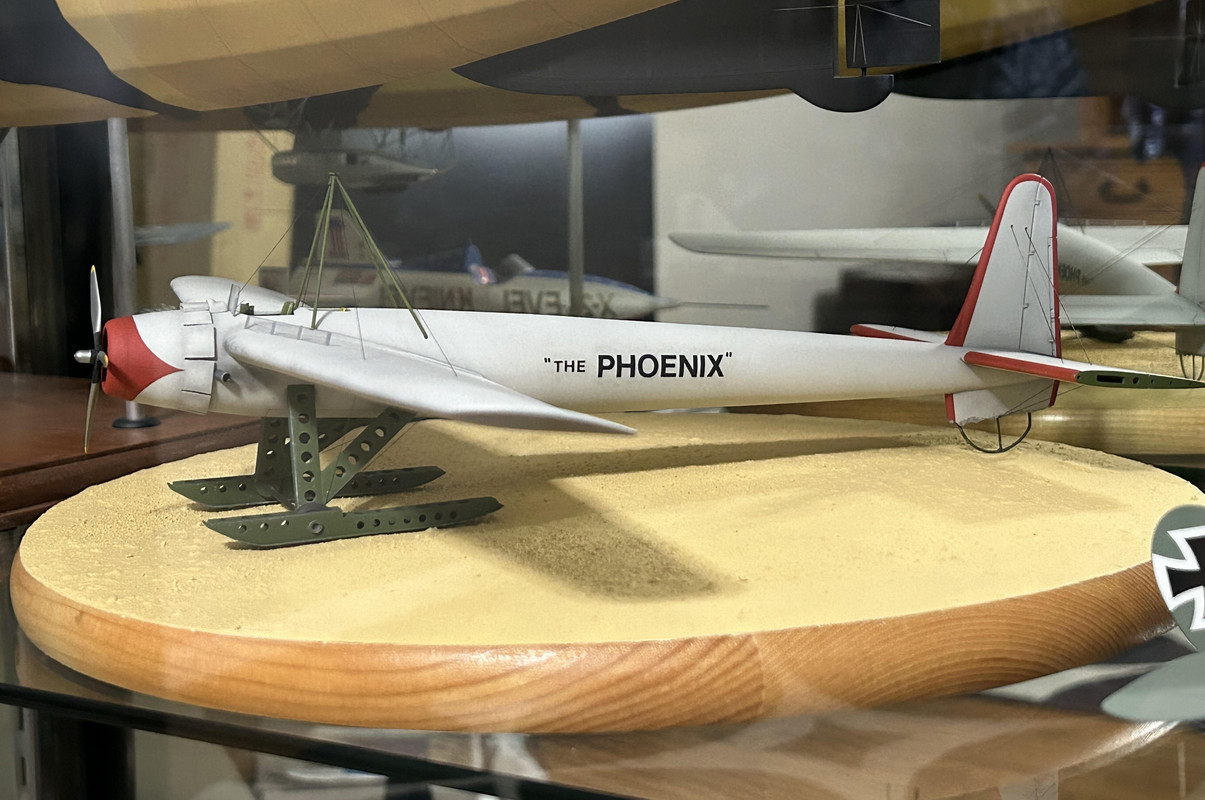
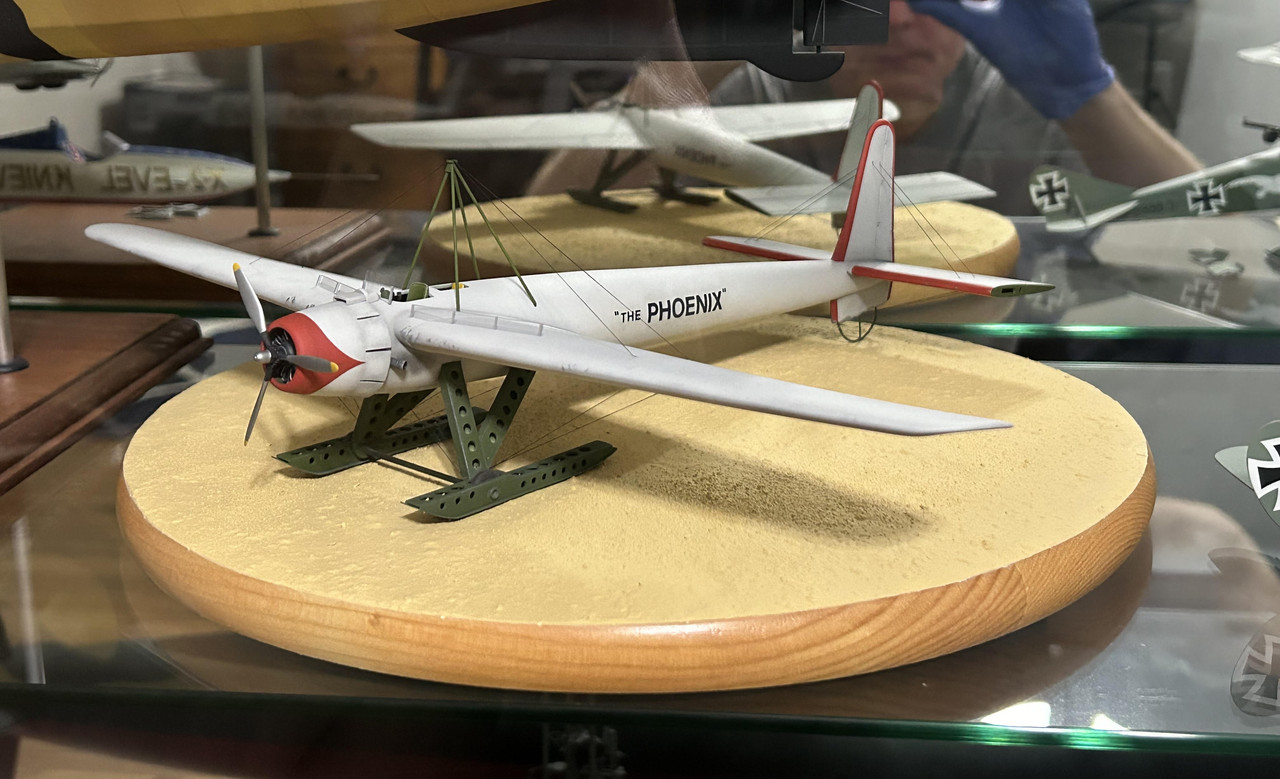
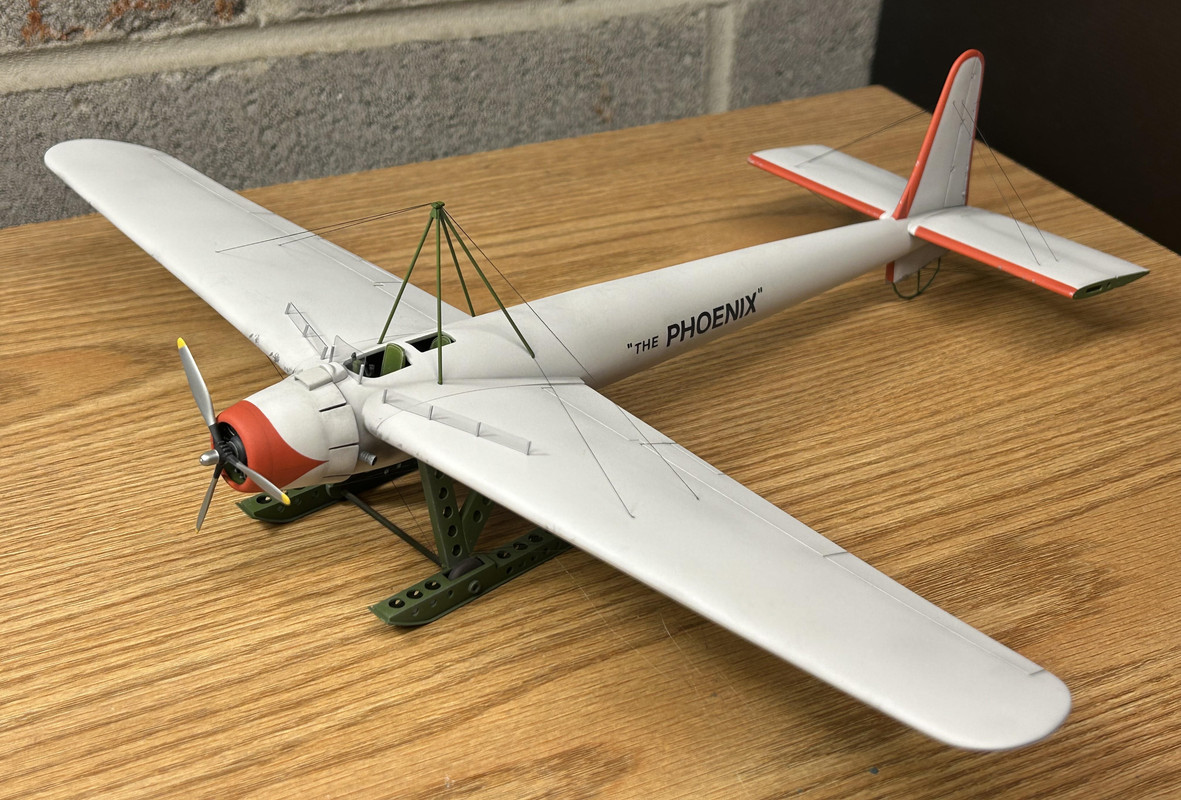
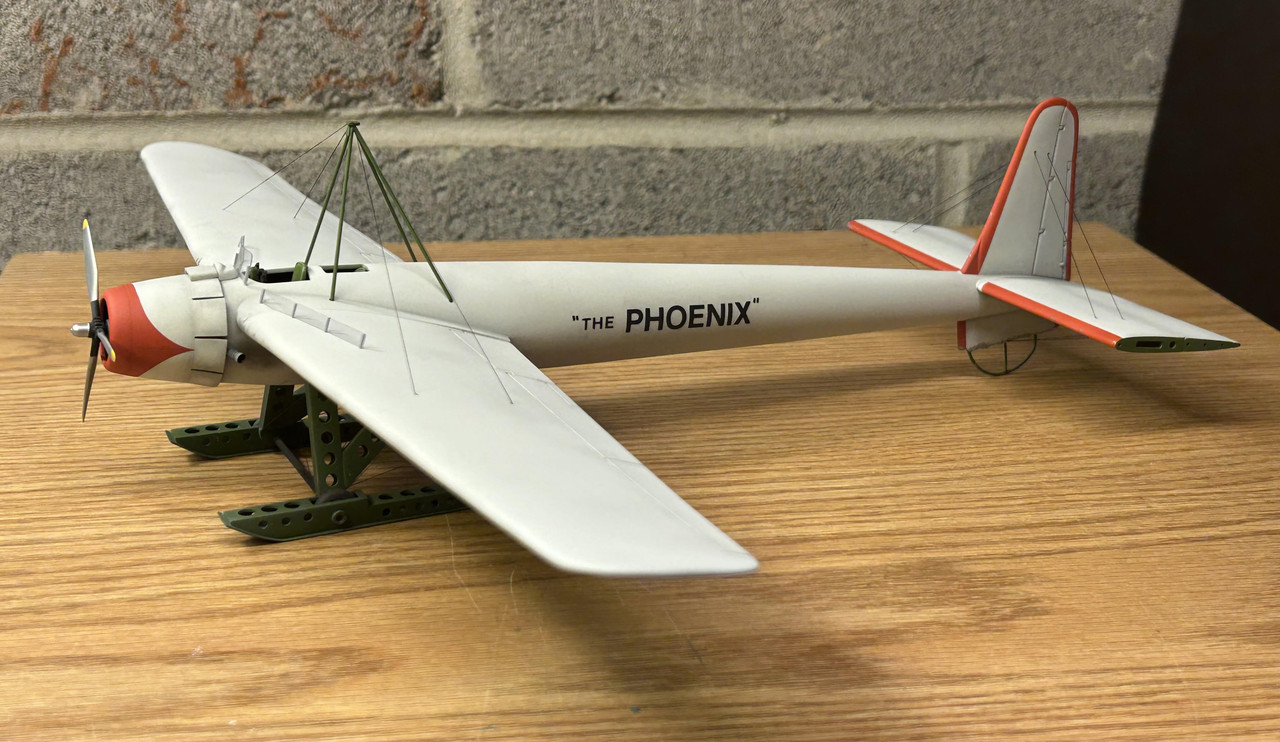
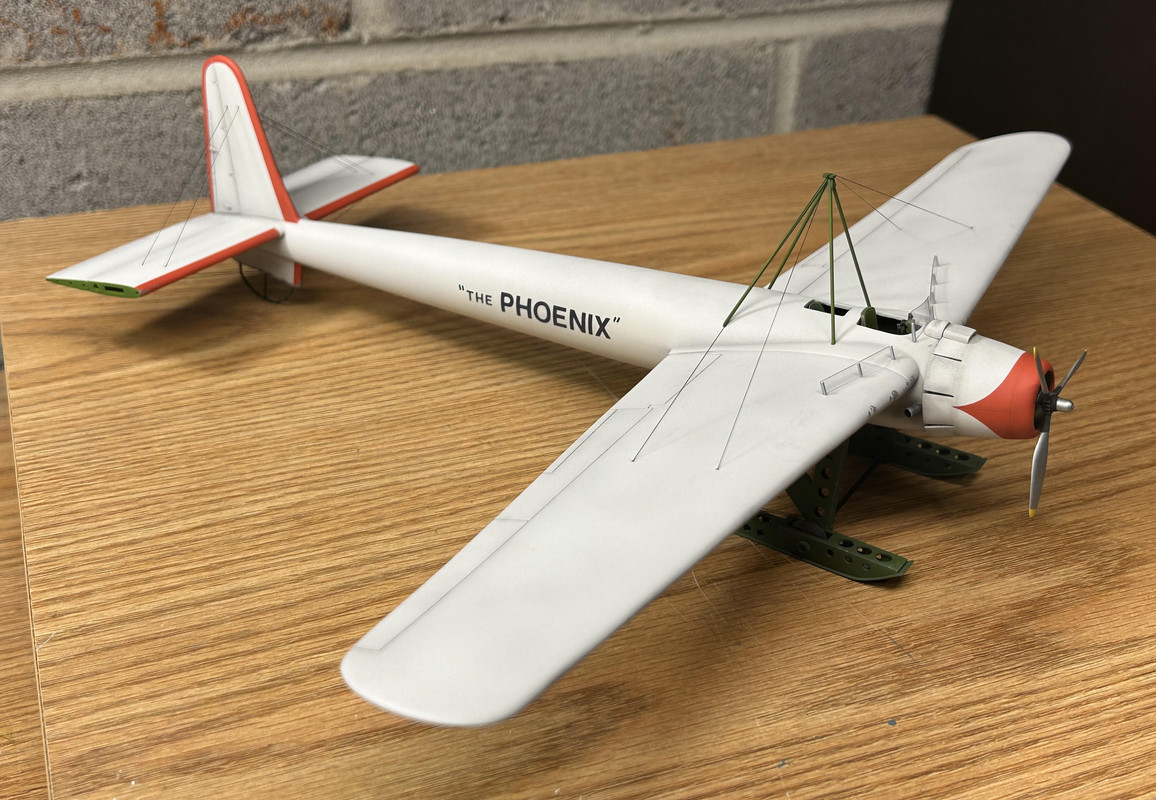
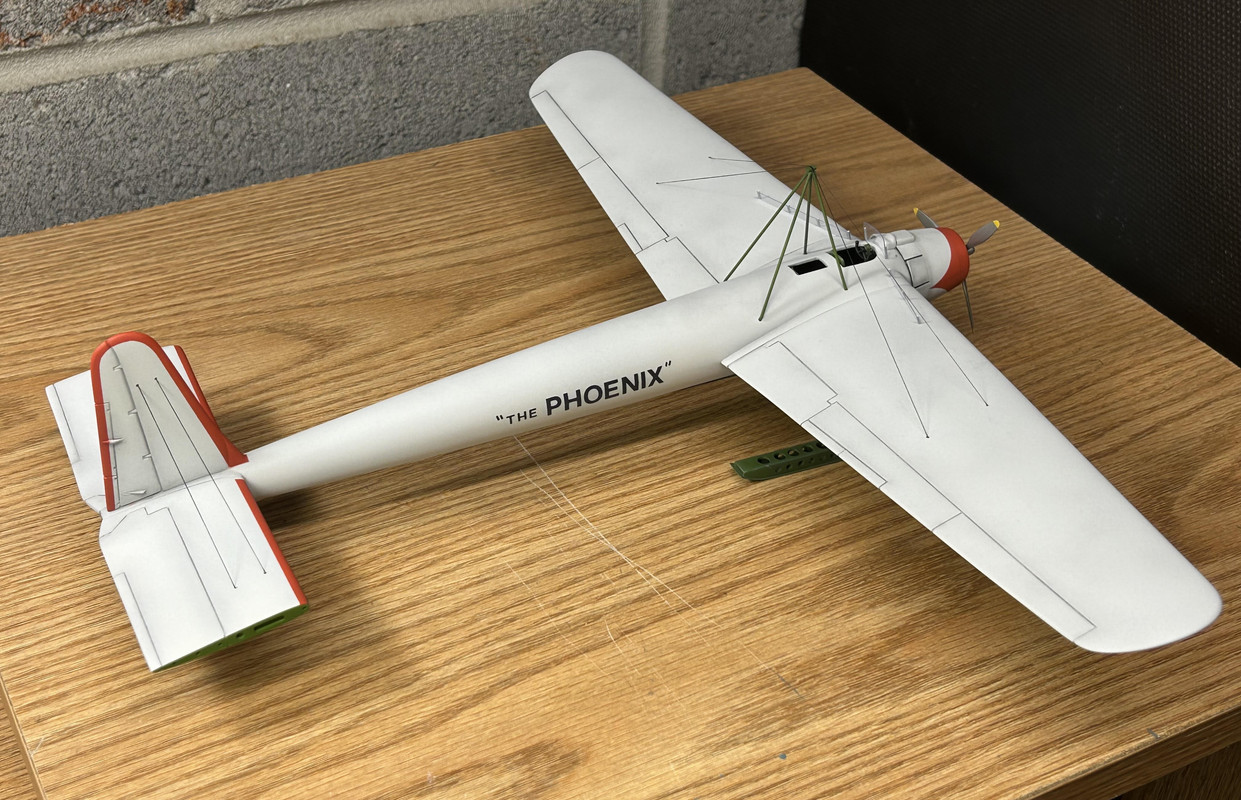
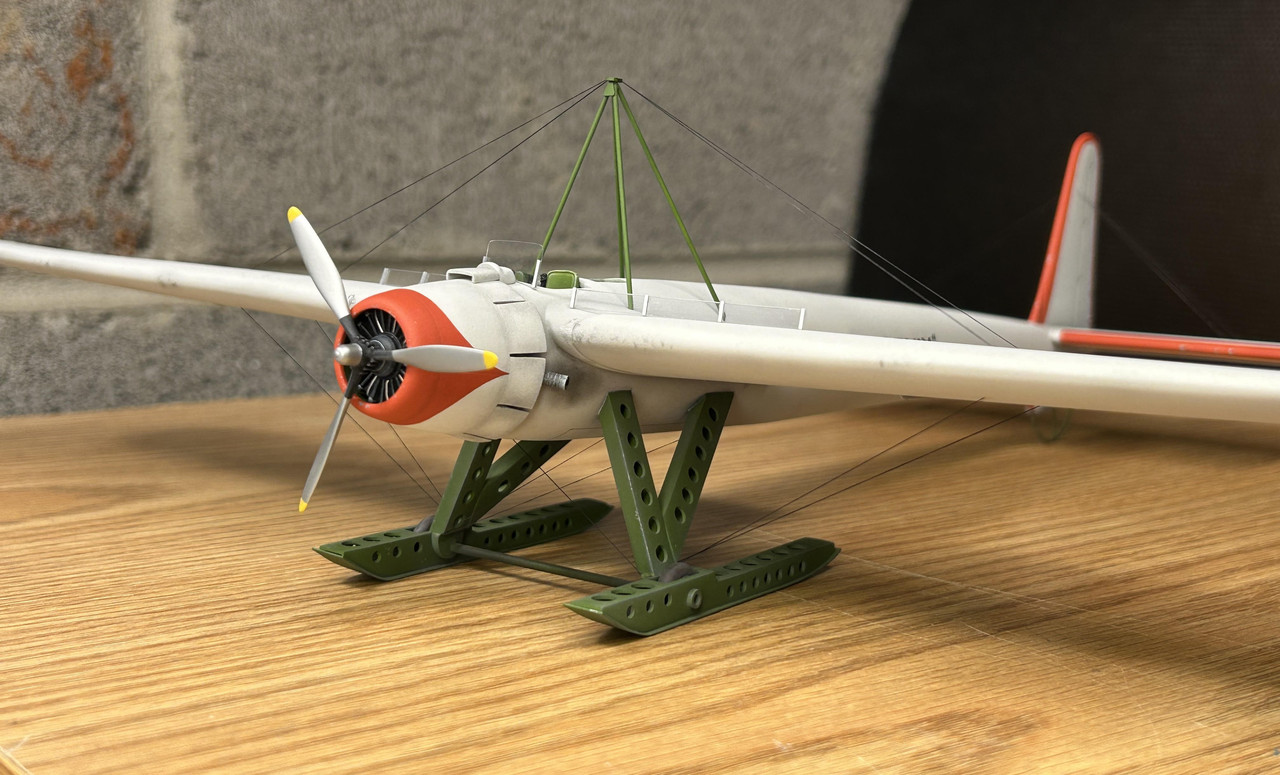
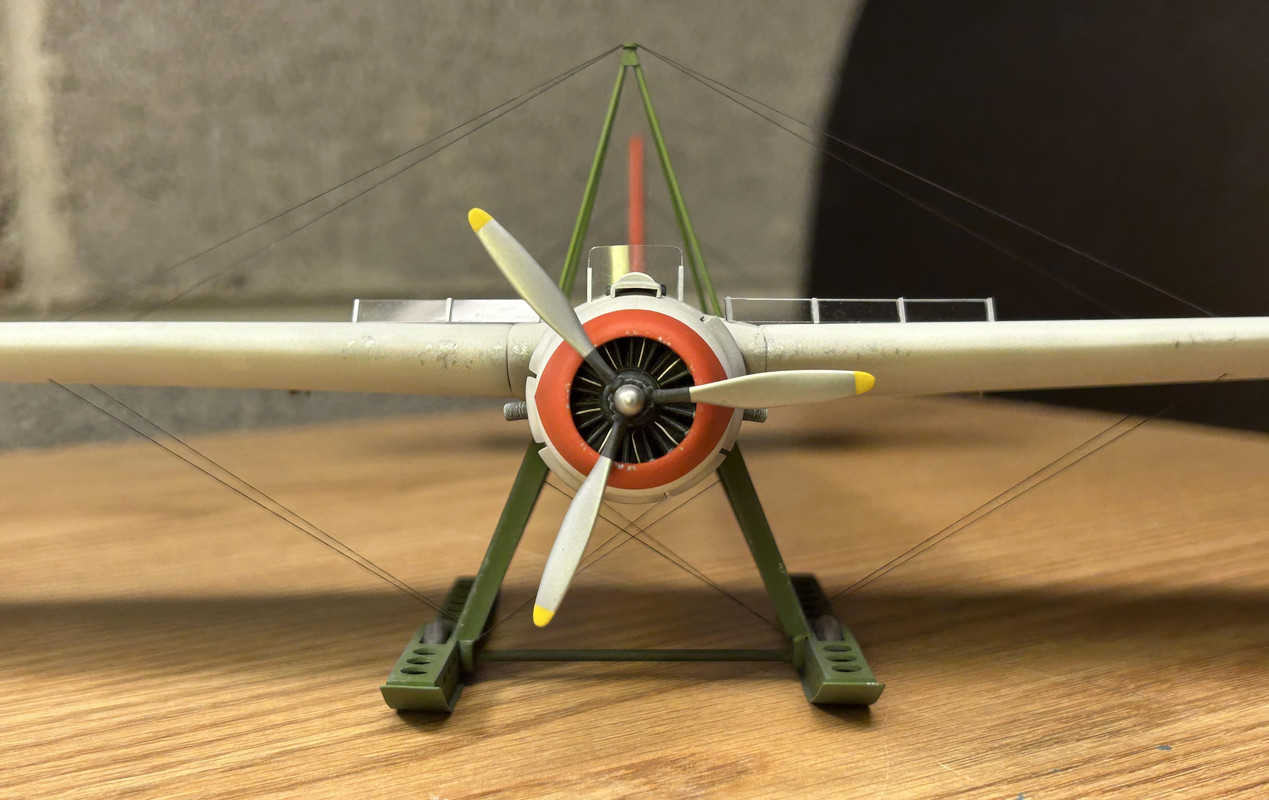
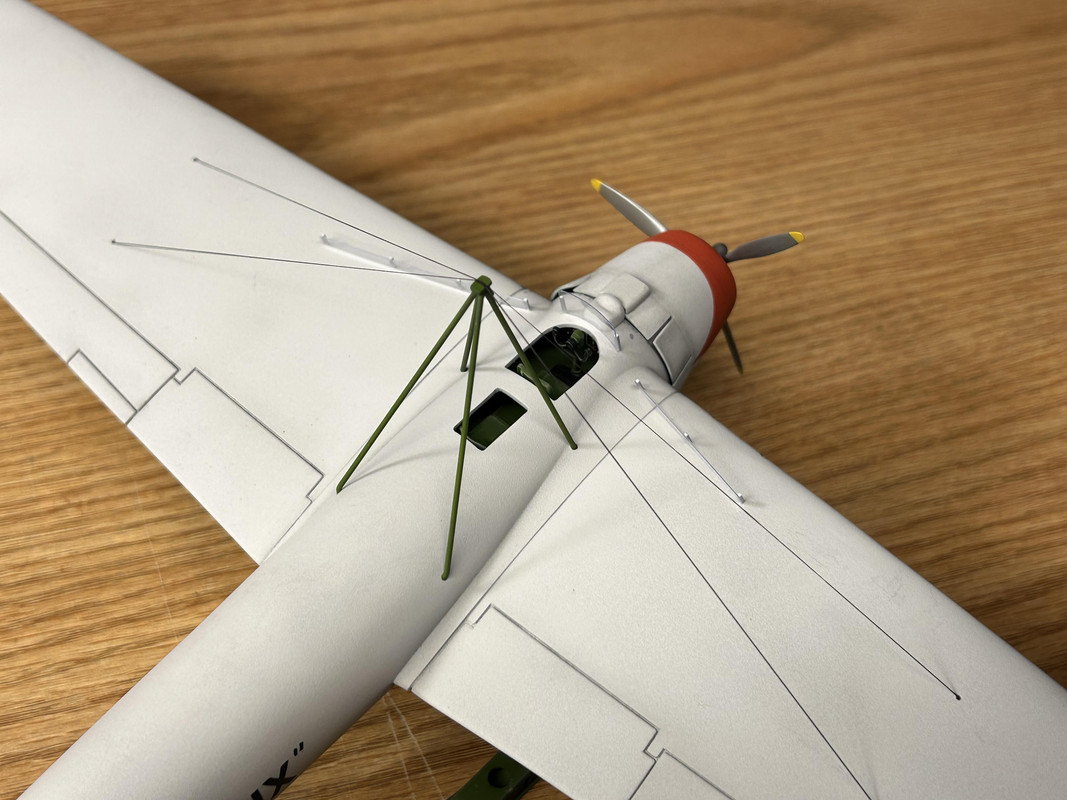
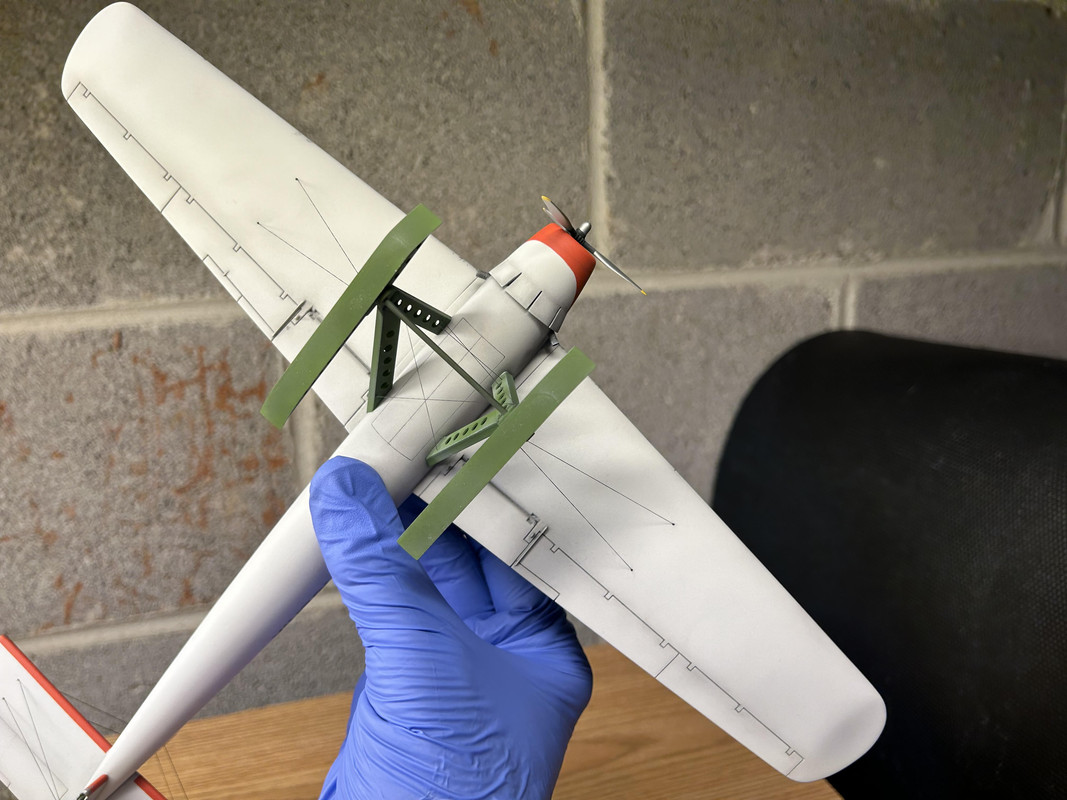
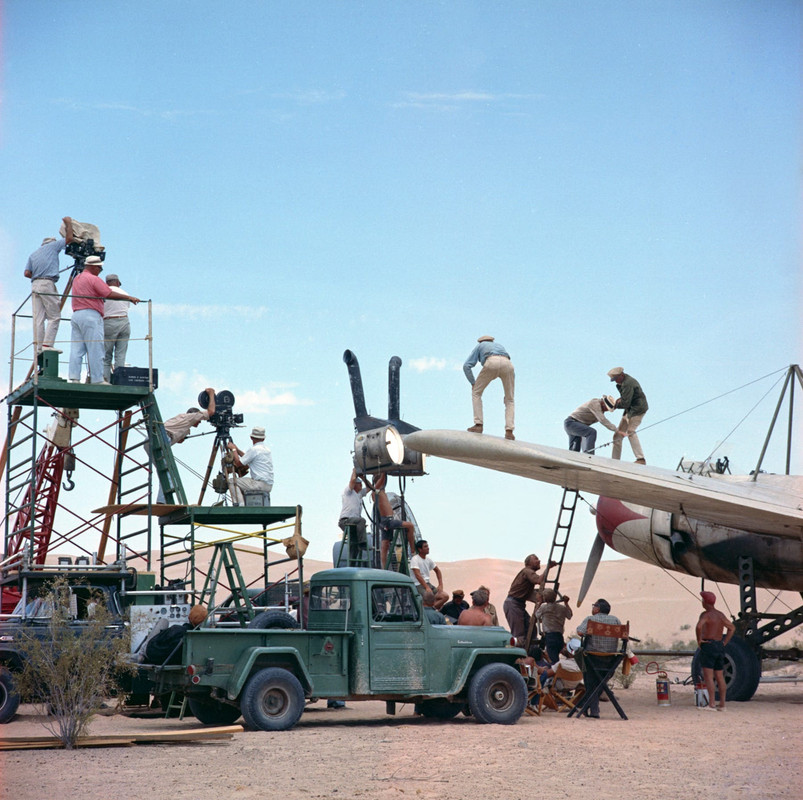
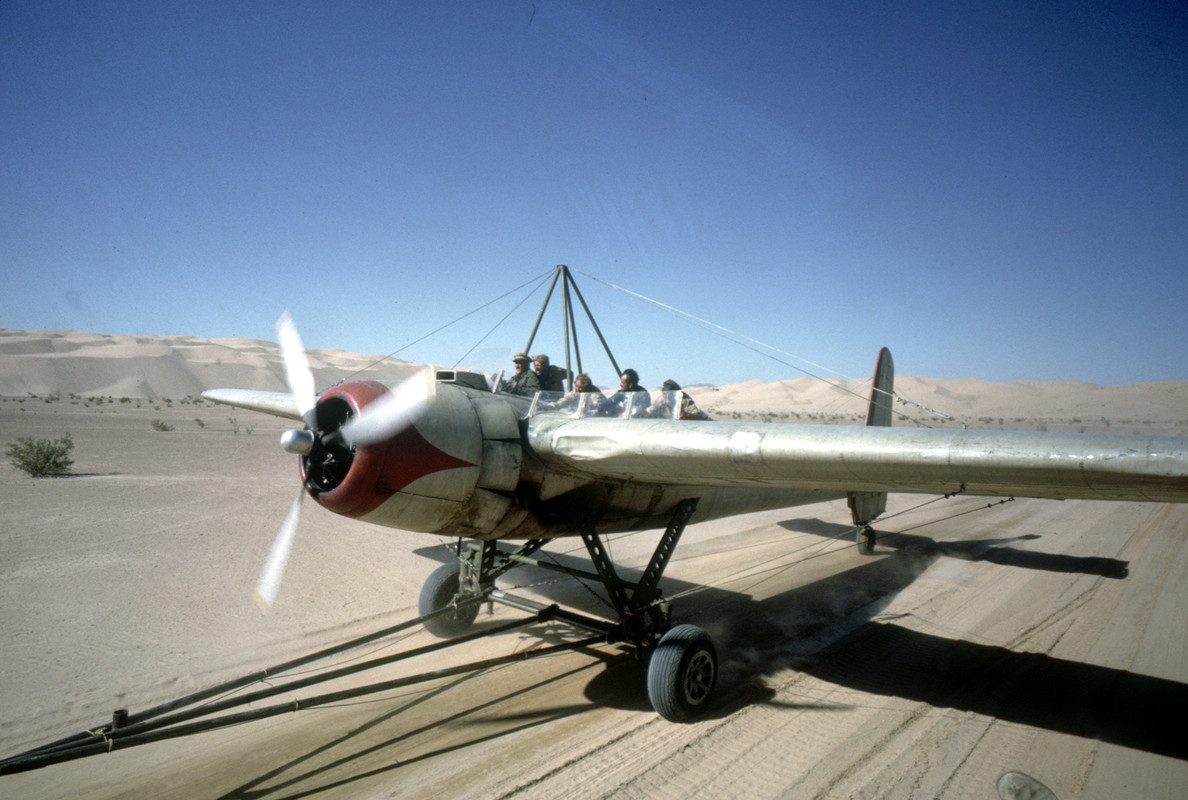
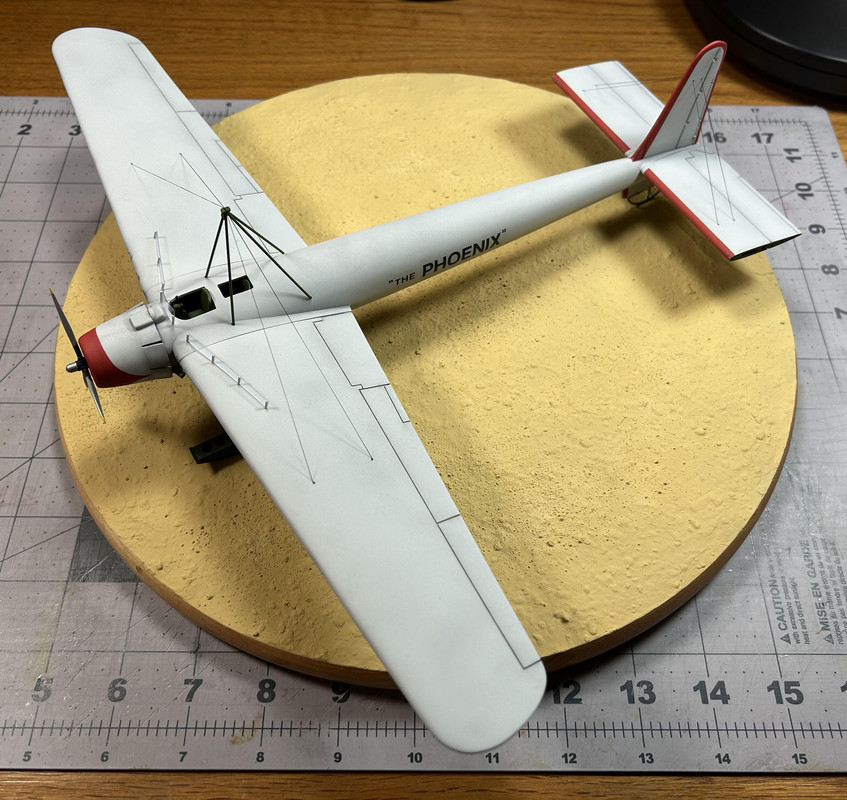
Figures 184 through 194b: The Phoenix airplane part of this project is complete! Here are several informal photos of it. The last two images are “behind the scenes” movie shots. The first shows the actors climbing aboard the wing before taking their final taxi ride. The second shows the Phoenix being pulled by a vehicle to recreate the illusion of taxiing before takeoff. Note the skis and tail skid have been removed and rubber tires added in their place-movie magic vs. the real world!
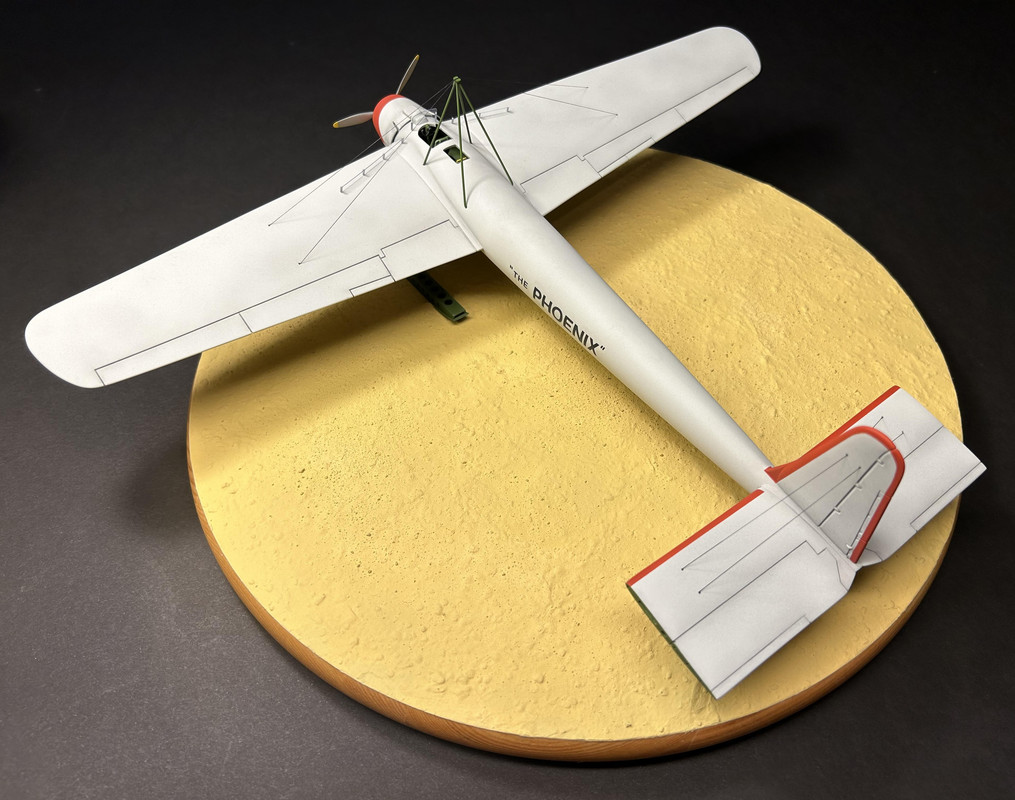
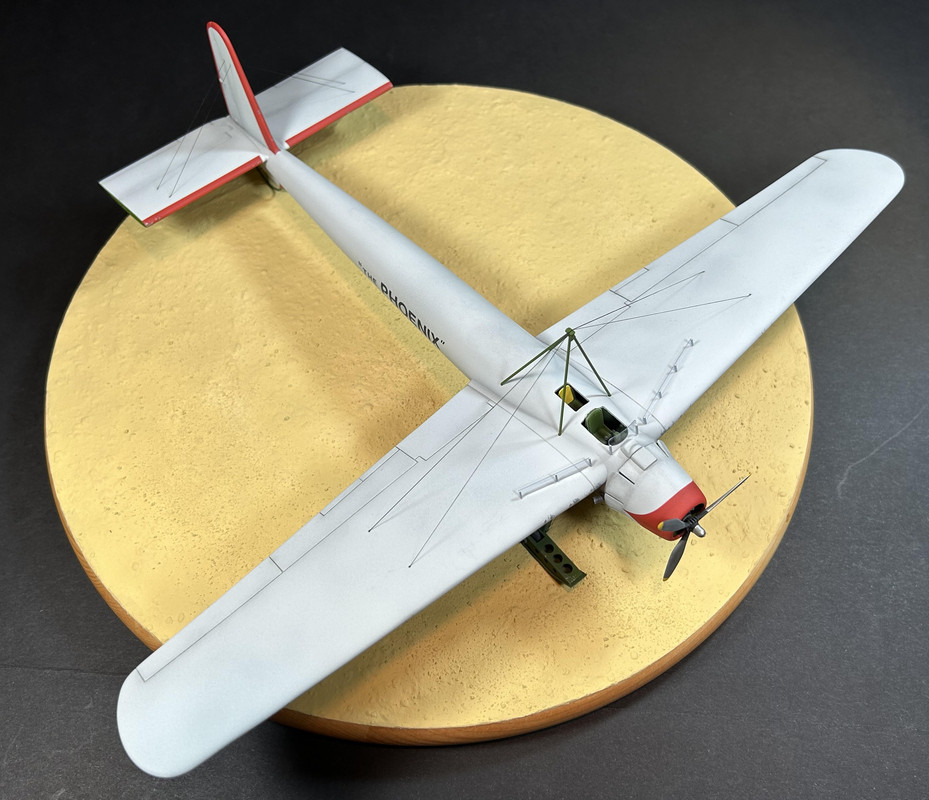
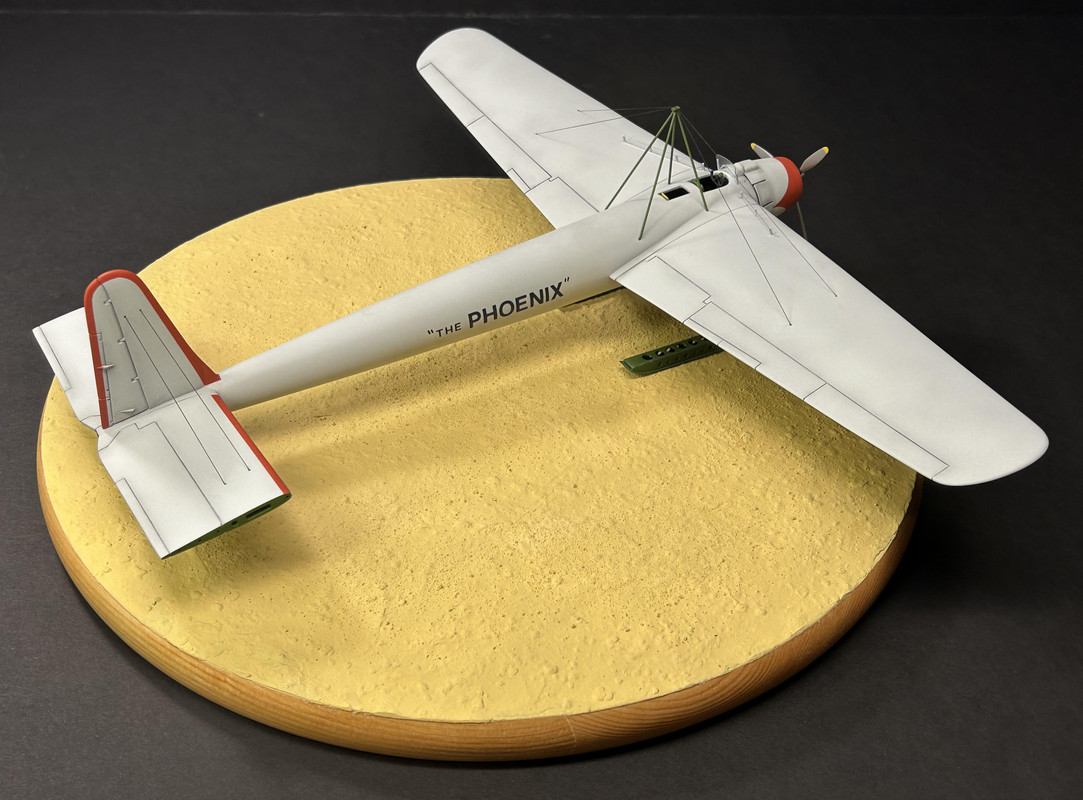
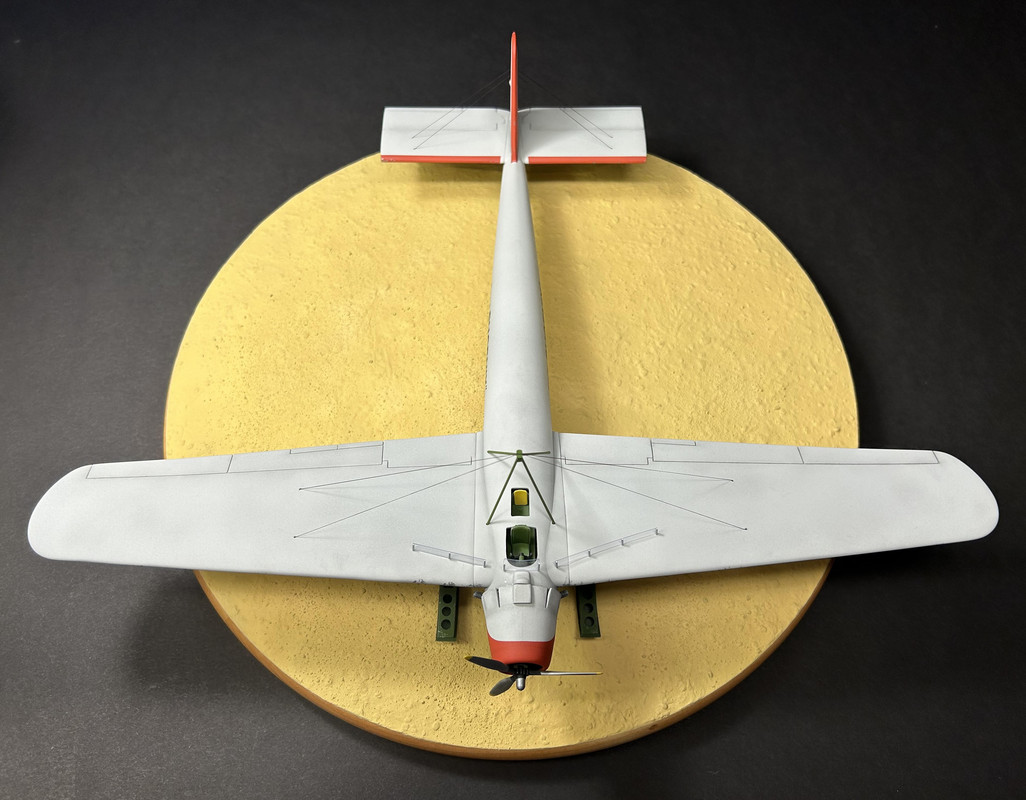
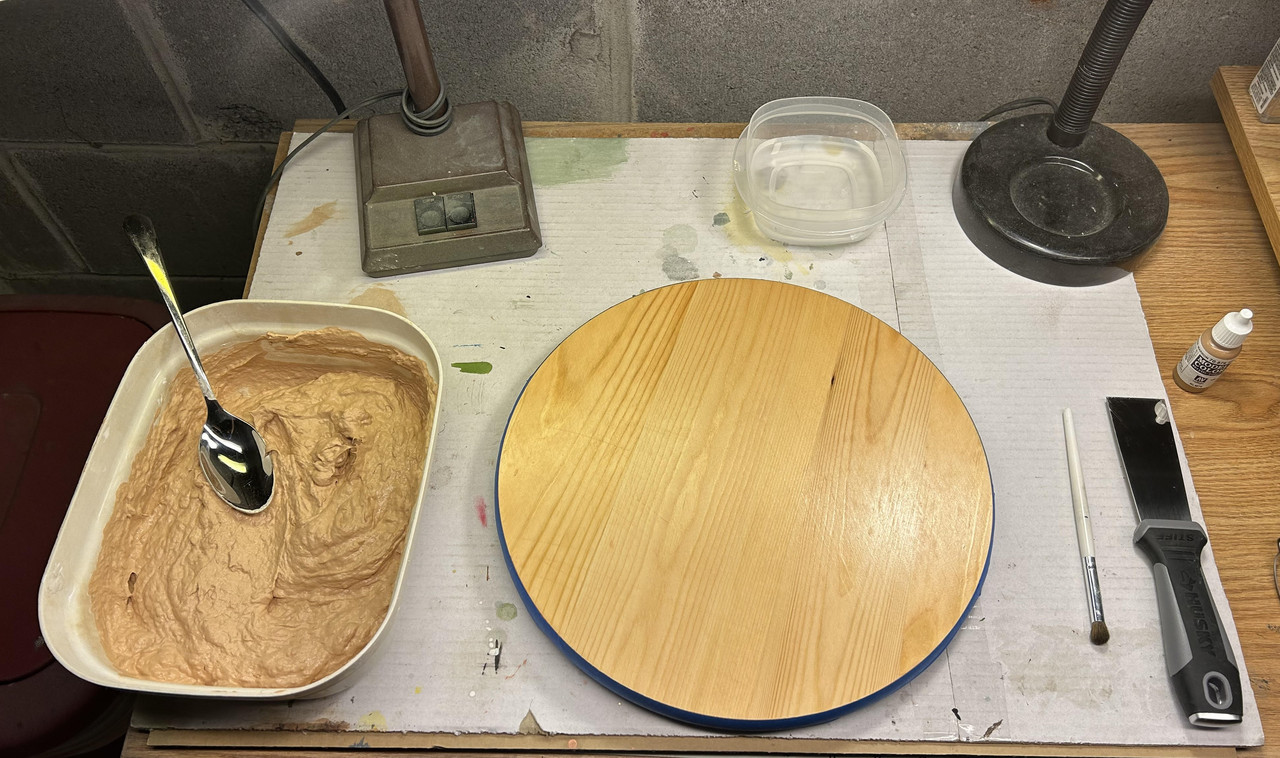
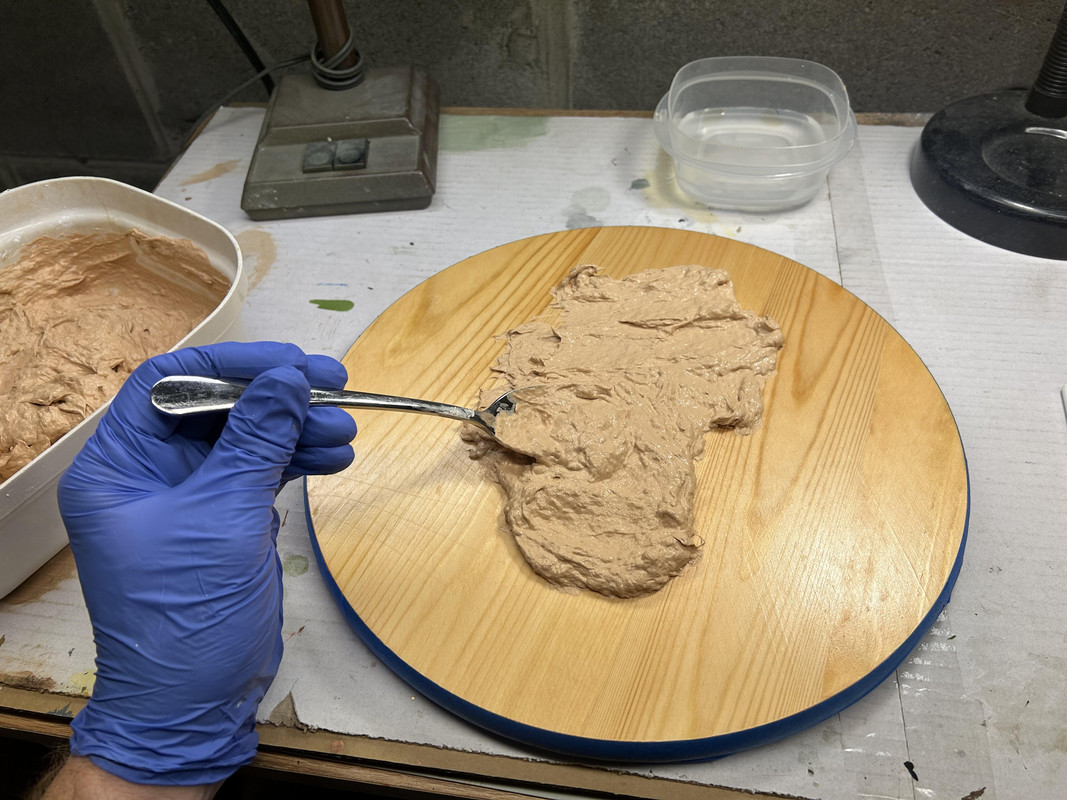
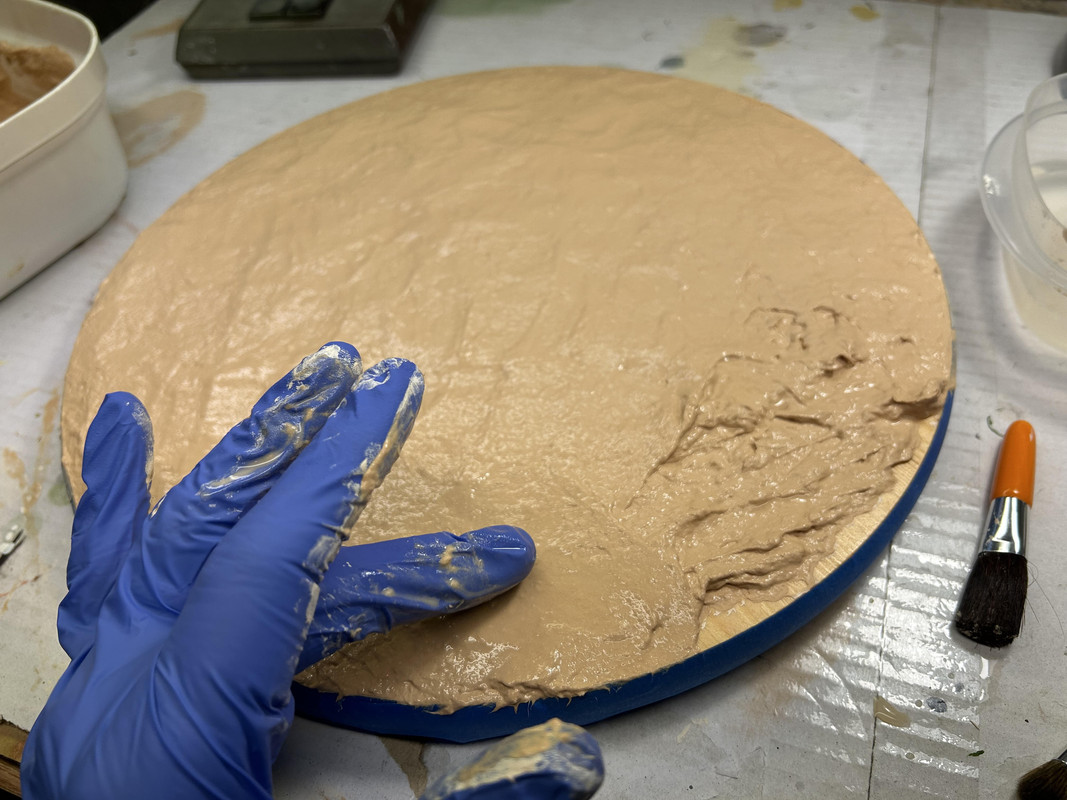
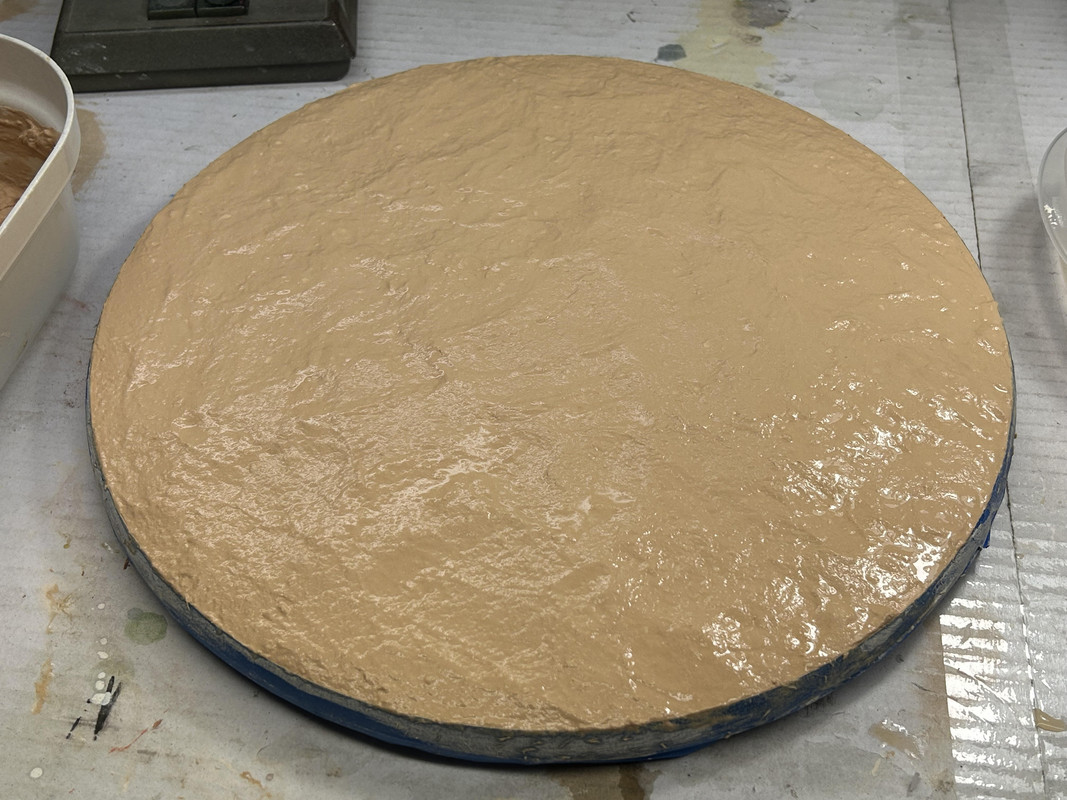
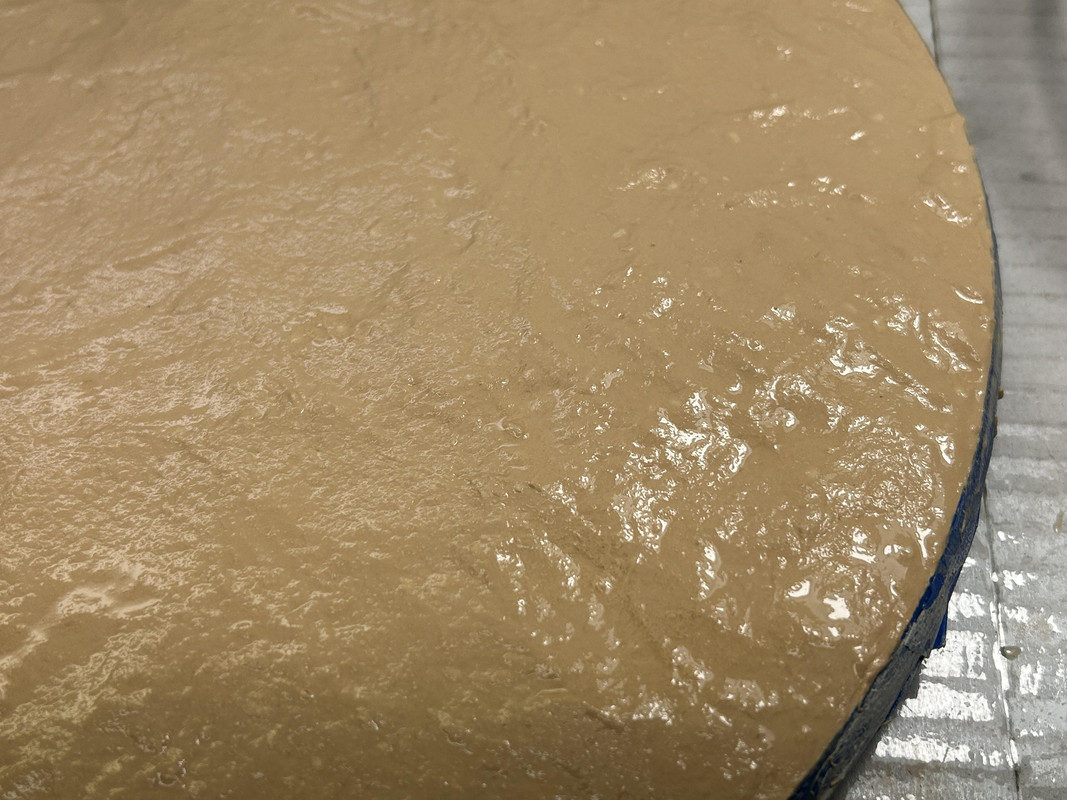
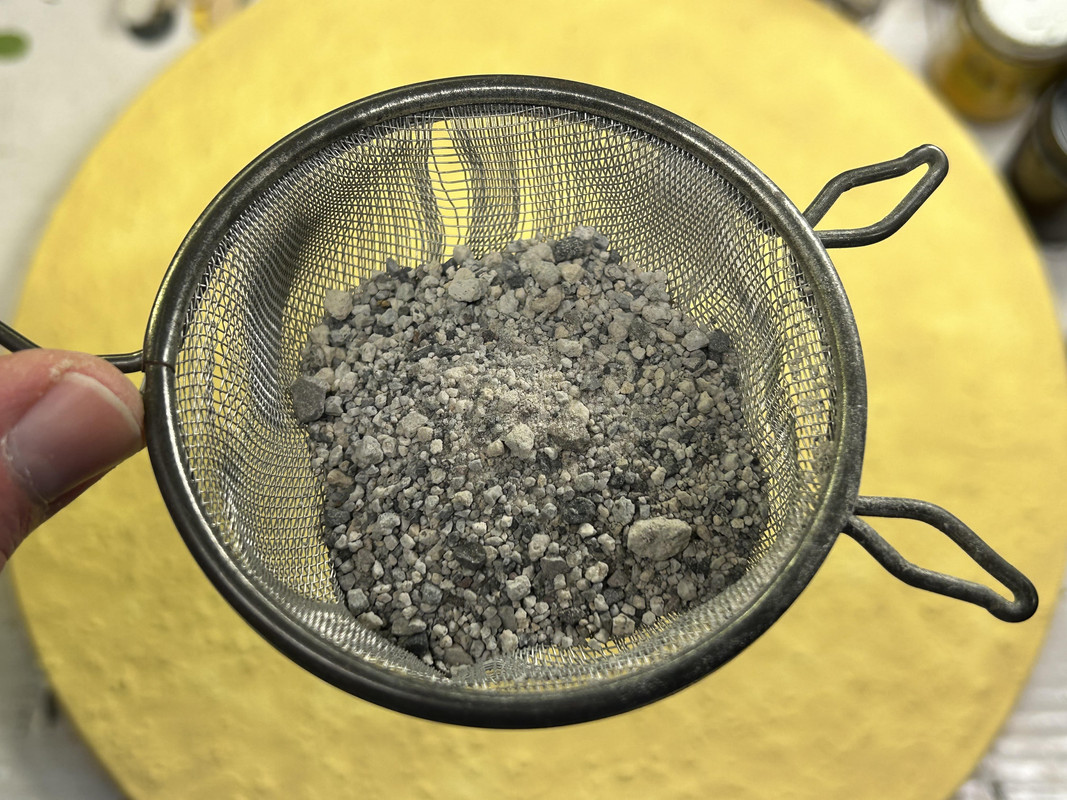
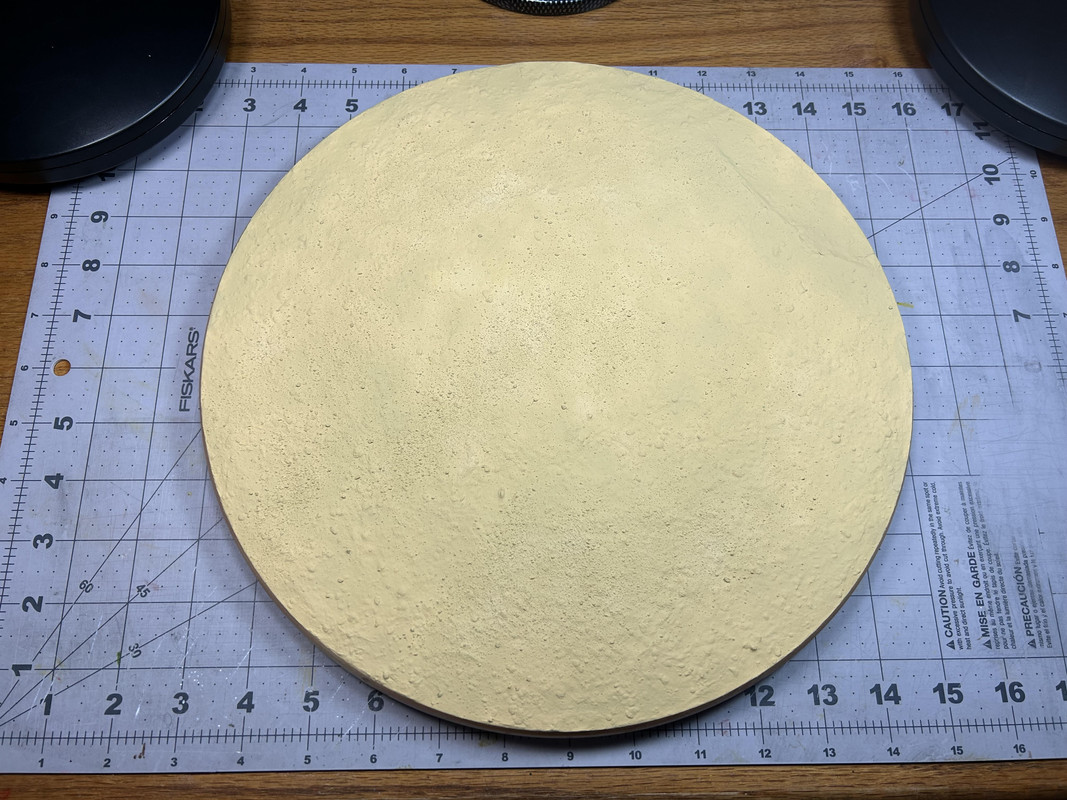
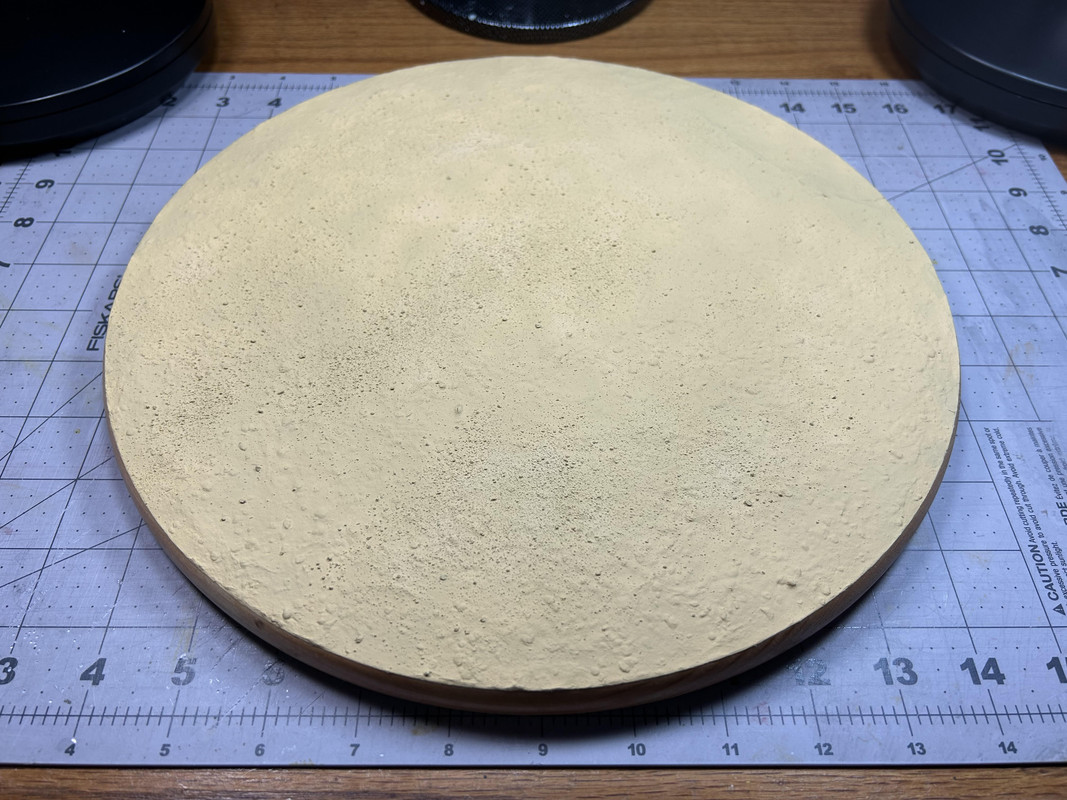
Figures 195 through 205: These photos show the construction steps to make the desert landscape. First, Scultpamold was mixed with water and spread out on the wooden base. Next, water and my fingers were used to level the mixture and make it smoother. A strainer was used to sprinkle a small amount of tiny gravel randomly on the base, then a 50/50 white glue and water mixture was brushed over the surface to lock the gravel in place. After completely curing, the entire base was painted Humbrol Flat Cream (103) which was a good contrast color to use against the light gray airplane. However, a wide range of different desert colors could have been used. Final, more professional photos will be posted in the next couple of days.
Until next time...
Phillip1
Re: Progress Build of the Phoenix Airplane from The Flight of the Phoenix Movie (1965)
Posted: Fri Nov 15, 2024 10:29 pm
by digger303
Re: Progress Build of the Phoenix Airplane from The Flight of the Phoenix Movie (1965)
Posted: Sat Nov 16, 2024 3:11 pm
by Phillip1
digger303-Thanks.
Phillip1
Re: Progress Build of the Phoenix Airplane from The Flight of the Phoenix Movie (1965)
Posted: Sun Nov 17, 2024 4:26 pm
by Phillip1
Re: Progress Build of the Phoenix Airplane from The Flight of the Phoenix Movie (1965)
Posted: Sun Nov 17, 2024 8:00 pm
by RangerNeil
That is truly an amazing job!! Congratulations.
Re: Progress Build of the Phoenix Airplane from The Flight of the Phoenix Movie (1965)
Posted: Mon Nov 18, 2024 5:38 am
by cor
Really nice work man.
Re: Progress Build of the Phoenix Airplane from The Flight of the Phoenix Movie (1965)
Posted: Mon Nov 18, 2024 1:54 pm
by Phillip1
RangerNeil/cor-Thank you very much for the great compliments!
Phillip1
Re: Progress Build of the Phoenix Airplane from The Flight of the Phoenix Movie (1965)
Posted: Tue Nov 19, 2024 9:39 am
by Elve1984
Verry cool project, with a great end result Phillip!
Re: Progress Build of the Phoenix Airplane from The Flight of the Phoenix Movie (1965)
Posted: Tue Nov 19, 2024 1:22 pm
by Phillip1
Elve1984-Thanks!
Phillip1
Re: Progress Build of the Phoenix Airplane from The Flight of the Phoenix Movie (1965)
Posted: Fri Nov 22, 2024 12:00 am
by DRUMS01
Thoroughly enjoyed the whole build process, thanks for sharing it with us all. I agree with you in that it is something you will not see in every modelers display. The build itself would have been nice, but the research and modeling skills you've shown have this one as a stand out show stopper!

Re: Progress Build of the Phoenix Airplane from The Flight of the Phoenix Movie (1965)
Posted: Fri Nov 22, 2024 9:09 am
by Kevthemodeller
Re: Progress Build of the Phoenix Airplane from The Flight of the Phoenix Movie (1965)
Posted: Fri Nov 22, 2024 1:45 pm
by Phillip1
DRUMS01-Thank you for the very kinds words! They are greatly appreciated!
Kevthemodeler-Finding this thread now means you get to see the whole show in one sitting!
Fellow Modelers-While I was working on this build, I did multiple Internet searches looking for any relevant photos or information on the Phoenix airplane that might be helpful. I did find two interesting items I wanted to share with anyone interested in this movie or model project.
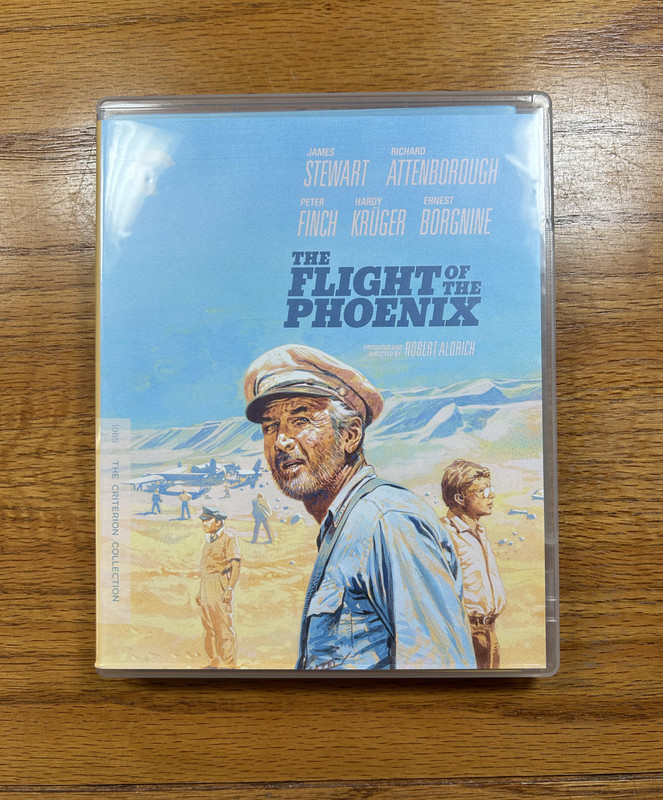
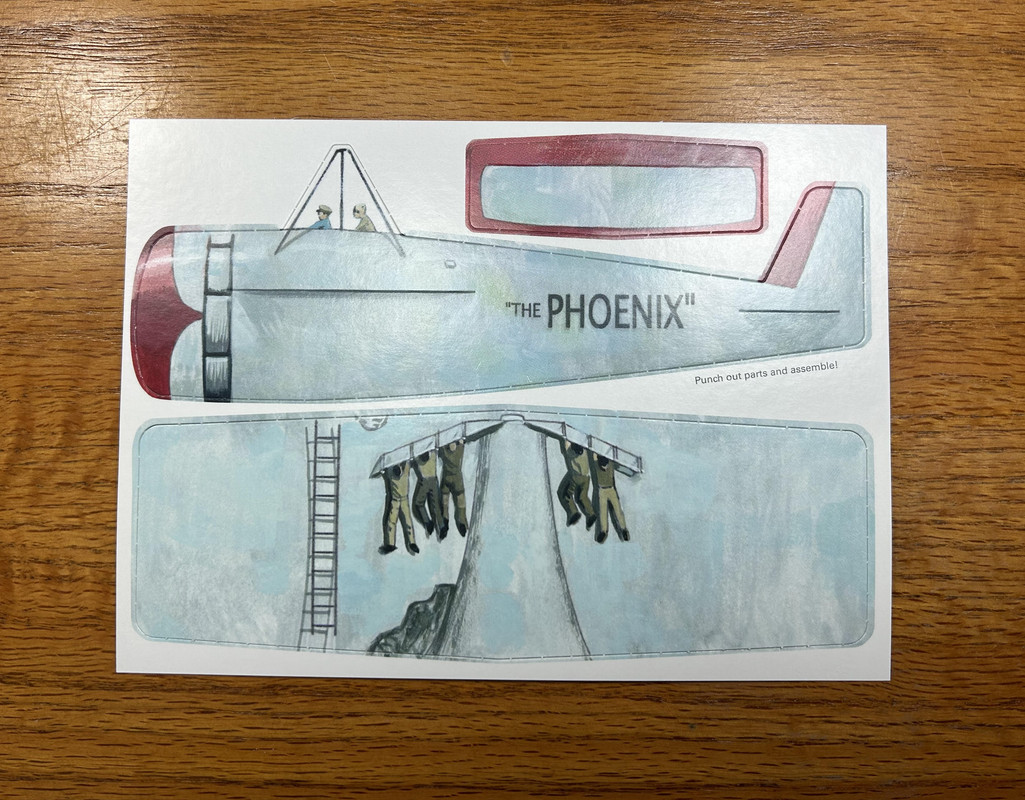
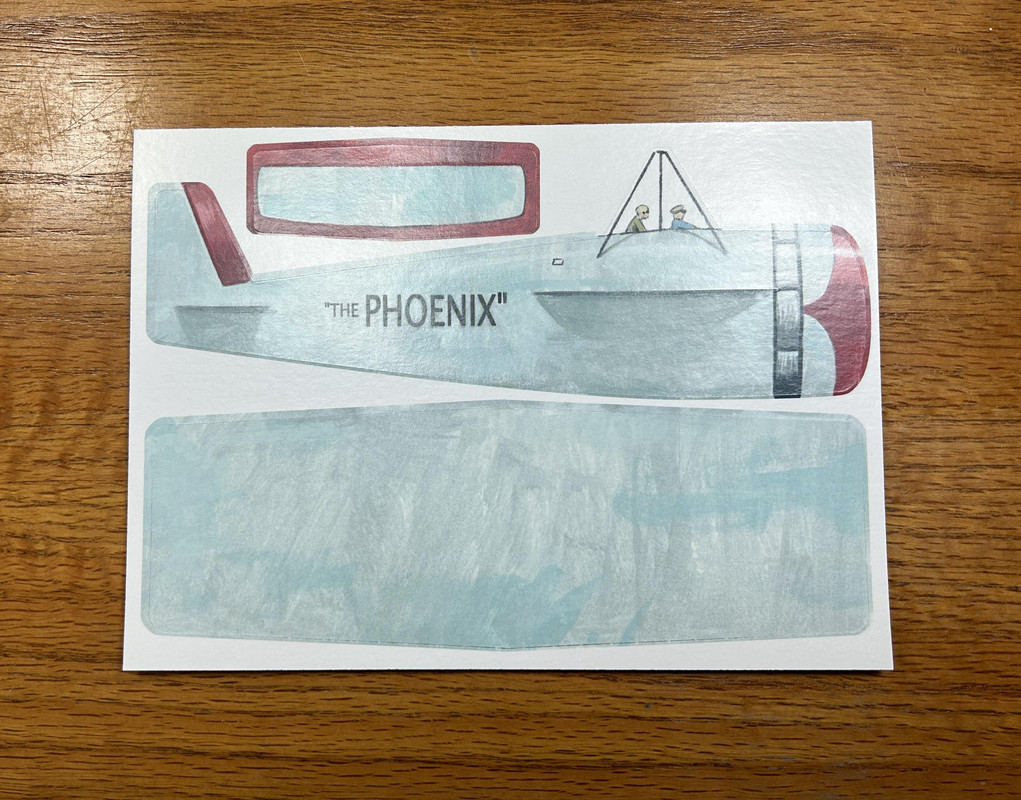
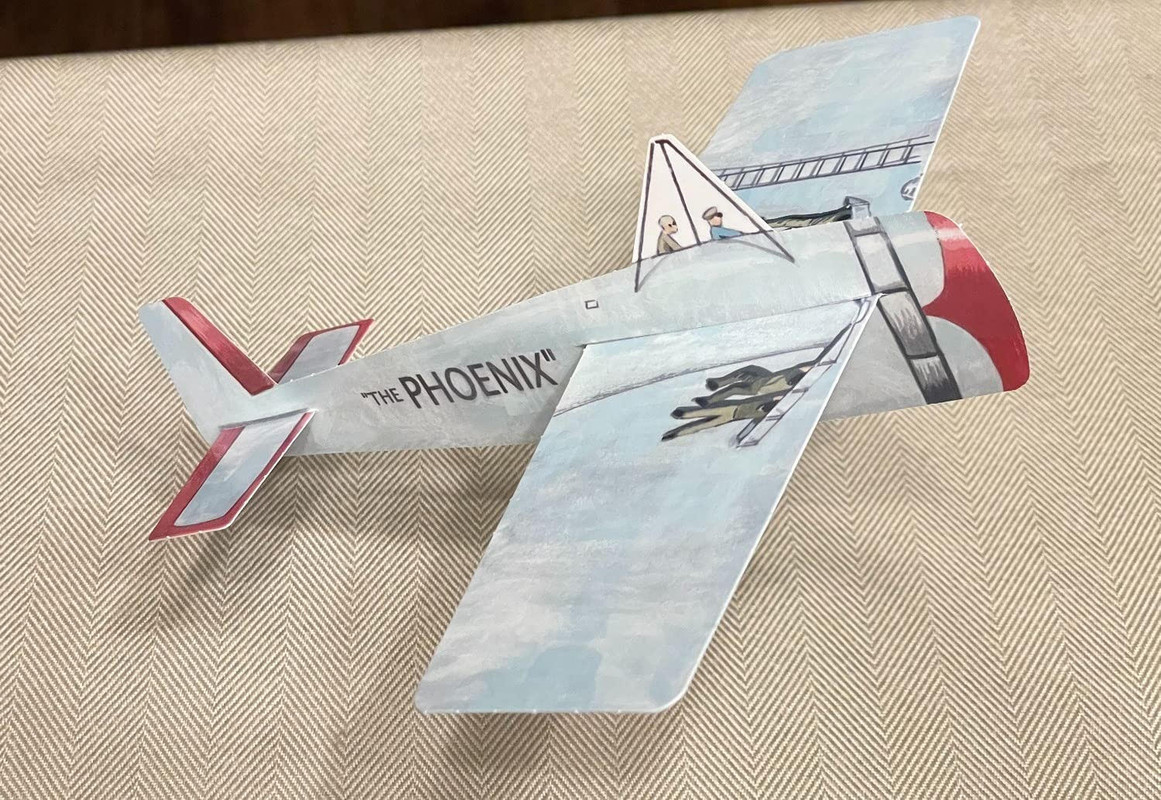
Item 1 (Blu-Ray DVD that includes Phoenix Paper Airplane):
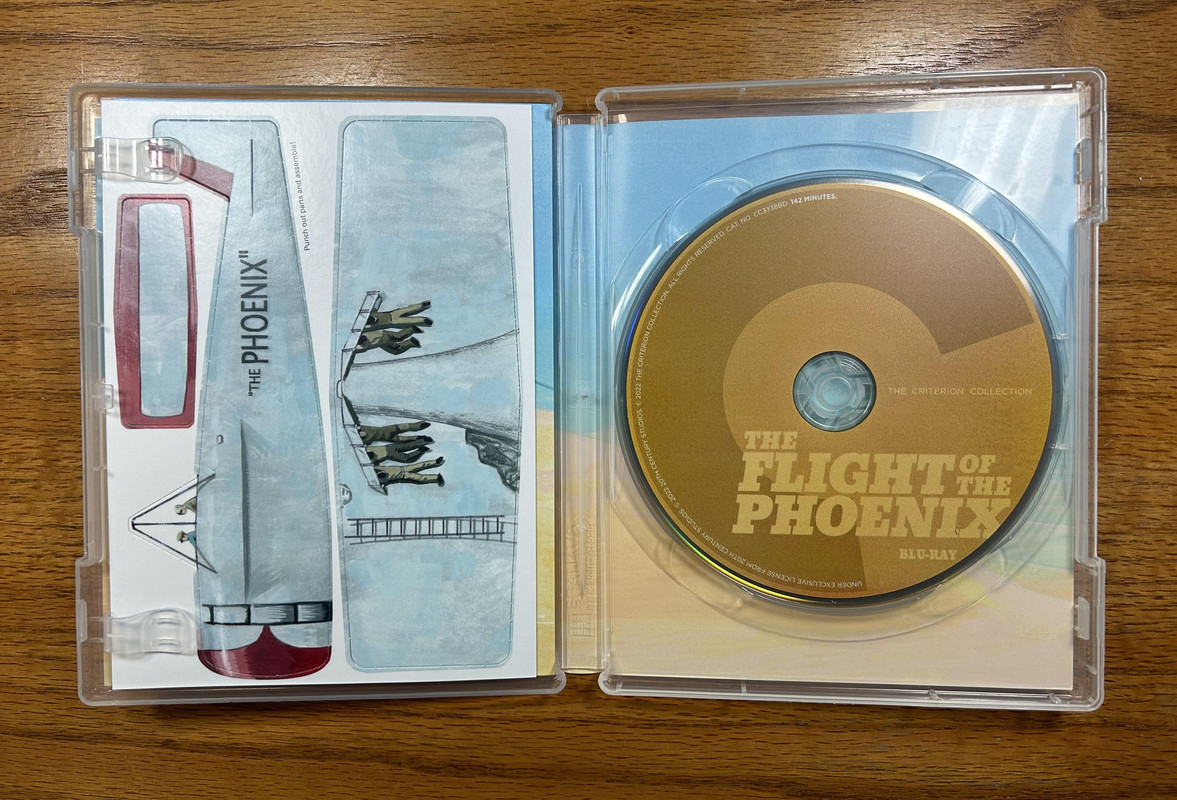
In 2022 The Criterion Collection released a Blu-Ray DVD of The Flight of the Phoenix movie that is really high quality. The picture coloring, detail clarity and depth of field are MUCH better than the 2003 DVD I already owned. As a bonus a small Phoenix paper airplane is included in the case, which is really pretty awesome (see images below).
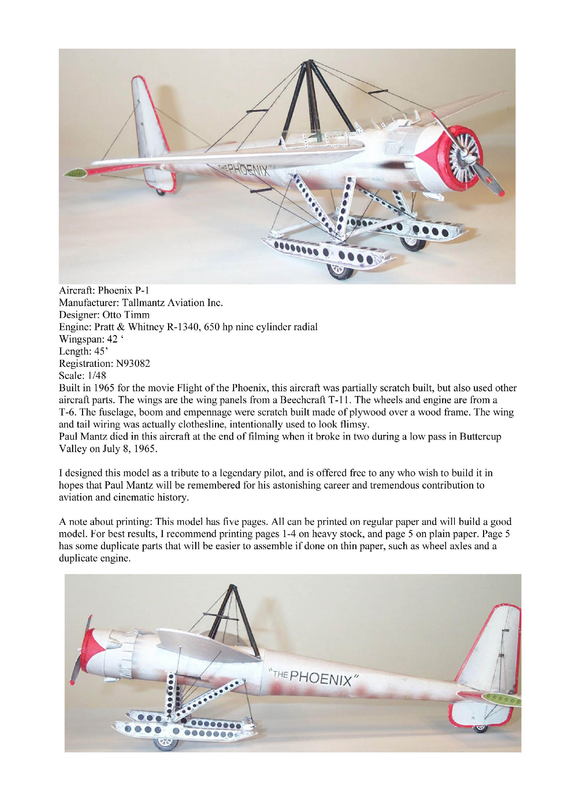
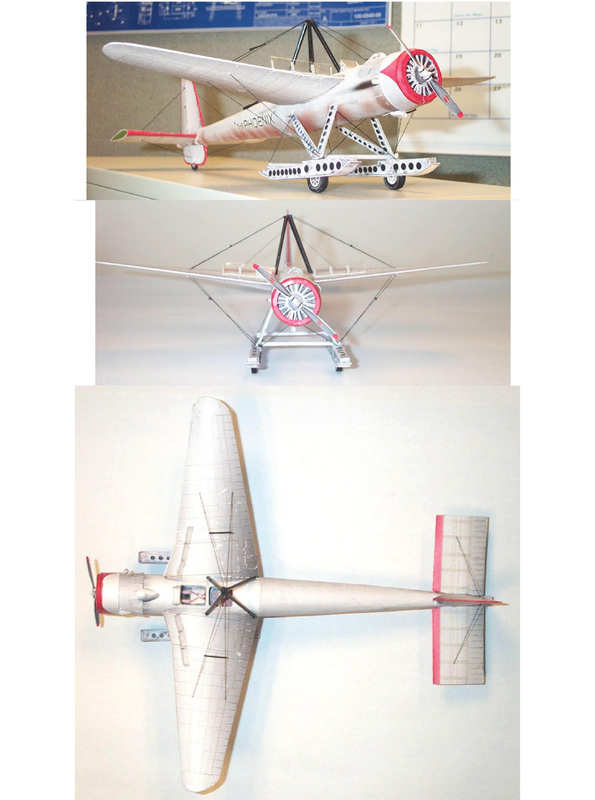
 Item 2 (Tallmantz Phoenix P-1 Papercraft Model Airplane Download for Sale):
A company called Bonanza (in Seattle, WA) will email you the parts layout download to assemble the Tallmantz P-1 Phoenix airplane out of paper for $2.30 (U.S. Currency). Note the P-1 is the flying version used in the movie and not the one I built in this thread. From all the images I have seen it looks very accurate. I bought the download but will need to educate myself further on building papercraft models before I attempt it (see images below).
Phillip1
Re: Progress Build of the Phoenix Airplane from The Flight of the Phoenix Movie (1965)
Posted: Fri Nov 22, 2024 11:04 pm
by digger303
Re: Progress Build of the Phoenix Airplane from The Flight of the Phoenix Movie (1965)
Posted: Sat Nov 23, 2024 2:44 pm
by Phillip1
digger303-Thanks!
Phillip1