Page 1 of 2
Tamiya 1:48 Raiden (Jack)
Posted: Fri Oct 03, 2025 11:49 pm
by bfrd
I will be building a Raiden.

Stay tuned for more information...
Re: Tamiya 1:48 Raiden (Jack)
Posted: Mon Oct 06, 2025 2:12 pm
by bfrd
Specifications
| |
|---|
| Manufacturer | Mitsubishi Heavy Industries |
| Year | 1943 |
| Model | J2M3 Raiden |
| Allied Code Name | Jack |
| Crew | 1 |
| Max T/O Weight | 8,699 lb. |
| Span | 35 ft. 5 in. |
| Length | 31 ft. 9 in. |
| Height | 12 ft. 6 in. |
| Maximum Speed | 407 mph |
| Cruise Speed | 228 mph |
| Rate of Climb | 3,838 ft/min |
| Power Plant | 1 x Mitsubishi MK4R-A Kasei23a 14-cylinder air-cooled radial engine, 1,820 hp. |
| Range | 656 mi |
| Service Ceiling | 36,080 ft. |
| Armament | Four Type 99 20-mm cannon |
History
planesoffame.org wrote:
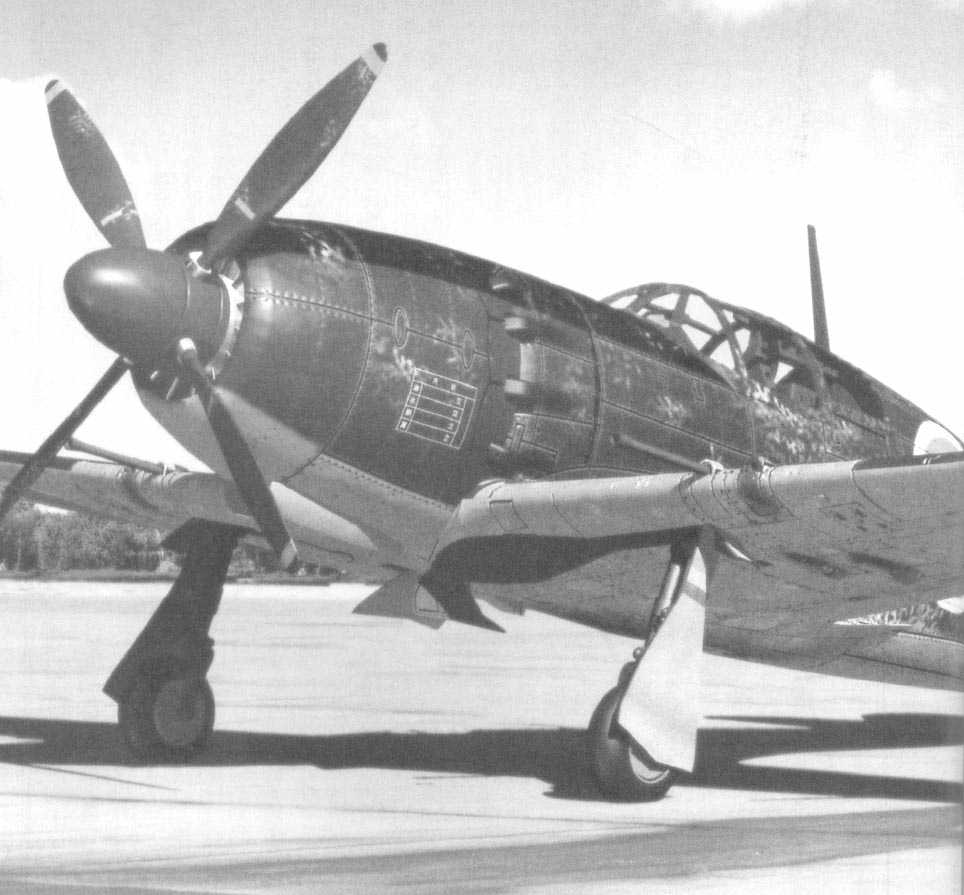
- Design of the J2M Raiden (Lightning Bolt) began in 1938. But almost five years passed before The Imperial Japanese Navy issued a request for a land-based interceptor, for which the Raiden (Allied code name Jack) was suited. It was the first time the Japanese military had identified the need for a true interceptor type aircraft capable of high speed, dive and climb characteristics similar to those of the A6M Reisen, but with heavier armament and longer operation at combat speeds. The aircraft was needed to intercept the Allied heavy bombers that were anticipated as the war progressed.
- The first of three prototypes took to the air in March of 1942 and many design issues were found. Among them were problems with the retractable landing gear and the engine and prop combination. Numerous modifications were required, including changing to the Kasei 23 engine that produced 1,800 hp and included water and gas injection for emergency combat power.
- It wasn't until December 1942 that all of the problems were believed solved and the aircraft went into production. Manufacturing was quickly halted until the causes of several crashes were determined. It was found that the tail wheel locking mechanism, when set after takeoff, caused the controls to be locked into the dive position.
- Although only 621 Raidens of all variants were produced, the J2M3 variant remained in service until the end of the war and was responsible for downing several Allied bombers.
Kit Details
Even though this Buddy Build is for my 50th birthday, this kit is older than I am!
Scalemates Link
The instructions are one area that shows this kit's age. The color callouts are essentially non-existent. So I decided to use the color callouts from the more modern Zoukei-Mura kit. They have several colors called out but I found the easiest link to be using the Mission Models colors --> Vallejo Model Air.

* Not shown is the underside which will be Vallejo Pale Blue Gray [71.046].
I will most likely paint the Yellow parts instead of the decals using Vallejo Medium Yellow [71.002].
I haven't yet chosen the livery. I like the visual interest of the lightening bolts, but I am concerned about the decals. At least one of the videos I watched had these decals behaving poorly. I won't be started for a least a week longer, so I have time to decide.
Re: Tamiya 1:48 Raiden (Jack)
Posted: Mon Oct 06, 2025 6:14 pm
by Stokesy44
Tasty subject


Re: Tamiya 1:48 Raiden (Jack)
Posted: Tue Oct 07, 2025 11:48 am
by digger303
Re: Tamiya 1:48 Raiden (Jack)
Posted: Tue Oct 07, 2025 12:47 pm
by bfrd
Aotake
It appears that there is some controversy among modellers regarding the undercoating of IJN aircraft. The original instructions said "Translucent Blue."
EDIT:
There is no controversy for me, I'm going with whatever I think looks cooler! 
Reference Images


Images from
History You Can Touch (blog)
I am going to experiment with Tamiya Translucent Blue over an Aluminum color. I also picked up some Vallejo Aotake [71.419]. I'll see which option I like better.
Re: Tamiya 1:48 Raiden (Jack)
Posted: Wed Oct 08, 2025 12:33 am
by digger303
Re: Tamiya 1:48 Raiden (Jack)
Posted: Wed Oct 08, 2025 7:20 am
by Stokesy44
Controversy already!
Didn't think that sort of thing happened in the modelling community

Re: Tamiya 1:48 Raiden (Jack)
Posted: Wed Oct 08, 2025 8:43 am
by Kevthemodeller
Re: Tamiya 1:48 Raiden (Jack)
Posted: Wed Oct 08, 2025 8:44 am
by Kevthemodeller
I've got my kit chosen, but I've got to get the FW190 finished first, can't do multi builds

Re: Tamiya 1:48 Raiden (Jack)
Posted: Wed Oct 08, 2025 1:25 pm
by digger303
Stokesy44 wrote: Wed Oct 08, 2025 7:20 am
Controversy already!
Didn't think that sort of thing happened in the modelling community
It does explain the colour variation rather nicely and opens it up to either colour on the plane or a combination of the 2 which is rather eye catching.

Re: Tamiya 1:48 Raiden (Jack)
Posted: Wed Oct 08, 2025 1:51 pm
by bfrd
Stokesy44 wrote: Wed Oct 08, 2025 7:20 am
Controversy already!
Didn't think that sort of thing happened in the modelling community
Like I said in my "edited" post. There is no controversy for me. I'll leave the debate for which color goes where to the rivet counters. I will use whatever color (or spelling) I think works best for me!
Re: Tamiya 1:48 Raiden (Jack)
Posted: Wed Oct 15, 2025 3:32 pm
by bfrd
I started doing some clean-up on the sprues. There are a LOT of raised panel lines on this kit. I built up the drop tank and had to scribe in new lines.
I also started work on the figures. Before I spend $20 on a 3D model (that I still have to print and get into the right scale) I want to try the kit figures. I primed in a full coat of black and then hit the figures from the top with white.

Re: Tamiya 1:48 Raiden (Jack)
Posted: Wed Oct 15, 2025 9:01 pm
by bfrd
I think the figures are done.


I don’t think I’ll use the standing guy, but I thought I would paint him all the same.
Re: Tamiya 1:48 Raiden (Jack)
Posted: Thu Oct 16, 2025 7:00 am
by Stokesy44
Nicely done
Re: Tamiya 1:48 Raiden (Jack)
Posted: Thu Oct 16, 2025 2:11 pm
by bfrd
I've got the base color down on the interior and cockpit.
Primed with Mr. Surfacer 1500 Black and painted with Vallejo IJN Deep Dark Green (Model Air). I'm not sure that is the "right" color, but it is the one I picked. I hope I have enough primer to finish the model. That stuff is nearly impossible to find. Online prices are going for stupid money. I may have to get the spray can and decant.


Re: Tamiya 1:48 Raiden (Jack)
Posted: Thu Oct 16, 2025 2:38 pm
by digger303
Re: Tamiya 1:48 Raiden (Jack)
Posted: Thu Oct 16, 2025 4:21 pm
by bfrd
I know it doesn't really matter, but since I am spraying a lacquer over the main body, I prefer a lacquer primer.
I plan to prime and then paint with Alcad Aluminum, followed by the application of chipping fluid. Once that is dry, I will come with the acrylic top color.
Here is my test sample.

I am not thrilled with the chipping fluid; it doesn't atomize, it squirts. That leaves an uneven finish. I need to experiment more, I suppose.
Re: Tamiya 1:48 Raiden (Jack)
Posted: Thu Oct 16, 2025 4:48 pm
by Twokidsnosleep
bfrd wrote: Thu Oct 16, 2025 4:21 pm
I know it doesn't really matter, but since I am spraying a lacquer over the main body, I prefer a lacquer primer.
I plan to prime and then paint with Alcad Aluminum, followed by the application of chipping fluid. Once that is dry, I will come with the acrylic top color.
Here is my test sample.
I am not thrilled with the chipping fluid; it doesn't atomize, it squirts. That leaves an uneven finish. I need to experiment more, I suppose.
The randomness of it looks very realistic
Re: Tamiya 1:48 Raiden (Jack)
Posted: Thu Oct 16, 2025 6:39 pm
by Stokesy44
Twokidsnosleep wrote: Thu Oct 16, 2025 4:48 pm
The randomness of it looks very realistic
My thoughts exactly. I would be very happy with that finish.
Re: Tamiya 1:48 Raiden (Jack)
Posted: Fri Oct 17, 2025 2:59 am
by bfrd
The interior is pretty much done.

Re: Tamiya 1:48 Raiden (Jack)
Posted: Fri Oct 17, 2025 5:41 am
by digger303
Re: Tamiya 1:48 Raiden (Jack)
Posted: Fri Oct 17, 2025 3:17 pm
by bfrd
So I did a quick dry fit and found that I didn't paint all of the interior, oops!

I also tried my best to identify all of the raised lines that will get damaged when fixing seam lines. I marked them with a paint pen.

I decided that at least some of them would be easier to pre-scribe before gluing together. I used Dymo tape placed right on the edge of the raised line and a Tamiya Panel Scriber to make the cut. Once cut I used Tamiya Extra Thin cement to even out the cut.

I am wondering now if I should re-cut
ALL of the raised lines. I'm not sure how easy it will be to tell raised from inset lines when finished.
Thoughts?
Re: Tamiya 1:48 Raiden (Jack)
Posted: Sat Oct 18, 2025 5:31 pm
by Twokidsnosleep
Flying along!
Re: Tamiya 1:48 Raiden (Jack)
Posted: Sun Oct 19, 2025 2:54 am
by digger303
Just a quick query, doesn't felt pen ink bleed through the paint ?
Re: Tamiya 1:48 Raiden (Jack)
Posted: Sun Oct 19, 2025 12:43 pm
by bfrd
digger303 wrote: Sun Oct 19, 2025 2:54 am
Just a quick query, doesn't felt pen ink bleed through the paint ?
It will be sanded and covered by black primer. I didn’t think it would be a problem. Fingers crossed; I guess.
Re: Tamiya 1:48 Raiden (Jack)
Posted: Mon Oct 20, 2025 2:22 pm
by bfrd
I made some decent progress this weekend. Masking the canopy is a challenge. The raised parts are only "raised" by the slimmest of definitions. There are no masking sets readily available locally. Stupid tariffs make ordering from overseas a crap-shoot. So I did the next best thing, I improvised. I picked the best image of mask sets that I could find and traced out the pattern in Adobe Illustrator exported the vectors to my
Silhouette program. I then used some calipers and measured the canopy part and scaled as close as I could. I then cut some home-made masks out of vinyl.

The most rounded areas wanted to pull-up but I think that will work well enough. I plan on using vinyl stencils for the Hinomaru (ball of the sun), as well.
After that I was ready to close up the fuselage halves and mount the wings and horizontal stabilizers.

Next, came the nose.

I also made a big pot of Gumbo. Probably a little early as it is still kinda warm here. It sure did taste good!

Re: Tamiya 1:48 Raiden (Jack)
Posted: Tue Oct 21, 2025 8:31 am
by cor
What is gumbo?
Re: Tamiya 1:48 Raiden (Jack)
Posted: Tue Oct 21, 2025 1:30 pm
by bfrd
cor wrote: Tue Oct 21, 2025 8:31 amWhat is gumbo?
Gumbo is a Cajun comfort food. It is basically a stew served over rice.
Although I live in Texas, I am originally from Louisiana. Learning to make gumbo is practically a rite of passage. Most families have thier own little nuances. The word gumbo comes from a West African word for Okra. In most traditional gumbo recipes, Okra is used as a thickener. My wife doesn't care for okra, so I make mine without it. It is also common practice to only make gumbo once it is cool. This past weekend saw the first cool weather here, so I decided to make the season's first pot.
https://en.wikipedia.org/wiki/Gumbo
Re: Tamiya 1:48 Raiden (Jack)
Posted: Wed Oct 22, 2025 1:28 pm
by bfrd
This kit has a small box molded into the fuselage halves for the radio. It is/was located behind the seat. This area was very bad in terms of fit so I removed it and built a replacement. It is out of scale, but suitable for my needs.

I tried gluing on (temporarily) the canopy, but I wasn't happy with the fitment. The canopy plastic is quite thin and flexible. The amount of glue I would have to use to make it stay in place would make removal later more challenging than I am comfortable with.

So, I am going to use a combination of cotton balls and masking fluid to protect the interior of the cockpit.

Ichiro thinks this is a VERY bad idea!
Re: Tamiya 1:48 Raiden (Jack)
Posted: Wed Oct 22, 2025 3:02 pm
by Quax
definitely beginning to look good, its quite a chunky plane isn't it! You did a great job in creating the masks, its such a shame that tariffs are having an effect on peoples hobbies but as they say "adversity is the mother of invention" (apparently it was Plato who said necessity is the mother of invention but Ive only read Cupo...

)
Have a good look at the decals...

Paul
Re: Tamiya 1:48 Raiden (Jack)
Posted: Thu Oct 23, 2025 3:34 am
by bfrd
I finished up scribing lost panel lines and primed in Mr Surfacer 1500 Black.

Once that was done I put a base coat of Alclad Aluminum.

Re: Tamiya 1:48 Raiden (Jack)
Posted: Thu Oct 23, 2025 6:47 am
by Stokesy44
Wow, that primer coat and the paint has gone down beautifully

Re: Tamiya 1:48 Raiden (Jack)
Posted: Thu Oct 23, 2025 1:14 pm
by bfrd
Scott always tells me that I am too hard on myself when it comes to modeling. I tend to focus on the deficiencies. However, for full disclosure, I feel that I owe it to all those who are starting to reveal the mistakes we would rather hide.
Here is the underside of the plane. It has a couple of blemishes.

I didn't get the seam between the fuselage as well hidden as I would have liked. A prominent arch is visible where the wing section and the fuselage section meet. I puttied and sanded the hell out of it, but I didn't get it all the way gone. One more round probably would have won it, but I got lazy.
The other significant user-generated error is on the right stabilizer. In my infinite wisdom, I attempted to freehand one of the panel lines with my non-dominant hand, using a razor saw. I have no idea what I was thinking. It went just as you would expect. There were several slips on the scribed panel lines. Those are *all* due to rushing or pushing too hard.
If you think you need a lot of force with a sharp scribing tool, try this. Find a flat section of your model and lightly scratch the surface to determine how much sanding is needed to smooth it out. The moral of that story is you are much better off making several light passes than one heavy one. Additionally, a thick tape, such as Dymo, is a handy guide; make sure that it is actually stuck.
This was the first time I have done this level of scribing. Overall, I think it looks great. I am also impressed with how well the parts fit for such an old kit.
Quax wrote:Have a good look at the decals...
I was worried about the decals, too, as other reviews mentioned they had issues, but they look freshly reprinted. The instrument panel decal went on perfectly.
Re: Tamiya 1:48 Raiden (Jack)
Posted: Fri Oct 24, 2025 2:30 am
by bfrd
The aotake is down.

Re: Tamiya 1:48 Raiden (Jack)
Posted: Fri Oct 24, 2025 2:39 am
by Twokidsnosleep
I like that !
Re: Tamiya 1:48 Raiden (Jack)
Posted: Fri Oct 24, 2025 7:15 am
by Stokesy44
Nailed it with that interior colour.
Re: Tamiya 1:48 Raiden (Jack)
Posted: Sat Oct 25, 2025 2:01 pm
by bfrd
Things took quite a turn yesterday, and not in a good way.
I sprayed the chipping fluid over the Aluminum. It didn't go down as smoothly as my second test, but I managed. A while later I played down the gray on the belly.

I left it for a bit and came back to mask it off. I had noticed some paint chips had come off when I popped out the spare wheel covers I used as a mask. I assumed I nicked it with my blade. While repositioning one of the wing masks I found that paint was lifting. I had forgotten to detack the tape. It was more chipping than I would have wanted, but I could live with it. I detached all if the tape and finished masking.
Sprayed the upper surfaces and removed the tape. To my horror paint lifted everywhere. I proceed with masking in hopes of fixing the paint freehand.


As I was spraying more paint was flaking and then getting fixed in place by the paint. It was an awful finish.
No big deal, I'll strip it and try again.

This morning I decided to unmask the canopy to make sure it was ok. It was not. I used 90%-ish isopropyl alcohol mixed with a little airbrush cleaner to clean off the paint. I was very careful around the canopy area and used a paper towel there. I am assuming that the vapors from the alcohol permeated the mask and softened the interior paint. That caused the cotton that I used to fuse to the inside of the canopy. As an added bonus the masking fluid hardened and refused to come off easily.

My plan is to paint the inside of the canopy Black and hide it.
Re: Tamiya 1:48 Raiden (Jack)
Posted: Sat Oct 25, 2025 5:32 pm
by Twokidsnosleep
Cockpit is Like a spider scene from Harry Potter

Sucks that happened, was going so well
Re: Tamiya 1:48 Raiden (Jack)
Posted: Sat Oct 25, 2025 5:38 pm
by bfrd
I used some distilled water and was able to clean up the cockpit well enough. I will still need to repaint parts of it, but I won't have to black out the canopy.

I am currently priming the body (again).
Re: Tamiya 1:48 Raiden (Jack)
Posted: Sun Oct 26, 2025 12:17 am
by digger303
Re: Tamiya 1:48 Raiden (Jack)
Posted: Sun Oct 26, 2025 1:22 am
by bfrd
Primed and pre-shaded.

Belly is also painted.

Re: Tamiya 1:48 Raiden (Jack)
Posted: Sun Oct 26, 2025 8:39 am
by Stokesy44
No plan survives the first shot fired in the battle.
Well done for pushing back and getting the kit back to looking great again. Great skill as well as perseverance.
Re: Tamiya 1:48 Raiden (Jack)
Posted: Sun Oct 26, 2025 1:52 pm
by bfrd
I think I have the body painted in its main colors.


Now for the markings…
Decal or stencil?
Re: Tamiya 1:48 Raiden (Jack)
Posted: Sun Oct 26, 2025 5:19 pm
by Twokidsnosleep
Stokesy44 wrote: Sun Oct 26, 2025 8:39 am
No plan survives the first shot fired in the battle.
Well done for pushing back and getting the kit back to looking great again. Great skill as well as perseverance.
I agree
He was at a tenuous point where binning it after so much effort would be tempting
Kudos for perseverance

Re: Tamiya 1:48 Raiden (Jack)
Posted: Mon Oct 27, 2025 12:16 am
by bfrd
Decals are down.

I’ll follow up with more fixing solutions tomorrow.
Re: Tamiya 1:48 Raiden (Jack)
Posted: Mon Oct 27, 2025 1:29 am
by Twokidsnosleep
That is looking really sweet
Re: Tamiya 1:48 Raiden (Jack)
Posted: Mon Oct 27, 2025 7:33 am
by Stokesy44
Looks VERY Japanese!
Re: Tamiya 1:48 Raiden (Jack)
Posted: Mon Oct 27, 2025 12:59 pm
by digger303
Re: Tamiya 1:48 Raiden (Jack)
Posted: Thu Oct 30, 2025 6:27 pm
by Kevthemodeller
Some cracking work going on here, great save too

Re: Tamiya 1:48 Raiden (Jack)
Posted: Mon Apr 27, 2026 3:06 pm
by bfrd
So, after getting a little modeling mojo back, I picked this up again.
I glued up the gear covers to the gear and mounted them. I also gave the exhaust a red-brown coat of paint.

I wanted a stronger bond with the gear, so I used Revell Contacta. Unfortunately, I didn't wait long enough to set it down. The gear had a very dissimilar angle. So keep note that the bond may be stronger, but it takes quite a bit longer to set. I should have taped them in place. Live and learn, I suppose.
To fix, I pulled the gear out, which essentially just broke off the attachment points from the gear bay. I drilled out the top of the gear, placed a small brass tube, and then drilled the bay with matching holes. This time I had to use super glue. Here is is another tip. Instead of using the spray for super glue kicker, put a bit in a small dropper bottle. I used a dark glass bottle with a glass dropper. This makes it easier to apply just a little exactly where you want it.

Anyway, the first side went perfectly. I moved on to the second side. Using a toothpick, I transferred some glue to the hole and set the gear in. I matched the angle of the 1st set and placed a drop of kicker. The angle was close enough; I was happy I seemed to have dodged a bullet. Then I noticed something that made my heart sink. The gear cover was on the wrong side. I was so focused on the angle that I didn't even notice that the gear was backward.
This is where things deteriorated. Thanks to the kicker, the gear was solidly in place. I had to use the de-bonder, which I had on hand. Next tip, when using de-bonder, mask everything off like you were painting. This stuff might as well be paint stripper and plastic dissolver all in one. The fumes from the de-bonder do just as much as the liquid. So much so that you should never store glue and de-bonder in the same place. There must have been less of a bond on the top part of the tube as it pulled out of the gear instead of the gear bay. It took a good bit of the gear with it. The brass tube was barely smaller than the gear, so there wasn't much plastic left after drilling. So I had it out, but I had to cut the gear almost in half to get to solid plastic.
To rebuild the gear, I had to use several materials and build it up. The first thing that I did was drill a small hole in the center and place a trimmed-down insect pin (0.5mm). This is the longest part, over which I slipped a small aluminum tube and glued it in place. That was almost the perfect diameter to fit over the brass tube. That was the last part to go on.

Using steel cutters, I then trimmed down the inner parts flush to the brass tube.
So, funny thing about nippers. When your fancy Dspiae nippers and your hardened steel nippers both have red handles, make sure you know which pair you have. I grabbed the Dspiae nippers by accident when trimming the insect pin and destroyed them with one cut. I have a spare still in the box, so that was a somewhat expensive lesson.
I have yet to take the next step, but I am pretty sure I will pay more attention this time.
P.S.
Here is a link to where I got the insect pins. A you-tuber (A4 Garage) uses them quite a bit. I got a few sizes, but I want to get more in larger diameters. I have mostly the small end.