Page 1 of 1

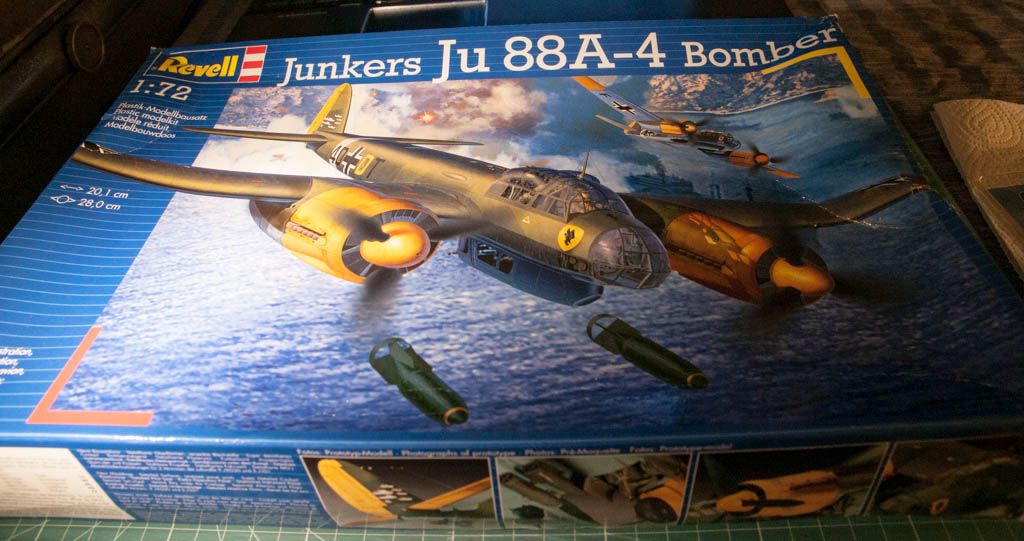
Revell 1/72 Junkers Ju 88A-4

Posted: Sat Feb 22, 2014 11:18 pm
by JonMW
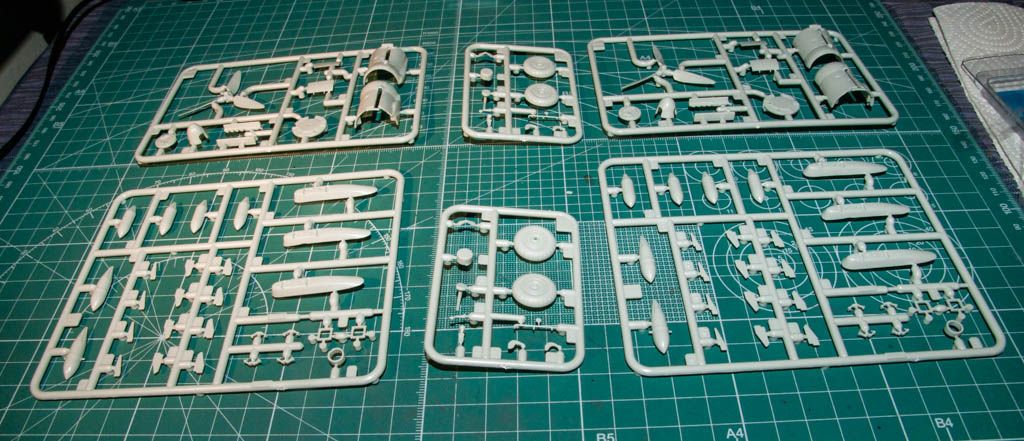
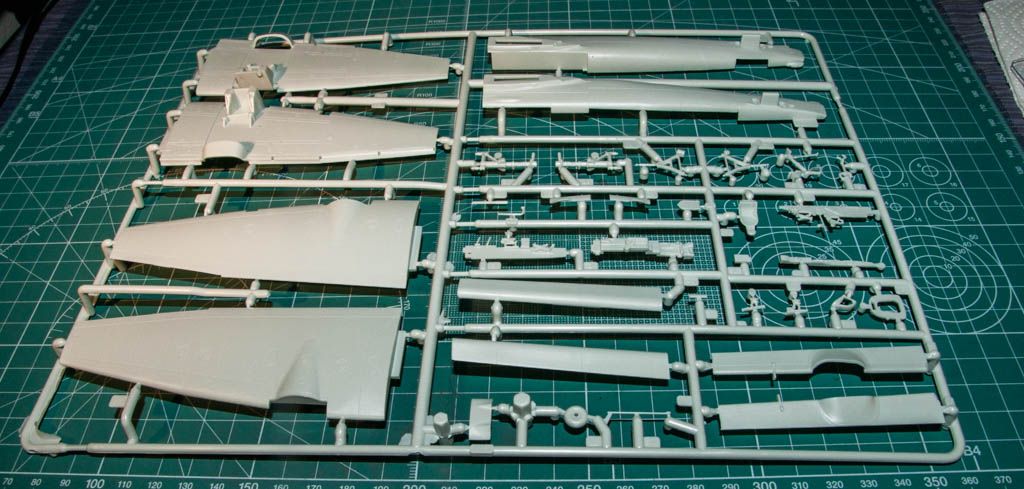
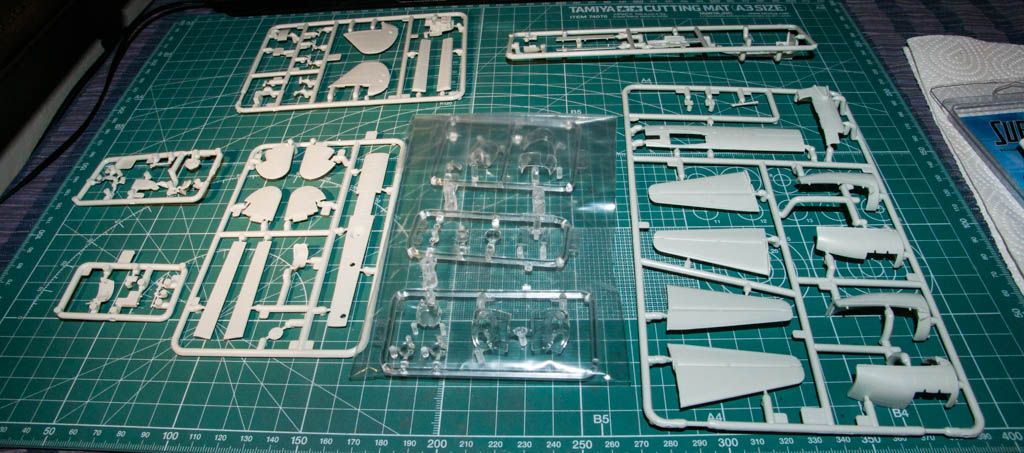
This will be my entry for the GB. The last time I build an airplane was around 20 years ago. So it will be a bit of trial and error, hopefully not too much error. The plan is to build it straight out the box, so no fancy aftermarket parts just detail painting. The kit looks really nice with a good amount of nice crisp details. I have started test fitting the cockpit together and everything seems to fit without any problem and with no ejector pin marks visible so that's good.

Image

Image

Image

Image

Re: Revell 1/72 Junkers Ju 88A-4

Posted: Sun Feb 23, 2014 8:00 am
by UKscalemodeller
That there is a REALLY NICE kit. Good choice and good luck.

Re: Revell 1/72 Junkers Ju 88A-4

Posted: Mon Feb 24, 2014 10:34 pm
by JonMW
So a bit of info on the plane:

It has wings and it flies.

Sorry I'm a car guy and have no idea about flying things. :wtf:


Luckily Wikipedia knows a bit more.

Junkers Ju 88

Role: Dive bomber/Tactical bomber/Night fighter/Torpedo bomber/Heavy fighter
Manufacturer: Junkers
Designer: W. H. Evers and Alfred Gassner
First flight: 21 December 1936
Introduction: 1939
Retired: 1951 (France)
Primary user: Luftwaffe
Number built: 15,183
Variants: Junkers Ju 188

Image

The Junkers Ju 88 was a World War II German Luftwaffe twin-engine, multi-role aircraft. Designed by Hugo Junkers' company in the mid-1930s to be a so-called Schnellbomber which would be too fast for any of the fighters of its era to intercept, it suffered from a number of technical problems during the later stages of its development and early operational roles, but became one of the most versatile combat aircraft of the war. Affectionately known as "The Maid of all Work" (Mädchen für Alles), the Ju 88 proved to be suited to almost any role. Like a number of other Luftwaffe bombers, it was used successfully as a bomber, dive bomber, night fighter, torpedo bomber, reconnaissance aircraft, heavy fighter, and even as a flying bomb during the closing stages of conflict.
Despite its protracted development, the aircraft became one of the Luftwaffe's most important assets. The assembly line ran constantly from 1936 to 1945, and more than 16,000 Ju 88s were built in dozens of variants, more than any other twin-engine German aircraft of the period. Throughout the production, the basic structure of the aircraft remained unchanged.

Design and development

The Ju 85 was a twin-engined bomber aircraft prototype, designed by Junkers in 1935. The Reich Air Ministry requested the aircraft, which differed from the Ju 88 due to the use of a twin fin tail unit. The aircraft was never put into service.
In August 1935, the German Ministry of Aviation submitted its requirements for an unarmed, three-seat, high-speed bomber, with a payload of 800-1,000 kg (1,760-2,200 lb). Junkers presented their initial design in June 1936, and were given clearance to build two prototypes (Werknummer 4941 and 4942).[6] The first two aircraft were to have a range of 2,000 km (1,240 mi) and were to be powered by two DB 600s. Three further aircraft, Werknummer 4943, 4944 and 4945, were to be powered by Jumo 211 engines. The first two prototypes, Ju 88 V1 and V2, differed from the V3, V4 and V5 in that the latter three models were equipped with three defensive armament positions to the rear of the cockpit, and were able to carry two 1,000 kg (2,200 lb) bombs, one under each inner wing panel.
The first five prototypes had conventionally operating dual-strut leg rearwards-retracting main gear, but starting with the V6 prototype, a main gear design debuted that twisted the new, single-leg main gear strut through 90° during the retraction sequence, much like that of the American Curtiss P-40 Warhawk fighter. This feature allowed the main wheels to end up above the lower end of the strut when fully retracted and was adopted as standard for all future production Ju 88s, and only minimally modified for the later Ju 188 and 388 developments of it. These single-leg landing gear struts also made use of stacks of conical Belleville washers inside them, as their main form of suspension for takeoffs and landings.
By 1938, radical modifications from the first prototype began to produce a "heavy" dive bomber. The wings were strengthened, dive brakes were added, the fuselage was extended and the number of crewmen was increased to four. Due to these advances, the Ju 88 was to enter the war as a medium bomber.

Image

The choice of annular radiators for engine cooling on the Ju 88, which placed these radiators immediately forward of each engine and directly behind each propeller, allowed the cooling lines for the engine coolant and oil-cooling radiators (integrated within the annular design) to be just about as short as possible. The concept may have led to a number of other German military aircraft designs adopting the same solution, such as the Arado Ar 240, Heinkel He 177, Heinkel He 219, the inline powered developments of the Focke-Wulf Fw 190 and the twin-engined Focke-Wulf Ta 154.

The aircraft's first flight was made by the prototype Ju 88 V1, which bore the civil registration D-AQEN, on 21 December 1936. When it first flew, it managed about 580 km/h (360 mph) and Hermann Göring, head of the Luftwaffe was ecstatic. It was an aircraft that could finally fulfill the promise of the Schnellbomber, a high-speed bomber. The streamlined fuselage was modeled after its contemporary, the Dornier Do 17, but with fewer defensive guns because the belief still held that it could outrun late 1930s-era fighters. The fifth prototype set a 1,000 km (620 mi) closed-circuit record in March 1939, carrying a 2,000 kg (4,410 lb) payload at a speed of 517 km/h (320 mph). However, by the time Luftwaffe planners like Ernst Udet had their opportunities to their own "pet" features added (including dive-bombing by Udet), the Ju 88's top speed had dropped to around 450 km/h (280 mph). The Ju 88 V7 was fitted with cable-cutting equipment to combat the potential threat of British barrage balloons, and was successfully tested in this role. The V7 then had the Ju 88 A-1 "beetle's eye" faceted nose glazing installed, complete with the Bola undernose ventral defensive machine gun emplacement, and was put through a series of dive-bombing tests with 250 kg (550 lb) and 500 kg (1,100 lb) bombs, and in early 1940, with 1,000 kg (2,200 lb) bombs. The Ju 88 V8 (Stammkennzeichen of DG+BF, Wrk Nr 4948) flew on the 3 October 1938. The A-0 series was developed through the V9 and V10 prototypes. The A-1 series prototypes were Wrk Nrs 0003, 0004 and 0005. The A-1s were given the Jumo 211B-1 or G powerplants.
Dr. Heinrich Koppenberg (managing director of Jumo) assured Göring in the autumn of 1938 that 300 Ju 88s per month was definitely possible. Göring was in favour of the A-1 variant for mass production.
Production was delayed drastically by developmental problems. Although planned for a service introduction in 1938, the Ju 88 finally entered squadron service (with only 12 aircraft) on the first day of the attack on Poland in 1939. Production was painfully slow, with only one Ju 88 manufactured per week, as problems continually kept cropping up. The Ju 88C series of heavy fighter was also designed very early in 1940, but kept secret from Göring, as he only wanted bombers.

Ju 88 A-4 Specifications

Image

General characteristics
Crew: 4 (pilot, bombardier/front gunner, radio operator/rear gunner, navigator/ventral gunner)
Length: 14.36 m (47 ft 2⅞ in)
Wingspan: 20.08 m (65 ft 10½ in)
Height: 5.07 m (16.63 ft)
Wing area: 54.7 m2 (587 ft2)
Loaded weight: 8,550 kg (18,832 lb)
Max. takeoff weight: 14,000 kg[61] (30,865 lb)
Powerplant: 2 × Junkers Jumo 211J[62] liquid-cooled inverted V-12, 1,044 kW (1,420 PS, 1,401 hp) each
Performance
Maximum speed: 510 km/h[61] (317 mph) at 5,300 m (17,389 ft) without external bomb racks or 433 km/h (269 mph) at 4,500 m (14,765 ft) at 14,000 kg (30,865 lb)
Range: 2,430 km[61] (1,429 mi)maximum internal fuel
Service ceiling: 9,000 m (29,500 ft) at average weight, without bombs
Rate of climb: 235 m/min (770 ft/min)

Armament
Guns:
1 × 7.92 mm MG 81J machine gun on flexible mount in front windscreen, firing forward with 1,000 rounds.[N 3]
1 × 7.92 mm MG 81J machine gun on flexible mount in lower fuselage nose glazing, firing forward with 1,000 rounds.
2 × 7.92 mm MG 81J machine guns on flexible mount in the rear of the cockpit canopy, firing aft with 1,000 rounds each.[63]
1 × 7.92 mm MG 81Z twin machine gun on flexible mount in the rear ventral Bola position, firing aft with 1,000 rounds.[61][63]
Bombs: Up to 1,400 kilograms (3,100 lb) of ordnance internally in two bomb bays rated at 900 kg (2,000 lb) and 500 kg (1,100 lb) or up to 3,000 kg (6,600 lb) externally. Carrying bombs externally increased weight and drag and impaired the aircraft's performance. Carrying the maximum load usually required rocket-assisted take-off.
Armament options
Additional option for a pair of 7.92 mm (.312 in) MG 15 machine guns on flexible "Donut" mountings firing laterally, one on each side of the cockpit canopy.
A single 13 mm (.51 in) MG 131 machine gun was sometimes used instead of the 7.92 mm (.312 in) MG 81J or MG 81Z machine guns in the A-Stand, B-Stand or ventral Bola positions.
Aircraft may carry one 20 mm MG FF cannon in the nose for ground attack purposes, with 90 rounds of ammunition, in place of the Lotfernrohr 7 bombsight
A modification of the Ju 88 A-4, the Ju 88 A-13 could mount the Waffenbehälter WB 81A or WB 81B (firing with 15° downwards deflection) gun pods on the external bomb racks for ground attack duties, each "watering can" containing three 7.92 mm (.312 in) MG 81Z twin machine guns, for strafing enemy troops.

[youtube]5EcZqLatu8E[/youtube]
Re: Revell 1/72 Junkers Ju 88A-4

Posted: Thu Feb 27, 2014 7:49 am
by T3hGuppy
Nice subject choice dude.

Interesting history too.

:th:

Re: Revell 1/72 Junkers Ju 88A-4

Posted: Sat Mar 01, 2014 10:30 pm
by JonMW
Now that I have finished the Ferrari I finally had some time to work on this. I started by building most of the cockpit and painting them in a dark grey color. It should be RLM66, and as I don't have that I mixed some Vallejo light grey and black to get a shade I was happy with.

Image

Image

Image

This was followed by picking out some details using red, light grey, black and brown.

Image

Image

All the parts where given a dry brushing of Tamiya X-11

Image

Image

Image

And to finish it off I added some Ultimate dark dirt wash to all the parts. I also mixed some sand and mud wash and added it where the crews feet would be to simulate dirt that would be stuck to the boots and then come off on the floor.

Image

Image

Image

Image

And all the parts together

Image

Image

Image

The weathering doesn't look as heavy in real as it does in the pictures. I have also finished the tail wheel, painted in RLM02, black and silver, finished with a dark dirt wash.

Image

So next up is putting the fuselage and wings together and start prepping for primer.

Re: Revell 1/72 Junkers Ju 88A-4

Posted: Sat Mar 01, 2014 10:37 pm
by Bissyboat
Great office. :thumb2:

Re: Revell 1/72 Junkers Ju 88A-4

Posted: Sun Mar 02, 2014 8:22 am
by T3hGuppy
Nice work on the cockpit dude.

Coming together very well so far.

Re: Revell 1/72 Junkers Ju 88A-4

Posted: Sun Mar 02, 2014 9:18 am
by Nige201980
great work on the cockpit mate

Re: Revell 1/72 Junkers Ju 88A-4

Posted: Mon Mar 03, 2014 5:16 pm
by chrismoseley
Fantastic Work Mate... That Will Be A Stunner When It Is Done :)

Alex

Re: Revell 1/72 Junkers Ju 88A-4

Posted: Mon Mar 03, 2014 6:59 pm
by JonMW
Thanks for the comments! I think I’m starting to enjoy building these planes instead of doing just cars.

Have done a bit more work, the fuselage is glued together. There is a big gap on the bottom between the two halves of the fuselage and the lower part.

Image

There is also a hole on the top of the fuselage.

Image

I didn't want to just use filler as this would most likely shrink over time and leave a mart. To solve this I cut a piece from a sheet of styrene a bit thicker than the width of the gap (maybe 0,05mm). The small notch on one of the sides is to clear a tab that locates the lower part of the fuselage.

Image

This was then pushed in to the gap and glued in place using Tamiya thin cement. The piece was made quite big so that I could get a good grip of it and really push it all the way in.

Image

Cut it down with a knife.

Image

And finished off with some sanding sticks. It will still need a bit of filler, but still a lot less than what would be needed to fill the gap.

Image

Re: Revell 1/72 Junkers Ju 88A-4

Posted: Mon Mar 03, 2014 7:06 pm
by HistoryRider
Good looking cockpit! :th:

I liked the styrene filler idea! :cheers2:

My Avenger may need that same treatment! good tip/technique!

Re: Revell 1/72 Junkers Ju 88A-4

Posted: Mon Mar 03, 2014 8:13 pm
by chrismoseley
Good Idea With The Styrene For Filler :th: Will Make A Note Cheer's For The Tip :)

Alex

Re: Revell 1/72 Junkers Ju 88A-4

Posted: Tue Mar 25, 2014 10:35 pm
by JonMW
So not much going on here, I have done some painting. And totally forgot to take and pictures. But this is how it looks at the moment. The underside was painted in RLM65, white for the wing tips and the wheel wells are in RLM02.

Image

The top has got the first of the two colors for the cameo, RLM71. I have started masking and hope to get the RLM70 on this weekend.

Image

Re: Revell 1/72 Junkers Ju 88A-4

Posted: Wed Mar 26, 2014 11:27 pm
by eoinfinnegan
Your doing a fantastic job, il look forward to seen it finished

Re: Revell 1/72 Junkers Ju 88A-4

Posted: Wed Mar 26, 2014 11:33 pm
by longlance67
Nice work mate


alot of fine detail work mate


Shane

Re: Revell 1/72 Junkers Ju 88A-4

Posted: Mon Mar 31, 2014 10:27 pm
by patrickroos
Great progress and great work mate!!
Love the 88 and am looking forward to seeing this one finished. :th:

:cheers2:

Re: Revell 1/72 Junkers Ju 88A-4

Posted: Thu Apr 03, 2014 11:36 pm
by rodrant
Good work so far on the Junkers 88 , When I built mine I also had the same 'gap' issues that you have, exactly on the same spots . The styrene was a very good idea , i fill ,or try to ,fill those gaps, and your cockpit is just great ! Looking forward to see it finish .

Re: Revell 1/72 Junkers Ju 88A-4

Posted: Fri Apr 04, 2014 11:55 am
by JonMW
Thanks for the comments! This thing has been going really slow for the last week and not much has happened. But I hope to get the final colors on during the weekend so I can start putting the decals on.

Re: Revell 1/72 Junkers Ju 88A-4

Posted: Sun Apr 06, 2014 8:27 pm
by JonMW
So all the colors are on and a light coat of clear. All colors are Vallejo Model Air, I had a lot of problem with the paint lifting so I had to touch up the paint in a lot of places. But I'm pretty happy with it now. So next up is start decaling.

Image

Image

Re: Revell 1/72 Junkers Ju 88A-4

Posted: Tue Apr 08, 2014 9:50 am
by patrickroos
Niiiice paint job! :th:
You did a great job with the mottled look and bleaching, me like a lot!
Just love the Lufwaffe camo schemes (if anyone has missed that by now), the white and especially the RLM04 breaks it up and creates a fantastic contrast.

Looking very very promising!

:cheers2:

Re: Revell 1/72 Junkers Ju 88A-4

Posted: Tue Apr 08, 2014 10:30 am
by UKscalemodeller
I am preparing to shamelessly copy this entire build with mine.

Nice work

Re: Revell 1/72 Junkers Ju 88A-4

Posted: Tue Apr 08, 2014 5:57 pm
by JonMW
UKscalemodeller wrote:I am preparing to shamelessly copy this entire build with mine.

Nice work
Now why in the bloody hell would you do that?! There must be tons of better Ju 88A's out there to look at.

Thanks for the comments, really appreciated.

Re: Revell 1/72 Junkers Ju 88A-4

Posted: Sat Apr 12, 2014 1:11 pm
by JonMW
All the decals are on, they went down really nice and conformed well . After the decals a second coat of clear was applied and it's now ready for some weathering.

Image

Image

Re: Revell 1/72 Junkers Ju 88A-4

Posted: Sat Apr 12, 2014 3:34 pm
by Daishi12
JonMW wrote:Thanks for the comments! I think I’m starting to enjoy building these planes instead of doing just cars.

Have done a bit more work, the fuselage is glued together. There is a big gap on the bottom between the two halves of the fuselage and the lower part.

Image

There is also a hole on the top of the fuselage.

Image

I didn't want to just use filler as this would most likely shrink over time and leave a mart. To solve this I cut a piece from a sheet of styrene a bit thicker than the width of the gap (maybe 0,05mm). The small notch on one of the sides is to clear a tab that locates the lower part of the fuselage.

Image

This was then pushed in to the gap and glued in place using Tamiya thin cement. The piece was made quite big so that I could get a good grip of it and really push it all the way in.

Image

Cut it down with a knife.

Image

And finished off with some sanding sticks. It will still need a bit of filler, but still a lot less than what would be needed to fill the gap.

Image
Great tip with the styrene sheet, will shamelessly use this idea :)

Re: Revell 1/72 Junkers Ju 88A-4

Posted: Sat Apr 12, 2014 7:43 pm
by eoinfinnegan
Your doing a cracking job, the paint job is very nice :th:

Re: Revell 1/72 Junkers Ju 88A-4

Posted: Thu Apr 17, 2014 9:33 pm
by JonMW
I ran in to some small problems with the weathering. I used Alclad Klear to seal the decals and prepare for the wash. I've had problems with it not fully drying even after a few weeks, it feels dry to the touch but if you hold it for a few seconds it starts to stick to the skin. The big problem was that the wash seems to have reacted with the clear where I had held. I did let the clear dry for 10 days before starting the weathering. This meant that I couldn't get the wash off the way you should using water and I was left with some palm prints on the wings.

Image

Not very nice. So to solve the problem I ended up more or less scrubbing the whole plane using cotton buds dipped in odorless turpenoid. The good thing with the tupenoid is that it doesn't harm the plastic or the acrylic base coat at all, but it will need a few days to fully dry before I can put down a coat of flat clear. This is how it came out after the tupenoid scrub.

Image

Re: Revell 1/72 Junkers Ju 88A-4

Posted: Fri Apr 18, 2014 7:46 pm
by Mike00
Looking good :th:

Re: Revell 1/72 Junkers Ju 88A-4

Posted: Fri Apr 18, 2014 7:56 pm
by UKguyInUSA
She's looking really nice, can't wait to see her completed!

Re: Revell 1/72 Junkers Ju 88A-4

Posted: Fri Apr 18, 2014 10:17 pm
by Rob
Excellent recovery! It looked like something out of an episode of CSI! Now looks like a top rate model :clap:

Re: Revell 1/72 Junkers Ju 88A-4

Posted: Sat Apr 19, 2014 4:34 pm
by eoinfinnegan
Great recovery, as my dad told me many times when I was doing my apprenticeship "things can go wrong and we all make mistakes but it's how we fix them that shows how good we are at our job"
You done a cracking job . Well done

Re: Revell 1/72 Junkers Ju 88A-4

Posted: Thu Apr 24, 2014 7:48 pm
by JonMW
Thanks for the comments. I was almost ready to give up on this when I saw the prints, but I'm really happy that I managed to sort it out.

It's time for a final update before the reveal. After I let the turpenoid fully dry I gave the plane a coat of Model master flat acrylic clear. I had left the guns off till now so I needed to remove the canopy that was held on by pva glue and then mount the guns from the inside and put the canopies back.

Image

One of the last things to do was to add the soot from the exhaust. Now I didn't really feel up to the task of airbrushing it on. I might have done it if I hadn't glued the engine pods to the wings. So instead I decided to do some streaking using oil paint. My weapon of choice was Mig 502 star ship filth. First thing I did was to brush a small amount of turpenoid where the streak will be.

Image

Image

Next step was to paint a line of the oil paint with a fine brush.

Image

Now it was time to start feathering the streak. This was done using a soft flat brush just slightly dampened in turpenoid and just pulling the paint in the direction I wanted the streak. I did have to go back with the brush with only turpenoid and remove some paint from where I didn't want it and also add a slight bit more to the center.

Image

Re: Revell 1/72 Junkers Ju 88A-4

Posted: Thu Apr 24, 2014 7:52 pm
by UKguyInUSA
Looks like you cleaned those prints up real good and the weathering looks great too!

Cheers,

Martin

Re: Revell 1/72 Junkers Ju 88A-4

Posted: Fri Apr 25, 2014 9:34 pm
by JayCub
Some fantastic work along with great tips, i will use the styrene mod in the future, nice weathering and brilliant to look through.
Tom

Re: Revell 1/72 Junkers Ju 88A-4

Posted: Sun Apr 27, 2014 9:44 am
by Nige201980
Wow some really great work and a great recovery mate