Page 1 of 1
Hasegawa 1/48 P-51D Mustang
Posted: Sat Jun 14, 2014 1:07 pm
by FishBowlMan
Yep, yet another P-51, but its the only kit I have in my stash that I want to build in a D-Day livery.
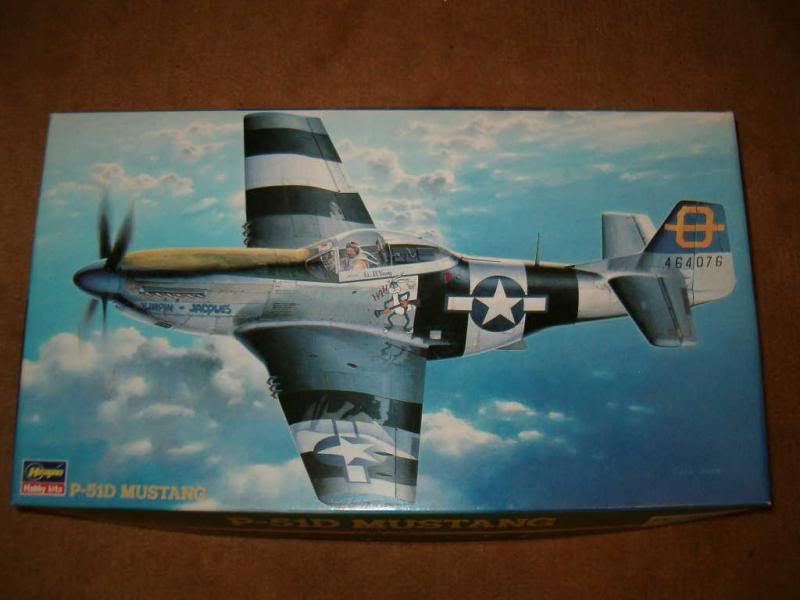
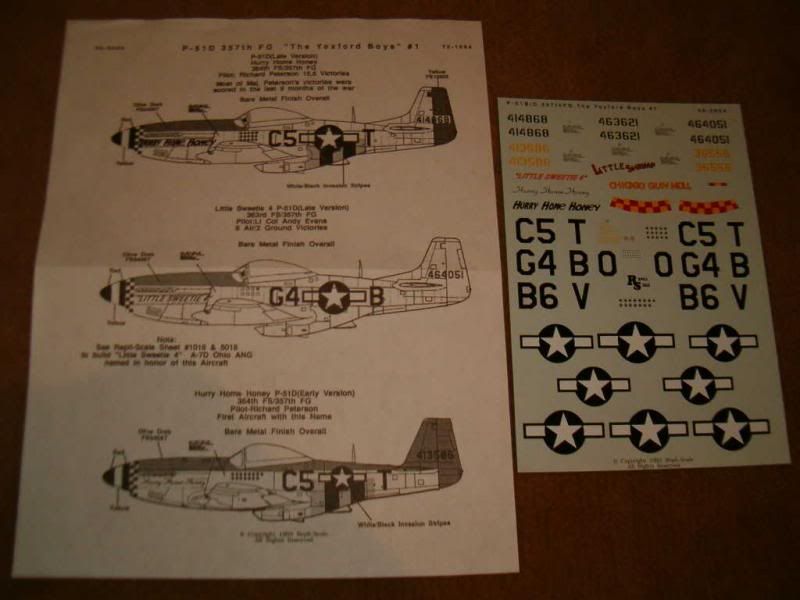
I bought this from ebay a few months back, and it came together with an AM decal set - 357th FG "The Yoxford Boys" #1 made by Repli-Scale.
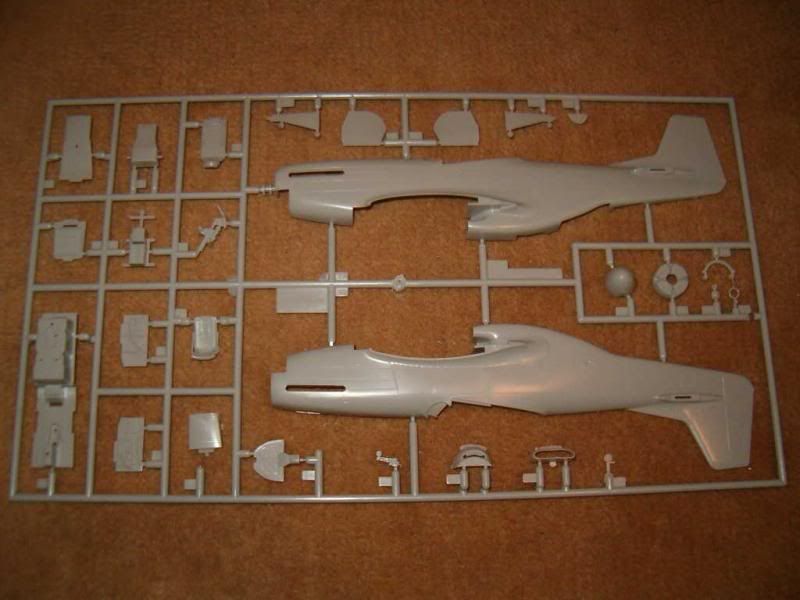
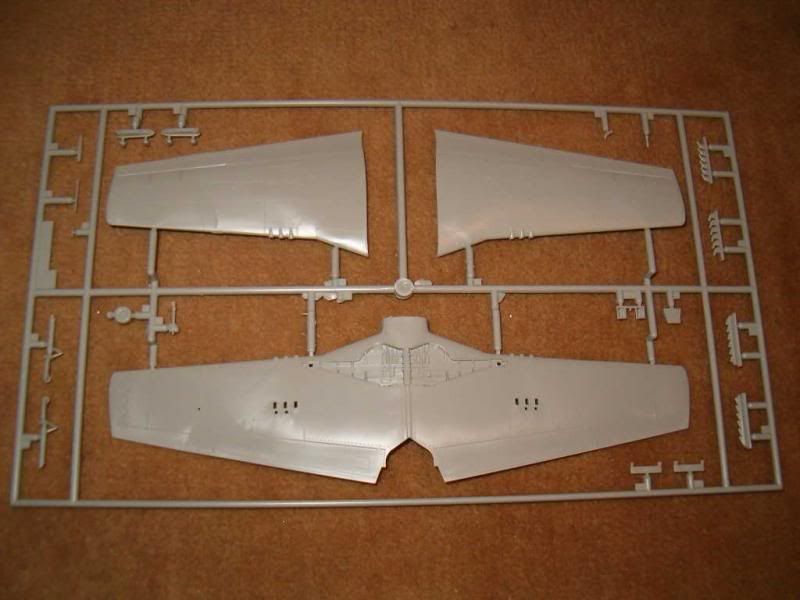
The plastic is nicely detailed. There's a little bit of flash here and there, but nothing excessive. Decals aside, I'll be building this OOB, with wheels down as there's no pilot included in the kit. Although all the sprues (including the clear parts) came in one bag, the clear sprue was placed "canopy up" on the top, so no scratches or dings!
Sprues:
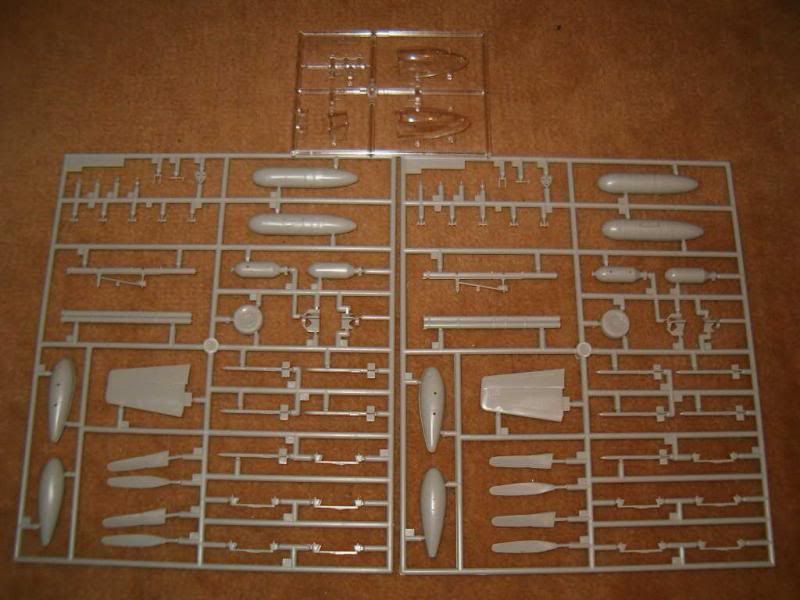
The obstructions are pretty standard and easy to follow, and I'm pleased that the AM decals were sold with the kit, mainly due to the fact that the kit-supplied ones are horribly yellowed. I'll be able to use the stencils, but everything else is pretty much a write off!
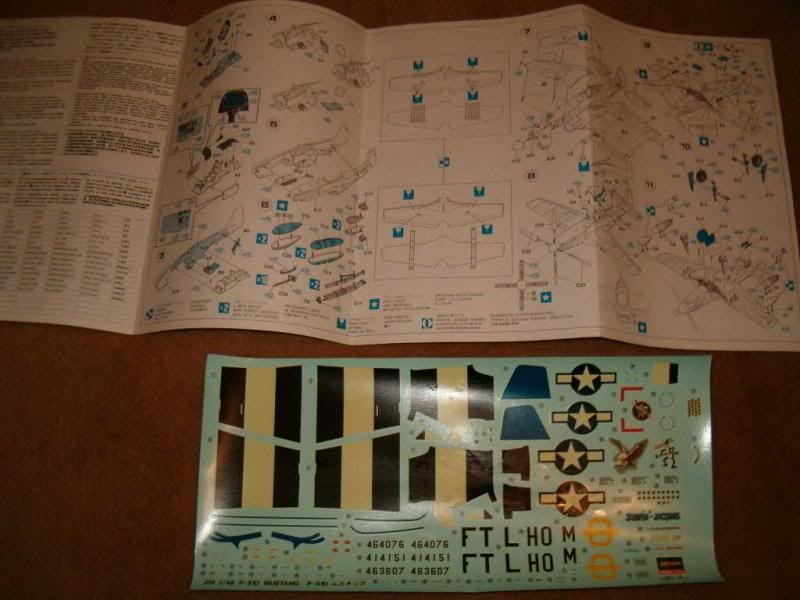
I'll be building this up (with a bit of modeller's licence) as "Hurry Home Honey" as flown by Captain (later Major) Richard "Bud" Peterson of the 357th FG, 8th AF based at Leiston Field, Suffolk, England.
More info to follow.
Re: Hasegawa 1/48 P-51D Mustang
Posted: Sat Jun 14, 2014 2:27 pm
by Paul
Nice choice, I'm yet to build a 1/48 hasi p-51 but I'm led to believe they are better than the tamiya so should be an awesome kit

Re: Hasegawa 1/48 P-51D Mustang
Posted: Sat Jun 14, 2014 2:44 pm
by rodrant
Nice entry ! We should have at least a full squadron of Mustangs in this GB , but I don't mind it is a beautifull plane

Never try an Hasegawa kit ,but they seems great kits at least they have a great variety and even great schemes to depict .
Good luck with this entry in this great GB

Re: Hasegawa 1/48 P-51D Mustang
Posted: Sat Jun 14, 2014 3:21 pm
by Willem
Built a few Hasegawa kits but not this one and they've been very good to work on.
Look forward to following the build and best of luck with your Mustang.
Re: Hasegawa 1/48 P-51D Mustang
Posted: Sat Jun 14, 2014 3:33 pm
by FishBowlMan
Paul wrote:Nice choice, I'm yet to build a 1/48 hasi p-51 but I'm led to believe they are better than the tamiya so should be an awesome kit
I'm looking forward to it. I've not built a plane for over 20 years. Strangely enough that was a Fujimi 1/48 Mustang. When I was in the air cadets, we spent a weekend doing Flight Line duty for an air show at an old RAF station in Essex / Suffolk. I can't for the life of we remember which one! The guest of honour was a retired USAF officer who was stationed there during the war and I was asked to make a Mustang for him. I remember researching his aircraft (long before the internet days) and managed to find enough spare decals to make his original plane.
Unfortunately, being a mere atc corporal, I wasn't there when he was presented with the kit, but apparently his reaction was along the lines of "Thank you for taking the time to make this for HEY!!! THAT'S MY PLANE!!!"

Re: Hasegawa 1/48 P-51D Mustang
Posted: Sat Jun 14, 2014 3:34 pm
by FishBowlMan
rodrant wrote:Nice entry ! We should have at least a full squadron of Mustangs in this GB , but I don't mind it is a beautifull plane
Never try an Hasegawa kit ,but they seems great kits at least they have a great variety and even great schemes to depict .
Good luck with this entry in this great GB
This is from the same FG as Coen's "Old Crow". Going to be its little brother

Re: Hasegawa 1/48 P-51D Mustang
Posted: Sat Jun 14, 2014 3:37 pm
by FishBowlMan
Willem wrote:Built a few Hasegawa kits but not this one and they've been very good to work on.
Look forward to following the build and best of luck with your Mustang.
Thanks, Willem. I'm going to need some help with the bare metal side of things as I can only really spray acrylics here, so no alclads, and unlike Nigel, I am not going to attempt a foil finish!
Re: Hasegawa 1/48 P-51D Mustang
Posted: Fri Jun 20, 2014 11:39 pm
by FishBowlMan
Seeing as there are several P-51 aircraft being built for this GB, I am not going to give general background info about the Mustang itself. It has already been covered in more detail than I could achieve. I'll fill in the blanks for the specific markings and kit details etc as they become relevant to the build. If this was twitter, I would probably finish this paragraph off with #LazySod

I started work on this a couple of days ago. Progress pretty much consisted of removing various parts from the sprues and light sanding to remove some burrs. I was really adventurous and attached some to cocktail sticks for priming.
The plastic is quite hard and brittle. I don't know whether its typical for Hasegawa kits, or its just that this kit is the original tooling from 1991, and thus 23 years old. I had to be really careful when removing the parts from the sprues as the gates wanted to splinter and take a big chunk out of the model.
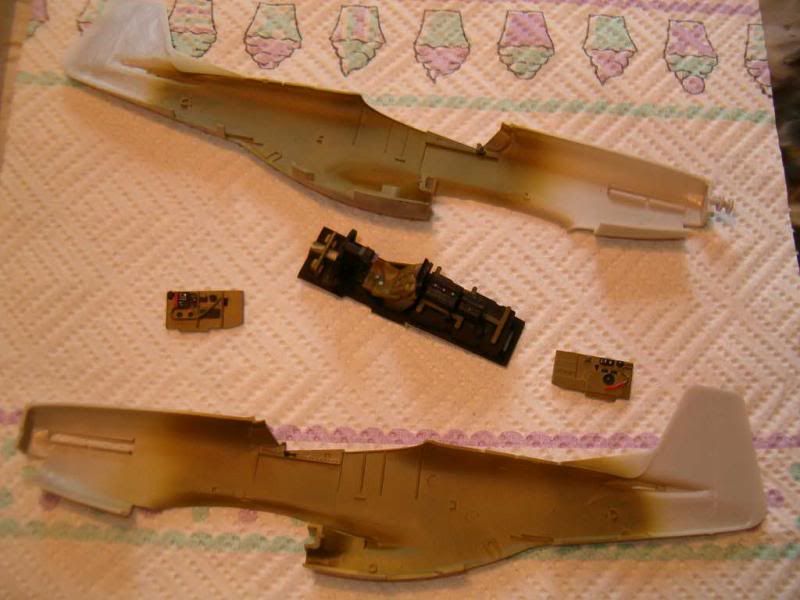
A paint order arrived so I decided to prime the interior parts, as well as some other odds and sods that can be painted separately and attached at a later date:
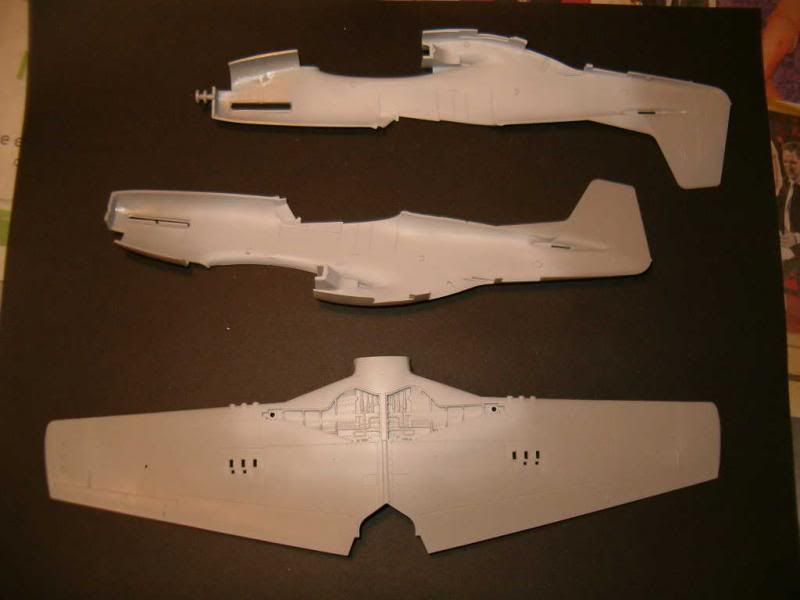
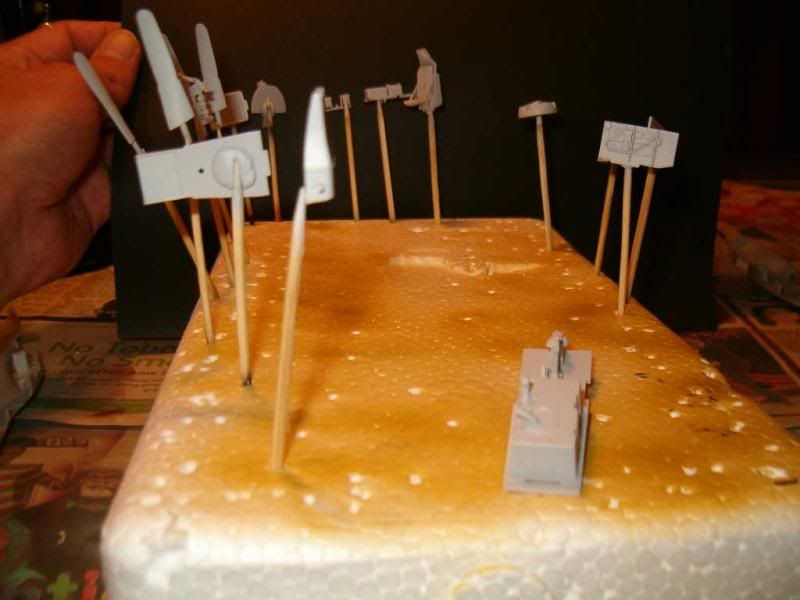
Next step is to paint the interior. Hoorah
Re: Hasegawa 1/48 P-51D Mustang
Posted: Fri Jun 20, 2014 11:52 pm
by Daishi12
FishBowlMan wrote:Paul wrote:Nice choice, I'm yet to build a 1/48 hasi p-51 but I'm led to believe they are better than the tamiya so should be an awesome kit
I'm looking forward to it. I've not built a plane for over 20 years. Strangely enough that was a Fujimi 1/48 Mustang. When I was in the air cadets, we spent a weekend doing Flight Line duty for an air show at an old RAF station in Essex / Suffolk. I can't for the life of we remember which one! The guest of honour was a retired USAF officer who was stationed there during the war and I was asked to make a Mustang for him. I remember researching his aircraft (long before the internet days) and managed to find enough spare decals to make his original plane.
Unfortunately, being a mere atc corporal, I wasn't there when he was presented with the kit, but apparently his reaction was along the lines of "Thank you for taking the time to make this for HEY!!! THAT'S MY PLANE!!!"
I'm glad that you made a veterans day/week/month/year/lifetime with your original kit, would have been awesome to see his reaction
Will be watching this build with interest.
Re: Hasegawa 1/48 P-51D Mustang
Posted: Sat Jun 21, 2014 3:53 pm
by fly1ngdutchm4n
Great choice of kit

Re: Hasegawa 1/48 P-51D Mustang
Posted: Sat Jun 28, 2014 5:19 pm
by FishBowlMan
INTERIOR:
Having referred to multiple sources for internal colours, most agree on interior green for the cockpit, but there are many many disagreements and interpretaions for the other interior parts ranging from bare metal, Zinc Chromate Primer (both yellow and green), interior green, Primer mixed with black paste, etc, etc. Sometimes, various paints were applied in the field and sometimes different production facilities used different combinations depending on the time of the war, and what they had available.
An excellent (but by no means exclusive) discussion and reference can be found on the ipmsstockholm website in an article by Martin Waligorsky:
http://www.ipmsstockholm.org/magazine/2 ... urs_us.htm
I've gone with Vallejo Model Air (71.010) Interior Green for virtually all the interior painting.
 COCKPIT
:
I've only found one picture of the cockpit showing the gun sight in place. Most images are of restored warbirds and have items such as gps etc in place. One that I've been using is from the combatsim.com website. I can't embed the photo directly, but here's the link. The picture is about half way down the page:
http://www.combatsim.com/htm/2010/02/p5 ... review.htm
The kit comes with a clear part for the gun sight, but I'm going to hold off attaching it as I'm not sure I like it too much. It seems very overscale, and the obstructions are not overly clear of exactly how it fits.
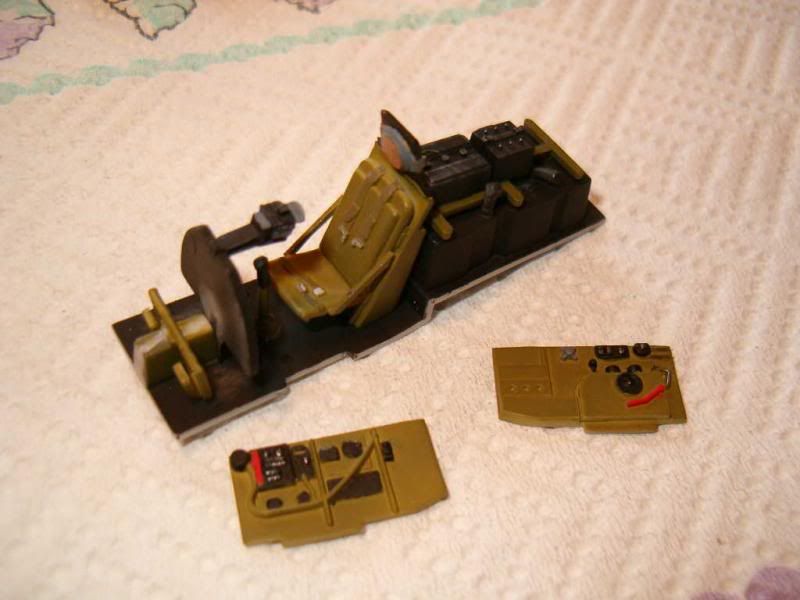
As mentioned, seat, rudder pedals, control column and bars / brackets for the fuel tanks are all interior green. The tanks themselves are Vallejo Matt Black (70.950), mixed with a small drop of Natural Steel (70.864) to give a very slight metallic hint. The seat belts are US Olive Drab (70.608), which I think is actually a Vallejo Primer, and the buckles are Silver (70.997). Some of the details on the side panels are picked out in Red (70.947) and Silver.
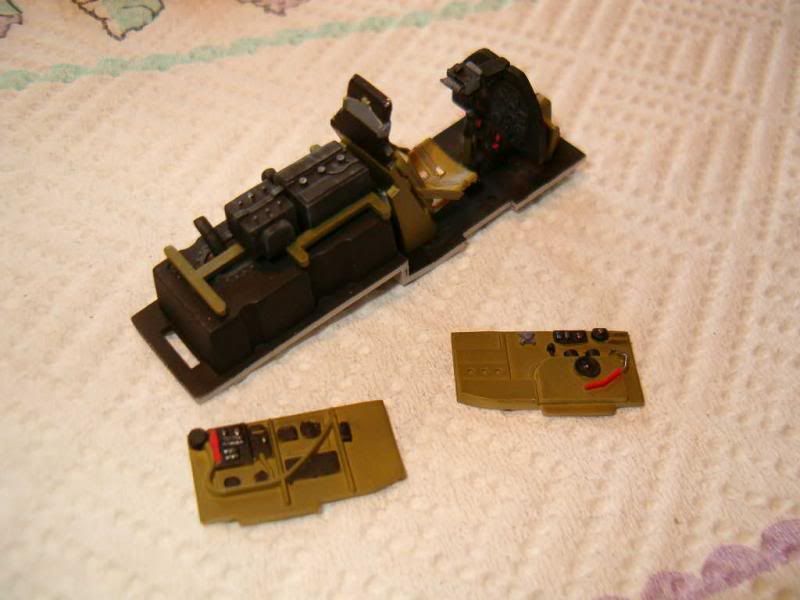 COCKPIT FLOOR
:
From ipmsstockholm website:
Another subject of long-going controversy is the colour of the cockpit floor, which in P-51 was made of plywood. Erection and Maintenance instructions for the P-51D specify all wood floor areas to be covered in black non-skid surfacer purported to be a mix of silica sand and matt black paint, the kind of finish that was also used for wing walks.
That's what I've gone for.
CONTROL PANEL:
An overall coat of Vallejo Black. I decided not to try and pick out the needles and dials using appropriate whites and yellows. My detail painting is not accurate enough and it would have looked a total mess! Instead, I opted for a drybrush of Vallejo Basalt Grey (70-869) to highlight the very nice 3D gauges and give a general impression of a "busy" panel. This was followed with small dots of Pledge Floor wax applied with a toothpick to simulate the glass. The gunsight detail was picked out using Basalt Grey.
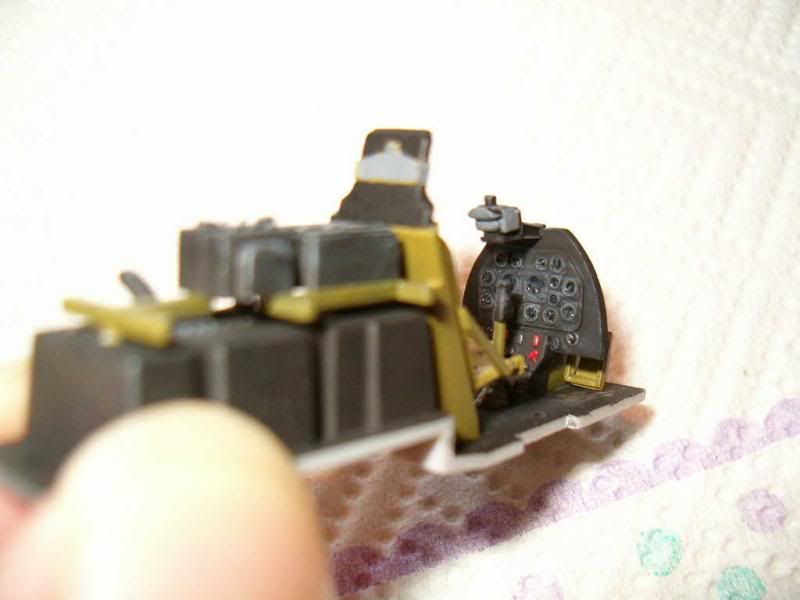
The grey drybrushing looks a bit manic and OTT in the picture due to the camera flash, but IRL looks fine. It breaks up the overall black and from the angle it will be viewed from, I think it looks pretty decent.
WEATHERING:
As the P-51D was a relatively new aircraft for D-Day (in fact the aircraft I am modelling may not have been flown during D-Day - more of that in a later post), I've been very sparing with weathering inside the cockpit.
A very light drybrushing of Vallejo English Uniform (70.921) on the floor under the rudder pedals is meant to simulate mud rather than exposed plywood. There's an even lighter chipping of Vallejo Silver on the rudder pedals themselves, and also on the seat frames. The fuel tanks have been drybrushed with Basalt Grey to show some of the raised detail.
Re: Hasegawa 1/48 P-51D Mustang
Posted: Sat Jun 28, 2014 5:49 pm
by Rob
Looks great - the details really pop
Re: Hasegawa 1/48 P-51D Mustang
Posted: Sat Jun 28, 2014 9:38 pm
by FishBowlMan
Rob wrote:Looks great - the details really pop
Thanks, Rob. One day I'll build a kit where the details will be visible when everything is assembled!
Baby steps...
Re: Hasegawa 1/48 P-51D Mustang
Posted: Sat Jun 28, 2014 10:27 pm
by felisbarcinonensis
Wow man! That's a thorough research

The results are outstanding
Re: Hasegawa 1/48 P-51D Mustang
Posted: Sun Jun 29, 2014 2:42 am
by Navcom
Nice cockpit. Great job! Looking forward to seeing how it comes along. Hasagawa makes some great kits...in line with Tamiya.
Re: Hasegawa 1/48 P-51D Mustang
Posted: Sun Jun 29, 2014 6:08 pm
by FishBowlMan
felisbarcinonensis wrote:Wow man! That's a thorough research
The results are outstanding
Thanks, Felis. Very kind of you to say so. To be fair, the research has basically consisted of me typing "P-51D cockpit" and "P-51D walkaround" into google and looking through many pictures, forums and web pages that came up.
This new fangled internet can be very useful at times.
Navcom wrote:Nice cockpit. Great job! Looking forward to seeing how it comes along. Hasagawa makes some great kits...in line with Tamiya.
Thanks for the kind words, Jeff. I'm very impressed with Hasegawa, especially seeing as this kit is nearly 25 years old. There's some lovely detail, and the fit, for the most part, is superb. That leads me nicely into:
SLIGHT ISSUES
To be fair, we are talking
very slight issues. I've no idea how these compare to modern kits, but there are slight inacuracies in the fuselage halves. Don't worry folks, this isn't a rivet counter issue,


but one with Hasegawa's drawings or moulds. Basically, when the fuselage halves are mated together, there are slight discrepancies where some of the cut outs don't quite line up. Nothing that can't be sorted with a couple of minutes with a sanding stick, so that's what I have done.
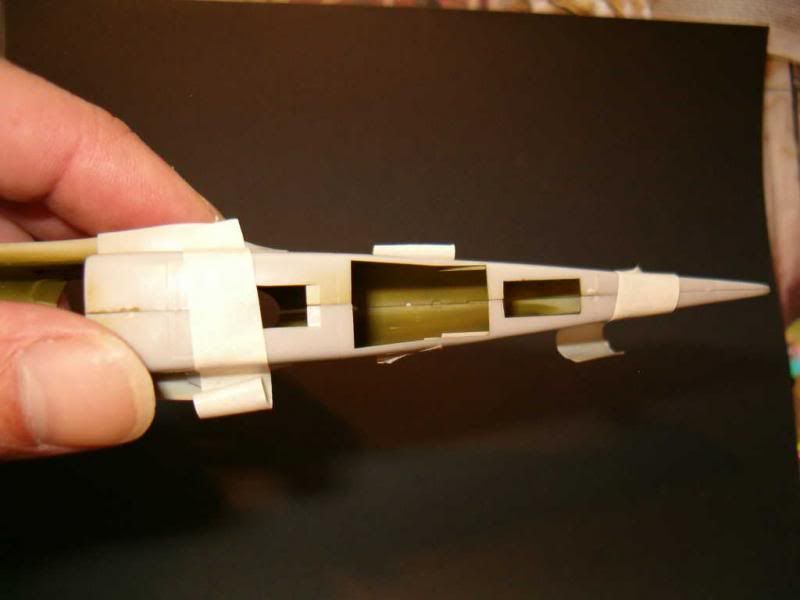
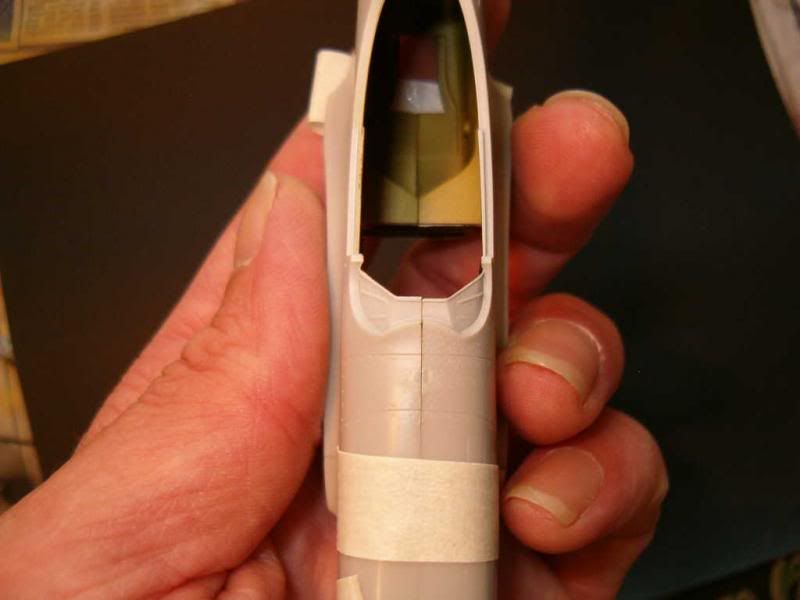
I've lined up the panel lines as my reference point and sanded accordingly to lose the step in the tail wheel doors, coolant radiator exhaust door and top ridge of the instrument panel. I did this before buttoning up as my sanders aren't small enough to get into the gaps when sealed. If that's the only fit issue, then I'm going to be very happy.
INTERNALS FITTED
This step involves fitting all the internals into one of the fuselage halves before the 2 pieces can be mated together. This involved scraping some paint to allow a clean join and lots of repeated dry-fitting and fine sanding to ensure all parts would fit correctly and allow the fuselage halves to join with minimal gaps.
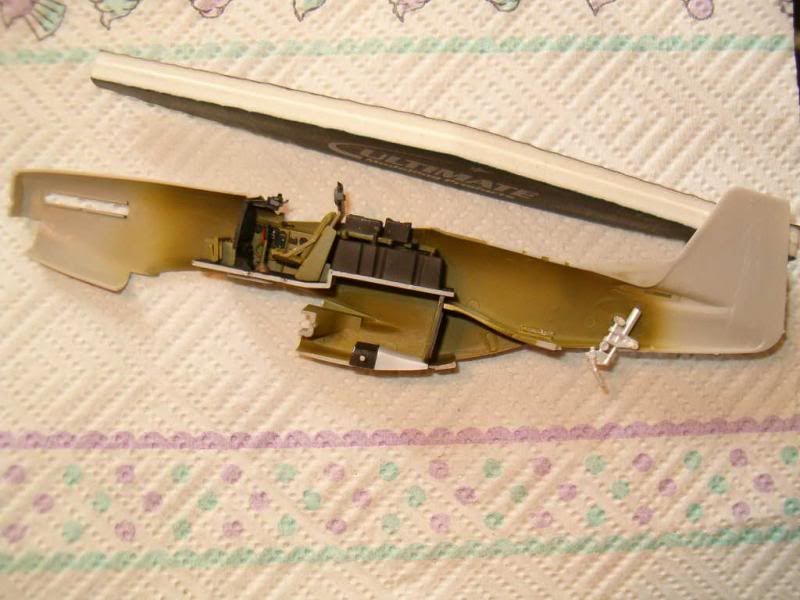
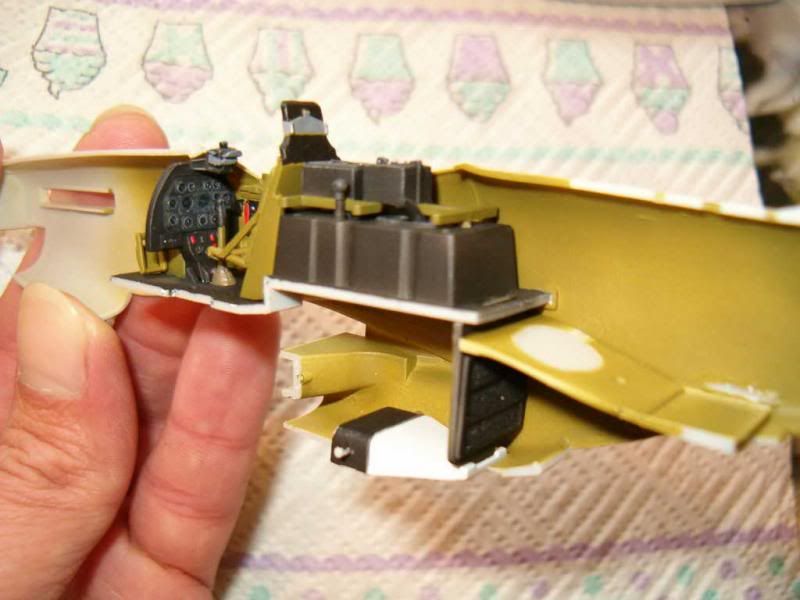
The next step is to work out which of the newly fitted parts are going to be visible from the outside, and if any paint needs touching up.
Re: Hasegawa 1/48 P-51D Mustang
Posted: Sun Jun 29, 2014 6:11 pm
by UKguyInUSA
Re: Hasegawa 1/48 P-51D Mustang
Posted: Sun Jun 29, 2014 6:30 pm
by fly1ngdutchm4n
Agreed! Nicely done, very crisp
Re: Hasegawa 1/48 P-51D Mustang
Posted: Sun Jun 29, 2014 9:51 pm
by felisbarcinonensis
Re: Hasegawa 1/48 P-51D Mustang
Posted: Tue Jul 01, 2014 7:31 pm
by FishBowlMan
Thanks again, folks. To be fair, credit for the cockpit really goes to Hasegawa. Their moulding and detailing is superb
FUSELAGE HALVES
The fuselage halves fitted together beautifully with no noticable gaps. Obviously, there will be a slightly indented trough where the plastic sinks slightly when the cement welds the plastic together. Using a toothpick, I "stippled" some CA glue on the joins to create a slightly raised surface:
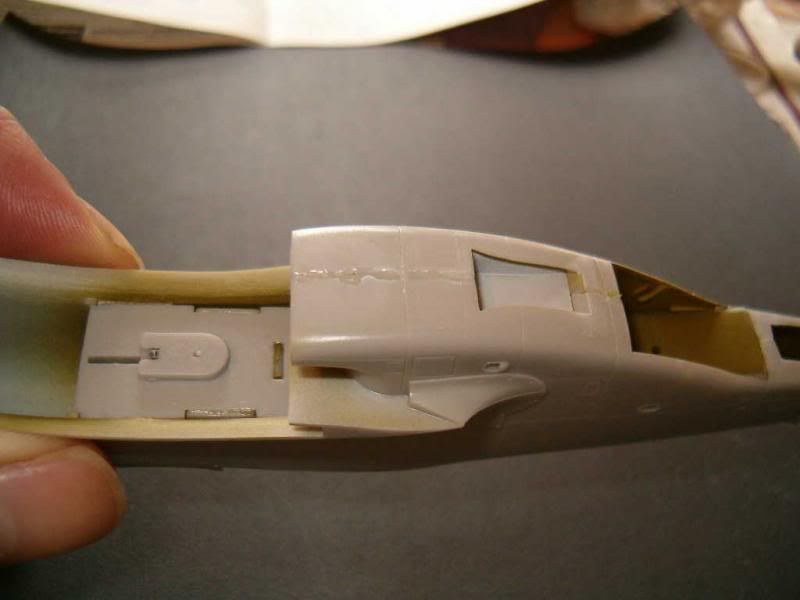
This could then be carefully sanded to create a flat surface. I won't know how well this will turn out until I prime the model.
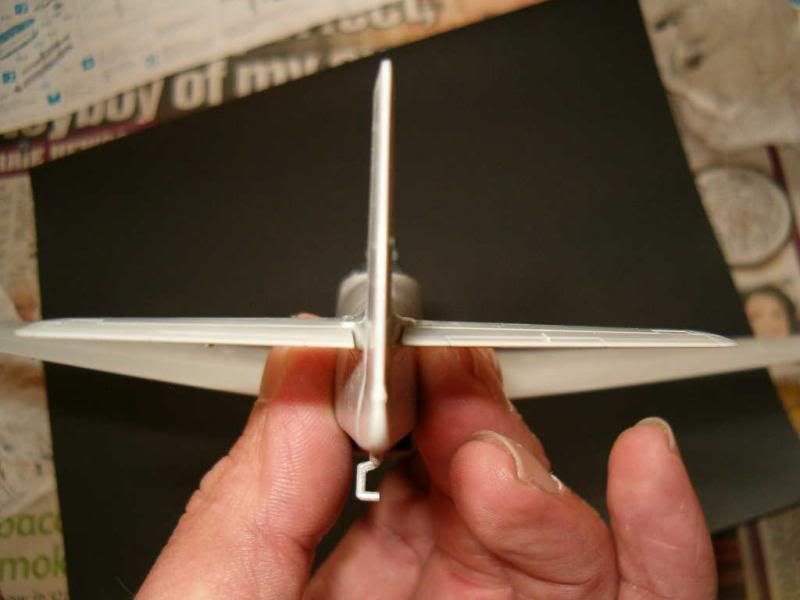
WINGS AND HORIZONTAL STABILISERS
The instructions call for a couple of holes to be drilled out in each wing to allow the brackets (for want of a better word) for the underwing drop tanks to be fitted. The brackets were attached, and then the lower wing was glued to the fuselage. Then the two upper wing sections were attached. Finally, the horizontal stabilisers were glued in place. Credit to Hasegawa here, as the fit was precise and the way the pieces were moulded meant that assuming you don't completely cock it up, the pieces would sit at the correct dihedral without needing supports or clamps to stop them moving.
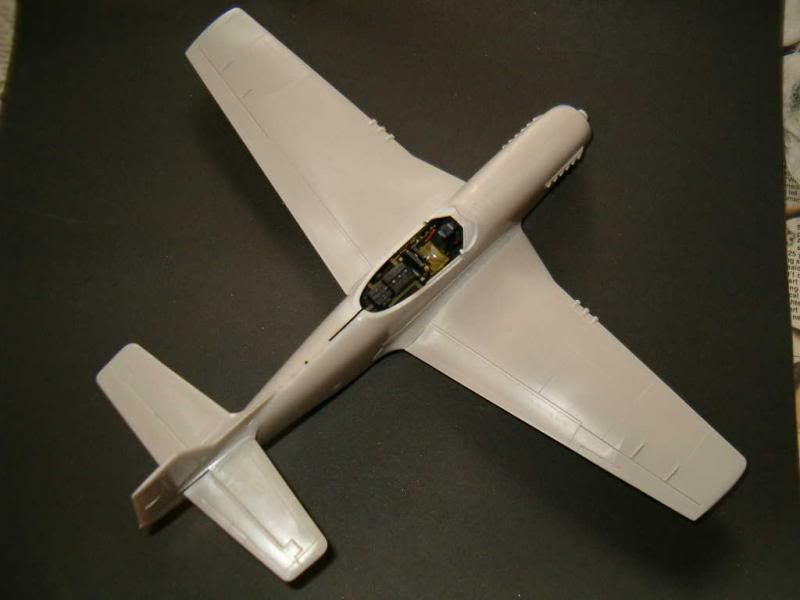
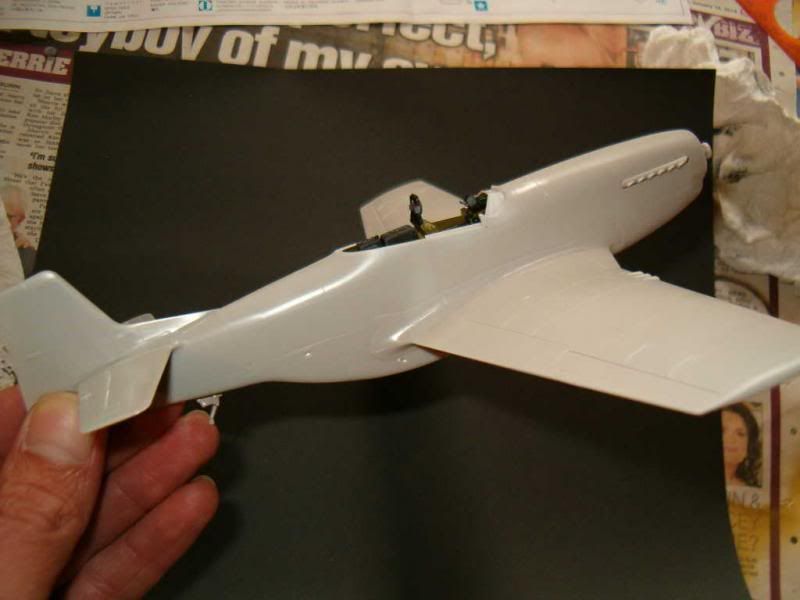
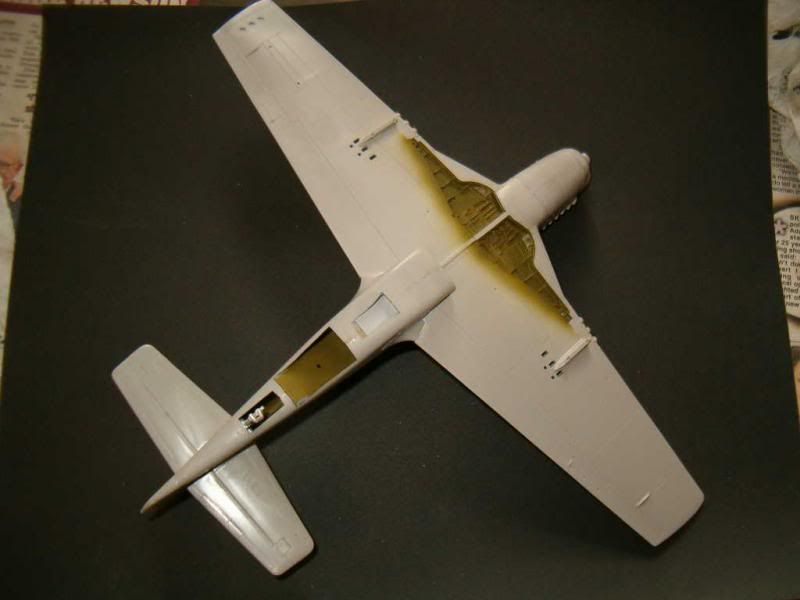
Lesson learned for the next model: I wish I'd masked before spraying the primer and green colour into the wheel wells and interior. Had a bit of "paint vs glue" when gluing the wings!

Also, there's a large green piece that I think needs to be silver. Wasn't clear where the part would fit and I think I guessed incorrectly when painting.

 CARBURETOR INTAKE
Oh what a let down! This part (A26) is a bloody nightmare!

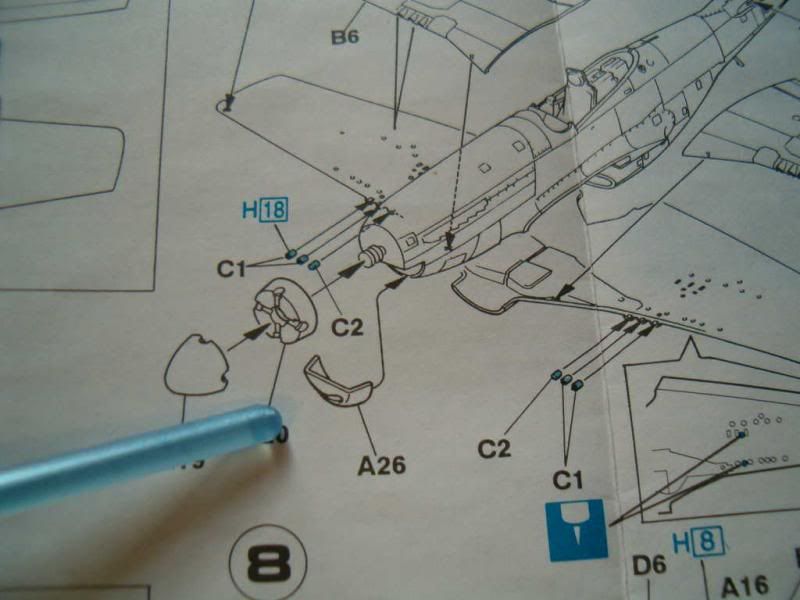
Its almost as though this piece is meant for a different kit.


The belly of the aircraft should follow a smooth profile from the wings to the nose. Fitting this piece as intended would result in a very pronounced step in all dimensions (probably time and space as well
). The best I could manage was to fit this part trying to keep the underbelly as smooth as possible, and then fill the resulting gaps with some stretched sprue and sand as smooth as possible.
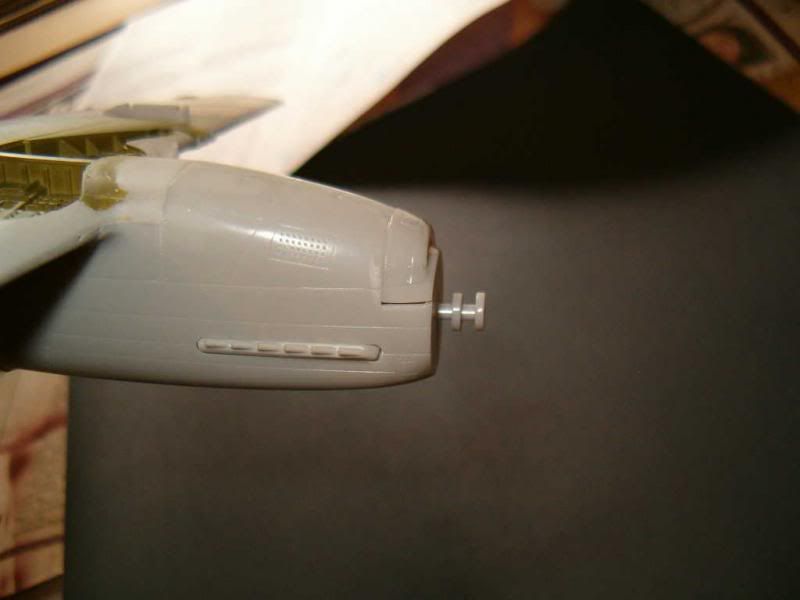
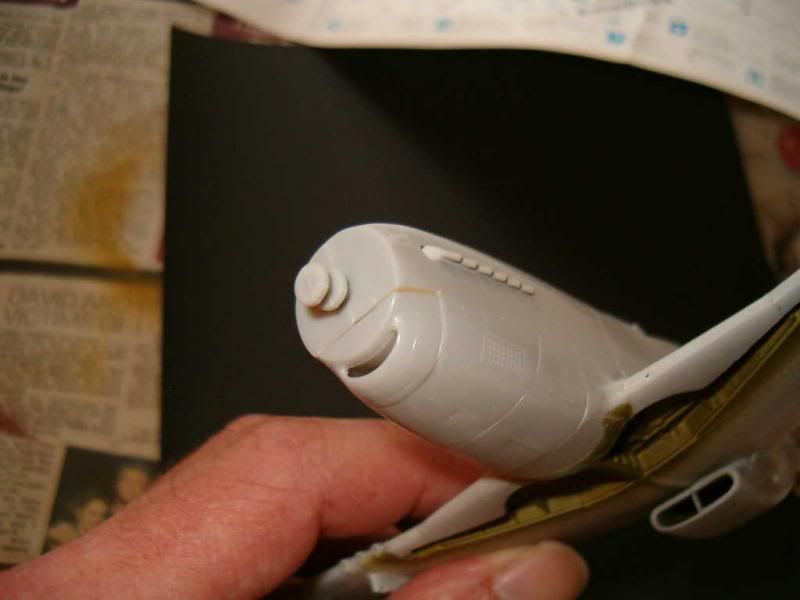
The brown mess is the stretched sprue (taken from another kit as I've found some sprues work far better than others for this) melted in place with some liquid cement.
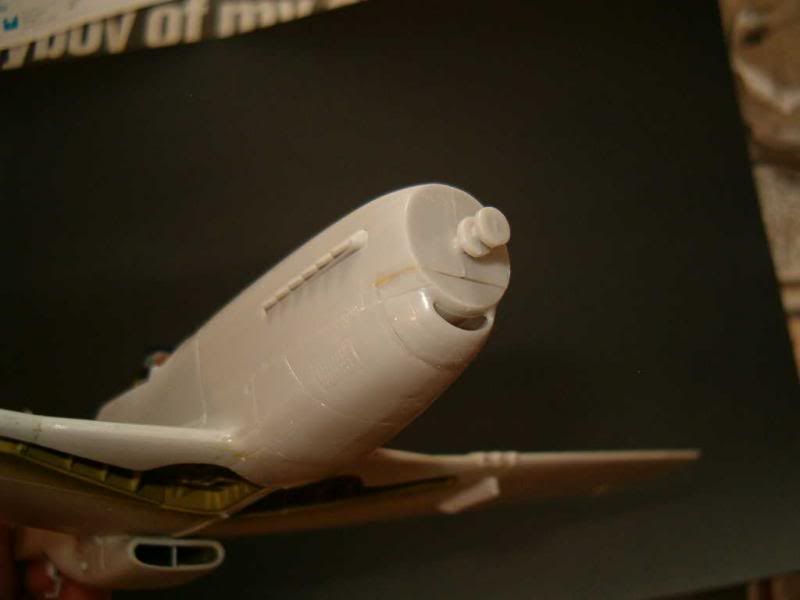
The large gap at the very front doesn't matter. It will be hidden by the nose cone
A lot more sanding is required as a step is still visible. The profile will be wrong compared to the real aircraft, but quite frankly, I don't care! At least the curve will be reasonably smooth... ish... I hope
Re: Hasegawa 1/48 P-51D Mustang
Posted: Tue Jul 01, 2014 8:10 pm
by felisbarcinonensis
It does look smooth

no worries

Re: Hasegawa 1/48 P-51D Mustang
Posted: Tue Jul 01, 2014 8:23 pm
by FishBowlMan
felisbarcinonensis wrote:It does look smooth
no worries
Cheers, mate. Unfortunately this is one of those rare times where the camera doesn't show up the problem, but I can feel the step and see it with the naked eye. It would really stand out when painted.
I'll keep attacking it with the sander while watching tonight's football match.
Re: Hasegawa 1/48 P-51D Mustang
Posted: Tue Jul 01, 2014 9:56 pm
by Willem
Nice work. Great detail in the cockpit. Shame the chin radiator is a pig of a fit, but liking your methods re ca glue and dissolved sprue. Confident you've got it beat . Great stuff.
Re: Hasegawa 1/48 P-51D Mustang
Posted: Mon Aug 11, 2014 10:56 pm
by FishBowlMan
"Hello, I'm a P-51 Mustang."
"Hi Mustang, I'm John."
Right! Now I've got re-acquainted with the kit, Let Battle commence!!!
ADDING SOME ODDS AND SODS!
More sanding was needed around the carburetor intake to remove the step caused by the really bad fit. Its not perfect, but it will have to do.
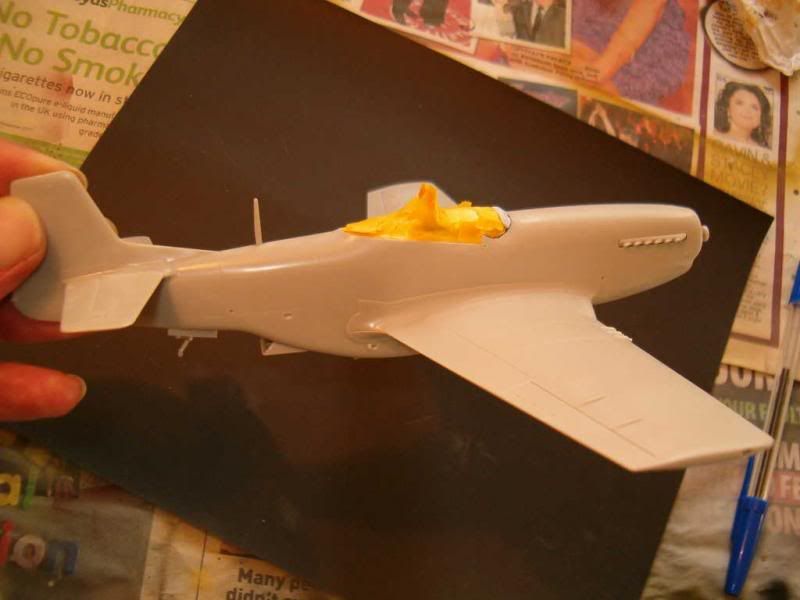
I decided to fit the VHF antenna mast even though It'll probably get knocked off sooner or later.
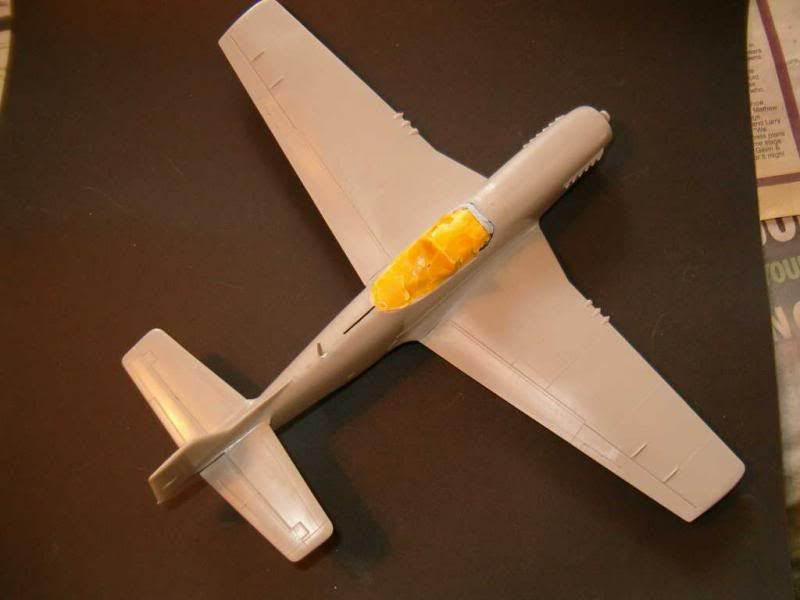
The coolant radiator exhaust door and the smaller exhaust door were fitted in the open position.
The front part of the air scoop was fitted, and I attached the tail wheel doors.
The pitot tube that fits under the starboard wing will have to be attached after decalling, as it sits right in the middle of the roundel.
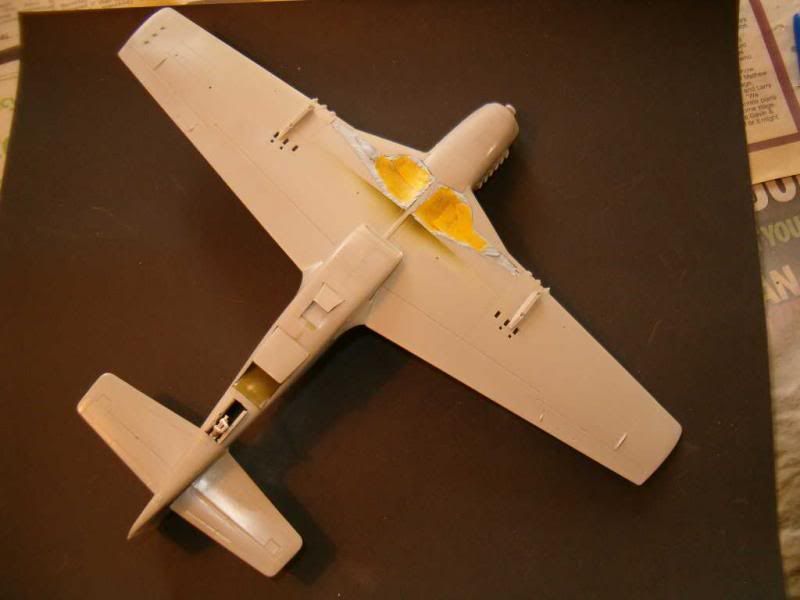 MACHINE GUNS
Most of the kit-supplied Browning A2 .50cal machine guns were glued into place. The remainder were fed to the carpet monster so more stretched sprue was used instead (and, yes, the carpet monster had a couple of those for dessert!)
Due to the way the guns are installed into the wing, only the 2 outermost guns actually protrude from the wing's leading edge. The innermost gun's muzzle actually sits within the wing itself, with only the blast tube sitting proud.
Fitting these into the wing required the holes in the wing to be drilled out properly. The 2 hemispheres (one on the top half and one on the bottom half) are slightly misaligned and don't form a round hole when the wing halves are mated together.
I contemplated drilling out the barrels but decided that even with my smallest drill bit, I wouldn't be able to align the holes properly.
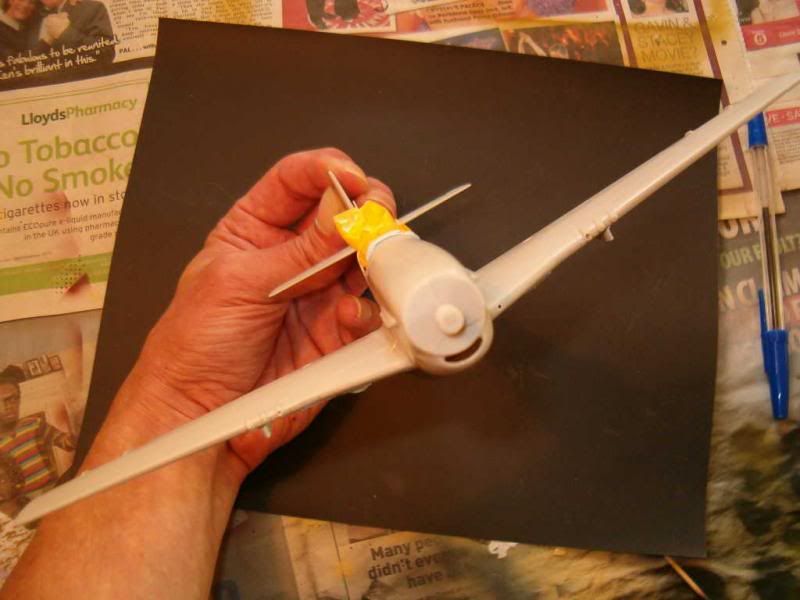 INITIAL MASKING
I decided against fitting the front part of the canopy at this stage as I'm not confident I can mask, spray and then remove the masking without knocking the part off, so I'll paint separately and attach afterwards. The rear part of the canopy will sit open, so this will be done separately as well.
The cockpit and wheel wells were masked off using a combination of Blu-Tac and masking tape, and we're ready for priming!
Re: Hasegawa 1/48 P-51D Mustang
Posted: Mon Aug 11, 2014 11:39 pm
by FishBowlMan
PRIMER
The aircraft was primed using Vallejo Light Grey (74.601) darkened with a few drops of German Panzer Grey (74.603) as the original colour was a very close match to the plastic and I was having trouble seeing if I had missed anywhere. The entire model was given 3 or 4 light coats and will be left to cure for at least 24 hours as a fair chunk of masking is required for the paint scheme.
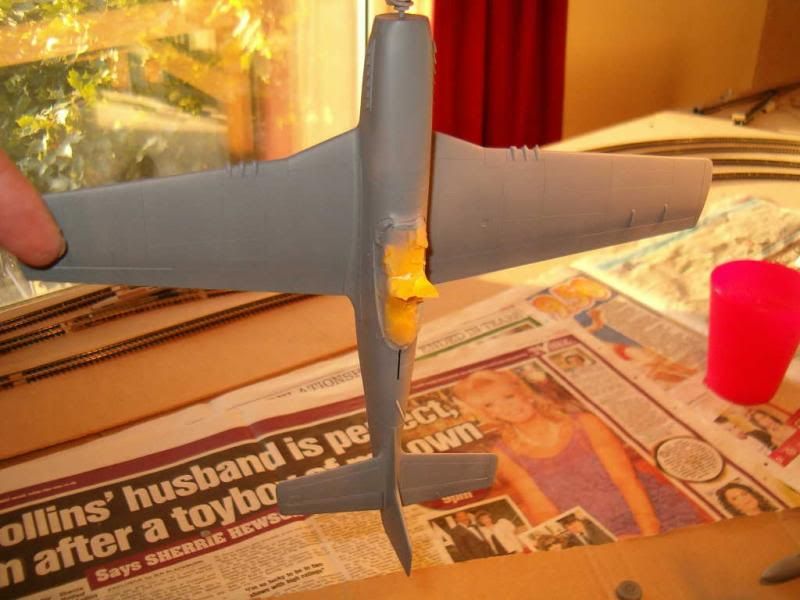
Due to the way the propeller blades and nose cone fit on to the fuselage, there was nowhere I could find to wedge an old brush or cocktail stick to hold the model while spraying, so I wrapped a piece of wire around the prop fittings.
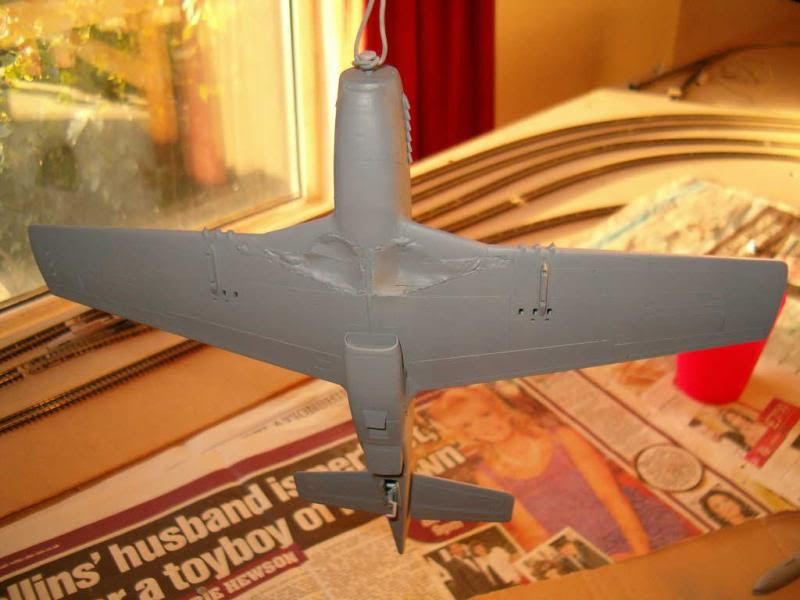
The main landing gear doors, main undercarriage and drop tanks were also primed at this time.
P-51 Piñata anyone?

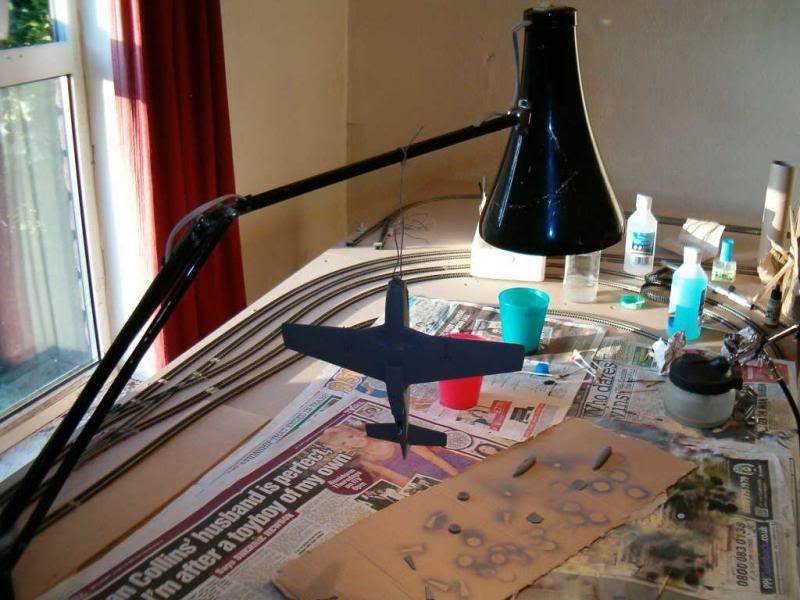
I'm using an Iwata Neo with a .35 needle so I'm not sure if I can spray thin enough lines to bother attempting pre-shading on the panel lines, so I may just go ahead and spray the main colours.
Re: Hasegawa 1/48 P-51D Mustang
Posted: Tue Aug 12, 2014 12:06 am
by cib2265
FishBowlMan wrote:
I'm using an Iwata Neo with a .35 needle so I'm not sure if I can spray thin enough lines to bother attempting pre-shading on the panel lines, so I may just go ahead and spray the main colours.
That should be fine with the .35 needle on your Neo - preshading doesnt need to be neat to be effective, in fact the more "overspray" you put outside the panel lines the better for tonal variation.
If Ive used a grey primer, I'll preshade the panel lines in black and then do some swirls and other light strokes (in direciton of airflow) on the panels in a random pattern. Go over this with your base coat very thin coats - stop when you think "one more pass" - and it gives a great color variation.
I admit I use my H&S Evolution for preshading with its finer control, but I sometimes use the Neo because I think the trigger is better (must be my fingers!)
cheers
Re: Hasegawa 1/48 P-51D Mustang
Posted: Tue Aug 12, 2014 12:14 am
by FishBowlMan
cib2265 wrote:FishBowlMan wrote:
I'm using an Iwata Neo with a .35 needle so I'm not sure if I can spray thin enough lines to bother attempting pre-shading on the panel lines, so I may just go ahead and spray the main colours.
That should be fine with the .35 needle on your Neo - preshading doesnt need to be neat to be effective, in fact the more "overspray" you put outside the panel lines the better for tonal variation.
If Ive used a grey primer, I'll preshade the panel lines in black and then do some swirls and other light strokes (in direciton of airflow) on the panels in a random pattern. Go over this with your base coat very thin coats - stop when you think "one more pass" - and it gives a great color variation.
I admit I use my H&S Evolution for preshading with its finer control, but I sometimes use the Neo because I think the trigger is better (must be my fingers!)
cheers
Thanks for the info, Chris. I'll give it a go then.
I'd assumed that I would basically end up with a black aircraft if I attempted it.
I normally spray at about 20psi. Do I need to reduce pressure to get the finer lines, or just be very careful with the trigger?
Re: Hasegawa 1/48 P-51D Mustang
Posted: Tue Aug 12, 2014 12:56 am
by cib2265
FishBowlMan wrote:
I normally spray at about 20psi. Do I need to reduce pressure to get the finer lines, or just be very careful with the trigger?
Sounds fine, low pressure and a bit thinner than usual and get used to your trigger - can I suggest Paul's trick first though!
Get a piece of card/paper whatever and do some left to right (or right to left) practice lines.
Then do some up and down/down and up lines.
Which is more comfortable/easier for you to do?
Just do those and re-orientate the plane when you do your preshading - voila!
Re: Hasegawa 1/48 P-51D Mustang
Posted: Tue Aug 12, 2014 2:43 am
by FishBowlMan
Thanks again, Chris - especially for the explanation of Paul's tip, which I had seen before, but totally forgotten
I'll hopefully have time to give it a go tomorrow... and if I completely cock it up, I can always make that "one more pass" with the main colour to cover it up.
Re: Hasegawa 1/48 P-51D Mustang
Posted: Tue Aug 12, 2014 8:35 pm
by FishBowlMan
Warning! This post contains images that folk may find disturbing!!!
PRE-SHADING
My first ever attempt at pre-shading... didn't go well. I can live with the wide, wobbly lines and uneven colour, but I wasn't expecting the paint runs (think I over-thinned it at times) or the constant spattering towards the end (think the airbrush started to get clogged and I really should have stopped and cleaned it).

I did consider cleaning it off and starting again, but I'd prefer to use this as an experiment to see what sort of effect this will produce. And if I don't like it, I'll spray a slightly thicker base coat and nobody will ever know it existed. Well, except for this post and the images contained within.

Brace yourselves, its gonna get messy!
I started with the underside as its not going to be as visible with the plane sitting on its wheels.
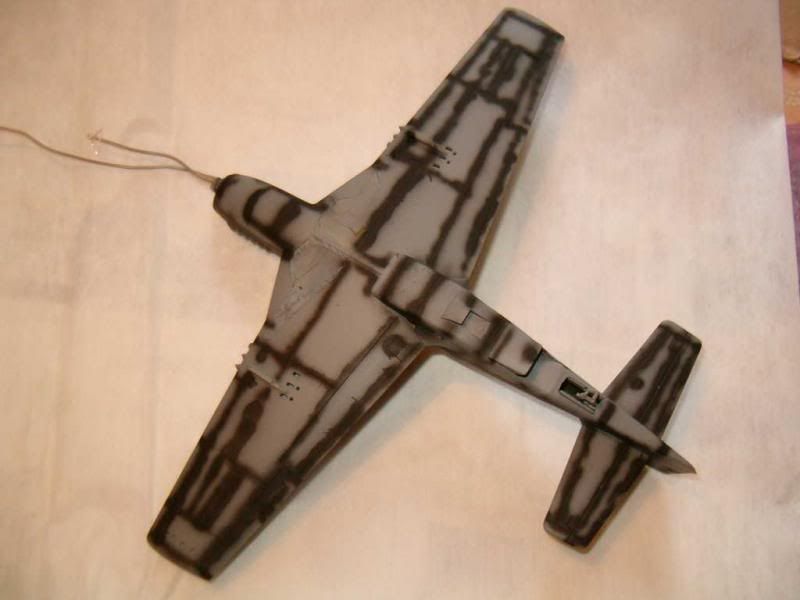
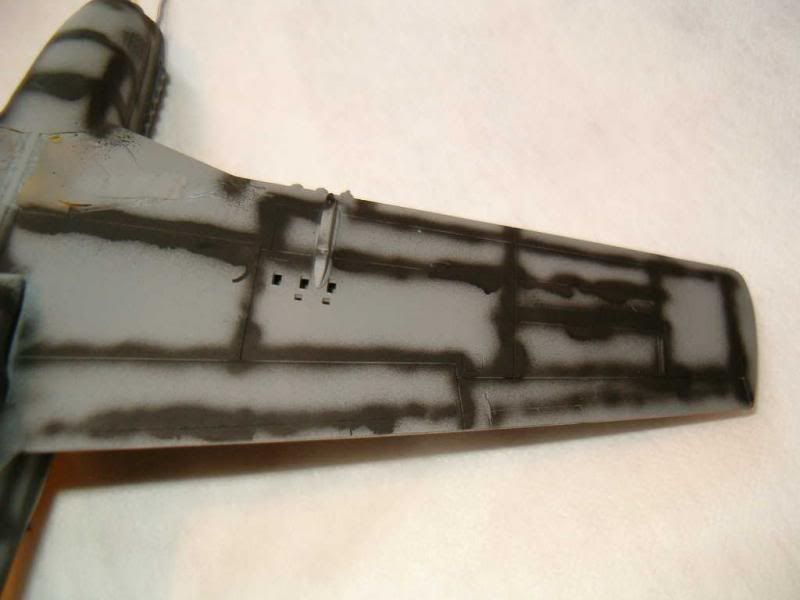
Now there will be a marked improvement on the top as I've got to grips with what I'm doing! Or maybe not!!!
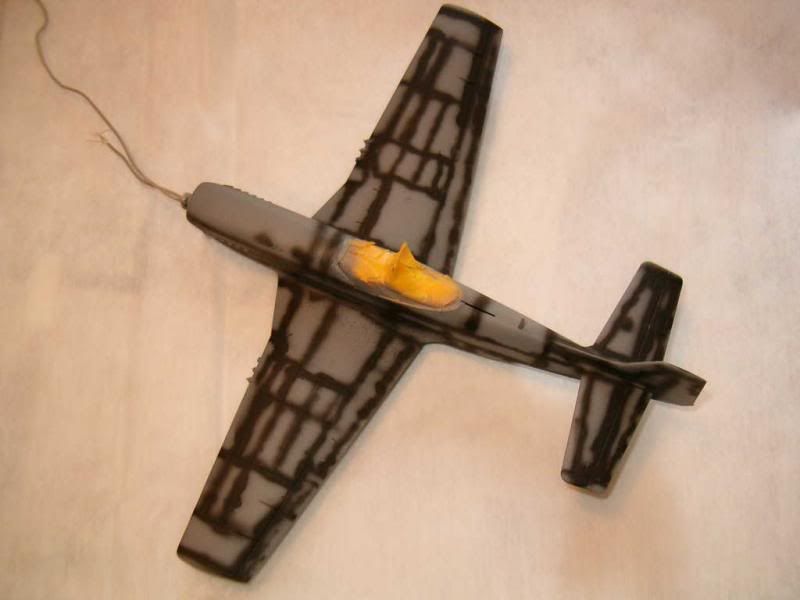
On to the sides and I must confess to be getting slightly PO'd by this point!
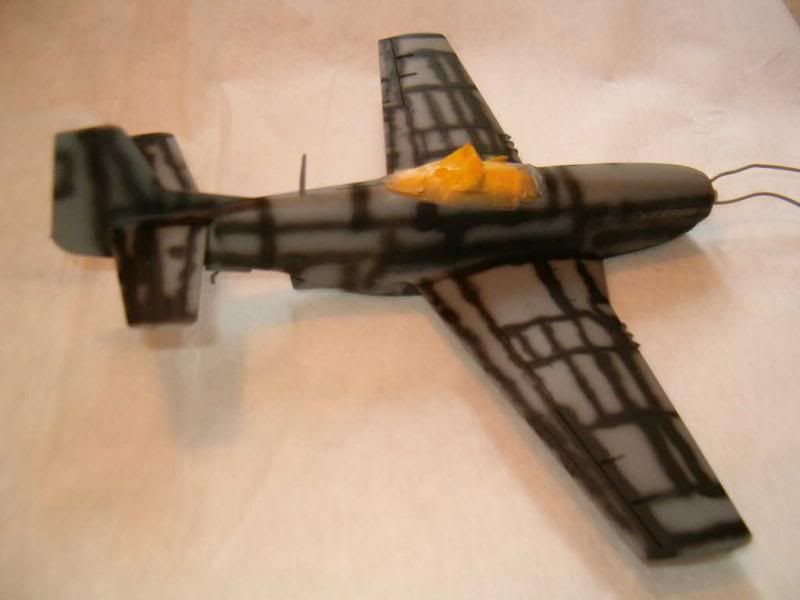
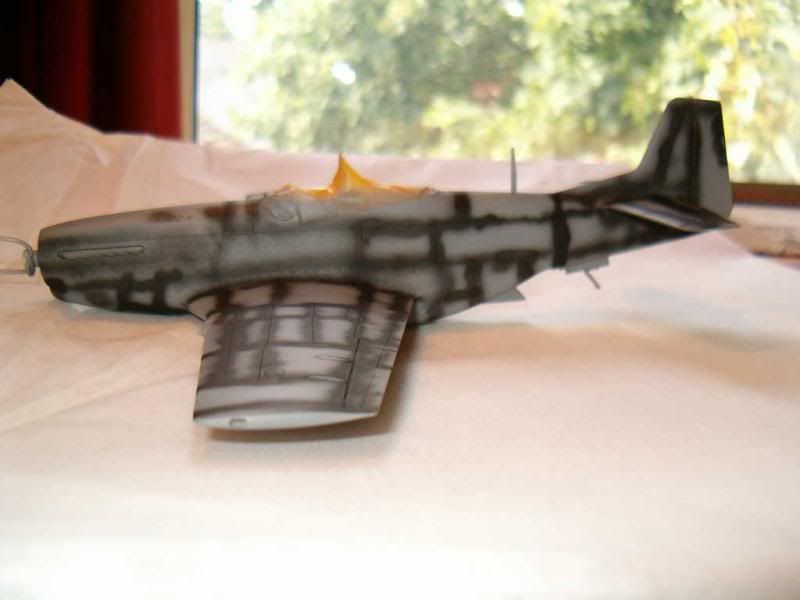
This was probably my favourite part. Somehow I've managed to get paint runs and spatter at the same time!
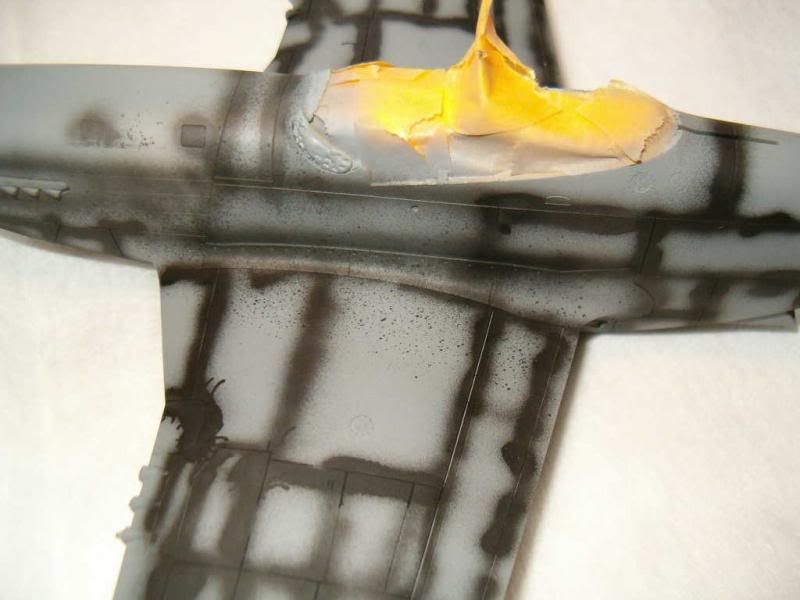
OK, you can come out from behind the sofa now.
Now, I feel pretty confident that I can paint some reasonably straight lines, and with a bit more practice, I can get the sprayed colour - in this case Vallejo Black (70.950) to be of the same shade and consistency. What I do lack is the experience and knowledge of how to adjust my airbrushing for a different set up.
When spraying the interior and then the primer coat, it was the first time I'd actually felt comfortable using an airbrush. Something clicked and I'd worked out roughly what I needed to do to spray thin, consistent coats at 20psi on wide areas. What I need is more practice on adjusting thinner ratios and pressure so I can get in closer for the detail work to enable me to achieve consistent results with finer lines, mottling etc. That will only come with time.
Likewise, another thing I discovered today was the need to work on my airbrush aiming skills. Some of the blobs at the start of the panel lines were caused by me starting a line a few mm away from where I intended. I think its a parallax thing that I hope I will adjust to with more practice.
Tomorrow, work permitting, I can make a start on the base coat. I just hope I can remember how to spray the "wide angle" stuff again.
Re: Hasegawa 1/48 P-51D Mustang
Posted: Tue Aug 12, 2014 9:36 pm
by Willem
Looks about right John. You are right about ratios etc so I think you are on track. It comes with time mate. If I haven't painted a model for a while I seem to get out of practise so understand the feeling. Just remember to build up your main camo colours in thin coats.
Hope this helps.
Re: Hasegawa 1/48 P-51D Mustang
Posted: Wed Aug 13, 2014 12:32 am
by UKguyInUSA
The paint splatter on the pre-shading will just help with the randomness of shades and tones, so, I wouldn't be concerned about it. Good luck with the base coats tomorrow, if you get time. Looking forward to seeing her come together now you're back on her!
Cheers,
Martin
Re: Hasegawa 1/48 P-51D Mustang
Posted: Wed Aug 13, 2014 12:08 pm
by FishBowlMan
Willem wrote:Looks about right John. You are right about ratios etc so I think you are on track. It comes with time mate. If I haven't painted a model for a while I seem to get out of practise so understand the feeling. Just remember to build up your main camo colours in thin coats.
Hope this helps.
Thanks for looking in, Will and cheers for the advice with the thin coats.
It looks very easy to cover up the pre-shading entirely if not careful. I feel more confident now I'm going back to a "general spray".
UKguyInUSA wrote:The paint splatter on the pre-shading will just help with the randomness of shades and tones, so, I wouldn't be concerned about it. Good luck with the base coats tomorrow, if you get time. Looking forward to seeing her come together now you're back on her!
Cheers,
Martin
Thanks, Martin.
I actually sprayed the top side of the wings and fuselage last night (pics will follow when I've charged the camera batteries again
) and you're right about it blending in. I guess that practicing this technique on pre-shading is a good way of doing it as any mistakes can be hidden or removed easily. I need to get more practice at detailed spraying before attempting mottling on a BF109 for example. If the paint runs or splatters there, its a lot harder to rectify.
Re: Hasegawa 1/48 P-51D Mustang
Posted: Wed Aug 13, 2014 2:44 pm
by FishBowlMan
Paraphrased from http://www.mustangsmustangs.com/p-51/?variants/p51d wrote:
The P-51B and P-51C were excellent aircraft that served until the end of the war. The B and C models suffered poor rearward visibility and gun jamming during high-G manuevers. The B/C models only had four .50 cal Brownings (2 in each wing). Pilots wanted more fire power.
The new line, designated NA-109, P-51D, was started after the USAAF ordered 2,500 in July 1943. Deliveries to fighter units began March of 1944 and a good supply was on hand for the Normandy Invasion. The signature change in the P-51D line was the new bubble canopy. A British company had designed and built the "Malcolm Hood" which improved visibility to the rear of the P-51B/C models.
The British had figured out how to make a bubble (also called "teardrop") canopy with unobstructed 360 degree view and they were beginning to use them on the latest model of Spitfires and Typhoons. The cut-down back for the new bubble canopy lead to a loss of surface area. This caused the P-51D to have directional problems (especially with full fuel in the fuselage tank creating an aft CG) for all but the most proficient pilots. The solution was to add a fillet (often called the "dorsal fin") to the vertical stabilizer that extended down and towards the front. The fillet was also added to other P-51 models already in the field.
The P-51D arrived in quantity in Europe in the spring of 1944, becoming the USAAF's primary long range escort fighter. The versatile Mustang also served as a fighter-bomber and reconnaissance aircraft.
As I'm sure you have deduced from the previous pictures, I am building a Late Version P-51 with the dorsal fin fitted. However, the colour scheme I am depicting is for an Early Version aircraft. I am going to assume that the aircraft had its tail modified in the field and was repainted at a later date.
The aircraft will have a silver / bare metal finish, with olive drab for the top of the wings, horizontal stabilizers, fuselage, vertical stabilizer and rudder. Full invasion stripes will be on the wing underside with a single white band on the top surface of the wing. Further stripes will be on the bottom half of the fuselage.
OLIVE DRAB
The relevant parts have been sprayed using Vallejo US. Olive Drab (70.608). Vallejo lists this as a primer but I'm not 100% sure about this. 3 or 4 thin coats have been applied and I'm really pleased with the way it turned out. The pre-shading is visible, but very subtle. At the time of D-Day was still a new aircraft, so very little panel fading would have occurred.
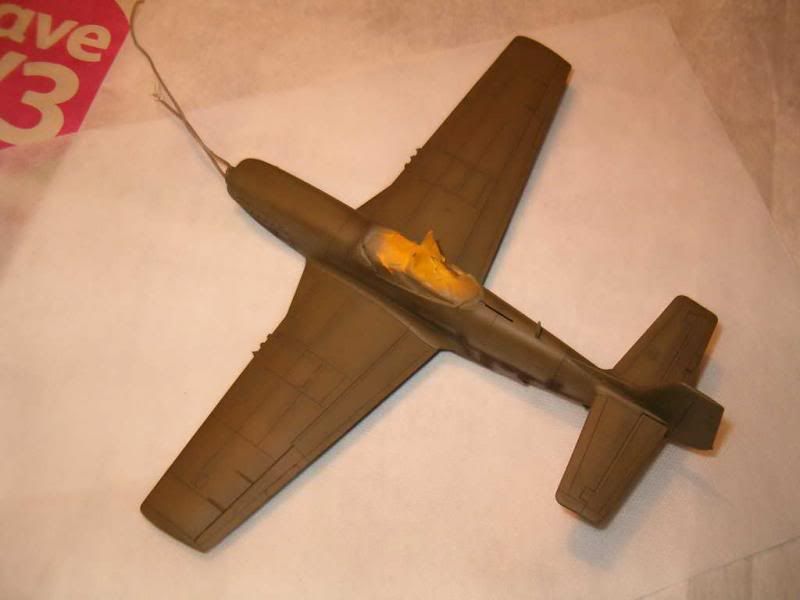
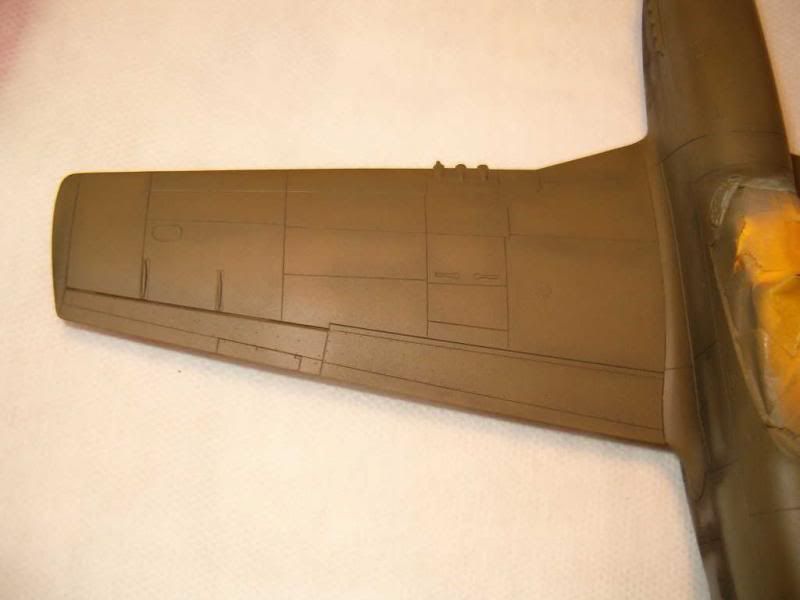
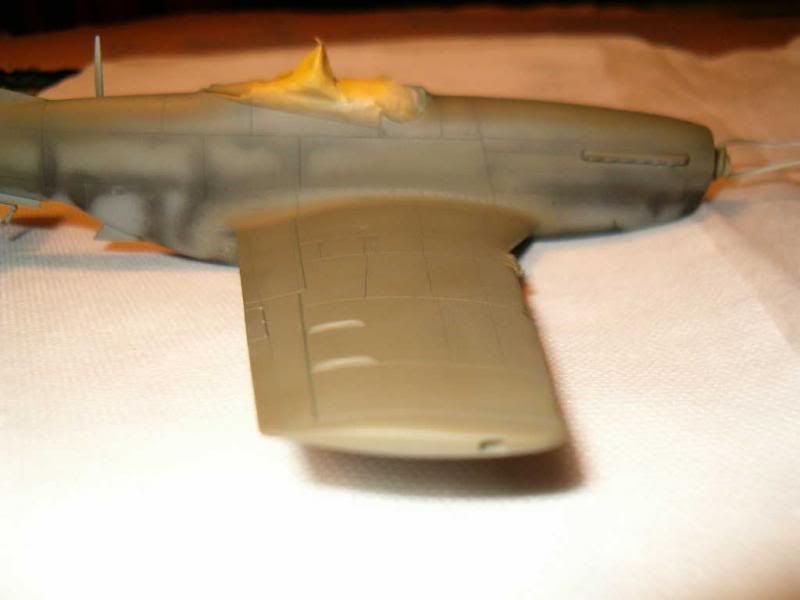
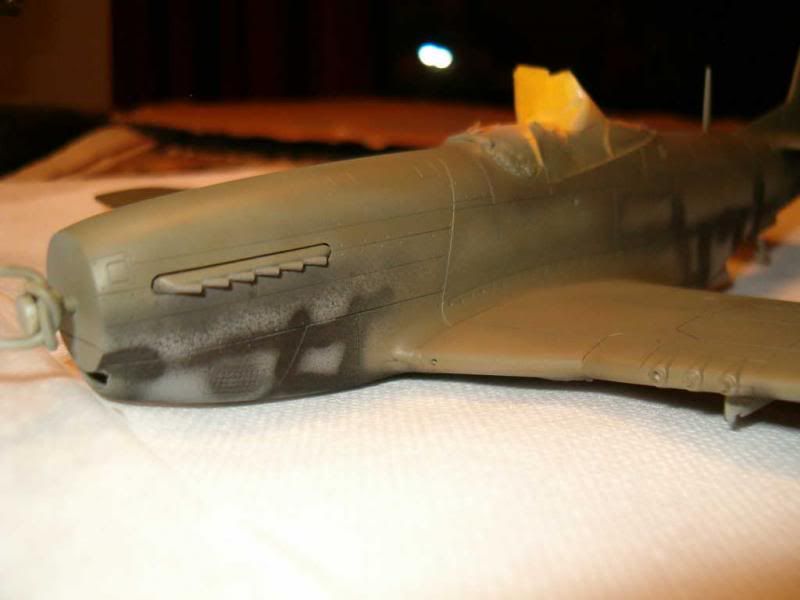
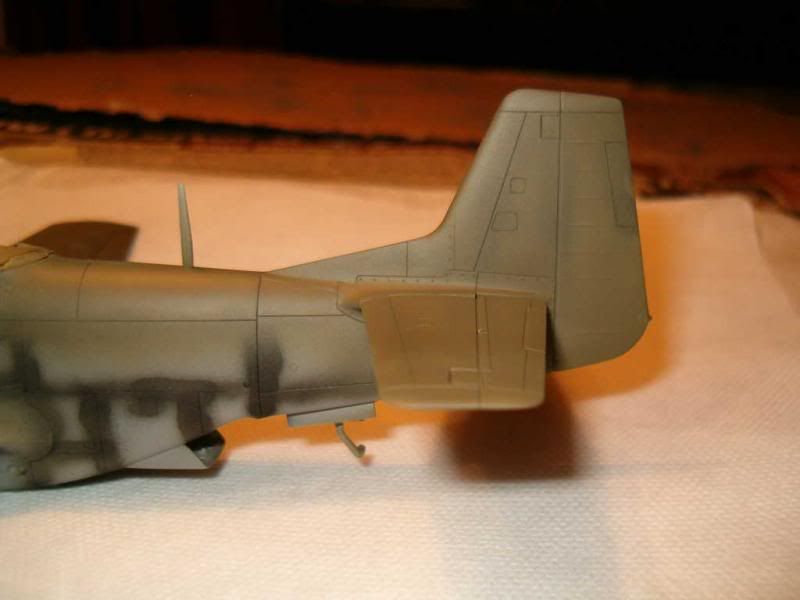
I think I'll mask and paint the invasion stripes next and leave spraying the metallic paints until later.
Re: Hasegawa 1/48 P-51D Mustang
Posted: Thu Aug 14, 2014 4:13 am
by UKguyInUSA
Looking good John, that pre-shading shows through a treat
Re: Hasegawa 1/48 P-51D Mustang
Posted: Thu Aug 14, 2014 10:18 pm
by felisbarcinonensis
There was no need to panic!!
The pre-shading looks already awesome below the olive layer!!

Re: Hasegawa 1/48 P-51D Mustang
Posted: Sun Aug 17, 2014 12:41 am
by FishBowlMan
felisbarcinonensis wrote:There was no need to panic!!
The pre-shading looks already awesome below the olive layer!!
Cheers, Felis. I can be a bit more confident the net time I pre-shade. First time nerves and all that.
INVASION STRIPES
Big thanks to Nige201980 for this topic regarding invasion stripes and the suggestion to use 10mm tape for 1/48 scale single engine fighters:
http://www.intscalemodeller.com/viewtop ... on+stripes
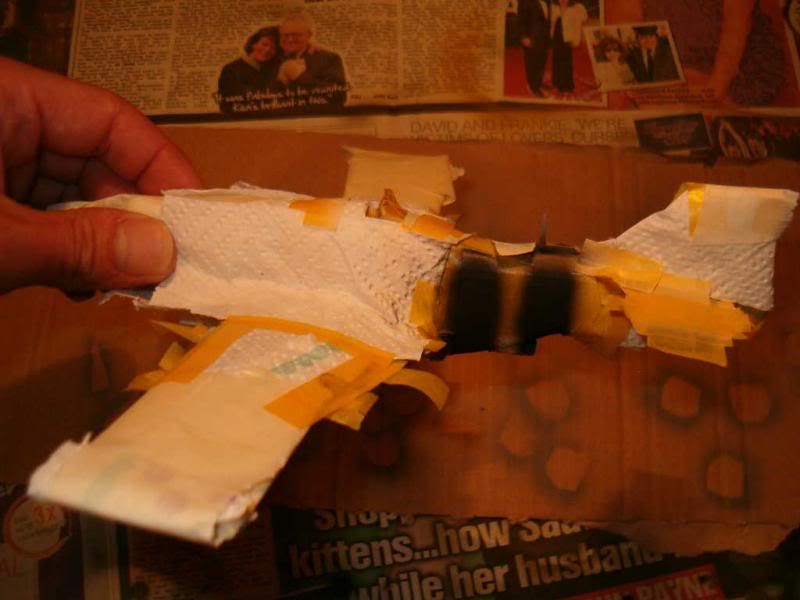
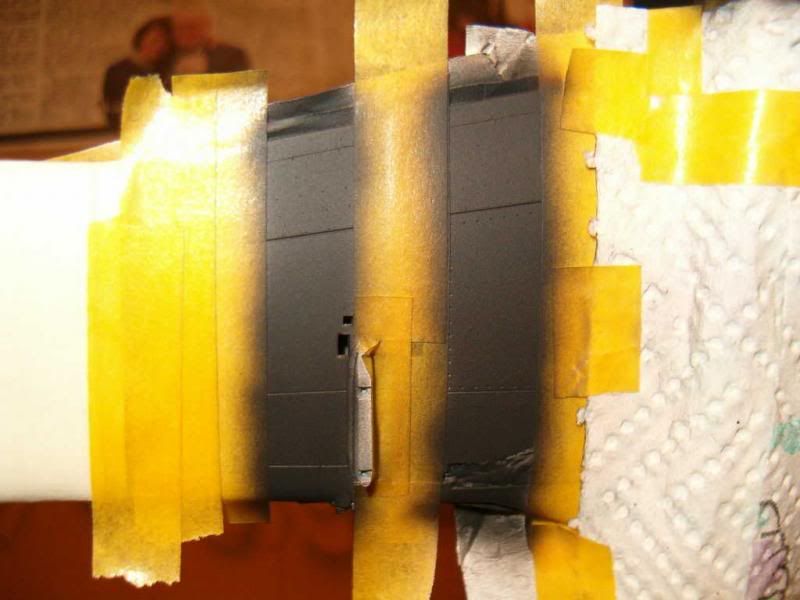
I forgot to take pictures until I'd finished spraying the black bands, but here's how I went about it:
White bands. Vallejo White (70.951) and Iraqui Sand (70.819) in about a 70:30 mix sprayed in thin mist coats to build up coverage. Add more white to the airbrush and thin. Spray a thin coat. Add yet more white (for about a 90:10 ratio) and thin a lot! Spray 1 or 2 very thin coats. This should reduce the "pure white" look and give a bit of tonal variation.
Black bands. A mixture of Vallejo Black (70.950) and Flat Flesh (70.955) in about 90:10 ratio again to take the edge off the pure black. Spray in thin coats. To my eye, this black mix is very similar to Tamiya Rubber Black (XF85).
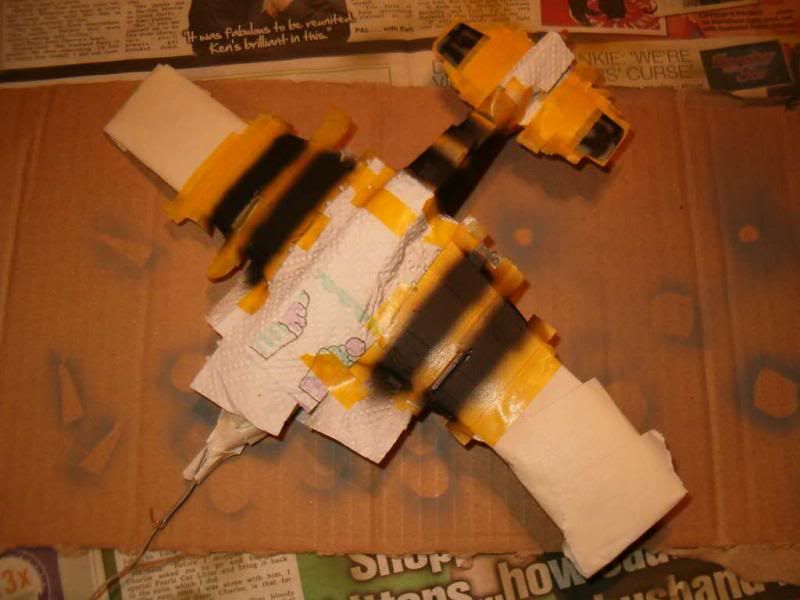
 BARE METAL
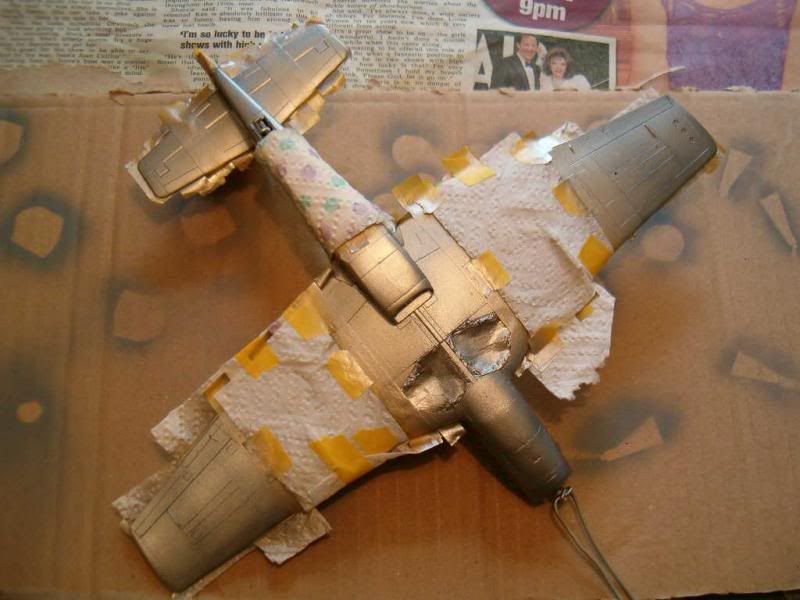
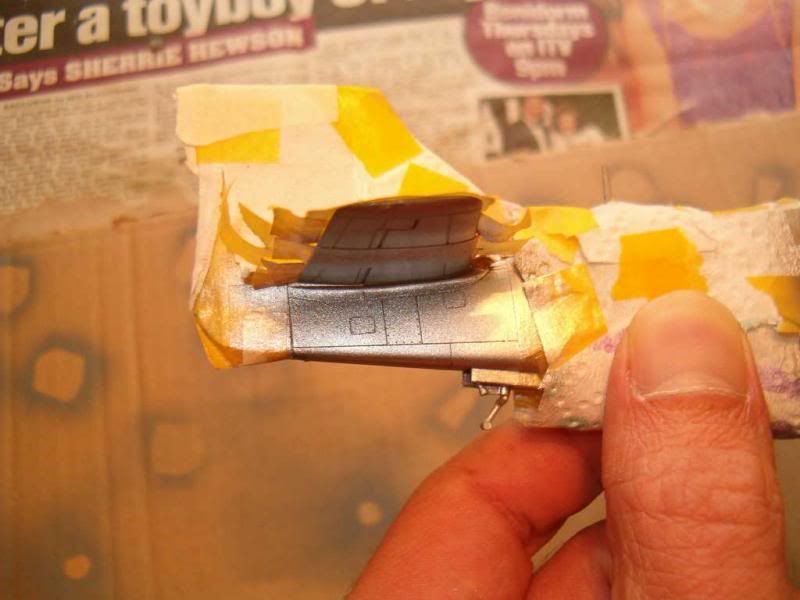
I used a 50:50 mix of Vallejo Natural Steel (70.864) and Silver (70.997). The coverage was quite thick, so I've lost the majority of the pre-shading, but I'm not too bothered about this.
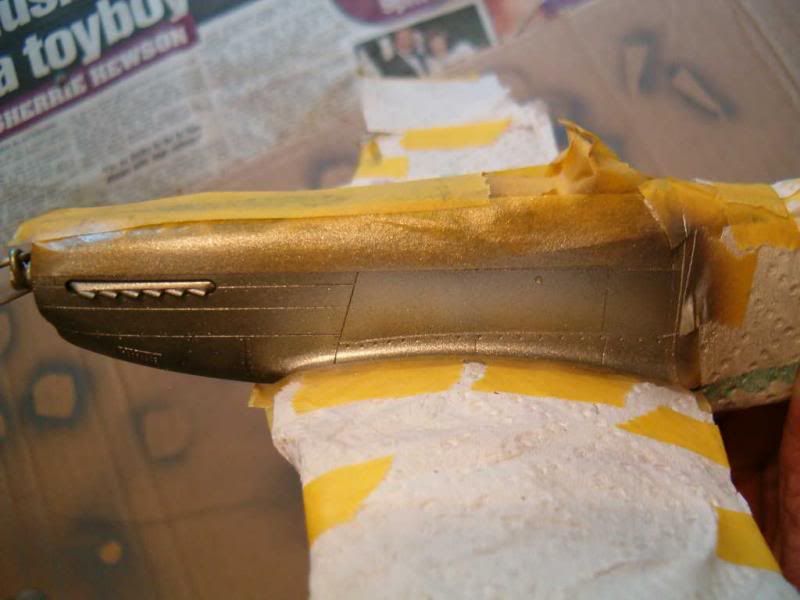 THE MOMENT OF TRUTH!!!
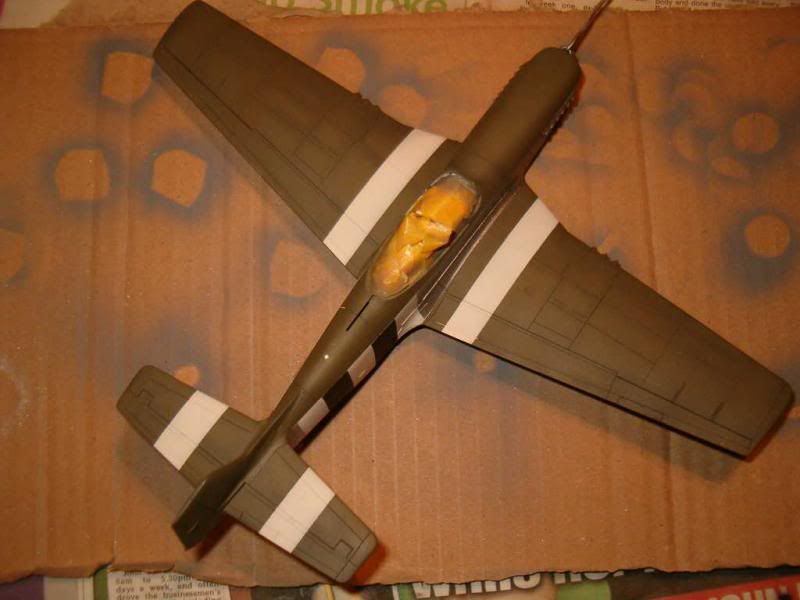
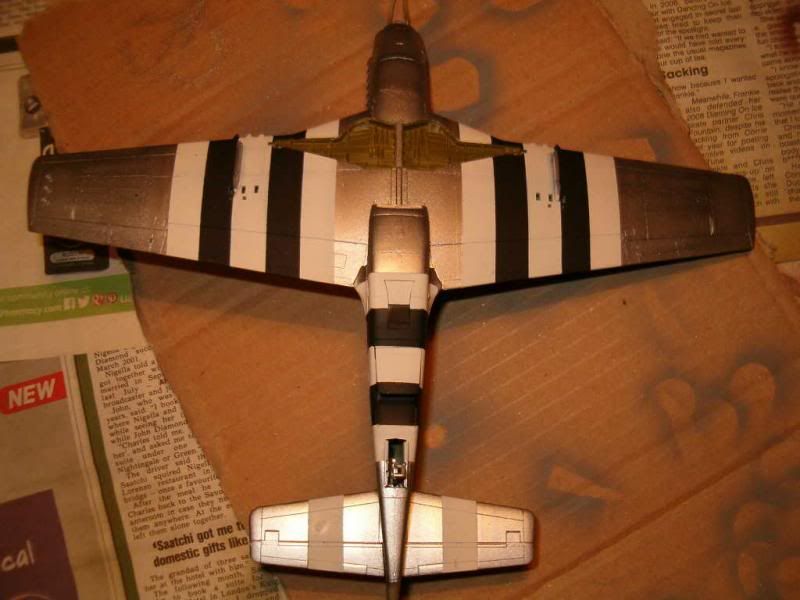
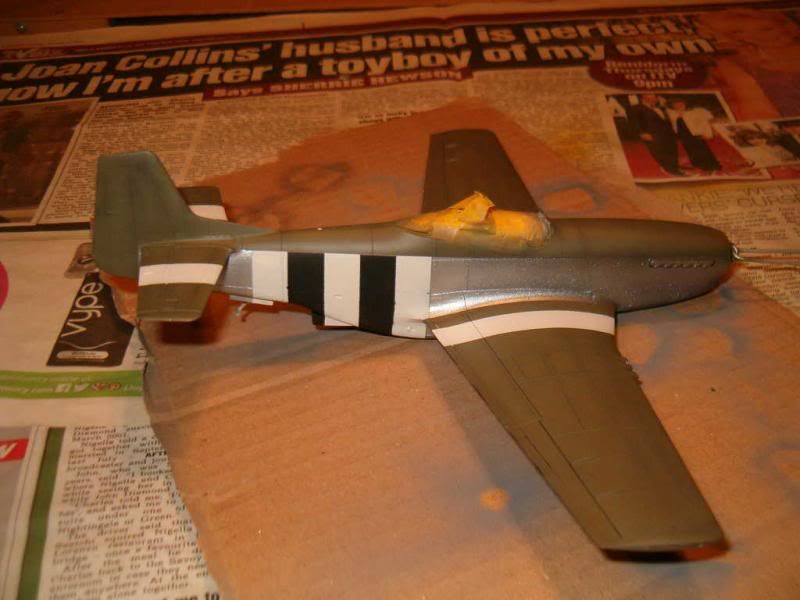
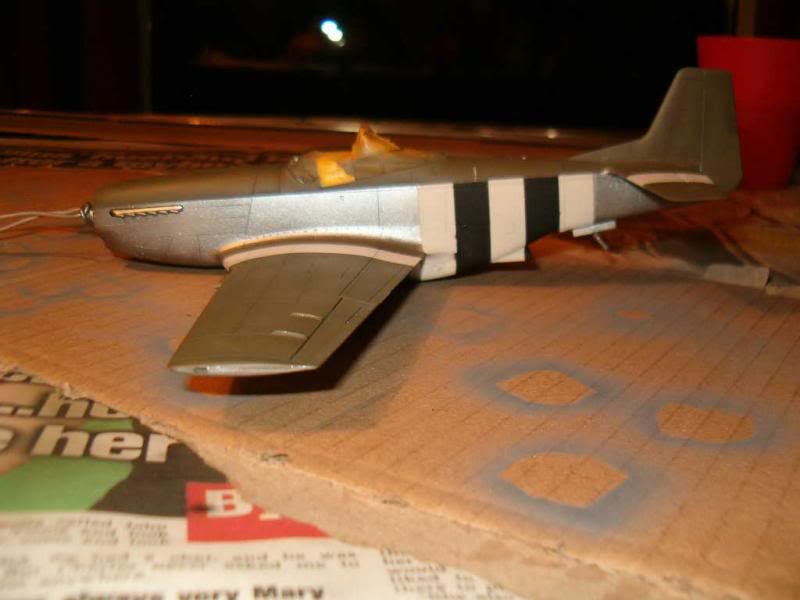
There are a few places to touch up, a few flecks of silver paint that found their way through the masking to remove, and some sticky residue from the masking tape in a couple of places, but overall I'm pretty pleased with it so far.
Once these are sorted, and I've sprayed the bits I forgot (white stripe on the undercarriage doors, for eample) its time for a couple of coats of future and crack on with the decals.
FishBowlMan wrote:I decided to fit the VHF antenna mast even though It'll probably get knocked off sooner or later.
Yep! Did that when I removed the masking!
Incidentally, I've read that a good product to clean Future from the airbrush is "Windex". Is that what is sold as "Windowlene" here in the UK?
Re: Hasegawa 1/48 P-51D Mustang
Posted: Sun Aug 17, 2014 12:46 am
by Willem
Wow. Really looks the part John.
Great stuff.
Re: Hasegawa 1/48 P-51D Mustang
Posted: Sun Aug 17, 2014 12:58 am
by Navcom
Awesome job! Funny...I spent 3 days trying to figure out the easiest way to get great invasion stripes. I stumbled on the 10mil tape as well. Wish I would have seen Nige's tip! Would've saved a lot of frustration!
Excellent Mustang! Can't wait to see it all finished!
Re: Hasegawa 1/48 P-51D Mustang
Posted: Sun Aug 17, 2014 1:09 pm
by FishBowlMan
Thanks,
Will and
Jeff.
Even with the 10mm tape, masking the stripes on the fuselage was an absolute PITA. I'm just glad they stopped at the olive drab paint rather than covering the entire section!


