Tamiya M-106A1 Mortar Carrier
Posted: Sat Sep 20, 2014 11:05 pm
This will be my entry to the GB and my first go at a GB on ISM. With Vietnam being my favorite subject area I just had to enter really and hope to enter more GB's & SiG's in the future.
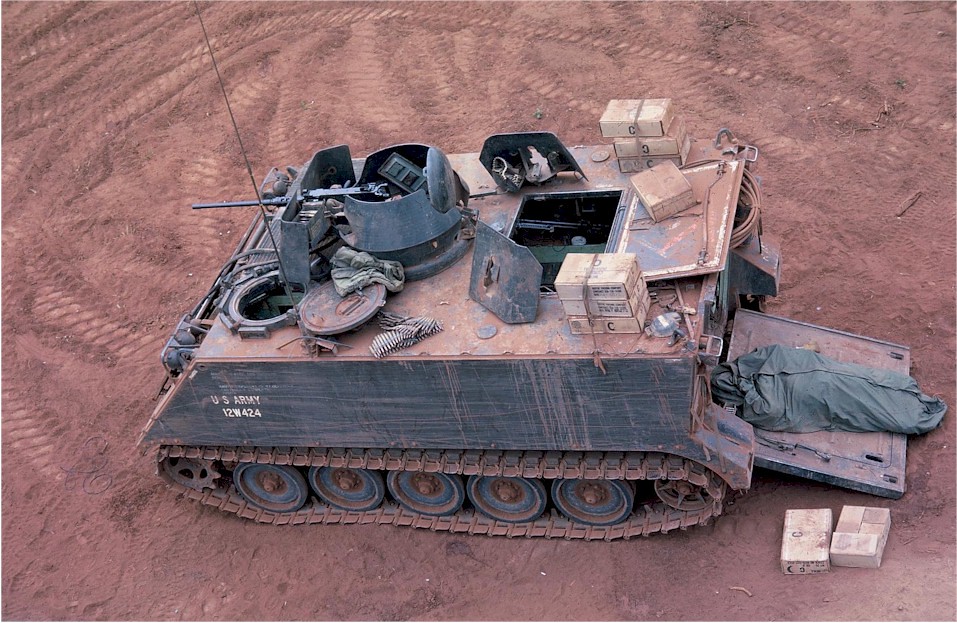
The M-106 is an M-113 armored personnel carrier that was used as a mobile fire support vehicle. It was fitted with a M30 mortar mounted on a turntable in the rear troop compartment. On this variant, the single hatch over the rear troop compartment was exchanged for a three-part circular hatch. The mortar could be fired from the vehicle, but could also be fired dismounted.
The M30 107 mm (4.2 inch Mortar) heavy mortar is an American rifled, muzzle-loading, high-angle-of-fire weapon used for long-range indirect fire support to infantry units.
The M30 system weighs 305 kg including the complete mortar with a welded steel rotator, M24A1 base plate and M53 sight.
A point of interest in the design of this mortar is the rifled barrel. A rifled barrel requires the round to be a very tight fit to the bore in order for the rifling to engage the round and impart rotation to it. But in a muzzle loading mortar, the round has to be loose enough in the bore to drop in from the front. In order to have it both ways, these rounds have an expandable ring at the base which expands into the rifling under the pressure of the explosion of the firing charge which propels the round. Additionally, imparting a spin to a round causes it to drift away from the direction of fire during flight and the longer the flight (greater range to target), the farther the drift, so the computation for setting the direction for firing at a specific target has to account for this drift.
American rounds are designed to be drop-safe and bore-safe. As such, the fuzes in the rounds for this rifled mortar did not arm unless the round was spun a certain number of times i.e. the round was not armed until it had exited the barrel spinning and traveled a safe distance from the gun emplacement.
The M30 could fire an assortment of rounds including:
HE M329A1—max range 5,650 m (6,180 yd), weight 12.3 kg (27 lb)
HE M329A2—max range 6,800 m (7,400 yd), weight 10 kg (22 lb)
HE M34A1—max range 4,620 m (5,050 yd), weight 12.2 kg (26.9 lb)
WP M328A1—max range 5,650 m (6,180 yd)
ILLUM M335A2—max range 5,490 m (6,000 yd)
WP is white phosphorus ("Willy-Pete")
ILLUM is illumination, a parachute flare round with fixed timed detonation. Deployment height above ground is determined by gun elevation angle and propelling charge.
HE and WP rounds could be fitted with various fuses before firing including a proximity fuse set for detonation at about 30 feet above ground to maximize the effected target area and to spray shrapnel down into foxholes.
There was also a sub-caliber training device that utilized blank 20 gauge shotgun shells to propel an inert training round a few hundred meters. This training was for gunnery skills of laying (in a sense, aiming) the guns.
Due to the heavy weight the mortar was most often mounted in the M-106. This vehicle mounted mortar was crewed by 5 people: the track commander (mortar sergeant/gun commander), gunner, assistant gunner, loader and vehicle driver. Ground mounting of the mortar was time consuming and strenuous as a hole had to be dug for the base plate of the mortar to rest in, sandbags had to filled and placed around the base plate to stabilize it and to protect the exposed ammunition. Also this decreased the accuracy of the weapon as the recoil from firing caused the base plate to shift in the ground. This movement also made the crew have to "lay" the gun back on the aiming stakes more often, causing a temporary lack of fire while the weapon was repositioned and re-sighted back to its original reference point.
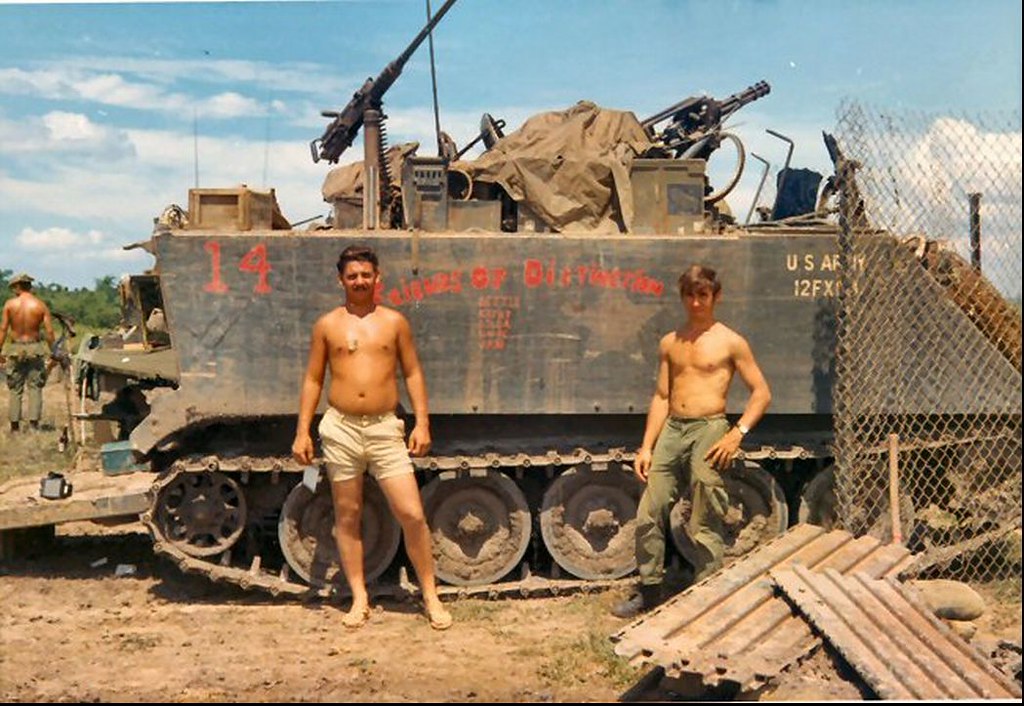
The Tamiya M-113's are showing their age now and are no match for the superior Academy kits but they still make up to be a decent models and is this is still the only M-106 in 1:35th. This is going to be a simple build for me with only a small amount of after market and possibly a bit of scratching. I will be purchasing a set of Friul Modellismo metal tracks to replace the vinyl crap that Tamiya provide with most of their AFV's. The .50 cal will be replaced by a Panzer Art Browning M2 with canvas cover to depict the weapon in a stored scenario. Lastly I will use a few items from the Legend M-113 accessory set that I have put aside for another M-113 build.
For weathering and reference I will be following Jerzy Krzminski's Flickr account as this is quite possibly one of the best sources of Vietnam War armour around with more M-113 pictures than you can shake a stick at.
https://www.flickr.com/photos/zippo132/
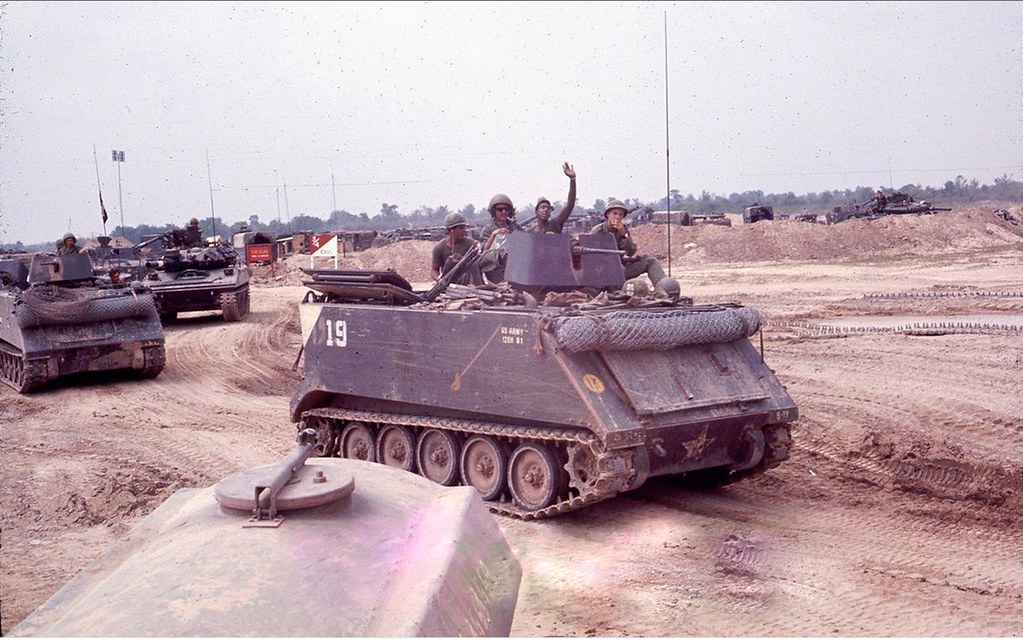 M106 mortar track "B" troop 3/4th Cavalry 25th Infantry Division "Tropic Lightning" by Jerzy Krzemiński, on Flickr
 M106 mortar track "Charlie Company" 1/50th Infantry "Play the Game" by Jerzy Krzemiński, on Flickr
 M106 mortar track 2/47th Infantry /mech/ "Black Panthers" 9th Infantry Division "Old Reliables" by Jerzy Krzemiński, on Flickr
 M106 mortar track 2/22nd Infantry "Triple Deuce" by Jerzy Krzemiński, on Flickr
Anyway here is what I will be working with... (sorry for the poor pics they were taken in low light.)
 IMG_4236 by Snapper_city, on Flickr
 IMG_4237 by Snapper_city, on Flickr
 IMG_4239 by Snapper_city, on Flickr
 IMG_4240 by Snapper_city, on Flickr
 IMG_4242 by Snapper_city, on Flickr
 IMG_4243 by Snapper_city, on Flickr
 IMG_4244 by Snapper_city, on Flickr
 IMG_4246 by Snapper_city, on Flickr
 IMG_4247 by Snapper_city, on Flickr
 IMG_4249 by Snapper_city, on Flickr
 IMG_4250 by Snapper_city, on Flickr
It could be a couple of weeks before I make a start on this as I'm finishing another couple of builds first.
Thanks for looking.
The M-106 is an M-113 armored personnel carrier that was used as a mobile fire support vehicle. It was fitted with a M30 mortar mounted on a turntable in the rear troop compartment. On this variant, the single hatch over the rear troop compartment was exchanged for a three-part circular hatch. The mortar could be fired from the vehicle, but could also be fired dismounted.
The M30 107 mm (4.2 inch Mortar) heavy mortar is an American rifled, muzzle-loading, high-angle-of-fire weapon used for long-range indirect fire support to infantry units.
The M30 system weighs 305 kg including the complete mortar with a welded steel rotator, M24A1 base plate and M53 sight.
A point of interest in the design of this mortar is the rifled barrel. A rifled barrel requires the round to be a very tight fit to the bore in order for the rifling to engage the round and impart rotation to it. But in a muzzle loading mortar, the round has to be loose enough in the bore to drop in from the front. In order to have it both ways, these rounds have an expandable ring at the base which expands into the rifling under the pressure of the explosion of the firing charge which propels the round. Additionally, imparting a spin to a round causes it to drift away from the direction of fire during flight and the longer the flight (greater range to target), the farther the drift, so the computation for setting the direction for firing at a specific target has to account for this drift.
American rounds are designed to be drop-safe and bore-safe. As such, the fuzes in the rounds for this rifled mortar did not arm unless the round was spun a certain number of times i.e. the round was not armed until it had exited the barrel spinning and traveled a safe distance from the gun emplacement.
The M30 could fire an assortment of rounds including:
HE M329A1—max range 5,650 m (6,180 yd), weight 12.3 kg (27 lb)
HE M329A2—max range 6,800 m (7,400 yd), weight 10 kg (22 lb)
HE M34A1—max range 4,620 m (5,050 yd), weight 12.2 kg (26.9 lb)
WP M328A1—max range 5,650 m (6,180 yd)
ILLUM M335A2—max range 5,490 m (6,000 yd)
WP is white phosphorus ("Willy-Pete")
ILLUM is illumination, a parachute flare round with fixed timed detonation. Deployment height above ground is determined by gun elevation angle and propelling charge.
HE and WP rounds could be fitted with various fuses before firing including a proximity fuse set for detonation at about 30 feet above ground to maximize the effected target area and to spray shrapnel down into foxholes.
There was also a sub-caliber training device that utilized blank 20 gauge shotgun shells to propel an inert training round a few hundred meters. This training was for gunnery skills of laying (in a sense, aiming) the guns.
Due to the heavy weight the mortar was most often mounted in the M-106. This vehicle mounted mortar was crewed by 5 people: the track commander (mortar sergeant/gun commander), gunner, assistant gunner, loader and vehicle driver. Ground mounting of the mortar was time consuming and strenuous as a hole had to be dug for the base plate of the mortar to rest in, sandbags had to filled and placed around the base plate to stabilize it and to protect the exposed ammunition. Also this decreased the accuracy of the weapon as the recoil from firing caused the base plate to shift in the ground. This movement also made the crew have to "lay" the gun back on the aiming stakes more often, causing a temporary lack of fire while the weapon was repositioned and re-sighted back to its original reference point.
The Tamiya M-113's are showing their age now and are no match for the superior Academy kits but they still make up to be a decent models and is this is still the only M-106 in 1:35th. This is going to be a simple build for me with only a small amount of after market and possibly a bit of scratching. I will be purchasing a set of Friul Modellismo metal tracks to replace the vinyl crap that Tamiya provide with most of their AFV's. The .50 cal will be replaced by a Panzer Art Browning M2 with canvas cover to depict the weapon in a stored scenario. Lastly I will use a few items from the Legend M-113 accessory set that I have put aside for another M-113 build.
For weathering and reference I will be following Jerzy Krzminski's Flickr account as this is quite possibly one of the best sources of Vietnam War armour around with more M-113 pictures than you can shake a stick at.
https://www.flickr.com/photos/zippo132/
M106 mortar track "B" troop 3/4th Cavalry 25th Infantry Division "Tropic Lightning" by Jerzy Krzemiński, on FlickrM106 mortar track "Charlie Company" 1/50th Infantry "Play the Game" by Jerzy Krzemiński, on FlickrM106 mortar track 2/47th Infantry /mech/ "Black Panthers" 9th Infantry Division "Old Reliables" by Jerzy Krzemiński, on FlickrM106 mortar track 2/22nd Infantry "Triple Deuce" by Jerzy Krzemiński, on FlickrAnyway here is what I will be working with... (sorry for the poor pics they were taken in low light.)
IMG_4236 by Snapper_city, on FlickrIMG_4237 by Snapper_city, on FlickrIMG_4239 by Snapper_city, on FlickrIMG_4240 by Snapper_city, on FlickrIMG_4242 by Snapper_city, on FlickrIMG_4243 by Snapper_city, on FlickrIMG_4244 by Snapper_city, on FlickrIMG_4246 by Snapper_city, on FlickrIMG_4247 by Snapper_city, on FlickrIMG_4249 by Snapper_city, on FlickrIMG_4250 by Snapper_city, on FlickrIt could be a couple of weeks before I make a start on this as I'm finishing another couple of builds first.
Thanks for looking.


 Going to town on that old gal hey ?


 I also like Friul tracks,you really can't beat them for getting realistic track sag.