Page 1 of 2
Meng French FT-17 Light Tank (Riveted Turret)
Posted: Mon Sep 22, 2014 1:15 am
by wbill76
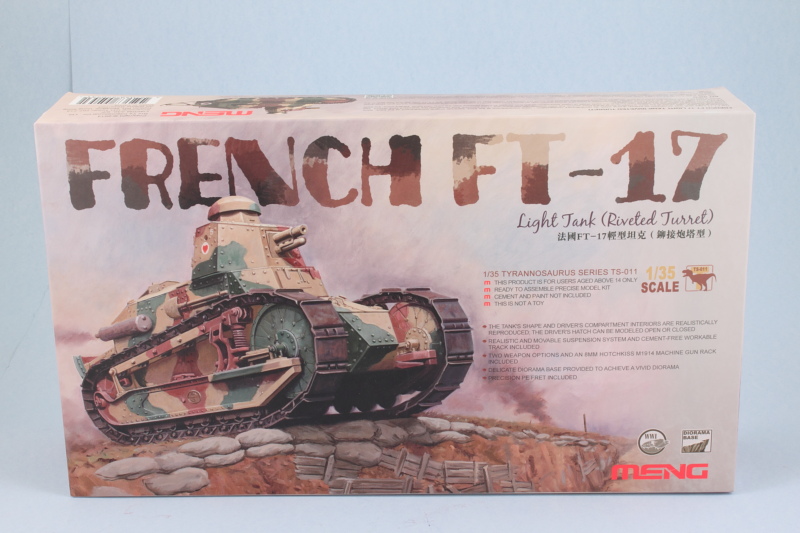
For my next victim, I chose Meng's 1/35 French FT-17 Light Tank (Riveted Turret).
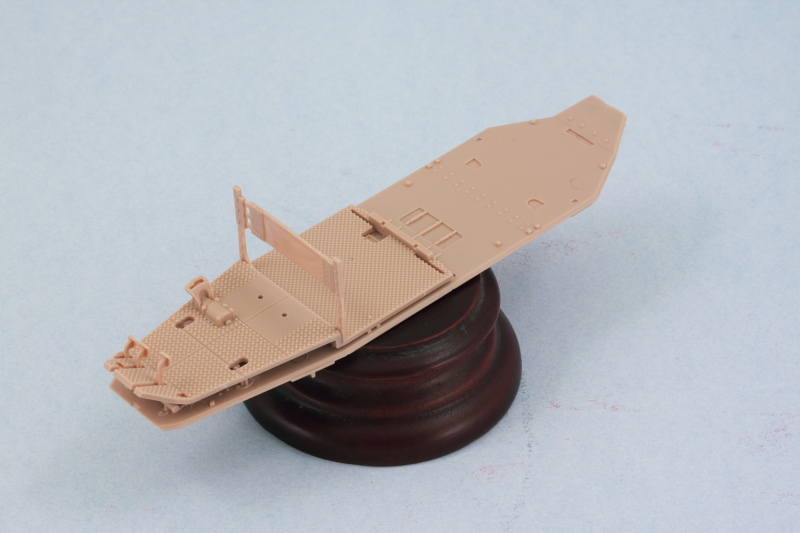
I started work on this little guy with Step 1 which deals with the hull floor plate and various elements of the driver's station and controls. As I'm contemplating painting the interior and leaving the access hatches open for this area, I left off the driver's seat cushion and control levers for the time being.
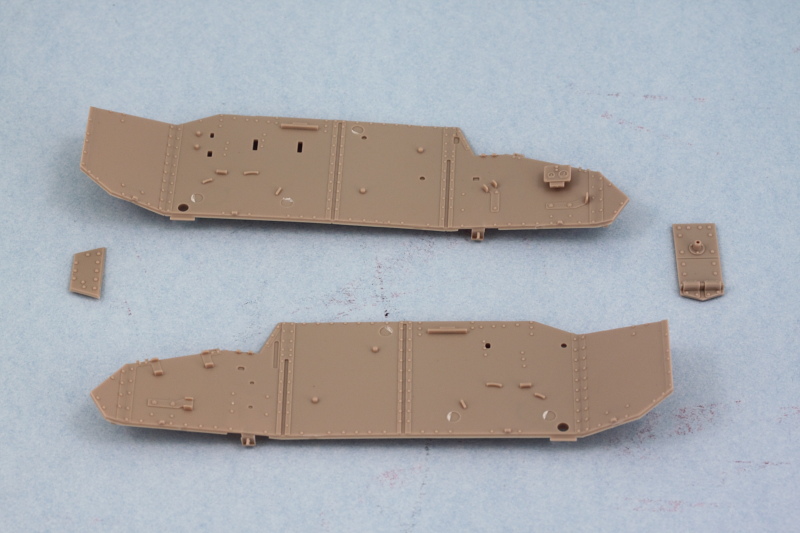
Next I cleaned up the hull sides and the nose and rear plates so I could get a good idea of how the hull would come together. Left side of the hull received the two-gauge instrument panel which was a little challenge to place since there aren't any locater marks or guides for where it should go beyond the one diagram in Step 2.
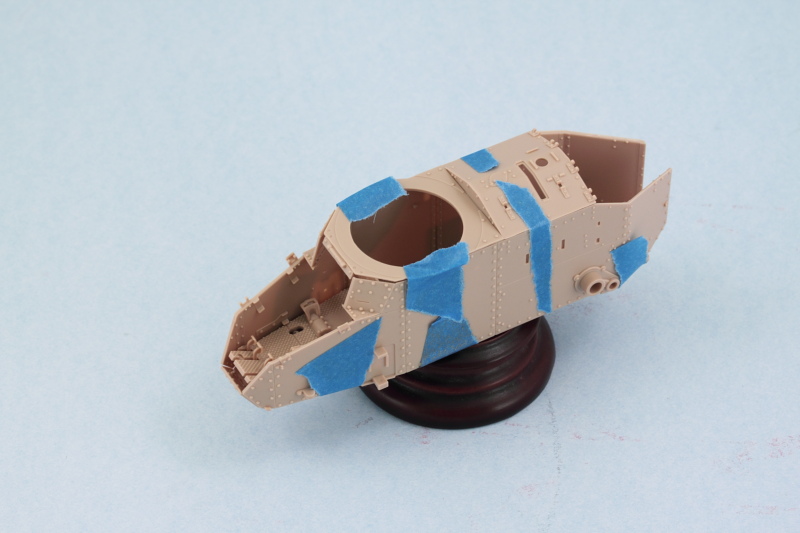
I assembled the hull roof plate as directed in Step 6 and added the angled side armor plates for the driver's view hatch outlined in Step 7. The nose plate, B8, was also installed on the hull floor. A quick check with some strips of masking tape let me mock up the hull and make sure that everything will fit together properly. The slight gap visible at the front of the hull roof is due to the limitations of the tape contact/tension in that area and not a fit flaw in the kit.
Skipping ahead a bit to Step 13, I cleaned up the driver's view hatch and the two access hatches and added their grab handles.
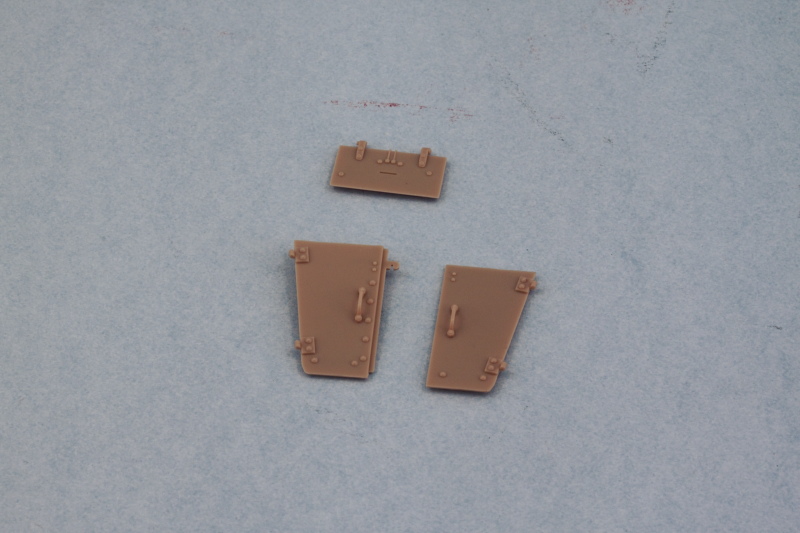
At this point I'm not 100% sure I will go ahead and leave the driver's area hatches open. This particular kit doesn't include any additional detail for the interior past the driver's seat back so I'm rethinking the notion. I may just pose the driver's vision hatch open instead...or just keep things simple and close it all up. Have to see how I feel about it and go from there I guess.
Re: Meng French FT-17 Light Tank (Riveted Turret)
Posted: Mon Sep 22, 2014 1:54 am
by brickfan8
Will you be building the trench
Re: Meng French FT-17 Light Tank (Riveted Turret)
Posted: Mon Sep 22, 2014 4:10 am
by wbill76
brickfan8 wrote:Will you be building the trench
I may do that if I close it up. Haven't decided which way to jump just yet.

Re: Meng French FT-17 Light Tank (Riveted Turret)
Posted: Mon Sep 22, 2014 6:57 pm
by HamilkarBarkas
Looking good. i made the other version with full interior and the engine did not fit into the hull so i ended up with small gaps here and there which was pretty annoying. in your case you won´t have these troubles

Re: Meng French FT-17 Light Tank (Riveted Turret)
Posted: Mon Sep 22, 2014 7:09 pm
by wbill76
Thanks HB! I'm leaning more towards just closing it up and not bothering with the interior at all to be quite honest, but don't want to make a hasty decision just yet.

Re: Meng French FT-17 Light Tank (Riveted Turret)
Posted: Sun Sep 28, 2014 8:48 pm
by wbill76
After some back and forth I decided ultimately to go ahead and button up this little guy and not display the driver's hatches open. So with that decided, I set about assembling the hull. Since it's all separate panels, I used regular glue on the hull sides so they could have some stability and then followed that up with careful applications of liquid glue where needed along the bottom edges.
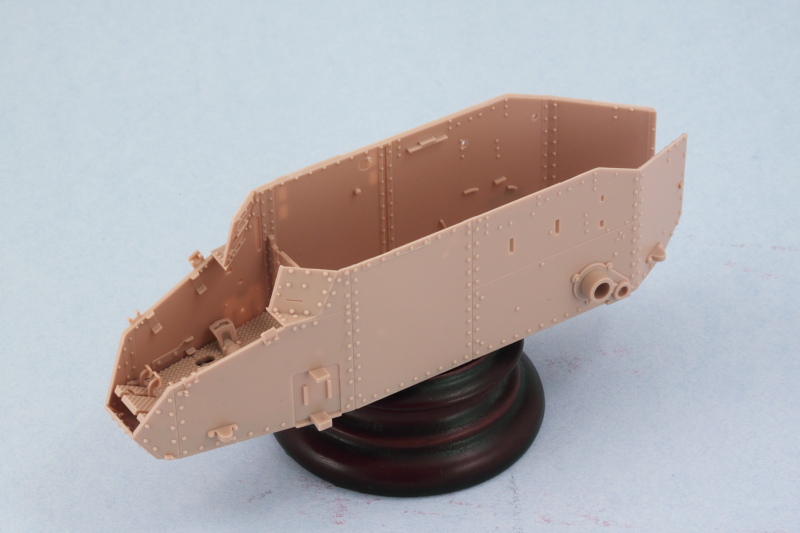
Then I added the roof plate next so I could use it to get the hull sides lined up square and the small driver's area side plates lined up with the view port hatch hinge and the top edges of the roof plate. This all requires some careful use of finger pressure and glue as the areas involved are tiny and rubber bands or clamps can't do the job. Then I added the angled top plate for the nose and the driver's access hatches since all three need to line up just so with each other to avoid issues or gaps. Last but not least, I added the driver's visor in the closed position.
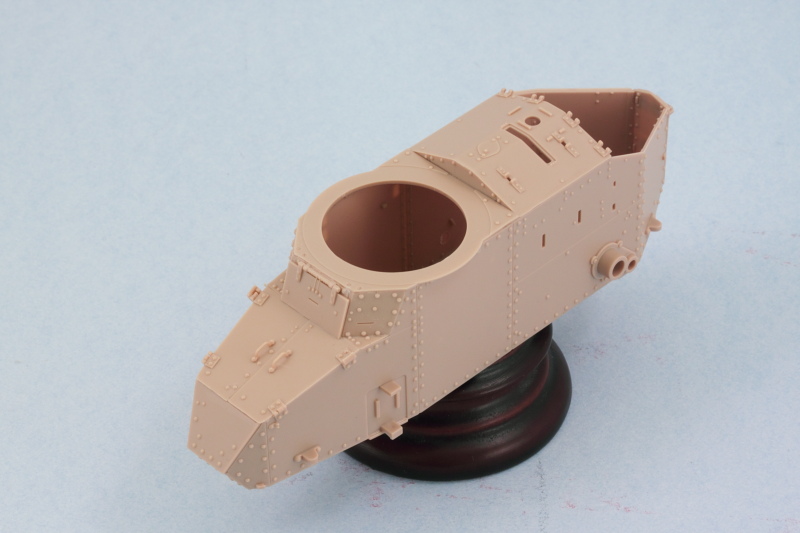
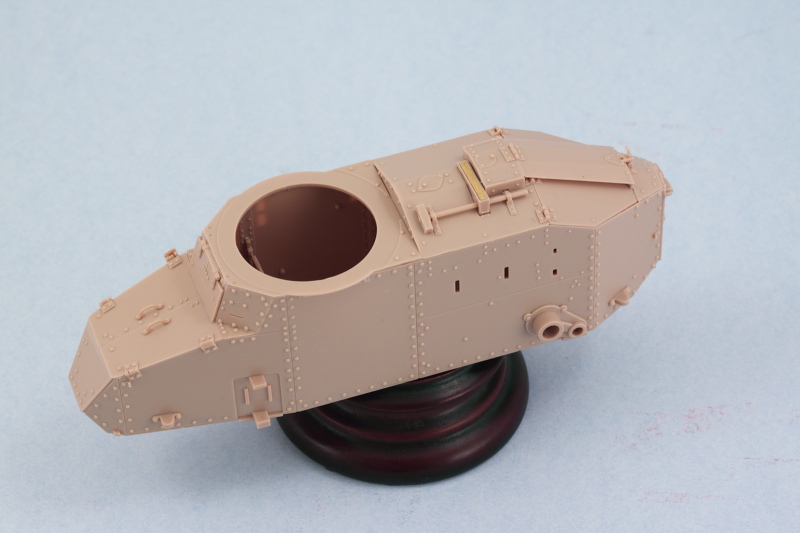
That got a chance to set up nice and solid overnight and attention turned to the engine deck area under Step 6. It's important to note (as the instructions do) that the sledgehammer is trapped in place by the little vent cover, B9, so that means it will have to be detailed in place later on. To help make that easier, I didn't glue the sledgehammer down, just placed it and am allowing B9 to hold it in place for now. In Step 7, the instructions would have you place part B11 and then add the engine bay hatches in Step 14. I found it easier to add them all together at the same time as B11 needs to be lined up very precisely in relation to the hatches for everything to play nice with each other here. This isn't a kit flaw or an engineering issue, quite the contrary...the engineering is very well done for these parts but since the vehicle itself is so small, fractions of a mm do matter in getting everything lined up correctly with all the plates/parts involved.
In preparation for working on the turret, I opted for the 37mm cannon version in Step 15. I assembled the gun as directed and used a drill bit to open up the cannon muzzle a bit more. The molding on the end of my barrel wasn't perfect, so some careful sanding and trimming was needed to get it into shape. I also installed it into the turret faceplate so that its all one module now and ready to go into the turret.
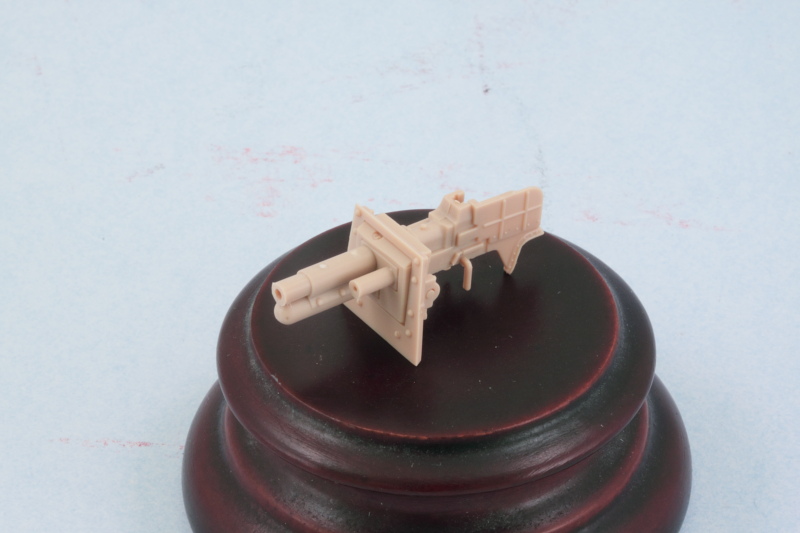
Since the turret assembles as a series of plates onto an octagonal base, that's going to require some careful attention to get all the plates together and lined up between the roof and base, so that will be what's on deck for the next round of effort
Re: Meng French FT-17 Light Tank (Riveted Turret)
Posted: Sun Sep 28, 2014 9:08 pm
by fly1ngdutchm4n
Looking great!
This kit is high on my wish list, so I'm following this build

Happy modelling!
Re: Meng French FT-17 Light Tank (Riveted Turret)
Posted: Sun Sep 28, 2014 9:12 pm
by wbill76
fly1ngdutchm4n wrote:Looking great!
This kit is high on my wish list, so I'm following this build
Happy modelling!
Thanks! I'm enjoying the build on this little guy so far, glad to have you along for the ride!
Re: Meng French FT-17 Light Tank (Riveted Turret)
Posted: Mon Sep 29, 2014 11:21 pm
by AchtungPanzer
Good start. Keep it up - interesting classic tank model

Re: Meng French FT-17 Light Tank (Riveted Turret)
Posted: Mon Sep 29, 2014 11:51 pm
by wbill76
Thanks AP! This little iconic vehicle certainly got around and served for a long time.
Re: Meng French FT-17 Light Tank (Riveted Turret)
Posted: Tue Sep 30, 2014 3:22 am
by Hillbilly
Great start so far!This little kit looks like a good one.
Re: Meng French FT-17 Light Tank (Riveted Turret)
Posted: Tue Sep 30, 2014 3:58 pm
by wbill76
Hillbilly wrote:Great start so far!This little kit looks like a good one.
Thanks Steve! I'm impressed with the detail and quality of the kit so far myself.

Re: Meng French FT-17 Light Tank (Riveted Turret)
Posted: Fri Oct 03, 2014 10:26 pm
by wbill76
Made some great progress on this little guy in the turret department. Steps 16 and 17 cover the assembly and it's important to note that the base of the turret is an octagonal ring with notches for tabs at the bottoms of each of the plates. You can start wherever you want, but once you commit to the position of the front plate with the gun, you need to place all the other plates as the instructions point out. In anticipation of that, I removed each of the panels from the sprue, cleaned them up, and marked their part number on the inside face so I didn't accidentally place a plate in the wrong spot.
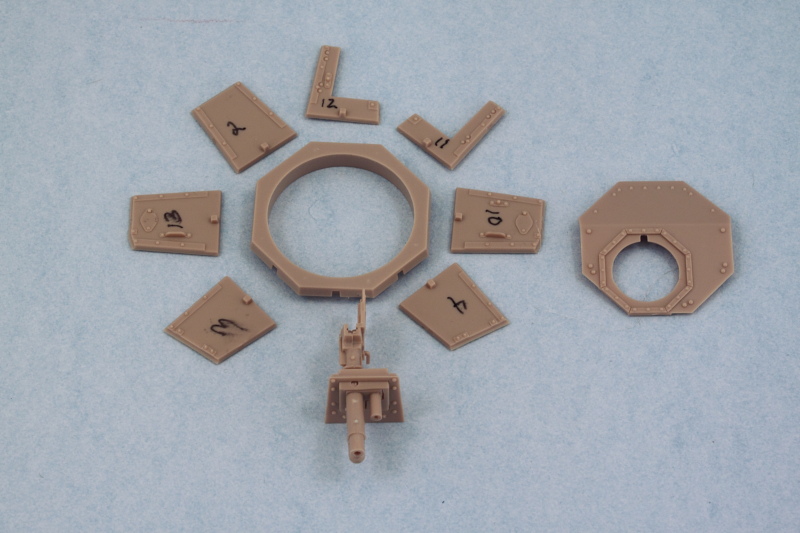
I opted for regular glue on the bases of the plates so they had a good grip, placed the front plate and gun first, then added the plates to either side, and so on until I had all the plates in position. I deliberately did not apply any glue to the areas where the plates met each other though until I was ready to install the turret roof plate. This made it possible for me to use the roof plate to help ensure all the side plates leaned in at the right angle and matched up as needed. I was impressed with the fit/engineering of all these parts...they all lined up nicely and only needed some slight finger pressure in a couple of spots to help the liquid glue grip and seal up the plate joins.
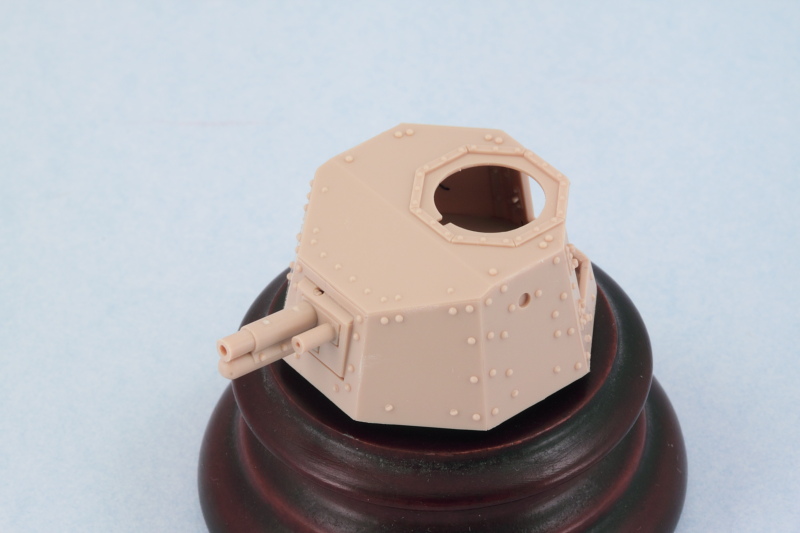
With all the plates in place, I added the rear turret hatches in the closed position. Then the three part cupola came next to round out things for the turret.
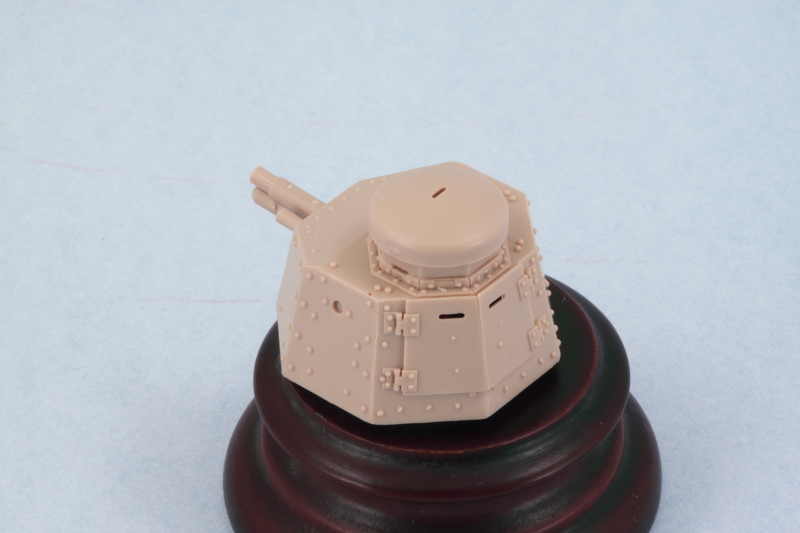
The turret base ring fits snugly into the hull roof opening, a nice friction fit that still allows the turret to rotate, so I'll have to be mindful of that when painting to ensure it stays that way.
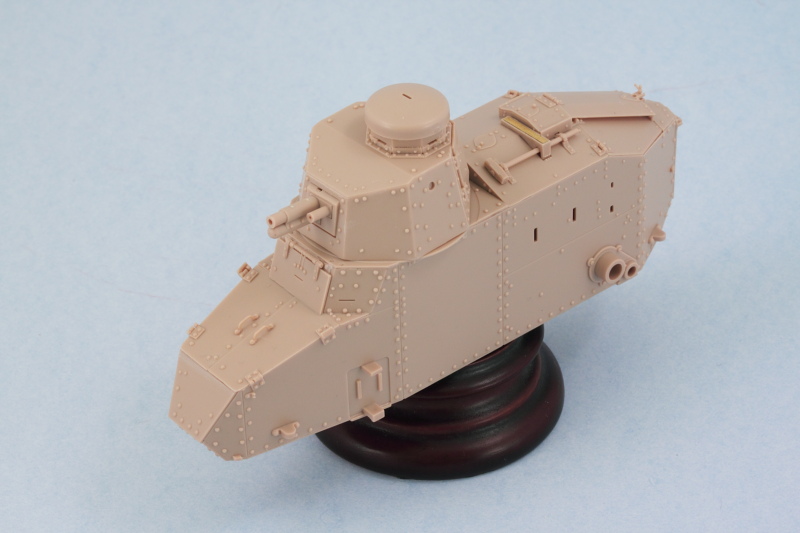
Next up will be tackling the suspension components, lots of small parts there so will take my time there as well.
Re: Meng French FT-17 Light Tank (Riveted Turret)
Posted: Thu Oct 09, 2014 1:00 am
by wbill76
Made some more progress on the little FT-17, this time in the suspension department. I decided to build up the suspension units one side at a time since the elements that you construct in Step 8 are 'handed' between the left and right side and I didn't want to cause any confusion there. I started with the A and B components needed for the left side and also assembled the return roller frame. Lots of care is needed when gluing the frame halves together so that the rollers remain free to rotate. Adding the metal pin and frame supports at the front is also a little challenging but works out in the end with a little patience. When assembling the road wheel elements, I found it easiest to assemble the frame halves and wheels together first, then add the top support arm portion before the glue had set up. This way you could flex the tops open to accept the pins without having the whole thing come apart in the process. The biggest time-consuming element in this step is cleaning up the two sprue connection points per road wheel and return roller as they have very delicate rims that intersect with the connection points.
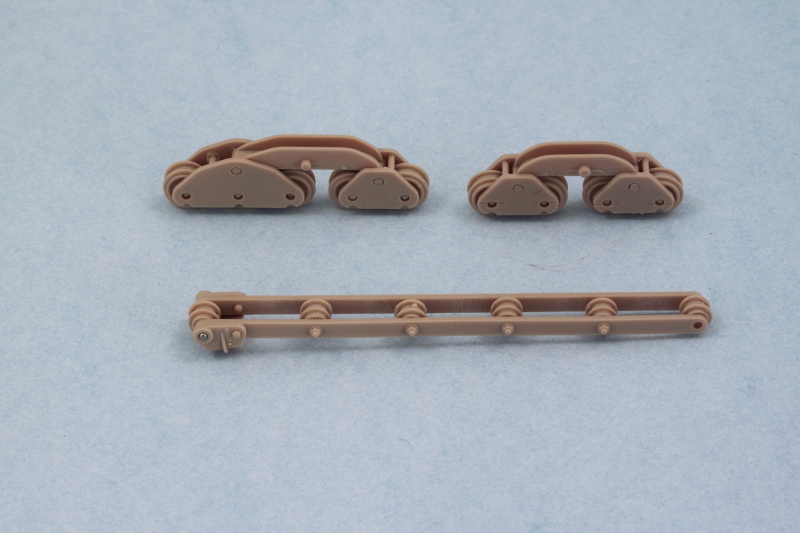
Step 9 assembles the full suspension unit using the components from the previous step. It's possible to assemble it and leave the suspension fully workable if you use the top part of the unit to help hold the sides together. Again, a very tricky assembly process that will leave you wishing you had another hand to help out but the end result produces a very nicely detailed assembly. Once the top and sides were firmly together, I added the support base for the return roller frame and used the kit-supplied steel spring and some CA glue to ensure it sat at the right height and angle to match up with the large idler.
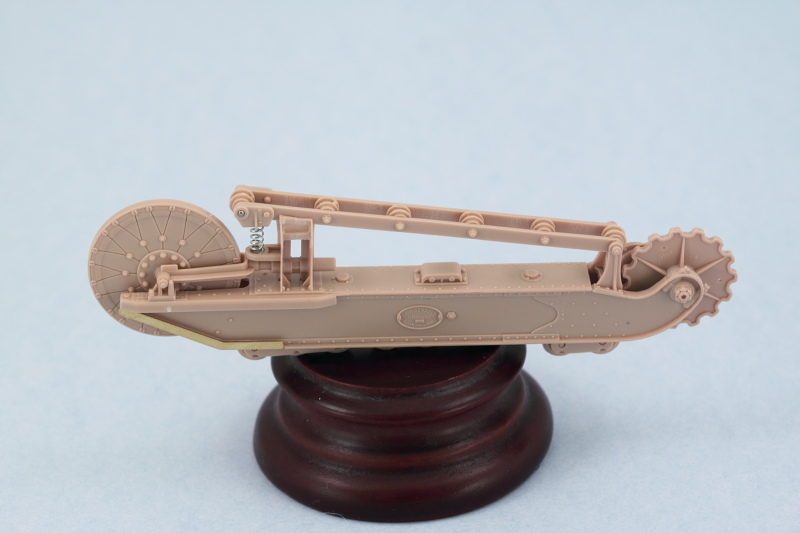
Once I'd figured out the little tricks and traps by doing the first unit, the second one for the right side took only half as long to pull it together.
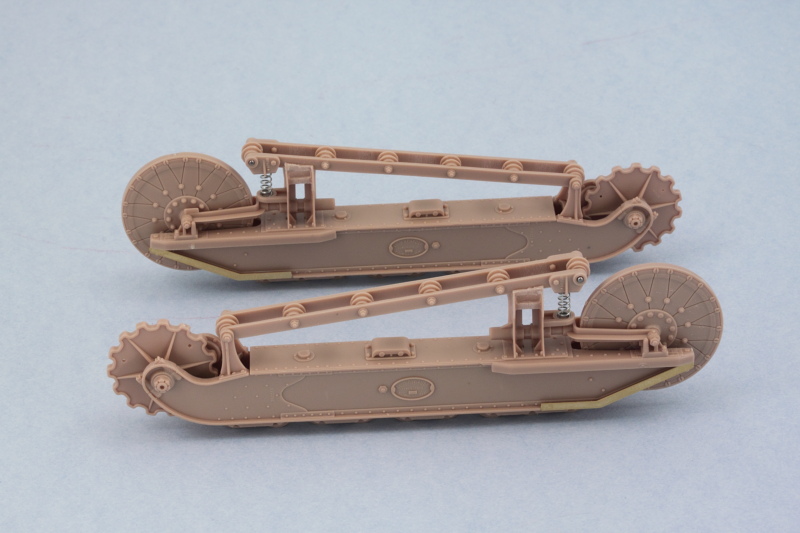
Given how complex this all is and how the suspension relates to the hull, I'm seriously considering leaving them separate for painting to make it easier to get everything covered and also make life simpler in terms of applying a camo pattern. Next up are the exterior details for the hull!
Re: Meng French FT-17 Light Tank (Riveted Turret)
Posted: Thu Oct 09, 2014 4:00 am
by UKguyInUSA
Looking good so far

That has some nice details on those molded parts
Re: Meng French FT-17 Light Tank (Riveted Turret)
Posted: Thu Oct 09, 2014 4:11 pm
by wbill76
Thanks UKGuy! I'm very impressed with the level of detail and engineering that Meng achieved with this kit. It's the first time I've built one of their offerings and aside from some very minor flash here and there on a couple of parts everything's been crisp and clean!
Re: Meng French FT-17 Light Tank (Riveted Turret)
Posted: Fri Oct 10, 2014 5:58 am
by PaulAyrey
Great progress Bill. Can't wait to see how this evolves.
Re: Meng French FT-17 Light Tank (Riveted Turret)
Posted: Fri Oct 10, 2014 4:04 pm
by wbill76
Thanks Paul! Appreciate the interest.
Re: Meng French FT-17 Light Tank (Riveted Turret)
Posted: Fri Oct 10, 2014 4:17 pm
by Coen
I found the painting of that kit to be the most challenging. I liked the build, fairly straight forward, a bit of ambiguity here and there, but very buildable. You're right about th detail. It's superb.
I'll be interested to see how you paint it up.
Re: Meng French FT-17 Light Tank (Riveted Turret)
Posted: Fri Oct 10, 2014 5:31 pm
by wbill76
Thanks Coen! Glad to have you along for the ride. I can definitely see where painting is going to be fun given the relatively small size of this guy to begin with along with the complexity of the suspension. Fingers crossed!
Re: Meng French FT-17 Light Tank (Riveted Turret)
Posted: Sat Oct 11, 2014 10:47 pm
by wbill76
Returning to the hull details, I went all the way back to Step 3 and added the details required for the left side of the hull. The kit includes a metal strut and spring for the front part of the suspension and the key to getting this in at the right height is the spring itself and the 'cap' styrene part that sits on top, D11. D11 doesn't sit snugly on top of the strut, so I glued the strut and spring into the housing with CA first and then added D11 to the top after to ensure it lined up correctly with the suspension module and wouldn't cause any fit issues along the way. Tow hooks and large box and rack were also added to round things out.
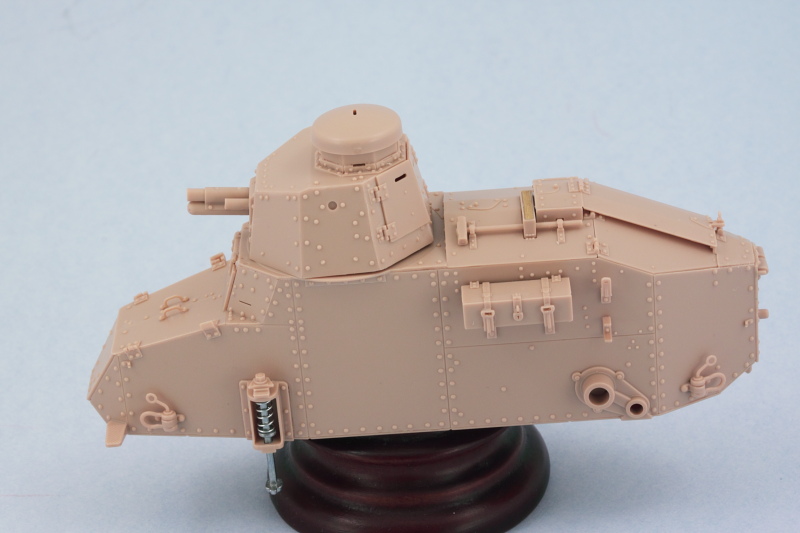
Process was repeated for the right side in Step 5 but I left off the exhaust muffler for the time being as that will be detailed and installed after painting.
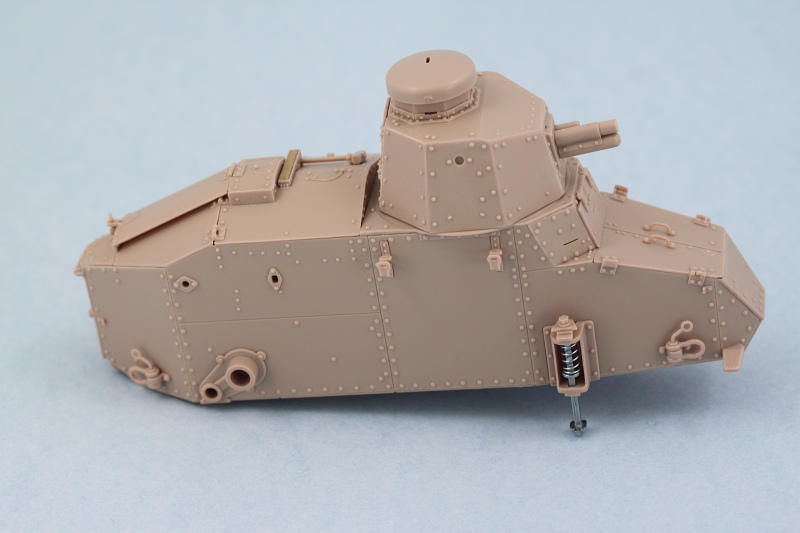
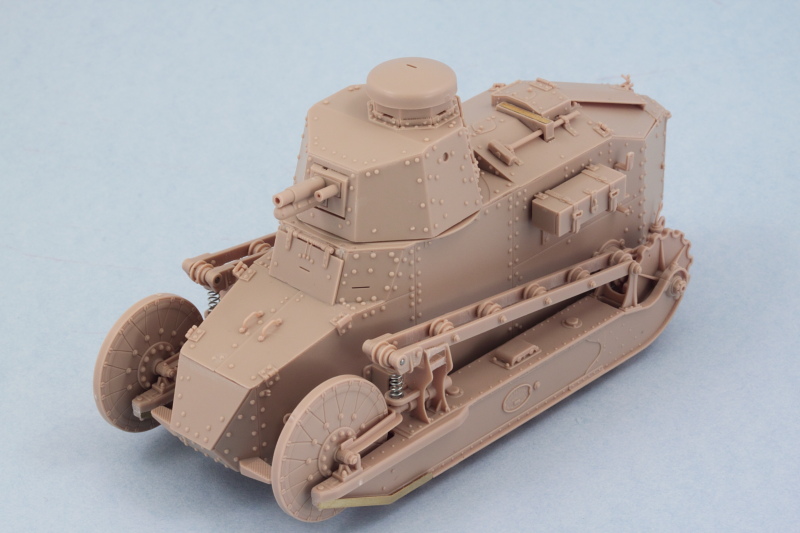
And just to be sure that 'stumpy' here would sit properly with the suspension modules in place, a dry-fit was in order! The test fit shows that when the time comes to glue the modules in place I'm going to have to be a little careful that they sit level as there's a slight tendency for the top to want to bow in slightly since there really isn't anything on the top side to prevent that by way of connection points.
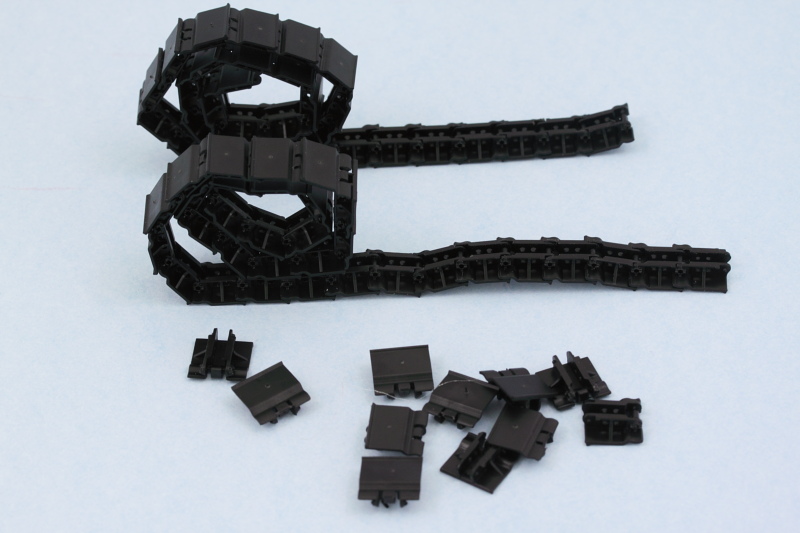
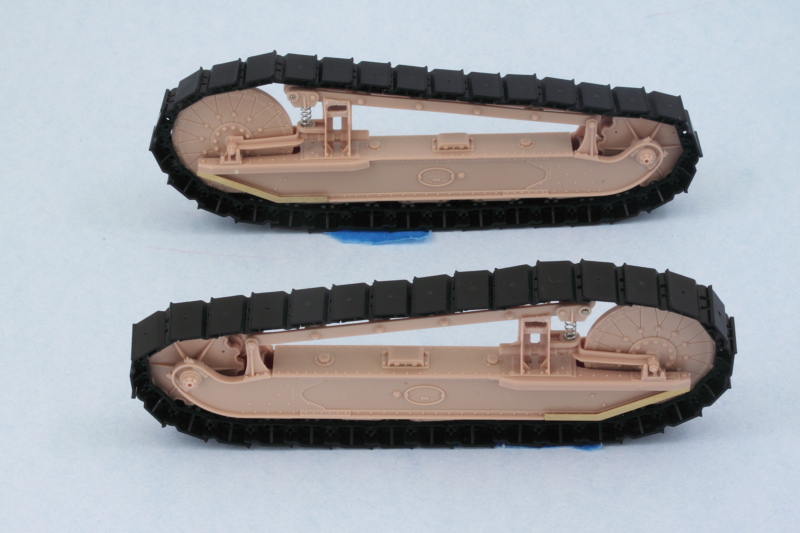
The next item of interest were the tracks which are dealt with in Step 12. The kit provides click-able individual tracks that will produce workable tracks of 32 links per side. I found in the assembly process though that I had to keep a sharp eye out for tiny amounts of flash around the hinge points as if those weren't caught the links would fit together almost rigidly or require too much force that could snap off the small pins. Fortunately the kit provides plenty of extra links so it wasn't a huge deal when a couple got sacrificed in this learning step.
A quick test fit with the suspension modules showed everything playing nice and 32 links working out perfectly. Connecting up the ends of the runs once the tracks have been painted and weathered may be a little challenging...I may just remove one or both of the pins on those final links and just rely on gluing the links together to secure the runs, have to see when the time comes.
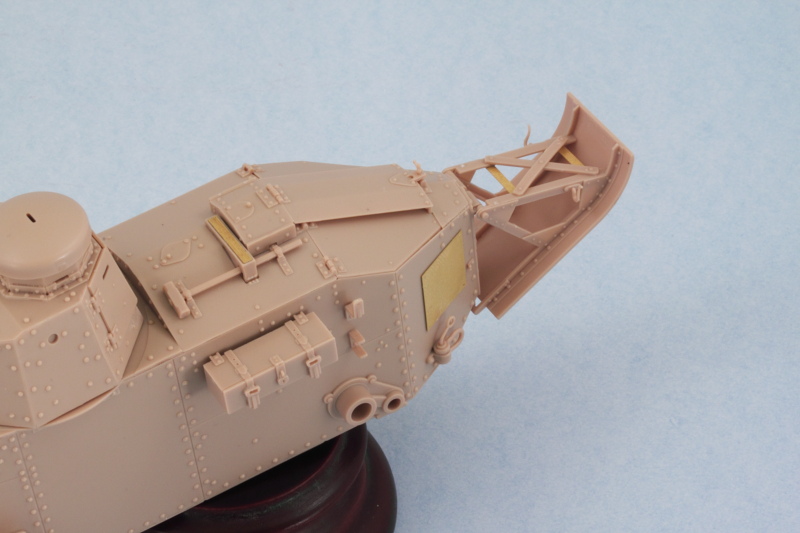
The last remaining area needing attention was the rear hull and the un-ditching tail covered in Step 11. I'm not 100% sure, but I think the PE placards (parts W5) should be placed only if you're doing the American WW1 version of this kit so be mindful of that as the instructions don't make any kind of distinction there. Since I am doing the American version, these were installed with Gator Grip glue so I could have some work time to get them properly positioned/straight relative to the areas they install into. The folded up tarp that installs over the X brace on the tail is left off for now and will be added after painting.
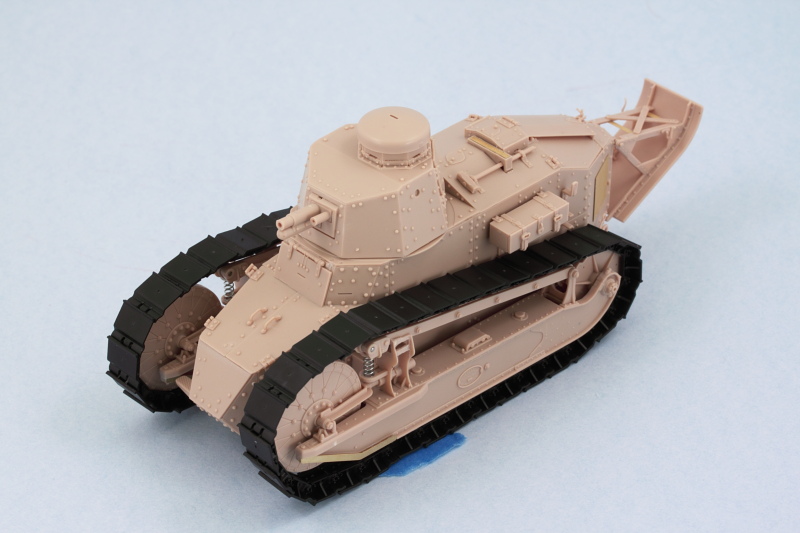
Just to satisfy my curiosity, I did a full mock-up with the suspension elements and tracks and I'm now 100% convinced that painting the suspension separately and installing after is the right way to go on this little guy.
Re: Meng French FT-17 Light Tank (Riveted Turret)
Posted: Sat Oct 11, 2014 10:51 pm
by Yevgeny
This looks amazingly neat.
Re: Meng French FT-17 Light Tank (Riveted Turret)
Posted: Sat Oct 11, 2014 11:24 pm
by JayCub
Great build log Bill and wonderful photographs, im looking forward to the next update
Tom
Re: Meng French FT-17 Light Tank (Riveted Turret)
Posted: Sat Oct 11, 2014 11:40 pm
by wbill76
Thanks
Yevgeny and
Tom! Appreciate the comments and interest!
Re: Meng French FT-17 Light Tank (Riveted Turret)
Posted: Sun Oct 12, 2014 6:45 am
by fly1ngdutchm4n
I love this little monster
Great progress buddy!
Re: Meng French FT-17 Light Tank (Riveted Turret)
Posted: Sun Oct 12, 2014 10:47 am
by Coen
Nice and neat! Well done.
Re: Meng French FT-17 Light Tank (Riveted Turret)
Posted: Sun Oct 12, 2014 4:07 pm
by wbill76
Thanks
Frans, it's a cute little monster for sure with all those rivets!
Coen, thanks as well, now the fun begins in the painting department.
Re: Meng French FT-17 Light Tank (Riveted Turret)
Posted: Thu Oct 16, 2014 11:17 pm
by wbill76
First stage in applying the camo pattern is complete! I'm using the kit's finishing guide for an American tank at Verdun in October 1918 that sports a hard-edged three-tone scheme, so the first order of business was marking out the green areas. I used some 'worms' of poster blue tack putty rolled out and pressed down with a wooden toothpick to create the masks.
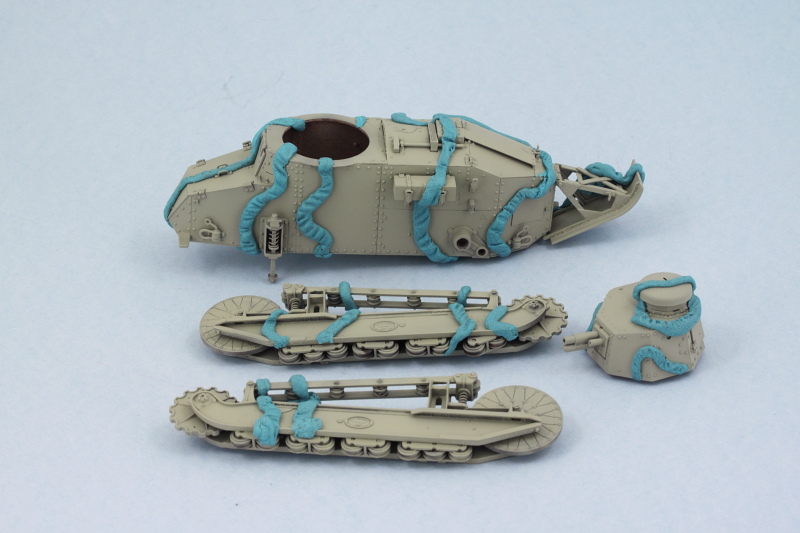
Some Model Master enamel Khaki was airbrushed at low pressure using a fine detail tip. After sitting for a couple of hours to touch dry, I removed the blue-tack to see how it turned out.
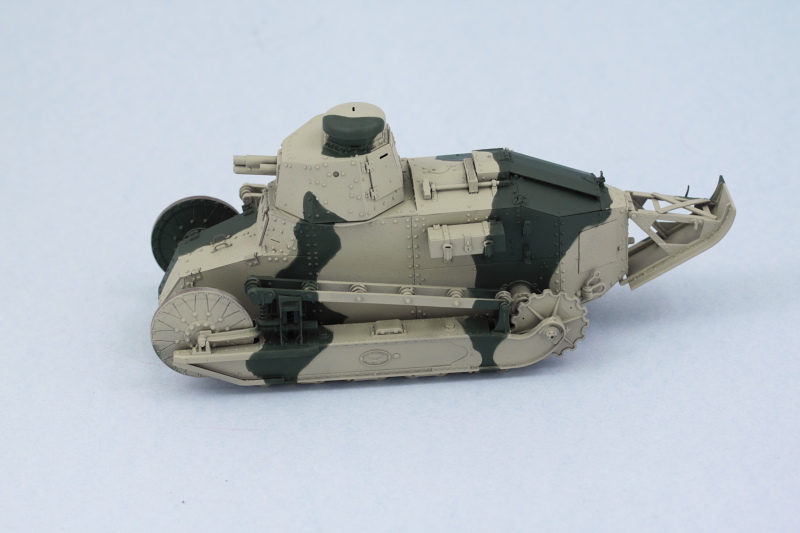
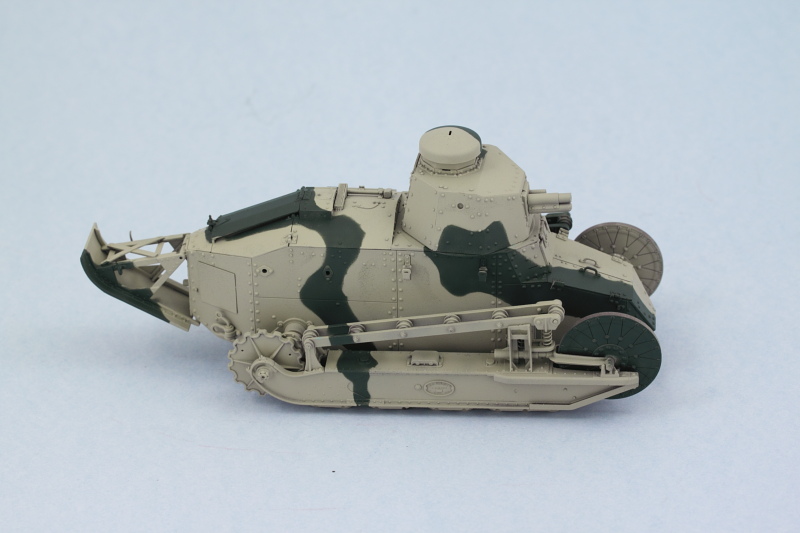
So far, so good, just some tiny areas that might need touch-up later on. Next up will be the red-brown portion.
Re: Meng French FT-17 Light Tank (Riveted Turret)
Posted: Thu Oct 16, 2014 11:21 pm
by UKguyInUSA
Great looking tank, Bill....looking forward to seeing it come to fruition now
Re: Meng French FT-17 Light Tank (Riveted Turret)
Posted: Thu Oct 16, 2014 11:59 pm
by Coen
With that running gear on there it certainly makes it a tricky thing to paint. I left mine on and I regretted it afterwards. Though getting the pattern to line up would have been tricky.
You did an excellent job on it. Well done so far.
Re: Meng French FT-17 Light Tank (Riveted Turret)
Posted: Fri Oct 17, 2014 12:06 am
by Yevgeny
You photos looks almost rendered, very clean build and pleasure to watch.
I just used BluTac for camouflage (with mixed results...) and got stains from it, you don't seems to have this problem.
Re: Meng French FT-17 Light Tank (Riveted Turret)
Posted: Fri Oct 17, 2014 6:24 pm
by wbill76
Thanks
UKGuy, getting closer!
Coen, you're right about the tricky nature of the suspension. To get the patterns to line up I carefully positioned each element in place on its respective side after I'd applied the blue-tack to the hull and then used that to help line up the masking for the suspension components. Still tricky, but easier than if I had tried it with them permanently in place. Today should see the brown go down, so fingers crossed.
Re: Meng French FT-17 Light Tank (Riveted Turret)
Posted: Fri Oct 17, 2014 6:30 pm
by wbill76
Yevgeny wrote:You photos looks almost rendered, very clean build and pleasure to watch.
I just used BluTac for camouflage (with mixed results...) and got stains from it, you don't seems to have this problem.
Thanks Yevgeny! I suppose the negative results might depend on the quality of the blue tack putty and the type of paint you used it on? Mine's made by 3M and I've had it forever (going on 8 years or so at least) since it's reusable and it doesn't leave a residue, at least not on the enamel paints I work with, but I don't know if they've changed their formula or materials perhaps in the batch or type you used? I let the enamels cure for a day before applying to make sure they are nice and hard/durable too as a precaution against paint lifting, I don't know if acrylics would behave differently if that's the type of paint you used either for example. Sorry to hear the method didn't work out on your particular project...that kind of thing can be so demoralizing when you get to this stage!

Re: Meng French FT-17 Light Tank (Riveted Turret)
Posted: Fri Oct 17, 2014 11:01 pm
by wbill76
Got the rest of the camo pattern on today with the red-brown portions. Same drill as with the green, I used the blue-tack approach to mask off the appropriate areas first.
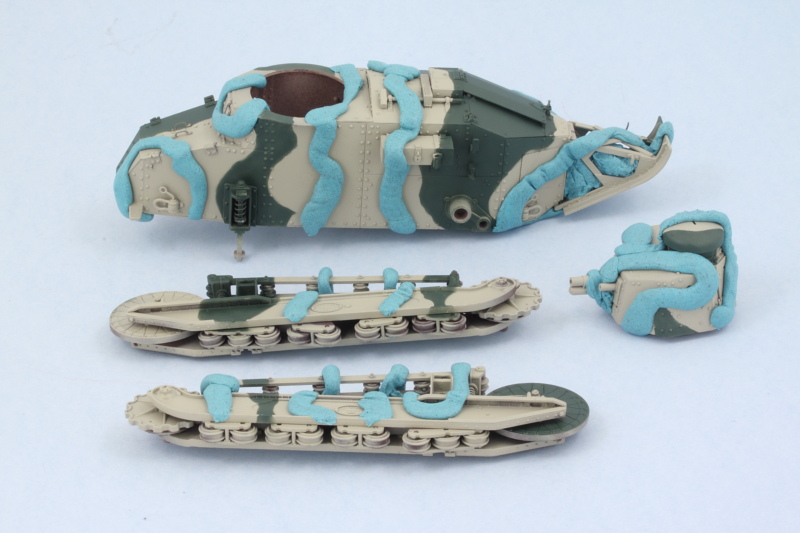
Out with the airbrush and a mix of 50-50 MM enamel Military Brown and Leather did the trick in no time.

After doing some light touch-ups here and there with the base coat, I sprayed a mist/filter coat of heavily thinned base coat color to tie the scheme all together and fade the scheme a bit.
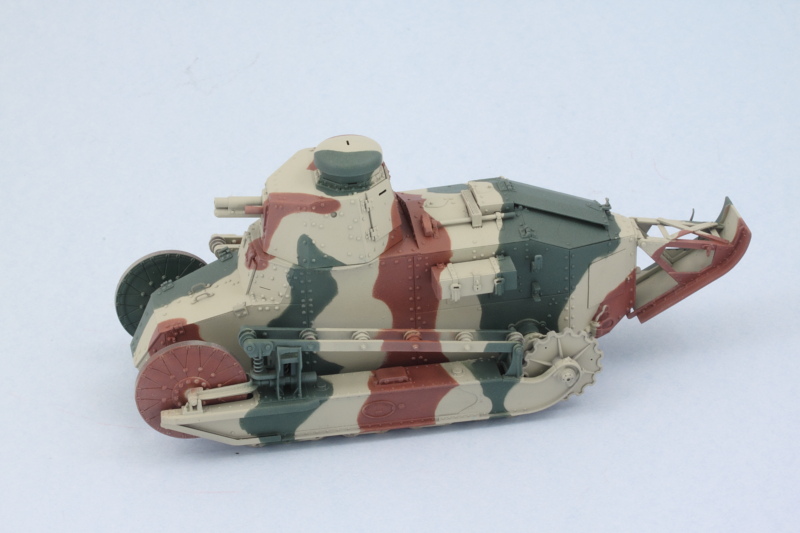
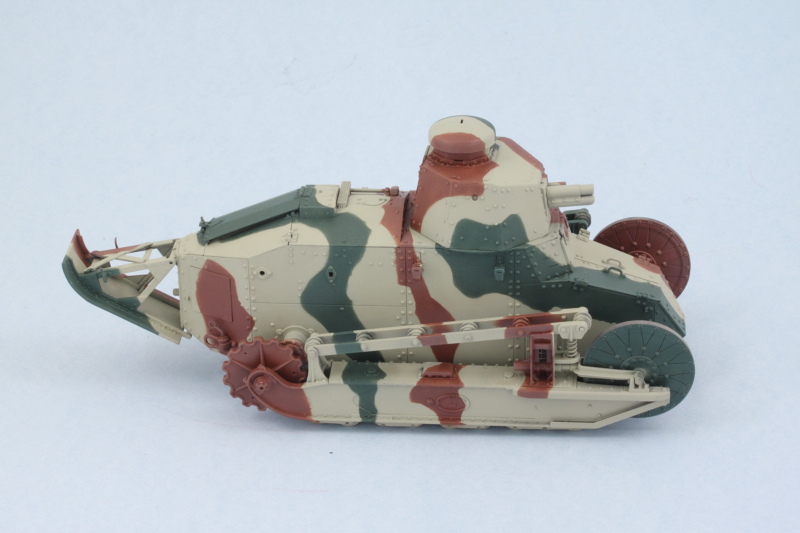
Once the tracks are on it will help break up the pattern some as well and provide some additional visual contrast.
Re: Meng French FT-17 Light Tank (Riveted Turret)
Posted: Sat Oct 18, 2014 7:14 am
by gustavlekstal
Look great! Good work with the camo.
Re: Meng French FT-17 Light Tank (Riveted Turret)
Posted: Sat Oct 18, 2014 1:03 pm
by Yevgeny
wbill76 wrote:I suppose the negative results might depend on the quality of the blue tack putty and the type of paint you used it on? Mine's made by 3M and I've had it forever (going on 8 years or so at least) since it's reusable and it doesn't leave a residue, at least not on the enamel paints I work with, but I don't know if they've changed their formula or materials perhaps in the batch or type you used? I let the enamels cure for a day before applying to make sure they are nice and hard/durable too as a precaution against paint lifting, I don't know if acrylics would behave differently if that's the type of paint you used either for example. Sorry to hear the method didn't work out on your particular project...that kind of thing can be so demoralizing when you get to this stage!
I was using the original BluTac, tried blue and white. I'm using acrylic paints and they been cured for at least a day... But never mind I'm learning
And your work is a great inspiration. Models on your website are absolutely stunning. Looking forward to see more.
Re: Meng French FT-17 Light Tank (Riveted Turret)
Posted: Sat Oct 18, 2014 5:37 pm
by rodrant
Very good work with that camo paint job ! It is very nice !
Re: Meng French FT-17 Light Tank (Riveted Turret)
Posted: Sat Oct 18, 2014 6:11 pm
by wbill76
Thanks
Gustav and
Rod!
Yevgeny, thanks for the kind words! There's so much diversity in paint and materials these days that it can sometimes be an 'interesting' learning experience. Glad to hear it hasn't discouraged you!
Re: Meng French FT-17 Light Tank (Riveted Turret)
Posted: Sat Oct 18, 2014 8:41 pm
by wbill76
Just a quick little update albeit an important one. Tracks received their base coat treatment by airbrushing some MM enamel Burnt Umber over the black plastic and will get some additional detailing/weathering attention later on. That doesn't mean they aren't still useful as it was time to go ahead and permanently fix the suspension elements in place to the hull. It was necessary to scrape some paint that had accumulated inside the drive sprocket and final drive mount holes as well as the mount pins themselves as the fit was too tight otherwise...something I had thought to prevent by masking those areas off with blue tack but forgot to do until it was too late. Liquid glue did the trick for those areas along with some CA for the metal struts at the front of the hull. The track runs were dry fit once more to ensure I had a level set top and bottom for the suspensions on both sides.
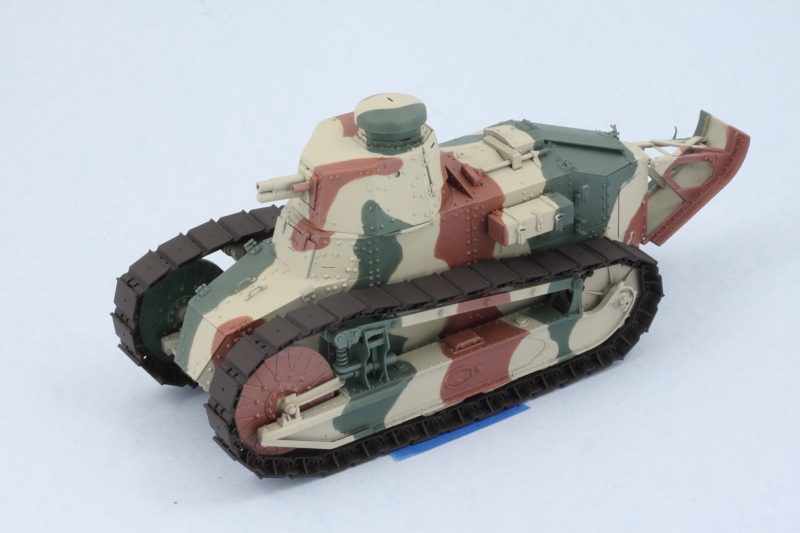
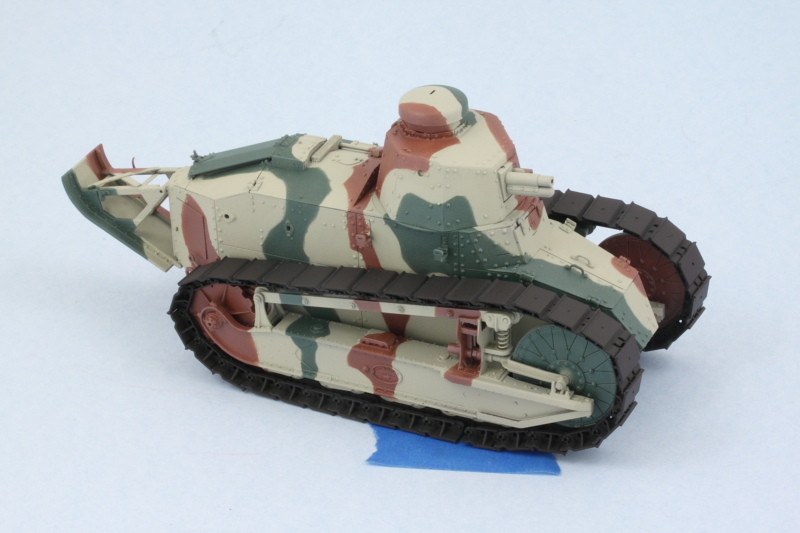
As you can see, having the tracks on totally changes the visual perception of the camo pattern as well, so that works out nicely. Just for fun, I also checked to see how it would look on the kit's dio base.
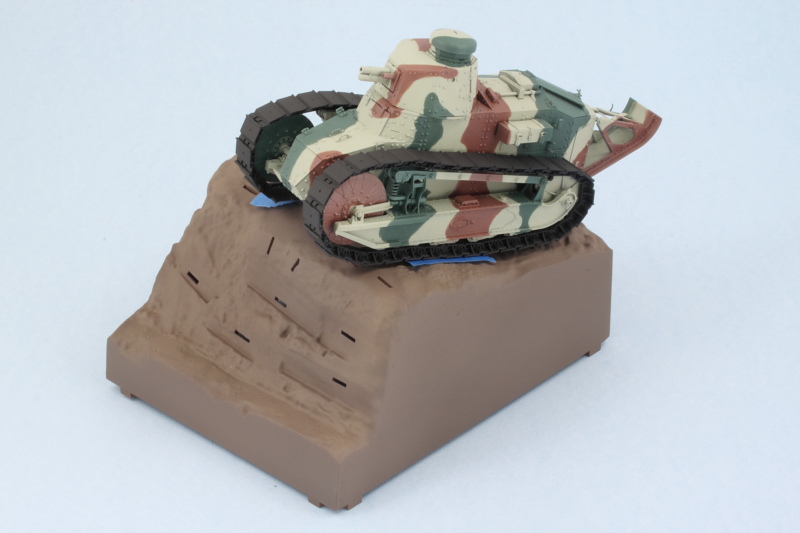
I'll let the suspension set up nice and solid before the next steps deal with the remaining details prior to getting the weathering process started.
Re: Meng French FT-17 Light Tank (Riveted Turret)
Posted: Sat Oct 18, 2014 8:45 pm
by fly1ngdutchm4n
Great job on that camouflage, love it!
And as this was a kit high on my wish list, I finally got my hands on one at a modelling contest!

Looking forward for your further progress.
Re: Meng French FT-17 Light Tank (Riveted Turret)
Posted: Sat Oct 18, 2014 10:08 pm
by wbill76
Thanks Dutch! It's a nice little kit, perfect for satisfying that WW1 itch but without having to go all-out with a bigger build like a Mk.IV.
Re: Meng French FT-17 Light Tank (Riveted Turret)
Posted: Mon Oct 27, 2014 9:56 pm
by wbill76
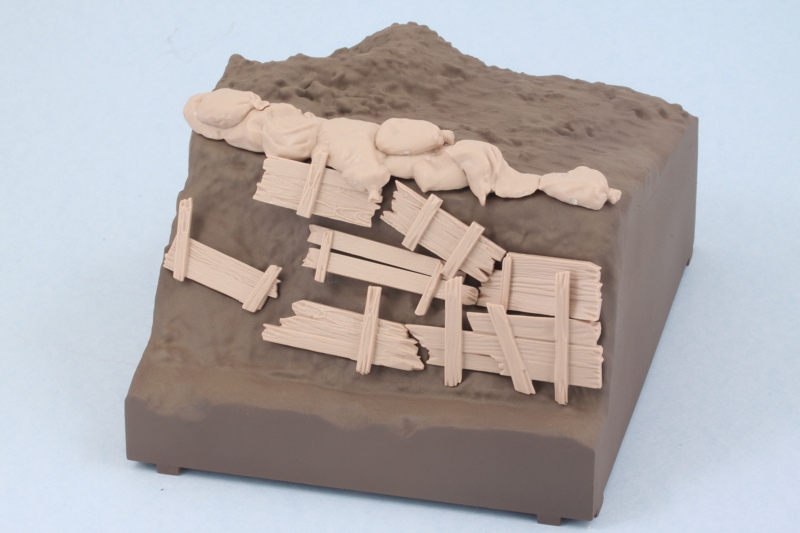
After giving it some thought I decided to go ahead and continue work on the base area first before I start weathering the vehicle. This way I can treat them all as elements of the same end result more or less instead of working on them independently. To that end, I turned to Step 21 which deals with the trench details (sandbags, wooden frames/braces, etc.)
The sandbags that go in along the top edge consist of 5 different pieces, 4 of which you can assemble together to create one large unit with the 5th piece, K4, needing to be dealt with separately. I had to enlarge a couple of the slot openings in this area to take the tabs on the underside of the sandbags but nothing major. I also cleaned up and test fit all of the L sprue parts that make up the frames/braces for the trench to see how they would all play together.
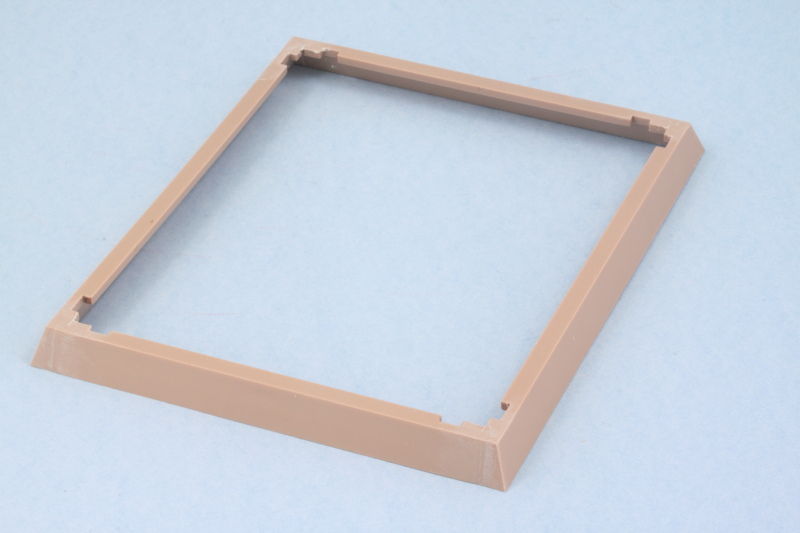
In Step 20, the instructions would have you add the angled frame plates of the base individually but I found it easier to attach them separately to create a single frame as some sanding/putty was needed at the joins to create a seamless result. I also had to sand down a couple of the tabs as they were slightly too wide to fit the slots in the base frames.
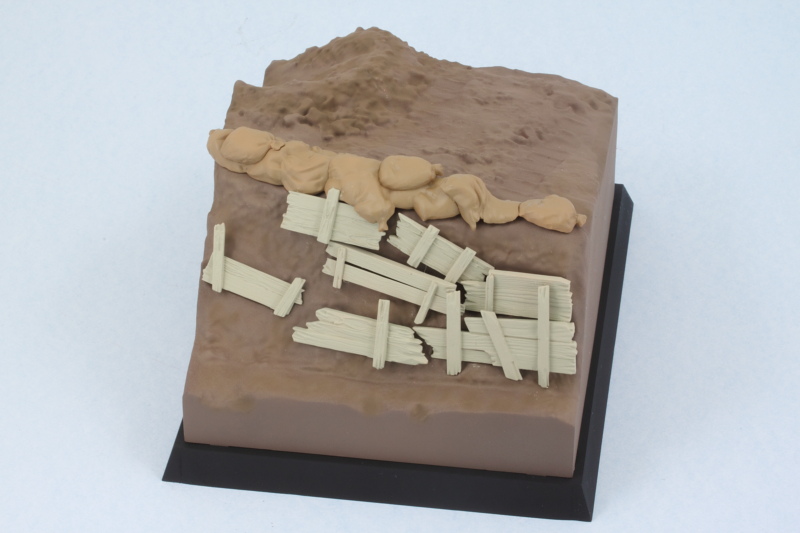
So with that done, it was time to give the airbrush a workout to 'block in' the colors I needed for the trench detail elements. I used Testors Model Master enamel Afrika Grunbraun for the canvas on the sand bags and used my 50/50 custom mix of Dunkelgelb/Light Gray for the wood frames/braces. That may seem like an odd choice but it's just a foundational color that's going to undergo some significant changes before its all said and done! While I was at it, I also applied some MM enamel Flat Black to the base frame.
This will all get a chance to cure before moving on to the next steps but it is moving ahead!
Re: Meng French FT-17 Light Tank (Riveted Turret)
Posted: Tue Oct 28, 2014 10:31 pm
by wbill76
More progress on the base to report. I applied some weathering to the sand bags in the form of some black artist pastels and some dry brushing to create some shadows and highlights.
For the wood braces/planks, things turned out a little more interestingly. I originally started out planning to finish them as relatively 'new' wood and applied a wash of MM enamel Leather over the previous paint base color. This worked out fine by themselves but when I placed them on the base I didn't like the tonal contrast, so I switched gears and decided to go aged wood instead. Rather than strip it and start over, I decided to keep what I'd already done and build on it instead. So I applied another wash, this time using MM enamel Gunmetal, and then dry brushed some MM enamel Light Gray to bring out the wood grain pattern. Some strategic use of black artist pastels also helped add some definition here and there.
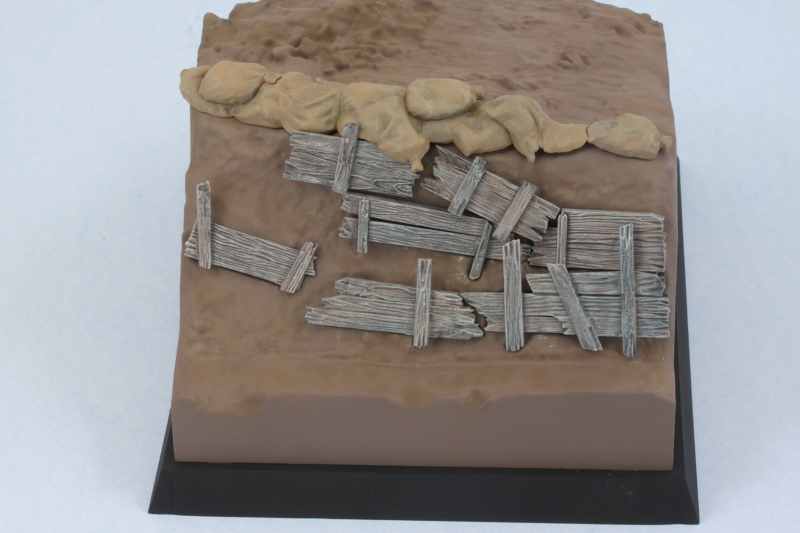
I'm fairly happy with the direction this one's heading in so far especially since it's sort of uncharted territory as I don't usually do bases for my builds.
Re: Meng French FT-17 Light Tank (Riveted Turret)
Posted: Thu Oct 30, 2014 1:18 am
by UKguyInUSA
Looking fabulous so far mate!
Re: Meng French FT-17 Light Tank (Riveted Turret)
Posted: Thu Oct 30, 2014 2:44 am
by wbill76
Thank you sir! Slugging away one bit at a time.
Re: Meng French FT-17 Light Tank (Riveted Turret)
Posted: Fri Oct 31, 2014 5:48 am
by fly1ngdutchm4n
Looks great so far!
I finaly managed to get my hands on this kit, so I'm following your progress with intrest and mayeven steal a tip or two...

Re: Meng French FT-17 Light Tank (Riveted Turret)
Posted: Fri Oct 31, 2014 9:35 am
by AchtungPanzer
Looks very well mate
Re: Meng French FT-17 Light Tank (Riveted Turret)
Posted: Fri Oct 31, 2014 3:35 pm
by wbill76
fly1ngdutchm4n wrote:Looks great so far!
I finaly managed to get my hands on this kit, so I'm following your progress with intrest and mayeven steal a tip or two...
Nice! Feel free to steal away wherever it suits you!
AP, thanks for following along as well!
Re: Meng French FT-17 Light Tank (Riveted Turret)
Posted: Sat Nov 01, 2014 9:13 pm
by wbill76
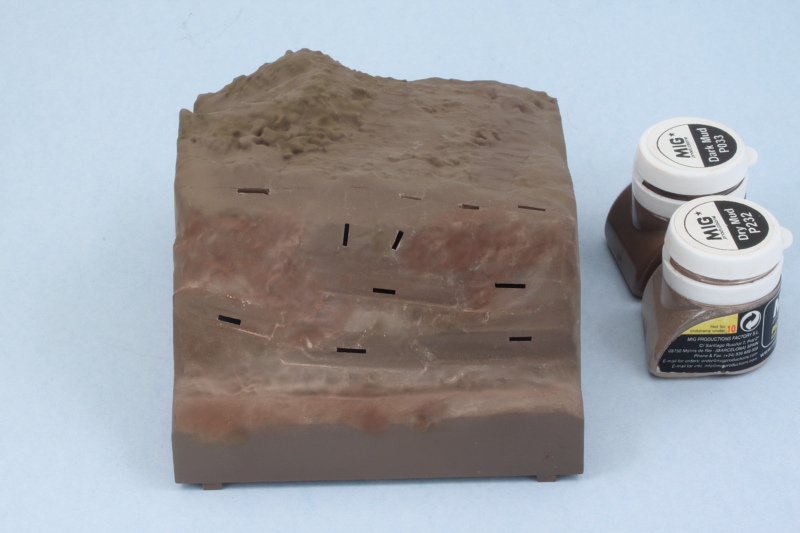
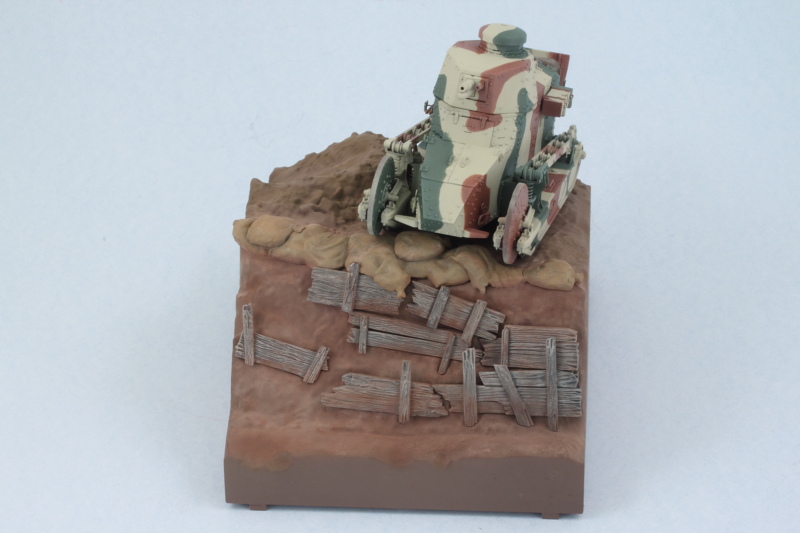
Continuing on with the base work, I decided the trench area needed some help in the pigments department. I used a combination of Mig Dark Mud and Dry Mud applied as dry powders with stiff bristled brushes and worked it around until I was happy with the depth/shading it was giving me.
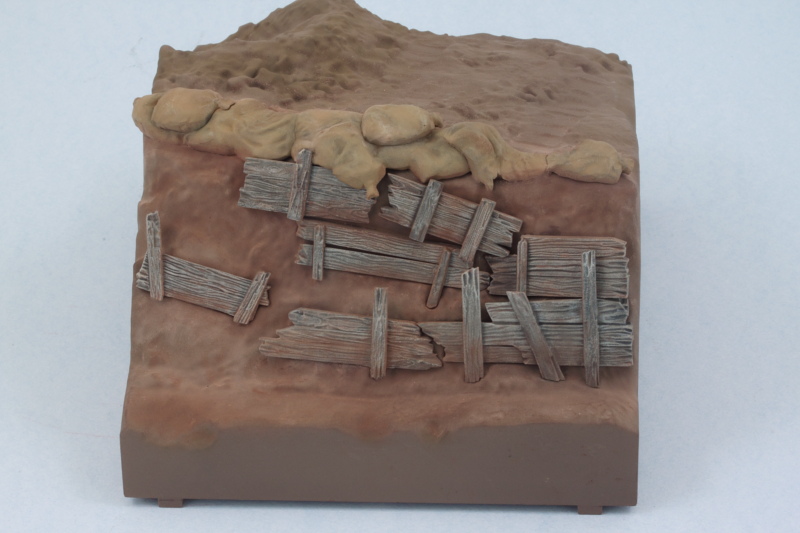
Then the wood braces were permanently installed along with the sand bags and the glue allowed to set. Once that was solid, I blended them in where appropriate using more of the pigments.
Shifting gears a bit, I went back to the vehicle and did some of the detail work there. The sledgehammer, shovel, and pick were hand detailed and installed where needed. Leather straps were painted and detailed and the muffler/exhaust worked on and installed as well. The folded tarp was added to the tail to round things out in that department.
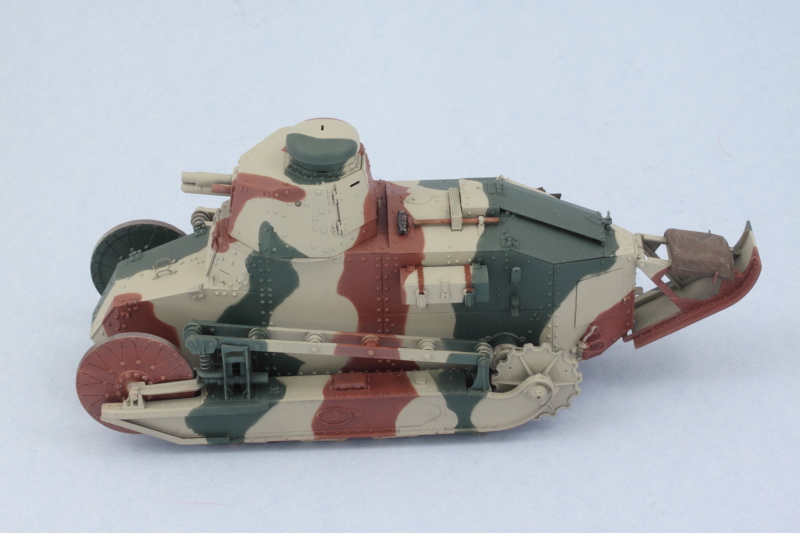
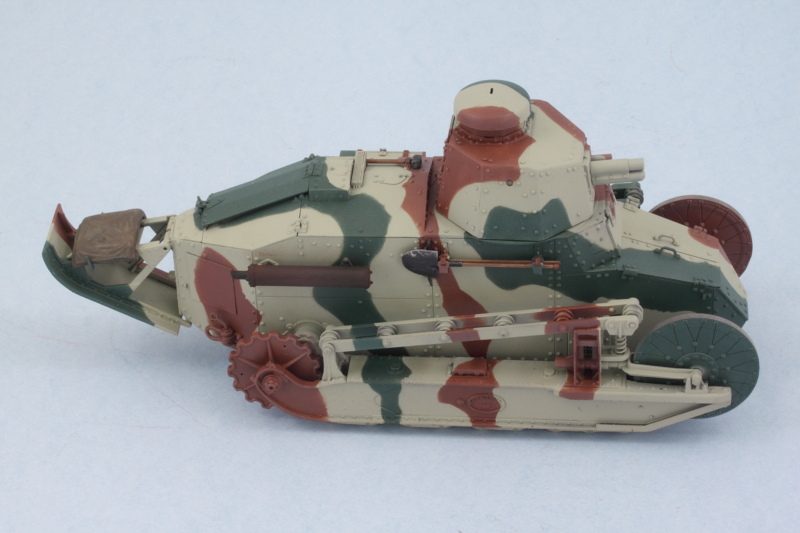
So here's where things stand at the moment as the little scene starts to come together.
Re: Meng French FT-17 Light Tank (Riveted Turret)
Posted: Sun Nov 02, 2014 10:56 pm
by wbill76
With the trench portion of the base done, I turned my attention to the top side of the base. Once the vehicle is placed, most of it will be covered with the shell crater being the main point of focus. I added some Mig Russian Earth pigments to the inner rim of the crater and in various places where I wanted to create some deep shadows. Mig Dry Mud pigments helped create more variation in the top side look and feel.
I hand brushed some Future acrylic floor polish to the bottom of the crater to protect the paint work done earlier and let it dry. Then a thinned wash of Afrika Braun was added and built up through multiple doses to create some muddy water effects. More Future was carefully hand brushed over the Braun wash to round out the 'puddle' accumulation.
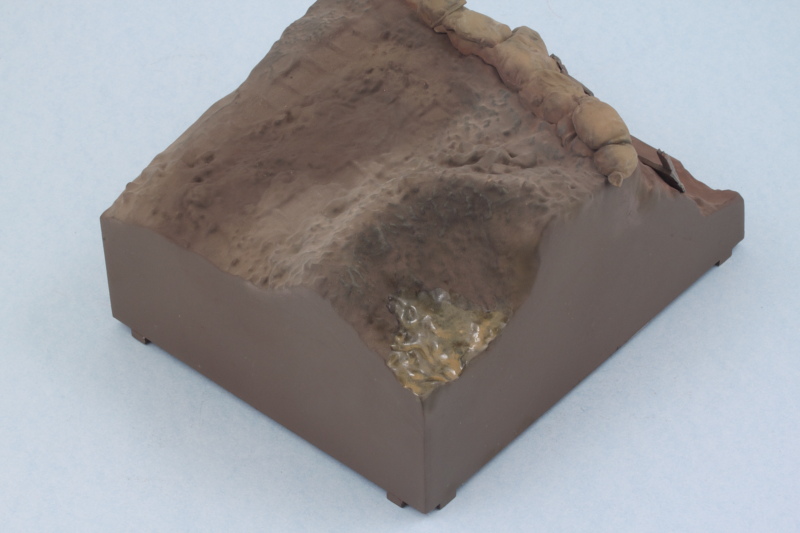
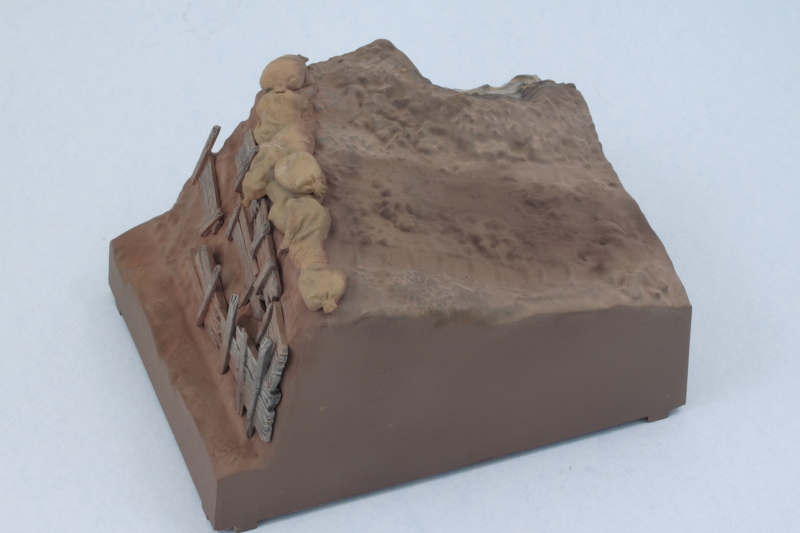
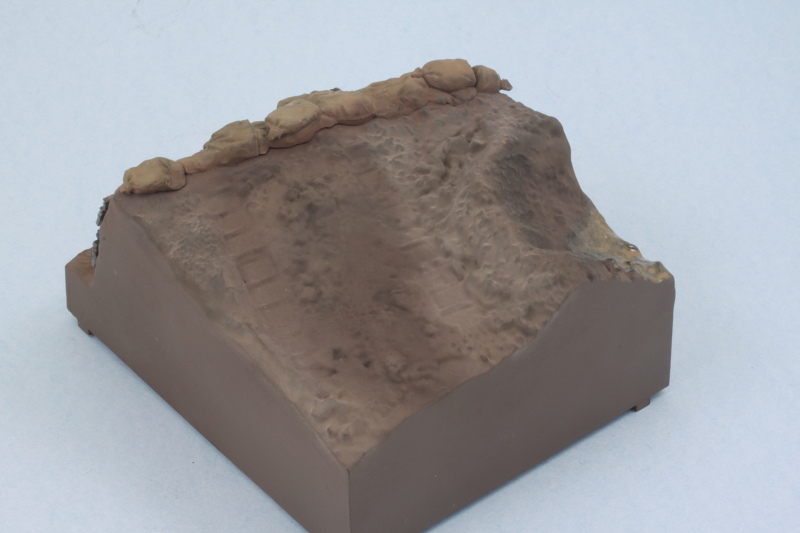
I think I've got the base where I want it now, so will let it sit and turn back to getting the FT17 to match up.