Page 1 of 1
more skycrane
Posted: Tue Oct 07, 2014 8:32 pm
by Pierce
build is moving along. There is not a lot of detail in the cockpit. There are no control sticks seatbelts. I dry brushed the instrument panel and added some red. yellow and blue highlights to add some detail.
cockpit in primer as you can see very little detail

finished cockpit hope the little detail I added helps

another shot of the cockpit before control panel was airbrushed

interior painted

rotor in primer. The fit was not that tight so I had to make sure the blades were lined up from one another

rotors in paint, I still have to add detail

back to the bench so I can have some pics for tomarrow
Re: more skycrane
Posted: Tue Oct 07, 2014 8:52 pm
by AlkaSeltzer
Nice job on the details to the cockpit. Your copter going to look real good nice. Post more images

.
Re: more skycrane
Posted: Wed Oct 08, 2014 5:03 pm
by Pierce
not much to add today. Finished the rotor hub last night. Now just to get it out of the way so not to scratch it up. I'm going to check with my LHS and see if they got the Alclad Aqua gloss I asked them to order for me so I can coat it. I might just matt coat it since there are no decals an I'm not going to weather it. I'm a see as you go kind of builder. Sometimes it works and sometimes not so much.

I decided to just add to the existing post and not start a new one every day or so.
Re: more skycrane
Posted: Wed Oct 08, 2014 5:23 pm
by snappercity
Great start.
Re: more skycrane
Posted: Thu Oct 09, 2014 6:06 am
by Pierce
Some more of the skycrane that I got started tonight.
Holly seam lines Batman. This kit is of such poor quality, the seam lines are off set

But with some sanding and some Mr. Surfacer I think we will get the seam line beat

I did discover with the seam lines on the engines, that the plastic is so soft I'm able to use my hobby knife and scrape the seam line down then use sanders to finish it off.


here is how it came out. Seam line is ready for Mr Surfacer and some more sanding. My fear is loosing the little detail this kit. I will just take my time.

Re: more skycrane
Posted: Fri Oct 10, 2014 8:13 pm
by Pierce
sanding all done on these parts


now I'm confused I have no idea what this hole is for. There is nothing in the instructions that involves this hole. I'm going to fill and sand smooth. Going through my options on how to do that. I have an idea and will share when I get started on the process. There has to be a cliff hanger, LOL

Why in the world would they put an ejector pin here, right in the middle, destroying all the detail and let me tell you this kit cannot afford to loose any detail. I'm at odds, do I fill and sand destroying more detail or do I leave it since it is on the bottom side, suggestions welcome on this issue. I hope the sprue layout designer was reprimanded for this brain fart

Re: more skycrane
Posted: Sun Oct 12, 2014 9:30 pm
by Pierce
Here is the repaired hole. What I did was glue a piece of extra plastic to the backside so the putty would have some on the back side to sturdy it up. Then I filled with Tamiya putty sanded then put 1200 mr surface and did a final sanding. I still have no idea what the hole was for.

Started gluing the body together. It is suck a long body I'm gluing in sections. I'm not waiting for the glue to completely harden but enough to hold it.


Re: more skycrane
Posted: Sun Oct 12, 2014 10:40 pm
by Yevgeny
Cool helicopter. Looks like you doing very good job considering the kit.
Looking forward for more updates.
Re: more skycrane
Posted: Tue Oct 14, 2014 11:09 pm
by Pierce
This kit was so out of lines I had to use a scraper and move the mr surface over the seam line and let the mr surface do the leveling. Sanding is so much fun, it as much fun as sewing my face to the carpet. I bet I have done a years worth of sanding on this kit. I just added a final layer just over the seam line. Waiting for it to dry and hopefully the last of the sanding.


As soon as the body is sanded the rest of the build should go fast. There is not a lot to this kit. I am going to use Alclad dull aluminum then use the Tamiya weather kit D to add heat stains. Or at least attempt heat stains. I have never used Alclad products before either, so we will see. It will either come out nice or the worst helicopter model ever shown. There should be a prize for worst reveal LOL.
Re: more skycrane
Posted: Wed Oct 15, 2014 10:31 pm
by Pierce
Finally got the sanding done and the front canopy mounted. I just have the rear canopy in place so you all can see it. I have to primer and paint where the canopy will cover the body. Also started the area around the rotor. I'm going to get started on the engines soon. Maybe this weekend or tonight after I get home from school.
Front canopy as you can see I have some fit issues I have to square away

Rear canopy


Re: more skycrane
Posted: Thu Oct 16, 2014 1:38 am
by UKguyInUSA
That's a lot of filler there, pity about the misalignments, but seems you're persevering well....it's coming together nicely.

Re: more skycrane
Posted: Thu Oct 16, 2014 5:03 am
by Pierce
Your not kidding about the filler. I think between the landing gear and the body there is going to be a big gap also. Guess I thought I was done with sanding. This build is becoming brutal. If I wasn't in this build it would probably end up back in the box and back on the shelf. Maybe I would just let my nephew build it, But I want to get it into the finally reveal, ugly bird or not.
Re: more skycrane
Posted: Thu Oct 16, 2014 6:05 pm
by Pierce
Got some work done on the skycrane and it's starting to look the part. You can see a little bit of fill but nothing major

I have to do some research to find out where the front landing gear is placed. There is no indications on the kit as to where to place the front strut

Another minor issue. the center hub is not centered. Easy fix, I sanded down the back side o the hub so I can place where needed

I'm sorry if it seem like all I do is complain about this kit. I should have know what I was getting into due to the age of the kit.
Re: more skycrane
Posted: Thu Oct 16, 2014 6:07 pm
by Yevgeny
Its almost a scratch build! You doing great job with the kit.
Re: more skycrane
Posted: Sat Oct 18, 2014 6:21 pm
by Pierce
I sprayed the engines with the alclad dull aluminum and must say it sprayed nice and the out come was better then expected. Not really sure what I was expecting. It was nice not having to thin. I now will get the entire line. I have a bottle of aqua gloss. I was not to happy with using Klear on my BF 109. However I will still use the klear on the glass parts and instead of spraying it I brushed it on. For me this worked much better. I'm still going to slightly weather the engines and get some of the fuel and oil lines painted just so there is a contrast.
in primer

in Dull Aluminum

Got the rest of the odds and ends on today. Hopefully I will have the chopper in primer by the end of the day.


Re: more skycrane
Posted: Mon Oct 27, 2014 2:22 am
by Pierce
I did not get to work on the helo very much this week but today I got it Primed and the engines are done.
Here she is in primer


Here are the engines. I tried to heat stain them with Tamiya weathering master Kit D. They turned out better then expected. I did find it easier to apply the product with a dry Q-tip or ear bud, which ever.


The next hurdle. I was looking at the model and there are no panel lines. There are just rivets all over this thing.

The question is, do I pre shade or use a wash on them after I paint it.
Re: more skycrane
Posted: Tue Nov 04, 2014 7:51 pm
by Pierce
Almost there boys and girls. Chopper is all painted up.

Even though the instructions called for everything to be painted in the same green I thought there should be some contrast


Not sure if the off color spot can be seen on the left side right above the canopy. Not sure what happened here. I am going to prime and re-spray.

and one more pic for good measure

Here is my idea for a simple diorama. It is the reverse side of 2 pieces or hard wood flooring glued together. I'm going to paint a white H with a circle around it and then lightly sand for a weathering effect.

I hope to have the decals on for the next update, if not have the model done and have the final photos posted in the reveal section
Re: more skycrane
Posted: Tue Nov 04, 2014 9:22 pm
by LudvigN
The filler, Ive been there and I feel your pain! Same thing with that strange EPM, sometimes you wonder if they even care about their work (details, rivets). Nice work anyway!
Re: more skycrane
Posted: Tue Nov 04, 2014 10:07 pm
by felisbarcinonensis
Re: more skycrane
Posted: Tue Nov 04, 2014 10:30 pm
by Twokidsnosleep
Paint looks good, your engines are awesome and the diorama idea sounds good too

Coming along nicely, despite a lot of putty and sanding
Re: more skycrane
Posted: Sat Nov 08, 2014 5:26 am
by Pierce
I found my self at the LHS and bought some Micro Mask. I have never used it before so why not give it a shot on the skycrane. I really never enjoyed masking with tape and if this works out then this will be the process for the canopies from now on. You can also see I got the wheels on. Should be done with her maybe tomorrow or at least I hope so. The model area needs a good cleaning. I also need to add some shelves to the paint rack.


Re: more skycrane
Posted: Tue Nov 11, 2014 4:27 am
by Pierce
she is all done boys and girls. Her she is, good bad or ugly
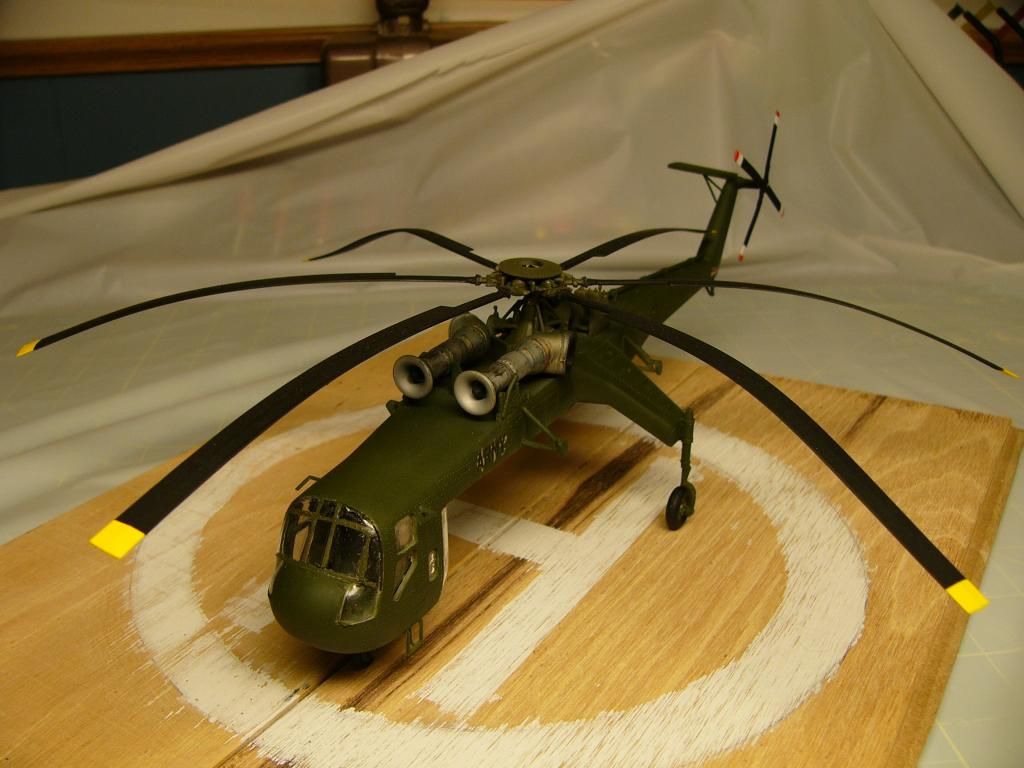
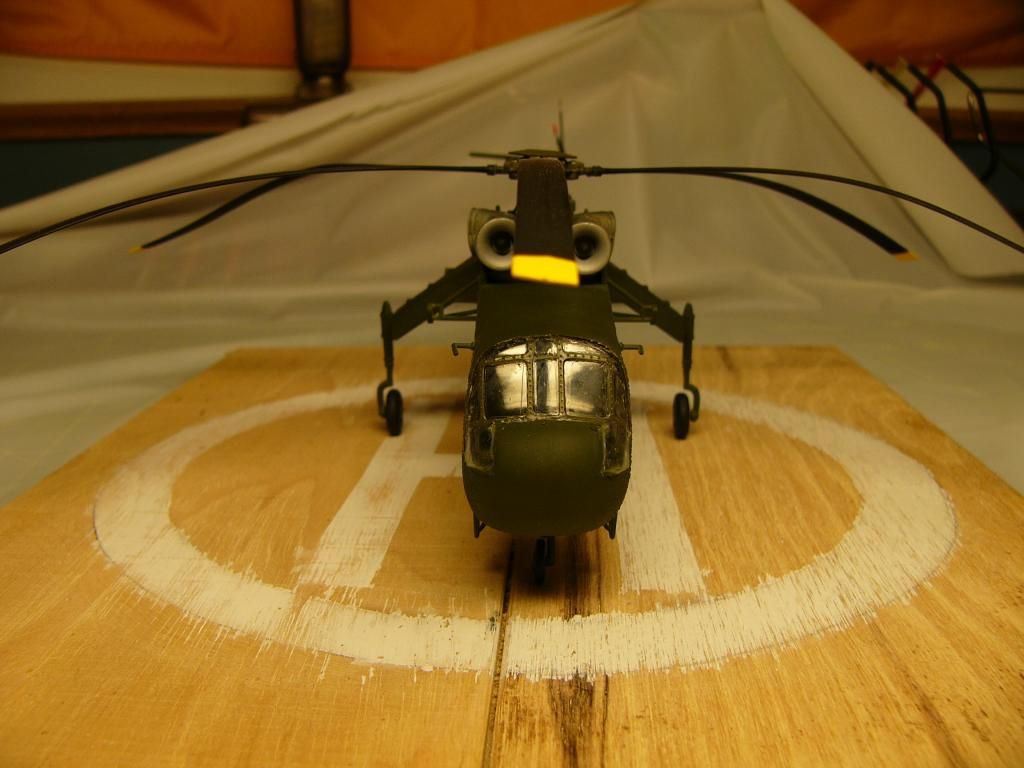
I would post more pics but photobucket is being a pain in the backside. I will post the rest tomorrow. Anyways, I wanted to put the chopper on something so I came up with a simple, very simple base. I think I will wait for the x-mas tree to come out and cut the tips of red light bulbs off and mount them on the helipad. Stand-by for more pics tomorrow
Re: more skycrane
Posted: Tue Nov 11, 2014 9:42 pm
by Pierce
Photobucket is acting good today so as promised
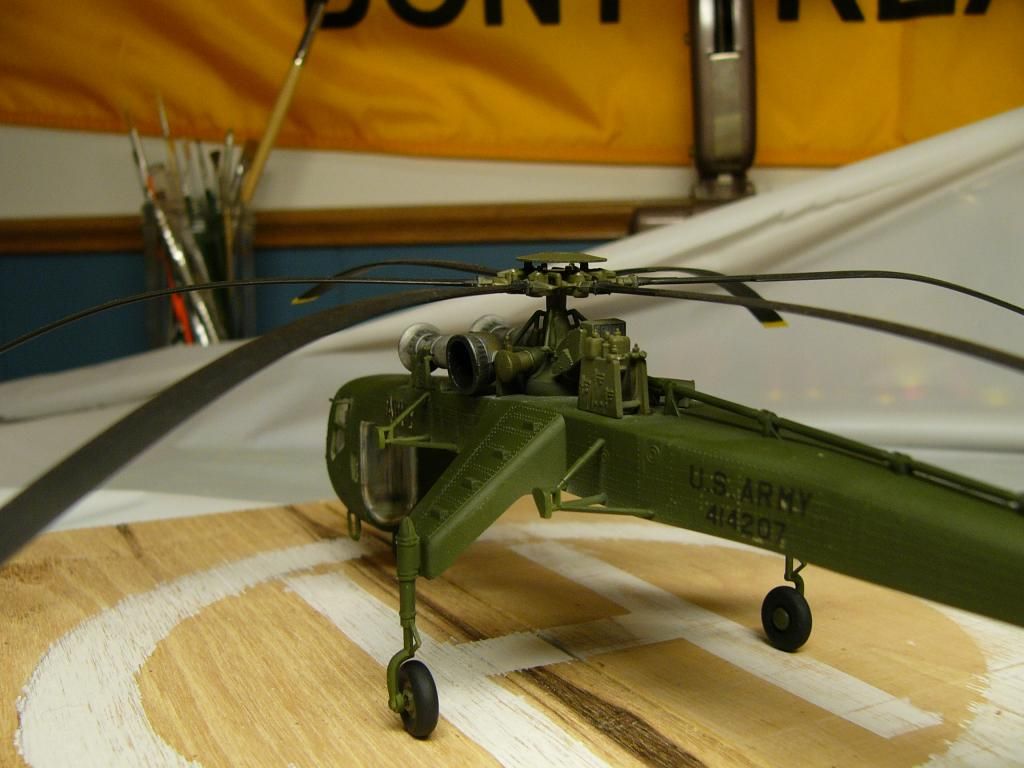
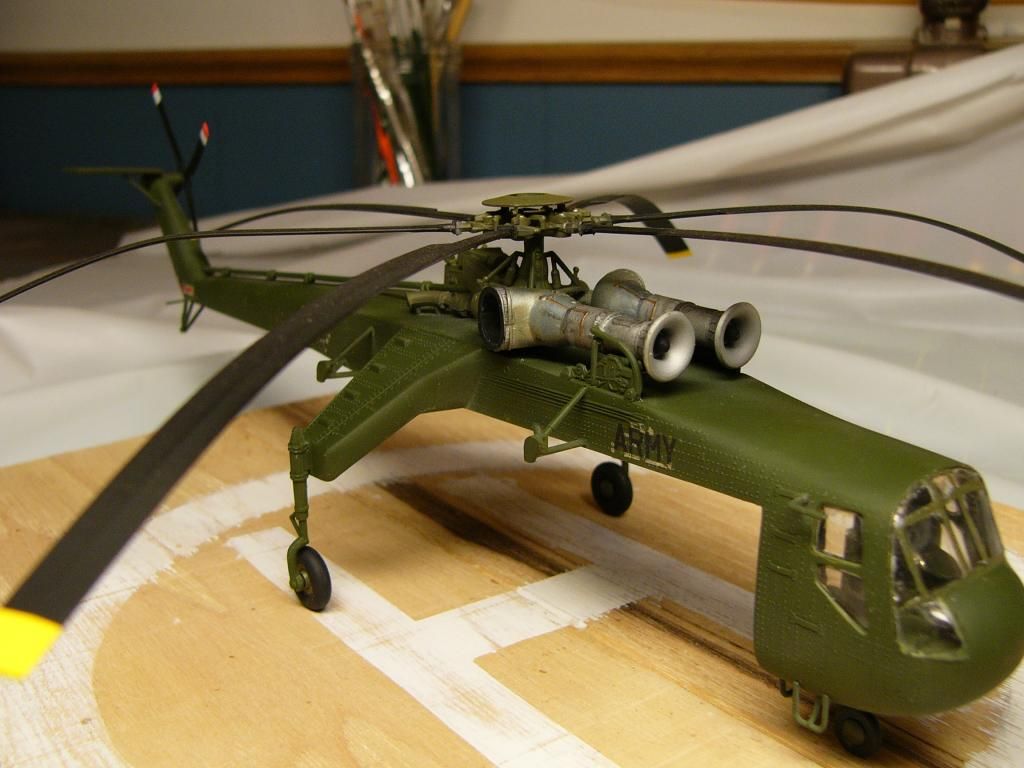
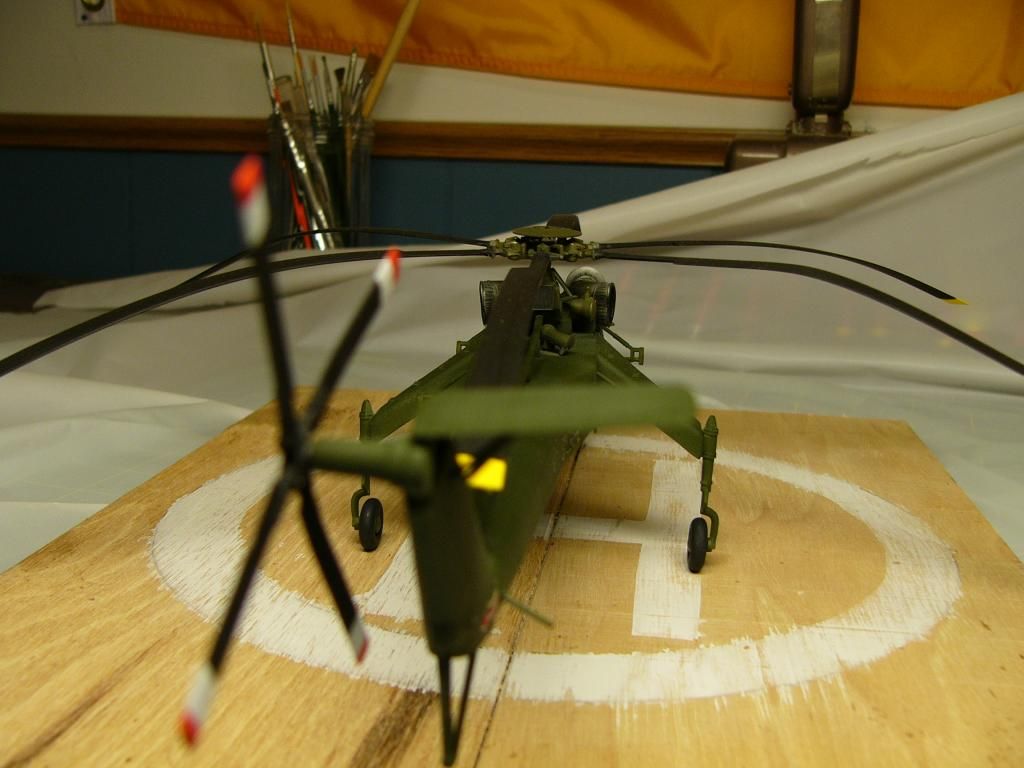
Well that's all she wrote. It was a challenge to build. This kit shows how far kits have come in detail and precision in the molding. I would love to see this kit as a new tooled with some photo etch. Now let me go and take some pics for the final review. This was my firs GB and it was a blast. I have learned a truck load for he other builds. I have already planned to enter 3 in 2015.
Re: more skycrane
Posted: Tue Nov 11, 2014 9:45 pm
by DBMiller
It certainly looks like the beast! I used to see them flying around a few years ago like a giant insect!
Re: more skycrane
Posted: Wed Nov 12, 2014 6:28 am
by Twokidsnosleep
Nicely done, it looks very realistic
Re: more skycrane
Posted: Mon Dec 08, 2014 8:51 pm
by felisbarcinonensis
Great job mate!!
Re: more skycrane
Posted: Mon Dec 08, 2014 9:50 pm
by UKguyInUSA
Great job mate!

Question: Did the rotor blades come with the curve in them to simulate weight over distance, or, did you bend them yourself?
Cheers

Re: more skycrane
Posted: Tue Dec 09, 2014 1:52 am
by Yevgeny
You done great job, especialy considering how many issues this kit presented.
Looks good


