Hobbyboss Pzkpfw I Ausf F (VK18.01)-Late 1/35
Posted: Sun Oct 26, 2014 9:49 pm
After a couple of months away from the bench, it was about time to pull my finger out and get on with something. All my other projects are at the painting / weathering / pondering a diorama stage, and I really wanted to build something, so I pulled this out of my stash:
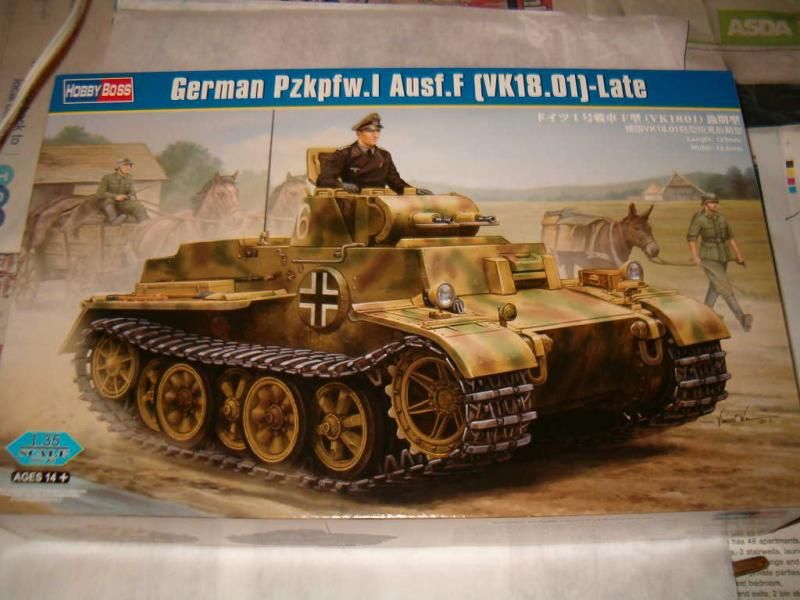
Its a lovely little kit with no flash and very few seam lines. The fit is beautiful and the only filler I (should have) used was for a slight gap for the glacis plate, and to fill in a bit of over-zealous sanding on the rear fenders.
I originally wasn't going to post build pictures here, but decided I may as well put a few up. There's not an awful lot of photos during construction. I mainly took pictures so I could identify places that I had missed while airbrushing, etc, so please forgive the quality.
ASSEMBLY
There's a nice little sheet of PE included in the kit including the grills for the engine. Its just occurred to me that as no engine is provided, maybe I should have painted the interior black or else the tan plastic may be visible inside. Hey ho!


The tools are pretty decent. Shame there weren't any PE clamps included though.

My 1st experience with link and length tracks. These needed a fair chunk of clean-up and I made a real hash of assembling one of the runs. I guess I'll rethink my diorama idea slightly and have the tank sitting up against a wall.

PAINTING
There are 2 colour schemes suggested. One is an unspecified unit from Kursk in 3-tone camo, and the other is an unspecified unit in panzer grey - possibly assigned to a training school. Shame hobbyboss don't seem to provide more detailed info on their kits. I'm going for the latter scheme.
I sprayed Vallejo German Panzer Grey primer (74.603) all over, and left it at that.


The camera flash has really lightened the grey in the pictures as the actual vallejo finish is incredibly dark - almost black. Some sources on the web say that this is probably a truer representation of panzer grey than is usually portrayed. May give it a filter later, or possibly some pigments to vary the surface a little. I'll decide when the decals are on and I've given it a matt cote.
DETAILS ADDED. READY FOR DECALS
Painted and fitted the tools and other bumflufferies. The only real thing of note was that I'm quite impressed with the way the jack block turned out (if you ignore the shine from the Future). I painted a couple of coats of Tan Yellow (70.912). When this dried, I went over it a couple of times with a thin wash of Smoke (70.939). There's already quite a nice wooden plank texture moulded on the plastic so that was one less thing to worry about.

The tracks were sprayed with Black (70.950), given a heavy drybrush of Natural Steel (70.864) and then a wash with Sepia Ink or Inky Sepia as vallejo like to call it (72.091)

Need to paint the headlights!


Need to paint the tail light!

After the painting, I sprayed a few light coats of Future at about 10psi and we're now curing overnight ready for some decals.
So that's the current progress. Comments, suggestions, criticism are all welcome.

Its a lovely little kit with no flash and very few seam lines. The fit is beautiful and the only filler I (should have) used was for a slight gap for the glacis plate, and to fill in a bit of over-zealous sanding on the rear fenders.
I originally wasn't going to post build pictures here, but decided I may as well put a few up. There's not an awful lot of photos during construction. I mainly took pictures so I could identify places that I had missed while airbrushing, etc, so please forgive the quality.
ASSEMBLY
There's a nice little sheet of PE included in the kit including the grills for the engine. Its just occurred to me that as no engine is provided, maybe I should have painted the interior black or else the tan plastic may be visible inside. Hey ho!


The tools are pretty decent. Shame there weren't any PE clamps included though.

My 1st experience with link and length tracks. These needed a fair chunk of clean-up and I made a real hash of assembling one of the runs. I guess I'll rethink my diorama idea slightly and have the tank sitting up against a wall.

PAINTING
There are 2 colour schemes suggested. One is an unspecified unit from Kursk in 3-tone camo, and the other is an unspecified unit in panzer grey - possibly assigned to a training school. Shame hobbyboss don't seem to provide more detailed info on their kits. I'm going for the latter scheme.
I sprayed Vallejo German Panzer Grey primer (74.603) all over, and left it at that.


The camera flash has really lightened the grey in the pictures as the actual vallejo finish is incredibly dark - almost black. Some sources on the web say that this is probably a truer representation of panzer grey than is usually portrayed. May give it a filter later, or possibly some pigments to vary the surface a little. I'll decide when the decals are on and I've given it a matt cote.
DETAILS ADDED. READY FOR DECALS
Painted and fitted the tools and other bumflufferies. The only real thing of note was that I'm quite impressed with the way the jack block turned out (if you ignore the shine from the Future). I painted a couple of coats of Tan Yellow (70.912). When this dried, I went over it a couple of times with a thin wash of Smoke (70.939). There's already quite a nice wooden plank texture moulded on the plastic so that was one less thing to worry about.

The tracks were sprayed with Black (70.950), given a heavy drybrush of Natural Steel (70.864) and then a wash with Sepia Ink or Inky Sepia as vallejo like to call it (72.091)

Need to paint the headlights!


Need to paint the tail light!

After the painting, I sprayed a few light coats of Future at about 10psi and we're now curing overnight ready for some decals.
So that's the current progress. Comments, suggestions, criticism are all welcome.


 John
John

 ) leading up to Christmas have been insanely busy for the parcel delivery companies. I probably had 2 1/2 to 3 times the volume that I was delivering in 2012 and 2013 and it was just relentless. 2013's xmas build-up started around the middle of November, whereas 2014 kicked off from the beginning of October and it just did not stop! I got to the stage of work, eat crap, sleep, repeat. Even on the few Sundays I was free I was too tired to properly catch up with the forums, let alone go anywhere near the bench.