Like a number of others here I’ve recently come back to modelling after some years (20+) away from the hobby.
One of the main inspirations for me to get back into the game has been Paul’s excellent ‘Aircraft Modelling Techniques’ series of videos, these have shown me the ‘how to’ and ‘what to use’ for skills that I’ve yet to attempt, let alone master, I’m sure you’ve all seen them but if you haven’t I can’t recommend them highly enough, check them out here…
thanks Paul
For my first model I’m going to build the Airfix 1/48 Bf109E as Paul used in his videos.
I bought the kit from ehattons.com, £11.90 + £2.00 p&p which I thought was very reasonable.
Here’s to box and sprue’s…
The box art, schemes and decals differ from the version shown in Paul’s videos
All the sprues in one bag
Sprue ‘A’
Sprue ‘B’
Clear
Hardly any distortion, please excuse poor photo but its really difficult to get a well focused clear part
PE seat belts, I’ve decided to have a ‘go’ at some PE and I thought that these would be a good starting point?
I’ll add photos of the relevant instruction page/section as I build the kit.
Here are the two ‘new’ schemes…
Scheme ‘A’
Scheme ‘B’
Decals, no swastika so I’ll have to get some aftermarket decals or stencils.
I must admit that neither scheme grabs me so I had a look on Wings Palette to see if I could find something more to my liking. (what a fantastic reference site) http://wp.scn.ru/en/ww2/f/32/2/13
Well I saw a number of interesting schemes however, I think I’ll try my hand at creating a ‘fantasy’ scheme based on a number of different aircraft with some ideas of my own that I’m sure would never have existed but I want to try some different ideas and paint techniques so we’ll have to see what it looks like when its finished.
As I needed swastikas I had a look on hannants and found these…
these will give me plenty of options to choose from
Thats all for now, I’m off to Telford at the weekend so I’ll not get started until next week
until then, John
Re: 1/48 Airfix Messerschmitt Bf109E build
Posted: Sat Nov 08, 2014 1:24 am
by SyntaxModels
Welcome back to the hobby, I've only started this year and have only built 2 1/48th kits so this should be good to watch. Good luck with the kit!
Re: 1/48 Airfix Messerschmitt Bf109E build
Posted: Sat Nov 15, 2014 8:34 pm
by shortCummins
Back from Telford, great day out, if you’ve not gone before, go next year, you’ll not be disappointed, so many cracking models on display, so much inspiration for future builds.
One of my main reasons for going was to buy a compressor and to see if I could get a ‘deal’ on a Harder & Steenbeck Ultra, sadly no deals to be had on the airbrush but I did manage to get a reasonable price on an AS186 compressor, and for and extra £7 they threw in an air-brush, something for me to practice with whilst I’m waiting for my ‘real’ one!? Or so I thought, bloody thing spitted and spluttered gobs of paint and then finally wouldn’t spray any paint at all! Still I’ll have to pay a visit to air-craft.net in the near future and place my order!
So anyhow, back from Telford and for the first time in far too long I got to use my sprue cutters and some glue! I’d forgotten how much fun it can be. As many others have said on this forum the Airfix kit is really good, hardly any flash, and the detail is really crisp. To be fair its been a while since I’ve looked at a kit, and I don’t really have a ‘touch-stone’ to know just how good, or otherwise, kits are these days but this kit is miles ahead of what I remember.
Starting with section 1
I cut the parts from the sprue and cleaned them up using a knife and a Ultimate thinny stick, while I was at Telford I got a range of Ultimate sanders, thinny sticks, airbrush thinner and the full set of weathering washes. I also managed to have a quick chat with Lee, and I got 10% off just for being a member of this forum, absolute bargain!
When I bought the sanders I thought that I’d be using the larger ones most of all but so far I’ve only opened the thinny sticks, I know I’ve done virtually nothing on the model yet but I wanted to pass on my ‘state of mind’, pre-conceived ideas, wrong or right, and any foul-ups along the way.
Many moons ago I’d use either a fine metal file and/or a scalpel, I must say these sanding sticks make life so much easier.
Here’s the seat completed…
Not much I know, but after 20 odd years I’m really pleased with what I’ve done
Onto section 2
On Paul’s recommendation I’m using Tamiya thin glue, what a difference, so easy to use and no stringy bits flying all over the place.
Here’s the section completed.
The odd thing about these photos is that the plastic looks blue, not grey, strange lighting?
Funnily enough the next section marries these two, so thats what I’ll be doing next and then I’ll be laying some paint down when my airbrush arrives. I’m going to differ slightly from Paul’s instructions as I want to paint the dials separately but more of that in my next update
Thanks for now
John (shortCummins)
Re: 1/48 Airfix Messerschmitt Bf109E build
Posted: Sat Nov 15, 2014 8:43 pm
by Nev
Good start mate will be following
Re: 1/48 Airfix Messerschmitt Bf109E build
Posted: Sun Nov 16, 2014 1:12 am
by SyntaxModels
Great start, can't wait to see this iconic aircraft completed!
Re: 1/48 Airfix Messerschmitt Bf109E build
Posted: Sun Nov 16, 2014 1:16 am
by Paul
Excellent stuff John. Look toward to seeing you build up this kit
Re: 1/48 Airfix Messerschmitt Bf109E build
Posted: Sun Nov 16, 2014 7:07 pm
by shortCummins
thanx for the encouragement lads, I know what I've done so far is 'nothing' but I'm really enjoying myself
this is likely to be a longish build and I'll try not to post too much nonsense however, I want to give myself a 'digital diary' so that I can look back in a couple of years to see just how bad I was and also to show other 'newbies' mistakes/cock-ups and success' that we can all take encouragement, or solace, from
I'll try not to be too boring
rgds
John (shortCummins)
Re: 1/48 Airfix Messerschmitt Bf109E build
Posted: Mon Nov 17, 2014 7:26 am
by SyntaxModels
Hahah, I can't wait John!
Re: 1/48 Airfix Messerschmitt Bf109E build
Posted: Mon Nov 17, 2014 10:22 am
by paulywall
Looking forward to watch your build progress
Re: 1/48 Airfix Messerschmitt Bf109E build
Posted: Thu Nov 27, 2014 1:19 pm
by shortCummins
Well expenses dictate that I can’t afford to get my airbrush just yet, I hadn’t forgotten my youngest was 21 this month, I ‘assumed’ that she was only 20, whats a year between friends , she’ll thank me for thinking she’s younger in a few years! Her mum’s been 21 for as long as I can remember
Anywho, no airbrush so I decided to revert to a hairy stick so that I can at least finish the office and move on with the build.
So after completing section 3 and adding the joystick…
I had planned on using some PE seatbelts however Airfix have moulded something to the seat, I’m guessing their meant to be seatbelts , and as I’m not quite up to chiselling them off (yet) and getting a good enough finish so I’ll use the PE on another build.
...I put together the instrument panel
I’m not sure why part 4B is optional, but I quite like the look of it so I ‘chose’ to use it, I’m sure that someone will point out that part 4B should only be used when building a later/earlier version but its my model, I’m flying by the seat of my pants and not building a specific aircraft so as the parts there and I like the look of it so I’m going to use it.
I said earlier that I’m deviating from Paul’s excellent tutorial and doing the instrument panel separately.
he’d painted the IP fantastically and I wanted to aspire/replicate his work and seeing how Airfix had seriously chicken’d out with instructions on how the IP should look, they’ve no paint details apart from it should be dark grey!
So I did a bit of research on good old google images and basically came up with so many different options that my head began to spin. I wasn’t impressed so I went onto the Eduard site to have a look at their aftermarket stuff to see if I could see something that would help. What I found was this…
I also looked at a couple of the Eduard manuals, available on their site http://www.eduard.com/store/Eduard/Plas ... html?cur=1
for colour directions, anyhow I decided on a composite scheme, mainly due to my current lack of skill , after adding different shades of black/grey, dry brushing with aluminium and adding a couple of ‘red and black buttons’ this is the result…
I painted the base of the gunsight black and added a touch of brown to the front of it, not sure what the brown thing is?
Its not as good as I’d imagined but probably better than I’d expected, does that make sense? I’m quietly happy with the result but I know I’ll get better the more practice, i.e. The more kits I build
Section 6 requires fixing the IP to the front bulk-head?
Here’s the office so far
Sections 7 & 8 deal with building the pilot and nailing him into his seat, as I’m not using him I’ve skipped these sections. Back in ‘the good old days’ I wouldn’t have dreamt of not adding the pilot but looking at this forum and some of the mind-blowing builds, most of them don’t have pilot/crew as they coverup most of the cockpit detail.
Next up were sections 10 & 11…
Here are the results…
… and with a base-coat of Tamiya XF-25 (light sea grey), I know thats not RLM02 but I figure its close enough for ‘inside’. I’ll be getting either Akan or Mr Color/Hobby paints when my airbrush arrives to do the outside of the aircraft …
The paint looks far rougher in these photos than it does ‘in real life’, either that or my eyes are really bad
Dry-brushing and adding some black detailing helps?
I’m not sure if it shows but I’ve added red and yellow tips to the leavers
And this is what the cockpit looks like dry fitted…
Next up will be fitting the fuselage half's together and then fitting the wings.
Until then
John (shortCummins)
Re: 1/48 Airfix Messerschmitt Bf109E build
Posted: Thu Nov 27, 2014 1:33 pm
by paulywall
Good progress,think I will try the hairy stick method!....lol
Re: 1/48 Airfix Messerschmitt Bf109E build
Posted: Fri Nov 28, 2014 5:42 am
by SyntaxModels
It'a a better looking IP than I've ever done! My way of painting IPs is to just paint it all flat black and leave it alone and then forget about it . You did a good job on it! Can't wait for more
Re: 1/48 Airfix Messerschmitt Bf109E build
Posted: Sat Nov 29, 2014 3:43 pm
by shortCummins
thanx for the encouragement guys, I'm hoping to get some bench time early next week, I have to work this weekend (bummer, 05:30 starts!) so I'll probably be too tired after work
Re: 1/48 Airfix Messerschmitt Bf109E build
Posted: Sat Nov 29, 2014 3:47 pm
by Yevgeny
Hope you get some time for it. You making a good progress
Re: 1/48 Airfix Messerschmitt Bf109E build
Posted: Fri Dec 05, 2014 10:17 pm
by UKguyInUSA
Great start so far mate!
Re: 1/48 Airfix Messerschmitt Bf109E build
Posted: Sat Jan 03, 2015 4:23 pm
by shortCummins
Sorry for the lack of activity on this build log, my excuse which I’m sticking to is “life just got in the way” what with Christmas, work - I was woking nights all of December, and waiting for the purchase of my airbrush.
All of thats in the past and I’ve had a little time to move the build forward.
As I’m following Paul’s video I’ve not built the propeller and won’t be adding it until near the end of the build. So for the moment I’ve missed step 9 and therefor won’t add the prop’ in section 12.
Installing the cockpit and joining the fuselage halves
You can see from this photo there’s a slight step between the two halves which I’ll need to take care of, nothing too major.
Next up section 16, joining the tops and bottom halves of the wing...
I’ve drilled and cut out the holes in the under wing as described in section 16 as I’m opting to build ‘option A’
Section 17, fitting the wing to the fuselage…
At this point I don’t want to permanently fix either the engine cowling, as I need to paint and fit the nose machine guns, or the air intake as I’ll need to fit the fixing pin for the propellor toward the end of the build unless I don’t have it able to spin. I may choose this option if it becomes a pain during painting not having this fitted.
Air intake…
Lower part of the air intake painted and dry brushed prior to assembly
The completed assembly
Air intake dry fitted
Engine cowling dry fitted (note the machine guns haven’t been attached)
Wing intakes…
Nose machine guns…
I’ve used Mr Metal Color buffable paint (iron) for the machine guns
I’ve also used the same paint for the exhausts…
The effect this paint gives after you buff it is quite astounding, I bought this paint from SnM Stuff who sponsor some of the GBs on this forum, visit their website to see their full range of products… http://www.snmstuff.co.uk
… so I’m off to have a practice using the airbrush, I’ve never used one before, and I’ll be back soon with another update
Until then
John (shortCummins)
Re: 1/48 Airfix Messerschmitt Bf109E build
Posted: Tue Jan 13, 2015 9:03 pm
by shortCummins
Well I’ve been having fun with my new (first) airbrush, if anyone needs a primer’d plastic spoon let me know and I’ll send you several
I’m using Vallejo grey primer and I’ll be cleaning up with Ultimate cleaner.
I’ve used screwed-up dampened tissue to protect the wheel wells and the engine cowling held in place with bluetac, I’ll fix it in place one I’ve painted the camo’ and added the nose machine guns. The bottom air scoop is held in place by friction, I’ll fix this permanently when I add the propeller.
For my first airbrushing ‘in anger’ I’m really pleased with the result…
Being slightly ham-fisted I managed to knock off a couple of pieces, the rudder and the left stabiliser, I’m blaming the Tamiya ultra thin glue, nothing to do with me
One thing that caused me a bit of a quandary is how to paint all of the aircraft in one go, more specifically how to hold the aircraft without damaging the newly painted surfaces. I ended up spraying the top and bottom in different sessions, waiting an hour or two after the underside was painted before spraying the ‘top’
Whilst I had the primer in the airbrush I sprayed the propeller and spinner…
I’ve yet to decide how to paint the spinner, I’ve seen several versions with different coloured spinners, yellow, white, black etc. Some were 3/4’s black and 1/4 white, I quite like the look of this however as I want to add some chipping I might stick with a solid colour. I quite fancy painting it red but I’ve not seen any colour schemes for a 109 with a red spinner, as I mentioned earlier this will be a ‘fantasy’, i.e. made-up scheme I may just go with what I fancy.
Whilst I was trawling through endless 109 schemes, wings palette http://wp.scn.ru/en/ww2/f/32/2/0#129, it became apparent that the exhausts that I’d painted using the wonderful Mr Metal buffable paint, would have looked far more worn/rusty assuming that the aircraft had been in use for any amount of time so I’ve used Ultimate rust wash to try and tone them down a wee bit…
To my eyes it looks far better in real life than it does in this photo
I’ve also painted the wheels, the tyres I’ve used Tamiya XF85 rubber black and the centres X1 gloss black.
Really pleased with the look of these, next I’ll add a Ultimate concrete wash to weather them.
I followed Paul’s tips on cleaning the airbrush, I must say it was pretty painless with the only slightly frightening bit being the removal and replacement of the needle. UMPs cleaner works like a dream. Although this is my first time using an airbrush and therefore I don’t have experience of any other cleaning products, I can see no reason to want to try another product and would highly recommend Ultimate cleaner.
Next up will be pre-shading and camo’ I’ll wait 24-48 hours for the primer to fully ‘go off’ and I’ll re-attach the bits that I managed to knock off.
any comments, criticisms or hints would be gratefully accepted
Until next time
John (shortCummins)
Re: 1/48 Airfix Messerschmitt Bf109E build
Posted: Tue Jan 13, 2015 9:18 pm
by Joesdad
Coming together nicely John, once you've started using an airbrush you'll never go back
Re: 1/48 Airfix Messerschmitt Bf109E build
Posted: Tue Jan 13, 2015 11:45 pm
by CJSomerset
Looking good! Love the instruments. This was my first kit with an airbrush as well, working along with Paul's videos made it (seem) easy and I ended up with nice looking 109. Your well on the way to doing the same.
Re: 1/48 Airfix Messerschmitt Bf109E build
Posted: Wed Jan 14, 2015 10:22 am
by shortCummins
thanks for the encouragement guys
Re: 1/48 Airfix Messerschmitt Bf109E build
Posted: Wed Jan 14, 2015 10:34 am
by shortCummins
More fun with the airbrush…
Once the primer had dried, I left it for nearly 48 hours, I reattached the bits that I ham-fistedly knocked off and started the pre-shading…
I used Tamiya XF-1 thinned with Ultimate thinner approx 50/50 for the pre-shading.
A couple of things, firstly its not as easy as Paul made it look! However as a first attempt I’m really pleased with my effort. I know with practice that I’ll get better and also its a lot of fun, if your wondering if you should get an airbrush, get one, you won’t regret it!
The other thing is that my pre-shading lines are much thicker than Paul’s. I think this is because my airbrush has a different tip.
My airbrush has this ‘standard’ tip
This is the ‘pinch’ tip that Paul mentions in his video.
Talking to Martin at air-craft.net, he couldn’t be more helpful!, he explained that I could get a ‘Fineline cap’ that would allow me to spray thinner lines, hence ‘Fineline’?, this will also have the added bonus of making clean-up easier.
For an excellent tutorial on airbrush cleaning have a look at Paul’s YouTube video, if you pay attention, unlike me , you won’t go far wrong.
So I’ll order a Fineline cap from those helpful people at air-craft.net in time for my next pre-shading exercise and report back on how I get on
You’ll also notice I’m getting slightly less ham-fisted, I only managed to knock off the tail this time
I left the paint to dry for a couple of hours, it was touch dry after about half an hour, well thats when I couldn’t wait any longer and touched it to find out if it was dry . It looked dry almost immediately but at this point I think I’m ‘erring on the side of caution’ with how long to wait before handling the model? Anyhow I didn’t smudge anything so I’ve now got a baseline for picking the thing up after spraying, for Tamiya paints, I’m sure others will be different!? It would be nice if manufactures would give some guide-lines on their paint properties i.e. how long before touch-dry, how long before you can over paint, how long before you can apply masking tape, how long before you can sand etc. I realise that atmospheric conditions, heat, humidity etc. will effect how the paint acts but a rough idea would be helpful.
Where was I, oh yes, spraying the camo’, sorry about the rant . Having watched a number of Paul’s video builds he mentioned how impressed he was with Akan paints, so I decided to get a set of Luftwaffe WWII 1939-1941 from Hobby Colours.
Once again I have nothing to base how good, or otherwise, these paints will be, only how they look once painted so I can’t really give a qualified review but I’ll let you know what I find, how they spray etc.
Here are my efforts for the underside RLM65 Hellblau…
Mixing the paint 90/10 with Ultimate thinners and setting the pressure to 25psi the colour went on like a dream. I slowly built up the layers of paint until I got the coverage I wanted with the pre-shading just showing through. I really like this paint.
I started by painting the wings and then moved down the fuselage toward the tail, which I’d re-re-attached . I then ran into a bit of a problem as the colour needs to come up the fuselage, nearly to the top and all of the tail, so how do I hold and manoeuvre the aircraft without damaging the paint. The simple answer was to spray the colour in stages, wings, rear fuselage underside, rear stabilisers, air intake and then leave them for a while before spraying the fuselage sides, engine cowling and tail.
I should learn to be a wee bit more patient, luckily I didn’t damage any of the paint work but in my haste I put too much paint on one side of the fuselage which has given me a couple of paint ‘runs’
I now have to wait for the paint to fully cure, I’m guessing 24-48 hours, before I can sand down the runs and then respray. This model was always going to be a learning exercise and hopefully I’ll find out how to rectify this. Good news is that I didn’t knock anything off it this time, see I’m learning
I’ve still to decide on what colour to paint the spinner, who’d of thought it would be such a difficult choice?
I’ll be back with more once I’ve cleaned up the paint runs and started the ‘top’ camo’
Until then, as always comments, suggestions and criticisms welcome
John (shortCummins)
Re: 1/48 Airfix Messerschmitt Bf109E build
Posted: Wed Jan 14, 2015 12:29 pm
by CJSomerset
Hi John
As you haven't fitted the prop yet, you should be able to poke something into the hole at the front and use that to hold the model whilst you paint. I found that long tweezers fitted well.
I'm not much more experienced than you, but if you have to wait half an hour before you can touch it but I reckon your paint might be too thin or your putting to much on? That will explain the runs as well. I use Vellejo air and that sprays on dry.
What size needle do you have in your Ultra? I got one for Xmas as well, mine has the .2mm. Before I got it, I had a cheap (£25) unbranded AB and my pre shading looked a lot like yours. Now I have the Ultra I can spray lines that are 1 or 2mm wide with no problem. I'm not trying to tell you that your pre shading is bad, just that you may not need the fine liner air cap.
Re: 1/48 Airfix Messerschmitt Bf109E build
Posted: Wed Jan 14, 2015 1:15 pm
by shortCummins
CJSomerset wrote:Hi John
As you haven't fitted the prop yet, you should be able to poke something into the hole at the front and use that to hold the model whilst you paint. I found that long tweezers fitted well.
I'm not much more experienced than you, but if you have to wait half an hour before you can touch it but I reckon your paint might be too thin or your putting to much on? That will explain the runs as well. I use Vellejo air and that sprays on dry.
What size needle do you have in your Ultra? I got one for Xmas as well, mine has the .2mm. Before I got it, I had a cheap (£25) unbranded AB and my pre shading looked a lot like yours. Now I have the Ultra I can spray lines that are 1 or 2mm wide with no problem. I'm not trying to tell you that your pre shading is bad, just that you may not need the fine liner air cap.
thanks for the advice about using the propeller hole, obvious when you (I mean me ) think about it
I also have a .2mm needle, perhaps I just need to play around with the thinning, pressure and how close I get to the model? it is good fun doing this isn't it
Re: 1/48 Airfix Messerschmitt Bf109E build
Posted: Wed Jan 14, 2015 1:52 pm
by CJSomerset
The only problem with the Ultra is the lack of a "pull back" lock. (I'm sure that's not the correct name for it.) On my cheap AB theres an adjustable stop that lets you set how far back you can pull on the lever. If the Ultra had that, once you'd found the best setting for pre shading you could lock it in so you got the same result every time.
Did you try Paul's test of writing you name? It should look more like it was done with a pen than a can of spray paint. Don't pull back as far and get closer (almost touching) and you'll get very fine lines.
I've still to decide what colour, at the moment its between the RML71 and red, I'm leaning more to the RML71 as I will be using red for either the tail or a fuselage stripe and I think the dark green will show off the chipping better?
decisions, decisions
rgds
John (shortCummins)
Re: 1/48 Airfix Messerschmitt Bf109E build
Posted: Fri Jan 16, 2015 10:20 am
by shortCummins
CJSomerset wrote:The only problem with the Ultra is the lack of a "pull back" lock. (I'm sure that's not the correct name for it.) On my cheap AB theres an adjustable stop that lets you set how far back you can pull on the lever. If the Ultra had that, once you'd found the best setting for pre shading you could lock it in so you got the same result every time.
Did you try Paul's test of writing you name? It should look more like it was done with a pen than a can of spray paint. Don't pull back as far and get closer (almost touching) and you'll get very fine lines.
Hi CJ thanks for tip, I think its all down to how hard I press and how close to the kit I am as I can get really fine lines on paper before I spray the kit! the main difference is that the paper is nice and flat whilst the kit is all curves, I'm sure with practice I'll 'get it"
once again thanks for the advice, I rally do appreciate it
rgds
John (shortCummins)
Re: 1/48 Airfix Messerschmitt Bf109E build
Posted: Fri Jan 16, 2015 10:22 am
by shortCummins
For the camo’ I’ve decided to go for RLM70 and RLM71 as a change to RLM02 and RLM70, I’m not sure I’ve made the ‘right’ choice but lets see how it turns out
So I freehanded the RLM70, sorry I forgot to take photos, and then masked for the RLM71
After waiting a couple of hours I carefully took the masking off…
...obviously not carefully enough!
I thought I was being really careful so I don’t understand how I managed to remove both top coat and primer? I’d waited over 2 days after applying the primer, a couple of hours before adding the masking tape, I’d ‘de-tacked’ the tape before applying and removed the tape really slowly.
So now I’ll have to fix this by respraying the RLM70, perhaps I should reapply the primer, pre-shading and then the top coat?
I also need to add some RKM70 to the wing…
...I managed to screwup the masking, well Paul did it in his video so thats what you need to do isn’t it?
I must admit that now that the main camo’, all baring a couple of touch-ups, is on the wings that I wish I’d gone with RLM02 and RLM70, when I build another WWII Luftwaffe aircraft I’ll plump for that option.
Whilst I had the RLM71 in the airbrush I painted both the spinner and propellor
So today I plan to ‘fix’ the paint and then I’ll add some side mottling, to help with this I bought a “Mottle Mask’ PE template from Hannants
I’m looking forward to using this.
You’ll also notice that I’ve added the canopy, I was waiting for the Montex mask, again from Hannants, that arrived along with the mottle mask.
I’ll add more photos and ramblings once I’ve finished the camo’
Until then, as always comments, suggestions and criticisms welcome
John (shortCummins)
Re: 1/48 Airfix Messerschmitt Bf109E build
Posted: Fri Jan 16, 2015 11:40 am
by AAC
That's coming along very nicely John looking forward to seeing the beastie come together.
Don't beat yourself up about the masking, I've found the Airfix styrene doesn't hold onto acrylic paint that well and can come off quite easily. A lacquer or enamel primer may work better, particularly the lacquer as it bonds with the styrene (there's an excellent write up about Alclad which is a lacquer here, but more importantly it describes how the different types of paint bond to the surface).
Anyway I think it's quite normal to go back and re-spray the same part over and over again... or is that just me
Re: 1/48 Airfix Messerschmitt Bf109E build
Posted: Fri Jan 16, 2015 2:15 pm
by heel
It's looking good John. Enjoying your build thread/comments as I'm still trying to get all this sorted as well.
Re: 1/48 Airfix Messerschmitt Bf109E build
Posted: Fri Jan 16, 2015 5:05 pm
by shortCummins
thanks for the tips and encouragement, I hope that my mistakes and misfortunes give encouragement to others (or just a laugh )
rgds
John (shortCummins)
Re: 1/48 Airfix Messerschmitt Bf109E build
Posted: Sat Jan 17, 2015 8:49 am
by shortCummins
Re-masking to touchup the damaged paint
After the touchup the mottle mask template was put to use…
Well it did its job and I’m quite pleased with the end result but I think in future, after a bit more practice, I’d try to get this result ‘by hand’.
On to the spinner, I’ve finally decided to add a bit of red to top/front of the spinner.
I’m going to try my hand at chipping the spinner, I think I’ll use a light grey rather than aluminium, I think aluminium would be too bright?
as always comments, suggestions and criticisms welcome
John (shortCummins)
Re: 1/48 Airfix Messerschmitt Bf109E build
Posted: Sat Jan 17, 2015 9:25 am
by CJSomerset
Hi John
There's something not quite right about that dappling but I can't decide what. You can't tell by the pics but did you paint both the camo colours into the dapple? And usually you'd paint the a top coat over a bare metal colour if you are planning on chipping so how are you doing it?
I really hope I'm coming across as helpful instead of annoying!
CJ
Re: 1/48 Airfix Messerschmitt Bf109E build
Posted: Sat Jan 17, 2015 12:11 pm
by shortCummins
CJSomerset wrote:Hi John
There's something not quite right about that dappling but I can't decide what. You can't tell by the pics but did you paint both the camo colours into the dapple? And usually you'd paint the a top coat over a bare metal colour if you are planning on chipping so how are you doing it?
I really hope I'm coming across as helpful instead of annoying!
CJ
I'm with you on the dappling, I've only used RLM70, I'm not sure that I'll do any more to it, I might just mark it down to experience
I'm going to add 'chipping', perhaps thats the wrong term?, by paintbrush and/or sponge
CJ I do appreciate the help its been a long time since I've done this and I'm really enjoying myself, even with the muck-ups
Re: 1/48 Airfix Messerschmitt Bf109E build
Posted: Sun Jan 18, 2015 9:56 am
by shortCummins
Having finished the main paintwork, is weathering paintwork? Its time for some decals. Back in the mists of time these used to be called ‘transfers’, when did they become decals? Then again I still think of a 10p as 2/-, Snickers as Marathon and don’t get me started on the size of mars bars, curly wurly and wagon wheels, who said Luddite?
Anywho, SnM Stuff didn’t have, or don’t sell?, micro-sol and micro-set but they did have Vallejo decal fix and medium, so I’ll be giving then a try.
I couldn’t find any Johnson’s Klear at any of my local supermarkets, has it changed its name?, so the chap at SnM recommended Vallejo Acrylic Gloss. Having never used anything like these before its going to difficult for me to give a fully considered report on their use, but I’ll let you know how I get on.
For some reason the Airfix decals don’t have swastikas? I know that in Germany, and presumably some other countries, that the swastika is banned, but as far as I know its not banned in the UK so why aren’t they included? I’ve seen some manufactures split the swastika, this seams to be a perfectly reasonable compromise, or am I being insensitive?
So Hannants get some more of my hard-earned…
The Airfix kit comes with an external fuel tank...
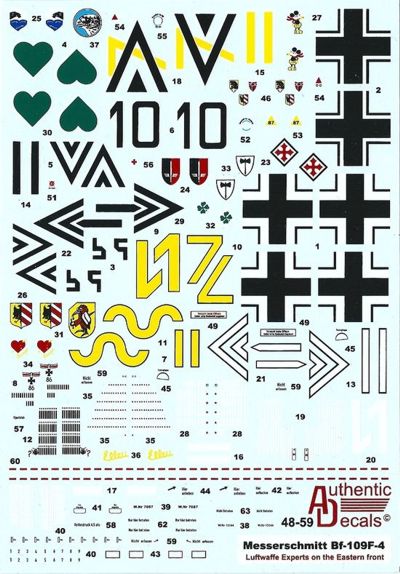
...which I’ve decided to use. However the two versions that you can build from my kit doesn’t use it and therefore there aren’t any decals for the fuel tank but happily Hannants have a decal sheet that does.
As a bonus the decal sheet contains a number of different badges, numbers and other insignia that I’m sure I’ll be able to put to some use.
So I’m off to try out the gloss varnish and then apply some decals, I’ll report back when I done some.
as always comments, suggestions and criticisms welcome
John (shortCummins)
Re: 1/48 Airfix Messerschmitt Bf109E build
Posted: Sun Jan 18, 2015 10:29 am
by Paul
Great work John, i ve just caught up on this thread, not checked it for a while. You've had some trouble but you've brought it back each time, well done buddy.
Glad to see my videos being helpful (i hope lol) and look forward to seeing how your 109 turns out
Re: 1/48 Airfix Messerschmitt Bf109E build
Posted: Sun Jan 18, 2015 12:22 pm
by shortCummins
Paul wrote:Great work John, i ve just caught up on this thread, not checked it for a while. You've had some trouble but you've brought it back each time, well done buddy.
Glad to see my videos being helpful (i hope lol) and look forward to seeing how your 109 turns out
Paul, I blame you for everything
thanks for your video's they were the inspiration for be to get back to modelling after too many years
Re: 1/48 Airfix Messerschmitt Bf109E build
Posted: Sun Jan 18, 2015 1:11 pm
by shortCummins
I’ve sprayed the top of the aircraft with gloss, while I’m waiting for that to dry, so that I can spay the underside, according to the Vallejo website it should be fully dry in 4 hours?
So while I’m waiting I’ve set about weathering/chipping (still not sure thats what I mean).
First I dry-brushed Tamiya XF-1 ‘flat black’…
Then I dry-brushed XF-53 ‘neutral grey’…
This is what it looks like assembled…
I’ve got to say I’m super pleased with the way this looks
Back to waiting for the top to dry so that I can gloss coat the underside.
I’ll return when I’ve added some decals
as always comments, suggestions and criticisms welcome
John (shortCummins)
Re: 1/48 Airfix Messerschmitt Bf109E build
Posted: Sun Jan 18, 2015 6:58 pm
by CJSomerset
Glad I'm not the only one who still calls them transfers!
Klear is still called klear but you can usually only get it in big Sainsburys stores.
The prop is looking really good, can't wait to see this finished.
Re: 1/48 Airfix Messerschmitt Bf109E build
Posted: Mon Jan 19, 2015 4:57 am
by SyntaxModels
John, I've been building wingy things since March 2014 and I've never done as good a job as you have done here. Keep up this spectacular work!
Re: 1/48 Airfix Messerschmitt Bf109E build
Posted: Mon Jan 19, 2015 4:49 pm
by shortCummins
thanks for the encouragement guys
rgds
John(shortCummins)
Re: 1/48 Airfix Messerschmitt Bf109E build
Posted: Fri Jan 23, 2015 5:17 pm
by shortCummins
Well I’ve finished putting the decals on, I still think of them as transfers, here are some photos…
… some of them are so small they can hardly be seen, I’ve circled these in red…
I’ve used decals from 3 different sets, the ‘main’ ones from the Airfix kit which included the microscopic ones, the unit insignia “R” and aircraft identification “13” from a set that I bought specifically for the drop fuel tank…
These had the transparent film over the entire sheet, I didn’t find this out until I’d soaked the first one, so they need careful cutting from the sheet getting very close to the print. They are far thicker than the Airfix ones which I must say bare no relation to the ‘transfers’ I remember from the past, their so much better now!
It was my first time using the Vallejo decal medium & fix
I want to have a go with micro-sol & micro-set, just to compare, perhaps the next kit I make I’ll give them a go.
After a trip to a larger Sainsbury’s I found is…
… so I’ve just given the kit a coat of it in preparation for the Ultimate wash
Until then
as always comments, suggestions and criticisms welcome
John (shortCummins)
Re: 1/48 Airfix Messerschmitt Bf109E build
Posted: Fri Jan 23, 2015 11:26 pm
by CJSomerset
Looking good! Did you gloss varnish before putting the decals on? That's what most people use the Klear for as it gives you a smooth surface which will reduce the risk of silvering and it's much cheaper.
Re: 1/48 Airfix Messerschmitt Bf109E build
Posted: Sat Jan 24, 2015 3:21 pm
by shortCummins
CJSomerset wrote:Looking good! Did you gloss varnish before putting the decals on? That's what most people use the Klear for as it gives you a smooth surface which will reduce the risk of silvering and it's much cheaper.
Hi CJ
I used the Vallejo gloss varnish before putting the decals on but I wasn't too impressed with the 'gloss', or rather lack of, finish. I'm guessing that the gloss is more for protection? but that it helps the decals slide as opposed to matt varnish that would have a rougher surface and prevent sliding of decals?
Anyhow I found the Klear, now called Pledge, and having now coated the kit it gives a far superior finish, in my non-experianced opinion. Having said that I didn't have any problems sliding the decals into place, apart from the seriously tiny ones and the problem there was seeing them!
thanks for your interest
rgds
John (shortCummins)
Re: 1/48 Airfix Messerschmitt Bf109E build
Posted: Sat Jan 24, 2015 9:06 pm
by AAC
I've got agree with you there about the size of some of the stencils, I think it's a problem for some (most) of us re-entry modelers, while I don't remember quite so much detail in the stickers... err... decals... when I was a kid I do remember I could at least see them! Maybe I'm just getting old
Re: 1/48 Airfix Messerschmitt Bf109E build
Posted: Sat Jan 24, 2015 9:10 pm
by shortCummins
AAC wrote:I've got agree with you there about the size of some of the stencils, I think it's a problem for some (most) of us re-entry modelers, while I don't remember quite so much detail in the stickers... err... decals... when I was a kid I do remember I could at least see them! Maybe I'm just getting old
you and me both
Re: 1/48 Airfix Messerschmitt Bf109E build
Posted: Sun Feb 01, 2015 6:18 pm
by shortCummins
I've put the matt cote on this afternoon, Vallejo which looks fantastic
I've a few little bits'n'bobs to add, propeller, landing gear, radio antenna etc. I'll nail them in place and then post the final photos
rgds
John(shortCummins)
Re: 1/48 Airfix Messerschmitt Bf109E build
Posted: Mon Feb 02, 2015 3:04 am
by mincemeat
You've done an awesome job with this. I plan on doing this kit next after I complete my Hanomag, hopefully it can be half the result yours has turned out to be!
Re: 1/48 Airfix Messerschmitt Bf109E build
Posted: Mon Feb 02, 2015 10:26 am
by CJSomerset
Can't wait to see it. And has the Wind Risen yet John?
Re: 1/48 Airfix Messerschmitt Bf109E build
Posted: Mon Feb 02, 2015 7:12 pm
by shortCummins
mincemeat wrote:You've done an awesome job with this. I plan on doing this kit next after I complete my Hanomag, hopefully it can be half the result yours has turned out to be!
funnily enough my next kit will be a Hanomag! unless my A5M1 Claude turns up, perhaps we should swap notes
Re: 1/48 Airfix Messerschmitt Bf109E build
Posted: Mon Feb 02, 2015 7:20 pm
by shortCummins
CJSomerset wrote:Can't wait to see it. And has the Wind Risen yet John?
not so far, the post office have told me that the shop in Japan must complain to them (the post office) about the wrong delivery, I can't complain because I'm the receiver not the sender
long and short of it the only way I'm likely to get a replacement is if the shop in Japan complains to the post office who then give compensation to them allowing Japan to send me a replacement I think one way or another I'm pretty much cattled for the SiG, if I'm lucky I might get the kit in a month or three




 and also to show other 'newbies' mistakes/cock-ups and success' that we can all take encouragement, or solace, from
 , she’ll thank me for thinking she’s younger in a few years! Her mum’s been 21 for as long as I can remember


 , after adding different shades of black/grey, dry brushing with aluminium and adding a couple of ‘red and black buttons’ this is the result…


 . You did a good job on it! Can't wait for more


