Page 1 of 2

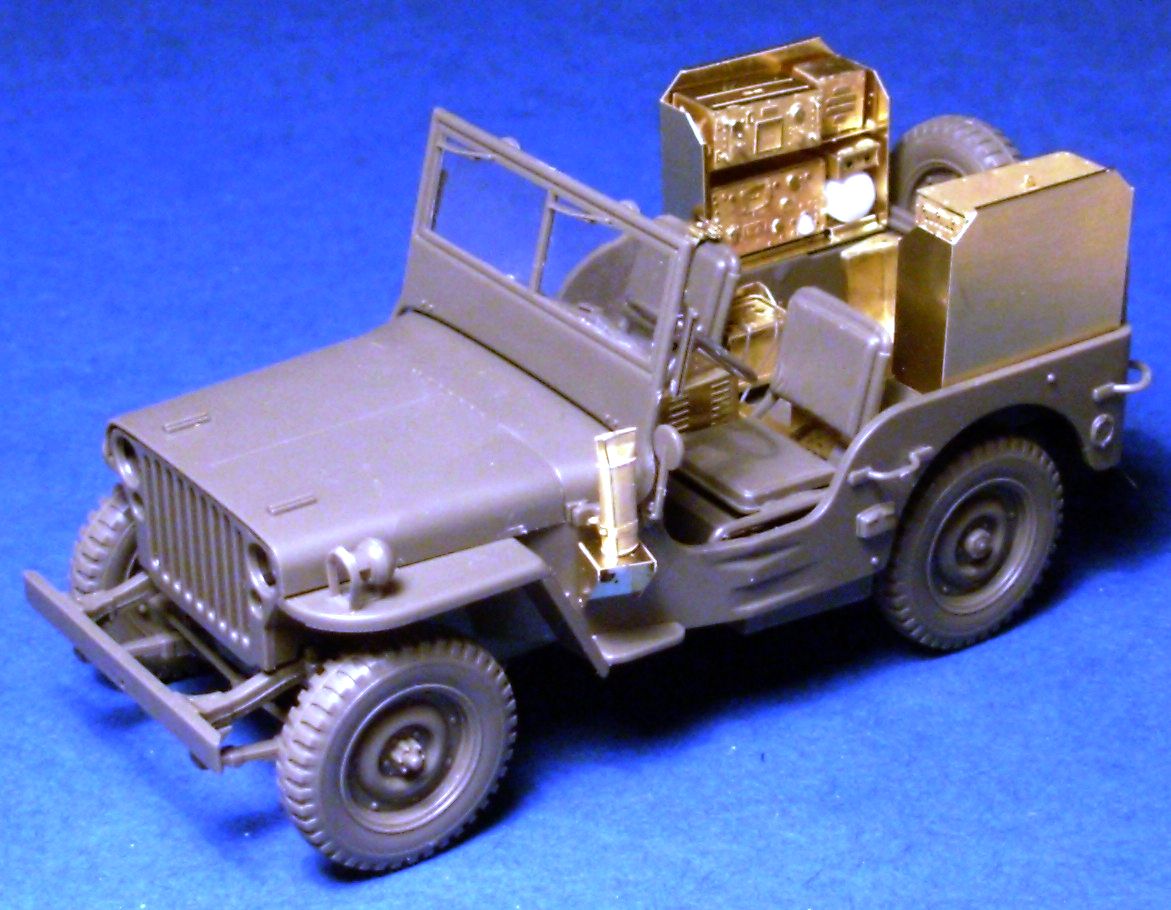
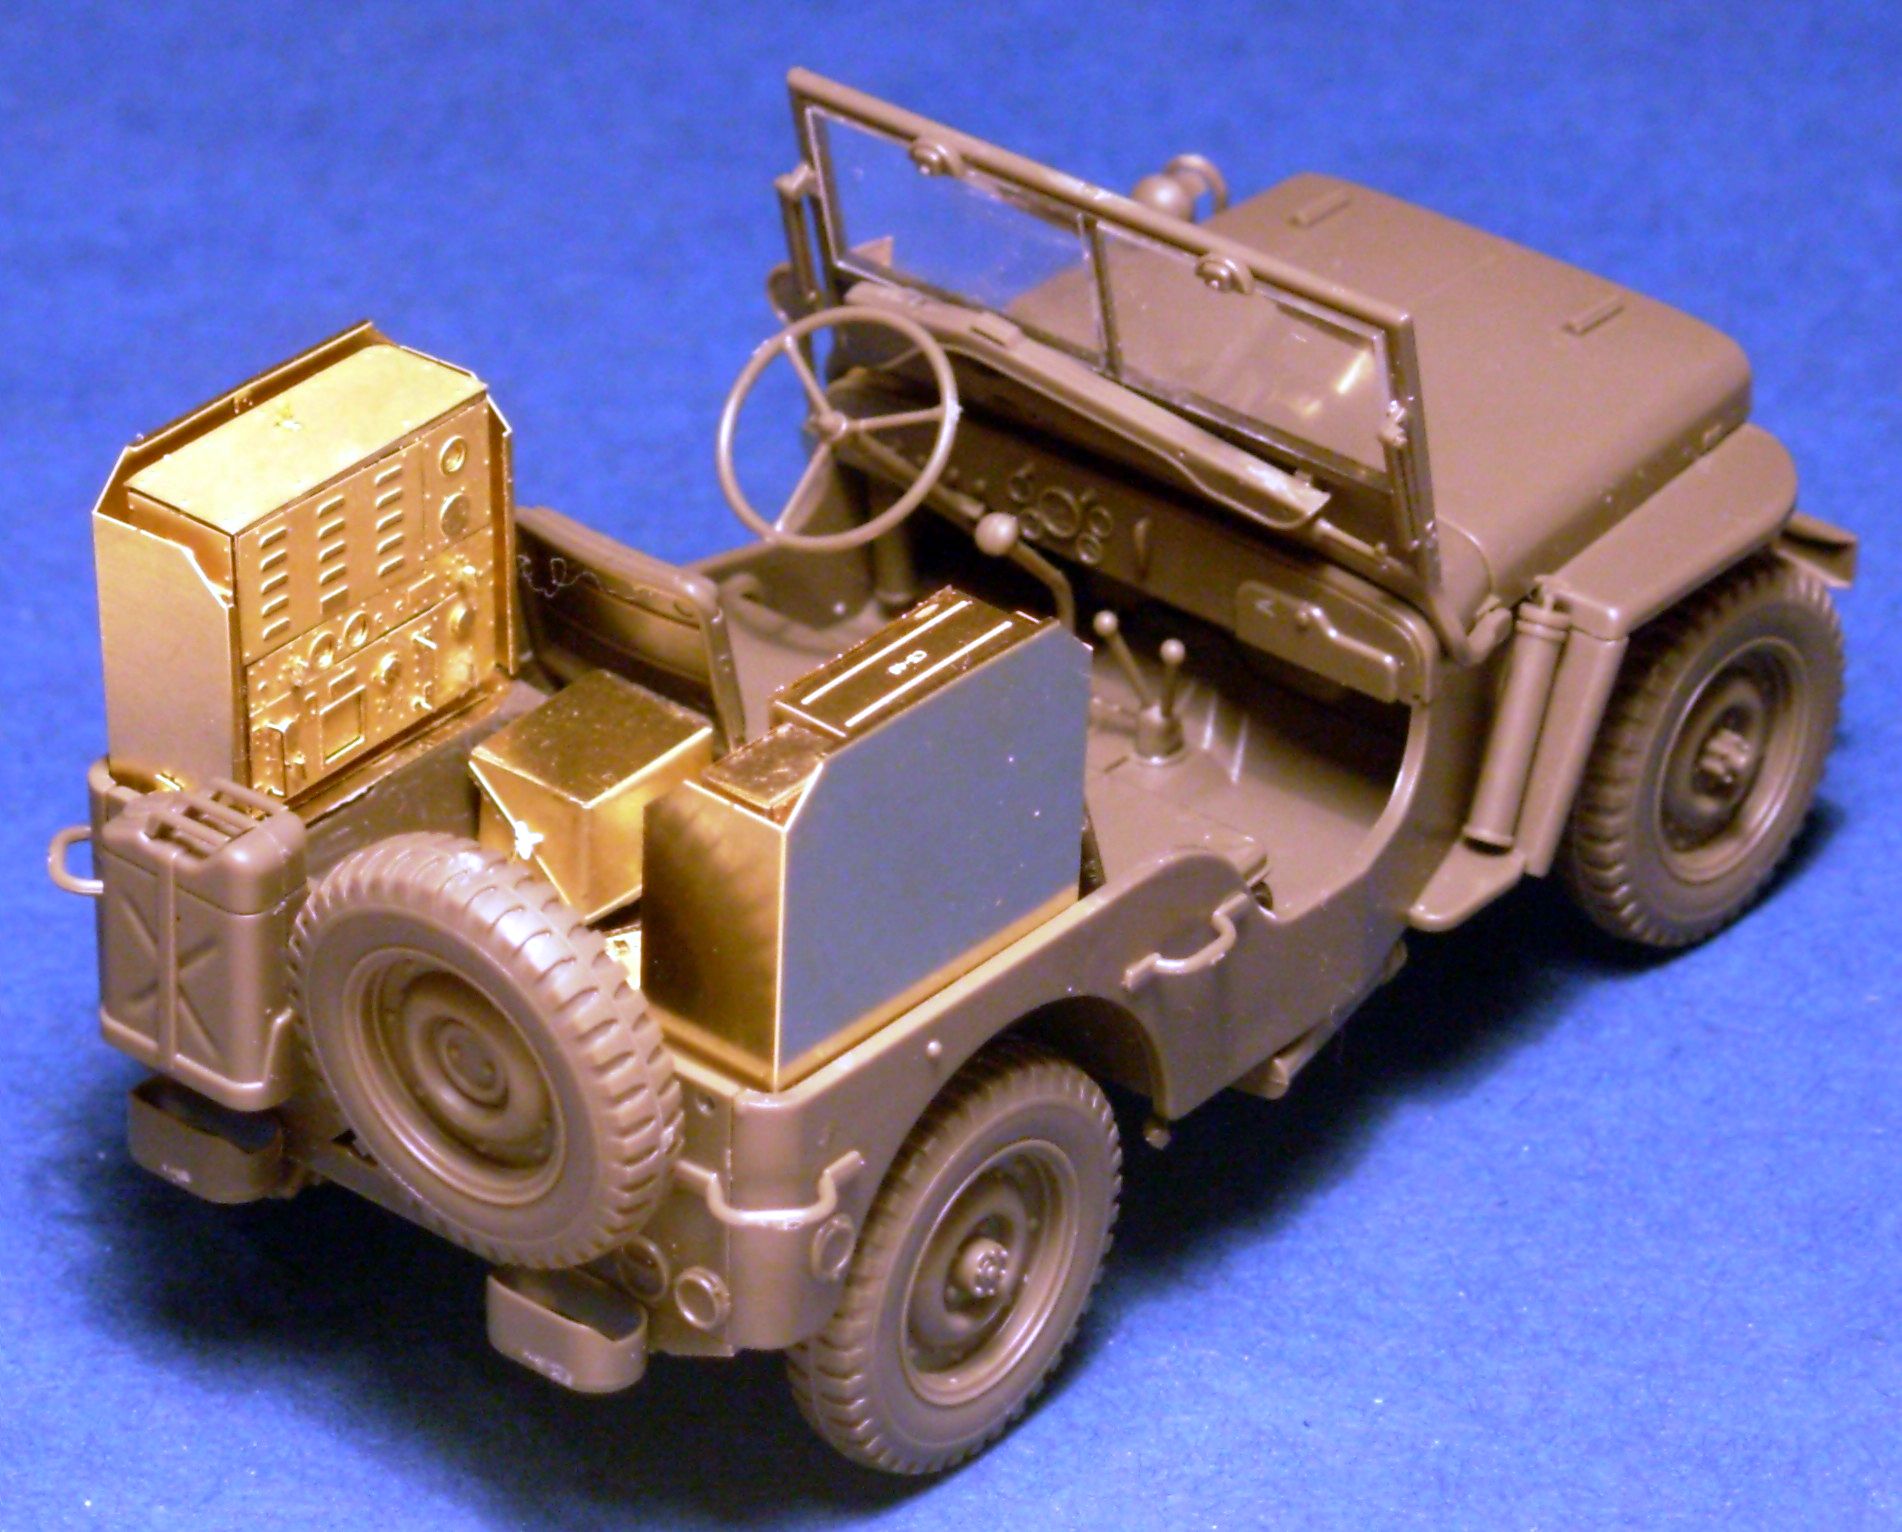
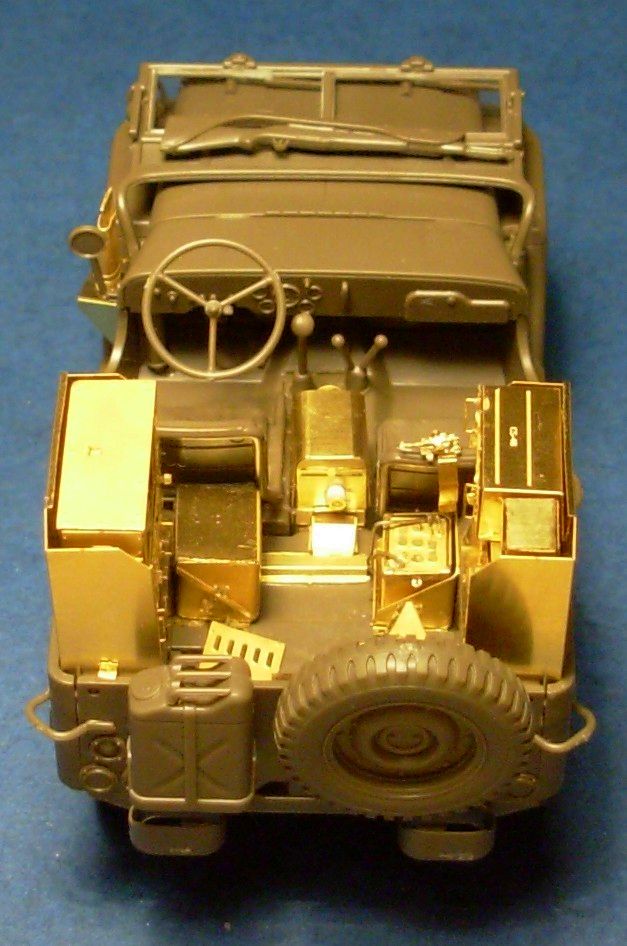
My entry for the Pacific GB. Ford GPW Follow me / Tow truck

Posted: Mon May 02, 2016 8:12 pm
by Vleugelmoer
As I have several things on the bench right now (doing a large diorama already) so that was out. I thought what can I build for this GB that will also serve that. I seceded on doing the latest reincarnation of the OLD Italeri 314. But then in the starter kit that was released in 2014.

Image

As I already stated it is a rebox / reissue of the old Italeri 314 kit. It does have a new part on the chassis sprue for the "follow me"sign on the back and only a couple of other decals, most of which I wont be using in this build.

so what's in the box.

Image

There is also a clear sprue with front and rear windows on it, but forgot to put it in frame before I took the picture, these will also not be used as I'm going aftermarket galore on this build. As the basic build institutions have just 6 steps to a completed model ;).

So I hear you ask what after market goodies is he going to be using. Well here are some of the pictures.

Image
the full Aber set of PE and the radio's from the Eduard PE set.

To add even more detail into the "cockpit" this Eduard ZOOM set for the data plates will also be used.

Image

As the decals with this kit are almost non existent and are mostly not suited for what I'm trying to achieve with this build they are also aftermarket.

Image.

The kits driver will also undergo some major plastic surgery in the upcoming month's and will include these aftermarket supplies amongst the mix.

Image.

Under the hood there will also be scratch built details added.

For now as always happy modeling and keep sticking styreen and stay tuned for the updates.

Paul

Re: My entry for the Pacific GB. Ford GPW Follow me / Tow truck

Posted: Tue May 03, 2016 12:51 am
by Richp1969
Wow that's a lot of photo etched parts. This should come out awesome.
:pop:

Sincerely,

Richard

Re: My entry for the Pacific GB. Ford GPW Follow me / Tow truck

Posted: Tue May 03, 2016 11:38 am
by Schoof
If this is gonna be your build threat please let me know so I can move it to the correct section

Re: My entry for the Pacific GB. Ford GPW Follow me / Tow truck

Posted: Tue May 03, 2016 12:33 pm
by Vleugelmoer
Sebastian, it sure is. Please move it. Thanks paul

Re: My entry for the Pacific GB. Ford GPW Follow me / Tow truck

Posted: Tue May 03, 2016 10:59 pm
by Always48
This Jeep is going to be proper pimped out. there is so much cool stuff out for 1:35 scale vehicles. im following with popcorn at the ready :pop:

Re: My entry for the Pacific GB. Ford GPW Follow me / Tow truck

Posted: Tue May 03, 2016 11:11 pm
by Vleugelmoer
I have already built this kit once before see thread http://www.intscalemodeller.com/viewtop ... 29&t=17493 for pictures of the completed kit. Now that I have honed my modeling skills again after a two decade sabbatical thought I go all out for this one and start with an OLD 1970's kit and turn it into a jaw-dropper. the completed model is the Italeri kit the Tamiya one in the same thread is on the bench at this time aswell.

As always happy modeling and keep sticking styreen.

Paul

Re: My entry for the Pacific GB. Ford GPW Follow me / Tow truck

Posted: Wed May 04, 2016 8:44 pm
by Lysus
:pop:

Re: My entry for the Pacific GB. Ford GPW Follow me / Tow truck

Posted: Mon May 09, 2016 9:40 pm
by MichaelHoffman
I'd be in PE heaven. looking forward to this build.

Re: My entry for the Pacific GB. Ford GPW Follow me / Tow truck

Posted: Mon May 09, 2016 9:51 pm
by Vleugelmoer
Had the Aber set for another build and I fudged the windshield fold :bash: . Loved the set so much for some of the other details I got another set from the bonus points collected during my retail therapy sessions at my go to shop. On closer inspection I found that most of the letters needed from the Archer set had been used so ordered up some new sets so waiting for those to arrive before starting the build.

As always happy modeling and keep sticking styrene.

Paul

Re: My entry for the Pacific GB. Ford GPW Follow me / Tow truck

Posted: Sun May 15, 2016 10:44 am
by fly1ngdutchm4n
Never seen this kit before, looks like a great build :th:
Pimp my ride kinda build... :lol:
Have fun Paul! :pop:

Re: My entry for the Pacific GB. Ford GPW Follow me / Tow truck

Posted: Sun May 15, 2016 10:29 pm
by Vleugelmoer
fly1ngdutchm4n wrote:Never seen this kit before, looks like a great build :th:
Pimp my ride kinda build... :lol:
Have fun Paul! :pop:
It's a 2014 re-box of the old 314 kit with a new part for the follow me sign on the back. I've built the kit before and it's actually a nice build for a kit dating from 1979 :jd:

The decals for the checkerboard look way thick so am going to paint them on.

Als always happy modeling and keep sticking styrene :th:


Paul

Re: My entry for the Pacific GB. Ford GPW Follow me / Tow truck

Posted: Mon Jun 13, 2016 7:50 am
by Les
1979? Wow, how is this one coming along? :jd:

Re: My entry for the Pacific GB. Ford GPW Follow me / Tow truck

Posted: Tue Jun 14, 2016 8:25 pm
by Vleugelmoer
Les wrote:1979? Wow, how is this one coming along? :jd:
I have started it but life got in the way a bit. Got rid of most of the kit detail and have started adding the PE. Stay tuned for the first pictures.

Re: My entry for the Pacific GB. Ford GPW Follow me / Tow truck

Posted: Tue Jun 14, 2016 8:52 pm
by Vleugelmoer
Image
Exterior molded kit detail removed in preparation for the Aber PE treatment.
Image
Internal visible ejecter pin marks removed
Image
Molded kit detail and ejecter pin marks removed and first bits of PE fitted along with some scratch details from evergreen strut.

Hope to get some more bench time this week so I can continue with this build.

Re: My entry for the Pacific GB. Ford GPW Follow me / Tow truck

Posted: Tue Jun 28, 2016 6:28 pm
by Vleugelmoer
Managed to get some build time in again YEAH.

The body tube has got the ABER and Eduard Photo-etch treatment. Looks pretty sweet if I say so myself.

Image
Image

Waiting on a replacement PE set from Minor Models with radio equipment and a Power Off-Take. Done some digging on the internet and found the old TM's applicable to the radio installation I'm intending to replicate.

Also started to add some scratch detail to the body sides. More to come as the Italeri kit I'm using as a canvas is lacking detail in all the places where we now expect to see them.

Image

Right body reinforcement plate made from 0.1 mm ABS Sheet. The uprights are 0,1 mm thick and only 0,4 mm wide o what fun I had making these.

Here is the end result on the left side of the body.

Image.

Thanks for stopping by and reading my gibber.

As always happy modeling and keep sticking styrene.

Paul

Re: My entry for the Pacific GB. Ford GPW Follow me / Tow truck

Posted: Thu Jun 30, 2016 9:37 pm
by Vleugelmoer
I did some googleing into follow me jeeps I found some more information and some cool pictures I would like to share with you.

Image

Follow me jeep from the 8th Airforce 381 Bomb Group 532 Squadron 7th vehicle on the inventory.

This is decripted from the unit code on the bumper. For a previous build I did a lot of research into unit identification bumper codes on US vehicles in WWII.

Image

Image

After finding out that there where also Follow Me jeep equipped with both VHF and HF radios. I thought it would be a nice touch to ad these to my build. This to create some interest into the rear of the jeep which would have been an "vast" empty space as the did not get filled up with all sorts of stowage you would normally see in the back of a "normal" operational jeep.

This lead to me doing some research into the radio equipment carried onboard USAAF jeeps in WWII. I found out that the set in the second picture was actually the AN/VRC-1 radio set. with this information I started looking into getting either resin or PE radio equipment for this build.

It seemed like an almost impossible task and I almost gave up. That was until I stumble onto something that could just be the ticket I was looking for while I was doing some retail therapy for another build. To my surprise there where the radios I was looking for for almost a month staring me right in the face :O. To my delight the where made in Europe by Minor Models in Spain and the model shop even had some in stock.

Image

After a couple of days waiting these two sets show up. Happy Chappy until I found out the radios wouldn't fit the cabinet which I was planing to use.

More google investigation was performed by myself and I found digital copies of the original TM 11 field manuals pertaining to the radio equipment. Bonus. Now I was really cooking on all boilers again. I also found some better photo's of the equipment and the radio rack cabinet.

Image
Front view.

Image
Rear view.

Image
Rear view right.

To my horror I found out that there was a second spare tuning unit fitted inside the cabinet O O and that there was also a strange box in between the driver and passenger seat in the front.

Image

That turned out to be an Electrical Power Off-Take which contained a second Dynamo to power the radio equipment. And these where not included in the original radio set I had lying on the desk. To ad to the agony even more the required radio set was out of stock at the shop where I got the previous sets. So off the manufacturer to do a direct purchase of the required set.

Image
Image
Image

It did not however contain the correct cabinet which I found out to be a CH-217. With that bit of information I called out the people of keep them rolling a WWII vehicle special interest group that has all sorts of real WWII vehicle owners as its members. And they gave some leads to where to go to get the required information.


Well that's all for now, als always happy modeling and keep sticking styrene.

Paul

Re: My entry for the Pacific GB. Ford GPW Follow me / Tow truck

Posted: Fri Jul 01, 2016 9:53 am
by Vleugelmoer
Now that I have the HF part of the radio set pretty much covered it was time to turn my attention to the VHF side of the radio equipment. It turns out that there is no off the shelf solution for this so like the correct cabinet it would have to be a scratch build job. Luckily I have found some real good reference material on the site http://www.radionerds.com in my opinion this is by far the most comprehensive site when it comes to US military radio equipment for WWII.

Image
VHF set overview sheet with dimensions of the individual components.

Big :th: for the radio enthusiasts over there for providing the content, without it I would have bee up the proverbial creek without a paddle ;). So off to my LHS in Maastricht to stock up on plasticard, rods and wires to connect all the elements of this now not so quick and easy build after all.

Moral of the story, don't start doing proper research after you have started the build. Hope to still get her done in time to take part in this GB.

Thanks for stopping by again and read my babbling about my build.

As always happy modeling and keep sticking styrene.

Paul

Re: My entry for the Pacific GB. Ford GPW Follow me / Tow truck

Posted: Sat Jul 02, 2016 7:12 am
by Lysus
I can't get enough of this one now. The detail work is impressive and educational for schmoes like me.

Glad it's still going! Though I think once you get to number matching your engine parts we'll need to have a talk...

Continued success! :cheers2:

Re: My entry for the Pacific GB. Ford GPW Follow me / Tow truck

Posted: Sat Jul 02, 2016 9:05 am
by Vleugelmoer
Lysus wrote:Glad it's still going! Though I think once you get to number matching your engine parts we'll need to have a talk...
.

I'm glad to hear that you are enjoying this build. I do think a number matching 1:35 Willys MB by Italeri that just had a off frame nut and bolt build will be doing to hot on the market... LOL

As this vehicle will be one of the change out vehicles for my longterm diorama build I won't be selling it any time soon anyway..

Thanks for stopping by and leaving a comment.

As always happy modeling and keep sticking styrene.

Paul

Re: My entry for the Pacific GB. Ford GPW Follow me / Tow truck

Posted: Sun Jul 03, 2016 6:58 pm
by Vleugelmoer
Managed to some more stuff done yesterday and earlier today so its time to share some more pictures.

After putting in the reinforcement brackets on the side walls it was time to also add the drivers and passengers side padding. As this was not in to kit (well what did you expect form a 1979 original release ;) ) It was out with placticard again and some reference pictures this is the end result so far.

Image

The passenger side.

Image

And the drivers side.

As I'm still waiting on my second radio set to arrive work on the cab came to a halt for now. With this in mind it was time to start tackling the chassis as this was also getting the Aber and Eduard Photo etch treatment.

Image

The frame as it came off the sprue. As you can see its riddled with ejector pin marks, the front and rear bumpers are solid casts and the bumperets are out of scale. Out with the razorsaw and Ultimate sanding sticks for some plastic surgery.

Image

This is how it looked after the cleaning and offending parts where removed. The front locating holes fort the front springs where filled using some Evergreen rod that was glued in place with the new Tamiya extra thin quick setting. I opted for this method as these holes will not be needed and was the easiest way to fill such a small hole.

Image

Now that the frame was prepared it was time to get the first photo etch on.

Image

The front bumper, attaching brackets and front body mounts.

Image

And the rear bumper.

The frame was test fitted on the body and found there was detail missing and that there would also be an fitting interference in the rear. Some of the detail that was missing was: The frame to body reinforcements strips where missing from the bottom of the bodyshell, The rear wheel-wells where missing the aft end on the internal wheel-well. As this part forms the bottom of the rear cabin stowage cabinets and are visible with the wheels installed it was time for some more scratch-build placticard alterations. As this was going to be a complex one peace shape I first made some templates from some thin colored cardboard.

Image
Image

The templates where then transferred to 0.2 mm plasticard and glued in place with TET and sanded back to alleviate any fit interference.

Image

This how it looked after the wheel-wells where reconstructed.

The reinforcement strips where cut out of plasticard and fitted.

Image

After these where fitted the frame was test fitted again and I discovered a fitting interference that would lead to a large gap between the body and rear bumper. This was caused by the bottom corners of the rear body square reinforcement plate hitting the tow hook sub-frame. Some X-acto chisel blade cuts soon sorted that out. Here's the after shot.

Image

That's all for now on this installment of my build thread. Thanks for stopping by and reading what I have been upto.

As always happy modeling and keep sticking styrene.

Paul

Re: My entry for the Pacific GB. Ford GPW Follow me / Tow truck

Posted: Mon Jul 04, 2016 3:31 pm
by Vleugelmoer
Thru a friend of a friend got this picture of the side view of cabinet CH-217.

Image

Now I have some good reference material it will be time to break out the plasticard. Which me luck as this will be the most visible and largest bit of scratch build items I have ever attempted. Fingers crossed.

As always happy modeling and keep sticking styrene.

Paul

Re: My entry for the Pacific GB. Ford GPW Follow me / Tow truck

Posted: Wed Jul 06, 2016 6:14 pm
by Vleugelmoer
After getting the last of the good reference pictures I have started the construction of the scratch build CH-217 cabinet to house the radio set. Here are some update pictures of the work done so far.

Image

Image

Image

Image

Image

Note: the grey plastic is 0,5 mm ABS and the white in 0,2 mm Styrene.

The mast base is turned brass from Panzer Art. The PE details up to now are scrap bits left over from other builds.

Thanks for stopping by and having a look and read what I've been up to.

As always happy modeling and keep sticking styrene.

Paul


P.s. I also finished up the under body detail work. Here are the pics.

Image

Image

This was the last bit of scratch build detail needed on the underside of the front fender. For an overview of how it will look once assembled I also added the first photo.

Re: My entry for the Pacific GB. Ford GPW Follow me / Tow truck

Posted: Wed Jul 06, 2016 8:04 pm
by OliveDrab
Great project, I really like all the research and scratch building :th:

Re: My entry for the Pacific GB. Ford GPW Follow me / Tow truck

Posted: Wed Jul 06, 2016 10:58 pm
by Vleugelmoer
OliveDrab wrote:Great project, I really like the all the research and scratch building :th:

Thanks Curt,

I try to do my best and get a model out in the end I'm proud to have in the cabinet or diorama.

It's been a enjoyable up to now, the intricate PE for the radios is proving to be a bit of a headache though.. :wall: That's what you get when you go : "that would look cool" the first week in the build... ;) :wall:

As always happy modeling and keep sticking styrene.

Paul

Re: My entry for the Pacific GB. Ford GPW Follow me / Tow truck

Posted: Thu Jul 07, 2016 1:29 pm
by Vleugelmoer
After the arrival of the second radio set from Minor Models yesterday. Got to play with some more photo etch last night.

Image

And here's a photo of the first NINE :jd: parts that got built up into the frame, and fascia's of transmitter BC 191. this took about 4 hrs of work and afterwards my eyes where indeed :crazy: and :wtf: .

Image

Image

Image

Image

I know she's not much of a looker right now with some gaps and such but as I have a second one of these radio's in another set I might be tempted to build it again if filling the gaps doesn't work the way I want it to.

But I also got a chance to test fit it into the scratch build cabinet from the day before. And YES IT DID FIT !!! :clap: :dance: :th: :thumb1:

Image

:bow:: If I say so myself This will shape up into a nice addition as I firs envisioned it :whistle:

That's all for today's installment stay tuned for more.

As always happy modeling and keep folding Photo-Etch for the next couple of day's anyway ;)

Paul

Re: My entry for the Pacific GB. Ford GPW Follow me / Tow truck

Posted: Thu Jul 07, 2016 1:54 pm
by fly1ngdutchm4n
Stuning Photo Etch work! Looks realy good and will make a great addition to this buid :thumb2:

Re: My entry for the Pacific GB. Ford GPW Follow me / Tow truck

Posted: Thu Jul 07, 2016 3:12 pm
by Vleugelmoer
Thanks Frans,

That means a lot coming from a Photo-Etch bender like yourself ;).

That diver you are working one is a work of beauty as well mate :th:

Greetz Paul

Re: My entry for the Pacific GB. Ford GPW Follow me / Tow truck

Posted: Thu Jul 14, 2016 11:06 pm
by Vleugelmoer
Since my last installment on this thread have been working on reworking the leaf-springs. In short a lot of sanding, drilling and parts clean up. The result looks like this now.

Image

Photo-Etch brackets, 0,6mm copper wire and a scratch built shackle link from 0,2mm styrene sheet for the torque reaction spring on the front left spring. Only the lock plate to build and clean up remain. That will be done once it is firmly in place on the frame. One down 3 to go...

Fore scale reference, the silver tweezers tips are of my Tamiya Photo-Etch bending tweezers. The are 1mm wide :jd:

As always happy modeling and keep sticking styrene.

Paul J

Re: My entry for the Pacific GB. Ford GPW Follow me / Tow truck

Posted: Sun Jul 17, 2016 10:26 pm
by Vleugelmoer
I was able to get some bench time in over the weekend with (non) modeling social obligations filling the agenda.

The leaf spring are now all on the chassis.

Image

The driver side

Image

The passenger side

I did have a minor mishap when I was fitting one of the leaf springs. The eyelet snapped :oops: :whistle: luckily a thin strip of 0,2 mm styrene cured the initial break. Although the thin styrene had trouble conforming to the sharp bend it did not affect the repair. Some Mr. Desolved putty filled that up nicely.

Image

Now that the major frame work was done I continued on assembling the Go-Devil engine. My helping hand managed to help me get into more trouble when it decided to make a large hole in the lower front of the crankcase :evil:. As I noticed that styrene scheet had a hard time conforming to sharp bend I opted to do the repair using some ABS sheet instead.

Image

In this side profile shot you can clearly see the initial repair. In this shot you can also see the generator and the coil which are part of the kit detail. There was also a distributorcap molded next to the coil. That was however flat and out of scale so that got the chop. The distributor will be replaced with either the Eduard (scratch build photo-etch combo) or the Aber photo-etch counterpart.

The cylinderhead als had to have some plastic surgery because thee water hose running to the radiator was cast as an integral part of the cylinderhead and looked funny. In the process of removing it some of the cylinderhead bolts got damaged, others where missing from the start so I had to address this problem at a later date anyway. The will be reinstated by some thin styrene rod.

Image

Here's a picture how it looked after the whealding of the scalpel and razor saw was over. I'm not all that concerned with the surface imperfections as the original Go-Devil engines where cast in sand I hope this will create some authenticity once its done. There will also be some photo etch and scratch built items in the affected area's.

Now that I had to wait for the repair to fully cure it was time to turn my attention to modifying the grill.

Because the Go-Devil engine was prone to overheating to hot climates the SAS and LRDRG (Long Range Reconnaissance Group) came up with some field modifications. One was fitting a large expansion tank to increase the capacity of the cooling system

Image

Here's a picture from one of my reference books showing one version of the tank.

The other field modification done to the grill to increase cooling was the removal of several slats from the grill. As I'll be depicting a jeep of the 5th airforce stationed in Papua New Guinea during the war I chose to ad both for historical reasons.

Image

How the kit part came off the sprue. Although it doesn't show in this picture, there was a faint mold line around the grill. A quick once over with a Ultimate Buffer took care of that. After which it was time to take the scalpel to it.

Image

As the tanks where field modifications using oil cans and other material that where at hand I took some artistic licence in the size and placement of the tanks on the model.

Image

The tank itself was made from 2 mm styrene rod as per the Aber instructions. I added some left over caps from an old PE-set. The straps where from the Aber photo etch detailing set.

That is all for now. I don't know when the next installment will be because I'll be helping a friend put in a new bathroom in his house over the next couple of weeks so bench time could be limited.

As always happy modeling and keep sticking styrene.

Paul J

Re: My entry for the Pacific GB. Ford GPW Follow me / Tow truck

Posted: Sat Jul 23, 2016 3:08 pm
by Vleugelmoer
Hi all,

After a week of construction work on my apartment and on a friends new bathroom stil managed to get some build time in on the bench :banana:

So after the grill it was time to also give the radiator some attention now that is was going to be more exposed. I also had to modify the frame a bit so I could get the copper wire through at the desired places.

Image

Fitted some Plus Model radiator mesh to the front side of the radiator to give it a bit more profile to aid in the chipping and dry brushing later on.

The rear got the same mesh added to it and also some Eduard photo etch .

Image

The kit part already had some detail on there but decided an upgrade would look even better. I did however have to fill in the gap that would have been created by just adding the rear photo etch. I used some styrene sheet to fill the gaps.

Image

This is how it looked when I was done with the big bits. In the Aber photo etch set there was also a radiator cap so put that on for good measure.

Image

Only some small and fragile parts remain to put on, but those will be done just before it is primed, painted and installed.

Whilst I was doing all this the missing photo etch parts for the radio set showed up on my doorstep from Minor Models in Spain.

Image

With most of the required radio parts now in hand it was time to get my photo etch on.

I started with the construction on the two battery boxes, the batteries contained in the boxes powered both VHF and HF radio sets when the engine was not running. These boxes are placed behind the driver and passenger seats and just under the radio cabinet. As I wanted these boxes to have a more permanent join I had an attempt at soldering photo etch for the first time in my modeling career. After I got the basics down and was familiar with the type of tin and flux it was quite an enjoyable experience.

Image

The bottom of the first battery box

Image

After the lids and attachment brackets where added

After this it was time to start on the 3 absolute minute parts that make up the latches and my o my where they ever fiddly

Image

The latch handels where the largest of the three parts at 3 mm only.

After a lot of trial and perseverance I managed to get one on. The silver tips are from my Tamiya photo etch tweezers and are 1mm wide.

Image

And a detail shot of the latch itself.

Image

Due to the high humidity the CA got its distinctive white residue so I decided to leave the latches be for now.

I made the junction box for the power cables and it was time for a test fit to see where all the components are supposed to go.

Image

It all fitted without a hitch so it was time to start on the fourth large sub assembly being the power off take. This is a second generator placed between the driver and passenger seats. This was added because the standard generator fitted under the hood could not supply the electrical power needed to run the radio's.

In the top cover there are air cooling louvers that had to be formed, after a quick question in Friday's live hangout got some tips on how this could be done. I used the tips of my Tamiya decal tweezers to push the out on a peace of packing foam.

Image

It was quite a challenge to get them all equal and even I didn't quite succeed in doing that. But due to the location of this item i'm presuming it would have endured it's fair share of abuse so I'm happy with the outcome

Image

This how the power off take looks now still parts to go on but it gives a good enough idea for another test fit photo.

Image

Image

That's all for now, thanks for stopping by and having a look

As always happy modeling and keep sticking styrene and photo etch.

Paul J

Re: My entry for the Pacific GB. Ford GPW Follow me / Tow truck

Posted: Wed Aug 17, 2016 1:48 pm
by Vleugelmoer
Due to some non modeling related activities and issues it's been a while since I had time, mojo or interest in modeling all together.

But now that is all behind me for now it was time to put my nose back to the grind stone and try to make the deadline for this build.

So what have I done since the last installment :scratch::

O ya, I put the finishing touches on the two battery boxes and power off take, put the last bits of photo etch on the inside on the body tub.

Then I started on the wheels, As the kit parts had mayor casting issues I when't on the look out for some resin Aftermarket that was in stock and not to expensive. All I could find was either for the Tamiya or newer Bronco Jeep :wall: no wonder considering the initial issue of this kit was back in 1979 :jd:
The kit wheels had such bad wheel hubs and low detail on them I did not wan't to fit those as I am super detailing this build by now. So after a bit of help from scalemates found the best option was the Wheel Set from SKP Models (made for bronco). And yes I had to go direct to get them.

Image

For good mesure I also threw in some light lenses from them because on closer inspection the kit cast ones where not all that good.

Because the wheel where intended for a model of different manufacturer I had to o some plastic / resin surgery to het them to work on by Italeri

Image

The kit part and its resin replacement, This was the most presentable of the wheels that came with the kit :evil:

Image

And a shot of the inside of the wheels, you can see that the attachment methode was quite different. on with the thinking cap on how I was going to tackle this issue.

Here's what I came up with. although not totally correct but it's a work around that will give me a sturdy and solid bond.

Image

I drilled out the wheel part from the tire

Image

Drilled a hole in the resin part to fit the end of the kit axel

Image

Modified the kit parts, here you see the axel locator on the top, the brake drum bottom left and inner ring from the combat split rim. Even though there was no bulge on the inside of the combat split rim wheel I needed it for locating purposes. It would also make for a stronger bonding joint.

Image

Fitted the kit wheel locator and brake drum. This is how it was supposed to look. Because of the small bonding area I added the ring I have made.

Image

To fill the void I used some Tamiya quick setting epoxy putty.

Image

This stuff to be exact as Tamiya do a couple of versions of it ;)

Image

When the epoxy putty was still soft I pressed the ring into it and made it to conform the resin wheel surface. As a finishing touch and to fill the small gaps that where there I gave the modification a lick of Tamiya extra thin.

Test fitted it and it fit like a gloves made to measure :banana: :bow:: One down three to go.

Image

The wheels on the left are the front wheels, on the right the rears

Image

Al modified and ready for paint.

Image

Also made the bench mount that came with the incorrect radio cabinet from Minor

Now the interior was sorted out (up to the dashboard) It was time to turn the my attention to the outside of the body

Image

The mayor bits of photo etch fitted to the rear also re-scribed the Panel lines. It was my frist time doing this with the Tamiya Scriber II os it might look a bit iffy ;)

Image

I scratch built some webbing loops from 0,3 mm copper wire but they where way off scale and looked wonky after I had fitted them and had a good look. So after a bit a searching in the instructions of both the Aber and Eduard PE sets I have for Jeeps found that there where a couple 6 included after all :wtf: :crazy: Gotta love PE instruction sheet right :lol:

Image

Those looked a lot better, but it was a good thing a had a couple of Aber PE sets... Because of the size some when't flying, others got twisted, mangled or destroyed when making the up whit my Tamiya Photo etch tweezers.

Now the rear end was done and dusted time to do the sides. The right side was easy enough as it was only getting the reflector on the rear and the windshield reinforcement plate. The left was a different ball game as the most visible vehicle tools are stored here (Axe and Shovel)

Image

Here it is all fitted, the sheath for the axe was a workable type and was a bit of a pain to construct and formed. The three loops for the webbing straps where now less tricky but ended up using 10 out of the twelve I had at my disposal.

Image

Rear side view of the side detail added.

The front fender also got some PE bolt head that hold the radiator grill

Image

Now that the sides where done it was time to get back to the engine compartment. As the grill, radiator, inner fenders, battery and engine block has or will be getting the PE treatment the firewall itself was a bit baren of detail. Luckily I have two great reference book at my disposal, Wartime Jeeps by Graham Scott and the Brooklands Books reprint of the original TM9 manuals. In there I found out that on the firewall where fitted a horn / claxon, oil can and fuel strainer. In the PE sets there where a manifold for the fuel strainer, the brackets for the horn and its amplifier. At least I had some stuff to help me out.

I started with the claxon. I got some spare PE disks of several sizes and soldered het together to make up the body. The better looking bracket and amplifier where formed and fitted. That was easy enough, It took me half a night of modeling to get it done but it looks absolute mint I you where to ask me...

Image

On the left is the Tamiya kit part the I used as a scale reference piece.

Image

and a second shot from above

For the fuel strainer I had the Tamiya firewall and the photo's to go by so here's what I have cobbled up for my version of it.

Image

Front view, the plack bits a 1 mm increments from a transparent ruller for scale reference :crazy:

Image

And the top view for good measure.

To cool down after the absolute exhausting and frustrating piece I made the little oil can that was fitted next to the horn.

Image

The ready made Oil Can from green sprue and a bit of evergreen rod 0,88 mm and the bits a PE fret that will make up the attachment bracket.

Now that these bits where made I fitted them to the firewall

Image

Front view

Image

And the a top view, the black lines on the top of the fenders are pencil marks to make sure the stuff fitted under the hood ;)

Image
Image

Two of the reference photo's I used for the under bonnet details

Well that's all for now I guise. I do hope I can get the build done by the closing date of the GB. If not I have a month to spare before starting the F-4 Phantom SIG together with Guy Mac

Thanks for stopping by and having a look at my latest modeling efforts. As always happy modeling and keep sticking styrene.

Paul J (The Other One)

Re: My entry for the Pacific GB. Ford GPW Follow me / Tow truck

Posted: Wed Aug 17, 2016 4:51 pm
by Twokidsnosleep
Loving the re-build , resin and modification of parts :thumb2:
Looking great so far!!!

Re: My entry for the Pacific GB. Ford GPW Follow me / Tow truck

Posted: Wed Aug 17, 2016 5:25 pm
by Vleugelmoer
Twokidsnosleep wrote:Loving the re-build , resin and modification of parts :thumb2:
Looking great so far!!!
:cheers2: Scott, love the build to so far even though it is time consuming and frustrating at times :wall:. I detailing the engine block today and all was going smooth until my fan belt staple (dental floss) started achting up :pistols: :bash:. Time for a Image, a Image and some more Image to keep the closing date stress levels down on my end...

Stay tuned for more to come.

As alsways happy modeling and keep sticking styrene

Paul J (The Other One)

Re: My entry for the Pacific GB. Ford GPW Follow me / Tow truck

Posted: Mon Aug 22, 2016 10:15 pm
by fly1ngdutchm4n
That's some awesome work done!
Love it!

Re: My entry for the Pacific GB. Ford GPW Follow me / Tow truck

Posted: Tue Aug 23, 2016 7:20 pm
by TommyKillander
So much eye-candy :banana:

Great job done enhancing this kit, it looks amazing! :thumb2:

:cheers2:
Tommy

Re: My entry for the Pacific GB. Ford GPW Follow me / Tow truck

Posted: Tue Aug 23, 2016 9:58 pm
by Vleugelmoer
Thanks Frans and Tommy, the radio's are all done. Found out that the cabinet was about 3 mm off in hight and 1,5 mm in width after seeing some good reference photos via a historical military car club. So to add to the stress I'm rebuilding it.

Stay tuned for more before I can do my final reveal

As always happy modeling and keep sticking styrene.

Paul J (The Other One)

Re: My entry for the Pacific GB. Ford GPW Follow me / Tow truck

Posted: Wed Aug 24, 2016 2:40 pm
by Vleugelmoer
now that the small details to the firewall it was time to start on correcting and detailing the engine. On the correction list where: re-positioning the engine oil tank, addition on the water inlet pipe and fitting the starter motor which was included in the kit but was fitted to the right inner fender. I also had to reinstate some of the cylinderhead bolts that got damaged when I removed the water outet pipe. I found out that not all te bolts where originally cast into the head so added those for good measure.

Image
Here's the technical drawing showing the fastening sequence of the 15 bolts nog the 10 that where cast.

I opted to do this with o,4 mm styrene rod. I first drilled pilot holes, the styrene rod was glued in place using TET Quick.

Image
Shot of the cylinderhead showing the styrene rods.

Those where cut down and sanded to match the length of the cast counterparts.

Image.

The re-positioning of the oil tank was easy enough as the location hole had to be moved up 1 mm. So a new hole was drilled and the old one filled with styrene rod. The starter motor took some more work but after a good 15 minutes that was also fitted and reshaped to fit the kit contours. For the water inlet pipe a hole was drilled on the side of the water pump to accept the styrene rod. Now it was time to start detailing the engine. That included the addition of a distributor a indiction pipe bracket and a shape correct fan. These parts where all included in the Aber PE set so no troubles there. I also added some copper wire for the coil and sparkplug wires. The oil tank got a scratch built bracket from more styrene rod and a small copper wire was used for the oil line running to the crankcase. Some dentalfloss was used to replicate the fan belt. Here's how it looked after I was done.

Image
Image
Image
Image
For the location of the induction pipe bracket the induction pipe and air cleaner filter where temporarily fitted using white glue.

After that is wat time to dry fit the engine, some minor sanding was required for it to fit correctly.

while the engine was in I also dry fitted the kit battery. That looked weird and very small compared with the reference pictures :scratch:: . Luckily my reprinted TM9 handbook contained the dimensions of the battery. After some number crunching I found out that the battery supplied was 48th scale and not 35th like the rest of the kit.

Image
The figures from TM9

Image
The Italeri (gray) and Tamiya (green) kit batteries. The Tamiya one is the correct size.

Now I had to make a decision, do I go with the off scale battery or do I use a different one. The Tamiya battery is intended for that kit which is destined to go into a long term diorama project that is on hold for now so that was not an option. Both the Aber and Eduard PE sets contained detailing parts for the battery so scratch building one was an alternative. Another option was to use the entire PE battery that came with one of the radio sets I have for this build. As there is going to be a large amount of PE in this as it is what could another 5 bits hurt right :whistle: . So back to folding, forming and soldering PE it was. I also wanted to add the battery terminals for good measure. This only meant that the clamps and battery had to be drilled, something I haven't done before. So after some perseverance and swear words later I managed to get it done.

Image
The clamps for the battery leads

Image
And the battery after it was done.

The clamps got soldered to some copper wire and the leads where also done.
Image

Now that I had a scale correct battery it was time for a dry fit. The battery tray in the right fender was to small for the 35th scale one. But due to my relocation of the starter motor to the engineblock I had enough relestate to work with to allow for a rework. So out with the razorsaw and the scalpels for some plastic surgery. Rework parts where made of some ABS and styrene sheet. Some CA glue and TET to bond it all together and hé presto here's how it looked when it was all done.

Image

Time for jet another dry fit of the parts under the hood.
Image

That looked a lot more like the pictures :banana: :cheers2:

Time to start on the Radio's that where going to be housed in the large cabinet I had made to fit on the back.
So back to folding and soldering PE and scratch building again. After two long night this is what I have made.

Image

The HF radio's where all contained in the PE sets from Minor Models. The VHF radio's where not however. I knew this already so I had managed to get the digital copies of the TM11 handbooks needed. After a couple of hours I had them on the desk.

Image

The Transceiver and Dinomotor for the VHF made from 0,5 mm sheet styrene and rod.

Time for a dry fit in the cabinet I had scratch built earlier. The radio's fitted but looked a bit crowded. After seeing some more pictures of the real thing I noticed that the cabinet was a bit on the small size. This was confirmed after I got a reply from a member of Keep Them Rolling (A Dutch Organisation for owners of WWII vehicles) got me the dimensions and a ton of detail photo's of his Radio Jeep.

As this build had spun into a full detail build anyway I redid the cabinet in a night.

Image
Image
Image
Now that I had good reference pictures at my disposal I could also add the finer details to the top of the cabinet.

Image
The size difference between the old (forward) and new (rear) cabinets. 0,5 mm in depth and 2 mm in height. It was only a small adjustment but it made all the difference.

Now back to modeling only the hood and windframe remain before I can start getting paint down. With a bit of luck I can even get it done in time :banana:

Thanks for stopping by and having a look again, as always happy modeling and keep sticking styrene.

Paul J (The Other One)

Re: My entry for the Pacific GB. Ford GPW Follow me / Tow truck

Posted: Wed Aug 24, 2016 3:50 pm
by Twokidsnosleep
Wow, keeps getting better and better
Great details :thumb2:

Re: My entry for the Pacific GB. Ford GPW Follow me / Tow truck

Posted: Wed Aug 24, 2016 6:17 pm
by Vleugelmoer
:cheers2: Scott, it'll be a stunner one's it done. now lets only hope I don't fudge the paintjob coming up ;)

Re: My entry for the Pacific GB. Ford GPW Follow me / Tow truck

Posted: Wed Aug 24, 2016 6:58 pm
by Lysus
Between you and Scott making perfectly detailed vehicles I really need to open my 1/12th scale key shop for the little figures to use in the ignition.

Truly fantastic work, Other Paul. :bow::

Re: My entry for the Pacific GB. Ford GPW Follow me / Tow truck

Posted: Wed Aug 24, 2016 7:12 pm
by Vleugelmoer
:cheers2: Jason, now if I where only building 1:12 I would definitely get me a set of keys ;)..

Just finished the last of the under hood details on to the hood clamps, windshield and dash.. I can almost start to smell the paint already. Like I just said to Scott now let's hope I don't fudge the paint job now the pressure is on to get it done.

Re: My entry for the Pacific GB. Ford GPW Follow me / Tow truck

Posted: Wed Aug 24, 2016 7:19 pm
by Lysus
I know what you mean about anxiety, i.e. not screwing it up at the last minute.

Image

Re: My entry for the Pacific GB. Ford GPW Follow me / Tow truck

Posted: Tue Aug 30, 2016 7:41 pm
by Vleugelmoer
After almost a week since my last post in this thread and the closing date just around the corner it has been a mad dash to the finnishline to get this build done in time.

Luckily I managed to get a bunch of bench time in since my last post I have been able to get a lot done and reducing the ToDo List tremendously :banana: . After the mayor components under the hood it was time for some of the smaller detail parts on and under the hood itself. First I located the hood and windshield hold down latchess.

Image

After a closer inspection of some reference photo's the windshield hold down latches where out of place. Time to get the scalpel out and ping them off and start over. My crude hand at rescribing the raised panel line in the middle of the hood left me a bit disheartened and on the verge of mojo loss on this build. This could be down to raising temperatures, temper and closing date stress. I always found great stress relief by doing modeling and there is nothing better than doing a bit of scratch build details to calm me down. Due to some vague PE instructions and I had a bit of a dilemma on my hands. Most of the required part where included in both the Aber and Eduard PE sets that I had gotten for this build. However the instructions for the grease gun looked nothing like the one I had seen in the pictures also its orientation in the bracket was reversed :scratch:: gotta love PE instructions right.
As I had no clear picture of the bracket for the grease gun in my reference material It was time to go to my last resort option Google Pictures in the hope to find something usable. My luck hadn't run out quite just yet. After about a good 30 minutes I found A combined photo of the grease bun both in and out of its bracket :clap: :dance: :cheers2: . With this new photo in hand I was able to to make a more accurate representation of the grease gun. As it was going to be a scratch build it was out with the styrene rod, copper wire and a variety of pliers. After a good 1,5 hrs. this is how it looked.

Image

As I had already rescribed the panel line on top, I thought it would be a nice touch to also include the reverse side of the crimped bead. For this I used a peace of 0,2 mm copper wire and some thin CA glue.

Now that the small details where also included unnder the hood it was time to revisit the cab. That was still missing a dashboard. Both the Aber and Eduard PE set included part for this. The Aber included workable glove box and windshield clamps. The Eduard was A bit crude and lacking some of the finer detail that had already gone into other parts of this build. So Aber it was, because both the Aber and Eduard PE sets where intended to be used on the Tamiya Willys MB. some finessing had to be done to the PE parts to make them fit the Italeri classic. After a lot of measuring, dry fitting, sanding and fileling there was not much room left to get all the PE parts for the workable glove box situated. The kit part was binned as it was lacking detail and crisp casting. Now I was stuck between a rock and a hard place. The nice dashboard would not work and the the one that might was lacking detail.... :scratch:: ??!!

I had not used the nice switches and hooks out of the Aber set so I opted to do a kitbash semi scratch built dashboard instead. after a lot of swearing, frustration and lets not forget determination here's what I have cobbled together.

Image
Image
Image

Not to shabby if I say so myself ;). Here's what I have done; made a back plate out of 0,5 mm white styrene sheet, fitted the Eduard basic dashboard PE and instrument film to it. The white styrene also showed off the instruments better than the grey styrene of the kit. the crude windshield securing hooks where removed from the Eduard dash. The scale correct glove box door out of the Aber set was fitted along with the windshield hooks from the same set. The switches in the Eduard dash got 0,4 mm pilot holes drilled to get the same size styrene rod inserted and secured with TET. the nice Aber switch and knob head got fitted to the ends of the styrene rod after they got snipped and sanded down to the correct length. That parking brake handle from Euard got fitted after the Aber one went flying off when I was forming it.

The tweezer end are from my Tamiya PE tweezers and are 1,5 mm in thickness for scale reference.

Now that the cab was full of detail I thought I would be a shame to hide it all bu putting up the roof. Nothing wrong with that, but now I was out of an option to attach the Follow Me Sign included in the kit. :scratch:: how was I going to solve this. The Aber set came to the rescue, it included parts to make a fully workable roof hoops :banana: . Some 1 mm copper wire, a bit of bending, some PE fret scraps and the trailer light from the left over bits from the Italeri 314 kit I still had lying around, soma sanding of the lights and the kits follow me sign and here's what you get.

Image
Image
Looks convincing enough to be a field modification if you ask me :whistle:

As the 5th Airforce was stationed in the pacific almost from the start of the campaign and Aber also included PE parts for an open windshield I thought that would be a nice little feature. However due to get there itus and a closing date looming I forgot to take soem pictures of its construction. All will be visible in my final reveal promice :th: . Now that all the mayor subassemblies where done it was time to add the last fragile internal and external PE. Of course some some of the earlier placed PE came of in several places :bash: :wall: . That was all reattached and it was time to give this build some color and bring it to life.

Image

This will be my last official post in this build thread until I do My fanal reveal With a bit of luck I can get it in before the midnight deadline tomorrow.

Thanks for stopping by again and having a look. As always happy modeling and keep sticking styrene.

Paul J (The Other One)

Re: My entry for the Pacific GB. Ford GPW Follow me / Tow truck

Posted: Wed Aug 31, 2016 6:49 am
by Lysus
Duuuude.

Dude.

The detail work you are doing...a real work of passion here. I feel like you've really turned a regular jeep into something special. Knuckle down, clock is ticking!

Re: My entry for the Pacific GB. Ford GPW Follow me / Tow truck

Posted: Thu Sep 01, 2016 1:33 pm
by Vleugelmoer
Okey, a bit of a change to my last post. Huh, what, why, how come and similar questions I hear you ask about there not being a final reveal post for this build.

Answer is simple, because at around 23:50 GMT ( 00:50 CET) my build still looked like this.....

Image

So needles to say I didn't make the deadline for this GB.

It was a big ask after missing bench time due to life in general. Yesterday was not much different in that respect. Even though an early start was made 06:45 a couple of appointments, delays and technical difficulties meant uninterrupted bench time started at 17:00. :wall: :jd: :nena: :scratch:: :doh: :roll: :scratch:: :whistle: . It also doesn't help I put a lot of detail into the build which is all fine and dandy. However all that detail would be worthless if it got lost in a basic and rudimentary paint job. The airbrush is fine for doing large area and general depth details to the paint scheme. However my airbrush skills aren't at that level that I can do 0,75 mm and smaller switch heads and other fine details with it. So that meant it was out with the range of fine detail brushes and a wet pallet.

After a good couple of stiff drinks I wanted to see how long it was going to take to get this build completed with a paint job matching the detail work gone into the build. In other words I changed the rules for myself now that the official GB was over. I am going to do a close to non stop build until Saturday morning.

Here are the first shots of the paint job so far

Image

Basic coat was done in a farriery of greens, a yellow, black and light sea gray. The colors where applied over Ultimate white and black primer. Here's how it all looked at around 19:00 CET.

Image
Image

More work has been completed but not photographed yet. Stay tuned for more.

Re: My entry for the Pacific GB. Ford GPW Follow me / Tow truck

Posted: Tue Sep 06, 2016 1:36 pm
by ElCapitan
Heartbreaking you missed the deadline! On the plus-side, the detail you've been doing looks amazing, and I've been following with interest. One of the few threads that I've subscribed to so far! At least you'll have a final product that you can be proud of :th:

Re: My entry for the Pacific GB. Ford GPW Follow me / Tow truck

Posted: Tue Sep 06, 2016 1:59 pm
by Vleugelmoer
ElCapitan wrote:Heartbreaking you missed the deadline! On the plus-side, the detail you've been doing looks amazing, and I've been following with interest. One of the few threads that I've subscribed to so far! At least you'll have a final product that you can be proud of :th:
It was a bit disheartening. Thanks for sticking it out with me. Have managed to get a lot done last week and over the weekend. Enough so that I will be able to write an update later on today. So stay tuned for more.

Re: My entry for the Pacific GB. Ford GPW Follow me / Tow truck

Posted: Tue Sep 06, 2016 3:41 pm
by Vleugelmoer
As promised here an update with photo's:

Oké just because I didn't make the deadline doesn't mean this build has gotten shelved.

Here are some overview and detail photo's to give you an impression of the paint job so far.

Image
Image
Image

The engine compartment completed.

Image
Image

The hood (still some touch up and decals to do.

Image
Image
Image
Instrument panel before clean up.

Image
Image
Instrument panel cleaned up and first parts of the comms set fitted.

Image
Bottom all nice and dirtied up.

Image
Image
Image
Image

An overview of the entire paint job so far.

Now that the vehicle part is done it is time to start on the radio cabinet and its associated radio equipment. I have also in the meantime located an almost complete copy of TM-11-2715. It is complete enough so that I can even wire it up to add even more visual intrest.

Thanks for stopping by and having a look again.

As always happy modeling and keep sticking styrene.

Paul J (The Other One)

Re: My entry for the Pacific GB. Ford GPW Follow me / Tow truck

Posted: Wed Sep 07, 2016 2:22 pm
by ElCapitan
Looks great! :th: Love the dirt on the underside, so realistic looking!

Re: My entry for the Pacific GB. Ford GPW Follow me / Tow truck

Posted: Wed Sep 07, 2016 4:43 pm
by TommyKillander
It looks fantastic!

:cheers2:
Tommy