Page 1 of 1
Airfix 1/72 A6M2b Zero
Posted: Mon May 16, 2016 4:50 pm
by SkyPainter303
I'll be building the new-tool, Airfix 1/72 Zero. For this kit, I am going to search for a more accurate, aftermarket decal set.
 zero-1 by Michael Keogh, on Flickr
 zero005 by Michael Keogh, on Flickr
 zero003_Page_1 by Michael Keogh, on Flickr
 zero003_Page_2 by Michael Keogh, on Flickr
 zero003_Page_3 by Michael Keogh, on Flickr
 zero003_Page_4 by Michael Keogh, on Flickr
 zero004 by Michael Keogh, on Flickr
Re: Airfix 1/72 A6M2b Zero
Posted: Mon May 30, 2016 11:59 am
by pourquoi61
Looks like a nice quick fun build, have fun mate.

Re: Airfix 1/72 A6M2b Zero
Posted: Tue May 31, 2016 2:19 am
by Lysus
No such thing as too many Zeroes.* Are you gonna do the saw-tooth pattern?
*Exception: 1941
Re: Airfix 1/72 A6M2b Zero
Posted: Tue May 31, 2016 5:54 am
by Sturm
I have the same model but the Starter set one. Haven't finished it but it has gone together very well so far. You will enjoy this one

Re: Airfix 1/72 A6M2b Zero
Posted: Tue May 31, 2016 11:02 am
by Cymru
Re: Airfix 1/72 A6M2b Zero
Posted: Wed Jun 01, 2016 2:15 am
by SkyPainter303
I am having a hard time finding decals that are in-stock and don't cost more than the kit price.
Re: Airfix 1/72 A6M2b Zero
Posted: Wed Jun 01, 2016 2:18 am
by SkyPainter303
 zero-6 by Michael Keogh, on Flickr
I just started putting the cockpit together this evening. The new Airfix plastic is well molded, but a bit on the soft side. The control stick is quite fragile.
Re: Airfix 1/72 A6M2b Zero
Posted: Wed Jun 01, 2016 4:24 am
by SkyPainter303
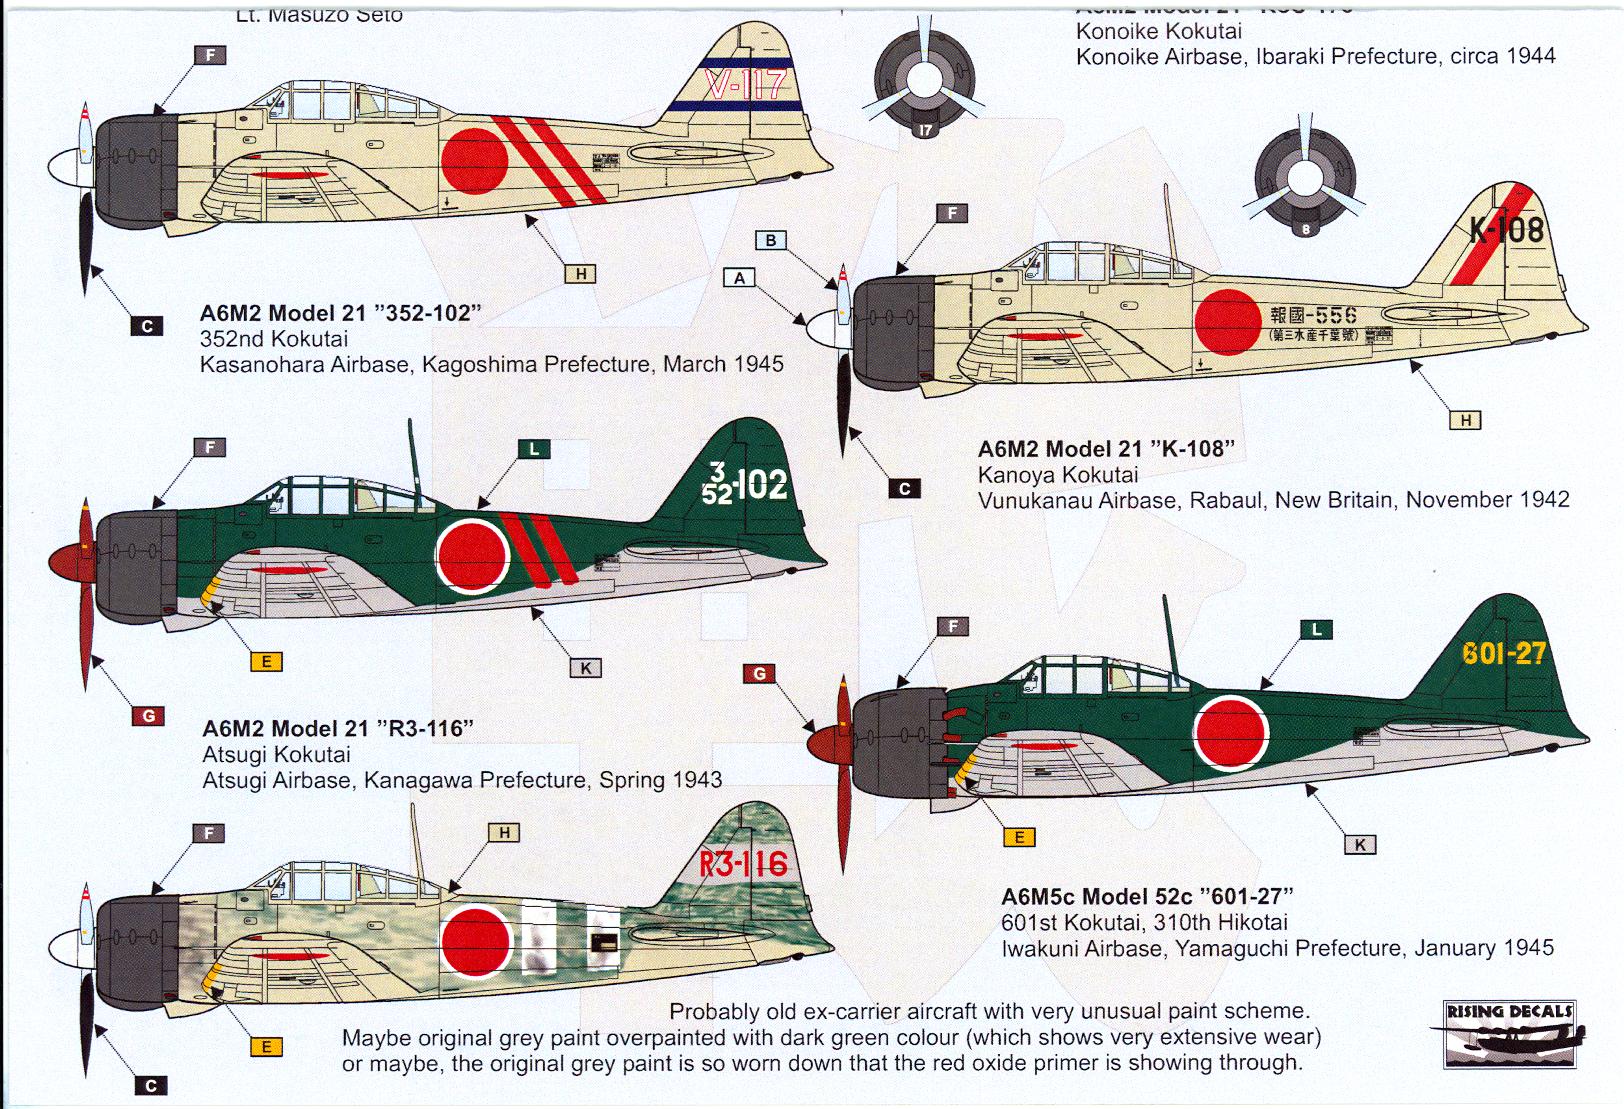
I will order this Rising Decals set to depict a Nakajima built Zero.
http://www.ebay.com/itm/Rising-Decals-1 ... 1e99a2bf8f
Re: Airfix 1/72 A6M2b Zero
Posted: Thu Jun 02, 2016 2:52 am
by SkyPainter303
 2009-12443 by Michael Keogh, on Flickr
My photo guide - an A6M5 at the Smithsonian.
 zero-7 by Michael Keogh, on Flickr
I sprayed the interior with Mr. Color 127 Cockpit Color (Nakajima).
 zero-8 by Michael Keogh, on Flickr
Here you can see just a bit of detail painting.
 zero-9 by Michael Keogh, on Flickr
Here is the assembled cockpit.
 zero-10 by Michael Keogh, on Flickr
I gave the interior an oil wash.
 zero-11 by Michael Keogh, on Flickr
Finally, here is the installed cockpit.
Re: Airfix 1/72 A6M2b Zero
Posted: Fri Jun 03, 2016 12:13 am
by SkyPainter303
 zero-12 by Michael Keogh, on Flickr
I got the fuselage halves together.
 zero-13 by Michael Keogh, on Flickr
I need to take care of that seam.
 zero-14 by Michael Keogh, on Flickr
The instructions say to drop in the gun cowling, but it won't go in that way. The guns are too wide to fit.
 zero-15 by Michael Keogh, on Flickr
The trick with the gun cowling was to slide it in from the front. The fit is excellent.
Re: Airfix 1/72 A6M2b Zero
Posted: Fri Jun 03, 2016 3:23 am
by SkyPainter303
 zero-16 by Michael Keogh, on Flickr
Fuselage seams are fixed. There will be other seams to fill once the wing is attached.
 zero-17 by Michael Keogh, on Flickr
I cut the hole in the lower wing surface for the drop tank attachment.
 zero-18 by Michael Keogh, on Flickr
At this point, the kit instructions call for the attaching the engine and cowling. To facilitate painting, I am breaking away from the instructions and will move on the the wing. I glued the wing parts together now because there is no way to center the lower wing surface to the fuselage otherwise.
 zero-19 by Michael Keogh, on Flickr
The engine has decent detail. I sprayed it with Mr. Metal Color 218 aluminum, then gave it a black oil paint wash, and sealed it with Testors Dullcote Lacquer. I think it could look better but at 1/72 scale and only visible head-on, it should be OK.
Re: Airfix 1/72 A6M2b Zero
Posted: Sun Jun 05, 2016 1:17 am
by SkyPainter303
 zero-20 by Michael Keogh, on Flickr
I attached the wing which revealed some huge gaps.
 zero-21 by Michael Keogh, on Flickr
There was also a noticeable step underneath. I was able to sand that down and rescribe.
 zero-22
 by
Michael Keogh, on Flickr
I filled the wing gaps with superglue and Tamiya Liquid Surface Primer G.
 zero-23
 by
Michael Keogh, on Flickr
There were no issues while attaching the rudder and horizontal stabilizers.
Re: Airfix 1/72 A6M2b Zero
Posted: Sun Jun 05, 2016 4:04 am
by SkyPainter303
 zero-24 by Michael Keogh, on Flickr
I broke one of the gear doors so I am going wheels up with this build.
Re: Airfix 1/72 A6M2b Zero
Posted: Mon Jun 06, 2016 1:04 am
by SkyPainter303
 zero-25 by Michael Keogh, on Flickr
It is hard to see, but I used liquid mask on the canopy.
Re: Airfix 1/72 A6M2b Zero
Posted: Sat Jun 11, 2016 5:19 pm
by SkyPainter303
 zero-26 by Michael Keogh, on Flickr
This is my first attempt at Black Basing / Marbling. I used Mr. Finishing Surfacer 1500 Black.
 zero-27 by Michael Keogh, on Flickr
Here is the marbling layer using Mr. Color 56 IJN Green/Grey (Nakajima)
 zero-28 by Michael Keogh, on Flickr
Here is what it looks like after I applied thin coats of Mr. Color 56
Re: Airfix 1/72 A6M2b Zero
Posted: Sat Jun 11, 2016 5:34 pm
by SkyPainter303
Re: Airfix 1/72 A6M2b Zero
Posted: Sun Jun 12, 2016 3:00 pm
by SkyPainter303
 zero-33 by Michael Keogh, on Flickr
I lightened the bottom color a little.
 zero-34 by Michael Keogh, on Flickr
Here, the model is masked off ready for the green color.
 zero-35 by Michael Keogh, on Flickr
This is actually Mr. Color 15 IJN Green (Nakajima). The camera read it as black.
Re: Airfix 1/72 A6M2b Zero
Posted: Mon Jun 13, 2016 3:51 am
by SkyPainter303
 zero-37 by Michael Keogh, on Flickr
I painted the canopy frames with Tamiya X-13 Metallic Blue to from the inside.
 zero-38 by Michael Keogh, on Flickr
The I sprayed Mr. Color 8 Silver to help the blue show.
 zero-40 by Michael Keogh, on Flickr
Then, finally Mr. Finisher 1500 Black as a primer for the green coat to come.
Re: Airfix 1/72 A6M2b Zero
Posted: Mon Jun 13, 2016 4:30 am
by SkyPainter303
 zero-36 by Michael Keogh, on Flickr
There was so much flash on the cowling.
 zero-41 by Michael Keogh, on Flickr
The cowling in primer.
Re: Airfix 1/72 A6M2b Zero
Posted: Fri Jun 17, 2016 3:56 am
by SkyPainter303
Well, I did have some updates to post, but I royally screwed up my Zero. I decaled the aircraft (though some decals refused to cooperate). I started to airbrush some acrylic gloss, but with the 90F weather, the paint was drying as it left the airbrush. The left wing is pretty much garbage now. The plane will need to be stripped and repainted.
I'm gonna put this one away for a while until I get my mojo again.
Re: Airfix 1/72 A6M2b Zero
Posted: Fri Jun 17, 2016 7:25 am
by Lysus
SkyPainter303 wrote:
I'm gonna put this one away for a while until I get my mojo again.
Sometimes you beat the kit, and sometimes it beats you.

No sense in going on if it isn't fun.


